Tag: catnip toys

  • DIY Cat Kicker Toy: A Tougher, Safer Sewing Pattern

    DIY Cat Kicker Toy: A Tougher, Safer Sewing Pattern

    You can make a DIY cat kicker toy from one 13-by-10-inch rectangle of sturdy fabric, polyester thread, and washable stuffing. Fold the fabric into a long tube, sew two reinforced seams, fill it so it is firm but still bendable, and close the opening with two rows of stitching. The finished toy is about 12 inches long and 4 inches wide—large enough for many adult cats to hug with the front legs and kick with the back feet.

    This version is deliberately plain. A cat does not need ribbon tails, plastic eyes, bells, glued trim, or a zipper to enjoy a kicker. Those details create extra places for a rough player to pull, chew, or expose the filling. No homemade toy is risk-free or indestructible, so supervise the first sessions and inspect the toy after hard play.

    What a Cat Kicker Toy Is—and Why the Shape Matters

    A kicker is a long, soft capture toy. A cat can wrap the front legs around it, bite or mouth the upper section, and strike the lower section with rapid alternating back-foot kicks. That sequence gives the cat an appropriate target for the grab-and-kick part of play while keeping your forearm out of the job.

    The best size is based on the cat, not a magic measurement. The toy should span much of the distance from the cat’s chest toward the hips when held lengthwise. It must be wide enough to stay outside the mouth rather than behave like a small prey item, yet soft enough for the front paws to compress and hold. For an average adult, a finished 10-to-12-inch length and 3½-to-4½-inch width is a useful starting range.

    Cat and play style Suggested cut rectangle Approximate finished size
    Kitten or small adult 11 × 8 in 10 × 3 in
    Average adult 13 × 10 in 12 × 4 in
    Large adult or long-bodied rough player 15 × 11 in 14 × 4½ in

    These are practical starting dimensions, not safety guarantees. Watch the first play session. If the cat cannot hold the toy while the back feet reach it, adjust the length. If the whole toy can be shoved far into the mouth, make the next one wider. If you have a very small kitten, a cat who eats fabric, or a cat with dental or mobility problems, ask your veterinarian about an appropriate play setup.
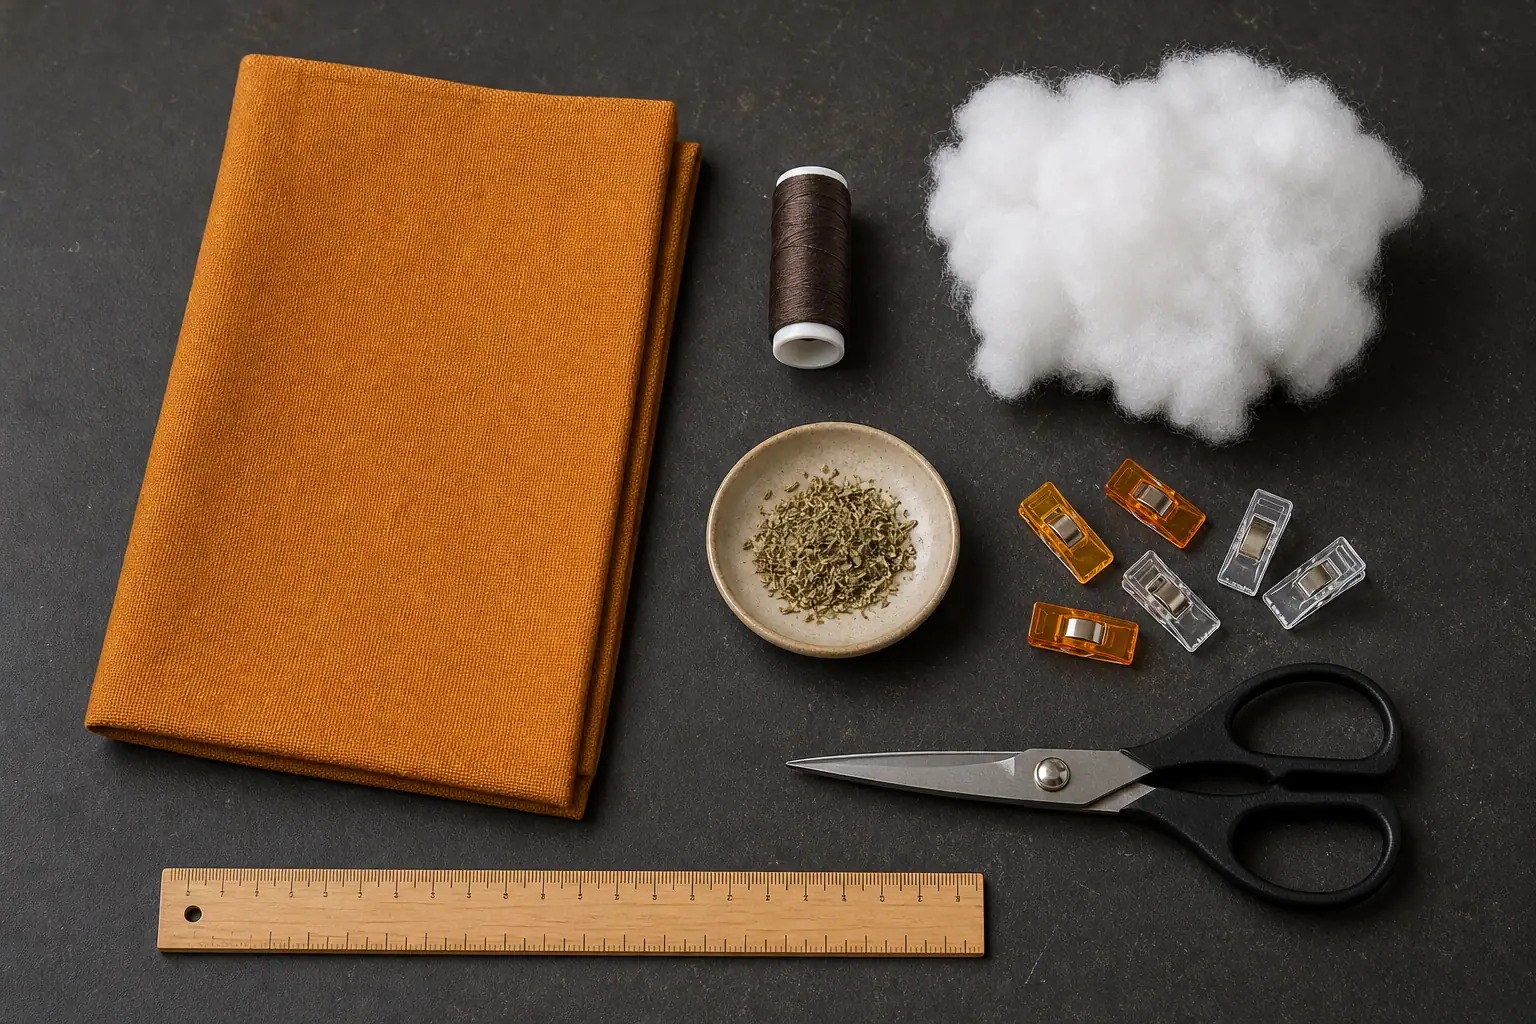
    Canvas, polyester thread, fiberfill, ruler, scissors, and catnip for a DIY kicker toy
    Keep the build simple: tightly woven fabric, strong thread, plain filling, and optional dried catnip.

    Materials for a Tougher DIY Cat Kicker Toy

    Choose simple, known materials that remain easy to inspect. Upcycling is useful only when you know what the fabric is, can wash it first, and can remove every fastener and decoration.

    • Outer fabric: one rectangle of tightly woven cotton canvas, midweight denim, or sturdy cotton twill. Avoid loose knits, stretchy fabric, lace, faux fur that sheds, and fabric already weakened by holes or worn patches.
    • Thread: all-purpose polyester thread. It tolerates repeated flexing better than old, brittle thread from an unknown sewing kit.
    • Filling: new polyester fiberfill or clean strips of tightly woven fabric. Use pieces large enough to retrieve if a seam opens; do not use foam beads, plastic pellets, dried beans, rice, loose cotton wool, or shredded plastic.
    • Optional scent: one or two teaspoons of dried catnip as a modest starting amount. Skip it for cats who become agitated around catnip or who try to eat the fabric.
    • Tools: ruler, fabric scissors, clips or pins, and either a sewing machine or a sturdy hand-sewing needle.

    Do not add yarn, tassels, ribbon, elastic, feathers, buttons, beads, bells, safety eyes, wire, pipe cleaners, hook-and-loop tape, or a zipper. Even a cute attachment is a new failure point. Veterinary guidance on foreign-body ingestion in cats identifies thread, string, wool, rubber bands, and small toys among objects cats may swallow; string-like material can be especially dangerous.

    If you want more detail on fabric strength, seam placement, and inspectable construction, see the Titan Claws guide to materials for durable cat toys. “Durable” still means maintained and replaced when damaged—not indestructible.

    DIY Cat Kicker Toy Pattern: Step by Step

    The directions below make the average-adult size. Use a ½-inch seam allowance throughout. Read all seven steps before cutting, and keep pins, needles, thread clippings, and the unfinished toy away from your cat.

    1. Prepare and inspect the fabric. Wash and dry it with an unscented routine, press it flat, and hold it up to light. Reject pieces with thin spots, snags, glued decoration, metallic print, or holes. Cut one 13-by-10-inch rectangle on the straight grain.
    2. Fold the tube. Fold the rectangle lengthwise with the right sides together so the two 13-inch raw edges meet. The folded piece will measure 13 by 5 inches. Clip or pin the open long edge and one short end.
    3. Sew the main seam. Starting at the folded corner, sew across the clipped short end and then down the open long edge with a ½-inch seam allowance. Backstitch at both ends. Leave the other short end fully open for turning and filling.
    4. Add a backup seam. Sew a second straight line ⅛ inch inside the first line, toward the body of the toy. Finish the raw edges together with a compact zigzag if your fabric frays. Clip the two sewn corners without cutting either stitch line.
    5. Turn and check. Turn the tube right-side out and push the corners out with a blunt tool. Do not use open scissors. Run a finger along both sewn seams, tug gently in several places, and restitch any spot that spreads.
    6. Fill without overpacking. Add small handfuls of fiberfill, distributing them from the closed end toward the opening. The tube should feel evenly full but still bend into a shallow curve. If using catnip, scatter a small amount between layers of filling rather than leaving one dense pocket.
    7. Close the high-stress end. Turn the open raw edges ½ inch to the inside. Machine-stitch across the opening, then sew a second parallel row ⅛ inch behind it. For a neater finish, first hand-close with a small ladder stitch and then add a second secured line. Backstitch or knot securely and trim every thread tail flush.
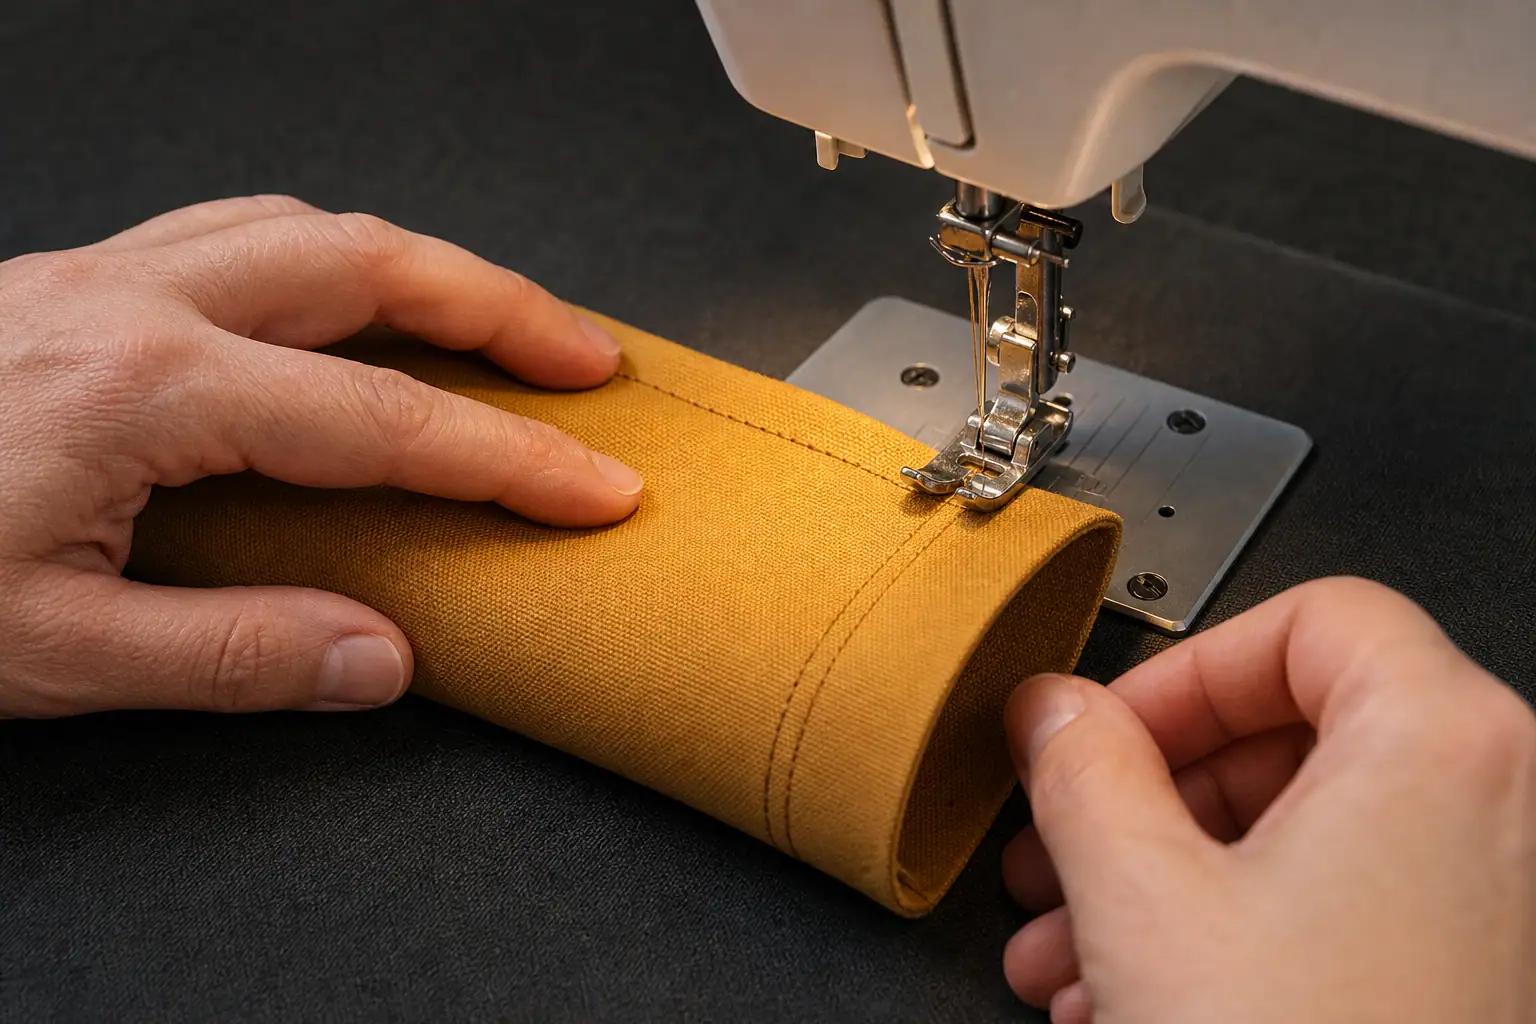
    Two parallel rows of stitching reinforcing a canvas cat kicker toy seam
    A second parallel stitch line provides backup at the long seam and closure.

    Hand-sewing option: use the same pattern and a short backstitch rather than a loose running stitch. Backstitch forms a more continuous seam because each new stitch overlaps the previous one. Sew the second line as described above, make small knots buried inside the seam allowance, and account for the needle and every pin before the toy reaches the cat.

    The two-minute post-build test

    • Squeeze the entire toy and listen or feel for hidden hard or sharp objects.
    • Bend it several times; the seams should remain flat without gaps.
    • Pull firmly—but not violently—across each seam and at both corners.
    • Rub the surface with a dry white cloth; stop if color or surface coating transfers.
    • Check that no thread tail, pin, needle, decoration, or loose filling remains.
    • Count and put away all sewing tools before inviting the cat into the room.

    If the toy fails your hands, it is not ready for teeth and claws. Open the closure, correct the problem, and repeat the test.

    Catnip, No Catnip, and a Washable Version

    Catnip is optional. Some cats ignore it, and a cat’s response can range from relaxation to intense excitement. VCA’s kitten behavior guidance notes that sensitivity varies and young kittens may not respond yet. If catnip makes your cat frantic, defensive, or more likely to rip at the toy, make the kicker without it.

    For a frequently washed kicker, leave herbs out and use washable fiberfill. Wash the finished toy separately on a gentle cycle only if the fabric and filling are washable, then air-dry it completely. Damp stuffing can stay wet long after the surface feels dry. Check for shrinkage, twisted filling, and opened stitches before reuse. Our cat-toy cleaning guide explains when spot cleaning, hand washing, machine washing, or replacement makes more sense.

    A refillable pocket sounds convenient, but zippers and exposed hook-and-loop closures give a determined chewer more edges to work on. A safer refresh is to rub a little dried catnip on the intact outside immediately before supervised play, shake off the excess, and store the toy dry afterward.

    How to Introduce the Kicker Without Teaching Hand Biting

    1. Place the toy on the floor and let the cat investigate. Do not press it into the cat’s face.
    2. Use a separate wand or toss toy to begin a stalk-and-chase sequence while keeping hands at a distance.
    3. After a few successful catches, slide or gently toss the kicker away from your body as the final capture target.
    4. Let the cat grip, bite, and kick the toy. Do not hold the other end during biting; your moving fingers can become part of the target.
    5. End while the cat is still controlled, then offer a small food reward or calm foraging activity if it fits the cat’s diet.

    This is a capture toy, not a complete play routine. Cats benefit from opportunities to stalk, chase, pounce, catch, and disengage. The Titan Claws hunt-catch-cool-down routine shows how to combine a moving lure with a satisfying finish. For more low-cost projects, compare the material and supervision levels in our guide to homemade cat toys.

    Cats Protection advises checking toys regularly, replacing worn ones, and not leaving cats alone with toys that could be shredded, eaten, or cause entanglement. Treat your first few sessions as a field test: stay close enough to stop play, but keep your hands out of the kicking zone.
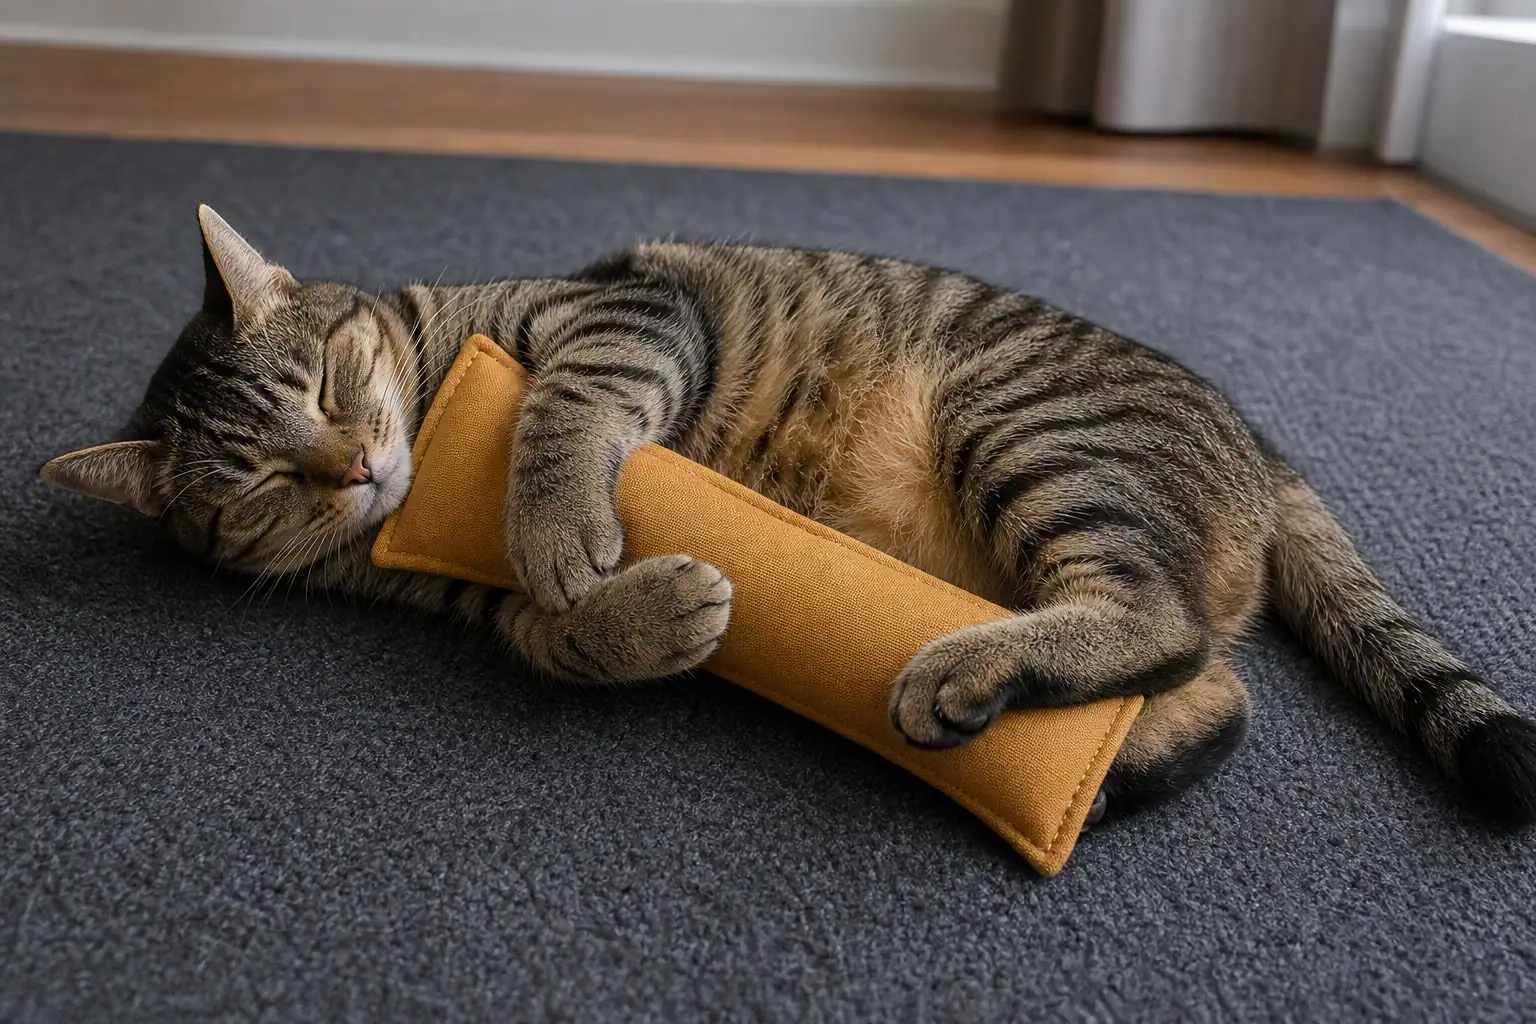
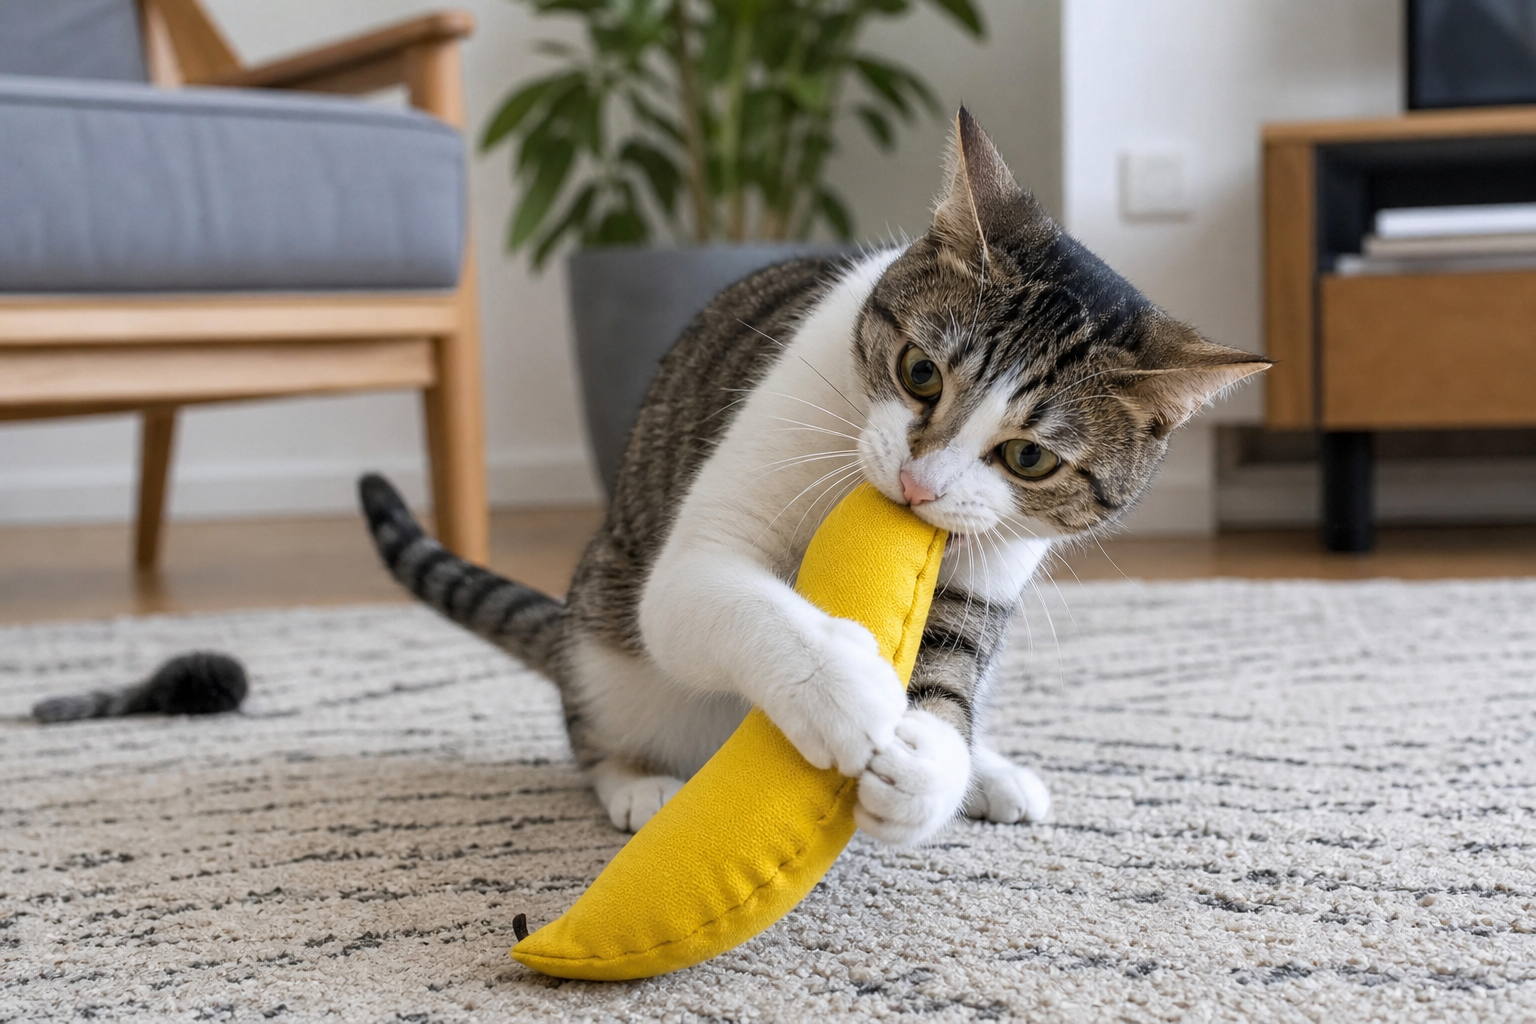
    Cat holding a homemade kicker toy that reaches from chest toward the back legs
    The right fit lets the front legs hold the toy while the back feet contact its lower half.

    Inspect, Repair, or Retire? Use This Decision Guide

    Inspect the kicker before and after every rough session. Roll it between both hands, flex the ends, and spread each seam slightly under good light. A quick glance from across the room will miss small tooth holes and broken stitches.

    What you find What to do
    Light surface fuzz, no thinning, all seams closed Trim fuzz flush, recheck, and keep for supervised play.
    One loose exterior stitch, fabric around it fully intact Remove the toy. Reinforce both seam lines before the next use.
    Small puncture or worn/thin fabric Retire it. A patch adds edges and may hide spreading damage.
    Open seam or visible filling Stop play immediately, collect loose material, and retire the toy.
    Missing fabric, thread, or filling Confine the remains, check the play area, and contact your veterinarian for advice.
    Wetness, odor, or filling that will not dry fully Retire it rather than sealing moisture inside.

    Vomiting, reduced appetite, abdominal pain, lethargy, straining to defecate, or pawing at the mouth after suspected ingestion needs prompt veterinary attention. Do not pull visible string from a cat’s mouth or anus; call a veterinarian or emergency clinic because anchored string can injure internal tissue.
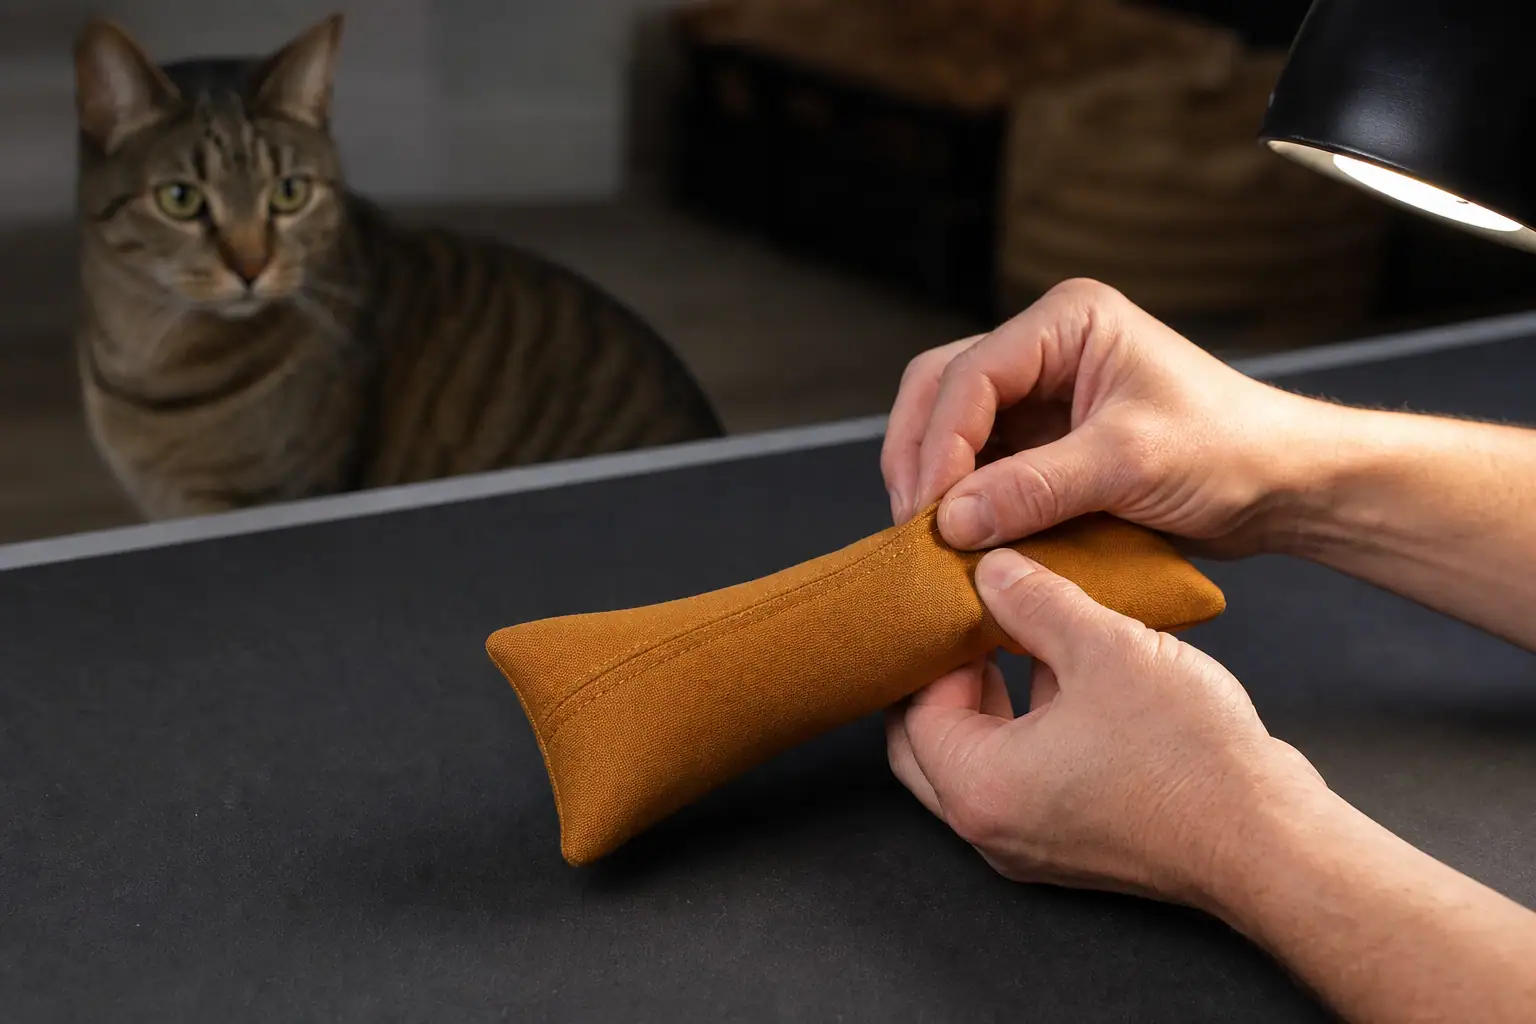
    Hands bending and checking every seam of a homemade canvas cat kicker toy
    Flex the toy and spread each seam under good light before and after rough play.

    DIY Cat Kicker Toy Quick Checklist

    • Size the toy so the cat can hug it and reach it with the back feet.
    • Use intact, tightly woven canvas, denim, or twill with known contents.
    • Use simple fiberfill or large fabric strips—not beads, pellets, rice, beans, or loose cotton.
    • Sew two lines along structural seams and across the closure.
    • Trim all thread tails and account for every pin and needle.
    • Skip ribbons, yarn, tassels, elastic, bells, plastic eyes, zippers, and glued trim.
    • Keep filling firm enough to hold shape but soft enough to grip.
    • Introduce the kicker on the floor, away from hands and feet.
    • Supervise early and rough sessions.
    • Inspect before and after play; retire punctured, opened, thinning, or incomplete toys.

    Bottom line: the safest useful DIY cat kicker toy is not the fanciest one. Make it large enough for the cat, simple enough to inspect, and strong enough to pass a firm seam test. Then supervise, maintain it, and retire it before a small defect becomes an exposed-filling problem.
    Sources

  • How to Clean Cat Toys: A Material-by-Material Guide

    How to Clean Cat Toys: A Material-by-Material Guide

    To clean cat toys safely, start with the care label and the material—not a one-method-fits-all cleaning hack. Remove hair and crumbs, inspect for damage, wash hard or washable toys with soap or detergent and warm water, rinse thoroughly, and let every part dry completely before play. Keep motors, battery compartments, glued feather attachments, and non-washable catnip filling out of the sink.

    Cleaning can extend the useful life of a sound toy, but it cannot make a failing toy safe. If a rough-playing cat has opened a seam, loosened a bell, split plastic, exposed foam, or driven moisture deep into filling that will not dry, retire the toy instead of washing it back into the rotation.

    Choose the Cleaning Method by Toy Type

    The manufacturer’s instructions take priority because two toys that look alike may use different glue, filling, electronics, or heat-sensitive plastic. When no instructions remain, use the least aggressive method that can remove the dirt and still let you rinse and dry the toy fully.

    Toy type Practical cleaning method Do not Retire when
    Machine-washable fabric kicker or plush Close fasteners, place in a mesh bag, use the labeled cycle and detergent amount, rinse well, then dry as directed Assume hot water or a hot dryer is safe without checking the label Seams open, filling escapes, hardware loosens, or the center stays damp
    Non-refillable catnip toy Follow its label; spot-clean only if that is the permitted method Soak a toy that cannot be dried through the center It is visibly dirty, moldy, musty, leaking filling, or cannot be cleaned as directed
    Hard plastic, rubber, or silicone toy Hand-wash with warm soapy water, scrub grooves, rinse, and dry; use a dishwasher only when labeled dishwasher-safe Expose unknown plastic or rubber to high heat It cracks, turns sticky, develops sharp gouges, or sheds pieces
    Food puzzle Disassemble as directed, remove food, clean every channel, rinse, and dry before reassembly Leave wet food, oil, detergent, or moisture in hidden cavities Food cannot be removed, parts deform, or a cat can pry pieces loose
    Electronic or motorized toy Switch off, unplug, remove batteries if the manual says to, and wipe only as directed Immerse the motor, charging port, speaker, or battery compartment There is corrosion, heat, odor, swelling, exposed wire, or a cracked housing
    Wand lure, feather, fur, or glued attachment Follow the attachment’s instructions; gently wipe or replace delicate parts when appropriate Soak, machine-wash, or heat-dry a weak glued assembly by guesswork String frays, quills split, clips bend, or small pieces loosen

    The CDC’s current pet-supply guidance uses the same basic distinction: hard items can be cleaned with soapy water, while soft washable items can go through a washer and dryer. It also says to follow product cleaning instructions and discard non-refillable catnip toys when they become dirty.

    Inspect Before Washing: Clean, Repair, or Retire?

    Give every toy a dry inspection before water hides the evidence. Pull gently at seams and attachments, flex hard shells, check every piece against the product photo or manual, and smell the toy. Set aside anything with a missing part until you know where that part went.

    • Clean it when the toy is structurally sound and the care method can reach the dirty area without damaging the toy.
    • Repair it only when the design supports repair and the result will not add loose thread, sharp knots, exposed glue, or an altered part your cat can swallow. When in doubt, replace it.
    • Retire it when it has an open seam, exposed stuffing, splintered feather shaft, cracked plastic, damaged battery door, deep tooth cuts, persistent odor, visible mold, or a section that cannot be rinsed or dried.

    For cats that bite and bunny-kick hard, washing is a stress test. Wet fabric may reveal a seam that was already separating, while flexing a clean rubber toy may expose a crack hidden by grime. The Titan Claws guide to durable cat toys explains the failure points worth checking before a toy returns to rough play.

    How to Wash Fabric, Plush, and Catnip Toys

    First remove loose fur with clean hands, a lint roller, or a vacuum attachment used carefully. Detach any refillable catnip pouch, bell, battery unit, or removable electronic mechanism only when the instructions say it is designed to come out.

    Machine-washable fabric toys

    1. Read the tag for water temperature, cycle, detergent, and drying limits.
    2. Place small toys in a closed mesh laundry bag so they do not disappear or strike the drum.
    3. Use the detergent amount appropriate for the load. A dye-free, fragrance-free detergent may be a better choice for a cat with sensitive skin, according to the CDC.
    4. Run the labeled cycle. Skip fabric softener unless the manufacturer explicitly permits it.
    5. Dry exactly as directed. Air-dry when required; use a dryer only at the allowed setting.
    6. Squeeze the center, smell the toy, and inspect seams and decorations again before returning it.

    Catnip toys and non-washable plush

    A refillable catnip toy is easier to maintain: remove the herb pouch, clean the empty cover as labeled, dry the cover fully, then refill it. For a sealed toy, do not assume that soaking is harmless. Water can carry soil into the filling and create a damp center you cannot inspect.

    Spot-clean only when the label allows it, using the specified cleaner and as little moisture as necessary. If a sealed catnip toy is dirty through the fabric, smells musty, shows mold, or remains damp, discard it. You can restore interest in a clean refillable toy with fresh catnip after it is dry, but added catnip cannot refresh a contaminated toy.

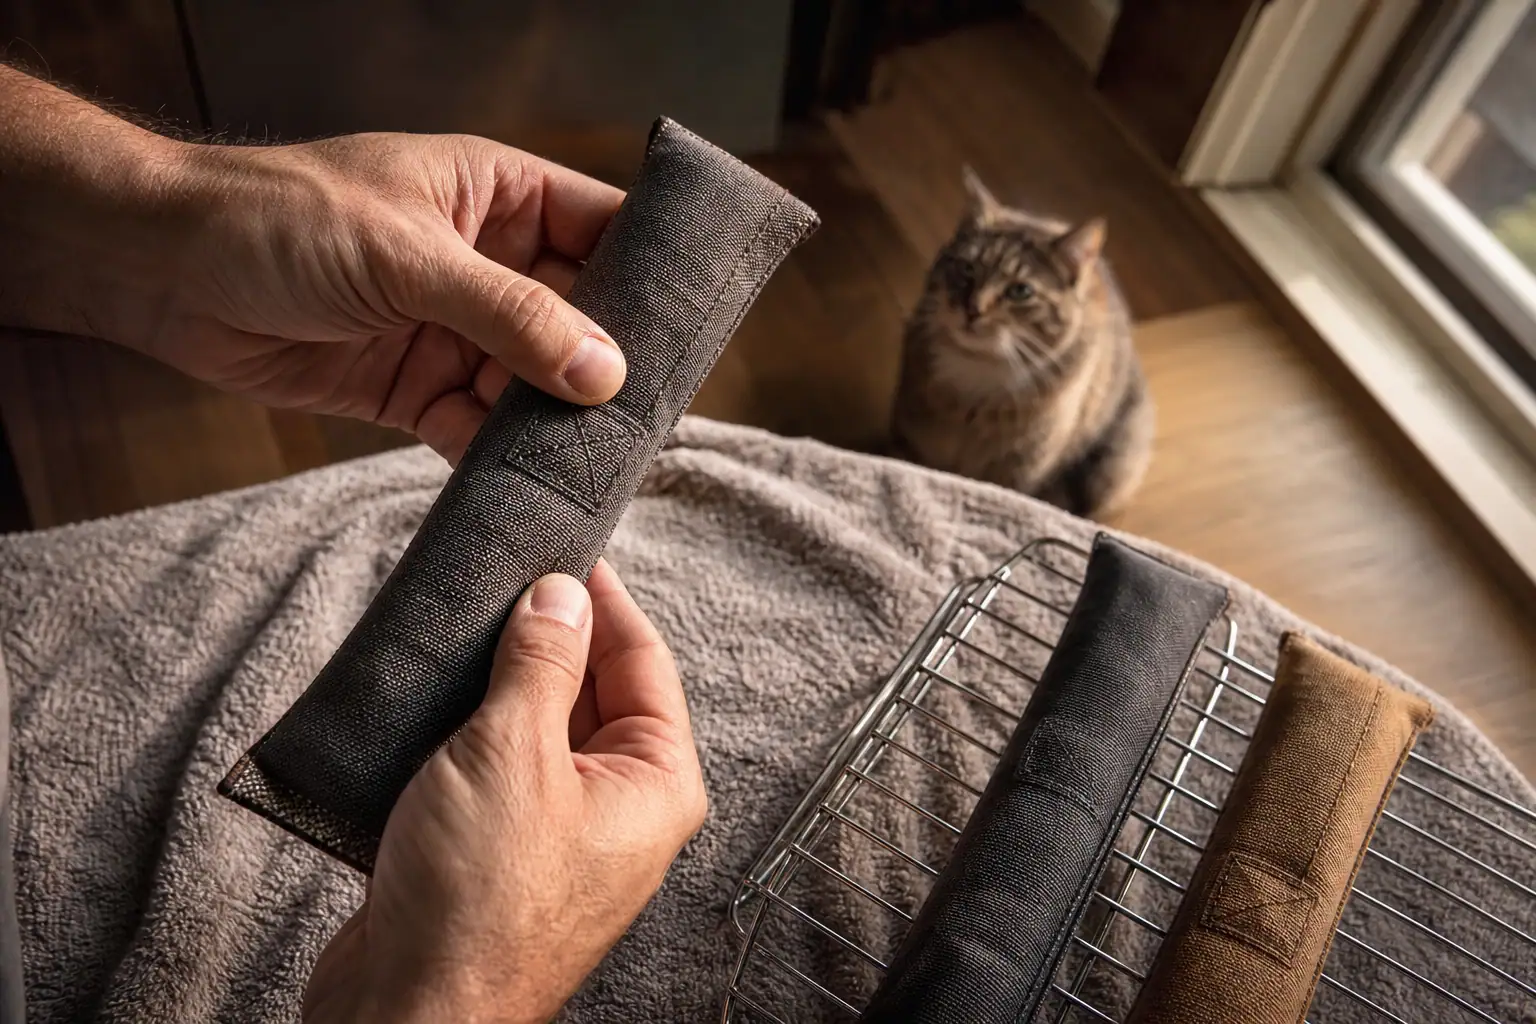
    Clean fabric cat toy being checked at the seams while drying
    A washed toy is not ready until the center is dry and its seams, filling, and attachments still pass inspection.

    How to Clean Hard Toys and Food Puzzles

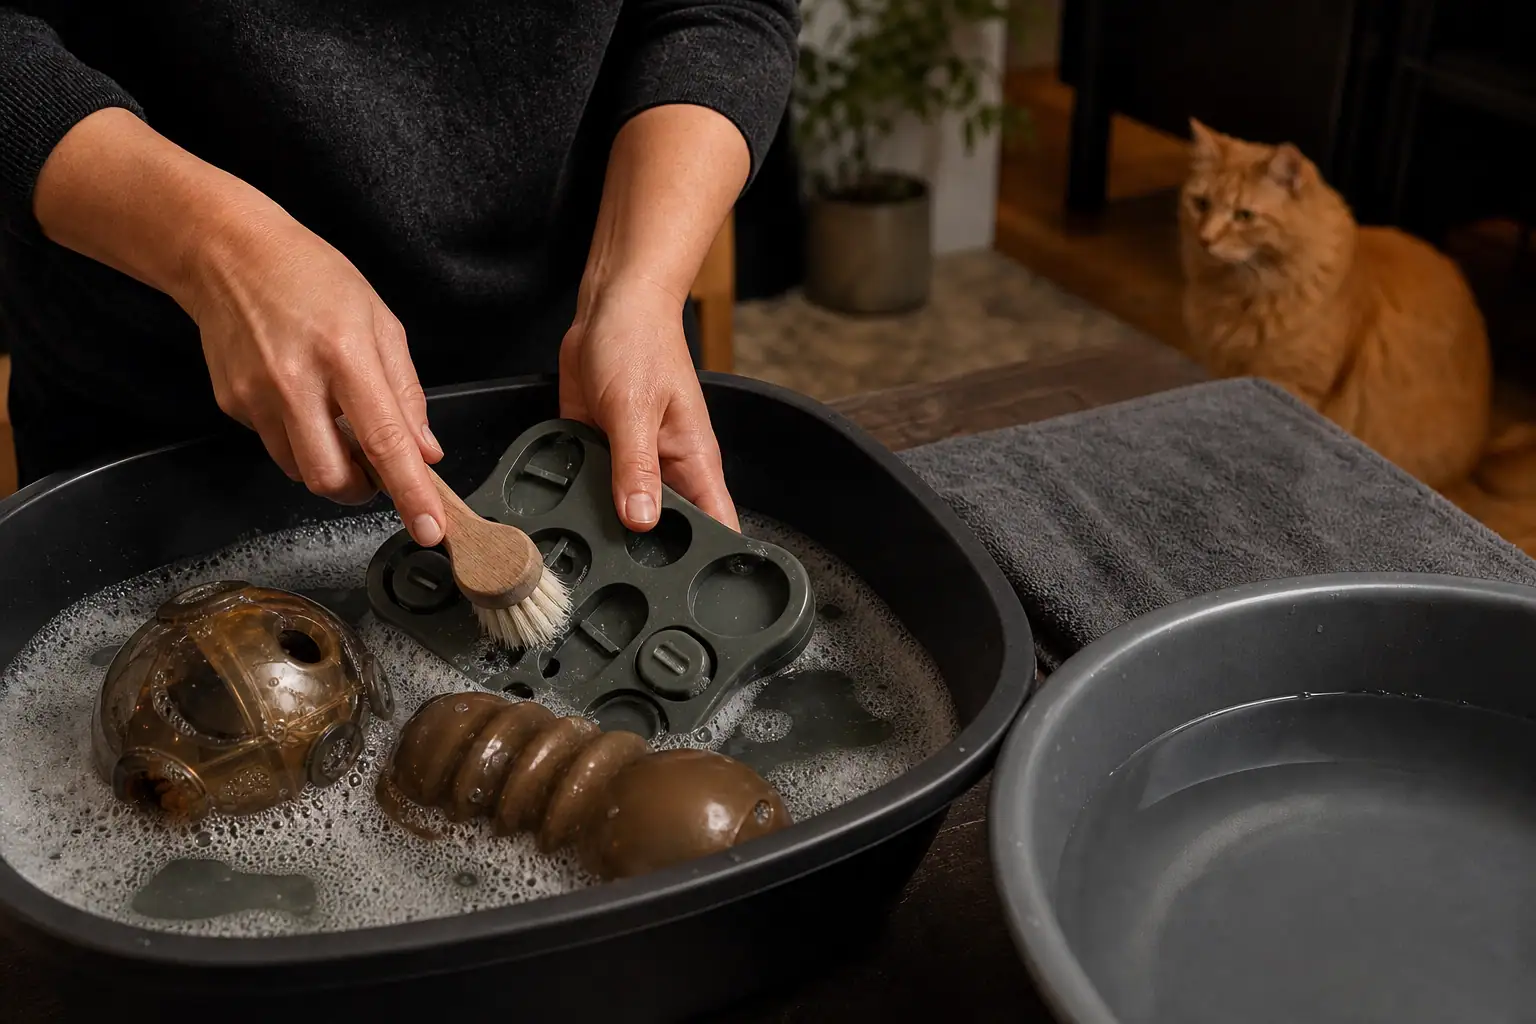
    For an intact, non-electronic hard toy, remove loose debris, wash it with soap or detergent and warm water, scrub joints and grooves with a dedicated soft brush, rinse away all dirt and suds, and dry it fully. Do not send a toy through the dishwasher unless its maker calls it dishwasher-safe; heat can warp plastic, damage rubber, loosen glue, or change how parts fit.

    Food puzzles need a stricter routine because crumbs, wet food, and oils collect in corners. Disassemble only as the instructions permit. Wash food-contact pieces after use, especially when they held wet or raw food, and inspect ports and channels before reassembly. The FDA advises washing pet food bowls and feeding utensils with soap and hot water after each use; applying that hygiene principle to food-dispensing toy surfaces keeps yesterday’s meal out of today’s game.

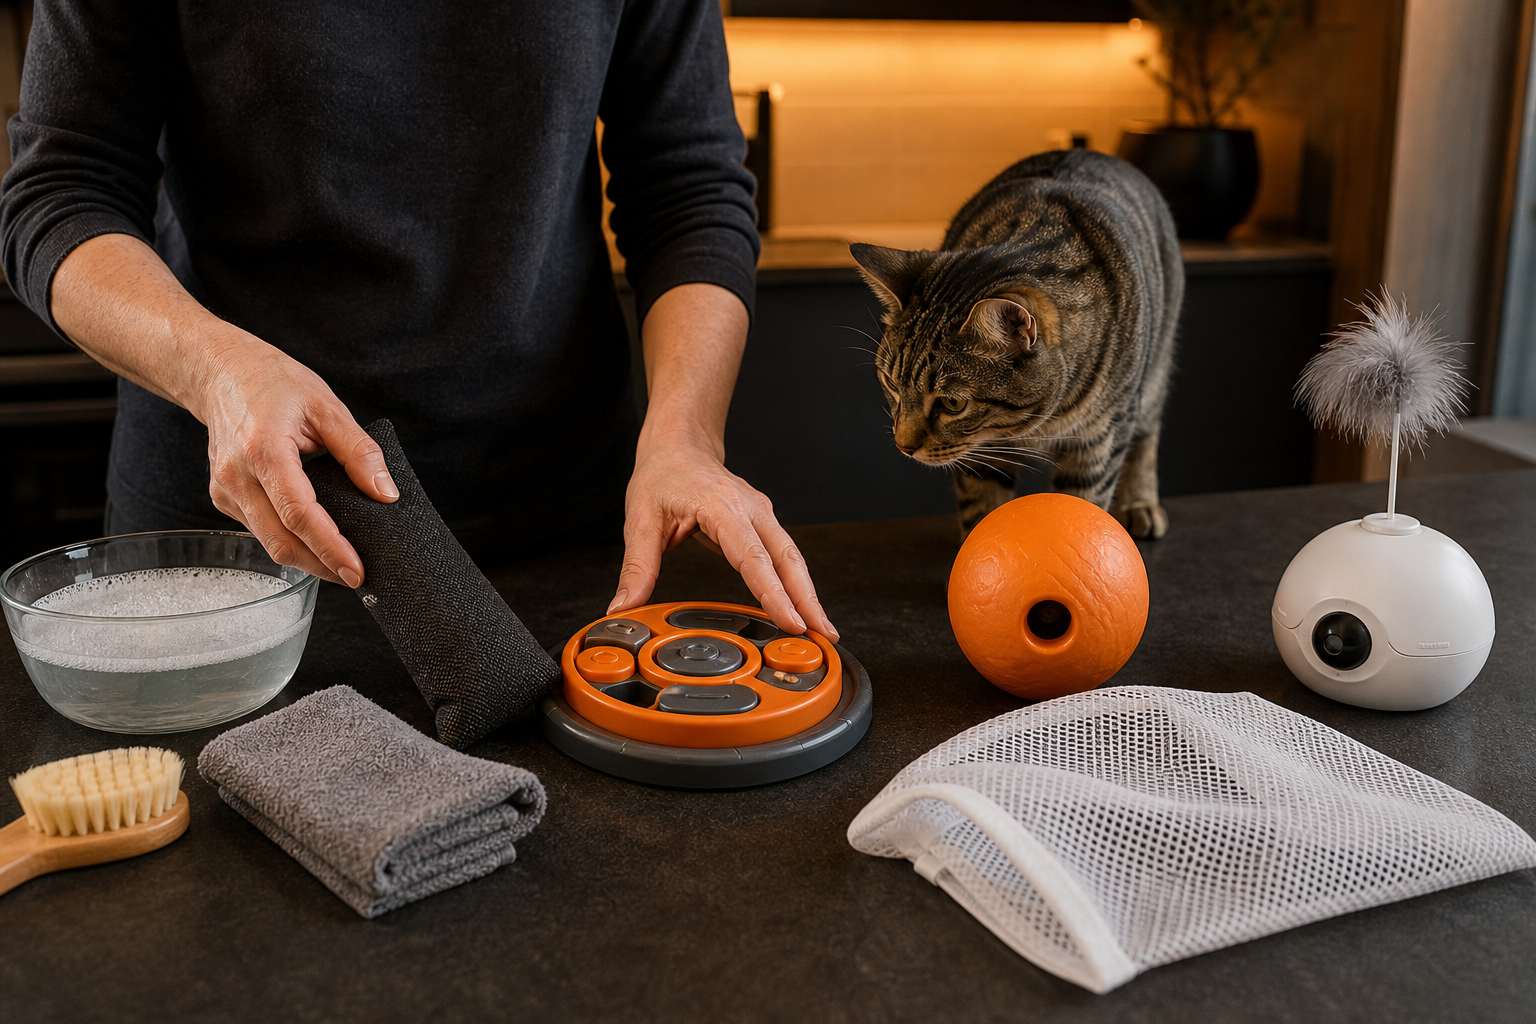
    Hard cat toys being scrubbed with warm soapy water
    Clean hard, non-electronic toys in the grooves and joints, then rinse away every trace of soap.

    A dedicated cleaning brush helps you reach channels without borrowing a greasy kitchen sponge. Replace heavily scratched food puzzles or toys with rough, cloudy surfaces that no longer come clean. Damage that traps residue is both a hygiene problem and a possible failure point for a determined chewer.

    Electronics, Wands, Feathers, and Mixed-Material Toys

    Mixed-material toys are limited by their least washable component. A removable fabric sleeve may be machine-washable even though the motor inside is wipe-only. A plastic wand handle may tolerate a damp cloth while its feather lure needs replacement. Treat every power port, speaker opening, seam, adhesive joint, and attachment clip as a boundary.

    • Turn electronic toys off and disconnect charging cables before cleaning.
    • Remove batteries only if the instructions direct you to do so.
    • Apply cleaner to the cloth rather than spraying toward openings, unless the manual says otherwise.
    • Never power the toy while it is damp. Reassemble only when each permitted-to-clean part is fully dry.
    • Store wands, string, elastic, ribbons, and feather lures in closed storage after supervised use, clean or not.

    If moisture reaches a battery compartment or you find corrosion, swelling, unusual heat, exposed wire, or a chemical smell, stop using the toy. Cleaning cannot repair an electrical or battery fault. The same rule applies to a lure whose glue softens after wiping: replace the attachment before a cat can detach and swallow it.

    When Does a Cat Toy Need Disinfecting?

    Cleaning and disinfecting are different jobs. Cleaning with soap or detergent physically removes dirt and germs; a disinfectant is used to kill germs on a compatible surface. The CDC says cleaning is usually sufficient for most pet items. Disinfection becomes more relevant when a pet is sick, an item contacts urine or feces, or a person or animal in the home is at higher risk of severe illness.

    If that situation applies, ask your veterinarian what needs disinfection and whether the toy is worth keeping. Use only a method compatible with the item, follow the disinfectant label’s dilution and contact time, keep the cat away during use, rinse when directed, and let the item dry fully before access. Never mix bleach with ammonia, vinegar, or another cleaner. If a porous toy was contaminated with waste, vomit, mold, or infectious material and cannot be reliably disinfected and dried, disposal is the safer choice.

    Do not treat vinegar as a proven substitute for a registered disinfectant. The CDC notes that evidence is insufficient to show how well vinegar cleans or kills germs and recommends soap or detergent for cleaning. For a broader home-surface plan, see our guide to pet-safe cleaners for cats. If your question is specifically about hand-dishwashing liquid and feline exposure, read is Dawn dish soap safe for cats?

    How Often Should You Clean Cat Toys?

    Use the toy’s job and condition rather than one rigid calendar. The CDC gives monthly cleaning as a general example for pet toys, with more frequent cleaning when an item looks dirty or smells bad. Food-contact toys, heavily mouthed favorites, shared toys, and toys used by a sick cat need closer attention.

    • After each use: remove wet food and clean food-contact puzzle parts; wipe up urine, feces, vomit, or another obvious contaminant using an appropriate plan.
    • After a hard play session: inspect seams, string, clips, feathers, plastic edges, charging ports, and missing pieces. Clean saliva or dirt when needed.
    • Weekly during rotation: review the active set, clean visibly soiled toys, and move questionable items to a wash-or-retire tray instead of the storage bin.
    • About monthly: give the broader washable collection a cleaning check, even if the toys look acceptable from across the room.
    • During illness: follow your veterinarian’s advice about frequency, separation, disinfection, and disposal.

    A simple three-zone cat toy storage system makes the routine easier: one small active set, one closed container for supervised-only toys, and one clearly separate tray for wash-or-retire decisions. Never seal a damp toy in the bin.

    Quick Cleaning Checklist

    • Read the care label or manual before choosing water, heat, detergent, or a machine cycle.
    • Remove fur, crumbs, removable refills, and batteries only as directed.
    • Inspect the toy dry; account for every attachment and loose piece.
    • Use warm soapy water for compatible hard toys and the labeled method for soft toys.
    • Do not immerse electronics or guess that a dishwasher, washer, dryer, or microwave is safe.
    • Rinse away soap and cleaner residue.
    • Dry the surface, seams, grooves, and center completely.
    • Inspect again after cleaning, especially if your cat plays rough.
    • Disinfect only when needed and with a compatible, label-directed method.
    • Retire toys with mold, cracks, open seams, exposed filling, loose parts, corrosion, or persistent odor.

    Can I wash cat toys in the washing machine?

    Yes, when the toy’s label says it is machine-washable. Put small items in a mesh bag, use the permitted cycle and detergent, and follow the drying instructions. Do not machine-wash toys with non-removable electronics, fragile glued parts, unknown filling, or a label that says to spot-clean only.

    Can I wash cat toys with Dawn dish soap?

    For an intact, nonporous, non-electronic toy whose instructions allow hand-washing, a small amount of mild dish soap may remove grime if you rinse it away completely. The exact product and toy label matter. Dish soap is a poor default for absorbent filling, feathers, electronics, or any toy that cannot be thoroughly rinsed and dried.

    Can you wash cat toys with catnip inside?

    Only if the care label says the filled toy can be washed. If the catnip pouch is removable, take it out and wash the empty cover as directed. Spot-clean sealed toys only when permitted, and discard a dirty, moldy, musty, or persistently damp non-refillable catnip toy.

    Can I disinfect cat toys in a microwave?

    Do not microwave a cat toy unless its manufacturer explicitly provides that method. Toys can contain metal bells, foil crinkle layers, batteries, heat-sensitive plastic, glue, or filling that heats unevenly. Use a label-approved cleaning or disinfecting method instead.

    Bottom line: the safest clean toy is one that is still structurally sound, washed by a method its materials can tolerate, free of residue, and dry through the center. When cleaning exposes a weak seam, damaged shell, trapped moisture, or missing part, replacing the toy is better than stretching its life one more round.

    Sources

  • Yeowww Cat Toys: What to Know Before You Buy

    Yeowww Cat Toys: What to Know Before You Buy

    Yeowww cat toys are popular because they are simple, catnip-forward toys: fabric shapes filled heavily with catnip rather than packed with squeakers, bells, batteries, feathers, or complicated moving parts. For many cats, that is exactly the appeal. The scent does the work, and the toy becomes something to sniff, bite, wrestle, carry, and bunny-kick.

    The practical answer for Titan Claws readers is this: Yeowww cat toys can be a strong choice for cats that love catnip and like fabric kickers, but they are not magic and they are not indestructible. They still need supervision at first, routine seam checks, and replacement when the fabric opens or your cat starts eating pieces. For cats that shred toys aggressively, treat them as a high-value supervised toy until you know how your cat damages them.

    This guide is not a sponsored review. It is a buyer-and-safety guide for owners trying to decide whether Yeowww toys fit a rough-playing cat, how they compare with other durable cat toys, and when a different enrichment tool is the safer choice.

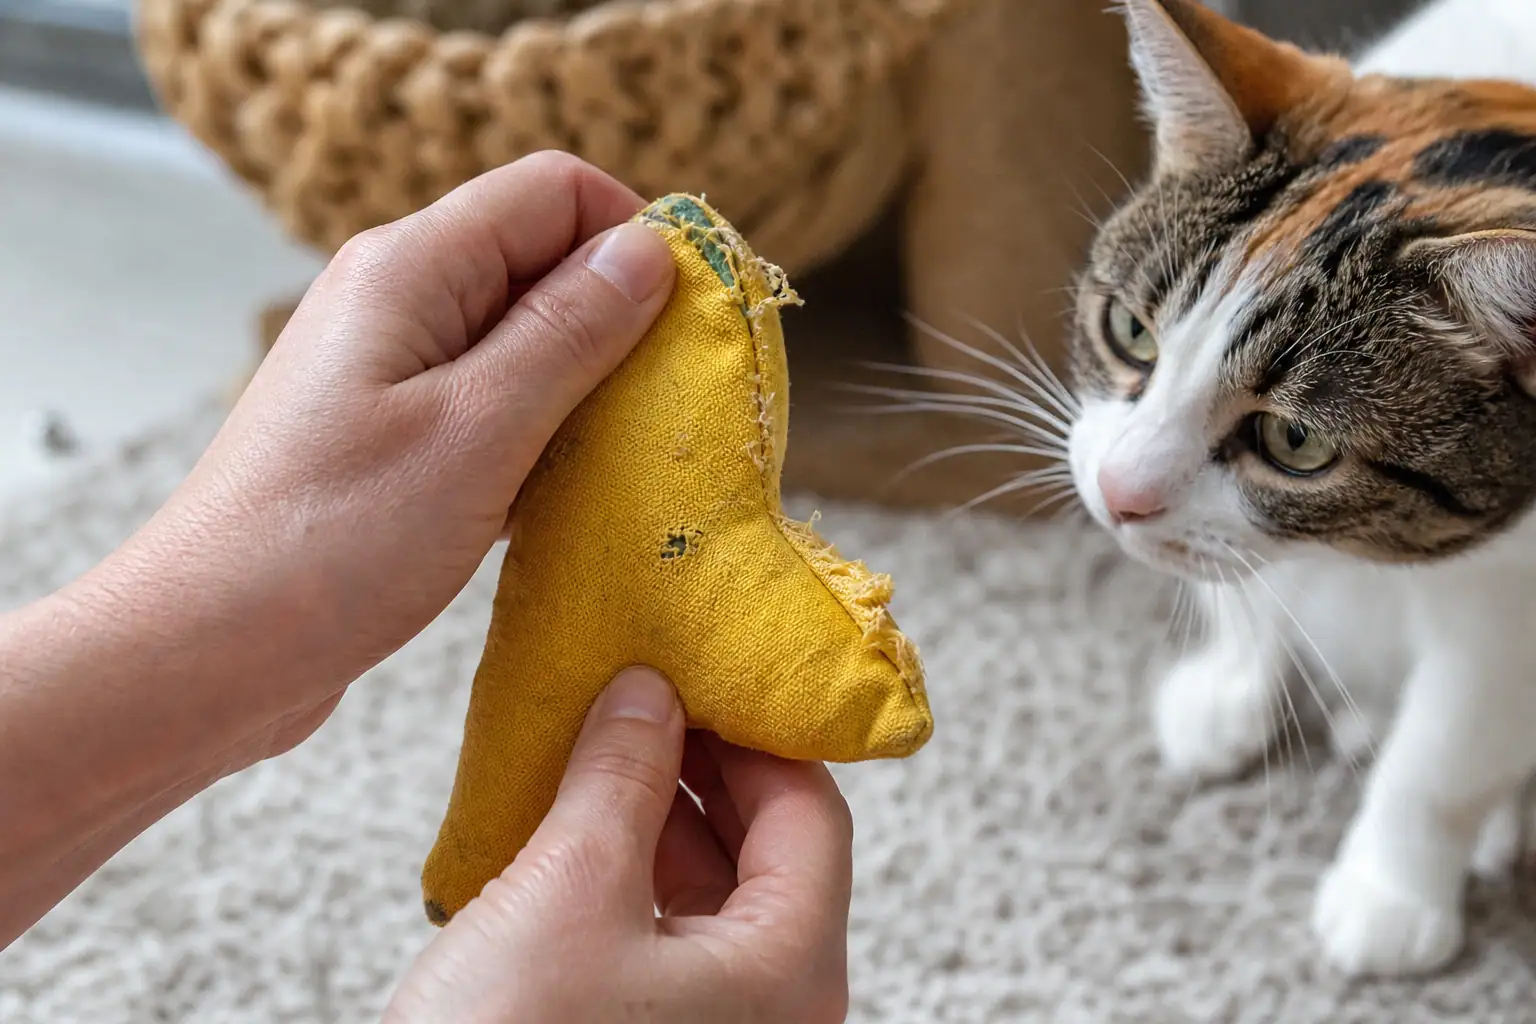
    Hands inspecting a fabric catnip toy for seam damage
    A catnip toy is only a good fit while the fabric, seams, and shape still match your cat’s bite strength.

    What Yeowww Cat Toys Are Known For

    Yeowww’s own product pages describe the line around a few consistent traits: USA-grown catnip, fabric toy shells, bright vegetable- or soy-based colors on many products, and simple shapes such as the Chi-CAT-a Banana, Rainbow, Lemon, Pollock fish, cigars, crayons, hearts, pillows, and small bags. The brand’s official homepage also describes its toys as made in the USA and made with durable cotton twill.

    The best-known Yeowww toy is the banana. The official Chi-CAT-a Banana page describes it as a curved 7-inch toy with a cotton twill casing and catnip filling. Retail listings commonly emphasize the same basic idea: a fabric toy with a strong catnip aroma and no complicated attachments. That simplicity is a real advantage for many cats because there are fewer decorative parts to bite off.

    Still, simple does not mean risk-free. A fabric catnip toy fails differently than a plastic ball or a wand lure. The common failure point is fabric damage: punctures, thinning, split seams, loose threads, or catnip spilling out. If your cat is a dedicated shredder, that inspection step matters more than the brand name on the package.

    Are Yeowww Toys Durable Enough for Rough Cats?

    They are often more durable than flimsy plush mice, but they should not be treated as chew-proof. Cotton twill can hold up well to normal bite-and-kick play, especially when the toy is large enough for a cat to grip with the front paws and rake with the back feet. That makes the banana, cigar, rainbow, and fish-style shapes more useful for many rough players than tiny mice with tails or glued-on features.

    The limit is intense, focused chewing. Some cats bite one seam until it opens. Some puncture fabric and then worry the hole larger. Some do not merely chew catnip toys; they try to eat the loose material or fabric. Those cats need shorter play sessions, closer inspection, and possibly a tougher toy category.

    Use the same standard you would use in Titan Claws’ guide to testing cat toy durability at home: watch where your cat attacks first, check the toy immediately afterward, and retire it before loose material becomes swallowable. If you are shopping specifically for heavy chewers, compare this guide with toys for cats that chew and safe cat chew toys.

    Who Yeowww Cat Toys Fit Best

    Yeowww toys are strongest for cats that respond to catnip and like a capture toy they can hold. A good fit is the cat that rolls, rubs, grabs, carries, bunny-kicks, and returns to the toy over multiple sessions without trying to eat the fabric. They are also useful for cats that ignore low-scent plush toys but come alive when catnip is fresh and concentrated.

    They are a weaker fit for cats that swallow fabric, unravel seams, chew string-like threads, or become possessive and overstimulated around catnip. Some cats get playful and relaxed around catnip; others get frantic, mouthy, or irritable. If catnip tends to push your cat into hard biting or swatting at hands, use the toy at the end of a structured play session, then put it away before the energy tips over.

    Age matters too. Many kittens respond weakly to catnip or not at all, and very young cats may need smaller, softer, lower-intensity toys while they build coordination. For kitten-specific shopping, start with Titan Claws’ kitten toys guide before choosing a high-catnip kicker.

    Catnip Safety Notes Owners Should Know

    Catnip is an enrichment tool, not a required supplement. PetMD explains that nepetalactone, an oil in catnip leaves, can cause behavior changes in cats that are sensitive to it, and not every cat reacts. ASPCA’s plant database lists catnip with nepetalactone as the toxic principle and notes that many cats love it, but ingestion can cause vomiting or diarrhea and may stimulate or sedate different cats. That is a useful caution: catnip is common, but more is not automatically better.

    For most healthy adult cats, a catnip toy used in short sessions is a reasonable enrichment choice. The problems to watch for are over-arousal, upset stomach from eating too much loose catnip, aggression around the toy, or a cat that starts treating fabric as food. If you see vomiting, diarrhea, lethargy, repeated attempts to swallow non-food material, or a sudden change in behavior, stop using the toy and talk with your veterinarian.

    If catnip is the main reason you are considering Yeowww, Titan Claws’ catnip safety and benefits guide goes deeper into frequency, response differences, and when to choose alternatives such as silvervine or non-scent enrichment.

    How to Inspect a Yeowww Toy After Play

    Inspection should take less than a minute. Do it after the first few sessions, then any time the toy has been through rough play.

    • Check the seams: Look for opened stitching, pulled threads, or areas your cat keeps returning to with their teeth.
    • Press the fabric: Feel for thin spots, wet areas, or stretched fabric where claws have weakened the shell.
    • Look for loose catnip: A few surface crumbs from normal play are different from filling spilling through a hole.
    • Watch your cat’s mouth: If your cat chews off fabric, threads, or clumps of catnip and tries to swallow them, retire the toy.
    • Smell and clean around it: If the toy is soaked with saliva, dirty, or losing pieces, replace it rather than trying to stretch one more session out of it.

    Cornell Feline Health Center advises avoiding toys with small pieces or linear strand-like parts such as feathers and string that can separate and be ingested, especially when chewed. Yeowww-style fabric toys avoid some of those obvious add-ons, but damaged fabric can still become a problem if your cat pulls it apart.

    How to Use Catnip Toys Without Creating Chaos

    A catnip toy works better inside a play routine than as a permanent floor object. VCA Animal Hospitals recommends predatory games with toys a cat can eventually catch, and the AAFP/ISFM environmental needs guidelines emphasize giving cats opportunities for play and predatory behavior. Use that idea with catnip kickers: make the toy part of the catch, not the whole day.

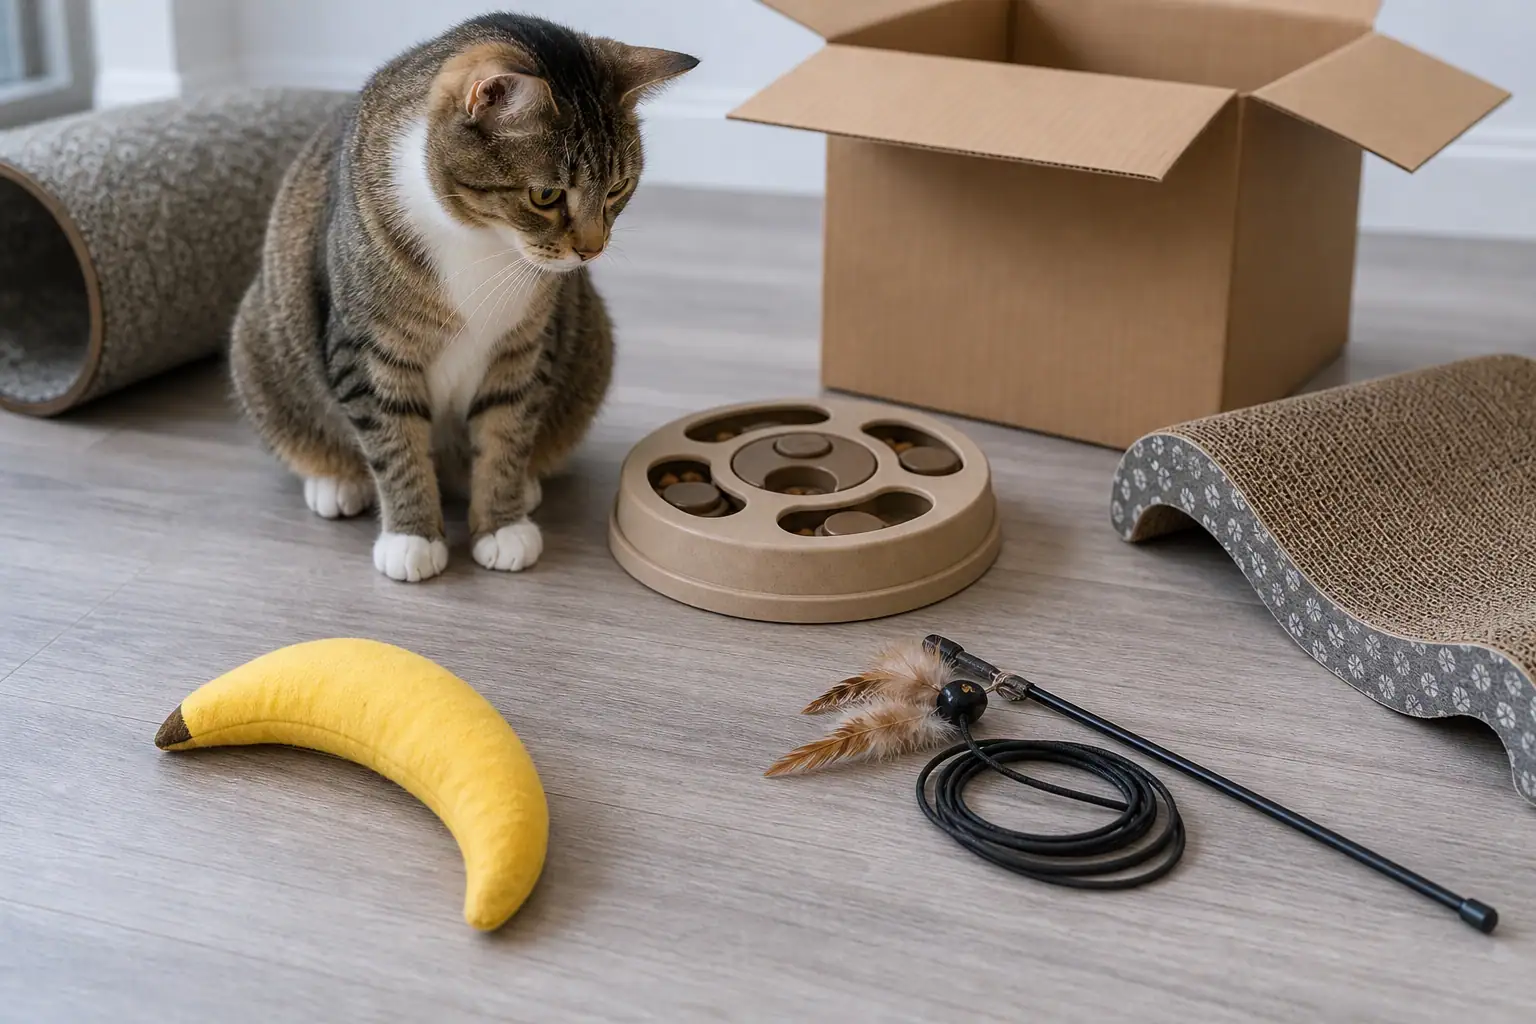
    Cat toy rotation with catnip kicker, wand toy, puzzle feeder, and cardboard box
    Yeowww-style catnip toys work best as one part of a rotation: kick, chase, forage, scratch, hide, and rest.
    1. Start with movement: Use a wand, tossed soft ball, or hide-and-seek movement around a box to wake up stalking and chasing.
    2. Let the cat win: End the chase with a real capture instead of teasing endlessly.
    3. Hand off the Yeowww toy: Let your cat bite and kick the catnip toy so teeth and claws land on the object, not your hands.
    4. Keep the session short: For intense cats, five to ten minutes may be enough before arousal climbs too high.
    5. Finish with food or rest: Offer part of a meal, a small puzzle feeder, or quiet time.
    6. Inspect and store: Put the catnip toy away so it stays novel and does not become an unsupervised chew project.

    This routine is especially useful for cats that bite people during play. A larger catnip kicker can redirect the bite-and-rake part of the sequence away from skin, while the stored-toy habit keeps the object interesting. For cats that need more movement before the handoff, see Titan Claws’ cat kicker toy, wand cat toy, and cat toys for hunting guides.

    Where to Buy and What to Check Before Checkout

    Searches for Yeowww cat toys near me or Yeowww cat toys Amazon usually mean the buyer already knows the brand and wants the safest, freshest option. Buy from Yeowww’s official site, a trusted pet retailer, your local independent pet store, or a marketplace seller with clear product details and recent reviews. Catnip strength fades over time, so stale inventory matters more here than it would for a plain plastic ball.

    Before checkout, confirm the exact size and shape, not just the product name. A 7-inch banana is a different play object than a tiny pillow or small catnip bag. For rough cats, larger kicker shapes are usually easier to grip and harder to swallow whole. Read low-star reviews for failure patterns, especially comments about seams opening, filling spilling, or cats tearing through the toy quickly.

    If your goal is maximum durability, do not buy only catnip toys. Build a small rotation with a scratcher, a wand stored after use, a puzzle feeder, a cardboard box, and one or two tough kickers. Titan Claws’ cat toy materials guide can help you compare materials and roles instead of expecting one toy to solve every play need.

    Quick Decision Checklist

    • Does my cat actually respond well to catnip?
    • Is the toy large enough for my cat to grip and kick without being mouth-sized?
    • Does it avoid feathers, strings, bells, glued eyes, and tiny detachable parts?
    • Will I inspect seams after the first few rough sessions?
    • Does my cat chew fabric, or do they try to swallow it?
    • Will this be a supervised toy, a rotation toy, or safe enough for my specific cat to leave out?
    • Do I have alternatives ready if catnip makes my cat overstimulated?

    Yeowww cat toys earn their popularity by being simple, scent-rich, and satisfying for cats that love catnip. The right way to use them is equally simple: match the shape to your cat’s play style, supervise the first sessions, inspect the fabric honestly, and replace the toy before damage turns into ingestion risk. For many cats, that makes a Yeowww toy a useful part of a durable enrichment setup. For true toy destroyers, it is one tool in the rotation, not the whole plan.

    Sources