Author: Nathaniel Price

  • How-to-Choose-Unbreakable-Cat-Toys-for-Heavy-Chewers

    How-to-Choose-Unbreakable-Cat-Toys-for-Heavy-Chewers

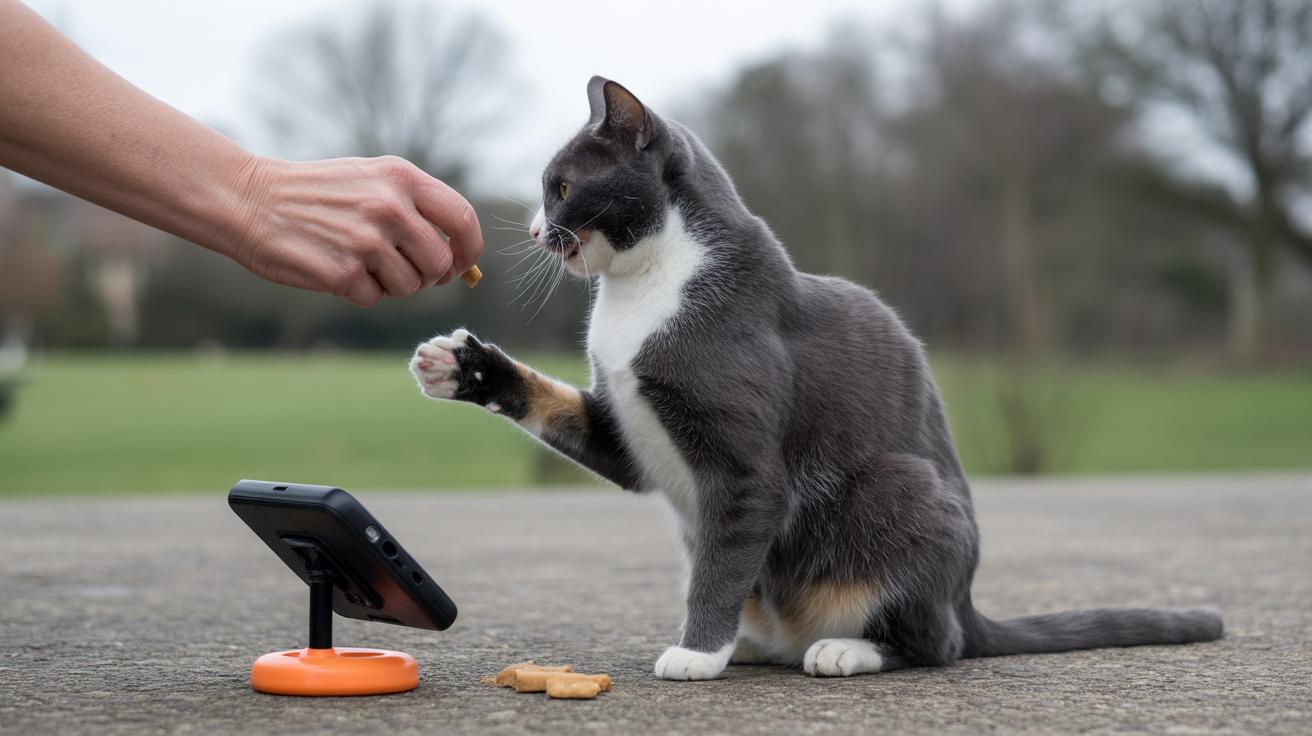
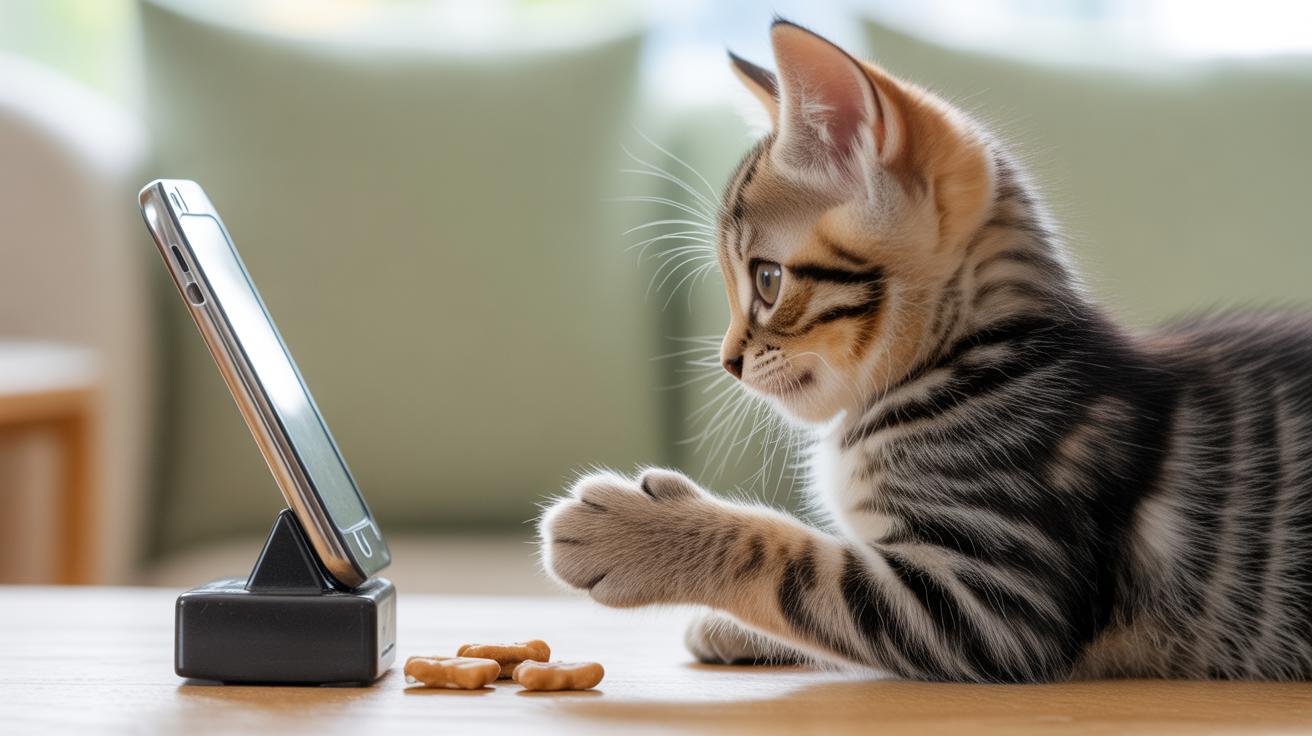
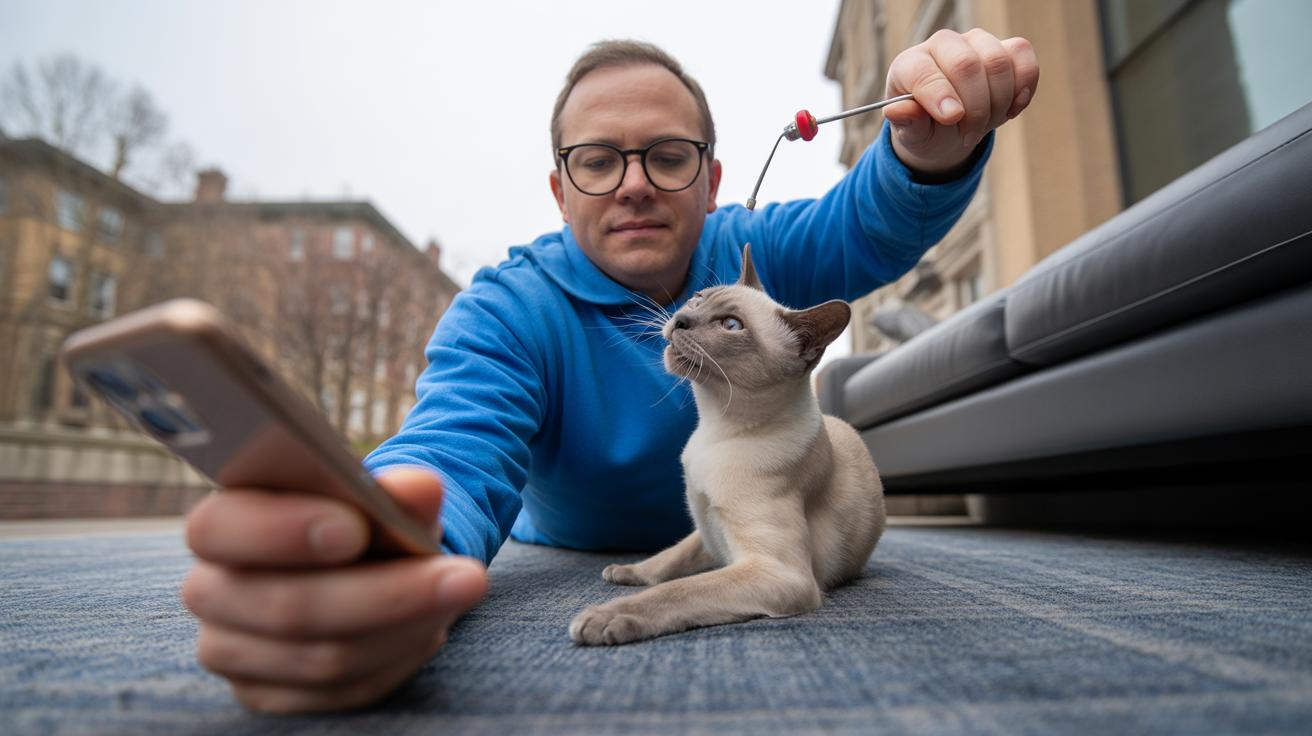
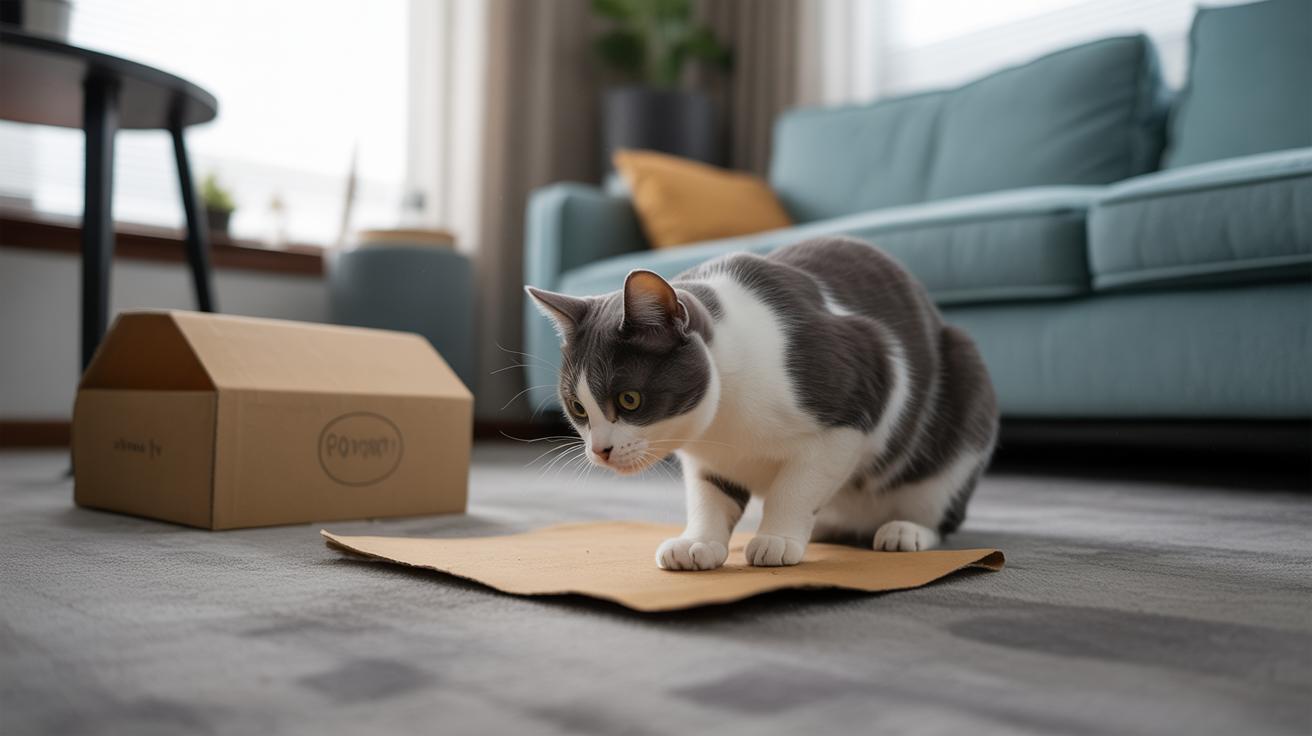
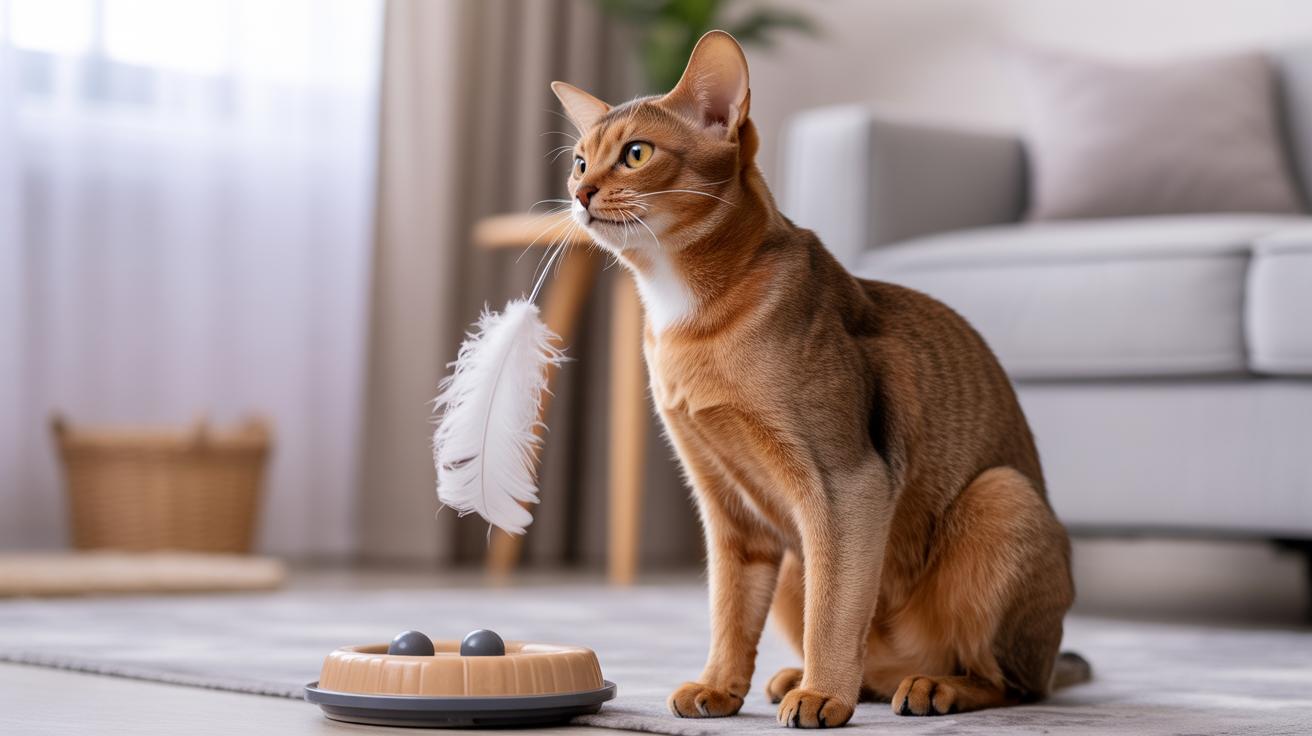
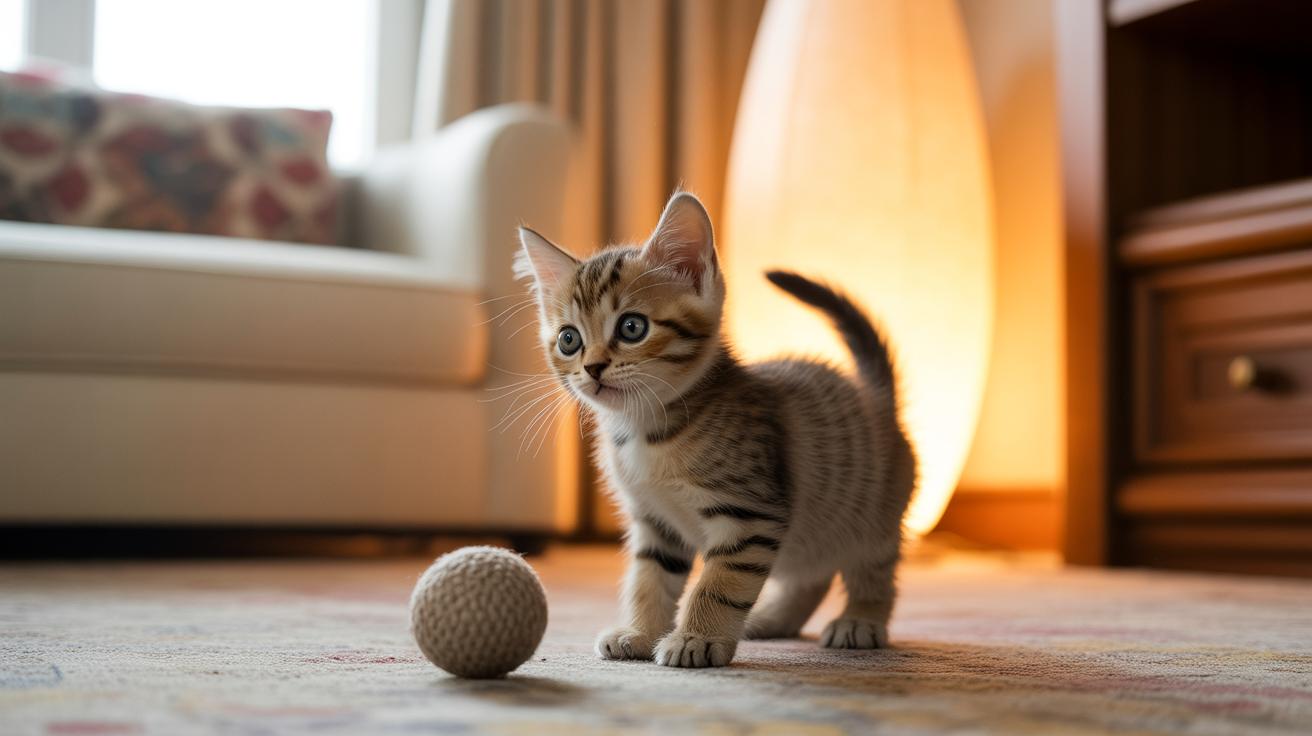
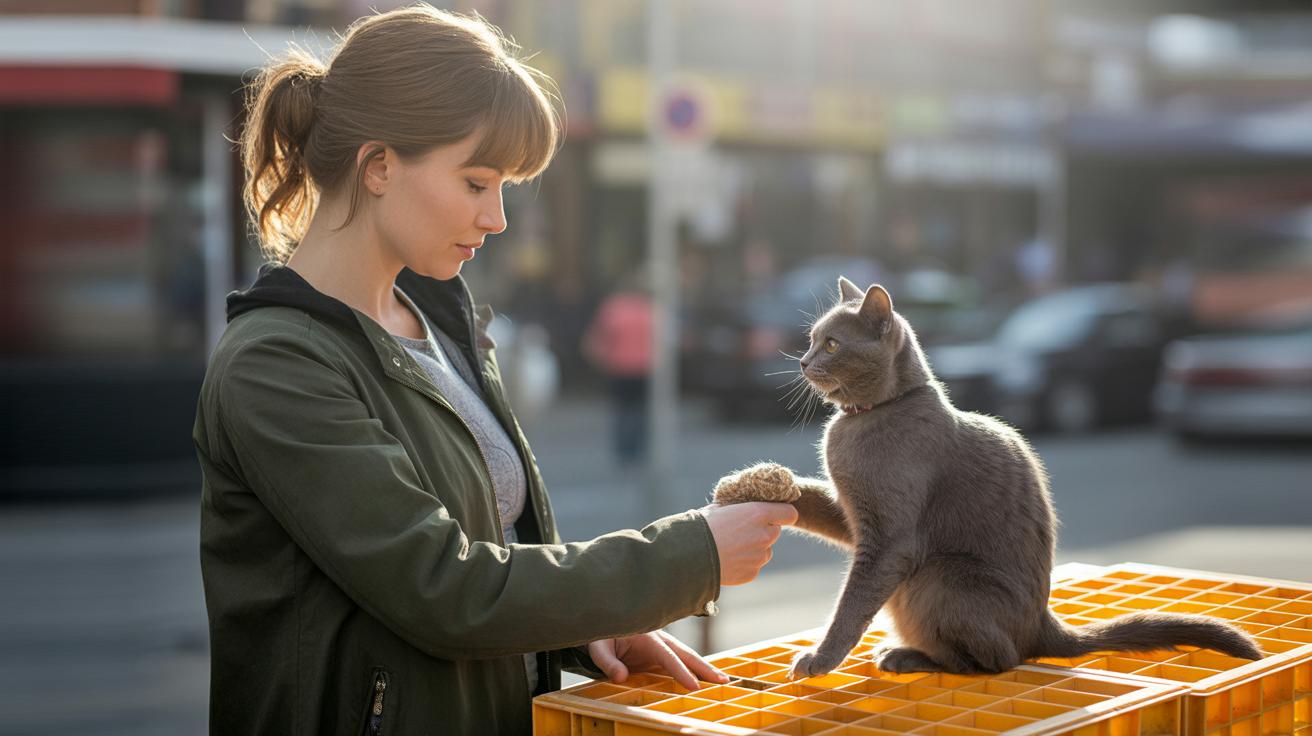
    Sick of buying toys that shred in one fling and leave your living room a shower of foam? You’re not alone. It’s the worst when your cat treats a plush like sushi. Check out our guide on Toys to Reduce Play Aggression.

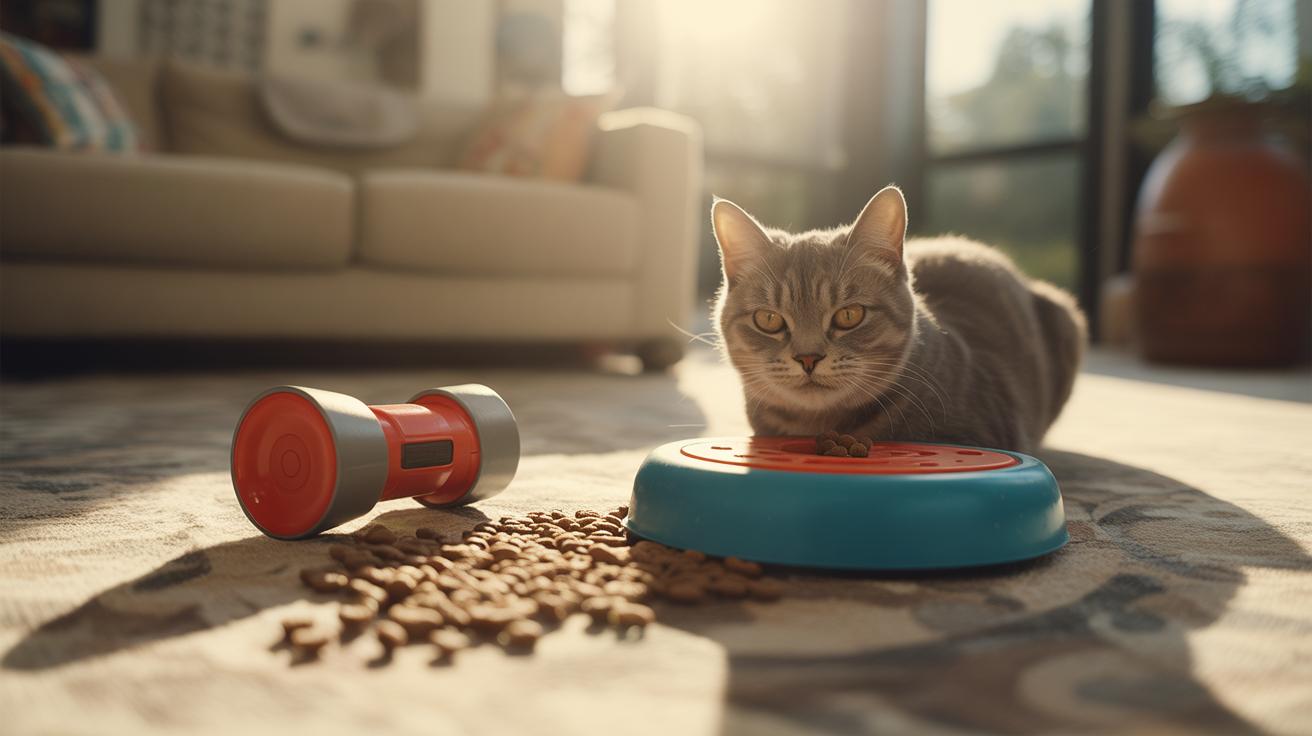
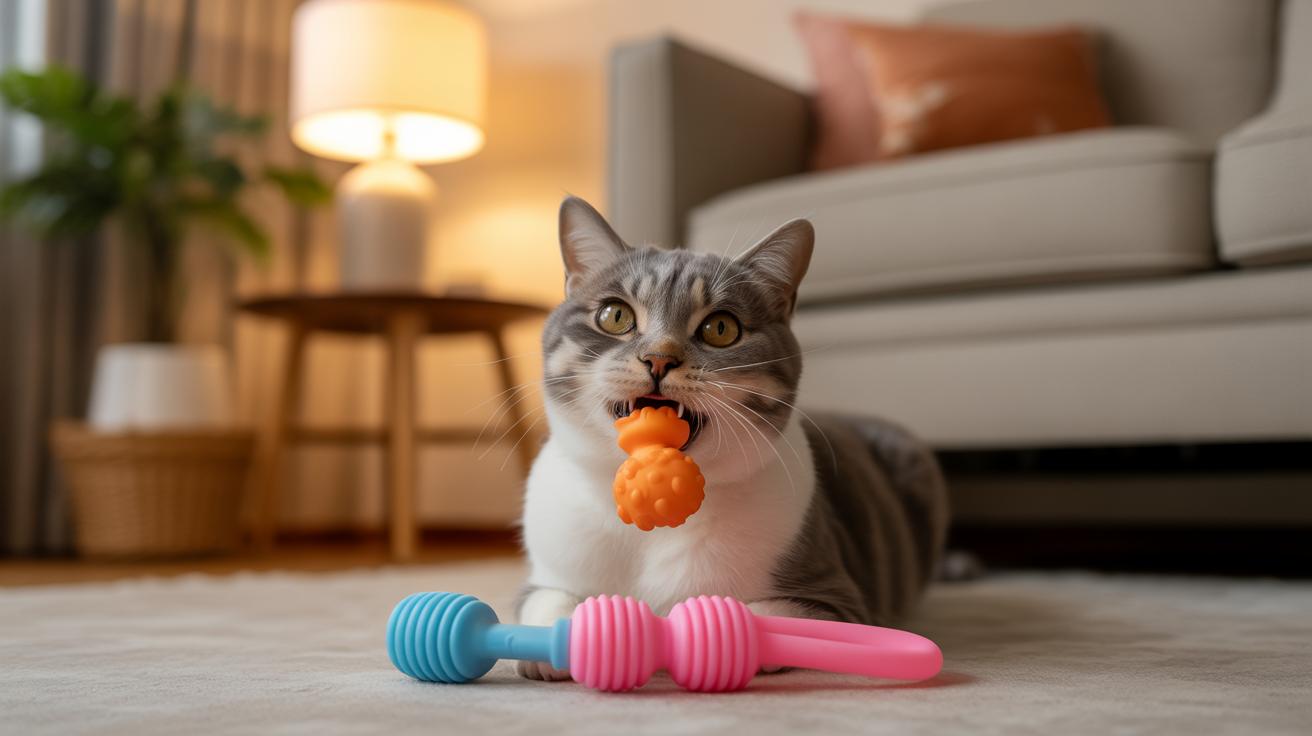
    If your kitty chews like a tiny tiger, pick food-grade rubber (the same stuff used in kitchen spatulas) or solid nylon (hard, chew-proof plastic). Make the toy bigger than their mouth so they can’t swallow it. Think chunky, not dainty.

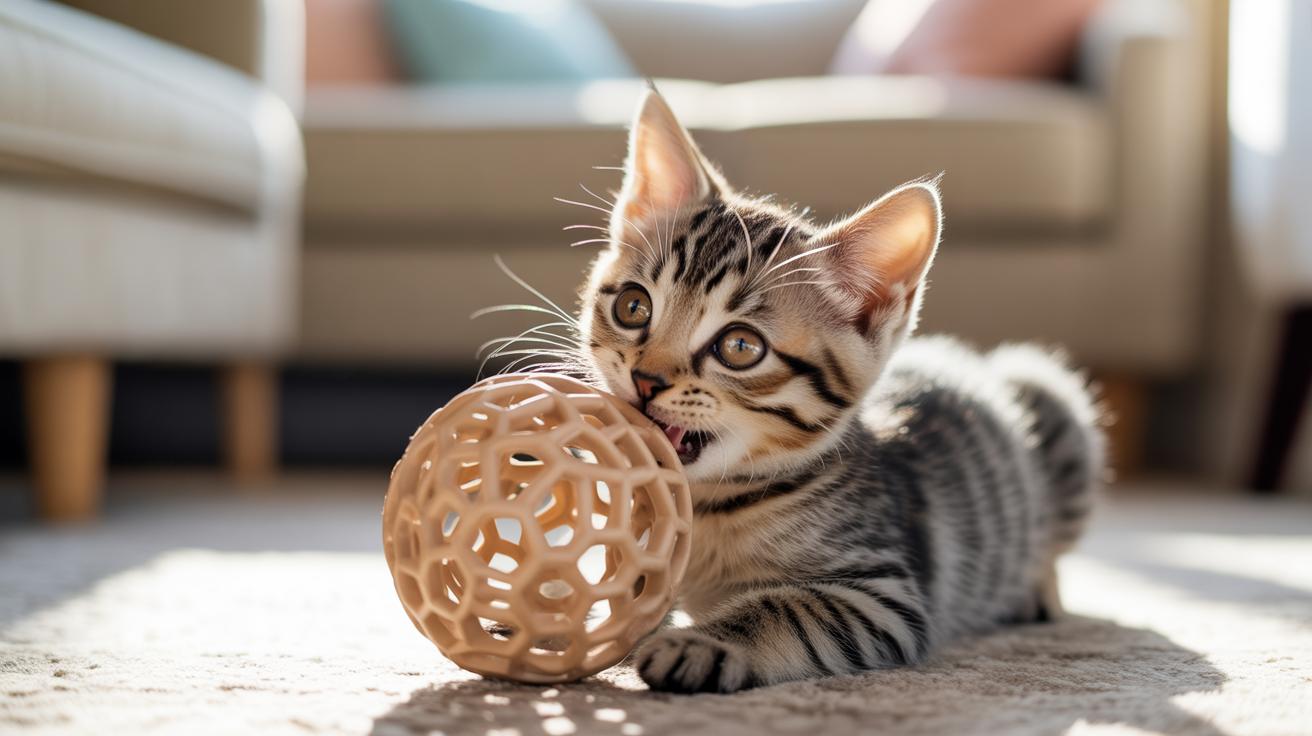
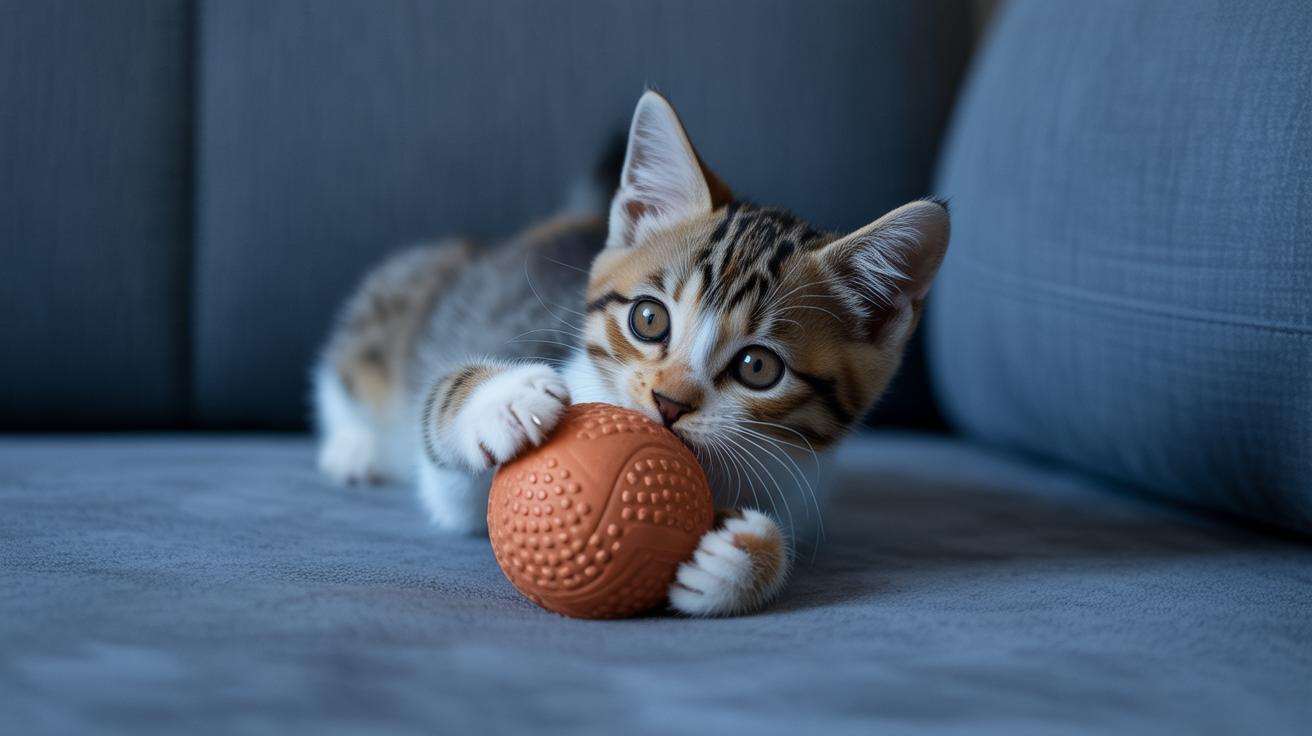
    Go for solid-molded shapes (one solid piece with no seams), welded metal parts (metal fused so bits won’t come loose), and absolutely no glued-on eyes or decorations. I once watched Luna chew through a plush mouse in five minutes, yikes. Oops, actually, make that avoid any glued bits at all.

    Quick checklist:

    • Material: food-grade rubber or solid nylon.
    • Size: bigger than your cat’s mouth.
    • Build: solid-molded, welded metal, no glued decorations.
    • Fillings: no loose stuffing or beads.
    • Cleanable: washable or wipeable.
    • Replace when torn or chewed through.

    Safety tips: check seams and joints before every play session. Toss toys that fray or split, because tiny bits can be a choking hazard. For string or ribbon toys, supervise play and put them away after, those are great for chase time, not for sleeping with.

    Worth every paw-print. Try a tough, simple toy and watch your cat go full pounce mode, satisfying.

    Quick Buy Checklist: Unbreakable Cat Toys for Heavy Chewers

    - Quick Buy Checklist Unbreakable Cat Toys for Heavy Chewers.jpg

    If you want one safe, durable pick right now, go for food-grade rubber (the kind used for kitchen tools) or solid nylon (a hard, chew-proof plastic) sized bigger than your cat’s mouth. Avoid antlers, rawhide, hooves and other brittle natural chews that can splinter. Skip soft foam that shreds into little bits. For gentler chewers or teething kittens, pick medical-grade silicone (soft, nonporous rubber used in medical gear) or tightly braided cotton (think rope-style weave). Look for solid-molded parts or welded metal components, clear non-toxic or BPA-free labeling, and real customer photos showing how the toy holds up. Then run the quick checklist below on the product page before buying. Ever watched your kitty try to swallow a toy? Don’t let that be a surprise.

    • Choose food-grade rubber or solid nylon (pick a size larger than your cat’s mouth).
    • For softer chewers or kittens, prefer medical-grade silicone or tightly braided cotton (both are less likely to tear).
    • Say no to antlers, rawhide, hooves, and other brittle chews that can splinter and cause injury.
    • No small, detachable parts like beads, stitched eyes, or glued decorations that can come off and be swallowed.
    • Favor solid-molded designs and welded metal components. No glued seams.
    • Confirm non-toxic, BPA-free, or medical-grade labeling on the packaging or product page.
    • Inspect product photos for smooth joints, reinforced stress points, and no exposed cores or visible fillers.
    • Make sure size and weight match your cat’s bite style: not small enough to swallow, not so heavy it hurts their mouth.
    • For plush or fabric toys, pick stuffing-free designs or double-reinforced seams to prevent quick shredding.
    • Favor treat-dispensing or compact, dense shapes made for heavy gnawers and long play sessions.
    • Check the seller’s warranty and return policy. See: Where to Buy/Warranty for terms.
    • Read several hands-on durability reviews and look for real wear photos or video clips from other buyers.

    Worth every paw-print when you pick the right one.

    Materials Comparison for Unbreakable Cat Toys

    - Materials Comparison for Unbreakable Cat Toys.jpg

    Material Durability Score (1–5) Tensile/Tear Test Result Fragmentation Risk Typical Use Cases Average Lifespan (observed)
    Natural rubber (elastic polymer from latex, like a stretchy balloon material) 4 20–28 MPa tensile (MPa = megapascals, a measure of pulling strength); 25–40 N/mm tear (N/mm = newtons per millimeter, how easily a tear grows). Lab: independent field tests with heavy chewers, typical failures were surface gouging and chunk loss. Medium , surface chunks can come off under extreme bite pressure Durable balls, chew rings, treat-dispensing shells 3–18 months (heavy chewers: 3–9 months)
    Food-grade silicone (medical-grade silicone, nonporous and soft but sturdy) 3 6–12 MPa tensile (stretch strength); 10–20 N/mm tear (resistance to ripping). Lab: fatigue bending tests showed hairline tears and edge splitting with repeated stress. Low–Medium, tends to tear before breaking into sharp fragments Teething chewables, flexible treat toys, soft gnaw pieces 1–12 months (kittens and gentle chewers last longer; aggressive gnawers shorter)
    Solid nylon (engineering thermoplastic, a hard dense plastic) 5 50–90 MPa tensile; 40–70 N/mm tear. Lab: puncture and crush tests , failures were mostly edge rounding and rare chipping. Low , mostly wear and tooth abrasion, fragments are uncommon Hard chews, long-life bone shapes, dense puzzle parts 6 months to several years (depends on bite intensity)
    Stainless steel components (corrosion-resistant metal used for cores and attachments) 5 400–600 MPa tensile; shear strength measured in weld tests. Lab: corrosion checks and weld fatigue testing , failures include weld break or corrosion on low-grade alloys. Very Low , metal fragments are rare if welding is done correctly Internal cores, welded attachments, joint reinforcements Years (typical structural parts >3–10 years)
    Braided cotton/linen rope (tight weave natural fibers) 2 30–50 MPa tensile in rope form; 5–15 N/mm tear. Lab: abrasion and pull tests showed fraying and fiber shedding as common failures. High , loose fibers and small bits appear as it wears Interactive tug toys, soft chew outlets, supervised fetch 1–6 months (heavy gnawers at the low end)
    Silvervine (natural chew stick, botanical stimulant that cats love) 2 Less than 1–5 MPa equivalent (organic twig tests); tear not really applicable. Field chew-rate trials showed rapid wear and occasional splintering if the stick is brittle. Medium , small splinters possible with aggressive biting Short-term chew sticks, teething relief, enrichment rewards 1–8 weeks (typical heavy-chewer use)

    Want the full test details and easy home checks? See Safety/Testing/Retirement for test methods and step-by-step home tests.
    Quick tip: if your cat is a heavy chewer, pick nylon or steel cores. If you just need gentle play or teething relief, silicone or silvervine can be fun and safe, um, with supervision.

    Construction & Design Features That Make Cat Toys Truly Tough

    - Construction  Design Features That Make Cat Toys Truly Tough.jpg

    Keep this tight. Look only at photos and label clues that actually show real-world toughness, not marketing fluff. Skip the general buying tips in the Quick Buy Checklist and zoom in on these specific construction details.

    Look for clear visual cues. Double-wall rubber (two-layer shell) means extra bite resistance and a squishy, solid feel when your cat chases it. Welded stainless cores (stainless steel inner rod welded into place) show up where anchors or rings attach, and they stop things from ripping out. Heat-sealed or whipped rope ends (sealed or wrapped to stop fraying) keep fibers from unraveling into a fluff storm. Any mention of ASTM-style testing notes (ASTM, standardized material testing) is a good sign the maker did formal checks. Close-up photos that show material thickness at stress points matter way more than a bold claim.

    Construction & Photo Checklist

    • Double-wall rubber at bite zones, two-layer shell. Example: zoom shows a thick rim around the ball, not a paper-thin lip.
    • Welded stainless cores for anchors or rings, stainless steel inner rod welded into place. Example: you can see the inner rod and a welded end cap, not just glued plastic.
    • Heat-sealed or whipped rope ends, sealed or wrapped ends that stop fraying. Example: rope tips look melted or tightly wrapped, no loose fibers.
    • Visible thickness at stress points like lips, seams, and joins. Thin edges usually mean early failure. Example: zoom reveals a thin seam that would split under tugging.
    • Close-ups of stitching, glue lines, or hollow vents. Big gaps, sloppy glue, or exposed hollow interiors are red flags.
    • Photos or teardown shots that show an interior core. Seeing a core means it’s more likely to survive rough play.
    • Attachments (rings, tags) with welded or molded joins, not flimsy clips that pop off.

    Quick pre-buy photo checklist:

    • Zoom the main seam and every stress point.
    • Hunt for third-party closeups or teardown photos.
    • Inspect seam detail for glue, stitches, or hollow vents.
    • Check if an interior core is shown or visible.
    • Scan attachments for welded or molded joins.

    See Safety/Testing/Retirement for how to validate these cues with simple home checks.

    How-to-Choose-Unbreakable-Cat-Toys-for-Heavy-Chewers

    - Safety, Durability Testing, and Retirement Rules.jpg

    Safety first. Below are easy at-home checks and clear retirement rules you’ll use before, during, and after the first play session so broken bits don’t surprise you or your cat. Think of it as a quick safety ritual , ten minutes that could save a lot of worry.

    1. Visual close inspection – Do this in good light. Look for seams, hairline cracks, soft spots, or anything that looks worn. Run your fingers over attachments and decorations so you can feel weak spots you might not see.
    2. Seam tug test – Give seams and attachment points a firm pull. This finds weak glue or stitching before your cat does. If it stretches or pops, retire it.
    3. Bite-pressure test – Press and twist rubber (elastic material that bounces back) or nylon (tough plastic) with your fingers to look for cracking or stress lines. This mimics a real bite and shows where it might split.
    4. Flex/fatigue test for silicone or rubber – Bend and flex the part repeatedly to reveal tiny fractures. Silicone is a soft, stretchy, rubber-like plastic; this test finds hairline splits that start small then grow.
    5. Fragment probe – Rub a damp cloth over soft surfaces to see if fibers shed or beads abrade. You’re checking for tiny bits that could come off during a chewing spree.
    6. Simulated chew pressure test – Use a safe tool (like pliers with a cloth cover) to press in at likely bite zones on hard toys. That concentrated pressure often reveals weak cores or cracking.
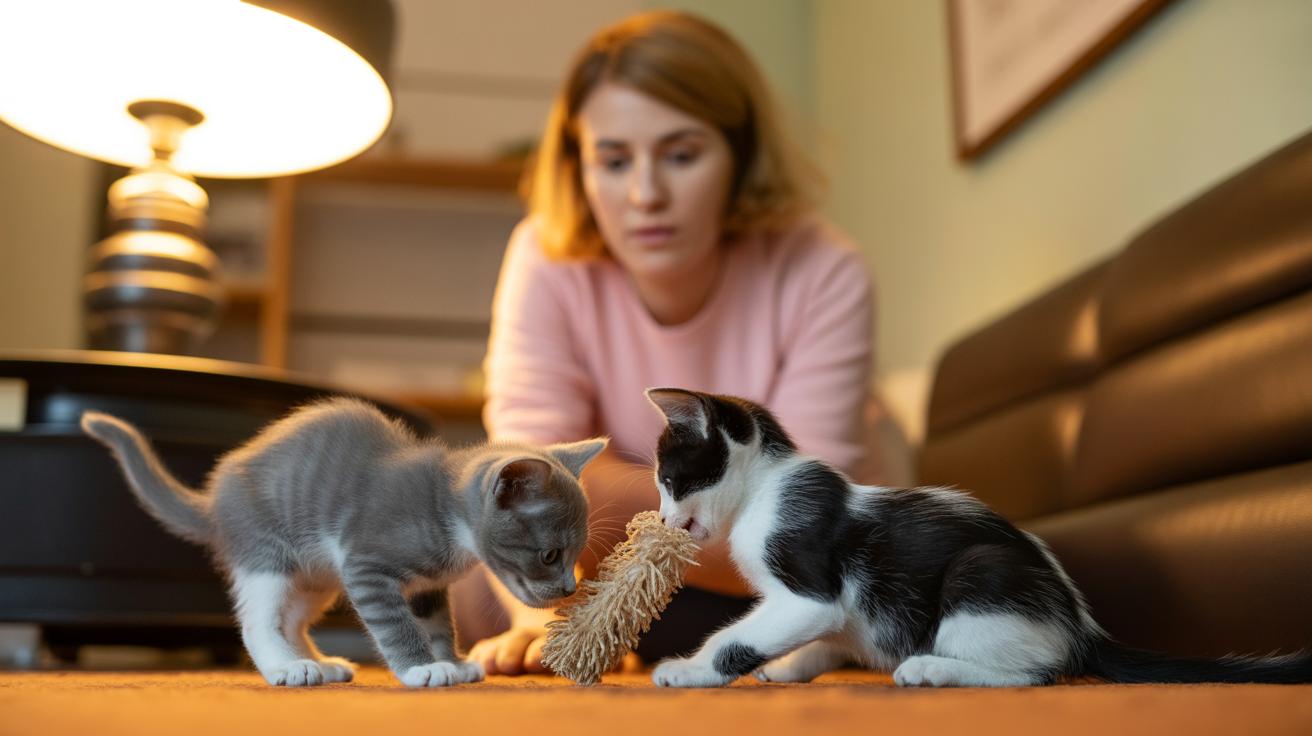
    7. Supervised first play session protocol – Let your cat play for 10 to 20 minutes while you watch closely. Look for loose bits, odd chewing behavior, or fast wear. Take a quick photo or video and note the time so you have a record if you need to decide retirement later.

    Watch for these red flags during tests and play:

    • Visible cracks or hairline fractures.
    • Loose fibers, threads, or fraying that make small pieces.
    • Exposed or broken hard core – metal, plastic, or wood.
    • Sharp, jagged, or pointy edges that could cut gums.
    • Missing chunks, beads, or pieces that can detach.
    • A new, persistent smell or a changed texture after use.

    Replacement-frequency norms for heavy chewers (expect variation):

    • Silvervine sticks (a cat-attracting plant like matatabi) – about 1 to 8 weeks.
    • Braided rope toys – about 1 to 6 months, depending on chew intensity.
    • Solid rubber pieces – commonly 6 to 24 months, depending on play style.
    • Solid nylon chews (hard, durable plastic) – from several months to years, depending on bite force.

    Quick tip: For busy days, toss an unbreakable ball before you head out , that’s ten minutes of safe play. I once watched my cat leap three feet for a rubber ball; worth every paw-print. Check Cleaning/Lifespan for sanitation steps and record keeping, and consult Quick Buy Checklist for immediate red-flag actions before you click buy.

    Cleaning, Care, and Lifespan Expectations for Unbreakable Cat Toys

    - Cleaning, Care, and Lifespan Expectations for Unbreakable Cat Toys.jpg

    Quick scope: this section helps you clean chew toys, sanitize rubber toys, wash rope toys, and set realistic expectations for how long toys usually last. It’s all about keeping playtime safe and smelling fresh without overthinking it. Ever watched your kitty drool all over a toy and wonder if it’s still okay? We got you.

    • After muddy or drooly play, rinse toys with warm water and a little mild soap. Give them a good shake and let them air-dry completely before sending them back into rotation. Your cat will thank you with dramatic head-butts.
    • Do a deeper clean weekly for food-grade rubber (rubber safe for kitchen tools) and medical-grade silicone (soft, nonporous rubber-like plastic used in medical gear). You can use the top rack of the dishwasher or a short boil if the toy’s label says it’s allowed. Don’t toss things in if the maker warns against it.
    • Machine-wash braided rope and fabric toys on a gentle cycle inside a mesh laundry bag (a see-through bag that keeps small items from tangling). Use mild detergent and then air-dry. Hand-wash fragile pieces and lay them flat to dry so they don’t lose shape.
    • Remove and empty treat housings (little compartments that hold treats) before washing. Scrub tight spots and crevices with a bottle brush so crumbs don’t hide and mold doesn’t invite itself over. Let everything dry fully.
    • Store toys dry in a sealed bin and rotate them weekly so each toy gets a rest between sessions. Rotation keeps toys interesting and helps moisture evaporate. Worth every paw-print.
    • After cleaning, do a simple visual wear check only. Look for frayed threads, thinning areas, soft spots, or sharp bits. If you spot damage, follow the steps in Safety/Testing/Retirement.

    Lifespan expectations vary a lot depending on your cat’s chomping style. Soft botanical toys (stuff made from plant fibers) can wear down in weeks. Woven rope toys (cotton or blended strands) often last months. Solid rubber toys usually hold up for many months to a couple years. Dense nylon (a hard synthetic material) can last years for some chewers. My cat once shredded a rope in two afternoons, so yes, it really depends.

    Sanitation checklist: disinfect rubber and silicone weekly if you use them with treats, wash rope toys every 1 to 2 weeks or after they get dirty, and wipe treat dispensers after each use. If cleaning reveals any damage, see Safety/Testing/Retirement before giving the toy back to your cat. Uh, better safe than sorry.

    Best Types and Top Picks for Unbreakable Cat Toys for Heavy Chewers

    - Best Types and Top Picks for Unbreakable Cat Toys for Heavy Chewers.jpg

    Quick note: I cleaned up duplicate how-to bits and moved them into Materials Comparison and the Quick Buy Checklist so you get one clear place for steps and checks. Below are short, handy notes to keep price bands and toy types front and center.

    Category Representative Example Types Typical Price Range
    Silvervine sticks Whole sticks, short chews, stick bundles (silvervine – a plant that attracts cats) $5–$15
    Braided rope toys Tug ropes, braided mice, looped chew rings (tight-weave cotton rope – sturdy cotton twisted tight) $6–$20
    Rubber treat-dispensing Treat puzzles, hollow chew balls, slow-feeders (food-grade rubber – dense, safe rubber used for kitchen items) $12–$40
    Solid nylon chews Bone shapes, rings, dense chews (nylon – hard, durable plastic) $8–$25
    Chew-resistant reinforced fabric Double-layer plush with no stuffing, sewn-in reinforcements (reinforced fabric – extra layers and stitching to resist ripping) $8–$30

    A few quick shopper notes you can drop into Materials Comparison or the Quick Buy Checklist:

    • Example line you can paste: "A $10 silvervine stick gave Luna a week of happy chewing." Short, true, and hits the point.
    • Mini-case: converting a dog rubber ball for your cat – pick one labeled food-grade rubber (non-toxic, used for kitchenware), make sure it’s too big to fit fully in your cat’s mouth, confirm BPA-free or medical-grade labeling, then do a seam and tug check before supervised play. I did that once – checked the label, sized the ball, and my cat batted it for days.
    • Size-fit and proof requests: ask sellers for photos of the toy next to a ruler or your hand, and check for any warranty or return policy before buying. Those tips are folded into the Quick Buy Checklist so you don’t have to hunt for them.

    Safety and shopping basics, short and sweet: choose non-toxic materials, avoid loose stuffing, and supervise new toys for the first few sessions. Ever watched your kitty decide a new toy is their life mission? Yeah, supervise.

    Worth every paw-print.

    Further reading

    How-to-Choose-Unbreakable-Cat-Toys-for-Heavy-Chewers

    - Matching Toys to Cat Age, Chewing Style, and Behavior.jpg

    Match the toy to why your cat chews – teething, boredom, dental pain, or just pure play drive. Add a concise "Match the toy to the chew reason" box into the Quick Buy Checklist or Materials Comparison so shoppers see the picks at a glance.

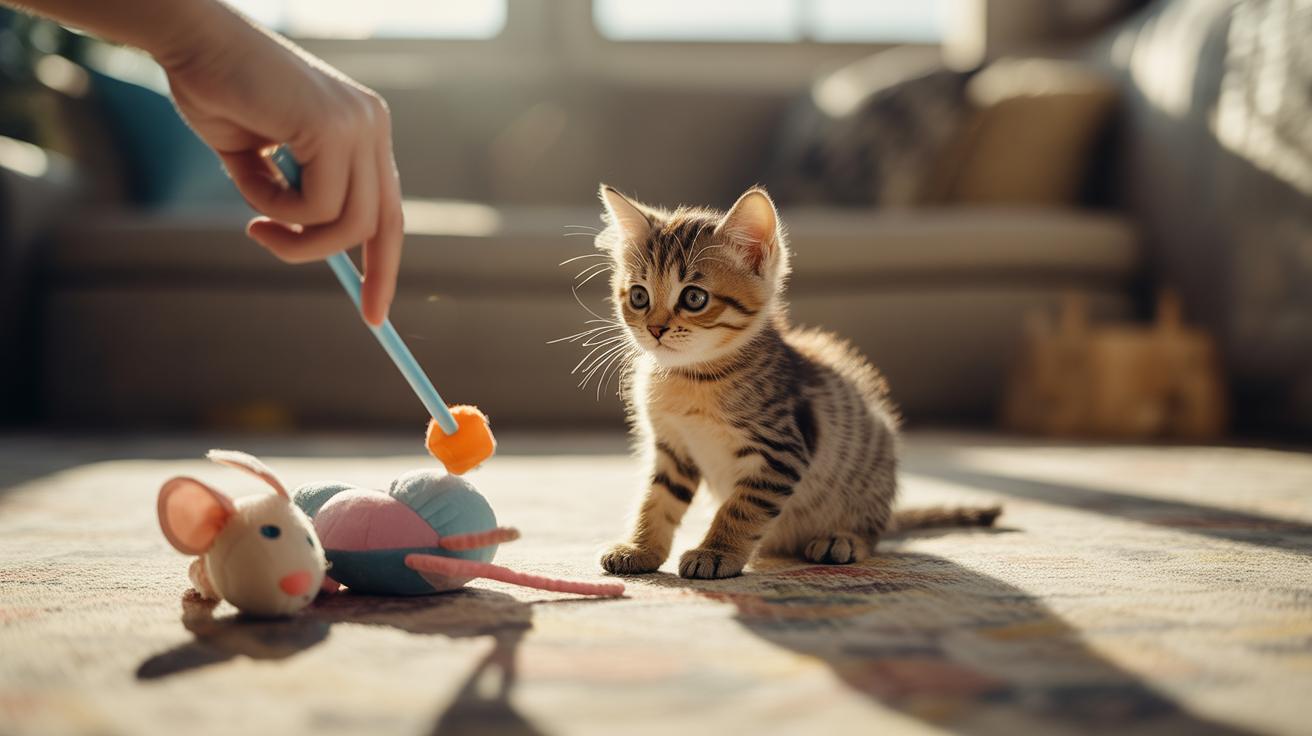
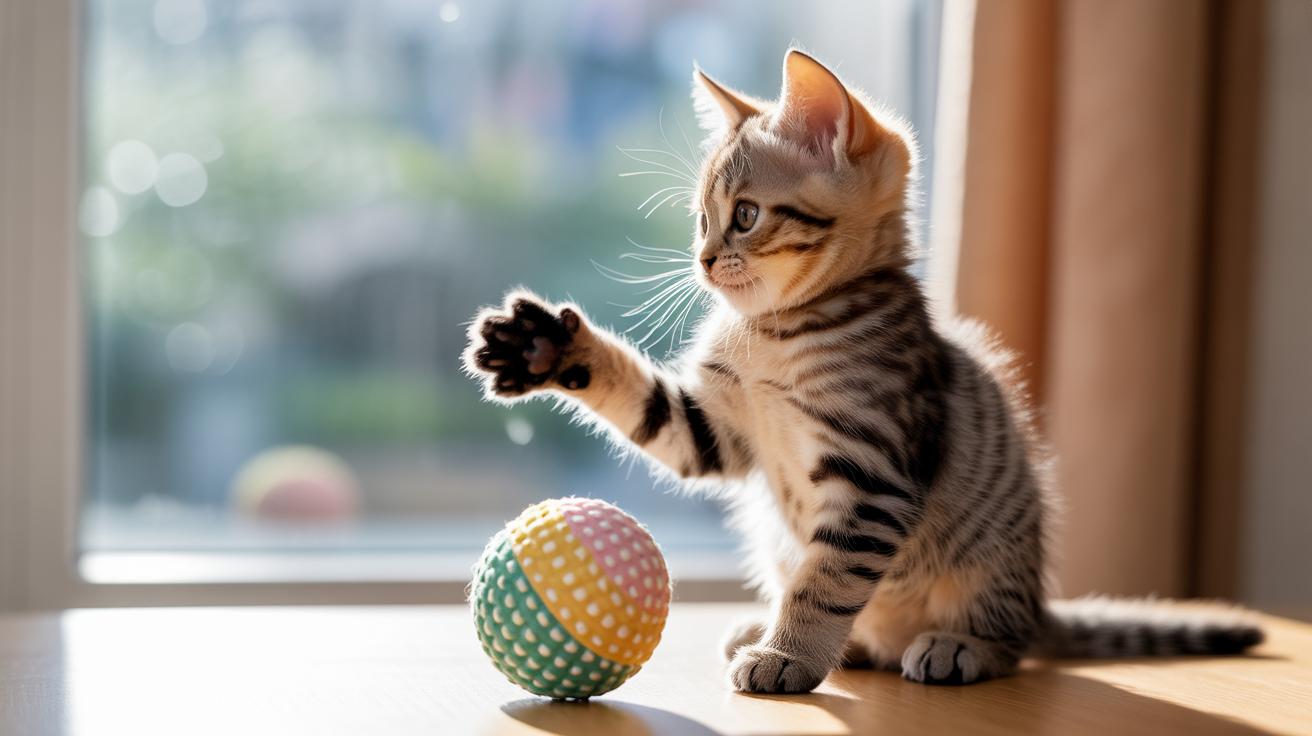
    • Kitten teething , flexible silicone (soft, food-safe rubber-like material), silvervine (a cat-attracting plant similar to catnip), and soft braided fabric (twisted fibers that give but don’t shred). These feel gentle on new teeth and encourage safe chewing.
    • Young aggressive chewer , solid nylon (a hard polymer used in chew-proof gear) and heavy rubber (dense rubber like you find in tough treat dispensers). Tough, resistant, and built to take a pounding.
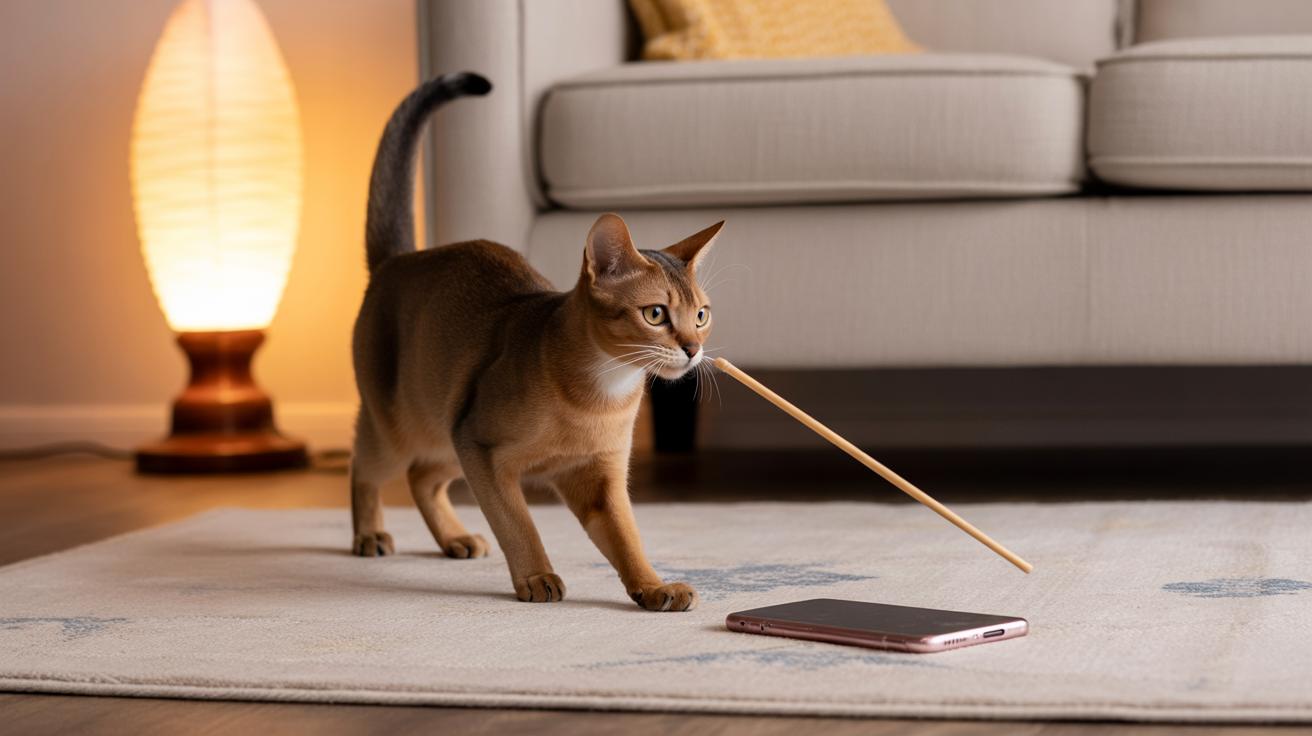
    • Nibblers , braided rope (twisted natural or synthetic fibers) and reinforced fabric chewables. Good for light tugging and nibbling without falling apart.
    • Senior cats with dental issues , soft medical-grade silicone (gentle, non-toxic material made for comfort) and supervised chew sticks. Soft textures protect sore mouths; watch them while they chew.
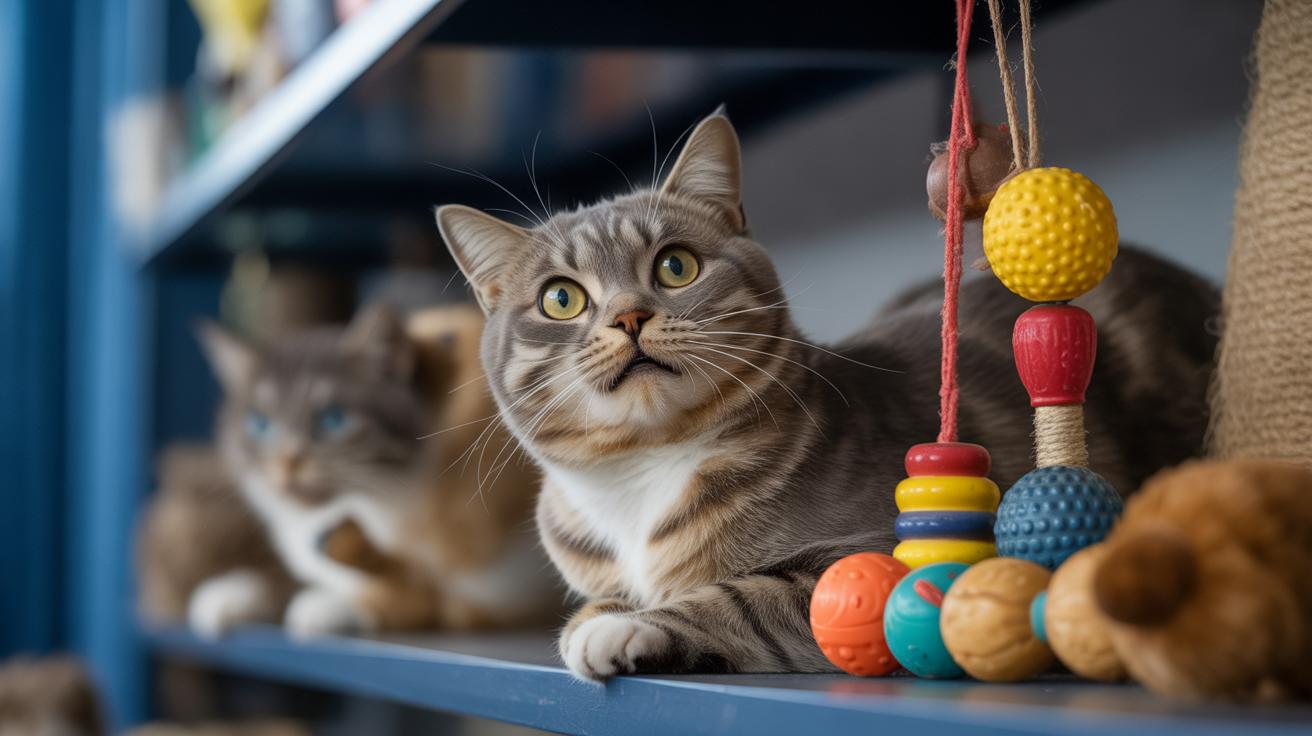
    • Multi-cat household , keep multiple identical durable items and rotate them often. That cuts down on fights and keeps toys interesting.
    • Cat + dog households , choose size-appropriate dog rubber items that are vetted for cat use, and keep an eye on shared toys to avoid accidental swallowing.

    Rotation and pairing guidance has been moved to Cleaning/Care as a one-paragraph practical tip; see the Toys Rotation note there for a quick method and storage cues. It’s a simple swap-and-store routine that stretches toy life and keeps kitties curious.

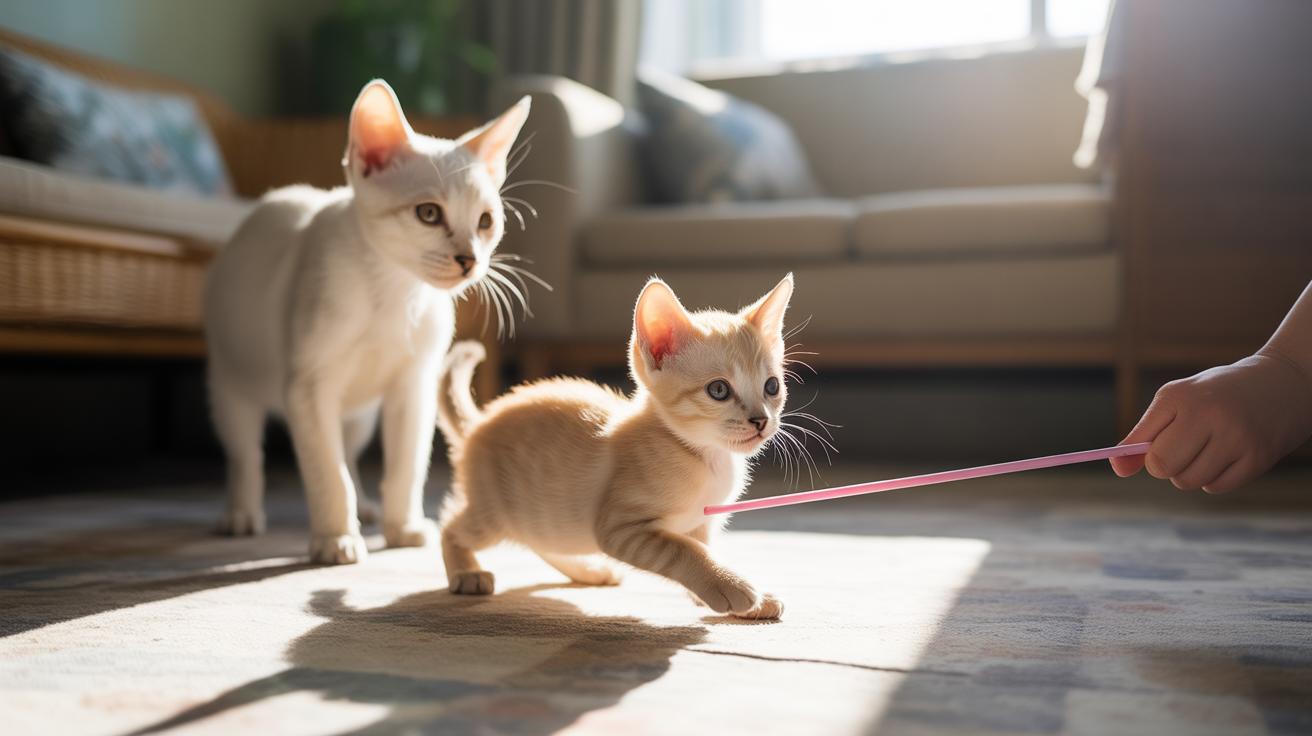
    For supervised first-play and the stepwise intro protocol, see Safety/Testing/Retirement – we cover the supervised session, retirement triggers, and monitoring steps. Use a short, repeatable intro routine so your cat learns which toys are for chomping and which are for chasing: "This one's for chomping; that one's for zoomies."

    Where to Buy, Price Ranges, Warranties, and Return Policies

    - Where to Buy, Price Ranges, Warranties, and Return Policies.jpg

    Shop where the seller shows material details and real-life durability photos. Brands and specialty shops that post clear return rules are usually the safest. Spending a little more often means a toy that lasts longer, especially if your cat is a super chewer.

    • Direct from the manufacturer – look for lifetime or durability guarantees. Typical prices: $8 to $40 depending on materials. Verify the written warranty and ask what counts as a defect. If they list materials, check for things like polymer (a tough plastic mix) or puncture-proof fabric (woven to resist claws).
    • Specialist chew-toy retailers with hands-on testing – stores that publish field reviews and wear photos. Prices: $5 to $40. Look for independent testing notes and before-and-after photos so you know real-world performance.
    • Vetted marketplaces with customer photo reviews – search buyer photos and videos before you buy. Prices: $5 to $40. Make sure there are multiple hands-on reviews and good seller return ratings.
    • Local pet stores – you can touch the seams and feel the fabric before you buy. Prices: $5 to $40. Ask to see labels, ingredient lists, and packaging claims in person.
    • Vet-recommended brands – ask your clinic for their favorites, especially if dental safety matters. Prices: $8 to $40. Verify any clinical approval or dentist-tested claims and ask what tests were done.
    • Subscription boxes for chewers – curated durable items delivered on a schedule, good for rotation and boredom-busting. Monthly cost: $10 to $35. Check replacement policies and look for sample photos from other subscribers.

    When you contact customer service, ask these exact things: does the warranty cover chewing damage or only manufacturing defects; how long is coverage; what proof do you need – time-stamped photos, video of first play, or the receipt; and what is the return window plus who pays shipping. Keep your purchase receipt and the original packaging. Take a short video during the supervised first play and timestamp it. That little clip is gold when you file a claim.

    If you need to make a claim, present a clear timeline, your photos and the test video, and any notes from your own safety testing or retirement inspection (like when you decided the toy was worn out). For a quick pre-buy check, see the Quick Buy Checklist for the single warranty pointer you should never skip.

    Ever watched your kitty attack a new toy like it owes them rent? Yeah, me too. Little prep up front saves fuss later, and your cat gets more play time that actually lasts. Worth every paw-print.

    FAQ: Common Questions About Choosing Unbreakable Cat Toys for Heavy Chewers

    - FAQ Common Questions About Choosing Unbreakable Cat Toys for Heavy Chewers.jpg

    Are "indestructible" toys real?
    Short answer: no. There’s no toy that’s truly indestructible, but some last a lot longer than others. See Safety/Testing/Retirement for how we judge real-world toughness and when to retire a toy. Retirement (taking a toy away when it’s chewed or cracked) keeps your cat safe.

    Which materials perform best for heavy chewers?
    Check [Materials Comparison](Materials Comparison) for the full tested rankings, notes, and failure modes (how things break). In general, look for thick rubber or hard polymers (types of plastic), tightly woven puncture-proof fabric (strong nylon), and solid metal parts where appropriate. We explain each material there and show what to expect if it starts to fail.

    Can I use dog chew toys for my cat?
    Sometimes, yes. But size matters, and so does labeling. See How-to-Choose and [Materials Comparison](Materials Comparison) for tips on sizing, non-toxic labeling (means the product is made from materials safe if chewed), and avoiding toys with small or detachable parts that could come off when your cat chews.

    Where should I report an unsafe product?
    Start with the seller or the marketplace where you bought it. If that doesn’t resolve things, escalate to consumer protection agencies or the manufacturer. See [Where to Buy/Warranty](Where to Buy/Warranty) for links and warranty tips. Below is a quick copy-paste script and a simple checklist to make reporting faster.

    Sample reporting script (copy-paste):
    "Hi, I purchased [product name/model] on [date]. Attached are time-stamped photos and a short video showing the defect or damage during supervised use. Please advise on refund or recall steps."

    Required evidence checklist:

    Item
    Photo of the product with visible damage and a clear date or timestamp
    Short video (10–30 seconds) showing the failure during supervised use
    Proof of purchase (receipt, order number, or screenshot)
    Photo of the product label, model or lot number, and packaging
    Your contact info and a brief note about any pet injury

    Quick tip: keep one safe spare toy to swap in while you report or replace a damaged one. Ever watched your kitty fang the air after a broken toy? Not fun. Keeping toys in rotation helps them last and keeps playtime safe.

    Final Words

    If you need a buy-now answer: use the quick 12-item checklist, pick food-grade rubber or solid nylon, skip antlers and rawhide, check photos for smooth seams, and confirm warranty and return terms.

    Then use the materials comparison and photo/label cues to screen options, and run the seven-step home tests during that first supervised play session.

    Follow the toy-matching tips, clean on the schedule, and read hands-on reviews so you know how to choose unbreakable cat toys for heavy chewers. Worth every paw-print.

    FAQ

    Best how to choose unbreakable cat toys for heavy chewers?

    Pick food-grade rubber (durable, flexible) or solid nylon (tough plastic-like), choose a size larger than your cat’s mouth, and avoid antlers or rawhide.

    Cat Chew Toys for Aggressive Chewers — What is the best thing for aggressive chewers?

    Use solid nylon chews or heavy-duty food-grade rubber, and add active play and toy rotation to redirect gnawing.

    Can I use dog chew toys for my cat?

    Yes if the toy is sized to prevent swallowing, labeled non-toxic (BPA-free), has no small detachable parts, and you vet it with a quick safety checklist and tests.

    How do I test a toy’s durability at home?

    Do a close visual inspection, seam-tug and bite-pressure checks, flex/fatigue bends, a fragment rub test, then a short supervised play session watching for cracking or shedding.

    What signs mean a toy should be retired?

    Retire a toy if it has visible cracks, loose fibers or threads, exposed or broken cores, sharp jagged edges, missing chunks or beads, or a persistent odd smell or texture change.

    Cat chew toys for pica — what should I do?

    Get a vet check, remove dangerous items, offer safe alternatives like braided cotton and medical-grade silicone, and supervise chewing until behavior improves.

    Cat chew toys for teething — What to give teething kittens?

    Give medical-grade silicone, silvervine sticks, and braided fabric chews; keep sessions short, supervise closely, and rotate toys to limit wear.

    Rubber chew toys for cats — are rubber chew toys safe?

    They are safe when made of food-grade rubber, solid-molded with no glued bits, BPA-free, sized to avoid swallowing, and cleaned per the maker’s instructions.

    OrkaKat Wiggle Worm — is it good for heavy chewers?

    The OrkaKat Wiggle Worm is a soft teaser for swatting and light chewing; it’s fun but not built for heavy gnawers—use it supervised and pair with tougher chews.

    Chewy cat toys for indoor cats — what should I pick?

    Choose treat-dispensing rubber toys, braided rope, interactive teaser wands, and washable fabric options; rotate items and favor easy-to-clean materials.

    What annoys cats the most?

    Sudden loud noises, forced handling, prolonged staring, abrupt routine changes, and strong citrus or chemical smells—watch tail flicks, flattened ears, and vocal warnings.

    What is the absolute best cat toy?

    The best toy matches your cat’s play style—often an interactive teaser wand for chasing, or a durable treat-dispensing rubber ball for solo chewing.

    Cat chew toys for aggressive chewers reddit — can Reddit help?

    Reddit can provide starting recommendations, but verify durability photos, material labels, and seller warranty; cross-check picks against your safety checklist and testing steps.

    Where do I report unsafe or defective pet toys?

    Report to the seller and marketplace, keep photos and video, contact the manufacturer, and file with consumer protection or pet-safety groups if needed for warranty or safety claims.

  • Clicker Training for Cats: Step-by-Step Tips

    Clicker Training for Cats: Step-by-Step Tips

    Think cats can't be trained? Think again.
    clicker training is simple and fun. It uses a clicker (a tiny handheld tool that makes a crisp click) and tiny special treats. The click works as a sound marker (a short, consistent "yes") that tells your cat exactly when they did the right thing. Watch those whiskers twitch.

    This short guide is your quick-start roadmap. You’ll get immediate steps, realistic timelines, and basic troubleshooting so you see first responses in just a few sessions. You’ll learn how to pair the click and the treat (so the click truly means yes), pick one easy behavior to start like touch or sit, and run short daily reps that actually fit a busy life. Ever watched your kitty chase shadows? This fits right into those little bursts of play.

    I once taught my cat to touch a target in two quick sessions, so doable.
    Worth every paw-print.

    Quick-start roadmap: immediate steps, timelines, and quick wins

    - Quick-start roadmap immediate steps, timelines, and quick wins.jpg

    This tiny plan gets you started fast with clicker training for cats and tells you what to expect in the first few weeks. You’ll build a clear marker-reward loop, see the first responses quickly, and have a short routine you can keep even on busy days. Kittens often show quick wins, watch those whiskers twitch.

    1. Pick a clear marker sound (a short click or one-word cue that always means “yes”) and choose a training-only reward (a tiny food treat or a special toy you only bring out for practice).
    2. Pair the marker with the reward 8 to 10 times so the sound reliably predicts the treat. Say the marker, then give the reward right away. Repeat.
    3. Pick one simple first behavior to teach, like sit or target (target means touching a stick or your hand with the nose or paw). Keep it easy.
    4. Mark the exact instant the behavior happens with your marker sound. Timing matters, mark the moment, not after.
    5. Give a tiny reward immediately from a saucer or treat pouch so it’s obvious what earned the treat (tiny means pea-sized for food).
    6. Do 3 to 5 quick reps of that behavior each session. Short bursts beat long, boring sessions.
    7. Run 1 to 3 short sessions a day until the response is steady. Consistency wins.

    You might see first responses in 1 to 3 sessions. A reliable cue usually takes 2 to 6 weeks of short, regular practice. Larger tricks or behavior chains can take months of shaping work, so be patient and celebrate small victories. Worth every paw-print.

    Troubleshooting quick tips:

    • Timing: re-time the marker so it lines up with the exact behavior.
    • Motivation: try a higher-value reinforcer (think: tastier treat or a toy reserved just for training).
    • Session length: shorten sessions if your cat loses interest.
      See Troubleshooting section below for full fixes and stepwise recovery strategies.

    Choosing the right clicker and rewards , Detailed guide

    Pick a clicker that makes a clear, repeatable sound and pair it with a reward your cat can’t resist. Ever watched your kitty chase a shadow and think, yes, that look? That’s the energy we want when you click and treat.

    Types of clickers and what they feel like
    Handheld plastic clickers are loud and steady (plastic clicker: a small plastic box that makes a clear click). They’re great when you need the sound to be exactly the same every time. Finger-ring clickers sit on your hand so you can click fast without fumbling. Silent or ultrasonic markers are nice for quiet homes (ultrasonic: a very high-pitched tone cats hear, but people often don’t). Voice or tongue clicks work in a pinch, but timing and tone can vary.

    Rewards that actually motivate
    Tiny high-aroma treats work best here (aroma means a strong smell cats notice from across the room). Soft, moist bites are eaten quickly so you can reward lots of repetitions. Crunchy treats last longer and can slow delivery, which is good for pacing. Training-only toys like a feather teaser or a small catnip mouse keep play exciting when food won’t do it. Match treats to any diet limits or allergies, and check ingredient lists if your cat has sensitivities.

    Quick checklist

    • Sound distinctiveness and repeatability: plastic clickers give a consistent click; voice clicks can change with your mood.
    • Ergonomics and single-handed use: finger-ring models let you hold a toy and click at the same time; handhelds tuck in pockets.
    • Silent/ultrasonic options: perfect for skittish cats or apartments; um, they might be harder for guests to copy.
    • Durability and cost: simple plastic is cheap and light; metal or branded models last longer but cost more.
    • Reward types and diet notes: tiny aromatic treats, soft vs crunchy trade-offs, and training-only toys for non-food reinforcement; always check ingredients for allergies.
    • DIY marker notes: tongue clicks or small noisemakers work short-term but lack the exact timing of a manufactured clicker, upgrade if timing matters.

    Practical tips for speedy training
    Keep treats in airtight tubs so they stay tasty, and use a small saucer for fast delivery. Rotate two or three reinforcers so your cat stays curious and interested. Wash hands and saucers after sessions, and keep your clicker where you can grab it in a flash for those short daily practices. For busy days, toss an unbreakable ball before you head out, that’s ten minutes of safe play.

    A tiny anecdote
    I once watched Luna leap four feet for a feather teaser after just three quick sessions. Worth every paw-print.

    Timing, session length, and structure for effective progress , Detailed guide

    Timing is the secret sauce. The marker sound needs to happen the instant your cat does the right thing so their brain links the action to the reward. Use a bridging marker (a short click that links the behavior to a later treat) and get that treat into the cat’s mouth within a second. Try a small saucer (a shallow dish with ready treats) or a treat pouch (a little pouch you keep at your hip) so you’re not fumbling when you need speed.

    Cat level Session length Repetitions per behavior
    Beginner (kitten or new) 3–4 minutes 3–5 reps
    Intermediate 5–7 minutes 5–10 reps
    Advanced / trick shaping 7–10 minutes Variable shaping reps

    Stop a session when your cat’s focus drops. Repeated failed attempts, strolling away, or tail swishing are signs to quit while you’re ahead. A handy rule: end after two or three misses or when enthusiasm fades. Finish on a win so your cat walks away feeling clever.

    Aim for one to three short sessions a day, spaced out, morning, mid-afternoon, and evening often work. Practice speed-of-delivery drills: click, then immediately drop a pre-portioned treat from your saucer, aiming for under one second. Pre-portioned treat (one tiny kibble or a pea-sized wet morsel) keeps timing consistent and avoids overfeeding.

    For sequence work, use a helper to hand fast rewards or try a small bridge tool (a second sound or tiny marker that links the next step). That way your first click stays precise while you deliver the next reward. Ever watched your cat lock on, whiskers forward, waiting for the next move? That’s timing doing its magic.

    Practical exercises and lesson plans , Detailed guide

    Pick exercises that match what actually gets your cat moving. Food-driven kitties often love sit and recall (recall = coming when called). Play-motivated cats usually glow with target work and paw tricks. Set a clear criterion (what counts as a success) for every step, and raise that criterion a little at a time so your cat keeps winning and having fun.

    Sit (lesson plan)

    Start tiny. Reward any small movement toward sitting, then shape the full sit over short, frequent sessions. Think in four micro-shaping stages (micro-shaping = breaking the behavior into tiny steps):

    • Reward a slight head drop or a shift back toward the haunches.
    • Reward a deeper lowering of the back, even if the feet stay planted.
    • Reward the full sit held for one second.
    • Add a verbal cue just before the action, then reward the sit.

    Fade the lure (lure = a treat or toy you use to guide the movement) across several sessions by cueing a little earlier each rep. Keep sessions short, 30 to 90 seconds for most cats. Motivated cats can give you reliable sits in a few days; expect steady cue-response in a few weeks with regular short practice. Worth every paw-print.

    High Five (lesson plan)

    Use a target or your open hand to build a paw touch, and keep criteria tiny at first so your cat succeeds. Gentle shaping steps:

    • Present a target at paw height and reward nose touches.
    • Reward any paw lift toward the target.
    • Reward direct paw contact on the target surface.
    • Raise contact time or height to shape a clear high five.

    A target stick (a small wand with a ball or dot) helps keep your hands out of the way, but your hand works fine. If your cat bats instead of touching, lower the target and reward softer, quieter contacts. This trick often takes several weeks, so be patient and celebrate the small wins.

    Recall / Come (lesson plan)

    Start close and reward every arrival. Then increase distance slowly. Distance progression idea: 1–2 feet, 4–6 feet, room-to-room, then door thresholds. Use a reward ladder: tiny frequent treats when close, higher-value treats or a short play session for longer distances, and a jackpot reward for a perfect outdoor or long-distance recall.

    For outdoor practice, use a long line (a long safety leash) and proper harness gear, and never let them free-run until recall is rock-solid. Log milestones like first reliable room-to-room come, dependable door recall, and percent success at longer distances.

    Track progress with a simple log: date, behavior, criterion, reps, reward, notes. Monitor trends over 2 to 6 weeks to spot steady gains or plateaus. I once saw Luna leap six feet for a jackpot treat, true story, and it started with tiny steps.

    Quick tip: short sessions, lots of praise, and timing your rewards right will make training feel like playtime rather than a chore. Ever watched your kitty chase a feather and forget the world? Do more of that.

    Troubleshooting during clicker training for cats: common issues and stepwise fixes

    Most training snags come from four places: a mistimed marker (the sound that links action to reward), a weak reinforcer (the reward that doesn’t excite the cat), session pacing that’s too long or too short, or a busy environment stealing focus. Fixes are mostly procedural: retrain the marker, rotate rewards, shorten training bursts, or move somewhere quieter. Do those and you’ll usually be back on track fast.

    • Late marker → do a marker-retiming drill: with your cat relaxed, give 10 quick pairings of the marker sound followed immediately by a treat (marker = a short sound that marks the exact moment the cat did the right thing). Then go back to easy, low-criteria reps so the timing stays obvious.
    • Low motivation → try a reinforcer ladder (a step-up plan of better rewards) and test new tastes or a special training-only toy (reinforcer = any treat or toy that makes your cat want to repeat the action). Small, high-value treats work best.
    • Overexcited biting or swats → drop the criteria to tiny, easy wins for a session or two, stop game-style rewards for a bit, then slowly raise the bar again. It’s like teaching a puppy to sit before letting it romp.
    • Environment distraction → use a control checklist for the room: quiet, few surfaces to leap from, closed doors. Rehearse in a calm room first, then practice in slightly busier rooms to build focus.
    • Satiation → shrink treat size, switch to short toy bursts, or shorten session length so your cat stays hungry for play.
    • Fearful response → add desensitization steps (gradual, gentle exposure to whatever scares them) and pair the marker with approach-friendly food at a safe distance (distance work = rewarding from farther away, then slowly moving closer).
    • Inconsistent handler cues → run a short pre-session checklist: cue word, your body position, and where your hands are so signals stay the same every time.
    • Multi-cat interference → give solo sessions and set up separate reward stations so each cat learns without competition.

    Read your cat’s body language like a quick map. Pause if you see flattened ears, a swishing tail, wide pupils, crouching, or sudden freezing , these are early stress signs. Keep going when ears are relaxed, eyes soft, whiskers forward, and the tail is loose. Ever watched whiskers twitch as a toy rolls? That’s gold.

    Quick recovery flow: spot the first stress sign and pause the session. If timing seems off, go back to marker-loading drills. For fear, use distance-based desensitization and reward calm approach from farther away, then inch closer. If aggressive bites or persistent avoidance keep happening after a few recovery sessions at very low criteria, consult a certified behaviorist (they can help when cat and person both need extra tools).

    Little tip: mark early and mark often during rebuilds. It’s like teaching your cat a new language, clear, tiny lessons win. Worth every paw-print.

    Adapting clicker training for kittens, seniors, shy, or reactive cats , Quick cross-reference

    This used-to-be-long block got trimmed and moved into the exact spots where it helps most. Think of the bullets below as a quick map to age- and temperament-specific tweaks you’ll find nearby in the full guide.

    • Timing, session length, and structure
      Short bursts work best. For kittens: aim for 1 to 3 minute sessions, 2 to 4 times a day. Very tiny learners may do even shorter bursts. Try simple rhythms: feather twitch, click, tiny treat. Repeat for 1 to 2 minutes and then quit while it’s still fun. You’ll see whiskers twitch and zoomies later.

    • Choosing the right clicker and rewards / Practical exercises for seniors
      For older cats, think comfort first. Train at a comfortable height or position so the cat doesn’t have to stretch or jump. Use soft, moist treats (easy to chew) and move in slower shaping steps (shaping = breaking a behavior into tiny doable pieces). Give lots of short rests and pets. Example: click for a one-inch nose lift, offer a soft treat, then give a gentle pet. Little wins add up.

    • Troubleshooting fear and avoidance , shy/reactive cats
      Take it slow and don’t rush the cuddle. Here’s a distance-progression checklist you can follow:

      1. Reward from across the room until the cat looks relaxed.
      2. Move to half the distance; keep rewarding until calm.
      3. Reward from just outside reach; repeat until approach feels normal.
      4. Reward from close contact only after calm behavior at each prior step.
      5. If you see stress signals (flattened ears, wide pupils, freezing), back up one step and try again more slowly.
        Quick pairing tip: pair the marker (the click) with a high-value treat they love (tuna or chicken are common favorites) at whatever distance feels safe , click, toss treat , so the sound means good stuff even when you’re far away.
    • Safety cautions and when to call a pro
      Stop and back up if behavior keeps escalating: freezing, repeated hissing, fast tail-lashing, or biting that’s getting worse. If mild problems keep returning even after you lower the criteria, or if there’s a real risk of injury, reach out to a certified trainer or a veterinary behaviorist for a customized plan and medical check. If hissing turns to lunging despite softer steps, call a pro.

    Worth every paw-print.

    Clicker Training for Cats: Step-by-Step Tips

    Basic gear: a clear, repeatable clicker (a small handheld device that makes a sharp click), a small treat pouch (a little bag you wear or slip into a pocket), a shallow saucer for ready treats, and a target stick (a short stick with a ball or marker used to point where you want the cat to go) for hands-off shaping (teaching a behavior in tiny steps). Pick tools that feel good in your hand, make the same sound every time, and are easy to grab when your cat gives a perfect performance. Easy to reach treats make learning faster.

    Tracking template , use this to spot patterns and tweak training. Tape a printed copy near your training spot so you’ll actually use it.

    Date Time Environment (room, distractions) Behavior Targeted Criterion Level (what counts as success) Reps Reinforcer (reward) Success Rate % Notes
    03/01/2026 9:00 AM Kitchen – door open, birds outside Touch target stick Nose touches stick twice 10 Tiny chicken bits 60% Tail flicks at rep 4

    Watch that success rate column over 2–6 weeks. A steady rise means bump the criterion a bit. A flat line for three sessions? Try a fresh reinforcer (reward) or shorten the reps. A sudden drop often points to timing or distractions you’ve noted in the environment field. Log short notes like “tail flicks at rep 4” so you can tweak pacing and timing, those little clues help a ton.

    Resources: pick one or two practical clicker training books with step-by-step photos and shaping charts (photos make it easier). Use an app (phone program) for a reliable click sound and a session timer so you’re consistent. Grab printable PDFs with lesson plans and simple charts you can tape to a cupboard. Structured courses that bundle short videos, clear lesson plans, and suggested homework are great, look for ones that show real cats and stepwise shaping.

    Cost guide: budget-friendly gear works fine for starters. Upgrade later when you’re tackling tricky shaping or running classes.

    Item Typical Cost Notes
    Basic clicker $5–$15 Plastic clickers are fine for beginners
    Treat pouch $8–$25 Look for water-resistant fabric (keeps treats fresh)
    Target stick $10–$20 Simple and light is best for quick gestures
    Apps / Courses Varies Free apps exist; pro courses cost more but include video lessons

    When it’s time to upgrade, consider a sturdier ring clicker (clicker attached to a wearable ring), a water-resistant pouch, or a pro-level course with live feedback. I once taught Luna to touch a target before breakfast, her whiskers went wild when she finally nailed it. Worth every paw-print.

    Final Words

    Jump in: the quick-start roadmap gives a short purpose, a seven-line routine, a three-line timeline, and three troubleshooting fixes to get you started.

    We covered clicker types and treats, timing and session templates, lesson plans for sit, high-five, and recall, plus adapting for kittens, seniors, and shy cats.

    Keep sessions short, rotate rewards, and track reps. With steady practice, clicker training for cats builds clear communication and happier, calmer housemates.

    FAQ

    FAQs about clicker training cats

    Are clickers good for training cats?

    Clicker training is effective for cats, speeding learning and clarifying timing with a unique marker sound (short, consistent noise). Pair the click with tasty rewards and short sessions for fast results.

    What clicker or kit should I buy for cat training?

    For a starter kit, pick a handheld plastic clicker or finger-ring clicker and a treat pouch plus tiny training treats; choose a silent or ultrasonic (very high-pitched sound) model if household noise bothers your cat.

    How can I use clicker training to stop bad behaviors like jumping on counters?

    Use clicker training to stop counter-jumping by marking and rewarding a clear alternative (like a mat), managing access, and consistently reinforcing the replacement behavior until it becomes routine.

    How do I load a clicker and how quickly will my cat respond?

    Loading the clicker means pairing the click with a reward; click and reward 8–10 times at rest. Kittens can show correct responses by the 3rd–4th repetition in early sessions.

    What is the 3-3-3 rule for cats?

    The 3-3-3 rule for cats describes adjustment phases: first 3 days to settle, 3 weeks to explore and bond, and 3 months to show full personality and routine comfort.

    What are the negatives of clicker training?

    Negatives of clicker training include mistimed clicks, low-value rewards, overlong sessions that bore cats, and inconsistent handler cues — all of which slow progress or cause confusion.

    What annoys cats the most?

    Cats are most annoyed by loud, unpredictable noises, forced handling, sudden face-level movements, water sprays, and constant interruptions during rest or feeding.

    Is Reddit a good place for clicker training tips?

    Reddit can offer practical tips and real-world success stories about clicker training, but advice varies; cross-check suggestions with trusted trainers or reliable guides before trying new techniques.

    How long until clicker-trained behaviors become reliable?

    Reliable cues usually take 2–6 weeks of short, regular sessions. First responses often appear in 1–3 sessions, while complex tricks or behavior chains can take months of shaping.

  • How to Stop Play Aggression in Cats

    How to Stop Play Aggression in Cats

    Think your cat is "just playing" when it suddenly nips, claws, and treats your hand like a moving toy? That quick pounce is often play aggression (when play turns rough and your cat bites or claws), and the good news is it’s teachable. Start by stopping play at the first sign of trouble , tail twitch, whiskers rippling, flattened ears, or big pupils. Ever notice those little signals? They mean, hey, pause. Check out our guide on Toys to Reduce Play Aggression.

    Calmly swap your hand for a wand (a stick with a string and feathers) or toss a pocket toy (a small fabric mouse or ball) so ambushes land on fabric, not skin. Think of a wand like a fishing rod for cats , irresistible from a distance. I once watched Luna leap three feet for a feather, and nobody lost a finger.

    If your cat bites, get up and walk away so they learn rough play ends the fun. Keep sessions short and regular, like five minutes a few times a day, and always trade your hand for a toy before things get too wild. With steady swaps and consistent timing, most cats learn to play gentler.

    Worth every paw-print.

    Immediate Steps to Stop Play Aggression Now

    - Immediate Steps to Stop Play Aggression Now.jpg

    When your cat gets too rough, stop play, redirect to a toy, and take away attention. Do it calmly so your cat learns the rule without getting more hyped. Ever watched your kitty go from purring to pounce in seconds? Yeah, same.

    Catch the warning signs early. Look for tail twitching, ears flattening, or dilated pupils (big black centers of the eye). Stopping play the moment you see one of those cues breaks the reward cycle that makes rough play feel like a win. If you walk away right when the cue appears, your cat learns that fun ends when it gets too rough.

    Give biting a safe outlet by swapping your hand for a toy. Wand toys (a stick with string and feathers) keep your fingers out of reach and let cats stalk, pounce, and “capture” a moving target. Tossing a small toy or using a pocket toy (tiny stuffed mouse or crinkle ball) redirects ambushes fast. If your cat has been using your hands as toys, it’ll take repetition and patience to change the habit , steady, consistent swaps win the day.

    When a bite or scratch happens, withdraw attention so your cat links the action to losing playtime. Don’t punish physically , that makes fear and aggression worse. Calmly stop interaction, turn away, or leave the room for a minute to reset both of you.

    1. Stop play at the first warning sign: tail twitch, flattened ears, or dilated pupils.
    2. Switch to a wand toy or toss a toy away from you to redirect attention.
    3. Never use hands or feet as toys; don’t reinforce the behavior.
    4. If bitten, push your hand gently toward the cat so it loosens its grip (do not yank), then withdraw.
    5. Keep pocket toys handy for instant redirection of surprise attacks.
    6. Keep sessions short and intense , about 10 to 15 minutes , and aim for several sessions a day.
    7. Reward calm behavior after play with a tiny treat or brief gentle petting once play is over.
    8. Seek veterinary or behaviorist help if attacks are frequent, intense, sudden, or cause injury , see "When to Consult" for details.

    Schedule play around your cat’s natural peaks, like dawn and dusk. Short bursts of focused chase followed by a capture and a meal help your cat feel satisfied , think of it as a tiny hunt that finishes with dinner. I once watched Luna leap six feet to snag a wand toy and then flop down, totally content. Worth every paw-print.

    If aggressive incidents keep happening, get professional help right away so medical or deeper behavioral issues aren’t missed. See "When to Consult" for what to look for and who to call.

    Causes of Play Aggression in Cats: Why Biting and Rough Play Happen

    - Causes of Play Aggression in Cats Why Biting and Rough Play Happen.jpg

    Kittens come wired to hunt , they love stalking, pouncing, and chasing anything that moves. If they miss the socialization window (3-16 weeks, when they learn how to play nicely with littermates and people) they might not learn bite inhibition (how hard is too hard). Early weaning or being hand-raised (mostly by humans instead of a mom and siblings) often means nobody showed them the limits of rough play, so they can grow up a bit bite-happy.

    Living indoors can turn that hunting motor inward. Without interactive play at dawn and dusk, or enough toys and vertical space (cat shelves or tall trees for climbing), all that predatory energy looks for a target , your waving hand, dangling toes, or the ankle that walks by. Picture whiskers twitching as a cat launches at a moving sock; young cats under three tend to do this more since they’re burning lots of energy and still learning self-control.

    Sometimes rough play is actually pain talking. Sudden or worsening aggression can mean dental trouble, arthritis, or neurologic issues (problems with the brain or nerves) are making even a chill cat snap. If rough episodes start quickly or get worse, check "When to Consult" for a red-flag checklist and then see your vet so medical causes can be ruled out , better safe than shredded, right?

    Recognizing Overstimulation and Play-Aggression Body Language

    - Recognizing Overstimulation and Play-Aggression Body Language.jpg

    Quick reads of posture and eyes help you step in before play gets too rough. If you want a short checklist of early signals, see Immediate Steps to Stop Play Aggression Now so the cue list lives in one place and we avoid repeating it here. Think of this as spotting the first little twitches before things escalate.

    Recognizing Overstimulation vs. Fear-Based Aggression

    Overstimulation (when play gets too exciting and a cat’s nerves spike) usually shows as short, punchy bursts , a rapid pounce, a quick shake, then right back to chasing. It’s noisy and brief. Your cat resets fast and often wants to jump right back in.

    Fear-based aggression (when the cat feels threatened or unsafe) gives clearer, longer warnings , prolonged hissing, turning away or backing off, or frantic escape attempts. These are not quick bursts; they’re avoidance and panic. When you see those, separate and calm the cat instead of trying to lure them back to play. Ever watched a cat bolt and hide after a hiss? That’s fear. Short, twitchy bursts are usually play.

    Stop Immediately
    Bites that break the skin
    Repeated lunges without pause
    Sustained growling or yowling
    Long, frozen crouch right before an ambush

    If you notice early signals (check Immediate Steps to Stop Play Aggression Now), stop or slow play right away. Pause movement. Switch to a calmer toy, or end the session so your cat can reset , ten minutes of quiet can work wonders.

    If any Stop Immediately signs show up, separate calmly and give space. Let the cat retreat, and avoid forcing comfort. If the behavior repeats or causes injury, get help from your vet or a behavior professional. Worth the peace of mind.

    How to Stop Play Aggression in Cats

    and H3 4 No lists or tables.jpg

    Redirecting play biting onto toys lets your cat use its hunting instincts without turning your hand into the target. Wand toys, plush prey, and little tossable toys give your cat a clear target and teach it to aim at objects, not people , see Immediate Steps for the triage and capture rationale. Ever had your sleeve treated like dinner? Yep, we’ve all been there.

    Wand toys are especially handy for bouncy kittens. A wand toy (a stick with a string, feather, or plush at the end) copies quick prey movement and keeps your fingers out of the danger zone. Do short chases, pause so your cat can stalk, then let it win with a capture so it feels satisfied. Soft plush prey (a soft stuffed toy) and lightweight balls (plastic or foam, easy to carry) help teach gentle mouthing. Be strict about safety: toss anything with loose eyes, strings, or stuffing , replace or retire ragged toys.

    Toy Why it works Safety & usage technique
    Wand toy (stick with string/feather) Keeps your hands safe and recreates stalk – pounce – capture play Move unpredictably, pause so the cat stalks, let it “catch” the toy at the end. Store out of reach after play.
    Furry mouse / plush prey (soft stuffed toy) Feels like real prey to bite and carry; great for solo cuddling or post-chase reward Supervise if small parts exist, replace when ragged, give after interactive play so the cat can carry a prize.
    Lightweight ball (plastic or foam) Encourages chasing and batting without heavy impact Pick balls without small detachable bits, toss away from you to redirect ambushes, swap if chewed through.
    Crushed paper / foil Cheap, noisy, and delightfully unpredictable Watch for ingestion of foil, retire when torn, use in short supervised bursts only.
    Puzzle feeder / treat ball (toy that hides food) Turns meal time into a hunt and stretches playtime Use near the end of a session to calm energy, pick sizes that fit kibble, clean regularly.
    Laser pointer (pair with a capture toy) Triggers fast stalking and pouncing without hand contact Short bursts only, never shine in eyes, and always finish by tossing a tangible toy so the cat gets a real capture.

    Rotate toys weekly so they feel fresh , tuck some away for a few weeks, then bring them back like new. Wash plush and puzzle feeders per the label, and toss anything with loose stuffing or chewed plastic. Keep a small pocket toy for quick redirection when an ambush starts , see Immediate Steps for when to swap toys during an escalation.

    Worth every paw-print. Um, actually , make that every playful pounce.

    training-shaping-gentle-play-clicker-microplans-and-time-out-theory”>Training: Shaping Gentle Play, Clicker Microplans, and Time-out Theory

    - Redirecting Play to Appropriate Toys Types, Safety, and Usage Techniques.jpg

    Training nudges your cat toward gentler play over days to weeks, not overnight. Follow the Immediate Steps during a session so you can stop rough behavior fast and keep things safe and useful. Think of this as triage: quick actions first, then practice.

    Mechanics of shaping gentle play

    Watch for tiny calm moments during play and reward them right away. Mark the quiet action with a clicker (a small handheld device that makes a short click) or a short verbal cue, then give a reward within about 0.5 to 1 second so your cat links the calm with the treat. Start tiny: reward a two second gentle paw touch or a soft mouth on a toy, then slowly raise the goal to five seconds of relaxed focus before you reward again. Keep each step obvious and repeatable; cats learn in small bites, so make success easy.

    Clicker microplans

    Plan A (kitten): three 5-minute sessions per day. Aim to mark the first calm pause in a chase and reward with the toy or a pea-sized kibble (tiny, tasty bite). Short, frequent wins speed learning in young cats.
    Plan B (adult or rescue): several 2-minute mark-and-reward microbursts, done 6 to 8 times a day. Use very small treats (pea-sized or a crumb), mark the exact quiet behavior, then reward within 0.5 to 1 second. Slowly increase the time between marks, and swap treats for brief petting or a prized plush prey as the behavior steadies. Keep sessions predictable and stop while your cat is succeeding so they feel satisfied.

    Time-out theory and applied examples

    A time-out removes the social reward of play so rough actions stop leading to fun. Keep time-outs short and calm; 30 to 60 seconds usually works best, then go back to normal interaction without drama. Three simple options: close a bedroom door and wait silently; step out of the room for a full minute and return calmly; or place the cat in a neutral safe spot, like an empty carrier or a quiet crate, for 30 to 60 seconds so the message is clear but not scary. Kittens often shift in days to weeks. Adults or rescued cats may need several weeks to a few months of steady repetition. If time-outs don’t reduce escalation or things get worse, see "When to Consult" for next steps.

    Worth every paw-print.

    Daily Play Schedules, Enrichment Setups, and Multi-Cat Perch Counts

    - Training Shaping Gentle Play, Clicker Microplans, and Time-out Theory.jpg

    Plan short, predictable play windows around your cat’s natural energy peaks so that zoomies get used up before they turn into misdirected pouncing. Short 10-15 minute bursts work best – they match a cat’s attention span and end with a satisfying capture. See Immediate Steps to Stop Play Aggression Now for the quick triage that explains the session-length logic we’re using here.

    1. Schedule A – Single adult indoor cat

      • 6:00–6:15 AM: Dawn interactive session with a wand toy. Fast chases, big swoops, ending in a capture. Your cat’s whiskers will tell you when they’re keyed up.
      • 11:30 AM: Midday slow mental play with a puzzle feeder (a toy that makes your cat work for food). Keeps the brain busy while you’re at your desk.
      • 6:30–6:45 PM: Dusk play-before-meal. Short, intense chase that finishes with a capture, then dinner. It’s the classic hunt-then-eat sequence cats love.
      • 9:00 PM: Gentle wind-down. Low-intensity toys or window-watching time for bird TV and soft batting.
    2. Schedule B – Multi-cat household

      • 6:00 AM: Staggered dawn sessions. Cat A gets a wand burst while Cat B watches from a perch (a raised resting spot), then swap. Keeps jealousy down and gives each cat solo fun.
      • 12:30 PM: Shared puzzle feeders in separate rooms so everyone eats without drama. One feeder per space reduces competition.
      • 6:30 PM: Paired short sessions in different rooms. Different toys so each cat gets a winning capture and doesn’t feel left out.
      • 8:30 PM: Individual calm-down periods. Quiet room or high perch for the cat that needs a break. Give shy cats solo time, confident cats can patrol the top spots.
    3. Schedule C – Kitten schedule

      • 7:00 AM: Three 5-7 minute micro-sessions after naps. Short, high-focus play while they’re fresh. Tiny bursts = big learning.
      • 11:00 AM: Supervised solo play with plush prey or crumpled paper. Safe, simple, and wildly entertaining.
      • 4:00 PM: Two quick micro-sessions before the evening nap and again before dinner. Keeps their energy curve steady.
      • Bedtime: Low-key petting and a small puzzle snack to help them settle into sleep.

    Set up vertical and hiding options to lower tension. Aim for about 1.5-2 perches (a mix of window perches, shelves, and a tall cat tree – a vertical climbing structure) per cat so every cat can choose a view or a top spot. Provide at least N+1 litter and water stations (N = number of cats) so no one has to wait or feel crowded. Offer roughly 1-2 hiding boxes or tunnels per cat, spread across different rooms, so shy cats have retreats and bold cats can claim higher real estate.

    Spread perches so access isn’t all in one place. High spots near windows make great solo-viewing posts, while ground-level cozy boxes are perfect for naps and quick escapes. Think of it like house zoning for cats – multiple neighborhoods, less drama.

    Use puzzle feeders as part of the play rhythm: do a play-before-meal burst so the cat “captures” and then eats, or give a treat ball (a toy that rolls out treats) right after an active session to stretch the reward. If these schedule changes don’t reduce aggression, see When to Consult for red-flag next steps.

    Worth every paw-print.

    Managing Multi-Cat Play Interactions and Safe Introductions

    - Daily Play Schedules, Enrichment Setups, and Multi-Cat Perch Counts.jpg

    Multi-cat homes are a joy and sometimes a little chaos. Cats test spaces, swap smells, and now and then play gets too rough. A slow, staged approach helps everyone feel safer and keeps kittens and resident adults from getting spooked.

    Safe introduction steps:

    Start with a sanctuary room. Give the newcomer its own quiet space with litter, food, water, and a couple hiding spots for several days. Let them stretch out and explore without pressure. Your resident cat can sniff under the door , let that happen.

    Do scent swapping for a few days. Swap bedding or rub a soft cloth on one cat and then the other, placing it with its counterpart twice a day so they learn each other’s smell. It’s like passing notes in class, but with whiskers.

    Move to short supervised visual sessions next. Use a baby gate (a portable barrier) or a cracked door so they can see each other but not touch. Keep these visits brief and calm. Watch body language: slow blinks and relaxed tails are good signs.

    Try brief supervised play sessions once they seem curious but calm. Use wand toys – think fishing-rod for cats – to keep hands out of reach. End each session with a capture and a meal so both cats leave happy and satisfied. Let sessions grow slowly over days to weeks, depending on how relaxed everyone stays.

    Spread out resources to reduce competition. Follow the N+1 rule for litter boxes – one per cat plus one extra – so nobody has to wait. Offer 1.5 to 2 vertical perches per cat (shelves or tall posts) and several hiding boxes or tunnels so each cat has choices. More places to climb and hide means fewer squabbles.

    Step in when play turns serious. If you see prolonged hissing or growling, chasing with intent, or any injuries, that’s a cue to redirect them. Use Immediate Steps for redirection tactics and consult When to Consult if problems keep happening.

    Worth every paw-print.

    When to Consult a Veterinarian or Behaviorist About Play Aggression

    - Managing Multi-Cat Play Interactions and Safe Introductions.jpg

    If your cat’s play turns suddenly into real aggression, pay attention. That kind of change can be a medical red flag. Look for new limping, avoiding the litter box, changes in appetite, or signs that your cat flinches or feels pain when you touch the mouth or joints.

    There are a few medical causes to consider. Dental pain (hurt teeth or gums) can make a kitty snap. So can injuries or neurologic issues (brain or nerve problems). Intact cats , ones not spayed or neutered , may also show different arousal or activity levels, and your vet will note that.

    Start with your regular vet if the behavior is new or getting worse. A clinic visit usually includes a physical exam, checking for pain, and questions about when the episodes happen and what seems to trigger them. Bring video clips that show the escalation, a short written timeline of episodes, photos of any injuries, and notes on how often it happens and what you tried. For tracking play-fight injuries, keep a simple log with dates, what happened, and any treatment you gave.

    Pros may recommend a mix of medical care and behavior work. If pain is the cause, treatment might mean dental care, anti-inflammatory meds (medications that reduce swelling and pain), or other pain management so your cat isn’t snapping from discomfort. A behaviorist will usually give a step-by-step plan with safe play schedules, toy strategies, and controlled time-outs to teach better boundaries.

    Ask about synthetic pheromones like Feliway (a diffuser that mimics calming cat scents) as part of the plan , some cats do calm down with them used alongside behavior change. And if a bite breaks skin, wash it, seek medical care, tell your vet, and take photos of the wounds to bring to appointments.

    Final Words

    Stop play at the first warning, redirect to a wand or toss a toy, and finish sessions with a capture so your cat calms down. Quick, consistent moves make a big difference.

    We ran through causes, body language to watch, safe toy choices and rotation, shaping gentle play, daily schedules for single or multi-cat homes, and when to call a pro if bites escalate. Use the Immediate Steps for fast triage and the training plans for lasting change.

    Stick with short, lively sessions and small rewards. With patience and smart redirection, you’ll master how to stop play aggression in cats and enjoy calmer, happier felines.

    FAQ

    How do I stop play aggression in my cat toward people?

    Stopping play aggression in a cat toward people starts by halting play at first warning signs, redirecting to a wand or toy, and withdrawing attention so biting loses its reward.

    How do I stop play aggression between cats?

    Stopping play aggression between cats means interrupting at escalation signs, redirecting with toys, providing extra perches and resources, and using staged reintroductions with scent swaps and short supervised play sessions.

    What is play aggression in cats?

    Play aggression in cats is predatory-style rough play—stalking, pouncing, biting, or scratching—driven by hunting instinct or overstimulation, common in kittens and under-stimulated indoor cats.

    What is the 3-3-3 rule for cats?

    The 3-3-3 rule for cats describes adoption adjustment phases: three days hiding and settling, three weeks exploring and routine building, and three months to fully relax and form lasting bonds.

    Do cats outgrow play aggression?

    Cats often mellow with age; many kittens outgrow intense play aggression by around three years when given regular interactive play, training to redirect bites, and varied enrichment.

    How can I tell if my cat is being playful or aggressive?

    You can tell play from true aggression by body language: play has quick pounces, soft vocalizing, then recovery; aggression includes hissing, sustained growling, biting that breaks skin, and hard lunges.

    Why do cats play-attack their owners?

    Cats play-attack owners when hunting instinct, pent-up predatory energy, poor early socialization, or overstimulation makes hands and feet feel like small, moving prey during exciting play moments.

  • Signs of a Happy Indoor Cat

    Signs of a Happy Indoor Cat

    Worried your indoor cat is bored and lonely? Hold that thought. Lots of indoor kitties are actually pretty content, and they give tiny, telling signs you can spot if you know what to look for. Check out our guide on Play Aggression Toys.

    Here’s a quick yes/no checklist to scan behavior, play, vocal cues, grooming, nutrition appetite, and litter habits. The more boxes you tick, the more confident you can be that your cat is happy.

    • Head nudges. When your cat bumps your hand or forehead, that’s a friendly hello and trust. Ever get a gentle head bop out of nowhere? Melt moment.
    • Slow blinks. Those lazy, slow blinks are basically a feline kiss. Try blinking back and see what happens.
    • Dreamy purrs. A low, steady purr while they curl against you or knead feels like a little engine vibrating under your palm.
    • Play bursts. Quick zoomies, stalking a toy, or batting at a feather show curiosity and joy. Think of it like a cat workout session.
    • Neat fur. Regular self-grooming and smooth fur mean they feel safe and comfortable. No mats, no weird bald spots.
    • Steady meals. Eating at regular times and finishing food signals a healthy appetite and less stress.
    • Regular litter use. Using the litter box consistently, with no sudden changes, is a big comfort sign.

    Tick several of these, and you probably have a purrfectly happy companion.

    Worth every paw-print.

    Signs of a Happy Indoor Cat

    - Core checklist Quick-scan guide to the key signs of a happy indoor cat.jpg

    Quick, friendly checklist to spot a content indoor kitty. Scan it like a yes/no list, more checks across categories means you can be more confident your cat is happy.

    Look for matches in behavior, play, and physical signs. One thing alone might mean nothing, but several signs across social, vocal, grooming (coat care), and appetite areas usually tell the full story.

    1. Calmly asks for contact , approaches you, nudges, or gives head butts. Behavioral cues: social signals
    2. Soft, relaxed purring with sleepy-looking eyes. Behavioral cues: vocalizations
    3. Slow blink, the classic "cat kiss" (a relaxed, deliberate blink toward you). Behavioral cues: eyes/ears/whiskers
    4. Tail held up or a gentle tail quiver when greeting you. Behavioral cues: tail signals
    5. Kneading (pressing paws, "making biscuits") with half-closed eyes. Behavioral cues: social signals
    6. Flop or belly show in a loose, relaxed pose , great for photos, but be careful about touching the belly. Behavioral cues: social signals/body posture
    7. Regular, confident play and curiosity, like watching birds from the window or chasing a toy. Play, daily activity, and energy patterns
    8. Normal grooming and a shiny, clean coat (grooming means coat care and keeping fur tidy). Health & Warning signs: grooming
    9. Healthy appetite and eagerness at mealtimes. Health & Warning signs: appetite
    10. Consistent litter box use and a normal posture when going. (Litter box means where your cat pees or poops.) Health & Warning signs: litter habits
    11. Comfortable sleep rhythms , regular naps and a predictable nighttime pattern. Health & Warning signs: sleep
    12. Positive, relaxed interactions with other pets or people. Behavioral cues: social signals

    Read clusters, not singles. If your cat purrs, kneads, greets with an upright tail, and eats enthusiastically, you’re seeing social, vocal, play, and physical signs all at once. That’s a happy mix.

    Watch for vet-trigger signs and act fast if you spot them. Seek care if you notice:

    • No appetite for 48 hours.
    • Vomiting or diarrhea lasting more than 24 hours or any signs of blood.
    • Not using the litter box for 24 hours, or straining to urinate or having blood in urine.
    • New, loud, or constant vocalizing, or hiding for more than 24 to 48 hours.
    • Sudden weight loss of 5 to 10 percent or more over a few weeks.
    • New bald patches, painful over-grooming, or a big drop in coat quality.
    • Collapse, trouble breathing, or severe bleeding , get emergency care right away.

    Each checklist item links to a deeper explanation, quick photo and video examples, and a printable daily log in the Monitoring section so you can track trends and bring clear notes to your vet.

    Behavioral cues: body language, vocalizations, and social signals

    - Behavioral cues body language, vocalizations, and social signals (detailed expansion of checklist items).jpg

    This section expands the quick checklist items 1–6 and 12 so you can read kitty signals with more confidence. Click the checklist anchors to jump from the short list to each detailed bit as you go: Behavioral cues: social signals, Behavioral cues: vocalizations, Behavioral cues: eyes/ears/whiskers, and Behavioral cues: tail signals. Ever watched your cat and wondered what all that wiggling and chirping means? You’re in the right spot.

    Tail signals

    Tail posture is one of the quickest ways to read a cat’s mood. An upright tail with a curved tip or a tiny quiver when your cat greets you (checklist item 4) usually means “happy to see you” , think of it as a feline wave. A slow, relaxed swish says casual interest. A rapid lash or thrashing tail usually means irritation or alarm, so move slowly and check the rest of the body before you act.

    Always read the tail with the whole cat: a high tail on a tense back is different from a high tail on a loose, relaxed body. Short video clip: quick demo showing upright tail greeting vs rapid lash.

    Eyes, ears, and whiskers

    A slow blink , the mellow “cat kiss” , and half-closed, sleepy eyes are cozy signs (see checklist items 3 and 2). If your cat slow-blinks at you and then nudges, that’s trust in action. Try returning the slow blink; it’s an easy, sweet connection.

    Ears tell a lot: ears that sit relaxed and neutral mean calm; ears forward mean focused interest; pinned ears mean stress. Whiskers (sensitive facial hairs) held gently to the sides are relaxed; whiskers flattened back can signal fear or defense. Photo examples: side-by-side shots of slow blink, neutral ears, and whisker positions.

    Vocalizations (purrs, chirps, trills, meows)

    Vocalizations (cat sounds) give important clues. Purring during petting or lounging is usually contentment when the body looks relaxed (checklist item 2). A chirp or trill at the window or when greeting you often means excitement or a “look over here” moment, not distress.

    Short, cheerful meows are normal greetings. Long, loud, repeated yowling or sudden changes in how your cat calls may point to stress or pain. Mini-note: any vocal changes that match the vet-trigger thresholds belong in the Health & Warning signs section for quick action. Audio clip: examples of purr vs chirp vs worrying yowl.

    Social signals and body posture (head butts, kneading, flopping, belly exposure)

    Head butts and rubbing , sometimes called bunting , leave scent and build social bonds; that’s checklist item 1 and item 12 in action. When a cat presses its face to your hand or rubs against your leg, it’s saying you’re part of its circle.

    Kneading (making biscuits, pushing paws rhythmically) with half-closed eyes shows comfort and security (checklist item 5). A full-body flop or rolling onto the back can be a sign of trust, though not always an invitation to belly rubs (checklist item 6); many cats prefer head scratches instead. Safe response tips:

    • Return a head butt with a gentle forehead touch or a slow blink.
    • If your cat flops, try a soft stroke to the head or chin instead of reaching for the belly.
    • When kneading, offer a flat hand nearby or a soft blanket so they can keep going.

    When you read these behaviors, look for matches across categories , posture, touch, and vocal tone , not just one signal. A slow blink plus a relaxed tail and gentle purring is much stronger evidence of comfort than any of those alone. Keep context in mind: recent changes, a new pet, age, or medical issues can shift meanings quickly, so check the Health & Warning signs section if you see troubling patterns or vet-trigger symptoms. I once watched my cat leap three feet for a toy and then flop for chin scratches , small moments like that tell you a lot.

    Play, daily activity, and energy patterns (age-specific expansion of checklist item 7)

    - Play, daily activity, and energy patterns (age-specific expansion of checklist item 7).jpg

    Play is where cats show their inner hunter and feel really satisfied. For a quick jump back, see checklist item 7. Log session times with the Monitoring daily log so you can spot when your cat is most active.

    Aim for interactive sessions that copy a hunt: a slow stalk, a lively pounce, a believable catch, then a calm finish. Some cats get a meal after play and adore that ritual. Use wand toys (a stick with a ribbon or feather), small movable toys (balls or motorized mice), and puzzle feeders (a toy that makes cats work for food) to mix motion with brain work. Picture your cat’s whiskers twitching as a toy skitters across the floor and the satisfying thud when they nab it.

    Age Group Typical Play Pattern Session Length & Frequency
    Kitten Short, frequent bursts of wild energy; fast learners 5–15 minutes per session; 3–6 short sessions per day
    Adult Hunting-style sequences with focused bursts and solo breaks Two 10–15 minute interactive sessions per day plus short solo play
    Senior Gentler, slower moves; shorter attention span; joint-aware play 5–10 minute sessions; 1–2 times per day tuned to stamina

    Safety and variety matter. Watch breathing, limping, or sudden disinterest – stop the game if your cat pants, hunches, or favors a leg. For seniors, pick low-impact toys and lower perches so they don’t have to make hard jumps. Do a few gentle wand moves first to warm up those muscles before any intense bursts.

    Rotate toys weekly so novelty stays high , store a few and swap them like a tiny surprise. Use puzzle feeders to stretch mealtime into hunting practice and to slow eating. Keep session endings predictable; let your cat “catch” a toy so they finish calm and happy.

    Track times and reactions in the Monitoring daily log so you can tune play length and type to your cat’s age, health, and personality. I once watched Luna leap six feet for a crinkly ball , worth every paw-print.

    Health & Warning signs: grooming, appetite, litter habits, sleep, and when to see a vet

    - Health  Warning signs grooming, appetite, litter habits, sleep, and when to see a vet.jpg

    This expands checklist items 8–11 and gives the exact signs to jot down in your printable daily log (see the Monitoring section). Read the quick troubleshoot tips, try the simple home fixes, and mark anything that crosses a vet threshold so you have clear notes for the appointment. Ready? Let’s make this easy and a little bit paw-sitive.

    Grooming and coat condition

    A healthy coat looks tidy and feels soft. Cats spend a lot of time grooming, often half their waking hours, so sudden changes matter. Watch for over-grooming that makes bald patches, sores, or raw skin, and under-grooming that leaves matted fur (tangled, stuck-down hair), greasy spots, or loose clumps. Those are red flags to record.

    Start home checks by peeking in the mouth for dental pain (sore teeth or gums), bad breath, or broken teeth; run a flea check (part the fur and look for tiny dark specks or bugs); and scan the house for new stressors like a new pet or a change in routine. Try extra brushing, a quiet safe spot, and short calm play sessions to reduce stress-linked licking. If you see persistent bald spots, bleeding, or painful grooming for more than a few days, log dates and times. Then call your vet.

    I once watched Luna groom so much she left a perfect mitten-shaped bald patch. True story.

    Appetite and feeding behavior

    If your cat heads to the bowl, rubs your legs, or meows before meals, appetite is probably good. Keep a simple baseline: how much they eat at each meal and how long mealtime takes. No interest in food for 48 hours is a clear stop sign – call your vet.

    If appetite dips, try switching to a mildly different formula or warming wet food to boost the smell. Watch for signs of dental pain like dropping food or pawing at the mouth. Weigh your cat weekly if you can; a 5–10 percent weight loss over a few weeks is serious and should be logged and reported. If home fixes don’t help, call the vet with your notes.

    Litter habits and toileting changes

    Follow the plus-one rule: one litter box per cat, plus one extra. Normal toileting looks relaxed and steady. Warning signs include straining, lots of short trips with little output, crying in the box, or any blood in urine or stool. Sudden avoidance of the box is another clear red flag.

    Check the box spot – is it private and low-traffic? Check litter depth and keep boxes clean – scoop daily and deep-clean every 10 to 14 days. If your cat skips the box for 24 hours, shows painful posture while urinating, or you spot blood, log times and contact the vet fast.

    Sleep and daily rhythms

    Most indoor cats sleep 12 to 20 hours a day. A real change is when sleep or activity shifts consistently for about a week, especially if appetite, grooming, or play also change. Sleep alone rarely tells the whole story, but sleep plus other declines can point to illness or pain. Use the daily log to spot trends.

    When to see a vet (immediate action box)

    • Collapse, severe trouble breathing, or heavy bleeding – seek emergency care right away.
    • No appetite for 48 hours – call your vet.
    • Repeated vomiting or diarrhea for more than 24 hours, or any blood present – urgent review.
    • Not using the litter box for 24 hours, or straining/bleeding during elimination – contact the vet.
    • New, loud or constant vocalization, or hiding for 24 to 48 hours – arrange a vet check.
    • Sudden weight loss of 5 to 10 percent over a few weeks, or new bald patches and painful over-grooming – book an exam.

    Bring your logged observations and the printable daily log to the appointment so the clinic can see timing, frequency, and any linked behaviors. Worth every paw-print.

    Home setup and engagement strategies that support long-term contentment (age-adapted, non-duplicative)

    - Home setup and engagement strategies that support long-term contentment (age-adapted, non-duplicative).jpg

    Indoor happiness comes down to five simple needs: hunting and stalking, climbing and surveying, scratching and marking, hiding and feeling safe, and social time or peaceful alone time. Match each need with a clear setup and your cat will be content, calm, and a little more claw-tastic.

    • Hunting and stalking: toys and puzzle feeders (a food toy that makes cats work for kibble).
    • Climbing and surveying: multi-level perches and wall shelves (elevated resting spots and platforms).
    • Scratching and marking: multiple scratching posts (upright posts covered in sisal or carpet for clawing).
    • Hiding and security: cozy hide spots like boxes, tunnels, or cat caves.
    • Social or alone time: quiet zones for bonding and separate retreats when your cat wants privacy.

    Give them vertical territory. Cats love to climb and watch. Put at least one sturdy perch (an elevated resting spot) at window height and another higher up so your cat can choose the view. Try to position a perch within arm’s reach of the window frame so sunlight and birdwatching are easy. Use multi-tier cat trees (sturdy climbing towers) and floor-to-ceiling shelves (wall-mounted platforms) to make obvious routes up and down.

    Respect scratching needs. Aim for one scratching post per cat, plus one extra in another room so marking doesn’t turn into competition. Make sure posts are stable and tall enough to allow a full stretch. Really , your furniture will thank you.

    Turn meals into play sometimes. Use puzzle feeders for about 25 to 50 percent of daily calories, or break meals into small puzzle sessions to extend hunting play during mealtime. Watch them stalk kibble like tiny predators. Rotate toys weekly so novelty stays high; tuck a few away and swap them like little surprises. Scatter three to five hiding options around the house so retreat spots are always available. For safe outdoor variety, try a catio (secure outdoor enclosure) or short, supervised harness walks.

    Age-adapted tips. Kittens: kitten-proof small parts and keep fragile items out of reach, they’re little explorers. Adults: give higher perches and stable climbing paths for bold jumpers. Seniors: add lower-step perches, ramps, and soft bedding to protect aching joints. Works wonders for their comfort.

    Quick starter purchases:

    1. Sturdy multi-level cat tree: gives climbing, scratching, and high resting spots.
    2. Two puzzle feeders: split meals into engaging sessions.
    3. One high-window perch: prime birdwatching real estate and sunshine naps.

    Worth every paw-print.

    How age and individual personality change the signs of a happy indoor cat

    - How age and individual personality change the signs of a happy indoor cat.jpg

    Life stage and personality both shape how a happy-cat checklist looks. A single sign , like purring, a sudden play burst, or extra naps , can mean very different things depending on your cat’s age and temperament, so read each item through those two lenses. Ever watched your cat do something and wonder, is that normal? This helps you figure it out.

    Check the age-specific norms for context in the detailed anchors: Play, daily activity, and energy patterns, Health & Warning signs: grooming, and Home setup. Those sections list kitten/adult/senior rows (table rows) and the quick-tip callouts have been moved into Play and Health so you won’t lose the actionable items.

    Quick rule of thumb: use life stage to expect rhythm , how often and how long behaviors happen , and use personality to read the style , bold versus shy. That combo helps you decide when a change is just normal, or when it’s worth jotting down and watching.

    Personality: bold/outgoing vs shy/secure

    Bold, outgoing cats make everything big and obvious. Think loud purrs, theatrical leaps, and full-speed chases that shake the rug. A happy roll from a bold cat might be a dramatic, full-body flop with the belly all out. Milo barreled into the room, headbutted my knee, then made a chuffing purr like a little motor. You can almost hear the joy.

    Shy or quietly secure cats show the same feelings in small, soft ways. Look for gentle trills, slow blinks, tucked-but-relaxed loafing, or a light knead at the edge of your hand. She slid onto the armrest, blinked twice, and sighed into a soft rumble that said, I like this corner with you. Notice the tiny signals and celebrate them.

    Monitoring progress: a printable daily log concept and how to use it (linked from checklist)

    - Monitoring progress a printable daily log concept and how to use it (linked from checklist).jpg

    Keep a simple, one-page daily log so you catch slow changes before they become big problems. Use an easy layout with these columns: Date, Time, Observed sign(s) (link to the checklist anchors, for example Play, daily activity and energy patterns), Duration or Frequency, Notes/Context, and Weight (if you can weigh your cat , use a kitchen scale or pet scale).

    Track things like purring or seeking contact, play session length, grooming quality, how eager they are at mealtimes, litter box visits, and any new sounds or vocal patterns. A tiny note helps later , “short chirp at 10:05 am” or “whiskers twitching during play.” Ever watched your kitty chase shadows? Jot the time.

    Review the sheet once a week and add a one-week summary line: more active, same, or less active; eating steady or reduced; grooming normal or changed. Look for clusters across categories. A drop in play plus a dull coat plus less eating is more worrying than any single sign. Follow the Health & Warning signs thresholds right away for red flags: no appetite for 48 hours, vomiting or diarrhea for more than 24 hours, litter box avoidance for 24 hours. Bring the log to the vet if patterns stick around.

    Below is a tiny example of one day so you can copy the layout into a printable PDF or notebook and start filling it in. Worth every paw-print.

    Date Time Checklist item(s) observed (anchor) Duration/Frequency Notes/Context
    2026-03-03 08:15 [Play, daily activity and energy patterns](#play-daily-activity-and-energy-patterns) 12 min Active, chased wand, caught toy
    2026-03-03 18:30 [Health & Warning signs: appetite](#health-warning-signs-appetite) Meal eaten Rubs legs before bowl, finished wet food

    Final Words

    Spot the signs in the action: calm nudges and head-butts, relaxed purrs and slow blinks, upright tails, regular play, clean grooming, eager meals, and steady litter habits.

    We covered behavior, age-tailored play, grooming and appetite checks, home setup, and a printable daily log; quick links and photos make ID easy.

    Weigh clusters of behavior, play, and physical cues for stronger evidence. Note vet thresholds: no appetite 48 hours; vomiting/diarrhea >24 hours; litter avoidance 24 hours; collapse or breathing trouble, seek care. Those gentle purrs are real signs of a happy indoor cat.

    FAQ

    How do I know if my indoor cat is happy?

    You know your indoor cat is happy when it solicits gentle contact (nudges, head butts), purrs with soft eyes, slow-blinks, holds its tail upright, plays confidently, grooms normally, eats well, and uses the litter consistently.

    What are clear signs a cat is unhappy and what annoys them?

    Signs a cat is unhappy include hiding, sudden aggression, constant vocalizing, loss of appetite, over- or under-grooming, litter avoidance, and tail-lashing; common annoyances are loud noise, forced cuddles, a dirty box, or abrupt routine changes.

    How can I tell if a cat is happy by its tail?

    You can tell a cat is happy by its tail when it holds it upright with a curved tip or gives a gentle quiver on greeting; a rapid lash or puffed tail usually signals irritation or fear.

    What is the 3-3-3 rule of cats?

    The 3-3-3 rule of cats is roughly three days to settle into a new space, three weeks to build routine and confidence, and three months to feel fully comfortable and bonded with their people.

    What facial and vocal signs show a happy indoor cat?

    Facial and vocal signs of a happy indoor cat are slow blinks, soft half-closed eyes, relaxed whiskers and neutral ears, plus gentle chirps or meows and purring while relaxed or being petted.

    Is there a quick checklist or quiz I can use to check my cat’s happiness?

    A quick checklist or quiz helps: track contact, purring, play, grooming, appetite, litter use, sleep, and social interactions daily; clusters of positive signs give stronger proof than a single ticked box.

  • How to Give a Cat a Pill: Step-by-Step Guide

    How to Give a Cat a Pill: Step-by-Step Guide

    Think giving your cat a pill is impossible? It doesn’t have to feel like a wrestling match. With a calm voice, steady hands, and a simple plan you can get meds in without fur flying or guilt. Seriously, your cat and you can both stay relaxed.

    This short guide covers what to do in an emergency, how to prep and position your cat, a couple of quick manual pilling methods, useful tools, easy alternatives, and what to watch for afterward. Keep it handy. Ever watched your kitty chase a shadow? Same focus, less chaos.

    Emergency checklist:

    • Stay calm. Your mood sets the tone.
    • Towel ready for a gentle burrito wrap (a snug towel wrap to keep paws tucked).
    • Phone nearby for the vet’s number.
    • A treat or small bit of wet food to positive reinforcement reward afterward.

    How to prep and position:
    Sit on the floor or a low chair so you’re steady. Put your cat on your lap facing away from you, or on a table with a towel under them. Use one hand to steady the head at the cheekbones and the other to hold the lower jaw gently. Keep your voice soft , whiskers will twitch, eyes will watch, and that calm helps.

    Quick manual pilling methods:

    • The scoop-and-drop: Slip the pill to the back of the tongue and close the mouth, then stroke the throat to encourage swallowing. Aim quick and be gentle.
    • The two-finger method: Hold the head top with thumb and forefinger, press the lower jaw down with two fingers, and place the pill at the base of the tongue. Close the mouth and stroke.
      Practice with a treat first so it feels less scary.

    Helpful tools:

    • Pill popper (a small plastic plunger that places the pill at the back of the mouth). It’s like a tiny syringe for pills and keeps your fingers clear.
    • Pill pockets (soft treats with a pouch for pills). They hide the taste and texture.
    • Oral syringe (a medicine syringe without a needle for liquid meds). It helps you squirt liquid gently into the cheek pouch.
      Try the tool that feels right for you and your cat.

    Easy alternatives:
    If pills are impossible, ask your vet about liquid medicine, which you can give with an oral syringe (a squirt tool); or transdermal gel (med applied to skin, usually the ear, that absorbs through skin) , vet approval required. Sometimes crushing the pill into wet food works, but only if the med is safe to mix. Always check with the vet first.

    What to watch for afterward:
    Make sure the cat actually swallowed , you’ll see a little lick or a soft paw to the mouth. Watch for coughing, gagging, or trouble breathing; if any of those happen, call the vet right away. Also look for vomiting or refusal to eat for a few hours.

    A quick tip: follow a pill with a tiny tasty morsel or a lick of water so they learn it’s not all bad. And if you mess up, it’s okay. Try again calmly in a minute.

    Worth every paw-print.

    Need to give a pill now? Emergency checklist

    - Need to give a pill now Emergency checklist.jpg

    In a rush and nervous? Stay calm. A steady voice and gentle hands make all the difference when your cat needs a pill.

    1. Confirm the medication name and exact dose. Double-check the label and your vet’s instructions so you don’t guess.
    2. Gather your supplies: a towel (for gentle restraint), the pill, a pill popper (a small plunger tool to place pills in the back of the mouth), a syringe (oral syringe for liquids), and a treat (a tasty reward).
    3. Hold your cat briefly and calmly. Wrap the towel loosely if needed, support their body, steady their head, then give the pill, quick but gentle. Think of it like a tiny, focused cuddle.
    4. Make sure they swallow and are breathing normally. Watch the throat for a swallow, listen for steady breaths, and check that they relax afterward.

    Watch closely for coughing, noisy breathing, repeated gagging, or blue gums. If you see any of those signs, get urgent veterinary help right away.

    See Preparing [More detail], Positioning [More detail], Manual Pilling [More detail], Tools & Alternatives [More detail], Troubleshooting [More detail], Aftercare [More detail].

    Preparing to give your cat a pill: vet checks, label reading, practice and calm setup

    - Preparing to give your cat a pill vet checks, label reading, practice and calm setup.jpg

    Before you try giving a pill, call the prescribing clinician and ask a few simple questions. Can the medication be crushed, mixed with food, swapped for a flavored version, or made as a compounded form (compounded = custom-made by a pharmacist)? Are there food interactions, does it need refrigeration, should you shake it before use, and is timing important? For a full supply list and formulation notes, see Tools & Alternatives. Ever wonder if you can hide it in tuna? Ask that too.

    Read the prescription label like a short map. Look for dose (mg), frequency (how many times per day), and route (oral versus transdermal (applied to the skin)). Check storage temperature and any warnings about food or other drugs. If the label says "do not crush" or "give on an empty stomach," follow that and call the clinic if you’re unsure. Better to ask than to guess.

    Practice the motions away from your cat so you’re calm and steady. Rehearse with a stuffed substitute or an empty pill popper, and practice drawing or dispensing with an oral syringe (a small plastic syringe for giving liquid meds). Pick a quiet, low-distraction room, lay out supplies, and have a helper nearby if you want one. I once practiced on a plush mouse and suddenly felt way less nervous. Worth every paw-print.

    Positioning and restraint for giving a cat a pill: towel wrap, one-person and two-person methods

    - Positioning and restraint for giving a cat a pill towel wrap, one-person and two-person methods.jpg

    Good positioning keeps your cat safe and stops frantic squirming that leads to scratches, bites, or even accidental inhalation. Calm, steady handling makes the whole thing faster and makes your cat more likely to cooperate next time. Ever watched your kitty try to Houdini out of a blanket? Yep, this helps.

    Towel wrap (burrito)

    Fold a medium towel so it’s wide enough to cover the cat’s body but leave the head free. Place the cat near one short edge, pull the near side over the hind legs, then snug the far side across the shoulders so the legs are gently tucked, cozy, not tight. The towel limits kicking and scratching and gives you one small head opening to work with. You’ll feel the soft towel against their fur and know they can’t fling their paws at you.

    One-person technique

    Sit with the cat on your lap or across your knees so their spine rests against you for stability. Keep the body wrapped or tucked under an arm so only the head is exposed, then support the head near the temples (the sides of the head near the eyes) with your free hand, using gentle pressure not a squeeze. This keeps your fingers farther from the mouth and helps the cat stay calm while you work. It’s easier and calmer when their back is against you.

    Two-person technique

    One person’s job is to hold and comfort: wrap the cat and steady the torso, keeping a hand over the shoulders to prevent turning. The second person focuses on the pill: steady the head and place the medication. Talk through roles before you start so both people move in sync and the cat feels steady, not jostled. Teamwork makes it faster and less scary for everyone.

    Protective gear and cautions
    If your cat bites or you’re nervous, wear sturdy gloves (garden or leather gloves work) or use a thicker towel for extra padding. Don’t make scruffing a routine move unless a veterinarian has shown you how; scruffing (grabbing the loose skin at the back of the neck) can cause fear or injury when done wrong. And if it’s not happening calmly, stop and try again later or call your vet for tips.

    Worth every paw-print.

    How to Give a Cat a Pill: Step-by-Step Guide

    - Manual pilling steps how to open a cats mouth and place the pill safely.jpg

    Start by supporting your cat’s head. Cradle the skull with one hand and tilt the muzzle up just a hair so the airway stays relaxed. This helps open the mouth safely without tugging or panicking them. Easy does it.

    Use gentle pressure at the jaw hinge or under the lower jaw (mandible – the bottom part of the skull) with your thumb and forefinger to encourage a tiny gap. Don’t pry or yank. Think slow and patient, not forceful.

    For placing the pill, slide it onto your fingertip or into a pill popper tool (a small plunger device that keeps your fingers farther from teeth). Aim to deposit the pill toward the back of the tongue, but stop before you push it into the throat. Keep your fingers flat and out of the bite zone to protect your hands. Follow any instructions your clinic gave you for tools.

    After the pill is in, close the mouth and gently massage the throat for a few seconds to help swallowing. If your vet okayed a small sip of water, give a tiny amount at the side of the mouth from an oral syringe (a small plastic syringe for giving liquids) to encourage a swallow. Only do this when your vet approves.

    For rules about trying again, how long to wait, and the urgent signs that need immediate care, see Troubleshooting.

    Tools and alternatives for giving a cat a pill: supplies, formulation warnings, pill pockets, syringes, transdermal options

    - Tools and alternatives for giving a cat a pill supplies, formulation warnings, pill pockets, syringes, transdermal options.jpg

    Keep a small pilling kit ready so you’re not hunting around while your cat glares at you. I toss these on a counter: a pill popper (Pet Piller, a plunger tool that keeps your fingers away from teeth), a pill crusher (a little grinder for pills, only use if your clinic says it’s okay), an oral syringe (a small plastic syringe for liquid meds, no needle), a clean towel, gloves, a soft plate with vet-approved wet food (no garlic, onion, or xylitol), and a few favorite treats for after the deed. Have everything within reach and the whole thing goes faster and calmer. Worth every paw-print.

    Most pills taste bitter. Call the prescribing clinician before you crush, mix with food, or swap forms. Check storage notes like “keep refrigerated” or “shake well,” and confirm whether the med should be given with food or on an empty stomach. Some meds can be made into flavored liquids or transdermal gels (a medicine you rub on the skin to absorb into the body), but those usually need a prescription and can absorb differently from cat to cat.

    Pill pockets and hiding in food

    Pill pockets or soft treats are great for masking texture and smell. Think of them like edible envelopes for tiny parcels of medicine. Rotate the hiding foods so your cat doesn’t learn one flavor equals a surprise, tuna this time, canned paté the next. Try the sandwich method: plain morsel, medicated morsel, plain morsel. It tricks the nose and the mouth, and it helps keep the odd one from getting spat out.

    Ever watched your cat’s whiskers twitch as they sniff dinner? Use that. For picky kitties, hiding a pill in a spoonful of tasty wet food can work, only if the pill is safe with food. Ask your vet first.

    Liquid syringes and transdermal options

    For liquid meds, draw the dose into an oral syringe (no needle). Gently slip the tip into the side of the mouth just past the lower teeth and squirt slowly so your cat can swallow tiny amounts; pause if you hear gagging or coughing. Go slow, too fast risks aspiration (liquid getting into the lungs).

    Transdermal gels go on thin skin, like the inner ear flap (the ear pinna), and skip the mouth-handling drama. They’re a good choice for cats who bite or hate pills, but absorption varies and the dose may need tweaking. Your vet must prescribe the specific formulation and dose.

    A few quick safety notes: don’t force anything if your cat panics, wipe up spills, and wash your hands after handling meds. Reward time helps, one lickable treat or a favorite chin-scratch goes a long way.

    Method When to use Pros Cons Vet approval required
    Pill pocket / soft treat Food-friendly pills; food-motivated cats Easy; low stress Some cats detect odd taste; not for all meds No (confirm med compatibility)
    Hide in wet food / tuna Pills safe with food Works for picky eaters Food interactions; not for meds needing empty stomach Yes
    Pill popper / Pet Piller When quick placement helps Keeps fingers away from teeth Misuse can injure throat No (use after instruction)
    Crush and mix (vet-approved) Pills safe to crush Useful with food or broths Some meds lose effect or taste awful Yes
    Oral liquid via syringe Liquid formulations or compounded liquids Good for small doses; avoids fingers in mouth Risk of aspiration if given too fast Yes (for compounded)
    Transdermal compounded gel Cats who refuse oral dosing or have dental issues Avoids mouth handling Variable absorption; may stain fur Yes

    Troubleshooting when giving a cat a pill: common problems, reattempt rules, and emergency signs

    - Troubleshooting when giving a cat a pill common problems, reattempt rules, and emergency signs.jpg

    If your cat spits a pill out, take a breath and check breathing right away. Look and listen for steady breaths, watch the chest rise, and get close enough to hear any coughing or gagging. If you can safely pick up the dropped pill without chasing the cat, do so. Note whether the pill looks whole or chewed and the exact time you tried to give it , that info helps your vet decide what to do next.

    If your cat is making loud or labored breaths, keeps coughing or gagging, breathes with an open mouth, has pale or blue gums, or collapses, get emergency care now. These signs can mean airway obstruction (something blocking the throat) or aspiration (when something goes into the airway or lungs). Don’t try to fish around inside the mouth yourself; you could make things worse and waste precious time.

    Wait until your cat calms down before trying again. Give several minutes, pet them, let them relax, maybe offer a treat if that helps. Then try quieter tactics: get a helper to gently hold the cat, hide the pill in a soft treat or pill pocket, or use a pill gun if you’ve practiced with your vet’s guidance. If your cat panics, stop. Repeated forced attempts raise stress and the risk to the airway.

    If you missed a dose, check the prescription label first. Some meds can be doubled safely, some cannot. If the label isn’t clear, call the clinic before giving an extra dose , a quick phone call prevents mistakes and keeps the treatment on track.

    Watch for allergic or bad reactions after a pill: facial swelling, hives, vomiting, sudden heavy sleepiness, or a big behavior change. If you see any of those, contact your vet or an emergency clinic right away and bring the medication label with you. It helps them identify the drug and act fast.

    A few extra tips from the trenches: think of a pill like a tiny treasure you want your cat to take willingly. Try wrapping it in a soft bit of food, or practice with a treat-sized dummy so everyone stays calm. Ever watched your kitty chase shadows after a calm snack? That’s the moment to try the pill again.

    Oops, one more thing , if you retrieve a chewed tablet, tell your vet. A chewed pill might mean a partial dose or a risk of irritation. Being specific about what you saw and when you tried the dose makes a big difference.

    How to Give a Cat a Pill: Step-by-Step Guide

    - Special situations for giving a cat a pill kittens, senior cats, dental disease, and feral animals.jpg

    Kittens need extra gentle care. Use weight-based dosing (dose set by the kitten’s weight) and handle them softly, tiny mouths and soft throats are real. Many liquid meds are easier for little kitties, and some come flavored to help. Call your veterinarian to confirm the correct dose for your kitten’s age and weight, and ask whether a liquid or flavored option is available; kittens process meds differently, so don’t guess.

    Older cats can have trouble swallowing. Missing teeth, slower reflexes, or dysphagia (difficulty swallowing) are common, so check all meds for interactions and ask the vet about alternatives like liquids or compounded formulas (custom-made meds from a pharmacy) that may be gentler on the throat. Ever watched an old cat try to gulp a pill? Yeah, we want to avoid that stress.

    Senior cats

    If your senior has trouble swallowing or has lost teeth, think about switching to a liquid, a transdermal gel (applied to the skin), or an injectable form. Absorption and dosing can change with different routes, so your vet may need to tweak the prescription. Watch for coughing, drooling, or food falling out of the mouth, those signs mean another route might be safer. Worth every paw-print.

    Feral or stray cats are a different challenge. Call your clinic or a local rescue for humane trapping, sedation, or in-clinic dosing instead of trying risky handling at home, protecting you and the cat is the top priority.

    Dental disease needs extra caution. Avoid painful oral manipulation. Talk with the prescribing clinician about transdermal, injectable, or pain-control options and see Tools & Alternatives for supply ideas and Troubleshooting for missed-dose or emergency guidance. In truth, a little planning now saves a lot of stress later.

    Aftercare, training, and building a reliable routine for giving a cat a pill

    - Aftercare, training, and building a reliable routine for giving a cat a pill.jpg

    Reward time helps. Give one lickable treat or a favorite chin scratch right after the pill so your cat starts to think medicine time is pleasant. Use a calm, happy voice and a few gentle pets after the dose. Your cat will begin to link pills with something nice, not scary.

    Desensitization & practice

    Spend about two minutes each day on tiny drills. Gently handle the head. Show an empty pill popper (a plastic pill-giving tool) like you would show a new toy. Touch the cheek with a treat so they learn the motion. Give a small reward after each step so the cat learns the routine is safe. Slow, steady repetition wins the whisker game.

    Make the practice simple and fun. Think of it like teaching a new trick – short sessions, same steps, lots of praise. Ever watched your kitty chase a laser for five minutes and then flop down satisfied? Same idea.

    Build a visible schedule and mark doses as you give them. Put a checklist on the fridge, set a phone reminder, or use a meds app and tick the dose off when done. Example checklist line: "Mon 8 AM – 5 mg – given." Rotate hiding foods – tuna one day, pâté the next – so your cat does not always expect the same smell.

    Store meds exactly as the label says and keep bottles clearly labeled and out of curious paws. When you travel, bring a written dosing plan with exact amounts and a spare supply. If home dosing keeps stressing you or just isn't working, call your clinic to talk about options like compounded meds (custom-made by a pharmacist), injectable choices, or having the clinic give doses for you. Your vet can also show a quick, hands-on demo so you feel confident.

    Final Words

    In the action, this post gives a tiny emergency checklist, then walks through prepping, safe positioning, manual pilling, tools and alternatives, troubleshooting, special situations, and aftercare.

    Practice the calm setup, read medication labels with your vet, and keep the supplies ready. Watch for coughing, noisy breathing, repeated gagging, or blue gums; call the clinic right away if any show up.

    Use the quick steps when time is tight, then follow the full how to give a cat a pill: step-by-step guide. You’ll build a low-stress routine and feel feline fine.

    FAQ

    FAQ

    What is the easiest way to give my cat a pill?

    The easiest way to give your cat a pill is with a pill pocket (soft treat with a hidden cavity) or a pill popper (small plastic tool that deposits pills), calm handling, and an immediate reward.

    Should I hide a cat’s pill in food or butter?

    Hiding a cat’s pill in food can work, but hiding in butter is not ideal; ask your vet first, use plain wet food or pill pockets, and rotate flavors so the cat won’t spot the trick.

    How do I give pills to cats without them spitting it out or refusing?

    If a cat spits or refuses a pill, try a towel wrap (snug body wrap), recruit a helper, switch to a pill pocket or flavored compound, keep sessions short, and reward after success.

    How do I give a pill to a cat with a syringe or liquid medicine?

    Giving liquid medicine with an oral syringe (plastic dropper for the mouth) means placing small amounts toward the cheek, past the lower teeth, delivering slowly and pausing so the cat can swallow.

    How do I give a cat a pill with a pill popper or Pet Piller?

    Using a pill popper (slender tool with a soft tip) means loading the pill, gently opening the mouth, aiming toward the back of the tongue, releasing the pill, then closing the mouth and massaging the throat briefly.

    What if my cat refuses to take a pill or is uncooperative?

    If a cat refuses or fights, stay calm, stop attempts, let the cat settle, try a gentler method or recruit help, and call your clinic for alternatives like liquids, transdermal gels, or clinic dosing.

    Can I crush pills or mix them with food safely?

    Crushing or mixing pills can be safe for some meds but risky for others; ask your prescribing clinician before altering a tablet and follow storage and dosing instructions on the label.

    How can a short pill-giving poem help, and what might it sound like?

    A pill-giving poem can calm you and add levity: “Tiny treat, tiny bite, swallow quick, my furball bright.” Say it softly during handling to steady your rhythm and tone.

  • Symptoms of Mold Ingestion in Cats: Signs, Timeline

    Symptoms of Mold Ingestion in Cats: Signs, Timeline

    \n

    Ever left a sandwich on the counter and forgot about it? That fuzzy bite could actually send your cat to the ER. Check out our guide on Unbreakable Cat Toys.

    \n

    \\n

    \n

    Mold is a kind of fungus that hides on food and in damp spots. Some molds make mycotoxins (poisonous chemicals made by mold that can damage organs). Those toxins can cause things that range from a soft cough to violent seizures.

    \n

    \\n

    \n

    You might spot a tiny change first – whiskers twitching, a weird cough, or your cat acting a bit off. Or you could see an emergency: severe tremors, bloody vomiting, or collapse. Ever notice your kitty suddenly seem unsteady? That’s a red flag.

    \n

    \\n

    \n

    This quick guide shows the common signs, the likely timeline (minutes to days), and the clear steps to take so you can act fast and keep your cat’s environment safe. If you suspect mold exposure, call your vet or an emergency clinic right away and, if possible, save the food or sample for them to check.

    \n

    \\n

    \n

    Immediate symptoms and red flags of mold ingestion in cats

    \n

    \\n

    \n

    \\\"-

    \n

    \\n

    \n

    If your cat ate moldy food or chewed something that might be moldy, watch them closely. The bad signs can show up in minutes to a few hours, though some mold-made poisons, mycotoxins (toxins from mold that can damage organs), may cause problems days later. Ever watched your kitty chase a shadow and thought, hmm, that cough seems odd? Respiratory signs from inhaled spores (tiny mold particles you can breathe in) can start quietly.

    \n

    \\n

    \n

    These are emergency signs that need immediate action because they can be life-threatening:

    \n

    \\n

    \n

      \\n

      \n

    • uncontrolled seizures
    • \n

      \\n

      \n

    • severe tremors or convulsions
    • \n

      \\n

      \n

    • open-mouth or very labored breathing
    • \n

      \\n

      \n

    • collapse or unresponsiveness
    • \n

      \\n

      \n

    • profuse bloody vomiting or bloody diarrhea
    • \n

      \\n

      \n

    • ongoing heavy vomiting with signs of dehydration
    • \n

      \\n

      \n

    • severe bleeding or nasal hemorrhage
    • \n

      \\n

      \n

    • sudden, severe lethargy or inability to stand
    • \n

      \\n

    \n

    \\n

    \n

    If you see any of those, get help now. Isolate your cat from the suspected source, and if you can, seal a piece of the food or item in a plastic bag as a sample for the vet (a zip-top bag works). Take photos of the item and of any vomit or stool, and note the exact time the cat likely ate it and when symptoms started. Those little details help a lot.

    \n

    \\n

    \n

    Not sure what a dangerous cough sounds like? Check what do cat coughs sound like (https://titanclaws.com/what-do-cats-coughs-sound-like/) to compare. Then call your veterinarian or a poison-control hotline and follow their instructions. For 24/7 help contact the Pet Poison Helpline (https://www.petpoisonhelpline.com/, phone: 855-764-7661) or the ASPCA Animal Poison Control (https://www.aspca.org/pet-care/animal-poison-control, phone: 888-426-4435; they may charge a fee).

    \n

    \\n

    \n

    When to go straight to emergency care: uncontrolled seizures, severe breathing collapse, or repeated collapse. Transport immediately in those cases, you know, like drop-everything kind of urgent, because quick action can change the outcome.

    \n

    \\n

    \n

    Quick checklist:

    \n

    \\n

    \n

      \\n

      \n

    1. Remove access to the suspected source and seal a sample in a bag for the vet.
    2. \n

      \\n

      \n

    3. Note the exact time of exposure, take photos of the item and any vomit or stool, and record when symptoms began.
    4. \n

      \\n

      \n

    5. Call your veterinarian or the listed poison-control hotlines (Pet Poison Helpline, ASPCA Animal Poison Control) and follow their instructions.
    6. \n

      \\n

    \n

    \\n

    \n

    Gastrointestinal signs after mold ingestion in cats

    \n

    \\n

    \n

    \\\"-

    \n

    \\n

    \n

    If you haven’t already, check the immediate red flags above for general emergency signs.

    \n

    \\n

    \n

    The stomach and gut are usually the first places you’ll see trouble after a cat eats something moldy. Vomiting, watery or bloody diarrhea, drooling and extra saliva, sore or irritated mouths with visible lesions, a sudden drop in appetite, and signs of belly pain like a hunched posture or refusing to be picked up are the common clues. These are the things most owners notice first, so trust your gut if something looks off.

    \n

    \\n

    \n

    Vomiting can be a little heave now and then or full-on projectile vomiting. Watch what comes up , clear bile, plain stomach fluid, bright red blood, or dark “coffee-ground” material (that means older, partially digested blood) can all show up and change how urgent it is. Symptoms usually start minutes to hours after eating mold, but some mycotoxins (toxins made by mold) can damage organs and show up days later.

    \n

    \\n

    \n

    Heavy vomiting and diarrhea can quickly lead to dehydration. Check your cat’s mucous membranes (the gums and inside of the mouth); tacky or sticky gums usually mean mild dehydration. Try a skin-tent test (gently pinch a fold of skin between the shoulder blades); if the skin is slow to fall back it suggests moderate fluid loss, about 8 percent. Very sunken eyes and fast breathing usually point to severe dehydration, around 10 percent or more, and that needs prompt veterinary care.

    \n

    \\n

    \n

    Look around the house for likely sources: bad pet food, bulging wet-food pouches or cans, moldy treats, soggy or old toys, spilled human food, damp bedding, or open kibble left in a humid spot. If you spot drooling, mouth soreness, or loose stool after your cat touched any of these, save the item for your vet to inspect. Ever watched your kitty tuxedo their way around the kitchen and disappear with a crumb? Yeah, keep an eye on that stuff.

    \n

    \\n

    \n

    If you’re unsure, call your vet or an emergency clinic. It’s better to ask and be sure than to wait while the clock ticks.

    \n

    \\n

    \n

    Symptoms of Mold Ingestion in Cats: Signs, Timeline

    \n

    \\n

    \n

    \\\"-

    \n

    \\n

    \n

    See the immediate red flags above for general emergency signs.

    \n

    \\n

    \n

    Neurologic signs can look dramatic. A real seizure often starts with stiffening then jerking (tonic-clonic movements), loss of awareness, paddling legs, and sometimes drooling or losing control of the bladder. If a seizure lasts more than 2 minutes or seizures keep happening without the cat waking up in between, that is critical and needs emergency care. After a seizure your cat may seem confused, act restless, or be quiet and a little blind for a while. That post-ictal phase can last minutes to hours.

    \n

    \\n

    \n

    Tremors are rhythmic muscle shakes and feel different from shivering, which is a cold response. Tremors may get worse and turn into stumbling or ataxia (loss of coordination and clumsiness). Ever watched your kitty try to walk like a tipsy pirate? That wobble is ataxia.

    \n

    \\n

    \n

    Systemic signs mean the mold toxins – mycotoxins (mold-made poisons) – are hurting organs. Look for jaundice, which shows as yellow gums, yellow inner eyelids, or yellowing of the whites of the eyes. Jaundice usually points to liver injury, like from aflatoxin. Very pale, white gums can mean anemia or internal bleeding. Kidney trouble may show up as less urine, urine that is too concentrated or too dilute, and a cat that is tired and not eating. These clues help your vet pick tests like liver enzymes (ALT and AST, which show liver damage), kidney values (BUN and creatinine, which show kidney function), and clotting profiles (checks if the blood can clot).

    \n

    \\n

    \n

    Keep in mind that some neurologic or organ signs can lag behind the first stomach problems. Vomiting or diarrhea might be the first thing you see. Then liver or kidney failure can develop over days depending on which toxin and how much was eaten. Prognosis changes a lot based on how fast you get care and which organs are affected. So sooner is definitely better.

    \n

    \\n

    \n

    Mycotoxins most likely to cause systemic effects

    \n

    \\n

    \n

      \\n

      \n

    • Aflatoxin (mainly causes liver toxicity; you may see high ALT and AST and jaundice)
    • \n

      \\n

      \n

    • Ochratoxin (tends to damage kidneys; can cause azotemia, which is high waste products in the blood)
    • \n

      \\n

      \n

    • Aspergillus-related toxins (can cause respiratory and wider systemic illness)
    • \n

      \\n

      \n

    • Stachybotrys-associated syndromes (linked to severe vomiting, tremors, and bleeding)
    • \n

      \\n

    \n

    \\n

    \n

    Neurologic red flags that need urgent care:

    \n

    \\n

    \n

      \\n

      \n

    • Continuous seizure activity lasting more than 2 minutes or repeated seizures without recovery
    • \n

      \\n

      \n

    • Loss of consciousness or sudden collapse
    • \n

      \\n

      \n

    • Severe ataxia with inability to stand or walk
    • \n

      \\n

      \n

    • Sudden blindness or severe disorientation
    • \n

      \\n

      \n

    • Progressive weakness or inability to rise
    • \n

      \\n

    \n

    \\n

    \n

    Respiratory and dermatologic signs when cats inhale or contact mold

    \n

    \\n

    \n

    \\\"-

    \n

    \\n

    \n

    If you already saw the immediate emergency signs above, get veterinary help right away.

    \n

    \\n

    \n

    When cats breathe in mold spores (tiny fungal particles), they often start with sneezing and a cough that just won't quit. You might watch their whiskers twitch as they sneeze, or hear a persistent, raspy cough. They can also wheeze, have a stuffed-up nose, or a runny nose. Sometimes nosebleeds happen. Fast or hard breathing , breathing faster or with effort , is a serious sign. In rare, severe cases mold can cause pulmonary hemorrhage (bleeding into the lungs), which shows as coughing up blood or sudden, severe trouble breathing. Those signs need immediate care. Ever heard a cough that sounds like a whistle or a stuck kazoo? Mention that to your vet.

    \n

    \\n

    \n

    Touching moldy bedding, vents, or damp corners can bother a cat's skin and eyes. HVAC (heating, ventilation, and air conditioning) vents are a common source. Cats may lick themselves nonstop until they make sore spots, or they might get new itchy patches, hair loss, and red, inflamed bumps. Watery, red eyes or sticky eye discharge usually mean the mucous membranes (the wet lining of the eyes and nose) are reacting to spores or bits of fungus. These skin and eye signs often follow direct contact or heavy exposure.

    \n

    \\n

    \n

    Observable respiratory and skin cues to note:

    \n

    \\n

    \n

      \\n

      \n

    • persistent cough
    • \n

      \\n

      \n

    • open-mouth breathing or wheeze
    • \n

      \\n

      \n

    • nasal discharge (clear, cloudy, or bloody)
    • \n

      \\n

      \n

    • new itchy patches or areas of hair loss
    • \n

      \\n

      \n

    • red or inflamed skin lesions
    • \n

      \\n

      \n

    • watery, red, or irritated eyes
    • \n

      \\n

    \n

    \\n

    \n

    Longer exposure can lead to ongoing breathing problems or to secondary infections. Hidden mold in basements, attics, HVAC systems, or even stored food can keep your cat exposed. If you think your home is the problem, tell your vet where you suspect the mold came from so they can link the symptoms to the environment. It’s not something to paws at.

    \n

    \\n

    \n

    Veterinary diagnosis: tests, what vets will ask, and differential diagnoses

    \n

    \\n

    \n

    \\\"-

    \n

    \\n

    \n

    Your vet will start with focused questions about timing and exposure – think of it as the checklist of details they need about possible mold or toxic food. Tell them when your cat likely ate the item, the brand and how much, whether other pets ate any, and any home first-aid you tried. If you can, bring photos, the packaging, and a sealed sample of the suspect food – those things really speed up decisions and testing. Ever watched your cat sniff a muffin and wonder what could go wrong? Yeah, vets ask questions like that.

    \n

    \\n

    \n

    Bloodwork is a big part of the initial workup. Expect a CBC (complete blood count – basic measure of red and white blood cells and platelets) and a chemistry panel that looks at liver values like ALT and AST and bilirubin (these show liver stress), plus kidney markers such as BUN and creatinine (BUN – blood urea nitrogen; creatinine – a waste product that tells us how well kidneys filter). If you noticed pale gums, unusual bleeding, or weakness, point that out – it can change the plan right away. Oops, let me rephrase that – those signs may prompt urgent treatment.

    \n

    \\n

    \n

    If there’s bleeding or nosebleeds, vets may run coagulation tests (blood-clotting checks) to see if clotting is slow or risky. When the belly, vomiting, or trouble swallowing are involved, imaging like X-rays or ultrasound (sound-based imaging to view organs and possible blockages) helps find obstructions, fluid, or organ changes. If the mouth or skin looks infected or fungal, skin scrapings or cultures (samples grown to find fungus or bacteria) are common.

    \n

    \\n

    \n

    Stool checks can find food bits, parasites, or infectious causes. There’s also special mycotoxin testing of food – mycotoxins are mold-produced poisons – but that’s usually saved for cases where a wider contamination is suspected. Your vet will pick tests based on the story you tell and the timing of signs – so those details matter.

    \n

    \\n

    \n

    See the table below for a quick snapshot of common diagnostics, then be ready for follow-up questions. See "Owner emergency checklist to bring to the vet" for the full list of items and details to bring to your appointment.

    \n

    \\n

    \n

    \\n

    \n

    \\n

    \n

    \n

    \\n

    \n

    \n

    \\n

    \n

    \n

    \\n

    \n

    \\n

    \n

    \\n

    \n

    \n

    \\n

    \n

    \n

    \\n

    \n

    \n

    \\n

    \n

    \\n

    \n

    \\n

    \n

    \n

    \\n

    \n

    \n

    \\n

    \n

    \n

    \\n

    \n

    \\n

    \n

    \\n

    \n

    \n

    \\n

    \n

    \n

    \\n

    \n

    \n

    \\n

    \n

    \\n

    \n

    \\n

    \n

    \n

    \\n

    \n

    \n

    \\n

    \n

    \n

    \\n

    \n

    \\n

    \n

    \\n

    \n

    \n

    \\n

    \n

    \n

    \\n

    \n

    \n

    \\n

    \n

    \\n

    \n

    \\n

    \n

    \n

    \\n

    \n

    \n

    \\n

    \n

    \n

    \\n

    \n

    \\n

    Test Why it’s done What abnormal results mean
    CBC (complete blood count) Checks red cells, white cells, and platelets to find anemia, infection, or low clotting cells Low red cells = anemia; high white cells = infection or inflammation; low platelets = higher bleeding risk
    Chemistry panel – liver values Measures liver enzymes (ALT/AST) and bilirubin to spot liver injury or stress High ALT/AST or bilirubin suggests liver damage or impaired bile flow
    Kidney tests (BUN / creatinine) Assesses kidney filtering and hydration status Elevated BUN or creatinine = reduced kidney function or severe dehydration
    Coagulation profile Evaluates clotting when bleeding or hemorrhage is suspected Prolonged clotting times point to bleeding risk and may lead to transfusion or other treatment
    Abdominal imaging (X-ray / ultrasound) Looks for obstructions, ingestion of foreign material, fluid buildup,, or organ changes Findings like a blockage, fluid pockets, or enlarged organs can mean surgery or targeted therapy is needed
    Fecal analysis / culture Finds food particles, parasites, or infectious agents Identifies parasites, bacteria, or ingested contaminated material that could explain signs

    \n

    \\n

    \n

    Immediate home first aid and when to avoid home treatments

    \n

    \\n

    \n

    \\\"-

    \n

    \\n

    \n

    The lede above lists immediate red flags. Use that to decide how urgently you need to get your cat to the clinic.

    \n

    \\n

    \n

    First, safety. Move your cat away from the suspected food or toy and keep everyone calm. If you can, seal a piece of the item in a zip-top bag (like a sandwich bag) or take clear photos, those little clues help the vet fast. Keep your cat warm and quiet. Watch breathing and any odd movements, and don’t try home remedies that might make things worse.

    \n

    \\n

    \n

      \\n

      \n

    1. Remove the cat from the source and put a sample in a sealed bag (or snap photos).
    2. \n

      \\n

      \n

    3. Note the exact time of exposure, take pictures of the item and any vomit or stool, and write down when symptoms started.
    4. \n

      \\n

      \n

    5. Keep your cat calm; watch breathing rate and effort, and look for neurologic signs (stumbling, tremors, odd twitching).
    6. \n

      \\n

      \n

    7. Don’t induce vomiting unless your vet or a poison-control expert tells you to.
    8. \n

      \\n

      \n

    9. Offer very small sips of fresh water only if the cat is alert and can swallow safely.
    10. \n

      \\n

      \n

    11. Call your veterinarian or a poison-control hotline and follow their directions.
    12. \n

      \\n

    \n

    \\n

    \n

    Do not:

    \n

    \\n

    \n

      \\n

      \n

    • induce vomiting without professional direction
    • \n

      \\n

      \n

    • give human meds unless a vet specifically tells you to
    • \n

      \\n

      \n

    • use home “antidotes” or folk remedies
    • \n

      \\n

      \n

    • force-feed or force-water a cat that won’t cooperate
    • \n

      \\n

      \n

    • wait to contact a vet if you see collapse, seizures, trouble breathing, or other severe signs
    • \n

      \\n

      \n

    • give the suspected food again before a vet checks your cat
    • \n

      \\n

    \n

    \\n

    \n

    Call for veterinary help right away if breathing worsens, seizures start, or the cat collapses. Clinics may give activated charcoal (a clinic treatment that can bind some toxins) if ingestion was recent and it’s appropriate. For emergency signs that need transport, see Immediate symptoms and red flags above.

    \n

    \\n

    \n

    Veterinary treatments, prognosis, and follow-up after mold ingestion in cats

    \n

    \\n

    \n

    \\\"-

    \n

    \\n

    \n

    Initial clinic care aims to stop more toxin getting into the body and to steady your cat. If the cat ate recently, vets may give activated charcoal (a powder that soaks up some toxins in the gut). They’ll also start IV fluids (fluids given into a vein to rehydrate and help organs) to correct dehydration and support the kidneys. Antiemetics like maropitant (drugs that stop nausea and vomiting) calm repeated vomiting and protect the throat, and gastroprotectants plus pain meds help soothe an upset stomach. Yep, it’s a lot, but small steps now can prevent bigger trouble later.

    \n

    \\n

    \n

    If signs are bad, vets add stronger support. Anticonvulsants (drugs that stop seizure activity, for example diazepam or levetiracetam) are used for tremors or seizures. Oxygen therapy (extra oxygen to help breathing) or assisted ventilation may be needed if breathing’s weak. If there’s a secondary infection or a confirmed fungal illness, antibiotics or antifungals (drugs that fight bacteria or fungi) get added. Throughout, antiemetics and IV fluids keep your cat more comfortable while tests guide the right targeted treatment.

    \n

    \\n

    \n

    Prognosis depends on which toxin, how much your cat was exposed to, and how quickly treatment started. Some mycotoxins (toxins made by molds) go after the liver or kidneys, so those organs need watching. Expect follow-up bloodwork to track liver enzymes (measures of liver health) and kidney values (tests that show how well kidneys filter). For bad exposures, vets may want longer-term checks to catch delayed problems. Worth every paw-print.

    \n

    \\n

    \n

    \\n

    \n

    \\n

    \n

    \n

    \\n

    \n

    \n

    \\n

    \n

    \n

    \\n

    \n

    \\n

    \n

    \\n

    \n

    \n

    \\n

    \n

    \n

    \\n

    \n

    \n

    \\n

    \n

    \\n

    \n

    \\n

    \n

    \n

    \\n

    \n

    \n

    \\n

    \n

    \n

    \\n

    \n

    \\n

    \n

    \\n

    \n

    \n

    \\n

    \n

    \n

    \\n

    \n

    \n

    \\n

    \n

    \\n

    \n

    \\n

    \n

    \n

    \\n

    \n

    \n

    \\n

    \n

    \n

    \\n

    \n

    \\n

    \n

    \\n

    \n

    \n

    \\n

    \n

    \n

    \\n

    \n

    \n

    \\n

    \n

    \\n

    \n

    \\n

    \n

    \n

    \\n

    \n

    \n

    \\n

    \n

    \n

    \\n

    \n

    \\n

    Treatment When used Expected outcome
    Activated charcoal (binds some gut toxins) Recent ingestion, if vet advises Reduces how much toxin the body soaks up
    IV fluids (fluids given into a vein) Dehydration, low blood pressure, support organs Restores hydration and helps circulation and kidneys
    Antiemetics (anti-nausea drugs) Ongoing vomiting or severe nausea Stops vomiting and helps appetite recovery
    Anticonvulsants (seizure-control drugs) Seizures or severe tremors Calms seizures and lowers risk of brain injury
    Oxygen therapy Respiratory distress or low oxygen levels Improves breathing and oxygen to tissues
    Antifungals / Antibiotics Confirmed fungal disease or secondary bacterial infection Treats infection and prevents spread

    \n

    \\n

    \n

    Monitoring and follow-up tests

    \n

    \\n

    \n

    Vets usually repeat a CBC (complete blood count) and chemistry panel (blood tests that check organ function) 48 to 72 hours after starting treatment or on the schedule your vet sets. If your cat has ongoing vomiting, jaundice (yellowing), dark urine, or worsening weakness, call the clinic for an earlier recheck. For tricky or long cases, your vet might recommend a toxicologist or internal medicine specialist to help. Ever watch your cat suddenly perk up after a good check-in? It’s the best feeling.

    \n

    \\n

    \n

    Preventing mold ingestion in cats: food, storage, and home measures

    \n

    \\n

    \n

    \\\"-

    \n

    \\n

    \n

    Keeping mold out of your cat’s world cuts down both eating it and breathing it in. It’s the easiest and safest step you can take, and honestly, it’s worth a few minutes of habit changes. Ever watched your kitty nose a suspicious package? Yeah, that one.

    \n

    \\n

    \n

    Store dry food in airtight containers (sealed bins that keep out moisture and pests) and tuck them in a cool, dry spot away from direct sunlight. For opened wet food, pop it in the fridge and toss leftovers after the time on the label , most makers say 4 to 6 hours at room temp. Before you serve anything, give cans and pouches a quick check: bulging, a bad smell, or fuzzy growth means don’t feed it.

    \n

    \\n

    \n

    Keep your feeding tools clean. Wash bowls and scoops daily with hot, soapy water and dry them well so moisture doesn’t hang around. Don’t let wet food sit out for long. And try to skip human foods that go moldy fast , bread, cheese, and damp cooked grains are trouble. If a toy, bed, or package feels damp or looks mildewed, set it aside and save a sample in a sealed bag (zip-top works) before you toss it.

    \n

    \\n

    \n

    Control the air and surfaces where your cat eats and sleeps. Use a dehumidifier (device that lowers indoor humidity) in damp basements, and consider a HEPA filter (High Efficiency Particulate Air filter) near litter or feeding areas to cut airborne spores. Wash and dry bedding often, fix leaks fast, and wipe up spills right away. Check attics, basements, and HVAC vents (home heating and cooling duct openings) for hidden mold, and call a mold remediation pro if you find spreading contamination.

    \n

    \\n

    \n

    Quick prevention checklist:

    \n

    \\n

    \n

      \\n

      \n

    • Store dry food in airtight containers (sealed bins that keep out moisture and pests)
    • \n

      \\n

      \n

    • Refrigerate opened wet food promptly
    • \n

      \\n

      \n

    • Discard uneaten wet food per the label (usually 4–6 hours at room temp)
    • \n

      \\n

      \n

    • Inspect cans and pouches for bulging, bad odors, or fuzzy growth
    • \n

      \\n

      \n

    • Wash food bowls, scoops, and feeding areas daily with hot, soapy water
    • \n

      \\n

      \n

    • Keep bedding dry and launder regularly
    • \n

      \\n

      \n

    • Use a dehumidifier in damp areas (basements, crawl spaces)
    • \n

      \\n

      \n

    • Use a HEPA filter near litter boxes or feeding stations if needed
    • \n

      \\n

      \n

    • Inspect basements, attics, and HVAC vents for mold
    • \n

      \\n

      \n

    • Clean spills and crumbs promptly
    • \n

      \\n

      \n

    • Avoid feeding mold-prone human foods (bread, soft cheeses, moist grains)
    • \n

      \\n

      \n

    • Double-bag and safely discard moldy food; save a sample in a sealed bag if you think contamination is widespread
    • \n

      \\n

      \n

    • Check product lot numbers and report contaminated products to the manufacturer or regulator (for example, the FDA or your local consumer agency) when needed
    • \n

      \\n

    \n

    \\n

    \n

    Worth every paw-print.

    \n

    \\n

    \n

    Higher-risk cats, breeds, and special considerations

    \n

    \\n

    \n

    \\\"-

    \n

    \\n

    \n

    Kittens and older cats are more likely to get sick from mold because their bodies are smaller or their organs are already worn down. Examples include CKD (chronic kidney disease, when the kidneys slowly lose filtering ability) and liver disease (the liver helps clear toxins). Cats with weak immune systems or ongoing illnesses can slide downhill faster, so even tiny changes in appetite or energy matter. Ever notice your cat sniffing food and then walking away? That small behavior can be a big clue.

    \n

    \\n

    \n

    Breed-wide sensitivity to mold is pretty rare. Most reactions are about the individual cat, not the breed. In homes with more than one pet, several animals can be exposed, so collect a history for every pet that shares food or space.

    \n

    \\n

    \n

    If you care for a high-risk cat, call your veterinarian right away at the first sign of trouble and have details ready: weight, exact exposure times, photos, and a sealed sample of the suspected food or item if you can. Your vet may want earlier or more frequent follow-up testing, like repeat bloodwork (simple blood tests to check how liver and kidneys are doing). Keep the suspect food sealed, separate affected pets, and watch litterbox output and appetite closely. Those basic checks tell you a lot. Worth every paw-print.

    \n

    \\n

    \n

      \\n

      \n

    • Keep suspect food or item sealed in a bag for the vet
    • \n

      \\n

      \n

    • Contact your veterinarian immediately at the first sign of illness
    • \n

      \\n

      \n

    • Record exact exposure times, amounts, and take photos
    • \n

      \\n

      \n

    • Arrange more frequent follow-up testing if your cat is young, old, or sick
    • \n

      \\n

      \n

    • Consider short-term fasting or withholding suspect foods until reviewed by the vet (follow your vet’s advice)
    • \n

      \\n

      \n

    • Isolate affected animals and monitor litterbox output (urine amount and stool changes)
    • \n

      \\n

    \n

    \\n

    \n

    Owner emergency checklist to bring to the vet and questions to ask

    \n

    \\n

    \n

    \\\"-

    \n

    \\n

    \n

    Bring the facts and a sealed sample. Take a piece of the suspected food or toy in a sealed bag, the original packaging with the lot or batch number (the code on the package), and clear photos of vomit, stool, or the item. Write down exact times, when your cat ate and when symptoms started, and list any home steps you tried or medications you gave.

    \n

    \\n

    \n

    Also bring your cat’s weight and age, current meds, and contact info for anyone else who helps care for your cat. If more than one pet ate the same thing, note who ate what and when. If you might need 24/7 help, have poison-control on hand: Pet Poison Helpline (855-764-7661) or ASPCA Animal Poison Control (888-426-4435; they may charge a fee).

    \n

    \\n

    \n

    Checklist to bring (12 items):

    \n

    \\n

    \n

      \\n

      \n

    • Sealed sample of the suspected food or toy
    • \n

      \\n

      \n

    • Original packaging with lot/batch number (the code on the package)
    • \n

      \\n

      \n

    • Photos of vomit, stool, or the product
    • \n

      \\n

      \n

    • Exact timeline of events (times of exposure and when symptoms began)
    • \n

      \\n

      \n

    • List of current medications and supplements
    • \n

      \\n

      \n

    • Cat’s weight and age
    • \n

      \\n

      \n

    • Description of how much was likely eaten
    • \n

      \\n

      \n

    • Notes on other pets exposed and their symptoms
    • \n

      \\n

      \n

    • Any home remedies tried and when they were given
    • \n

      \\n

      \n

    • Contact info for other caretakers
    • \n

      \\n

      \n

    • Recent food brand and batch if available
    • \n

      \\n

      \n

    • Veterinary records of pre-existing conditions (like kidney disease or allergies)
    • \n

      \\n

    \n

    \\n

    \n

    Suggested questions to ask your veterinarian:

    \n

    \\n

    \n

      \\n

      \n

    1. What are the most likely causes of my cat’s symptoms?
    2. \n

      \\n

      \n

    3. Which tests do you recommend now, and why?
    4. \n

      \\n

      \n

    5. What immediate treatments do you suggest?
    6. \n

      \\n

      \n

    7. What are the estimated costs and how long might my cat stay in the clinic?
    8. \n

      \\n

      \n

    9. What should I watch for at home and when should I bring my cat back?
    10. \n

      \\n

      \n

    11. Should we send a sample to the manufacturer or report this incident?
    12. \n

      \\n

    \n

    \\n

    \n

    Final Words

    \n

    \\n

    \n

    Sudden vomiting, tremors, or trouble breathing? Act fast , those are the red flags that need immediate attention; isolate the source and call your vet or poison-control.

    \n

    \\n

    \n

    We ran through the minutes-to-hours timeline, GI (gastrointestinal) signs, neurologic and respiratory clues, what vets will test, safe at-home steps, treatments, and prevention tips for multi-cat homes.

    \n

    \\n

    \n

    Keep the owner checklist handy: recognizing symptoms of mold ingestion in cats early can change outcomes, and with quick care your busy household will be back to purrs and playful zoomies.

    \n

    \\n

    \n

    FAQ

    \n

    \\n

    \n

    \\n

    \n

    \\n

    \n

    What are the symptoms of mold ingestion in cats?

    \n

    \\n

    \n

    The symptoms of mold ingestion in cats include repeated vomiting, diarrhea (sometimes bloody), drooling, sudden lethargy, abdominal pain, tremors, seizures, breathing difficulty, nasal or eye bleeding, and collapse.

    \n

    \\n

    \n

    \\n

    \n

    \\n

    \n

    \\n

    \n

    What happens if my cat ate mold and how quickly will signs appear?

    \n

    \\n

    \n

    If your cat ate mold, signs often appear within minutes to hours; initial vomiting or diarrhea is common, while some mycotoxins (mold toxins) can cause delayed organ damage over days.

    \n

    \\n

    \n

    \\n

    \n

    \\n

    \n

    \\n

    \n

    Can mold kill cats?

    \n

    \\n

    \n

    Mold can kill cats in severe cases; heavy mycotoxin (mold toxin) exposure may cause seizures, hemorrhage, organ failure, and death, particularly without prompt veterinary care.

    \n

    \\n

    \n

    \\n

    \n

    \\n

    \n

    \\n

    \n

    What neurological signs can mold cause in cats?

    \n

    \\n

    \n

    Neurological signs from mold in cats include tremors, ataxia (stumbling), confusion, tonic-clonic seizures (convulsions), loss of awareness, and post-seizure disorientation; seizures over two minutes are an emergency.

    \n

    \\n

    \n

    \\n

    \n

    \\n

    \n

    \\n

    \n

    How should I treat mold exposure in cats at home?

    \n

    \\n

    \n

    To treat mold exposure in cats at home, remove access, seal a sample, give small sips of water if alert, and call your veterinarian or Pet Poison Helpline (855-764-7661); don’t induce vomiting unless directed.

    \n

    \\n

    \n

    \\n

    \n

    \\n

    \n

    \\n

    \n

    How are black mold exposures treated in cats?

    \n

    \\n

    \n

    Black mold (Stachybotrys) exposures are treated with supportive care: decontamination, IV fluids, antiemetics, anticonvulsants, oxygen, and specific care for bleeding or organ damage; prognosis depends on dose and prompt treatment.

    \n

    \\n

    \n

    \\n

    \n

    \\n

    \n

    \\n

    \n

    What are the warning signs of mold toxicity in cats?

    \n

    \\n

    \n

    The warning signs of mold toxicity include vomiting, bloody vomit or stool, uncontrolled seizures, severe tremors, labored breathing, collapse, nasal bleeding, sudden severe lethargy, jaundice, and decreased urine output.

    \n

    \\n

    \n

    \\n

    \n

    \\n

    \n

    \\n

    \n

    What eye or respiratory signs should I watch for after mold exposure?

    \n

    \\n

    \n

    Eye and respiratory signs after mold exposure include watery or inflamed eyes, persistent coughing or sneezing, wheeze, nasal discharge, nosebleeds, open-mouth breathing, and rapid respiration.

    \n

    \\n

    \n

    \\n

    \n

    \\n

    \n

    \\n

    \n

    What should I tell my vet if my cat ate mold?

    \n

    \\n

    \n

    Tell your vet the time of exposure, product and lot/batch info, approximate amount, photos or a sealed sample, exact symptom times, other pets affected, current meds, and your cat’s weight.

    \n

    \\n

    \n

    \\n

    \n

    \\n

    \n

    \\n

    \n

    Are natural or home remedies recommended for mold exposure in dogs?

    \n

    \\n

    \n

    Natural or home remedies for mold exposure in dogs are not recommended; remove the source, contact your veterinarian or poison-control hotlines, and avoid unproven supplements or human medications without veterinary approval.

    \n

    \\n

    \n

    \\n

    \n

    \\n

    \n

    \\n

    \n

    \n

    \\n”

    \n”

  • diet for active cats: feeding guidelines

    diet for active cats: feeding guidelines

    Think your active cat can eat the same as a couch cat? That’s a really common mistake. Ever watched your kitty bolt across the room and wondered where all that energy comes from?

    Active cats usually need about 30 kcal per lb (kcal = food Calories on labels), not the 20 kcal per lb many owners assume. So a 10-lb (pound) sprinter needs roughly 300 kcal a day, not 200. That extra hundred calories can be the difference between happy zoomies and slow, bored loafing.

    I’ll give you clear feeding targets, simple calorie math, and protein (muscle-building nutrient) focused tips so you can fuel the zoomies, protect lean muscle, and avoid accidental weight gain. No more guessing, um, promise.

    Worth every paw-print.

    At-a-glance feeding targets for adult active cats

    - At-a-glance feeding targets for adult active cats.jpg

    Quick rule of paw: aim for about 20 kcal per pound of your cat’s ideal body weight for everyday maintenance, and about 30 kcal per pound for very active or outdoor adults. (kcal = kilocalories, the “Calories” you see on pet-food labels.)

    So, math in plain terms: a 10-lb adult at maintenance needs roughly 200 kcal/day (20 × 10). A highly active 10-lb cat needs about 300 kcal/day (30 × 10). Simple. Really.

    Use your cat’s ideal body weight for planning, not their current overweight weight. For precise needs, use the RER formula: RER = 70 × [body weight in kg]^0.75 (RER = resting energy requirement; kg = kilograms). Then apply activity multipliers, check the Calorie calculation and portion sizes section for those numbers and step-by-step guidance. And, um, ask your vet if you’re unsure.

    Macronutrient headline: more protein for muscle (protein builds and preserves muscle), enough fat for steady energy (fat = concentrated calories), and limited carbs so you don’t overload calories. Think of it like fueling zoomies and long naps, balanced, muscle-supporting, and not too many extra carbs. Worth every paw-print.

    Calorie calculation and portion sizes for active cats (sample portion chart)

    - Calorie calculation and portion sizes for active cats (sample portion chart).jpg

    Base your cat’s daily food on their total calorie need, not just what the bag says. Start with the RER formula: RER = 70 × (body weight in kg)^0.75. RER means resting energy requirement (the bare minimum calorie amount your cat needs at rest). Then pick an activity factor with your veterinarian and multiply RER by that number to get MER (maintenance energy requirement, the daily calorie goal for an active cat). Think of the product label as a rough map. Measure, watch, and adjust.

    Quick conversion tips: assume dry kibble is about 400 kcal per cup (kcal means food calories) and a 3-oz wet can is about 80 kcal, but always check your brand’s label. Use a standard 8-oz measuring cup for quick scoops, or better yet weigh food on a kitchen scale for accuracy. Log treats and toppers too. Start with the calculated totals, then check weight and body health condition after 2 to 3 weeks and tweak portions by about 10 to 20 percent if your cat is gaining or losing too quickly.

    Pick the activity multiplier with your vet based on what your cat actually does, short indoor zoomies? Use a lower multiplier. Outdoors patrols or working cats? Use a higher one. Weigh-ins every couple weeks keep you from guessing. Worth the few minutes. Your cat will thank you with extra purrs.

    Body weight (lb) Activity level Calories/day (approx) Dry food (cups/day, assume 400 kcal/cup) Wet food (oz/day, assume 3-oz cans about 80 kcal)
    6 lb Maintenance / Active 120 / 180 kcal 0.30 / 0.45 cups 4.5 oz / 6.75 oz
    8 lb Maintenance / Active 160 / 240 kcal 0.40 / 0.60 cups 6 oz / 9 oz
    10 lb Maintenance / Active 200 / 300 kcal 0.50 / 0.75 cups 7.5 oz / 11.25 oz
    12 lb Maintenance / Active 240 / 360 kcal 0.60 / 0.90 cups 9 oz / 13.5 oz
    14 lb Maintenance / Active 280 / 420 kcal 0.70 / 1.05 cups 10.5 oz / 15.75 oz
    16 lb Maintenance / Active 320 / 480 kcal 0.80 / 1.20 cups 12 oz / 18 oz

    Protein, fat and micronutrient priorities in diets for active cats

    - Protein, fat and micronutrient priorities in diets for active cats.jpg

    Active cats need food built around high-quality, easy-to-digest protein. Think named meats first – chicken, turkey, salmon – not vague words like "meat" or "animal." Named proteins usually mean a better mix of amino acids (the building blocks of muscle) so your cat keeps its lean muscle through all that zooming and play. Look for an on-package statement that the food is complete and balanced (AAFCO – Association of American Feed Control Officials) and check the guaranteed analysis numbers, like crude protein and crude fat percentages. Higher protein numbers usually help maintain muscle during heavy play and training.

    Fat is your cat's concentrated fuel. It gives steady calories between sprints and helps the body absorb fat-soluble vitamins. Look for clear fat sources on the label and sensible calorie density so you’re fueling zoomies without adding too many carbs. Omega-3s – EPA and DHA (long-chain fish oils that reduce inflammation) – are especially useful. They support joints, soothe exercise-related inflammation, and keep coats shiny. It’s nice when food lists digestibility claims too – digestibility means how much of the food your cat actually absorbs.

    Supplements can plug real gaps, but use them carefully. Fish oil, specific amino-acid supplements, and probiotics can help when a diet falls short, but too many extras can unbalance nutrition and cause problems. Avoid homemade or vegetarian diets unless a board-certified veterinary nutritionist wrote the recipe – cats have unique needs and missing one nutrient can cause serious issues. When in doubt, ask your veterinarian before adding supplements or changing core foods. Seriously, ask them.

    Taurine, omega-3s and amino-acid priorities

    Taurine is a must-have amino acid for cats – it’s essential for heart and eye health. Low taurine causes real disease, so double-check that the diet supplies it. EPA and DHA (omega-3 fatty acids from fish oil) calm exercise-related inflammation, help joint comfort for active cats, and keep fur glossy and soft. Favor foods with named animal proteins, digestibility claims, and that AAFCO complete-and-balanced line – those three things together usually point to better protein quality.

    If your cat trains hard, competes, or has special medical needs, chat with your vet about targeted supplements and consider a nutritionist consult before trying homemade plans. Ever watched your kitty chase shadows? Feeding smart makes those moments even better. Worth every paw-print.

    Wet vs dry food and hydration strategies for active cats

    - Wet vs dry food and hydration strategies for active cats.jpg

    Wet food usually wins when it comes to moisture and taste. That rich, savory smell and soft texture get many thirsty cats to eat more fluids, which is perfect after a big play session when they need a quick rehydrate-and-recover meal. Ever watched your kitty lap up every last bit? Yeah, that.

    Dry kibble (dry, crunchy cat food) is handy. It’s easy to portion, stays fresh on the counter longer, and that satisfying crunch appeals to some chewers. If your cat is active, pick high-protein, low-carb (low-carbohydrate) kibbles so they get the energy they need without extra carbs.

    Simple hydration tricks that actually work: give at least one canned meal a day, canned food adds real moisture. Stir in a splash of warm water or a little low-sodium broth (broth with very little added salt) to make meals juicier and more tempting. For busy days, toss an unbreakable wet meal before you head out, that’s ten minutes of safe play and fluid intake.

    Place water where your cat already prowls. Put multiple fresh-water bowls around the house so your cat “finds” water during patrols. Try a cat water fountain (a circulating dish that keeps water moving and smelling fresher) and swap bowl types, some cats prefer shallow dishes, others a deeper bowl. Enrichment feeders (puzzle-style bowls that slow eating) can also help, movement during mealtime often makes cats sip more afterward.

    Food safety and timing matter. Don’t leave wet or raw-fed portions at room temperature for more than about two hours, and pop opened cans into the fridge right away. Dry kibble can sit out longer, but follow the maker’s guidance and toss any stale or contaminated food. For conversion math and portion tables, see the Calorie calculation and portion sizes section.

    Meal timing, pre- and post-exercise feeding for active cats (sample schedules and treat limits)

    - Meal timing, pre- and post-exercise feeding for active cats (sample schedules and treat limits).jpg

    Keep it simple. For most adult cats, two measured meals a day, once in the morning and once in the evening, matches their wake-and-hunt rhythm and makes portion control easy. If your cat bursts into short, intense play sessions, try three smaller meals spaced through the day so they have steady fuel without one heavy plate that sits on the tummy. Ever watched your kitty chase shadows? This helps them stay energized without overeating.

    Give a tiny pre-play snack about 15 to 30 minutes before a high-energy session to top off quick energy. A spoonful of wet food (canned food with extra moisture) or a few kibbles (dry food pieces) works great. Then after play, offer the main meal within 20 to 40 minutes to help recovery and hydration. Wet food is especially nice here because it adds moisture.

    Avoid a big meal right before a sprint. Small snack, lots of praise, then the main meal after cool-down. Really.

    Sample feeding schedules for active cats

    1. Two-meal adult schedule with a pre-evening-play snack
      Morning: give half the daily calories at wake. Evening: offer a small snack about 20 minutes before a 10 to 15 minute play burst, then serve the rest of the meal after your cat winds down.

    2. Three-meal spacing for highly active indoor cats
      Breakfast: 30% of daily calories (calories mean the energy your cat uses). Midday mini-meal: 20% before a short training or play session. Dinner: the remaining 50% after evening play.

    3. Mixed feeding plus puzzle-feeder approach for grazing plus measured meals
      Serve two measured canned meals and put the leftover dry portion in a puzzle feeder (a toy that hides food and makes your cat work for it) so your cat gets bits of food while staying busy.

    Treats should stay under about 10% of daily calories (yes, count them in the total). Pick high-protein, low-calorie treats for training so you don’t tip the balance. Worth every paw-print.

    Monitoring body condition, weight tracking and when to adjust an active cat’s diet

    - Monitoring body condition, weight tracking and when to adjust an active cats diet.jpg

    Use a simple body condition score (BCS) , a quick scale to judge fat versus muscle , and do hands-on checks to see where your cat sits. You should be able to feel the ribs with a light touch but not see them as sharp ridges. From above you want to see a clear waist. From the side there should be a gentle abdominal tuck (a slight upward curve under the belly). If the ribs are hard to feel, your cat is carrying extra fat; if the ribs are very obvious, your cat may need more calories (energy in food) or a vet visit.

    Weigh your cat once a week at the same time of day , morning before food is best , and write the numbers down so you spot trends, not one-off blips. Small changes are safer: tweak portions by about 10-20% and check back after two weeks to see how things move. For planned weight loss, most vets prefer gradual programs that cut total daily calories by up to about 25% while protecting lean muscle (muscle that helps your cat move) and keeping activity steady.

    Watch for red flags that mean a vet check is needed:

    • sudden changes in appetite
    • unexplained weight loss or gain
    • big changes in water use
    • vomiting or diarrhea
    • trouble jumping or moving like they used to
    • a dull, rough coat

    Obesity is common , about 61% of U.S. cats are overweight or obese , and extra weight raises the risk of diabetes and joint problems. So if something feels off, sooner vet attention can save a lot of trouble and help your cat get back to full zoomies. Ever watch them sprint from the kitchen to the couch and think, wow , lets keep them that happy?

    Special feeding considerations for active kittens, seniors, outdoor and working cats

    - Special feeding considerations for active kittens, seniors, outdoor and working cats.jpg

    Kittens are tiny calorie engines. Aim for about 50 to 60 kcal per pound of ideal body weight (kcal = food Calories). Feed small, frequent meals , about 3 to 4 times a day while they grow, so they have steady energy for play and development. Ever watched a kitten crash mid-play? That sudden nap is often hunger.

    Nursing queens need extra calories and usually more frequent feedings, so check with your veterinarian to set daily targets during pregnancy and lactation (nursing). Keep a close eye on body condition and litter-box output (poop frequency and consistency). Rapid weight swings or loose stools mean slow the changes and call your vet.

    Active outdoor or working adults often need about 30 kcal per pound of ideal body weight because they burn extra energy patrolling, hunting, or doing chores. Adjust calories for seasonal workload , colder months usually call for more fuel, light-duty times need less. Use the cat’s ideal weight when you calculate needs, not a temporary heavy or thin number, and measure portions so you don’t overshoot during busy seasons.

    Senior active cats may still need similar calories, but they can lose appetite, drop weight, or develop dental or medical issues that make eating hard. Offer softer food or smaller kibble pieces if teeth hurt, and consider therapeutic formulas (special vet diets for health problems) when your vet recommends them. When you change diets, do it gradually over about 7 to 10 days by mixing increasing amounts of the new food with the old, and watch weight, litter-box output, appetite, coat shine, and energy. If any of those checkpoints shift suddenly, call your veterinarian for a plan , better safe than sorry.

    Final Words

    Quick numbers: about 20 kcal (food calories) per pound of ideal body weight for maintenance, and about 30 kcal per pound for active or outdoor cats. A 10-lb cat = ~200 kcal/day maintenance, ~300 kcal/day when active.

    Use ideal body weight, not current obese weight. See the Calorie calculation section for the RER (resting energy requirement) and activity multipliers.

    Aim for higher protein, enough fat, limited carbs. Hydrate with wet meals or a fountain, time feedings around play, and track weight as you tweak. Keep this diet for active cats: feeding guidelines handy , happy, active kitties.

    FAQ

    Frequently asked questions

    How much dry food should I feed my cat per day and how does that compare to wet food?
    How much to feed depends on calories: about 20 kcal per pound of ideal body weight for maintenance and about 30 kcal per pound for active/outdoor cats. Dry kibble ≈ 400 kcal per cup; a 3-oz wet can ≈ 80 kcal.
    <dt>What does a cat diet chart by age look like?</dt>
    <dd>
      Kittens need roughly 50–60 kcal per pound and 3–4 meals daily. Adults need about 20 kcal per pound (30 kcal/lb for active/outdoor cats). Seniors may need portion or diet adjustments depending on health.
    </dd>
    
    <dt>How do I calculate my cat's calorie needs with a feeding calculator?</dt>
    <dd>
      Start with RER = 70 × (body weight in kg)^0.75 (resting energy requirement), then multiply by an activity factor to get daily calories. Ask your vet to choose the right multiplier for your cat.
    </dd>
    
    <dt>What can I feed a cat without commercial cat food and are homemade diets safe?</dt>
    <dd>
      You can feed a cat homemade diets, but they must be balanced and ideally formulated by a veterinary nutritionist. Plain human meals often lack taurine and other essential nutrients, so work with a pro to ensure safety.
    </dd>
    
    <dt>What are the cat nutritional requirement percentages for protein, fat and carbs?</dt>
    <dd>
      Cats need a diet high in animal protein, moderate-to-high fat, and minimal carbohydrates. Look for named animal protein sources, digestibility claims, and an AAFCO "complete and balanced" label.
    </dd>
    

  • Tonkinese cat exercise and enrichment needs

    Tonkinese cat exercise and enrichment needs

    Think Tonkinese are mellow couch buddies? Think again. These cats are bright, social, and love to be part of the action. Ever watched a Tonkinese tail twitch right before a lightning-fast pounce? Yeah, they’re playful and curious, and need daily brain and body time.

    Adults do best with about 30 to 60 minutes of activity a day. That can be chasing, climbing, or training. Kittens prefer lots of short sprints, many 3 to 5 minute bursts throughout the day. Older cats like gentler play, around 10 to 20 minutes per session, with slow moves and soft toys.

    Here’s an easy routine to keep them happy and out of trouble. Morning: a quick chase session or a teaser wand (like a fishing rod for cats) to wake up their hunting game. Midday: a puzzle feeder (food-dispensing toy) to make meals into a brain workout. Evening: a short training set, clicker training (reward-based training using a small clicker) or simple tricks, to tire their minds. Add perches (elevated resting spots) and hiding spots (boxes, tunnels) around the house so they can climb and snoop safely.

    Swap toys often to keep things fresh: wand toys, crinkly balls, soft chasers, and puzzle feeders are great. For busy days, toss an unbreakable ball before you leave, that’s ten minutes of safe play. Your cat’s whiskers will twitch. You’ll hear the satisfying thud of a tiny pounce. It’s fun, honestly.

    Do this and your Tonkinese stays sharp, less bored, and far less likely to act out. Worth every paw-print.

    Tonkinese Activity Overview: Exercise and Enrichment Needs Answered

    - Tonkinese Activity Overview Exercise and Enrichment Needs Answered.jpg

    Aim for about 30 to 60 minutes of active play each day for adult Tonkinese. Kittens usually do lots of short bursts, many 3 to 5 minute sessions that add up to 30 minutes or more. Older cats do better with gentle, lower-intensity activity, around 10 to 20 minutes a day. Think of these as target ranges to help you plan playtimes, puzzle meals, and climbing sessions.

    Of course, every cat is an individual. Health, personality, and life stage change these numbers, some Tonkinese want way more chase time, others are content with less. Check the Age & Health section for adjusted minute ranges and clinical precautions if your cat has medical limits or recent surgery.

    Tonkinese are social and clever, so not getting enough stimulation can lead to stress and behavior changes. Keep an eye on energy levels and mood. The Managing Behaviors section lists the full signs and vet triggers to watch for, so I won’t repeat them all here.

    Here’s a practical daily checklist to cover Tonkinese needs:

    • Physical play minutes per day (see adults/kittens/seniors above) , short chases, wand toys, and fetch keep hunting sequences intact and burn extra energy. Your cat’s whiskers will twitch as the toy zooms across the floor.

    • Mental tasks like puzzle feeders (food-dispensing toys) and target training (teach your cat to touch a stick or target with its nose) , these challenge the Tonkinese brain and scratch that scent-and-problem-solving itch.

    • Vertical access: perches, shelves, or cat trees (cat trees are multi-level climbing posts) , height lets them stalk, survey the room, and hide when they need a break.

    • Hiding and secure resting spots, such as covered beds or boxes , these let your cat finish stalking rituals and recharge away from household bustle.

    • Social interaction: interactive play, short training sessions, and gentle handling , Tonkinese thrive on company and these moments strengthen your bond.

    • Feeding enrichment, like foraging trays (spread kibble so they hunt for food) and treat-dispensing toys , slows down fast eaters and makes mealtimes more rewarding.

    • Rotate toys and new items every 3 to 7 days , novelty keeps prey-like interest fresh. Swap a feather one week for a crinkly ball the next, and watch their curiosity spark.

    Quick note: treat this as your daily checklist to keep a Tonkinese curious and content. Mix climbing, chasing, thinking, and company every day, and you’ll have a pretty happy, claw-tastic companion.

    Daily Play Needs for Tonkinese Cats: Templates and Sample Schedules

    - Daily Play Needs for Tonkinese Cats Templates and Sample Schedules.jpg

    These templates give you ready-to-use, minute-by-minute plans you can copy to hit the Activity Overview goals for Tonkinese play. Timing play around meals and using tasty, high-value treats helps motivate your cat and links hunting sequences to predictable rewards. Ever watched a Tonkinese zoom after a feather? This makes that hunt feel earned.

    Short bursts work great for high-energy kittens, homes with multiple cats where attention is shared, and busy people who can sneak in tiny sessions throughout the day. Longer, single sessions fit folks who prefer an evening routine. If you live alone, you can swap several short daytime bursts for one longer evening chase and still reach the same daily total.

    1. Kitten template (ages 8–24 weeks) , lots of short bursts; total 30–60 minutes (8–12 sessions of 3–5 minutes)
    • Wakeup: 4 x 3 minute wand chase (12 minutes) , quick stalking, pouncing practice, and silly leaps that make your heart melt.
    • Mid-morning: 3 x 3 minute puzzle-play (9 minutes) , small puzzles or treat tosses; puzzle-feeder (toy that drops kibble when nudged) works well.
    • Lunchtime mini-training: 1 x 4 minute target or clicker work (4 minutes) , short, focused tricks that build confidence.
    • Afternoon: 3 x 4 minute fetch or ambush games (12 minutes) , gentle running and retrieval to burn extra zoomies.
    • Evening: 2 x 5 minute longer chase sessions (10 minutes) , let them make big leaps and a satisfying capture.
      Note: Kittens nap a lot; short rests between bursts are normal and actually help learning.
    1. Adult template (1–7 years) , balanced routine to reach 30–60+ minutes
    • Morning: 2 x 5 minute feather-wand sessions (10 minutes) , a lively start that wakes the hunting muscles.
    • Midday: 15–20 minute puzzle-feeder meal (15–20 minutes) , mental work while they eat keeps them busy and satisfied.
    • Late afternoon: 10–15 minute interactive chase (10–15 minutes) , use a motorized ball or wand to vary the prey.
    • Evening: 10 minute targeted training or fetch (10 minutes) , calm finish with a clear capture and praise.
    • Single-owner swap option: combine midday and late afternoon into one 25–35 minute evening session if you can’t play during the day.
    1. Senior / medically adjusted template (8+ years or mobility-limited) , low-impact 10–20 total minutes
    • Morning: 1 gentle 5–8 minute scent-work session with a snuffle mat (5–8 minutes) , snuffle mat (fabric nose-work mat) encourages foraging without jumps.
    • Midday: 5–7 minute calm wand play near the floor or short target training (5–7 minutes) , keep movements slow and close to the ground.
    • Evening: 5 minute window-perch observation or passive feeder activity (5 minutes) , visual stimulation and easy rewards.
      Note: Favor scent and puzzle work over high jumps; watching birds through a window can be as rewarding as a chase.

    Session structure checklist (use for every session)

    1. Warm-up: 30–60 seconds of slow stalking or an attention-getter.
    2. High-intensity play window: 2–5 minutes of active chasing (scale to kitten, adult, or senior).
    3. Controlled successful capture: let them have one clear catch to finish the hunt.
    4. Cool-down: 30–60 seconds of calm interaction or gentle petting.
    5. Reward timing: give treats or praise within 1–2 seconds of the desired behavior.
    6. Session cap: stop before fatigue or boredom; jot down the outcome and play type so you can rotate activities later.

    Quick tips

    • High-value treats near meals boost motivation, but keep portions in mind so daily food totals stay balanced.
    • Rotate toys every few days to keep novelty fresh. Think of it like opening a tiny present for your cat.
    • Log sessions if you want to track progress or spot patterns: morning hyper, afternoon snooze, that kind of thing.
      Worth every paw-print.

    Tonkinese cat exercise and enrichment needs

    - Indoor Exercise and Vertical Space Measured Installation Specs and Equipment Table.jpg

    See the Activity Overview for why vertical access matters. This quick guide focuses on measurements and safety notes for installing perches, shelves, and trees so your Tonkinese can climb, stalk, and snooze in real comfort. Vertical space lowers territorial stress and helps them move around safely, and window perches give visual stimulation plus warm sun naps that match an adult cat's 12-16 hours of sleep a day. Ever watched your kitty chase a sunbeam? Pure joy.

    Here’s a simple cheat sheet with sizes, uses, and price ranges to help you choose the right pieces for your home. Worth every paw-print.

    Product Type Suggested Height/Size Best For Estimated Price Range
    Multi-level cat tree (multi-level climbing post) Height 4-7 ft; base 24″ x 24″ Active adult Tonkinese who love jumping, napping, and high-perch surveying $60-$250
    Wall-shelf walkway Shelf depth 8-12″; vertical spacing 12-24″ between tiers Vertical travel and giving cats their own zones; stagger routes for multi-cat homes $20-$120 (per shelf + installation)
    Window perch Platform width 12-18″; weight rating 20+ lbs Birdwatching and supervised sun-resting; great for visual stimulation near windows $15-$80
    Compact tall apartment tree Height 5-6 ft; footprint ≤18″ x 18″ Vertical activity for small homes; slim design fits narrow spaces $40-$180

    Anchor wall shelves to studs (the vertical wood framing inside walls) and avoid placing heavy ornaments near perches so nothing tips or falls. Check mounts and fasteners each week. It’s a small habit that prevents big accidents.

    Choose low-slip surfaces so paws get a secure grip , carpet or sisal (sisal is a rough plant fiber that claws love) work well. Aim for stable platforms with edges they can peek over, and keep higher spots free of breakable stuff. Your Tonkinese will appreciate the safe routes, and you’ll appreciate fewer mad dashes at 3 a.m. Claw-tastic, right?

    Toys, Puzzle Feeders, and Foraging: Types, Difficulty Levels, Rotation Cadence, and Placement

    - Toys, Puzzle Feeders, and Foraging Types, Difficulty Levels, Rotation Cadence, and Placement.jpg

    This bit helps you pick toys and feeders, decide how often to swap them, and choose where to put them so your Tonkinese stays sharp without changing total daily play. Think of the hunting steps: spot, stalk, chase, catch. Ever watch those whiskers twitch when the chase starts? Good stuff.

    • Feather wand – Easy – rotate every 3 to 4 days – Use on open floors or low furniture where leaps and pounces are safe. The flutter and soft taps on carpet make your cat go wild. Tip: tuck it behind a couch for surprise ambush play.
    • Motorized erratic mouse (motorized toy that moves unpredictably; battery powered) – Medium – rotate every 5 to 7 days – Best on carpeted spots to soften landings. Supervise first runs and turn it off if your cat gets too frantic.
    • Ball track set – Easy – rotate every 4 to 7 days – Put at floor level in a living room corner for batting and rolling. The steady click and roll keep attention without needing you.
    • Treat-dispensing ball – Medium – rotate every 3 to 7 days – Leave during short absences or at mealtimes to slow eating. It’s food-motivated play, so stash it in places your cat already likes to snack.
    • Puzzle box (multi-step puzzle feeder; food hiding toy that needs several moves) – Hard – rotate every 7 to 14 days – Floor or low table works. Watch the first tries to set the right challenge level. Oops, you might need to simplify at first.
    • Snuffle mat (fabric nose-work mat) – Easy to Medium – refresh and rotate every 3 to 5 days – Scatter kibble or treats and place near the feeding area or a sunny windowsill for scent work between naps. Your cat noses around like it’s treasure hunting.
    • Automated wand system – Medium – rotate every 7 days – Place near a sofa or the base of a climbing tree and supervise remote sessions. Check batteries and cords for safety before each use.
    • Crinkle or jingle toys – Easy – rotate every 3 to 5 days – Tuck inside boxes or behind furniture for ambush-style play and surprise rewards. That rustle gets attention fast.
    • Hide-and-seek feeder jars – Medium – rotate every 5 to 10 days – Hide under shallow boxes or low shelves so your cat paws, sniffs, and problem solves to earn food.

    Placement basics: put high-reward puzzles near feeding spots so food foraging links to meals, and keep chase toys in clear open areas to avoid tumbles. Quiet sniffing tools like snuffle mats should sit close to favorite perches so scent play happens between naps. Rotate toys on a schedule so novelty stays fresh and the hunt feels real.

    Safety and upkeep matter. Check toys for loose bits, frayed fabric, or broken parts and toss or repair them. Supervise battery or corded toys and remove small pieces that could be swallowed. For busy days, toss out a single unbreakable ball before you head out, that’s ten minutes of safe play. Worth every paw-print.

    Tonkinese cat exercise and enrichment needs

    - Training Protocols, Checklists, and Outdoor Options.jpg

    Training helps your Tonkinese focus, gets their brain working, and turns play into a safe, predictable routine. Keep sessions short and positive, and give rewards right away so learning feels like a fun game, not a chore. (See Activity Overview for daily minute goals.) You’ll build skills and a stronger bond at the same time.

    Leash Training Protocol

    Phase 1 – Harness habituation indoors:

    • Let your cat sniff and explore the harness first. (Harness: a soft, padded vest that spreads pressure.)
    • Put the harness on for just a minute, then take it off. Do that a few times over several days.
    • Give treats and calm praise while they wear it so the harness becomes a good thing.
    • Notice small comfort signs, like relaxed blinking or purring. That’s progress.

    Phase 2 – Indoor leash walks:

    • When they accept the harness, try 5 to 10-minute indoor leash (leash: a short lead) sessions.
    • Walk slowly and let the cat lead. If they crouch, freeze, or meow in a worried way, stop and give space.
    • Only move forward when they walk confidently for a few sessions. Slow wins here.

    Phase 3 – Controlled yard exposure:

    • Pick a quiet, fenced yard on a calm day for short supervised outings.
    • Keep the first outings under 10 minutes and watch for stress signs: flattened ears, tail-thumping, or hiding.
    • Stay close and make it about sniffing and exploring, not long treks.

    Phase 4 – Short neighborhood walks:

    • Do this only after your cat is steady indoors and calm in the yard.
    • Start with very short routes and head home before they tire or get anxious.
    • It’s okay to cut a walk short. Your cat remembers good outings.

    Harness & safety checklist

    • Proper fit: snug but allow two fingers of space at neck and chest.
    • Escape check: let them move and give gentle tugs to make sure they can’t slip out.
    • Lead length: keep a short lead, about 4 to 6 feet, to avoid sudden pulls.
    • Supervision: always watch your cat; never attach a leash to a collar alone.
    • ID tag and microchip (a tiny ID implant) should be up to date.
    • Emergency recall cue: use one clear word or a whistle so you can redirect quickly.

    Teaching Fetch and Clicker Basics

    Short, food-timed sessions with instant rewards make fetch click. (Clicker: a small sound device that marks the exact right moment.) You can teach fetch in simple steps and keep it playful.

    1. Target the toy: show the toy and reward any nose or paw touch.
    2. Reward the touch: click or treat the moment they touch the toy.
    3. Reward pick-up: give a treat when they grab the toy in their mouth.
    4. Shape return: reward when they carry the toy toward you, even a few steps.
    5. Add a cue like “fetch” the instant they pick it up.
    6. Increase distance and fade the food lure: toss a little farther, reward returns, then use treats less often.
    7. Phase to reliability: aim for steady reps, then keep occasional treats to maintain interest.

    Make sessions short, about 1 to 2 minutes of focused work, and end on a happy note. Ever watched your Tonk chase a toy across the room and pause, ears forward, like they solved a mystery? That’s the sweet spot.

    Session progression checklist

    • Sustained attention for 60 to 90 seconds during the drill.
    • Successful touch or pick-up in 3 of 5 tries.
    • Calm transfer of the toy back to a resting spot after play.
    • No signs of stress or over-arousal during or after the session.
    • Increase the challenge only after you see repeated success.

    Worth every paw-print.

    Age & Health Adjusted Exercise: Clinical Precautions and Minute Ranges

    - Age  Health Adjusted Exercise Clinical Precautions and Minute Ranges.jpg

    Kittens do best with lots of short play bursts, about 3–5 minutes each, spread through the day to total 30–60+ minutes. Think of them as practice rounds: stalk, pounce, capture, then nap. Ever watched a kitten go full ninja, then flop over and snore? Keep a close eye after vaccinations or surgery. Stop play and call your vet if they limp, seem unusually tired, or refuse food.

    Adults should aim for 30–60+ minutes a day made up of short bursts plus at least one longer 10–20 minute session that mimics a full hunt sequence. Mix in toys that encourage stalking, chasing, and a satisfying capture. Neutered or indoor-only Tonkinese often need extra brain work and activity to manage weight, so use puzzle feeders (toys that hide food) and treat-dispensing toys, and add a little extra chase time if the scale starts creeping up.

    Seniors and cats with medical limits should get 10–20 minutes a day of low-impact activity. Try snuffle mats (scent foraging mats), gentle wand play kept near the floor, short target training (touching a stick with their nose), and calm window-watching. Cut intensity for arthritis (joint inflammation causing pain and stiffness), cardiac issues (heart-related problems), or other mobility concerns, and chat with your vet about slowly increasing activity.

    Worth every paw-print.

    Clinical Precautions & Recovery
    Pause activity and call your vet if your cat has labored breathing during or after play.
    Avoid high-jump play for cats with known joint disease or chronic limping.
    Post-op: follow your vet’s activity restrictions and reintroduce enrichment slowly and gently.
    If weight changes by more than 10% in 4–8 weeks, schedule a vet visit for a checkup and a feeding plan.
    Use low-impact enrichment (snuffle mats, gentle wand near the floor, short target training) for mobility-limited cats. See the detailed templates for day-to-day timing.

    Tonkinese cat exercise and enrichment needs

    - DIY  Small-space Solutions Build Steps and Swap Schedule.jpg

    DIY builds work great in small apartments and for tight budgets. Cardboard, fabric scraps, and a bit of tape can become little mystery zones that invite stalking, pawing, and scent games. These projects give indoor-only Tonkinese chances to climb a bit, solve tiny puzzles, and run through the hunt sequence without eating up your whole living room.

    Keep things fresh by rotating items every 3 to 7 days, per the Activity Overview cadence, so your Tonk treats each setup like a new game. Move things around the apartment too, so hiding spots feel exciting again. Ever watched your cat go from bored to full-on pounce mode when something looks slightly different? Magic.

    1. Cardboard ambush box:
      Make a simple hideout by cutting two entry holes and a small peephole, taping the floor for strength, and tucking in a soft towel. Materials: sturdy box (corrugated cardboard), box cutter (utility knife), packing tape, scrap towel. Build time: 10 to 20 minutes. Rotate or swap every 3 to 7 days. Place near a climbing route or low shelf so surprise pounces feel natural.

    2. DIY snuffle mat:
      Tie strips of fleece into a rubber mat frame and trim the ends so it looks fluffy, then hide kibble in the pockets for scent-search play. Materials: rubber mat (entry mat), fleece strips (soft knit fabric). Build time: 30 to 45 minutes. Wash and refresh it every 3 to 5 days. Put it by the feeding area or on a windowsill for a sniff-and-hunt break.

    3. Treat jars for foraging:
      Clean jars, make small holes in the lids for kibble to fall through, and close them loosely so fiddling is part of the fun. Materials: glass or plastic jars, drill or strong knife (use with care). Build time: 10 to 15 minutes. Swap contents or move them every 5 to 7 days. Tuck jars inside a low cabinet or under a shallow box for extra challenge.

    4. Window-seat hammock:
      Attach a fabric sling to a small bracket so your cat can lounge in a sunny spot, then test the weight carefully before trusting it. Materials: sturdy fabric, wall anchors (plastic or metal anchors for drywall), screws (metal fasteners). Build time: 30 to 60 minutes. Check fastenings weekly and rotate perches every two weeks. Mount it at a sunny window so your cat can watch birds and sunbathe.

    5. Stacked-box climb:
      Stack boxes, tape them together, and cut stepping holes so your Tonkinese can hop up and weave through levels, with a heavy book or weight at the base for balance. Materials: multiple boxes, packing tape, small cushion. Build time: 20 to 30 minutes. Rearrange the stack every 4 to 7 days. Put it against a wall for extra stability.

    6. Mini obstacle course:
      Lay out tunnels, set low jumps with folded towels, and mark target zones with small mats for a short, fun workout circuit. Materials: collapsible tunnel (fabric tube that folds flat), towels, rugs or mats. Build time: 20 to 40 minutes. Change the layout every 3 to 7 days to keep it interesting. Use the central living area so play becomes a shared moment.

    7. Frozen treat cube station:
      Pour water or low-sodium broth into a shallow tray, add a few tiny treats, and freeze flat for a cold, slow-snack that encourages pawing. Materials: shallow tray (ice tray or baking pan), small treats. Prep time: about 10 minutes plus freezing. Offer once or twice a week. Serve on tile or a protected surface to catch drips.

    8. Low-shelf ambush trail:
      Mount narrow shelves at staggered heights, glue little rug pieces for grip, and test each shelf before your cat explores, creating a secret hallway route to patrol. Materials: narrow shelves, screws, small rug pieces. Build time: 60 to 90 minutes. Change the shelf order every 7 to 14 days. Install in a hallway or behind furniture for a sneaky royal passage.

    Safety notes, quick:
    Always check that fastenings hold, watch for loose bits your cat could swallow, and supervise new setups until you know they’re safe. Worth every paw-print.

    Tonkinese cat exercise and enrichment needs

    - Managing Problem Behaviors, Monitoring Thresholds, Weekly Checklist, and Vet Triggers.jpg

    Start a simple check-in habit so small changes don’t turn into big problems. Do a quick weekly run-through of play time, weight, and mood, and compare the totals to your Activity Overview targets instead of guessing. Jot down minutes of active play, puzzle success, and favorite resting spots so you can spot real patterns, your notes are the best proof when you talk with a vet. Ever watched your Tonk’s whiskers twitch as a toy rolls? Those little details matter.

    Tech and smart toys can do a lot of the heavy lifting while you’re out. Activity trackers (wearable collar sensors), motion cameras (video devices that record movement), puzzle feeders (feeders that make your cat work to get food), and timed treat dispensers (automatic treat release devices) all help keep your cat engaged. Keep an eye on treat frequency and calories, treats add up fast, so log portions and swap in low-calorie options when you use food-based toys for play while you’re away. Tossing out measured snacks before you leave gives you ten minutes of safe play and peace of mind.

    If you see any of these lasting signs, talk to your vet. They’re simple flags that something’s off, and catching problems early helps everyone feel less stressed.

    • Persistent pacing or restlessness for more than 2 weeks despite rotated enrichment – check with your vet.
    • New or increased destructive behavior ongoing more than 2 weeks – vet or behavior consult advised.
    • Excessive vocalizing at odd times, or a sudden change in how they sound, lasting more than 1 week – get a vet review.
    • Over-grooming, skin wounds, or big coat changes – veterinary exam recommended.
    • Unexplained weight loss or gain greater than 10 percent in 4 to 8 weeks – schedule a vet visit.
    • Labored breathing, collapse, or a big drop in mobility after play – seek immediate veterinary attention.
    Item Target Frequency How to Measure Notes
    Active play minutes Weekly total meeting Activity Overview targets Sum minutes logged Note intensity and type – chase, puzzle, scent work; write a quick note on enthusiasm
    Puzzle-feeder sessions 3 to 7 sessions / week Count sessions and level of difficulty Track success rate and time to finish to spot boredom or skill gains
    Vertical access checks Daily Visual inspection of shelves and trees Make sure mounts and perches are solid; look for wobble or loose screws
    Scratching station use Daily or weekly Count uses or note wear Replace sisal (natural fiber rope) or pads when worn so they stay inviting
    Weight check Weekly or biweekly Scale reading (small pet scale) Log percent change versus prior readings and flag big shifts
    Behavioral notes Daily One-line note on mood or changes Flag anything lasting more than 2 weeks for follow-up

    Helpful tools and small habits that actually work:

    • Activity tracker collar or app for step counts and rest trends (great for shy cats).
    • Scheduled video check-ins or motion-activated clips so you can watch behavior while you’re out.
    • A simple food/treat log to track calories and feeder usage; measure treats before you leave.
    • Puzzle complexity log to record boredom or skill progress, bump it up slowly.
    • Neighbor or friend check rotation for longer absences so your cat gets human time.
    • Clear vet referral triggers that match the list above so you act fast when something changes.

    Worth every paw-print.

    Final Words

    In the action, we gave exact daily targets: adults 30-60+ minutes, kittens many 3-5 minute bursts totaling 30+ minutes, seniors 10-20 minutes, and templates to hit them.

    We mapped vertical specs, toy types with rotation cadence, training steps, DIY small-space builds, and clinical tweaks by life stage so you can match play to physical needs.

    Put these ideas to work: swap toys every 3-7 days, use snuffle mats and puzzle feeders, and keep a quick weekly check. Tend to your Tonkinese cat exercise and enrichment needs with short, joyful sessions, and you’ll feel that happy purr.

    FAQ

    Tonkinese cat FAQ

    Tonkinese cat exercise and enrichment needs at home

    Adults: 30–60+ minutes per day of active play. Kittens: many short 3–5 minute bursts totaling 30+ minutes. Seniors: 10–20 minutes of low‑impact activity. Provide physical play, mental challenges (puzzle feeders, training), vertical perches, hiding spots and regularly rotated toys.

    What do Tonkinese cats need?

    Daily physical play, mental challenges (puzzle feeders, training), vertical access like perches, regular social interaction, and a variety of toys to satisfy hunting and social instincts.

    How much enrichment does a cat need?

    Match activity to life stage: adults 30–60+ minutes/day, kittens many short bursts totaling 30+ minutes, seniors 10–20 minutes/day. Split activity into short sessions and include puzzle or foraging work.

    Tonkinese cat personality

    Tonkinese are social, playful and intelligent — a mix of Siamese energy and Burmese cuddliness. They are curious, sometimes vocal, quick to bond, and thrive on interaction and mental challenge.

    Tonkinese chocolate and black Tonkinese cat

    “Chocolate” describes a warm brown coat. Black Tonkinese do exist but are less common; consult reputable breeders or a registry for accepted color classes and markings.

    Tonkinese cat lifespan

    Typically 12–16+ years with proper care. Good diet, regular veterinary checks, and daily enrichment support longevity and quality of life.

    Tonkinese kittens for sale

    Kittens come from breeders and rescues. Expect waiting lists; ask for health clearances, evidence of early socialization, and, when possible, meet the parents to judge temperament.

    Tonkinese vs Siamese

    Tonkinese blend Siamese curiosity with Burmese mellowing. They are often less loudly vocal, stockier, and have a more even temperament while remaining playful.

    Tonkinese cat shedding

    Shedding is moderate. Their short, close-lying coat sheds year‑round with heavier seasonal molts. Weekly brushing reduces loose hair and promotes bonding.

    What is the 3-3-3 rule for cats?

    The 3-3-3 rule: three days of initial shock, three weeks to settle in, and three months to fully adjust to a new home. It’s a guideline for patient, calm introductions.

    What are enrichment activities for cats?

    Examples: wand play, puzzle feeders (food toys), snuffle mats for scent foraging, window perches, vertical shelves, target training, and short fetch or chase sessions.

    How do Tonkinese compare to Burmese, Ragdoll, Russian Blue, and Birman?

    Tonkinese are highly social and playful. Compared to Burmese they share sociability; compared to Ragdolls they are more active; compared to Russian Blues they are less reserved; and compared to Birmans they are generally more interactive. They combine energy and sociability with a friendly, engaging temperament.

    Related Articles

  • Abyssinian cat play needs and best toys

    Abyssinian cat play needs and best toys

    Think your Abyssinian naps all day? Nope. These clever furballs run on short, explosive zoomies and mental puzzles. Your cat’s happiest when its whiskers twitch and it gets to pounce, think quick bursts, not marathon play. Ever watched your kitty chase a shadow? Pure joy.

    Here’s the simple three-step routine that keeps mischief low and joy high. Aim for about 30 minutes total, split into short sessions across the day.

    • Morning sprint: 10–15 minutes of fast chasing to burn off overnight energy.
    • Midday brain break: 10 minutes of puzzle play to work that clever brain.
    • Evening wind-down: a short 5-minute burst to calm the zoomies before bedtime.

    Toy picks that actually work. Feather wand (a stick with feathers that mimics prey) for chase and jump play. Puzzle feeder (a food-dispensing toy) to make meals into a game. Small balls or crinkle toys for quick, satisfying pounces and the thunk of a rolling toy across the floor. Teaser wand (like a fishing rod for cats) is perfect for those gravity-defying leaps.

    Quick tips so toys last and your cat stays safe. Supervise string and feather play so nothing gets swallowed. Rotate toys every few days so they stay exciting. Toss an unbreakable ball before you head out for ten minutes of safe solo play, works wonders on busy mornings. My cat once leaped six feet for a feather toy. True story.

    Give the routine a try and tweak times to your cat’s vibe. It’s fun. It’s simple. And your Aby will be way less likely to redecorate your curtains. Worth every paw-print.

    Abyssinian cat play needs answered

    - Abyssinian cat play needs answered.jpg

    Aim for about 30 minutes a day, split into short bursts. Start this exact 3-step routine today. These clever, energetic cats focus in quick bursts and get bored by long, slow drills. Morning play burns extra energy. A short evening session tames the zoomies and gives social time, which cuts down on mischief when you’re away. Human-led play helps keep a steady daily routine for Abyssinians.

    1. Morning sprint (10 minutes, physical)
      Start with a 5-minute warm-up chase using a feather wand (stick toy with feathers). Then do a 3-minute high-speed ball toss , lightweight fetch with a soft ball works great. Finish with 2 minutes of slow wand pulls to simulate the catch. Your cat’s whiskers will twitch as the toy darts under the couch. Fun and fast. Really.

    2. Midday brain break (15 minutes, mental)
      Begin with a 3-minute scent hunt , hide a few pieces of kibble around a room. Next, 10 minutes with a puzzle feeder (food-dispensing toy) to make mealtime work the brain. End with 2 minutes of treats and praise. It’s like a coffee break for your cat’s mind. Ever seen an Aby pounce on a hidden prize? Pure joy.

    3. Evening wind-down (5 to 10 minutes, mixed)
      Start with a 3-minute laser or short wand burst (laser pointer works as a fast, light target). Follow with 2 to 5 minutes of gentle fetch or plush-prey capture to let your cat finish the hunt. End on calm petting or a quick clicker reward. Nice and mellow before bed.

    Quick toy tips and DIYs

    • Feather wand (grab and wave): Great for short chase sprints and the satisfying capture ritual.
    • DIY kibble ball (plastic bottle with kibble inside): Fast to make and perfect for rolling during mealtimes.
    • Cardboard tunnel (simple hide-and-seek tube): Cheap, instant, and great for stalking practice , toss a toy inside and lure your cat through.

    Small notes: if you’ve only got five minutes, pick one high-energy burst. If your day’s packed, put a quick puzzle feeder out before you leave , that’s ten minutes of safe play. Oops, make that ten minutes of sanity for you too. Worth every paw-print.

    Top interactive toys for Abyssinian cats (canonical toy list and comparison)

    - Top interactive toys for Abyssinian cats (canonical toy list and comparison).jpg

    Abyssinians glow when toys move and when toys make them think. Motion wakes their stalking-chase-pounce loop: short jerks, sudden stops, and a believable "catch" hold their attention. Puzzle toys give their clever brains something to do and turn meals into playtime. Ever watched your kitty’s whiskers twitch as a ball rolls? Yeah, that.

    Match the toy to the goal. Want sprint practice? Pick fast, unpredictable motion. Need calm mental work? Use quiet, food-based puzzles. Want recall and teamwork? Try lightweight fetch toys. Wand toys let you set the tempo and finish with a satisfying capture. Puzzle feeders (treat-dispensing toys) turn eating into a hunt so your cat stays busy while you’re out. Motorized mouse toys (battery-powered toys with a small motor, a tiny electric mechanism) and automated lasers (moving laser units) give surprise motion when you can’t play hands-on.

    Best wand play routines

    Keep wand sessions short and rhythmic. Do 2-6 second bursts , dart, freeze, flutter , then pause for 1-3 seconds. That start-stop pattern tricks prey instincts and keeps focus. Let the cat "catch" a soft plush or a treat at the end so the session finishes with a win.

    Build intensity slowly. If ears tip back or the tail lashes, slow down or wobble gently; if whiskers push forward and eyes lock on, add quick darts and a few long pulls down the floor. Finish with a capture moment and 30-60 seconds of calm petting or a treat so the last memory is success. Worth every paw-print.

    • Feather wand (stick toy with feathers): Great for short chase sprints and easy speed control so you can copy real prey movement.
    • Puzzle feeder (treat-dispensing toy): Makes meals into a brain game and lowers boredom while you’re gone.
    • Motorized mouse (battery-powered toy with small motor): Skitters in unpredictable ways to spark hunting drives.
    • Automated laser (moving laser unit): Perfect for quick, high-speed focus without much effort from you.
    • Small ball (light, rollable): Great for fetch and independent chases across floors and low furniture.
    • Plush prey (soft stuffed toy): Lets cats do the catch-and-kill ritual safely and practice bite control.
    • Treat-dispensing cube (multi-chamber puzzle box): Ramps up difficulty for smart cats and stretches snack time into play.
    • Cat tunnel (collapsible hiding tube, foldable): Creates ambush spots and adds depth to stalking games.
    Toy Type Best Use Durability Price Range
    Feather wand Interactive chase with owner 6-12 months; noise: low; supervision: occasional $
    Puzzle feeder Meal-time mental stimulation 12-36 months; noise: low; supervision: none $$
    Motorized mouse Unpredictable solo motion 6-18 months; noise: medium; supervision: occasional $$
    Automated laser Fast visual chase 12-24 months; noise: low; supervision: occasional $$
    Small ball Fetch and rolling chases 12-36 months; noise: low; supervision: none $
    Plush prey Capture and bite practice 3-12 months; noise: low; supervision: occasional $
    Treat-dispensing cube Advanced puzzle challenges 12-36 months; noise: low; supervision: none $$
    Cat tunnel Stalking, ambush, and hiding 12-48 months; noise: low; supervision: occasional $-$$

    Abyssinian kitten play tips and transitioning toys for growth stages

    - Abyssinian kitten play tips and transitioning toys for growth stages.jpg

    Kittens are little bundles of zooms and curiosity, so keep play short, snappy, and fun. Five to ten minute sessions match their energy and give them quick wins, which boosts confidence and keeps them coming back for more. Ever watched your kitty chase a shadow and suddenly act like a tiny tiger? Yeah, that.

    Pair play with meals and naps to build a routine. Try a 5–10 minute play session right before mealtime so activity leads into eating, then a calm 5-minute wind-down after food to help digestion and tame the zoomies. It’s simple, and your cat will thank you with a satisfied purr.

    Swap toys as teeth and strength change. Start with soft, lightweight prey toys like plush mice, then move to tougher fetch toys and durable plush (plush with reinforced seams and strong fabric) as their bite gets stronger. If a kitten chews through seams or clearly dislikes a texture, retire that toy and upgrade to something sturdier.

    Here are six short play routines you can try. They’re designed to teach skills and give you clear milestones to watch for.

    1. Warm-up wand routine

      • 5 minute wand warm-up; 2 minute rest; 3 minute soft fetch.
      • Reward: one kibble piece and petting.
      • Goal: build focus and recall. Milestone: responds to name twice during play.
      • Think of the wand like a fishing pole for cats, flutters, then pause, then reward.
    2. Hide-and-seek kibble hunt

      • 4 minute hide-and-seek with kibble; 3 minute easy puzzle feeder (a toy that hides food).
      • Reward: small wet treat.
      • Goal: scent work and problem solving. Milestone: finds all treats in under 7 minutes.
      • Cute to watch: whiskers twitching as they sniff each corner.
    3. Clicker practice

      • 6 minute clicker (clicker is a small training device): quick 1-second clicks to mark grabbing a plush; give a treat after three clicks; rest 2 minutes.
      • Goal: build cue response. Milestone: sits on cue before play.
      • Oops, make that three clicks then treat, consistency is the secret sauce.
    4. Tunnel ambush game

      • 5 minute tunnel ambush; 2 minute calm.
      • Reward: short grooming or gentle petting.
      • Goal: stalking practice and confidence in hiding spots. Milestone: uses the tunnel without fear.
      • Bonus: cats love the sound and feel of the tunnel; you’ll hear tiny paws zip.
    5. Gentle tug for bite control

      • 8 minute gentle tug with a soft toy only, include 30 second pauses.
      • Reward: praise and a quiet cuddle.
      • Goal: teach bite inhibition. Milestone: releases on cue.
      • Keep the toy soft and stretchy so teeth meet resistance but don’t hurt.
    6. Supervised water curiosity

      • 3 minute shallow bowl splash (supervised); 2 minute dry towel play.
      • Reward: a treat.
      • Goal: safe, calm exposure to water. Milestone: sniffs water without backing away.
      • Some kittens love a little splash; others just poke with a paw. Either is fine.

    Use the Top interactive toys section for specific picks and keep age tweaks simple. For younger kittens reduce tether force (how hard the toy pulls), choose softer textures like microfleece (soft, fuzzy fabric), and lower puzzle difficulty. For older kittens step up durability and challenge.

    A quick note for safety: always supervise new toys, toss any toy with exposed stuffing or ripped seams, and rotate toys so each one feels fresh. Watching a kitten pounce on a well-loved toy is one of life’s small joys. Worth every paw-print.

    High-energy Abyssinian play ideas and routines (detailed session blueprints)

    - High-energy Abyssinian play ideas and routines (detailed session blueprints).jpg

    These blueprints take the quick starters and turn them into full micro-plans you can run on repeat. Each one gives a clear sequence so your Abyssinian gets a real hunt-like workout instead of scattered zoomies. Think short, focused games that build stamina, speed, and focus, while keeping it fun for both of you.

    1. Stalk-Chase Circuit (Goal: stamina & stealth)
      Tools: tunnel (collapsible cat tunnel), feather wand (wand with feathers), small ball.
      Steps: Start with a 1 minute scent trail using 6 kibble pieces spaced out. Then do 3 minutes of wand bursts: 2 to 4 seconds of fast wiggle, 1 second pause, repeat. Lure the feather toy into the tunnel for a 30 second ambush, let your cat pounce and hide a bit. Follow with 3 minutes of rolling-ball sprints across the room, then two 30 second jumps onto a 12 inch platform (12 inches equals about one foot). Finish with 2 minutes of calm capture using a plush prey toy so your cat can settle. Your Aby will love the chase and the cozy capture at the end.

    2. Vertical Power Ladder (Goal: jumping strength)
      Tools: three platforms (8 inches, 16 inches, 24 inches), wand.
      Steps: Warm up 2 minutes with slow wand teasing. Do five reps of floor-to-8 inch jumps, resting about 20 seconds between reps. Move up: five reps to 16 inches, rest 30 seconds. Try three reps to 24 inches, rest 45 seconds. End with 2 minutes of slow wand play and a gentle petting cooldown. It’s like a staircase for their legs, builds power without overdoing it.

    3. Treat Trail Sprint (Goal: quick bursts + scent work)
      Tools: tiny treats or kibble (about 10 pieces, total ~1/2 teaspoon), timer.
      Steps: Space 10 pieces about 3 to 5 feet apart, then set a timer and let your cat sprint the trail. Aim to finish under 3 minutes. Reward with 2 extra treats at the end and 1 minute of calm petting. It’s a short, tasty interval, fast, focused, and rewarding.

    4. Tunnel Ambush Series (Goal: stalking accuracy)
      Tools: two tunnels or boxes, motorized mouse (battery toy that zips around).
      Steps: Hide the motorized mouse at a tunnel entrance for 1 minute to pique curiosity. Do 3 minutes of guided ambushes with the wand at the tunnel mouth so your cat practices waiting and striking. Let 2 minutes of free pounce on the motorized toy follow. Finish with 1 minute of treat rewards, three small kibbles. This hones patience and the thrill of a surprise catch.

    5. Interval Fetch & Recall (Goal: recall + sprinting)
      Tools: lightweight ball, clicker or name cue.
      Steps: Run 10 quick rounds: throw (about 20 seconds of chasing), call your cat back by name and give 1 small treat, then rest 30 seconds between rounds. Total time is around 12 minutes. Aim for a reliable return after about 5 rounds. Teaching recall like this makes playtime productive and helps on busy days.

    6. Puzzle Burst Combo (Goal: brain + cardio)
      Tools: medium-difficulty puzzle feeder (a treat-dispensing toy), motorized mouse.
      Steps: Start 8 minutes with the puzzle feeder, scatter about half a meal so they work for it. Then 4 minutes of a motorized chase to get the heart rate up. Finish with 2 minutes of wand capture and 1 minute of brushing or petting. It’s food for the brain and a sprint for the body.

    7. Slow-Prey Stalking Drill (Goal: patience + focus)
      Tools: long wand, plush prey.
      Steps: Spend about 12 minutes doing slow strokes with the wand: 10 to 20 second slow moves, then 10 second pauses. Hide the plush under a light cover for three ambush attempts. Give a tiny treat after each capture. This builds focus and teaches controlled hunting, perfect for the thoughtful Aby.

    Harness walks and supervised outdoor play
    Introduce outdoor gear slowly. Harness (soft vest harness) means a small, secure vest you can clip a leash to. Day 1: 2 to 3 minutes indoors in the harness. Day 2: 5 minutes in a quiet hallway. Day 3: 8 minutes outside on a leash. Add about 3 to 5 minutes each day so you reach 15 minutes by the end of the week. Always check fit, watch for stress signs, and consult the Safety section for gear materials and inspection routines. Never leave a harnessed cat unattended.

    Sample weekly rotation ideas

    • Monday = puzzle feeders + scent games
    • Tuesday = vertical ladder + wand routines
    • Wednesday = motorized solo session + short wand cooldown

    Reference Solo enrichment for rotation schedules and maintenance.

    Climbing and vertical enrichment: best cat trees, shelves, and placement for Abyssinian activity

    - Climbing and vertical enrichment best cat trees, shelves, and placement for Abyssinian activity.jpg

    Abyssinians live for height. Give them a multi-level cat tree with platforms, tunnels, and built-in scratchers and you’ll see them sprint, leap, and perch to watch birds at the window. Their whiskers twitch when something outside moves, so put climbing gear near a sunny window for visual stimulation , sun puddles, birds, and street action keep them entertained. Align platforms with likely jump paths so landings are easy on the joints and muscles.

    Match platform spacing to your cat’s reach and hop power. Low steps: 8-12 inches (20-30 cm). Mid-level steps: 12-18 inches (30-45 cm). Top-perch access: 48-72 inches (4-6 feet) in taller setups. Use sturdy materials and a wide base so towers don’t wobble. If space is tight, secure a freestanding tree to the wall for extra stability.

    Ever watched an Abyssinian launch like a tiny panther? It’s music to a cat-lover’s ears. So think about scratcher placement, too , cats love to land and immediately rake a post. That satisfying thud, then the scratch, is part of the fun.

    Installing wall shelves safely

    Find studs first with a stud finder (studs = the vertical framing behind drywall). Mark the center of each stud. Choose shelves rated for at least 50 pounds per shelf if you expect multiple cats or chunky loungers. Space shelves so jumps are about 10-18 inches apart, depending on your cat’s age and agility.

    Use cat-safe fasteners: lag bolts into studs (thick heavy screws for serious hold), toggle bolts for hollow-wall anchoring (bolts that expand behind the wall), or heavy-duty wall anchors rated for the expected load. Don’t use small screws or flimsy anchors that might pull out when your cat launches.

    Installation steps, simple and safe:

    • Measure and mark stud centers.
    • Drill pilot holes sized for your bolts.
    • Mount brackets with the recommended hardware.
    • Do a press-sit test using a weighted bag to mimic a cat.
    • Let your cat try a low-risk hop last. If anything creaks or shifts, tighten or remount.

    A few quick specs to keep handy:

    • Platform size: 12 x 12 inches minimum; 14 x 18 inches ideal for loafing.
    • Scratching surface: 6-12 inches vertical post or a 12 x 8 inch horizontal pad in sisal (coarse rope-like fiber).
    • Clearance under platform: 6-8 inches for stalking and launch space.
    • Stability base: 24 x 24 inches footprint recommended for tall towers.
    • Material: solid wood or plywood (layers of glued wood; stronger than particle board, which is compressed wood).
    • Warranty: look for at least a 1-year structural guarantee.

    One small tip: if your cat is super athletic, add staggered landing pads so they can build momentum without overreaching. For busy days, toss an unbreakable ball on a lower platform before you head out , that’s ten minutes of safe play right there.

    Model/Type Height Platforms Durability Rating (1-5) Best For
    Tower (freestanding) 48-72 in 4-6 (platforms ~12 x 14 in) 4 High-energy jumpers; small apartments ($100-$300)
    Multi-level condo 36-60 in 3-5 (platforms ~14 x 18 in) 3 Cats who love hideouts and sleep spots ($80-$250)
    Wall shelf set Flexible (mounted) 3-8 (platforms 12 x 12 in typical) 5 Space-saving vertical routes; window approaches ($50-$200)
    Modular system Customizable Variable (mix of shelves & perches) 4 Families who want expandability and tailored routes ($150-$500)

    Solo enrichment solutions: puzzle feeders, motorized toys, rotation, and maintenance

    - Solo enrichment solutions puzzle feeders, motorized toys, rotation, and maintenance.jpg

    Solo enrichment helps an Abyssinian stay busy when you’re out, and keeps boredom from turning into shredded curtains or couch disasters. Puzzle feeders (treat-dispensing toys) give brain work and reward, while motorized mouse toys (battery-powered toys with a small motor, a tiny electric mechanism) add prey-like motion so your cat can stalk and pounce without a person tied to the session. Ever watched whiskers twitch as a toy skitters across the floor? Yep, that.

    Rotation and basic upkeep keep toys feeling new and working right. Toys left out all the time get boring fast, and motors can quietly quit if you never check them. A little routine , swap, clean, test , saves you surprises and keeps your cat entertained.

    1. Easy , Kibble ball (1–2 weeks)

      • What: rolling ball with holes that drops one or two kibbles per roll.
      • Goal: slow feeding and playful rolling practice. Think of it like a snack and a mini workout in one.
      • When to level up: if your cat empties it in under five minutes for three sessions in a row, try something trickier.
    2. Easy-medium , Slow feeder bowl (2–4 weeks)

      • What: raised maze-style bowl (a bowl with ridges or bumps that slows eating).
      • Goal: stretch mealtime, help digestion, and add a bit of thinking.
      • When to level up: if meals finish in less than eight minutes for three meals, increase the challenge.
    3. Medium , Sliding-panel feeder (2–4 weeks)

      • What: a manual puzzle with sliding covers that hide treats.
      • Goal: paw coordination and basic reasoning. Your cat learns cause and effect while you sip your coffee.
      • When to level up: if your cat solves it in under five minutes across three tries.
    4. Hard , Multi-chamber puzzle (4+ weeks)

      • What: layered puzzle with compartments, levers, or tunnels that need steps to reach rewards.
      • Goal: longer problem solving and persistence training. These feel like escape rooms for cats.
      • When to level up: switch to harder layouts after about two weeks of consistent success.
    5. Advanced , Feeder with timed release (4+ weeks)

      • What: programmable dispenser that paces meals across hours.
      • Goal: long-term engagement and portion control when you’re gone for a while. Great for busy days.
      • When to use: once simpler puzzles are emptied too quickly, this steadies the feeding schedule.

    Rotation plan and maintenance checklist
    Keep two labeled bins of solo toys and swap one bin every seven days. That keeps novelty high, dust low, and your cat curious. Quick maintenance rules: check batteries monthly, replace alkaline batteries every three to six months for frequently used motor toys, or recharge rechargeables about once a month. Wipe plastic and silicone feeders weekly with warm soapy water, deep-clean puzzle parts monthly, and inspect seams, gears, and small pieces weekly for wear or loose bits.

    Maintenance steps, quick list:

    • Swap: alternate bins every seven days.
    • Clean: wipe weekly, deep-clean monthly.
    • Batteries: test monthly, replace alkaline every 3–6 months for heavy use, recharge rechargeables monthly.
    • Inspect: look at seams, gears, wheels, and small pieces once a week.

    Quick troubleshooting for motorized toys

    • Battery reset: remove batteries for 30 seconds, then reinstall and test.
    • Motor cleaning: blow out lint and hair with compressed air, then run the toy empty for about ten seconds.
    • Noise diagnosis: if you hear grinding or squeal, open the housing and check for debris or loose gears; stop use until fixed.
    • Basic run test: a toy should run for at least ten seconds on fresh batteries. If it fails, retire or repair.
    • Retire when moving parts wobble, wiring is exposed, or parts are cracked. Safety first.

    A few extra tips, because I can’t help myself: try hiding a puzzle in a towel for a sniffing challenge, or toss a kibble ball down the hall for a sprint before you leave. Worth every paw-print.

    Safety, toy materials, inspection, and maintenance for Abyssinian play gear

    - Safety, toy materials, inspection, and maintenance for Abyssinian play gear.jpg

    Abyssinians love to pounce, bat, and shred , so safety matters. Major hazards are loose parts, exposed stuffing, dangling strings, and tiny bits your cat could swallow. Hide electrical cords, keep toxic plants and little knickknacks out of reach, and scan the room before playtime. Ever watched your kitty chase shadows? A quick check keeps that fun from turning risky.

    Daily checklist

    • Look for detached strings, beads, or bells; remove anything smaller than 1.25 inches / 3 cm (roughly a quarter) right away.
    • Check plush toys for frayed seams or loose stitching; if stuffing peeks out, tag the toy and retire it.
    • Sweep or vacuum for small broken plastic pieces from balls or puzzle toys, those bits can hide in carpet fibers.

    Weekly checklist

    • Give seams and attachment points a gentle tug for 5-10 seconds to find weak spots before they fail.
    • Inspect tether toys and wand connections for splinters or cracked dowels (wood rods).
    • Check squeakers (small sealed noise devices) and sewn parts for chewing damage or sharp edges that could cut whiskers or tongues.

    Monthly checklist

    • Run motorized toys (toys with a small electric motor) and listen for grinding, whining, or odd rhythms; unusual sounds mean repair or retire.
    • Verify battery compartments close securely and battery contacts (metal connectors) are not corroded.
    • Look for exposed wiring or cracked housings on electronics; stop using the toy at the first crack.

    Retirement rules

    • Retire any toy that shows stuffing, loose small parts, or material breakdown. Heavy-use toys often need replacement in about 2-6 months.
    • In truth, if something looks iffy, it probably is. Worth every paw-print to be safe.

    Cleaning and repairs

    • Machine wash fabric toys (fabric = washable cloth) on a gentle cycle; a wash bag helps keep bits together.
    • Hand wash toys with glued parts or squeakers; remove the squeaker or batteries first.
    • Air dry or tumble on low. Never put toys with electronics or batteries in the dryer.
    • If seams keep splitting or stuffing is exposed after a wash, retire the toy.

    Batteries and electronics

    • Store spare batteries in a cool, dry spot away from curious paws.
    • Replace alkaline batteries (single-use batteries) every 3-6 months with heavy play. Rechargeables (batteries you charge) should be recharged per the maker’s instructions, or about once a month if your cat plays a lot.
    • If a battery gets hot, bulges, smells odd, or leaks, stop using the toy, remove batteries with gloves, and replace the item. Dispose of damaged batteries safely.

    A tiny story
    I once found a bell lodged under the couch, yikes. Since then I toss a quick toy audit into my morning routine. Ten minutes of checking means hours of safer, happier play for both of you.

    DIY and budget-friendly Abyssinian toys: projects, materials, and safety notes

    - DIY and budget-friendly Abyssinian toys projects, materials, and safety notes.jpg

    Pick stuff that’s tough, non-toxic, and easy to wash. Good basics to have on hand: cotton socks (adult crew size), 16–20 oz PET water bottles (PET is a clear recyclable plastic), sisal rope (1/4 inch thick; sisal is a coarse natural fiber used for scratching), wooden dowels 12–18 inches long (a smooth wooden rod, like a broom-handle core), and feathers about 3–4 inches long. Bring a sewing needle and strong thread, scissors, a ruler, and a hot-glue gun only for parts your cat won’t chew. Make sure any small bits are bigger than 1.25 inches / 3 cm, and stitch seams where your cat might bite instead of relying on glue.

    1. Sock crinkle toy

      • Materials: 1 adult crew sock, 6–8 inches of crinkle material (from a food-safe wrapper) or a layered foil sheet, 1 tbsp catnip (optional).
      • Steps: Stuff the crinkle material and catnip into the toe so it makes a crunchy center your cat can pounce on. Tie a tight knot, fold any extra sock back, and stitch across the seam twice so it won’t pop open. Trim loose threads.
      • Build time: 8–10 minutes.
      • Safety checklist: Check stitches regularly. No exposed sharp foil edges. Toss if the sock starts to fray or the crinkle material pokes out.
    2. Cardboard puzzle box

      • Materials: medium corrugated box (about 12 x 12 x 8 inches), box cutter, tape.
      • Steps: Cut round holes about 2–3 inches across for paws and peek-ins. Make a couple of sliding flaps or hidden pockets and hide kibble or a small toy inside. Tape all cut edges smooth so nothing catches whiskers.
      • Build time: 15–20 minutes.
      • Safety: Remove any loose tape strips. Replace the box if it gets soggy or crushed.
    3. Treat-bottle dispenser

      • Materials: 16–20 oz PET bottle, marker, drill or sharp tool, 1 strip duct tape.
      • Steps: Mark three half-inch holes around the bottle so kibble can tumble out. Drill or carefully cut the holes, remove the cap, fill with kibble, and tape the cap on if you don’t want your cat opening it. Roll the bottle for treats to fall out.
      • Build time: 10 minutes.
      • Safety: Sand or cover any sharp plastic edges. Retire the bottle if it cracks or splinters.
    4. Feather wand DIY

      • Materials: 12–18 inch wooden dowel, 6–8 inch ribbon, 3 feathers, non-toxic glue, thread.
      • Steps: Think of this like fishing for cats. Tie the ribbon to the dowel, bind the feathers together with thread, then glue and stitch them to the ribbon so they stay put during dramatic leaps. Finish the joint with tape for extra hold.
      • Build time: 12 minutes.
      • Safety: Double-stitch the feather base and never leave the wand unattended while your cat is playing with the loose end.
    5. Simple tunnel from boxes

      • Materials: three medium boxes, box cutter, duct tape.
      • Steps: Cut doorways in each box, tape them end-to-end to make a tunnel, and reinforce the seams where the boxes meet. Cut a few peep-holes for pounces and sneaky ambushes.
      • Build time: 20–30 minutes.
      • Safety: Check for collapsed sections or crushed corners. Replace panels if they get too soft or torn.
    6. Puzzle cup stack

      • Materials: 6 sturdy plastic cups (no small handles), treats.
      • Steps: Turn cups upside down and stack them in a pyramid. Hide treats under random cups and show your Aby how to paw or nudge cups to find snacks. Repeat with different arrangements to keep it fresh.
      • Build time: 5 minutes.
      • Safety: Avoid brittle cups that can crack. Retire if you see hairline fractures.

    Quick care notes: rotate toys so they stay new-feeling, and do a short inspection before each play session for loose threads, cracks, or chewed bits. For rotation and battery-free maintenance schedules, see the Solo enrichment section; for inspection rules and retirement thresholds visit the Safety section.

    Keep an eye on wear, and have fun testing what your Aby loves. They’ll tell you fast.

    Worth every paw-print.

    Measuring play impact and adapting for age, health, and multi-cat households

    - Measuring play impact and adapting for age, health, and multi-cat households.jpg

    Each week, watch a few simple signs: activity minutes, appetite, weight, and mood. Jot a quick note after play sessions so patterns jump out fast. Ever watched your kitty tuck in after a romp and thought, "Yep, that was a win"? That's the vibe we want.

    • Eager approach to toys: a bright sign. Keep the session length and repeat schedule.
    • Quick eating after play: good news. Try playing before meals to help appetite.
    • Flattened ears or tail lashing during play (common signs of overstimulation in cats): stop right away. Give 5 to 10 minutes calm time, then next time shave about 5 minutes off the active bits.
    • Sudden hard biting or repeated swatting that stops play (early play aggression): pause play. Swap to a puzzle feeder (a toy that makes cats work for kibble) for 10 to 15 minutes, then bring back low-intensity play.
    • Weight loss or drop in appetite: track food daily. Call your vet if the change is more than 5 percent in two weeks, and favor low-impact puzzle feeders.
    • Multi-cat chasing that turns into one cat hogging a toy: give each cat its own toy set and run staggered 10-minute sessions so no single cat hoards playtime.
    • Slower recovery, stiffness, or a limp after play (senior or injured cats): cut jump heights and sprint lengths; switch to gentle floor chases and puzzle feeders.
    Date Activity Duration (min) Behavioral Notes Follow-up Action
    2026-01-10 Wand sprint 10 Engaged, returned on name Repeat same routine
    2026-01-12 Puzzle feeder 15 Ate slowly, alert Increase puzzle difficulty next week
    2026-01-15 Fetch 8 Tail lash mid-play Stop; shorten future sessions by 5 min
    2026-01-18 Motorized mouse 12 Two cats fought over toy Give separate toys; stagger play by 10 min
    2026-01-21 Low-intensity wand 6 Older cat joined calmly Keep low jump heights; repeat daily
    2026-01-24 Treat trail 4 Quick sprints, seemed tired after Shorten sprints; add 3 min rest between runs
    2026-01-28 Puzzle + wand 20 Happy, steady eating after Keep schedule; rotate toys next week

    For seniors or injured cats, reduce vertical work: lower jump heights to 6 to 8 inches (about 15 to 20 cm) and keep mid-level platforms around 10 to 12 inches (25 to 30 cm). Slow the wand stroke rate to 2 to 3 second moves with 3 to 5 second pauses (stroke rate means how fast you move the wand, measured in seconds per stroke). Favor puzzle feeders and gentle floor-level chases over big leaps.

    In multi-cat homes, stagger sessions by 10 to 15 minutes or give each cat a dedicated toy set to avoid competition. Use the Solo enrichment and Top interactive toys sections for specific gear and rotation ideas. Little changes like that stop squabbles and keep everyone feline fine.

    Worth every paw-print.

    Final Words

    Start with the bottom line: aim for ~30 minutes/day split into short sessions, use the 3-step routine, expand with the seven micro-plans, lean on the canonical toy list, vertical setups, solo enrichment, safety checks, DIY builds, and tracking tools.

    Short, frequent interactive play keeps attention sharp and cuts overstimulation risk. Morning bursts burn excess energy. Evening sessions tame zoomies, and human-led play wards off separation boredom.

    Keep this guide handy so you'll meet Abyssinian cat play needs and best toys for happy, healthy pounces and less furniture damage.
    Worth every paw-print.

    FAQ

    Frequently Asked Questions — Abyssinian Cats

    What do Abyssinian cats need?

    Abyssinian cats need daily interactive play (about 30 minutes), vertical climbing space, toys for play, scratching surfaces, a consistent feeding routine, regular vet care, and plenty of social time to stay happy and healthy.

    What do Abyssinian cats like to do? Do Abyssinians play fetch?

    Abyssinian cats like climbing, stalking, chasing moving toys, and solving puzzles. Many Abyssinians do play fetch, happily returning small balls or plush prey for repeat chases and extra bonding time.

    How much daily playtime do Abyssinians need and what’s a simple routine?

    Abyssinians need about 30 minutes of active play daily, split into short sessions—try 3×10 minutes (morning, afternoon, evening) using a wand chase, a quick puzzle feeder, then a gentle cooldown.

    What toys suit Abyssinians?

    Toys that suit Abyssinians move or challenge their mind: feather wand, motorized mouse, puzzle feeder (treat-dispensing toy), tunnels, lightweight balls, treat cubes, plush prey, and automated lasers for fast chase bursts.

    What are the 10 things a cat needs?

    The ten things a cat needs are nutritious food, fresh water, a clean litter box, a scratching post, vertical climbing space, daily play toys, regular vet care, grooming, a safe home, and an ID/microchip (tiny ID under the skin).

    What is an Abyssinian cat like — personality, colors, and health facts?

    An Abyssinian is active, curious, and social, often very people-focused; common colors include ruddy, red, blue, and fawn. Healthwise they’re generally sturdy but can face dental disease, kidney issues, or pyruvate kinase (PK) deficiency (blood disorder).

    How do I find an Abyssinian kitten for sale and what should I check?

    To find an Abyssinian kitten for sale, seek reputable breeders or rescue groups; check vaccination records, health clearances, parents’ temperament, genetic testing (screen for inherited conditions), a written contract, and a recent vet exam.

    Related Articles

  • Are unbreakable cat balls safe for kittens

    Are unbreakable cat balls safe for kittens

    About those "unbreakable" cat balls , they’re not automatically safe for kittens. Labels are mostly marketing. So don’t skip the sniff test: size, materials, and how the inside is sealed matter more than the name on the box. Ever watched a kitten chew like it’s auditioning for a shredding contest? Yeah.

    Pick materials that actually hold up. Food-grade silicone (safe for contact with food) or natural rubber (chewy and springy) are better than thin, brittle plastics. Look for low-toxicity materials (unlikely to poison if a little gets in their mouth) and chew-resistant construction (hard to shred into tiny pieces). You want something with a nice bounce and no flaky edges.

    Size and sealed internals are deal-makers. The ball should be too big to swallow but comfy to bat around. Check that any seams are tightly sealed and there are no small parts that can pop out. And watch the first play sessions, supervise until you’re sure the toy won’t fall apart.

    I learned this the hard way. My kitten turned a "tough" ball into confetti in minutes. Oops. So trust testing over the label, and give new toys a short, supervised trial run. Worth the few minutes for peace of mind.

    Quick checklist:

    • Right size: not a choking hazard.
    • Good materials: food-grade silicone or natural rubber over brittle plastic.
    • Sealed well: no loose bits or holes.
    • Supervise early play: watch for chewing or breakage.

    Are unbreakable cat balls safe for kittens

    - Immediate verdict and quick-rules for kitten play.jpg

    Short answer: not automatically. "Unbreakable" is a marketing word, and whether a ball is safe comes down to size, what it’s made of, how it’s built, and if you keep an eye on playtime.

    • Size: about 1.25 to 2.0 in. in diameter for most kittens. Never use toys smaller than 1.0 in. or you risk choking.
    • Materials: look for food-grade silicone (safe, non-toxic), natural rubber (chew-resilient), or BPA-free plastics (plastic without bisphenol A, a chemical you want to avoid). If you see thin, brittle plastic, pass.
    • Age: most kittens can try small, sturdy balls around 8 weeks, but heavy chewers need extra caution.
    • Supervision: watch the first few sessions. Toss it, watch the chase, listen for weird crunches, and pull the toy if you see cracking or tiny bits.

    Before first use, inspect the toy closely and give it a sniff, odd smells can mean bad materials or chemicals. Toss it right away if it cracks, tears, or starts shedding pieces. Ask the maker for test reports or warranty info, and prefer toys with sealed internals rather than removable batteries or parts that can come loose. Also, check with your vet if you’re unsure about a specific material or if your kitten is a determined chewer.

    My kitten once went full ninja on a supposedly unbreakable ball, um, lesson learned: supervision matters. Worth every paw-print.

    Materials, testing, and verification methods

    - Materials, testing, and verification methods.jpg

    Calling a toy "unbreakable" is cute. It doesn't tell you much. The materials and real test data tell the real story.

    Food-grade silicone (silicone safe for contact with food) and natural rubber (rubber from plants, chewy and springy) are the top picks for low toxicity and bite resistance. Silicone is usually firmer. Rubber is softer and may smell at first. TPE (thermoplastic elastomer, a soft plastic that behaves like rubber) and composite rubbers sit in the middle. Thin, brittle hard plastics can crack and send out sharp shards under repeated chewing, so skip those for heavy chewers. Ever watched your cat try to eat a plastic toy? Not pretty.

    Surface coatings, paints, and glued seams are common weak spots. When they flake or wear off they can make sharp edges and add chemical risk. Internal bits like bells, LEDs, squeakers, and batteries bring extra ways to fail unless they are permanently encapsulated (fully sealed inside the toy). Battery housings are a special worry. Coin cells can be swallowed and cause chemical burns if punctured, so choose designs where batteries are not user-removable.

    Ask for these tests and what they measure. Tensile or tear testing shows how easily material rips. Puncture resistance tells you how well a surface stands up to a bite. Fatigue or chew-cycle testing simulates repeated biting over time. Accelerated aging (UV and heat) mimics long-term wear. Chemical assays check for phthalates, lead, and BPA. Third-party lab reports are more trustworthy than a vendor label. Look for ASTM or CPSIA references (ASTM is a standards group; CPSIA is U.S. consumer product safety rules often cited for small parts and chemical limits) or CE-style marks where they apply. A clear warranty or replacement policy is a practical sign the maker trusts their product.

    A quick checklist you can use when shopping or emailing a maker:

    1. Ask for named test reports and the lab that ran them. Request tensile, puncture, chew-cycle, and chemical assay results.
    2. Check product pages and packaging for ASTM, CPSIA, or CE marks and plain non-toxic pet toy labels.
    3. Search recall databases and user incident reports for the brand or model.
    4. Confirm internals are permanently sealed and battery housings are non-user-removable or child-proof.
    5. Prefer brands that offer an explicit warranty or replacement policy for early failure.

    Worth every paw-print.

    Design and age considerations: size, shape, teething, and hollow vs solid tradeoffs

    - Design and age considerations size, shape, teething, and hollow vs solid tradeoffs.jpg

    Pick a ball for the kitten’s mouth, not for a full-grown cat. The rule of thumb: if the ball can slip past the front teeth and move toward the throat, it’s the wrong size. You want a toy that’s easy to bat and pick up, but too big to swallow. Watch how your kitten carries a test toy in their mouth , that tells you more than any label ever will. Kittens get overexcited during mouthing and play, so size matters most then.

    Holes and openings can actually help , they let water drain and air get through if the toy covers a muzzle, which lowers the risk of suffocating. But poorly sized holes can catch whiskers or a toe, so check shapes and edges first. Holes need smoothed edges and sensible spacing to avoid snagging whiskers or digits (toes). For hollow versus solid toys, it’s a tradeoff: hollow ones can collapse or shred, while solid ones won’t, but they might be heavier.

    Teething kittens want softer, a little bouncy materials that give under a bite, like soft silicone (a rubbery, bendy material) or natural rubber (an elastic sap-based material). That eases pressure on new teeth and helps prevent splintering. Too hard and you risk dental stress. Too soft and bits can shear off. Thin-walled hollow balls feel light and fun, but they can crack, shred into strips, or lose internal parts. Thick-walled hollow designs resist collapse and stay lightweight. Solid balls don’t collapse, but they can be heavy and focus force on baby teeth during aggressive chewing.

    Keep an eye out for warning signs: hairline cracks, tiny flakes, pin-prick holes, a sudden loss of weight (missing innards), or rough edges after chewing. If you spot any of those, pull the toy and replace it , kitten mouths heal fast, and we want them to stay healthy. Worth every paw-print.

    Feature Rationale / Failure modes
    Diameter Fit-to-mouth and choking risk versus playability. Failure mode: toy small enough to be swallowed.
    Openings/Holes Allow airflow and drainage but can trap whiskers or digits (toes). Failure mode: entrapment or snagging.
    Hollow vs Solid Hollow can collapse or shred; solid avoids collapse but may strain jaws and teeth.
    Surface/Texture Smooth hard surfaces resist shredding; textured ones can trap saliva and need cleaning. Failure mode: abrasion, flaking, or buildup.

    Are unbreakable cat balls safe for kittens

    - Supervision, cleaning, rotation, and discard procedures.jpg

    Start every new ball with a short, watched play session. The first 10 to 20 minutes are the most important. Watch your kitten chew and carry the ball so you can spot intense chewing or any loose bits fast. Ever watched your kitty try to swallow a toy? Yeah, better safe than sorry.

    Only leave a ball out unsupervised if it’s clearly oversized and has no small, detachable parts (things a kitten could pull off and swallow). If a toy has a battery or small pieces, keep it for supervised play only.

    Wash toys after heavy use, or at least once a week. Use warm water, mild dish soap, rinse well, and let the toy air dry completely before storing. If the maker says the toy is dishwasher-safe (safe to run in the dishwasher), follow those instructions. Store toys dry to help prevent mold and mildew.

    Quick checklist , look over toys before and after play:

    • Check for cracks in hard plastic (sturdy polymer material).
    • Check for tears or soft spots in fabric.
    • Check seams and glue lines for separation.
    • Check for exposed internals (things inside the toy, like stuffing or motors).
    • Check for sharp or rough edges that could scratch a paw.
    • Check for odd chemical smells or strong odors.
    • Confirm no missing parts.
    • Confirm battery housings are intact and sealed (the place where batteries sit).

    Rotate toys weekly to spread out wear and keep play interesting. That also slows how fast any single ball breaks down. Keep a dry bin out of direct sun for storage so heat and moisture don’t weaken materials. When you’re supervising, watch how your kitten carries and chews the ball , that tells you if the design is too easy to shred.

    When to throw a toy away? Toss it right away if you see hairline cracks, sharp flakes, exposed stuffing, loose internals, or a strange chemical smell. Inspect toys before and after play; once you notice damage, don’t risk a small piece becoming a snack.

    Worth every paw-print.

    Are unbreakable cat balls safe for kittens

    - Safer alternatives and a cautious buying checklist.jpg

    Kittens mouth and chew everything with heroic enthusiasm, so tiny novelty balls can be risky. Choose toys that cut the swallowing hazard, or save small things for times you can watch them. Ever watched your kitty chase shadows? That’s play you don’t have to worry about.

    Good substitutes:

    • Larger non-swallowable balls that are too big to fit in a kitten’s mouth. They roll and bat like the real thing, without the choke risk.
    • Soft fabric or felt balls for supervised play. They feel cozy and make gentle thuds on the floor.
    • Track-and-ball toys where the ball stays inside the track. Your cat gets the chase, and the ball can’t escape.
    • Oversized treat-dispensing toys that won’t pull apart. Treats keep interest high and the parts stay put.
    • Wand or teaser toys that keep play at arm’s length. Think fishing rod for cats, easy for you, thrilling for them.

    Buying checklist – look for these before you click buy:

    • Confirm labeled materials, like food-grade silicone (silicone safe for contact with food), natural rubber (elastic plant-based rubber), or BPA-free plastics (plastic without bisphenol A). Ask the maker for test details if anything seems vague.
    • Prefer toys with permanently sealed internals and no user-removable batteries or coin cells (small flat round batteries). Those bits are the most dangerous if pulled out.
    • Favor brands that publish durability test methods or offer a warranty or replacement promise. That tells you they back their gear.
    • Check washability and whether the toy can be dried fully to prevent mold. A toy that stays damp is a no-go.
    • Avoid loose strings, glued-on trims, or small removable attachments that can pull off during play.
    • Look up user reports for breakage or ingestion incidents before buying. Reviews often flag problems fast.
    • Consider weight and balance so the toy rolls and bats well for a small kitten. Too heavy and it won’t move; too light and it flies off weirdly.
    • Pick simple designs with smooth finishes to reduce abrasion and places that trap saliva.

    Sealed internals really matter. If a bell, LED, or battery can be pried out, the toy should be for supervised play only. Washable toys that dry completely lower mildew risk; give fabric toys a quick sniff after washing to be sure.

    Simple shapes with fewer seams mean fewer places to split open, and lighter designs keep play fun without putting extra force on tiny teeth. My kitten once won a tug-of-war with a glued-on feather, oops, lesson learned: glued bits don’t last.

    Price and storage tip: expect about $3 to $20 for a single kitten-safe ball or $8 to $30 for small sets. Store toys in a dry container, rotate them weekly, and retire anything that shows wear.

    Worth every paw-print.

    Are unbreakable cat balls safe for kittens

    - Emergency signs and first actions if a kitten chokes or swallows part of a ball.jpg

    Watch your kitten closely for sudden signs that something is wrong. You might hear gagging or wheezy breaths, or see persistent coughing, pawing at the mouth, drooling, vomiting, trouble breathing, sudden sleepiness, or a kitten that won’t eat. Those are classic red flags that a toy piece could be stuck or partly blocking the airway (windpipe).

    If you can actually see the object and reach it easily, try to remove it gently with your fingers. Don’t stab or dig around blindly with tools, too easy to push it farther down. Keep the kitten calm. A quick wrap in a towel can help steady them while you work.

    If breathing sounds noisy or too fast, or if you can’t reach the object, call your emergency vet right away. Say it’s a choking emergency in a kitten so they know to help fast. They’ll tell you whether to head straight in or try first-aid steps on the phone.

    At the clinic, vets may use imaging like an x-ray (a quick scan that shows bones and dense objects inside) to find swallowed pieces. They’ll also watch for signs of an intestinal blockage (think of it like a traffic jam in the gut) such as repeated vomiting or no bowel movements. Depending on what they find, they might recommend close monitoring or surgery.

    1. If the object is visible and easy to reach, remove it gently with fingers.
    2. Keep the kitten calm, wrap in a towel if needed, and transport safely to your vet.
    3. If breathing is noisy, shallow, or the object isn’t reachable, get emergency veterinary care immediately.
    4. Follow your vet’s advice about imaging and watching stool and vomiting; report any new vomiting, extreme sleepiness, or lack of stool right away.

    Worth every paw-print to be prepared. Ever watched a kitten chase an unbreakable ball only to lose sight of it? Yeah, a few minutes of care now can save a lot of worry later.

    Final Words

    in the action: not inherently safe – "unbreakable" is a marketing claim; size, material, construction, and supervision decide safety.

    We covered quick rules (diameter, non-toxic materials (food-grade silicone, low chemical risk), age, supervision), testing and materials, design tradeoffs, cleaning and rotation, safer options, and emergency steps.

    Inspect new toys; toss at the first crack or odd smell; ask makers for test reports; see your vet if chewing's a worry. If you’re asking are unbreakable cat balls safe for kittens, use these checks and your multi-cat crew can stay playful and cared-for.

    FAQ

    FAQ

    Are unbreakable cat balls safe for kittens?

    Unbreakable cat balls aren’t automatically safe for kittens; safety depends on size, material, construction, and supervision. Choose a 1.25–2.0 inch diameter and materials like food-grade silicone (soft, durable plastic) or natural rubber (flexible tree rubber). Discard the toy if it becomes damaged.

    Are mylar or crinkle balls safe for kittens?

    Mylar and crinkle balls can be risky because mylar (thin metallic film) and crinkle layers may shred into small pieces that kittens can swallow. Supervise play and remove any torn or flaking toys immediately.

    Are felted or wool toys safe for cats, including DIY felt toys?

    Felt and wool toys can be safe when tightly felted (pressed wool) and free of loose fibers. Wool may shed, so supervise DIY felt toys and discard them if fibers begin to pull out.

    At what age should you give kittens toys and what should they avoid?

    Give kittens toys around eight weeks, adjusting for individual chewing habits. Avoid strings, small removable parts, glued trims, removable batteries, brittle plastics, or anything smaller than about 1.0 inch. Supervise first play sessions.

    What’s the number one killer for cats?

    The leading cause varies: outdoor cats most often die from trauma such as vehicle strikes, while older indoor cats commonly die from chronic diseases like kidney disease and cancer. Keeping cats indoors reduces trauma risk.

    Related Articles