Author: Nathaniel Price

  • Teaser Wand Target-Training Techniques for Cats

    Teaser Wand Target-Training Techniques for Cats

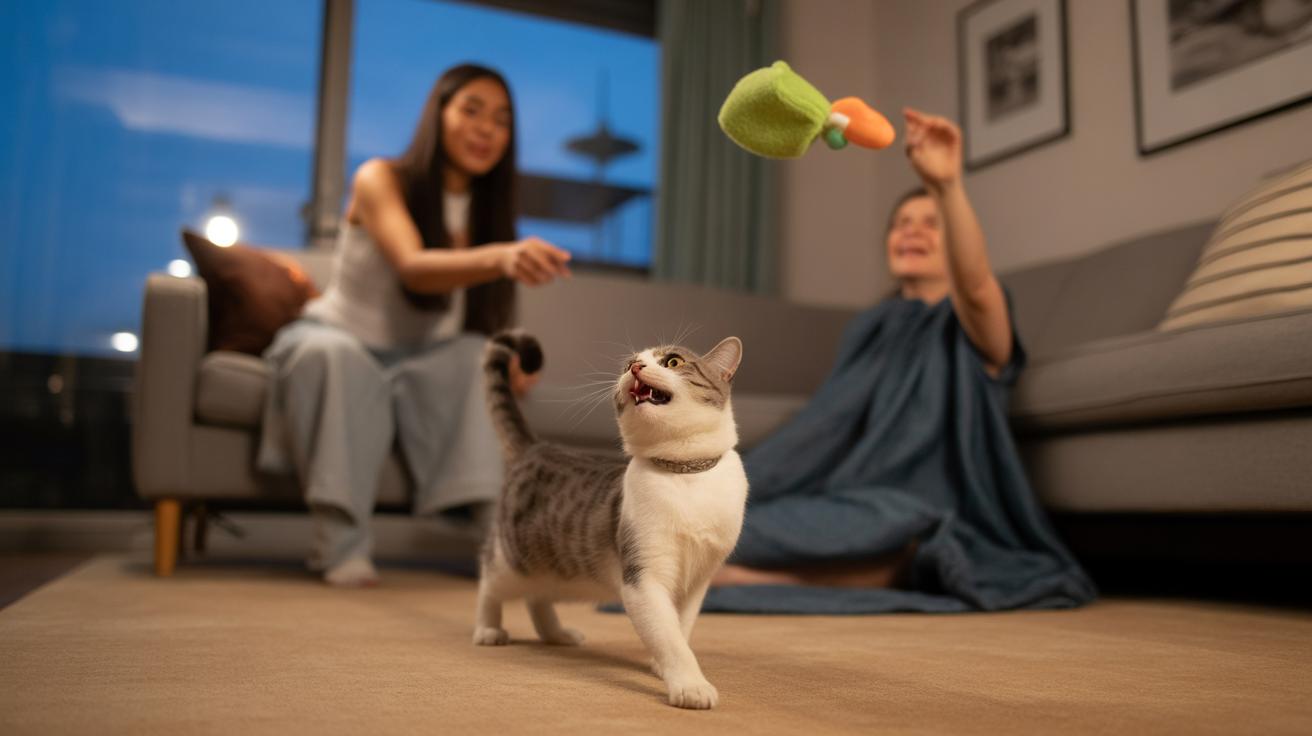
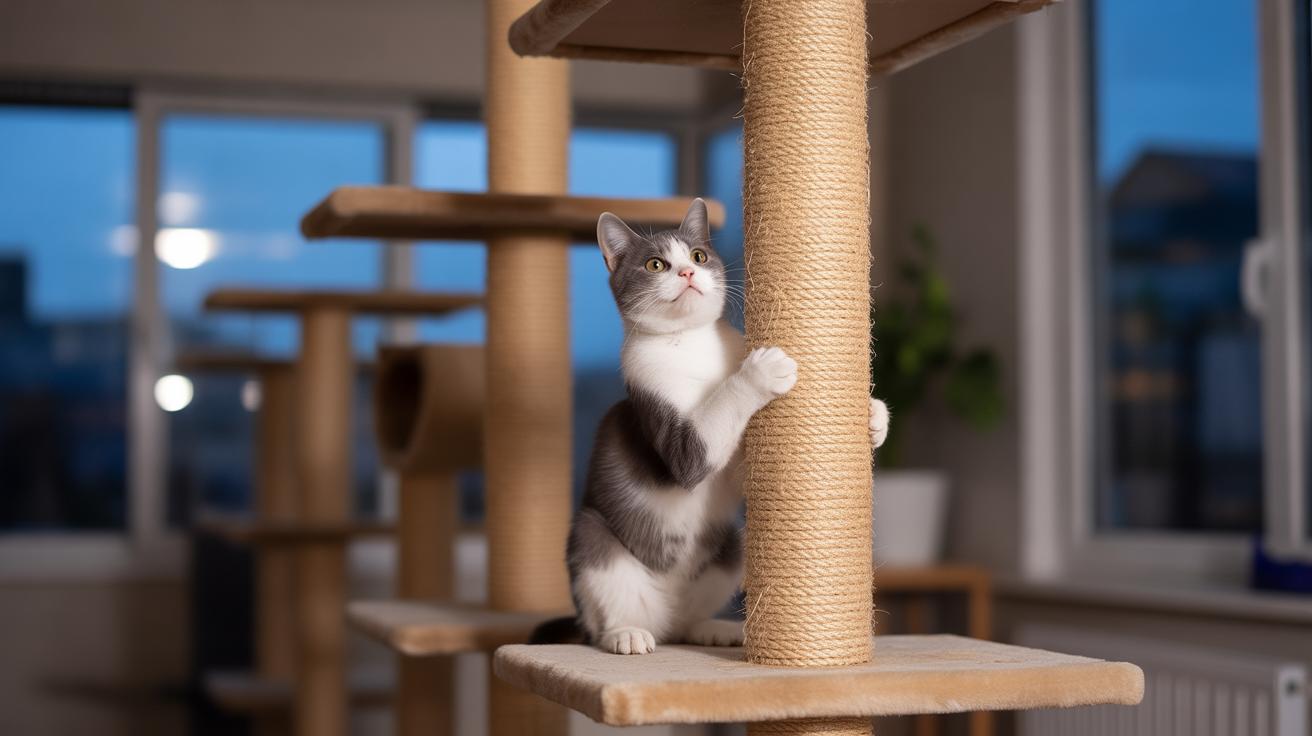
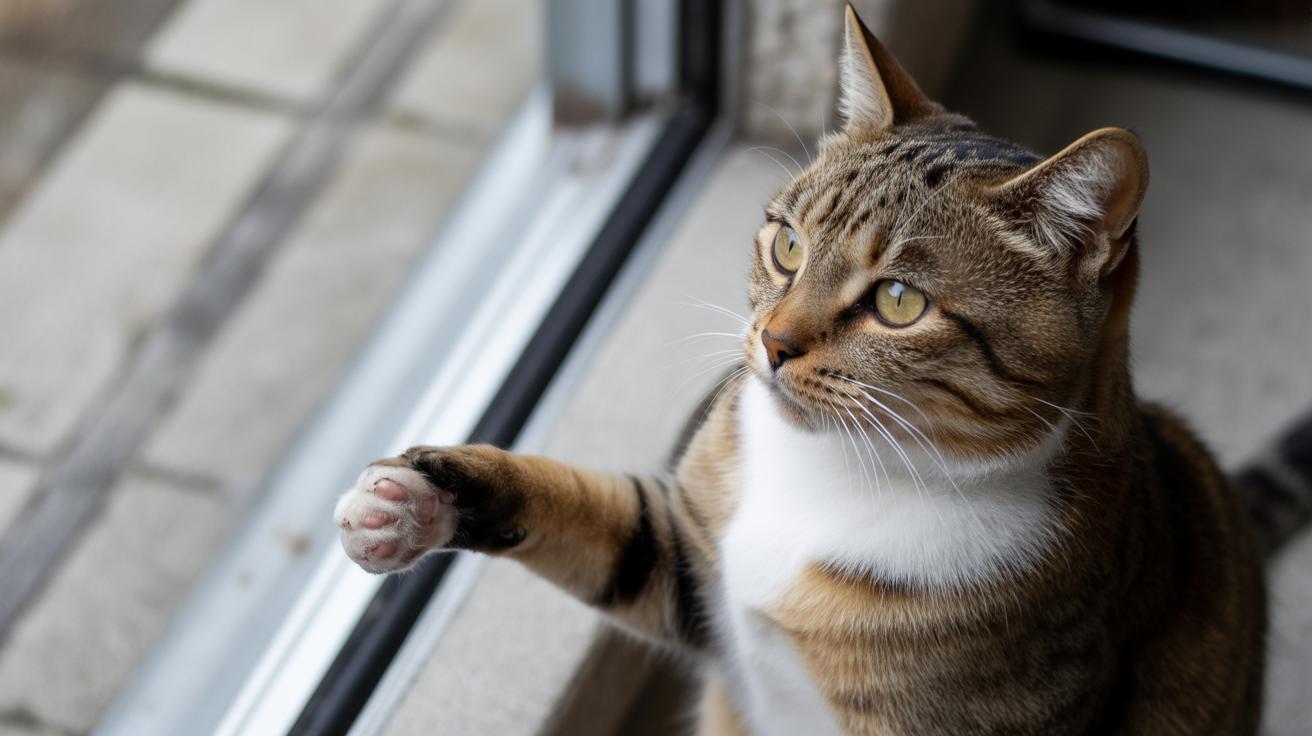
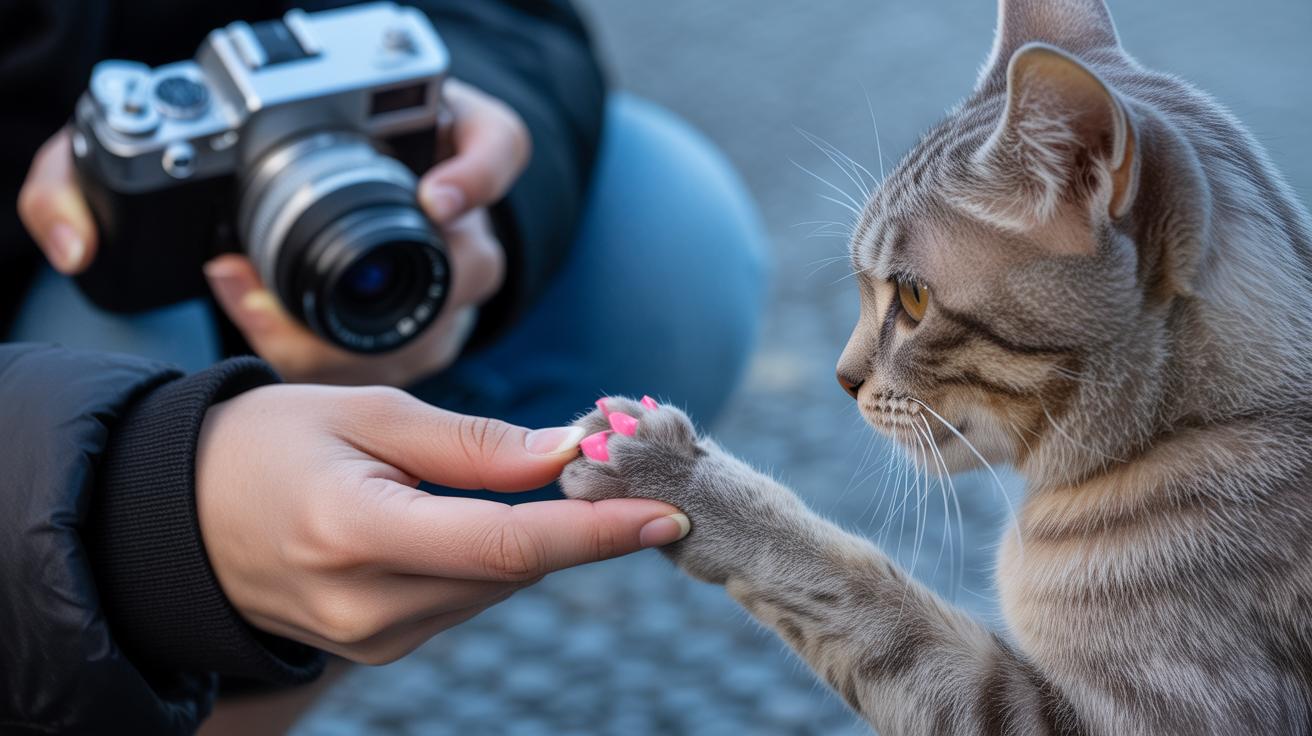
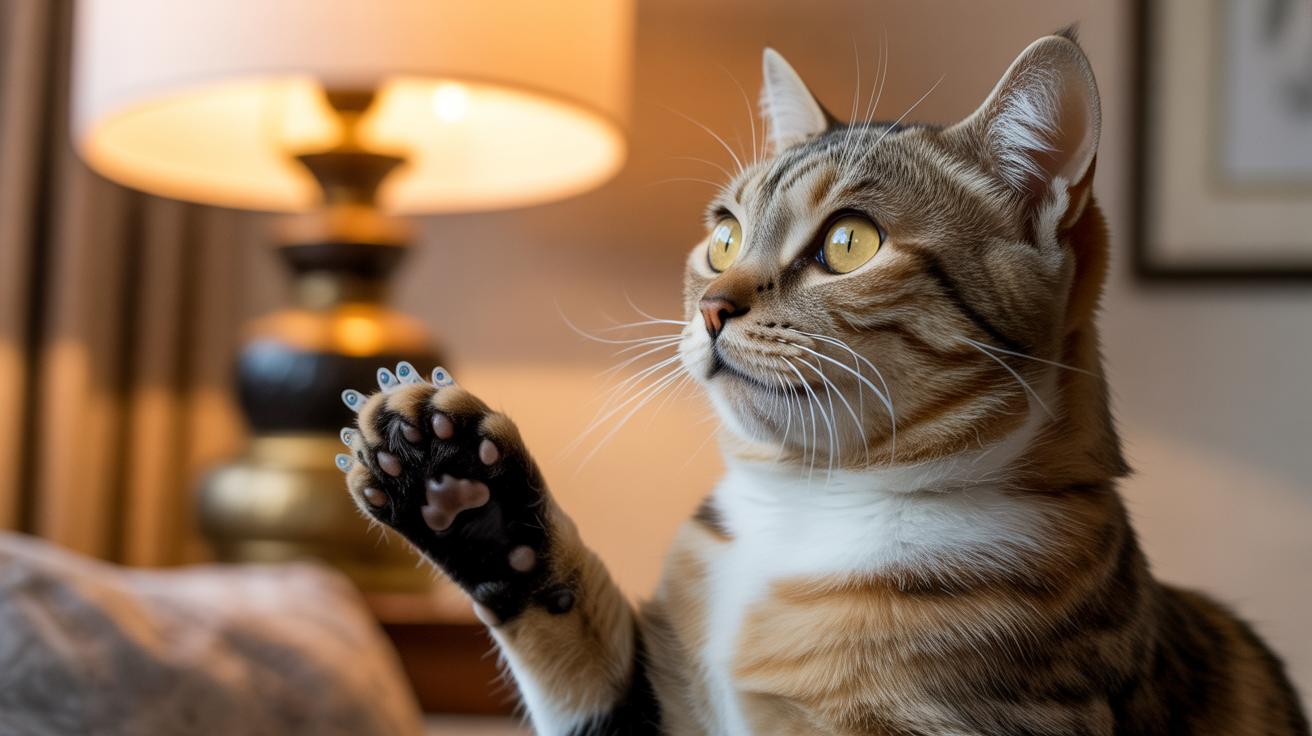
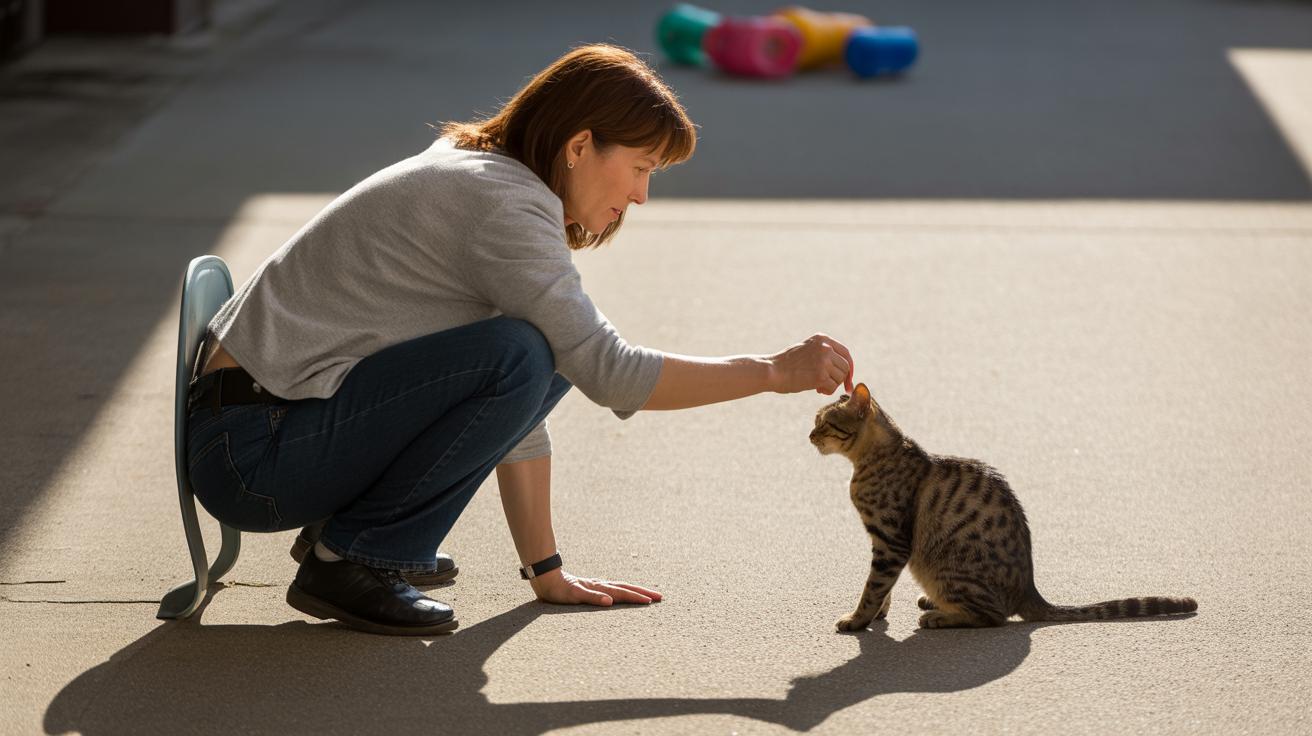
    Think target training is only for dogs? Try it with your cat and watch whiskers twitch, paws reach, and focus bloom in minutes.

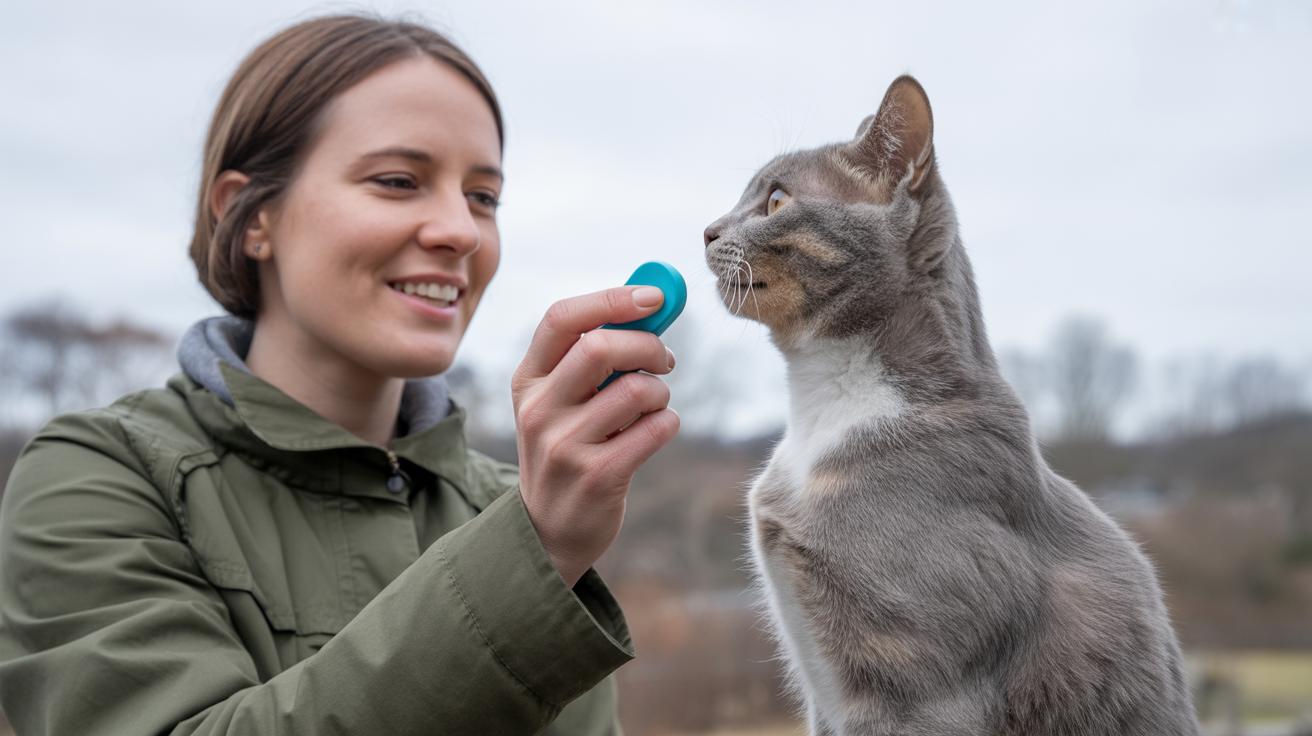
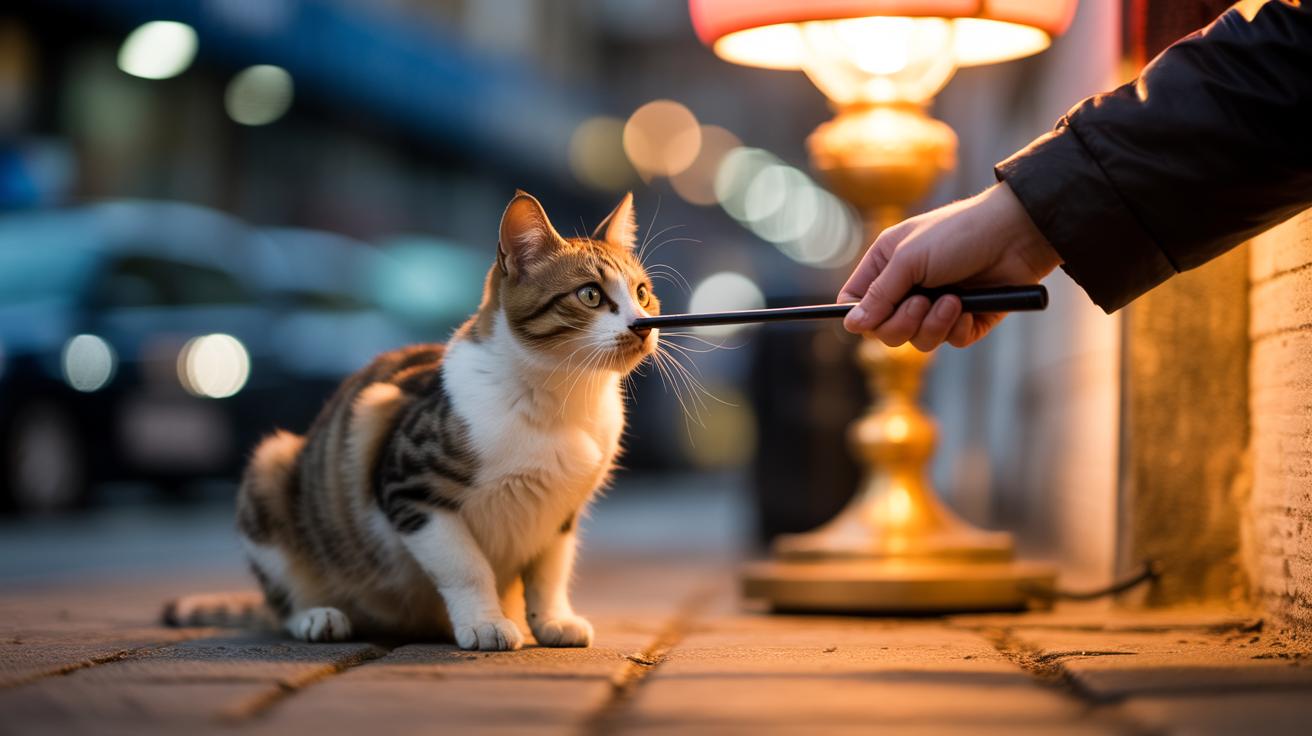
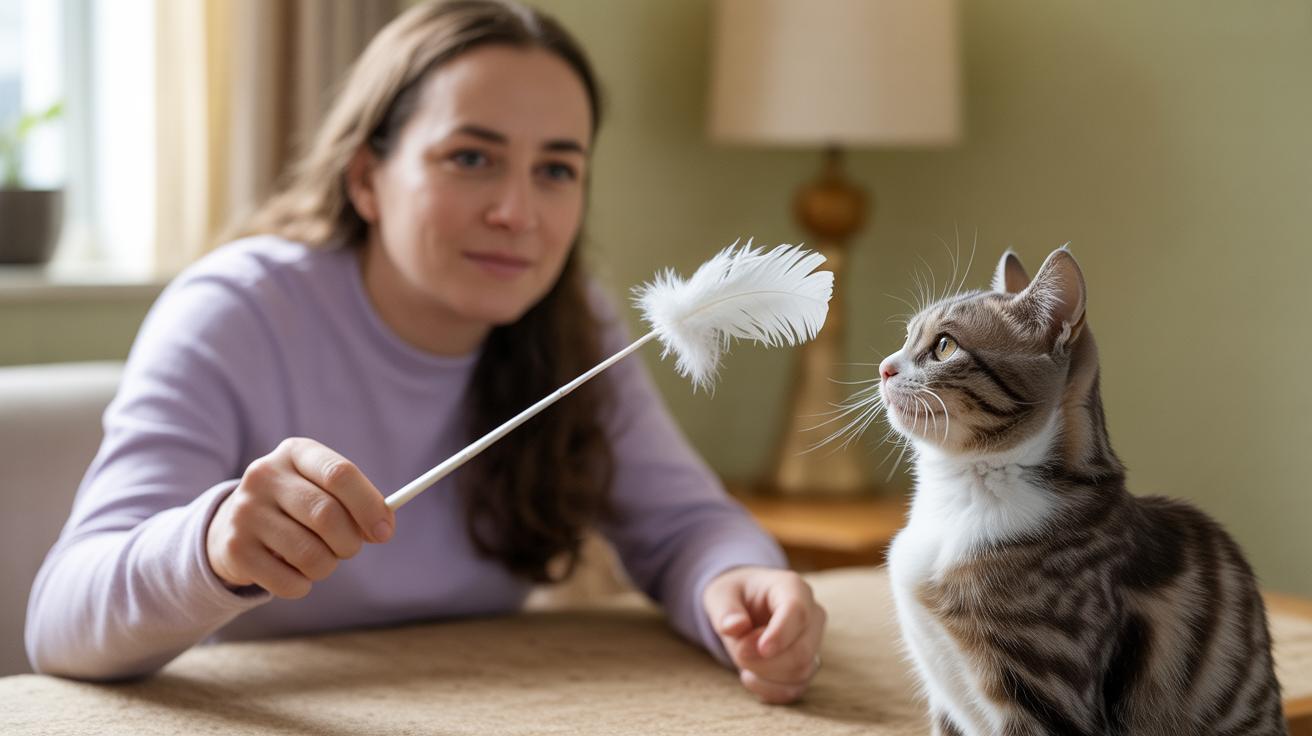
    This quick intro gives a one-page checklist and three step-by-step methods. You’ll use a wand (a strong stick you point or dangle), a tiny soft treat (small, easy-to-eat reward), and a simple marker like a clicker (a small device that makes a sharp sound) or a short word. Target touches (gentle nose or paw taps to the wand tip) are the whole idea.

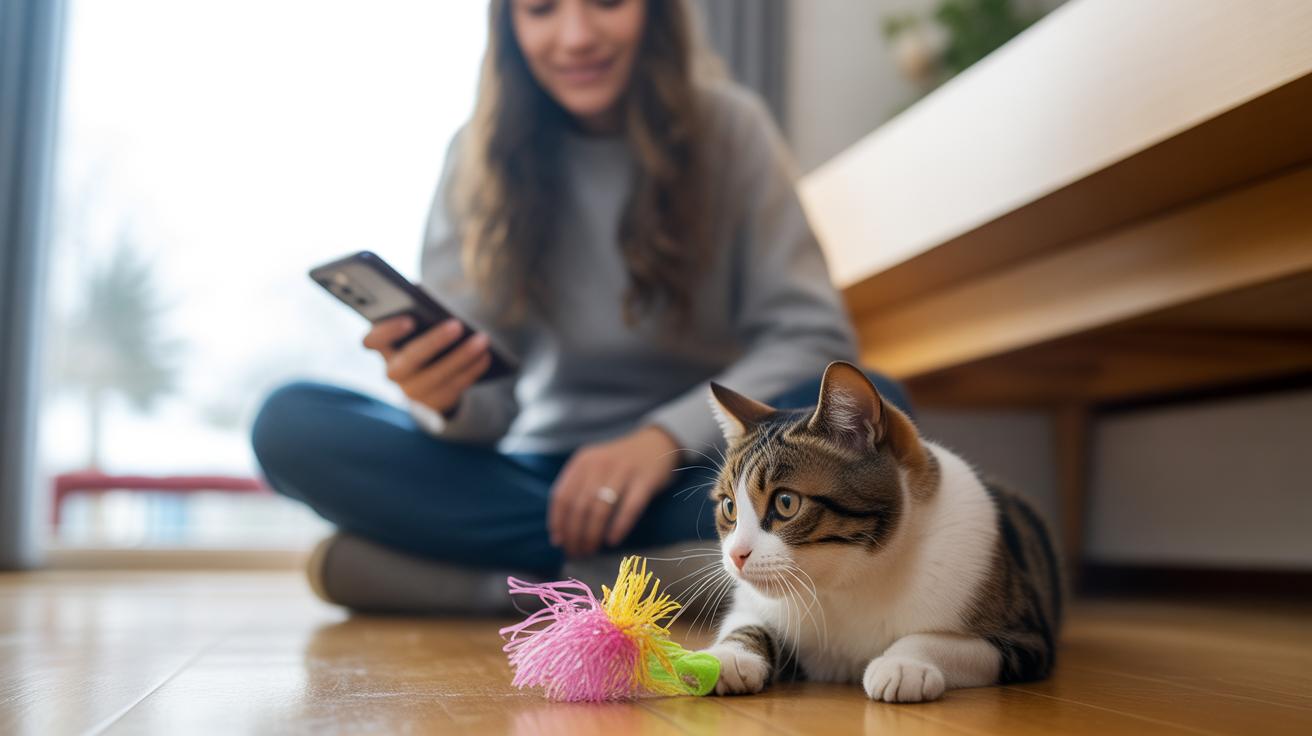
    Short sessions build trust. They keep play safe. And they make training a little ritual you both look forward to. Ever watched your kitty lock on a toy? That same zoom-in focus shows up here, and it’s oddly satisfying.

    Quick how-to in three moves:

    1. Get attention, show the wand close, wait for a sniff or tap, then mark and treat.
    2. Move the wand a bit farther so they reach or step, mark the touch, and treat.
    3. Add a cue word (like “touch”), reward every time, then slowly give treats less often as they learn.

    I once watched Luna leap six feet for a gentle tap. Worth every paw-print. Ready to get feline fine?

    Quick-start target-training: 6-item checklist plus three exact methods

    - Quick-start target-training 6-item checklist plus three exact methods.jpg

    Ready to start training your cat right now? This one-page guide gives a short checklist and three step-by-step ways to teach target touches. Think of it like a quick play session that builds focus and trust. Ever watched a whisker twitch as a toy rolls by? That’s the good stuff.

    Checklist

    • Equipment: sturdy wand with a long handle (wand = a strong stick you point or dangle, keeps your hands safe). Also have small soft treats and an optional pocket clicker.
    • Marker: clicker (small handheld device that makes a click sound) or a short bridge word said in a steady tone. Keep it the same every time.
    • Treat: tiny, high-value soft bite (easy to chew and quick to swallow).
    • Starting distance: 1-2 inches from the cat’s nose.
    • Session length: kittens 1-3 minutes; adults 3-5 minutes. Short and sweet wins.
    • Safety: watch every session, retire attachments (feathers, fabric bits) when more than 10% is frayed, and never stick treats to the tip where your cat could swallow parts.
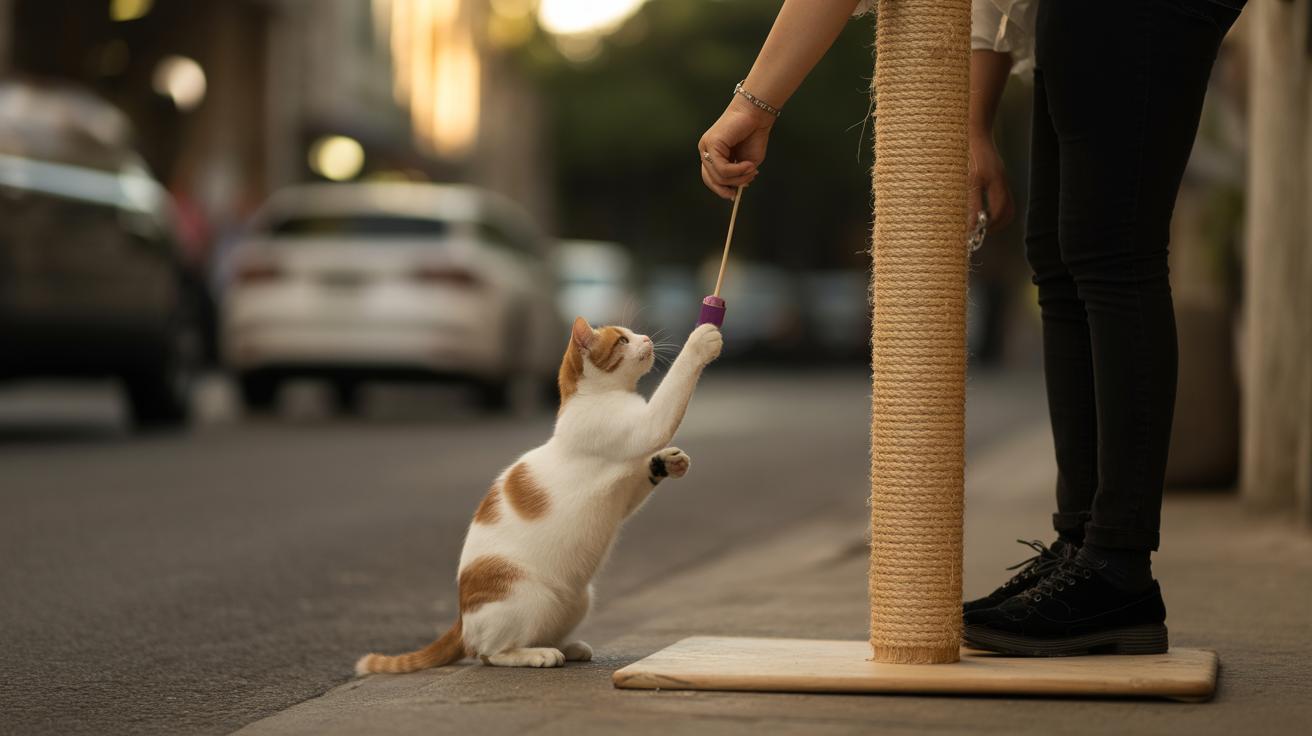
    1. Method 1 – pretend treat on floor, point with stick
    • Setup: have a tasty treat in hand and point the wand at an empty spot on the floor near your cat.
    • First-session cue: point the wand at the pretend treat spot and wait. Let the cat come to the stick.
    • Marker-to-treat timing: mark within one second when the cat moves toward the stick, then give the treat by hand or drop it on a little plate near their paws. Timing matters.
    • Fading plan (how to remove prompts): slowly raise the stick in 1-2 inch steps over sessions. Only move on when your cat gets 8 out of 10 touches at that new height for two sessions. Yep, patience pays off.
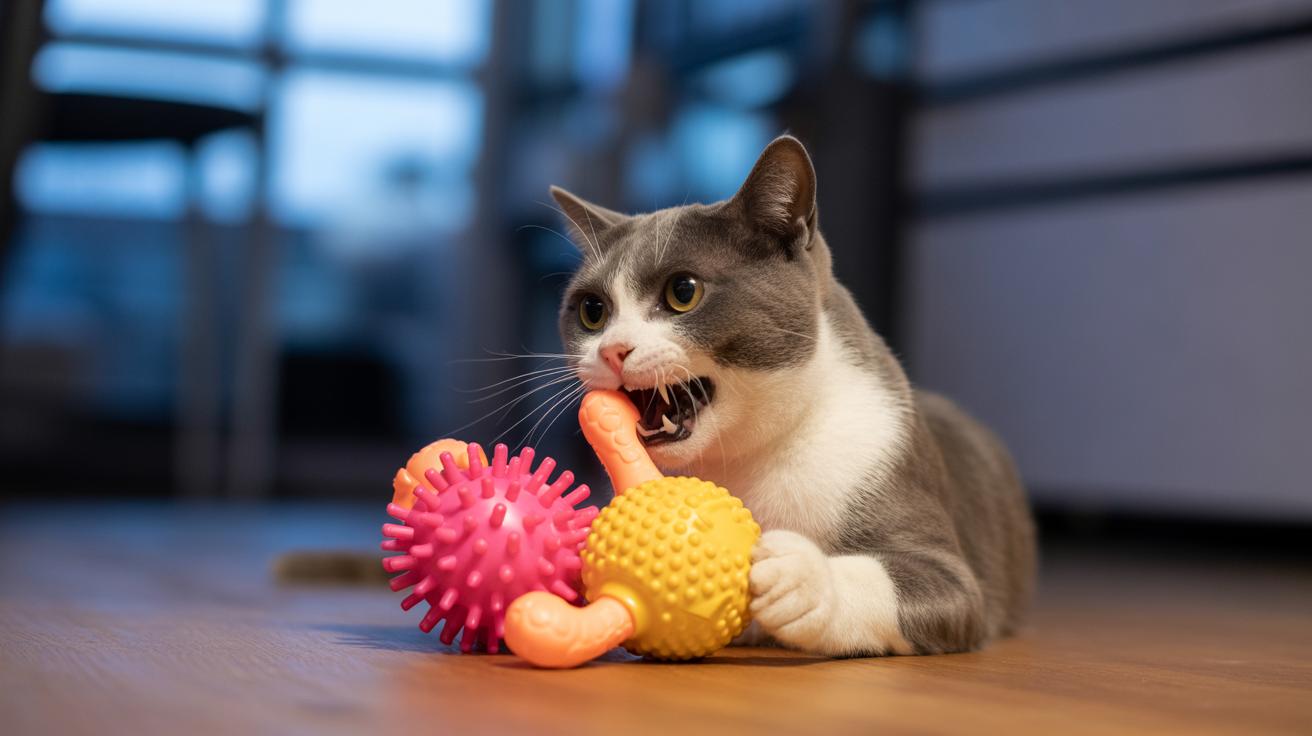
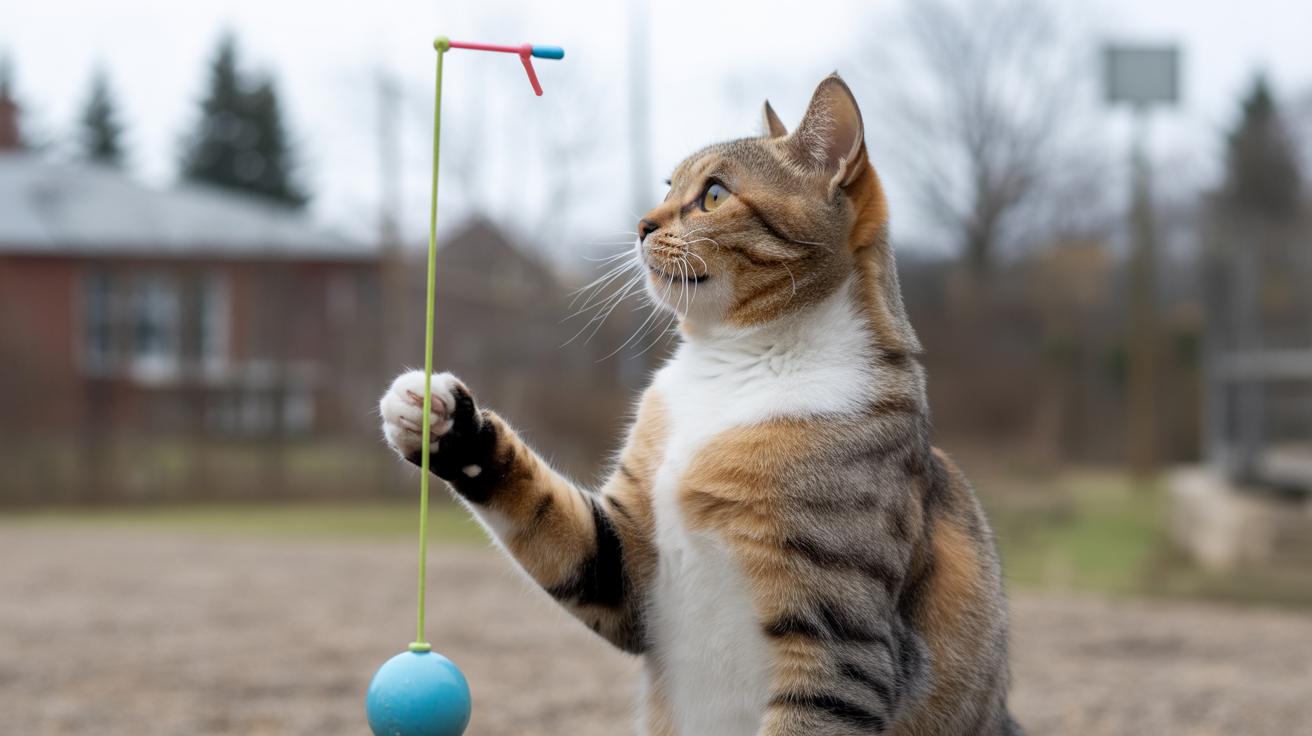
    1. Method 2 – big ball stuffed with treats, fade to small ball, then stick
    • Setup: use a large hollow ball with visible treats inside (hollow ball = plastic orb with holes). Keep a smaller ball on the wand for later steps.
    • First-session cue: show the big ball so your cat noses it and finds the treats. This makes the idea clear.
    • Marker-to-treat timing: click or say your bridge within one second of nose contact, then reach in and give one treat right away.
    • Fading plan: when about 80% of trials are confident touches, swap in the smaller ball. After you hit 80% success across two sessions with the small ball, remove the ball and reward for touching the bare tip.
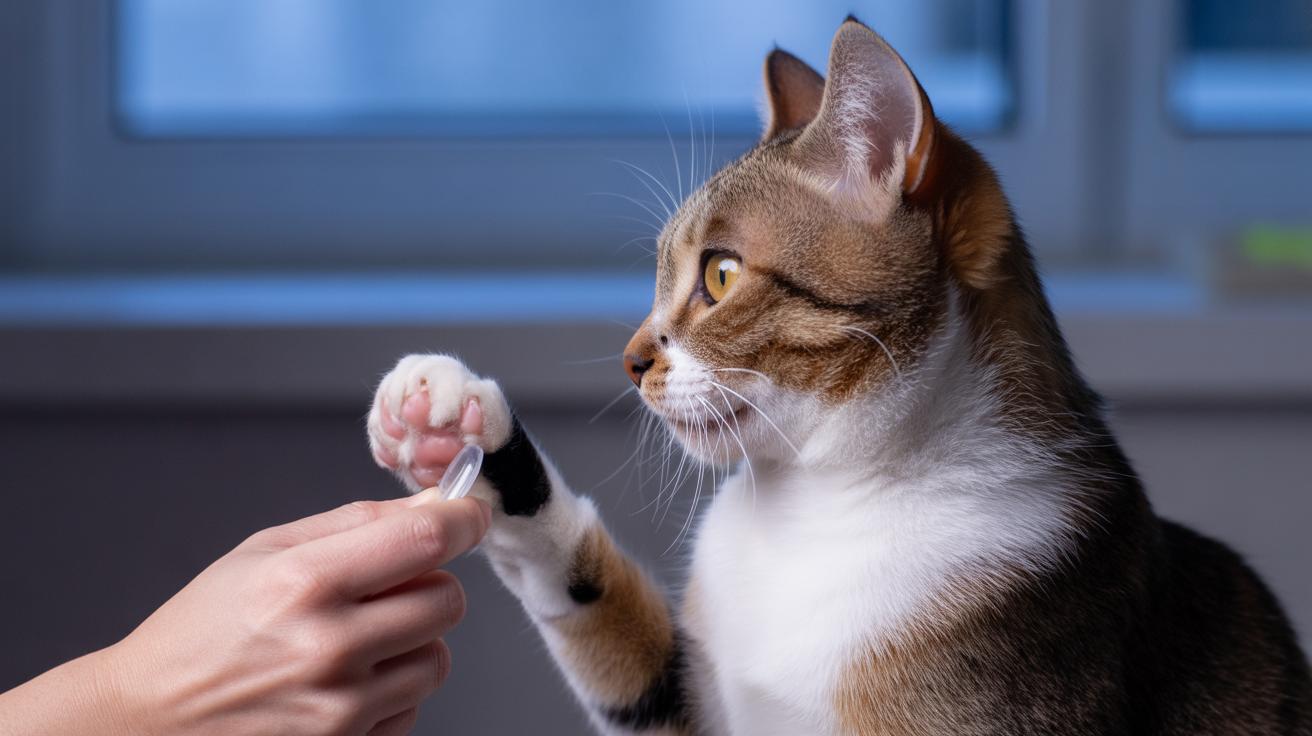
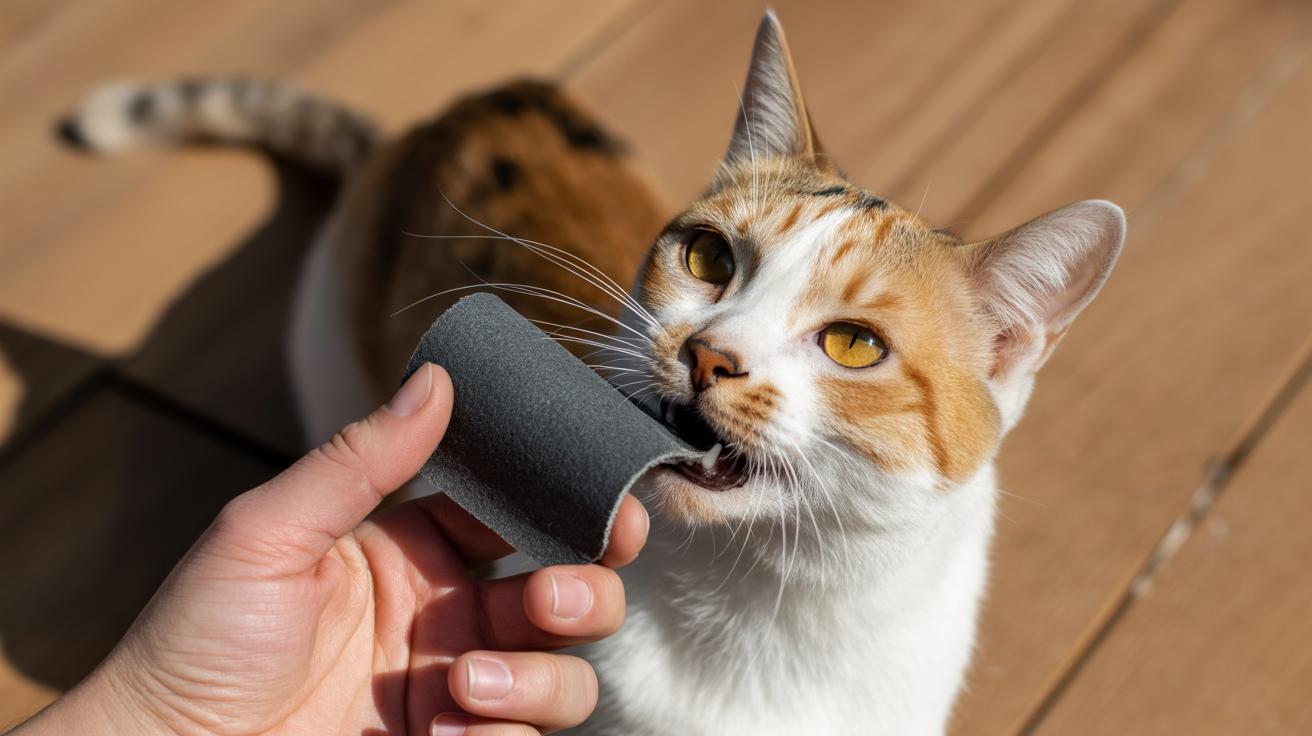
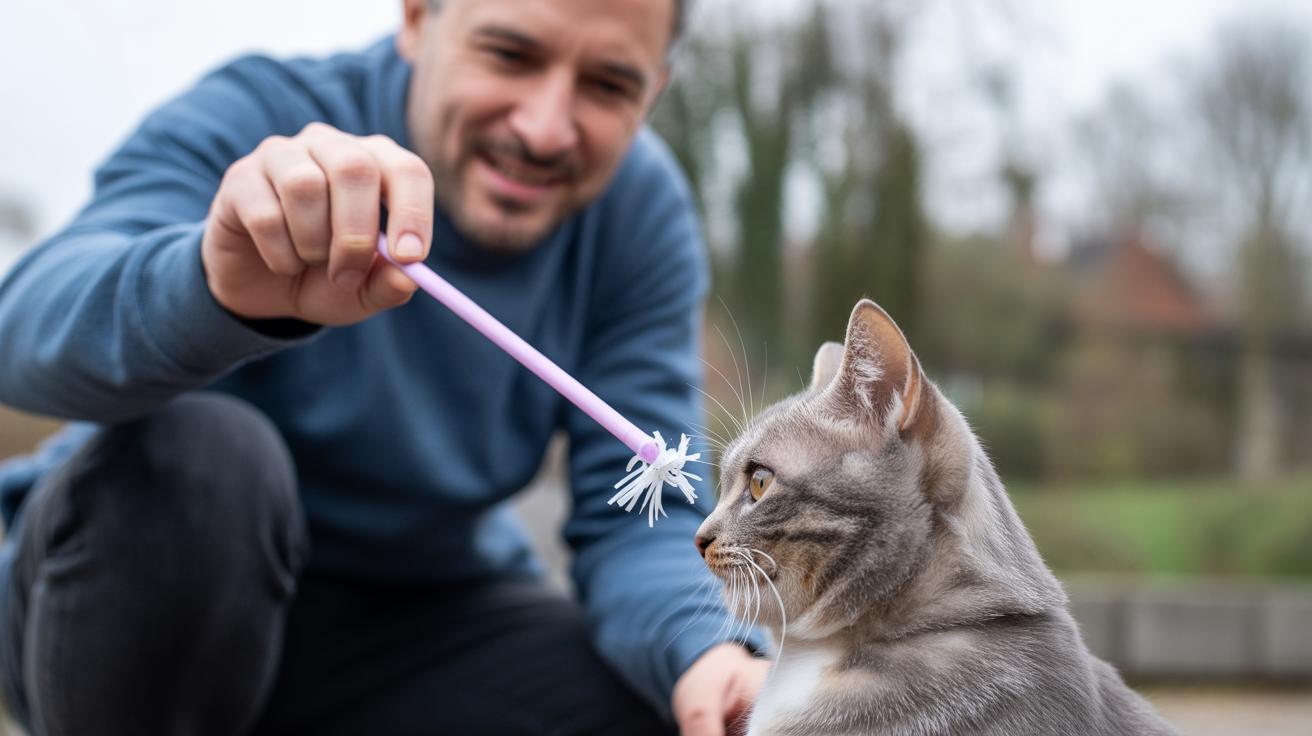
    1. Method 3 – lickable treat on the tip, fade to none
    • Setup: smear a pea-sized lickable treat on the tip of the wand (lickable treat = soft, paste-like food cats lick off).
    • First-session cue: hold the tip near the cat and let them lick once or twice. Easy wins build trust.
    • Marker-to-treat timing: mark within one second when they approach to lick, then give a small hand reward right away.
    • Fading plan: after 6-8 successful approaches for two sessions, halve the smear. Keep halving until there’s no smear and your cat still follows the tip expecting a reward. Actually, make that tiny steps, cats notice changes.

    Session notes and limits

    • Expect 3-7 trials per short session.
    • Do sessions per day: kittens 3-5; adults 1-3.
    • Stop if your cat shows overstimulation: flattened ears, tail lashing, or backing away. Take a break. Worth every paw-print to keep it fun.

    Troubleshooting and extras

    • If timing feels hard, see Equipment (H2 #2) for buying or DIY ideas, and Advanced Marker and Fading Strategies (H2 #3) for help with marker timing and smoothing the fade.
    • Tip: toss in a playful one-minute warm-up before training to get interest. My cat once leapt six feet after a wobbling ball. True story.

    Equipment, wand selection, and safety specifics

    2) for buyingDIY and Advanced Marker and Fading Strategies (.jpg

    Pick a sturdy wand with a long handle so your hands stay well away from claws and teeth. Look for a solid feel, not floppy. Good materials include strong plastics (tough, lightweight molded polymer), wrapped attachments with no exposed metal that can snag fur, and feathers or toys that are fastened tight. Think fixed-length durable wands, retractable models (they pull in for storage) for extra reach control, or combo clicker+wands if you use a marker (a training clicker).

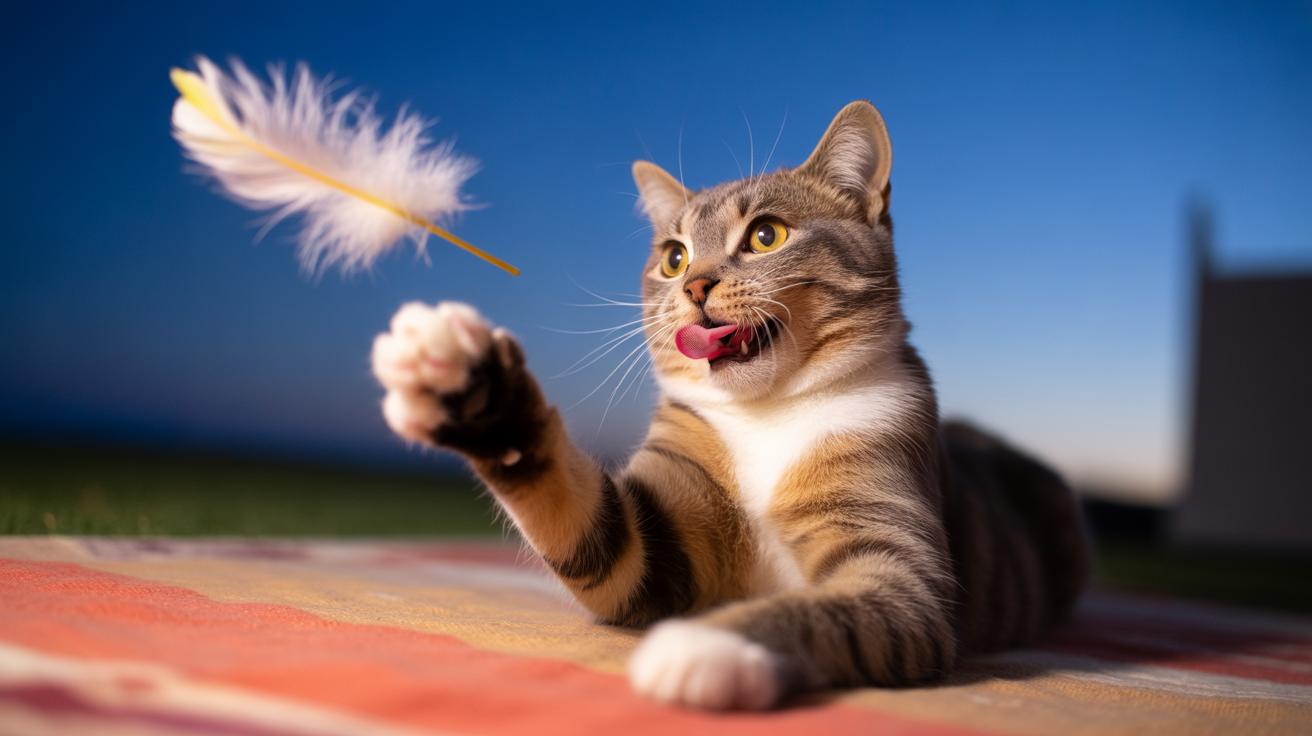
    A longer handle gives you better control and lets you move the lure without crowding your cat. It’s more fun for both of you when you have room to swing the toy and your kitty can leap or stalk. Ever watched your cat track a feather across the carpet and go full ninja? That extra space helps.

    Check the wand every time before play. Inspect it closely; retire attachments when more than 10 percent is frayed or stitching is loose. Store wands out of reach between sessions. Never leave a wand with small parts where a cat could chew and swallow them, and always supervise play.

    DIY fixes that actually hold up: use a strong braided cord (multi-strand cord) about 2 to 3 mm thick and tie a figure-eight knot or a double-overhand knot. Then secure the knot with epoxy (thick glue) or a crimp sleeve (a small metal tube you squeeze shut) for a more permanent bond. For quick temporary repairs, wrap the joint tightly with strong tape and replace the attachment before the next session.

    Introduce any new attachment slowly. Hold it still so your cat can sniff, then add short, calm movements so curiosity beats fear. Your cat’s whiskers will twitch, the ears will swivel, and before you know it, you’re both having a claw-tastic time.

    Advanced marker and fading strategies

    3) for troubleshooting marker errors.jpg

    This section walks you through shaping progressions, medium- and long-term reinforcement plans, and a tidy four-step fix for marker errors so you can polish behaviors without repeating the basic fades in the Quick Start. Think of it like fine-tuning your timing as a trainer and building your cat’s confidence. Ever watch whiskers twitch right before a perfect pounce? That’s the magic we want to capture.

    Shaping progressions

    1. Step A – orient: Reward any nose or head turn toward the wand. Criteria: 5 out of 6 consecutive trials. Work in very short bursts. Move on after two sessions that meet that ratio and celebrate the tiny win.

    2. Step B – approach: Reward a deliberate 1 to 2 cm approach (1 cm is about the width of a fingernail). Criteria: 6 out of 8 trials. Require two successful sessions before raising the bar. Short sessions keep the cat curious, not bored.

    3. Step C – full touch: Reward a clear nose touch at about 1 to 2 inches (that’s roughly the length of a matchstick). Criteria: 8 out of 10 trials. Hold this stage for three reliable sessions so your cat feels steady and sure.

    4. Step D – distance and direction: Increase distance in small 10 to 20 percent steps (measure in centimeters), and ask for about an 80 percent success rate in one session to advance. Add left and right direction changes once distance feels steady. Tiny increments matter. Cats notice little changes, so be proud of small gains.

    Variable schedules and marker troubleshooting

    Start with a staged reinforcement plan (a reinforcement schedule is how often you give rewards). Begin at 100 percent rewards for the first 3 to 5 sessions. Then drop to 70 percent for about 5 sessions. Move to 50 percent over the next 5 to 10 sessions. Finally settle at 30 percent maintenance, and give a high-value bonus every 8 to 12 trials. Mix in short play bursts or a gentle stroke (tactile reward) every fourth reward to keep things fresh and fun. For busy days, a quick toss of an unbreakable ball before you leave gives your cat safe solo play.

    Marker troubleshooting (quick four-step protocol)

    1. Detect delay: Watch short video clips to spot markers made after the movement. Latency means delay, so look for any pause between the action and the mark.
    2. Retrain marker-to-reward: Do 20 to 50 immediate repeats at a very short latency. Mark within less than 1 second, then deliver the treat. Think of it like muscle memory for your timing.
    3. Probe test: Run controlled probe trials (about 10 trials with random timing) to confirm the marker is reliable. If the cat still looks confused, keep drilling the basics.
    4. Reintroduce continuous marking briefly if false positives rise, then shift back to the variable plan once reliability returns.

    If you use a bridge word (a spoken marker that links action to reward), keep tone and pitch consistent and practice it in 30 to 60 second drills so timing becomes automatic. This is clutch when a clicker isn’t handy. Oops, make that a quick habit, your hands and voice will thank you later.

    Worth every paw-print.

    Teaser Wand Target-Training Techniques for Cats

    - Equipment, wand selection, and safety specifics.jpg

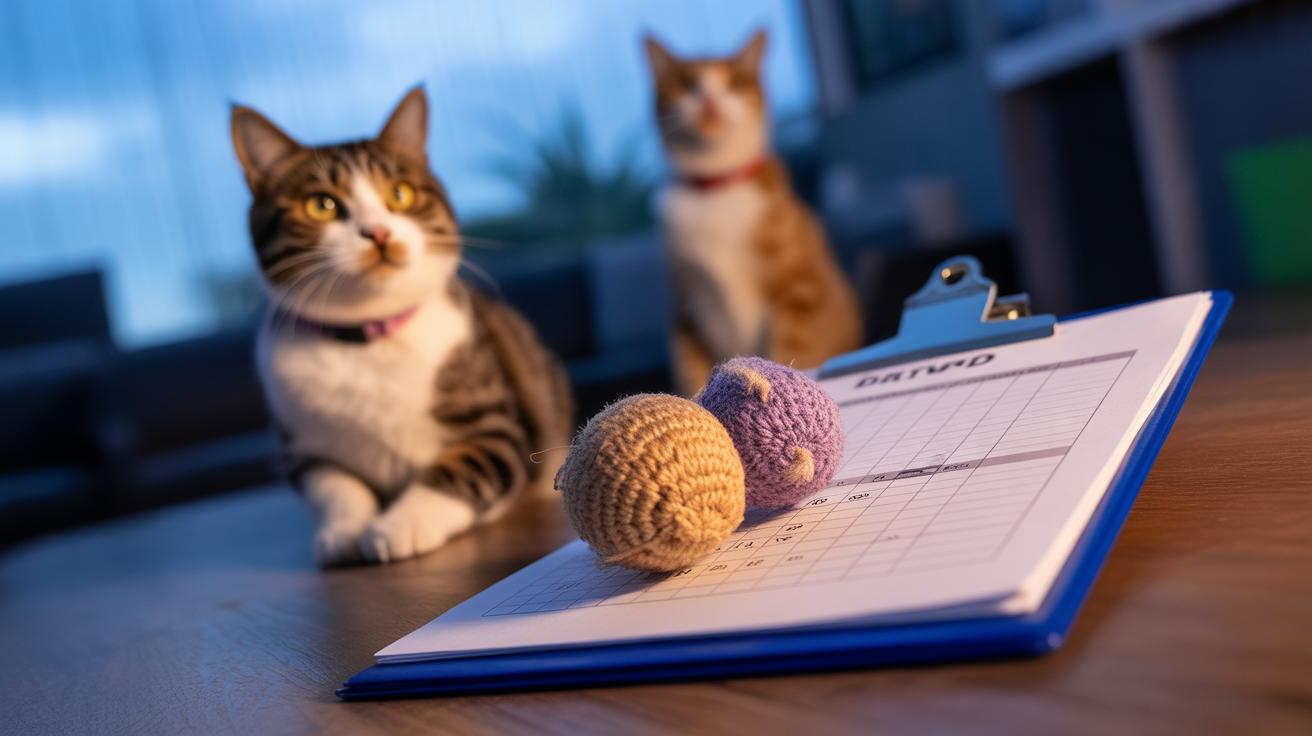
    This 30-day plan lays out a clear week-by-week path and gives you one simple log template to track every short session. Think of it as tiny training sprints you can do a few minutes a day while your cat watches the wand like it’s the best toy in the world. Ever watched your cat’s whiskers twitch as the wand tip nudges a paw? That’s the good stuff.

    Week Primary Goal Criteria to Move On
    Week 1 Establish a reliable close-range touch (1-2 in) – touch means the cat taps the wand tip with a paw 75-85% reliable touches over 3 consecutive sessions
    Week 2 Increase distance and add simple left/right direction 80% success on distance and direction across 3 sessions
    Week 3 Cross-room following and basic transfers (mat, low perch, carrier opening) 80-85% success on transfers and room follow for 3 sessions
    Week 4 Proofing around mild distractions (window noise, other household sounds) 75-85% reliable responses with distractions present for 3 sessions

    Use the same logging format every session so you can compare progress day to day. Keep each log short and friendly – it’s easier to stick with. Here are the fields and how to write them:

    • Date (YYYY-MM-DD)
    • Time (HH:MM)
    • Session label (A/B/C)
    • Number of trials (integer)
    • Success count (integer)
    • Average latency (s, decimal) – latency means average response time in seconds (how fast your cat touched)
    • Reinforcement schedule used (e.g., 100%, 70%) – reinforcement means how often you gave a treat or click
    • Notes/triggers (short text) – distractions, mood, or funny moments
    • Video clip filename (e.g., cat_20260210_1405.mp4)

    Sample entry: 2026-02-10 | 14:05 | B | Trials 5 | Success 4 | Avg latency 0.9s | Reinforcement 70% | Notes: distracted by window | Video: cat_20260210_1405.mp4

    Keep logs consistent and a little playful, um, you know, like a tiny training diary. Your cat’s tiny wins add up fast. Worth every paw-print.

    Troubleshooting: multi-step diagnostics and escalation guidance

    - Advanced marker and fading strategies.jpg

    Quick tips: breathe, stay calm, and grab your phone to record short clips. Those videos help a lot. Use the Quick Start and Advanced Marker sections for fast retraining steps. Ever watched your cat freeze mid-pounce? Yeah, those little moments tell a story.

    • Overstimulation / play-biting
      Diagnose: look for faster reaction times, tail whipping, flat ears, sudden hard swats, or a session that ramps up quickly on video. Your cat may go from playful to prickly in a flash.
      Quick test: run two calm probe trials. First, hold the wand still so your cat can sniff. Then try one slow move. Watch for the same signs.
      Staged fixes: (1) shrink how much the wand moves and end the session at the first mild sign, (2) do only stationary sniff trials for 2-3 sessions, (3) follow recovery with 1-2 minutes of calm play or gentle grooming as a reward.
      Escalation triggers: repeated aggressive lunges, bites that break skin or draw blood, or escalation over two sessions; call a certified behaviorist or your vet.

    • Waning interest
      Diagnose: your cat takes longer to approach, misses touches, or seems unfocused on video. Boring toys are the usual suspect.
      Quick test: offer a novel high-value treat probe and a favorite toy probe to see which gets a better response.
      Staged fixes: (1) rotate wand attachments, (2) bring back a known high-value treat for 1-3 sessions, (3) slowly fade treats back to normal rewards over several days.
      Escalation triggers: no response to probes after 4 sessions or sudden avoidance; get a vet check to rule out medical causes.

    • Marker confusion
      Diagnose: the cat hesitates after you mark, looks at your hand, or you see delayed reactions on video. That means the marker word or sound lost its meaning.
      Quick test: do 10 quick marker-to-treat repeats at very close range. Make it obvious and immediate.
      Staged fixes: (1) retrain the marker with 20-50 immediate repeats, (2) run short probe trials, (3) briefly reintroduce continuous marking so the cat remembers the cue.
      Escalation triggers: persistent confusion after retraining; contact a trainer for help.

    • Safety incident – chewing or ingestion
      Diagnose: you find torn toy bits in the mouth, see coughing or gagging, or video shows chewing. Check the toy right away.
      Quick test: gently inspect the mouth and airway if your cat will let you, and check the stool for fragments.
      Staged fixes: (1) remove the toy, (2) give basic first-aid and watch closely, (3) swap to a sturdier wand and shorten sessions.
      Escalation triggers: vomiting, trouble breathing, or suspected ingestion; call your vet immediately.

    • Dependency on the wand (won’t perform without it)
      Diagnose: the cat ignores verbal or hand cues and only responds to the wand. That’s a learned dependency.
      Quick test: try a shorter wand probe or use only a hand cue for five trials to see if anything transfers.
      Staged fixes: (1) alternate between wand and hand cues, (2) shift the reward to a verbal cue or food cup over 10-20 reps, (3) gradually shorten the wand until the cup or voice is enough.
      Escalation triggers: no transfer after 20-30 reps; look into Advanced Marker strategies or consult a trainer.

    • Stalled progress / plateau
      Diagnose: you keep succeeding but you’re not moving forward in distance or time; video shows steady but stalled work. That’s normal sometimes.
      Quick test: change the distance by 10-20 percent for six probe trials to shake things up.
      Staged fixes: (1) drop criteria back one step and rebuild confidence, (2) use variable reinforcement for 3-5 sessions, (3) add a few short high-value booster trials.
      Escalation triggers: plateau that lasts two weeks despite staged fixes; consider professional help.

    Pause training long-term if fear or aggression continues for more than four sessions or if anyone gets hurt. For a referral, gather: dated session logs, 30-60 second video clips showing the issue, brief session notes, a list of treats used, photos of injuries if any, and a short timeline of what you tried. That packet makes a behaviorist or vet consult way more useful. Worth every paw-print.

    Recall & Agility Protocols

    - 30-day calendar and canonical logging format.jpg

    Add this as a short subsection under "Advanced marker and fading strategies" or slot it into Week 3 of your 30-day plan. Ever watched your cat light up when a wand appears? This is the step-by-step for keeping that spark while teaching reliable recalls and small jumps.

    • Guided recalls with a wand (teaser wand, like a fishing rod for cats) , do full-length guided repeats, then shorten the wand and finally probe with the verbal cue alone. Example snippet: Guided recalls – "Here, kitty" then "Here, Luna!"
    • Use a low-hurdle progression: raise height by 2-3 cm (centimeters, about 1 inch) between steps so it stays fun and achievable.
    • Increase distance in 10-20% steps; move on when success lands around 75-85%.
    • Keep sessions short: 2-5 minutes. Stop right away if your cat shows stress.
    • Proof the behavior with mild distractions (quiet radio or someone walking past) before making bigger changes.
    • Track reps (repetitions) and success rate for each increment so you can apply the same criteria next session.
    • If progress stalls, go back one step, repeat the required reps, then try the next increment again.

    Reproducible recall protocol (compact)

    A clear, repeatable sequence helps you fade the wand without confusing your cat.

    • 10-20 guided full-length repeats: hold the wand at full length, lead your cat to the target, mark/click (clicker: a tiny training device), then reward.
    • 10 repeats with the wand shortened: shorten the wand by half or more, keep the same motion and timing.
    • Verbal-only probes: 5-10 quick checks using the cue alone; reward when your cat comes.
      Example: Guided: 15 repeats at full length. Short wand: 10 reps. Verbal probe: say "Come" – reward when they respond.

    Agility progression table and checklist

    Step Height (cm) Required reps Success threshold
    Ground pass / rolled towel 0-2 (cm) 8-12 75-85%
    Low jump 2-5 (cm) 8-12 75-85%
    Raised jump Increase by 2-3 cm per step 8-12 per step 75-85%
    Hoop / pass-through Adjust by 2-3 (cm) clearance 8-12 75-85%

    Quick checklist for the table: pick a safe starting height, hit the reps at the stated threshold, raise height by 2-3 cm (about 1 inch) only after you meet the threshold, and add mild distractions before you call a step "done." Short sessions, consistent criteria, and a little patience make this claw-tastic. Worth every paw-print.

    Teaser Wand Target-Training Techniques for Cats

    - Troubleshooting multi-step diagnostics and escalation guidance.jpg

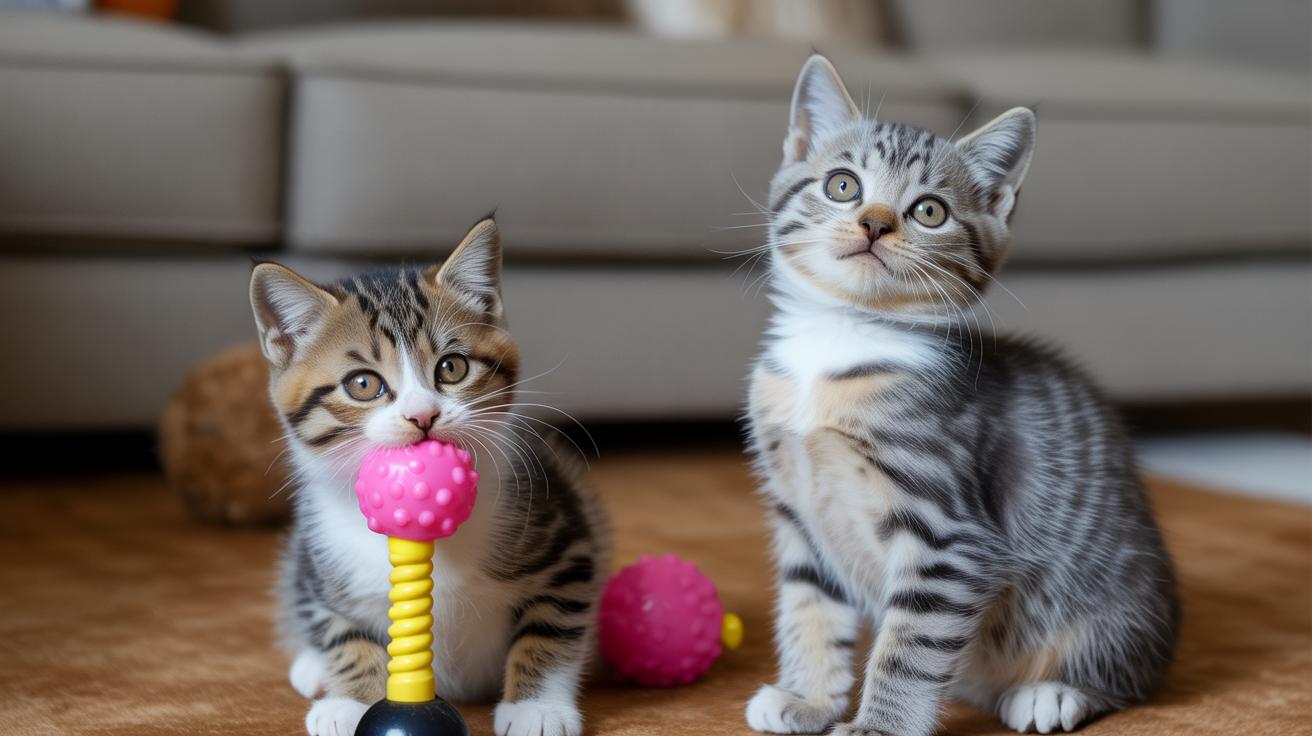
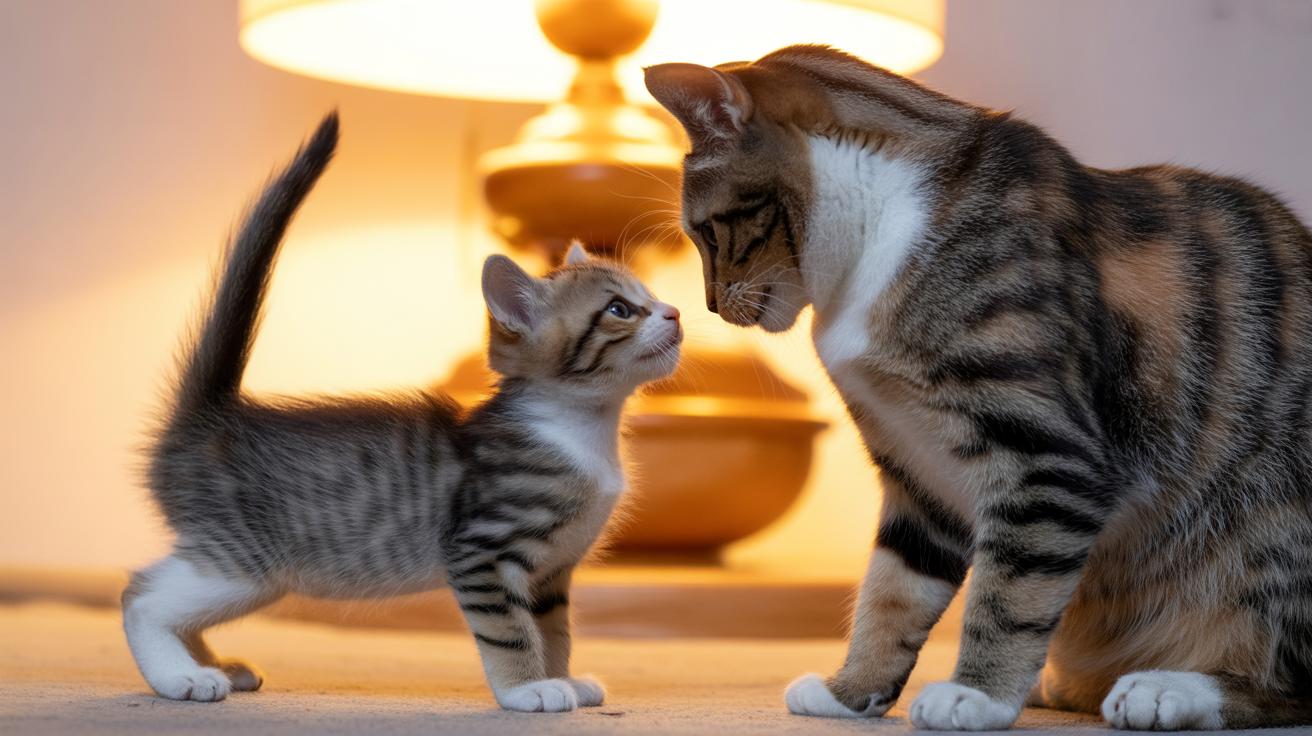
    Kittens: start tiny and slow. Keep sessions to 1 to 3 minutes, two to four times a day. Short bursts keep their attention and protect little joints. Use lickable treats (paste-like, easy to lick) and move the wand very slowly and predictably so a kitten can sniff and succeed. Picture their whiskers twitching as they nose the target. If you see stress signs, flattened ears, a swishing tail, or hiding, for two sessions in a row, step back to stationary sniff-only trials and shorten the pace.

    Okay, seniors need a different kind of fun. Think low-impact brain games instead of big jumps. Ask for short follow distances, tiny turns, or target-to-mat moves that keep paws on the floor. Keep sessions to a few gentle repeats and switch crunchy treats for soft bits if chewing is hard. Move more slowly if mobility is limited, and if a cat shows discomfort in two sessions, pause and reassess. My neighbor’s old tabby surprised us both by learning a tiny spin, slowly, but proudly.

    Shy or fearful cats and multi-cat homes take careful choreography. Let a new wand just sit for sniffing at first, then add tiny motions. Start with at least 1 meter of space (about 3 feet) and use very favorite treats and short, predictable sessions. In a multi-cat house, train one cat at a time in neutral space, stagger session times so there's no competition, and rotate wand attachments so no single toy becomes a hot commodity. If stress signs keep showing up for two sessions, stop or back up; trust builds faster than you think.

    Tiny tip: celebrate the small wins. A single sniff, a gentle paw, a soft purr, those are progress. Worth every paw-print.

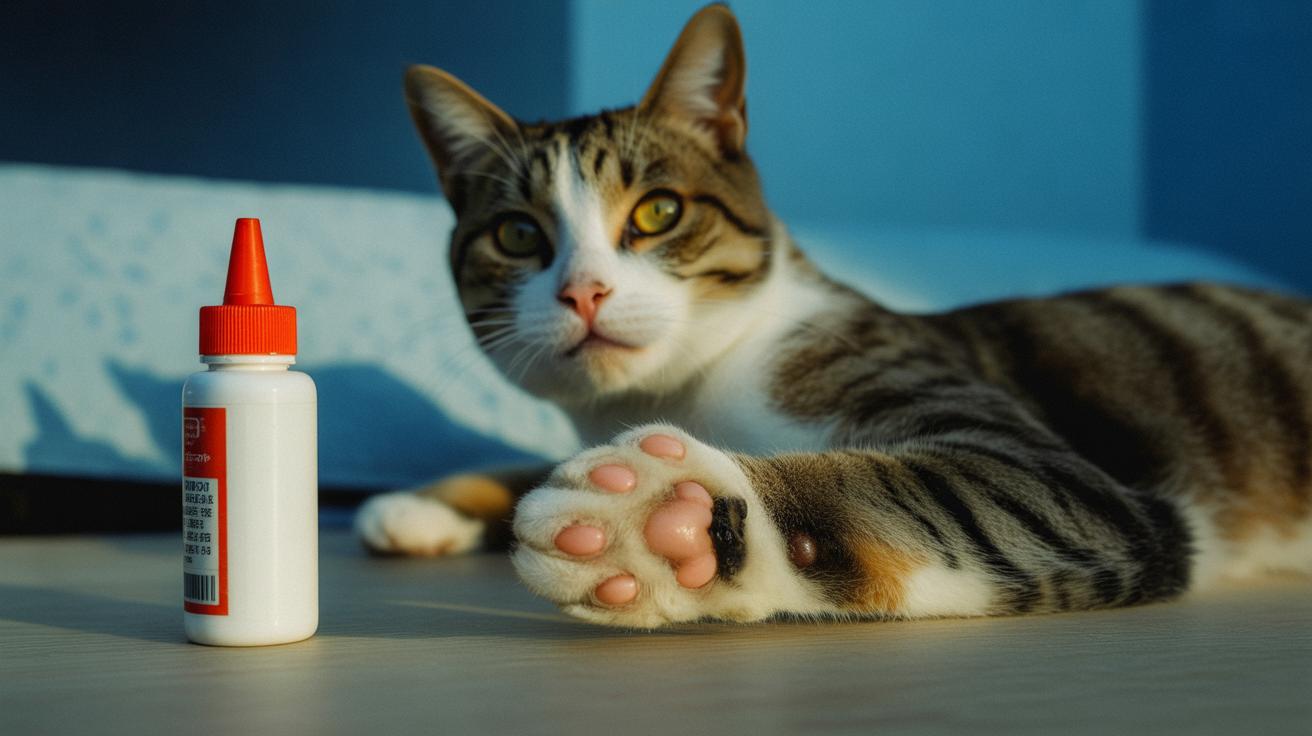
    Rewards, reinforcement schedules, calorie management, and duration-building

    - Advancing skills recalls, agility, and real-world applications using teaser wand target-training techniques.jpg

    Mix food, toys, and praise so training feels fun and fresh. Tiny soft treats (about 2-4 kcal each; kcal = kilocalories, aka food calories) and a pea-sized lickable smear (about 4-6 kcal per portion) are great for short sessions. Keep all treats to roughly 10-15% of your cat’s daily calories. Example math: a 4 kg cat (about 8.8 lb) with a 200 kcal/day goal gets a treat budget of 20-30 kcal (200 × 0.10–0.15 = 20–30 kcal). Swap in a quick play burst or gentle petting when you need to cut calories , for instance, two minutes of feather-wand sprinting instead of an extra treat. Ever watched your kitty go full pounce mode? That’s the ticket.

    Treat budget & calorie limits Quick notes
    Small soft treat 2-4 kcal each
    Pea-sized lickable smear 4-6 kcal per portion
    Daily treat budget 10-15% of daily calories (example: 200 kcal/day → 20-30 kcal)
    Low-calorie swaps Short play burst, petting, or extra praise instead of food

    For variable reinforcement, follow the plan in Advanced Marker – Variable schedules and marker troubleshooting. That’s the master guide where the full 100%, then 70%, 50%, 30% progression and session tips live. Start with lots of rewards so your cat catches on, then shift to intermittent rewards per that schedule. Watch your cat’s motivation and tweak timing or reward type instead of changing the percentages mid-stream.

    Hold-time progression now lives under Shaping progressions – Hold-time progression (after Step C). The stepwise approach is simple: add 1-2 seconds for each successful repetition, require a set number of consecutive holds before you increase time, and use micro-rewards (tiny food bursts or very short play) to help your cat stretch out holds. Once the hold is solid, fade those micro-rewards into praise-only maintenance. Oops, make that sound easier than it is, practice and patience pay off.

    Keep sessions short, playful, and consistent. Your cat learns faster when it’s fun, predictable, and a little bit rewarding. Worth every paw-print.

    Tracking progress, logs, and FAQs for teaser wand target-training techniques

    - Target training adaptations for kittens, seniors, shy cats, and multicat households.jpg

    • Why is my cat biting the wand? Ever had your kitty go from pouncing to chomping? That’s usually overstimulation or play-biting. See the overstimulation/play-biting flow in H2 #5. Quick fixes: mark earlier (use a click or a short word like "Yes!" and say it under 1 second after the right move), make your motions smaller, try stationary sniff trials so they can investigate without chasing, and rebuild food drive with a favorite treat. Tiny steps. Mark fast: "Yes!" within under 1 second.

    • Why does my cat ignore the wand? Uh, been there. Check re-motivation steps in Quick Start and the reward schedules in H2 #8. Easy resets: swap in a new attachment so it smells or looks different, give a 30-second warm-up of gentle play to wake the interest, or bribe with a high-value treat for a few sessions to reset the game. Rotate toys like you’d rotate snacks, keeps it fresh.

    • When should I stop a session? Stop at the first signs of stress: flattened ears, tail lashing, backing away, or sudden swatting. Then do calm sniff-only reps next time so they can approach without pressure. If fear or aggression keeps happening despite staged fixes, see a behaviorist or vet. Bring dated logs, short video clips, concise notes on what you tried, a list of treats you used, and photos of any injuries, those make assessments faster.

    See the canonical log template in the 30-day plan (H2 #4) for exact fields to record: date, time, session label, trials (individual attempts), success count, avg latency (average time from cue to response), reinforcement schedule (when and how you give rewards), notes, video filename.

    Final Words

    Grab your wand and start a short session with the six-item checklist and one of the three complete methods, right now.

    We ran through gear and safety, three step-by-step training methods with exact marker timing and fading plans, advanced shaping and schedules, a 30-day calendar and log template, troubleshooting flows, skill progressions, and reward/calorie guidance.

    Follow the session metrics, stop at signs like flattened ears or tail lashing, and have fun, teaser wand target-training techniques can turn tiny practice bursts into a calmer, more playful home.

    FAQ

    Cat Target Training FAQ

    What is cat target training?

    Cat target training is teaching a cat to touch or follow a target (stick or wand tip) to guide movement, build focus, and teach tricks through short, reward-based steps that boost confidence.

    How to train using a target stick?

    Training using a target stick involves presenting the tip (a small stick with a touchable end), marking a correct touch with a clicker or bridge word, then delivering a treat within <1 second.

    What are teaser wand target-training techniques?

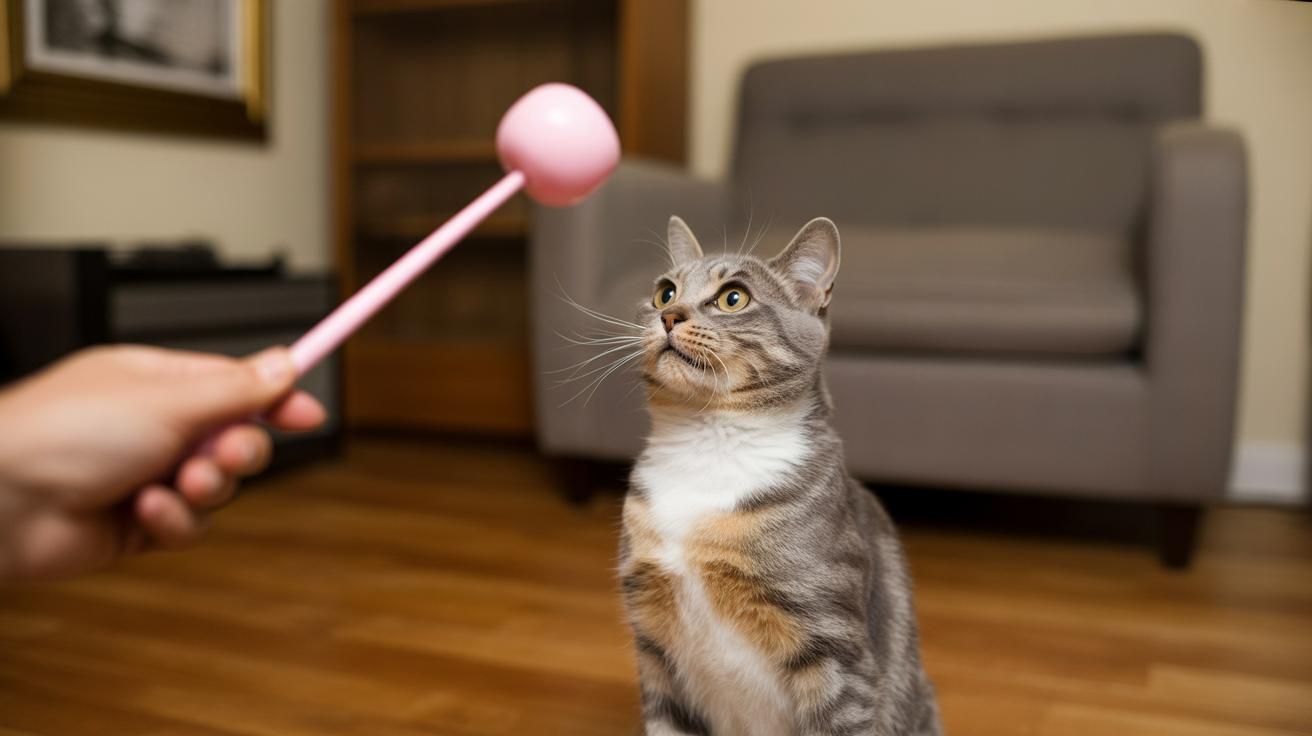
    Teaser wand techniques use a wand (handle with dangling toy) as a moving target: start stationary for sniffing, reward nose touches, introduce gentle motion, then fade the lure to the stick tip.

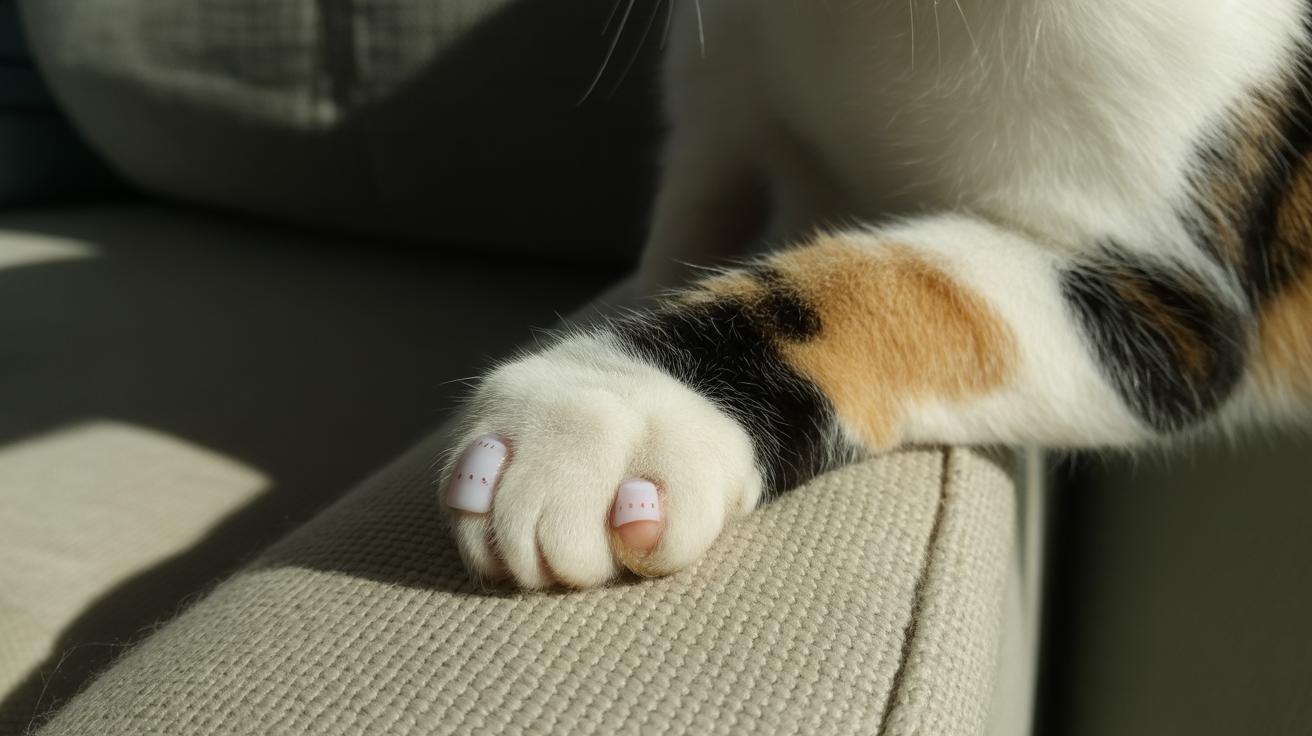
    How to teach paw targeting?

    Teaching paw targeting uses shaping: reward any paw movement toward a marked target, click within <1 second on clear progress, then raise criteria stepwise so the cat lifts the paw on cue.

    What is the easiest trick to teach cats?

    The easiest trick is a nose touch to a target; it’s quick to learn, builds focus, and provides a purr-fect foundation for recalls or paw tricks with short, fun sessions.

    Can I use a clicker with a target stick?

    Yes. Using a clicker with a target stick speeds learning: click the instant of touch and hand a treat within <1 second, practicing high reward rates early to link the sound and the reward.

    Related Articles

  • how to rotate cat toys to prevent boredom

    how to rotate cat toys to prevent boredom

    Think more toys mean more fun? Think again. Cats get bored when everything's always out. A small, hand-picked stash you swap every two to three days keeps their hunting spark alive and cuts down on chaotic shredding. Ever watched your cat's whiskers twitch as a toy rolls across the floor? It’s the best.

    This simple, eight-step rotation shows you how to mix chase toys (fast toys that dart), wrestling toys (for batting and tackling), soft carry toys (small plush toys they can carry), and a scent toy (a toy with a smell cats love). It also walks you through hiding and reintroducing favorites so each toy feels new again. Quick wins: more focused playtime, fewer shredded cushions, and toys that actually last. Try it. Your cat will pounce like it's brand new again.

    Quick 8-step rotation protocol for immediate results

    - Quick 8-step rotation protocol for immediate results.jpg

    Keep a small, hand-picked group of toys out and swap them every 48 to 72 hours to keep things feeling new. Cats love novelty. When a toy becomes too familiar, their hunting spark dulls and they move on, so a compact set that includes chase toys, wrestling toys, soft carry toys, and a scent toy (something with a smell like catnip) keeps play exciting.

    Reintroducing an older favorite often works better than a shiny new gadget. The surprise of a returned toy can spark big pounces. Try nudging it, tapping it, wiggling it, or talking to your cat, and hide toys in different spots , the sofa edge, behind a curtain, a low shelf , to copy the angles of real hunting and get them curious again. Ever watched your kitty sniff a toy like it’s a tiny treasure? Cute, right.

    1. Take inventory of all toys and toss anything broken or dangerous, especially choking hazards.
    2. Sort toys into 3 to 4 sets, and try to give each set a mix: chase, wrestling, soft carry, and a scent toy.
    3. Pick Set A to start and leave a small, curated selection out for daily play.
    4. Stash the rest in a closed bin or drawer to keep them smelling new.
    5. After the baseline cycle (48 to 72 hours , see above), swap Set A for Set B and repeat on that schedule.
    6. When you bring a toy back, show your cat how it moves, and optionally refresh scent with catnip or silvervine (silvervine is a plant many cats love).
    7. Include a short, 5-minute interactive session with one returned toy so your cat remembers how fun it is.
    8. Watch interest over several cycles and shorten or lengthen rotation if needed. Look for boredom signs like ignoring toys, sleeping a lot, overgrooming, or losing interest mid-play.

    Expect fast wins: more playtime, fewer bored antics, and toys that last longer because wear is spread out. Worth every paw-print. For step-by-step wash instructions, retirement rules, and repair tips see Storage/Cleaning/Safety; for longer reintroduction scripts and clever hiding spots see Reintroduction.

    Toy rotation schedules: sample templates and decision rules

    - Toy rotation schedules sample templates and decision rules.jpg

    Start with the baseline protocol from the lede as your timing guide, then pick a template that matches your household rhythm and your cat’s energy. Think about when you have time for short play bursts and when toys need to hold the fort on their own. That helps you set a sensible schedule and decide how often to rotate (swap toys in and out).

    Schedule Name Cycle description Toys per Set Best for
    Brief-cycle template Quick swaps to keep things fresh; short gaps between changes Small curated set (2-4 toys) Very high-energy cats or kittens who love new things
    Moderate-cycle template Regular swaps with enough time for your cat to explore Moderate curated set (4-6 toys) Typical adult indoor cats with mixed activity levels
    Themed-swap template Rotate by theme, like chase week, plush week, or puzzle week Themed sets (grouped by play style) Multi-cat homes or owners who want clear variety
    Low-touch template Long tuck-away storage, fewer returns, focus on puzzle feeders Larger tucked-away stash (8+ toys) Busy owners using puzzle feeders (food-dispensing toys) and occasional play

    Short decision rules: shorten cycles when your cat’s attention drops fast or toys get ignored. Lengthen cycles when a cat digs in and studies a toy for a while. Keep quick notes or a tiny log of engagement scores (how much your cat plays) to guide adjustments. Try one template for several cycles before switching so you can see real trends and fine-tune your schedule.

    Ever watched your kitty sniff a toy like it’s a mystery prize, then pounce? Use that curiosity. Swap novelty and familiar objects, add a short play burst before you leave, and you’ll probably get better engagement. Worth every paw-print.

    How many toys to rotate and how to group them by toy type

    - How many toys to rotate and how to group them by toy type.jpg

    Aim for 2 to 6 toys per active set, with 3 or 4 as a sweet spot for most homes, because that gives variety without overwhelming your cat. Keep each set focused and simple so your cat can learn the game and stay curious. Ever watched a kitty ignore a pile of toys? Less is often more.

    Mix play roles in every set: chase, tug or wrestle, carry, scent, and puzzle (treat-dispensing toy). That way a single rotation hits different instincts, stalking, grabbing, chewing, sniffing, problem-solving. Three toys can cover a lot: a bouncing ball, a crinkle mouse (thin, crunchy material), and a short tug rope make a lively trio.

    Copy-and-play set ideas:
    Set A: 2 chase + 1 scent (two zip-balls and a scent sachet (small pouch with cat-safe scent oils)).
    Set B: 1 tug + 2 plush (soft, fuzzy fabric).
    Set C: 1 puzzle (treat-dispensing toy) + 1 crinkle (thin, crunchy material) + 1 ball.

    Quick kit line you can use: "Set A keeps chasers busy: two zip-balls and a scent sachet make a fast, focused play session." Cute and useful, right?

    Two practical tips to keep rotations fresh:

    • Mix textures and sounds across sets so each rotation feels new. Try plush (soft, fuzzy fabric) + rubber (stretchy, chew-resistant material) + a rattle or a quiet felt ring (soft, dense fabric). Your cat will love the contrast of soft, bouncy, and noisy.
    • Rotate scent-heavy items less often so their oils last longer. Put scented pieces away for 48 to 72 hours between uses instead of swapping them every day, and the smell will stay interesting.

    A plush mouse, a rubber ball, and a quiet felt ring make a lively trio; stash scent sachets for longer breaks so the smell stays special. Worth every paw-print.

    Toy storage, cleaning, safety checks, and when to retire or repair toys

    - Toy storage, cleaning, safety checks, and when to retire or repair toys.jpg

    This is your quick, friendly guide for cleaning, storing, and retiring your cat’s toys. Keep the 48 to 72 hour swap timing from the lede in mind so you know when to pull a new set out of storage. Think of this as the toy rotation cheat sheet.

    Wash washable plush toys on a regular schedule, or sooner if they get slobbered or soiled. Machine-wash soft toys inside a mesh bag (a laundry net that stops tiny toys from snagging) on a gentle cycle, or hand-wash with mild fragrance-free soap (soap without perfumes). Air-dry completely before letting your cat play again so damp stuffing doesn’t grow mold. Keep scented items sealed in a fabric bin with a lid (a cloth storage cube with a cover) or a zip-top bag (plastic bag with a sealing strip) to preserve catnip and silvervine (a cat-attracting plant) oils.

    For electronic toys, battery-powered moving toys, wipe external surfaces with a damp cloth and remove batteries before any washing. Follow the maker’s care instructions for motors (tiny electric engines) and charging ports (where you plug in the charger). If a toy has a charging dock, keep that dry and clean so contacts don’t corrode.

    Do safety checks every swap. Inspect seams (the stitched edges) for loose threads, look for exposed stuffing (soft inner filling), and watch for loose beads or hard bits. Retire frayed strings, loose small parts, or failing motors right away so nothing becomes a choking hazard. Simple fixes that work: restitch seams, replace stuffing with clean fill, sew shut holes, or trim and securely remove dangling bits. If plastic is snapped, electronics are broken, or safety parts are missing and you can’t make it safe again, replace the toy and recycle what you can.

    At each swap, launder washable toys as needed and refresh sealed scent pouches before reintroducing them. Repair small wear or retire anything unsafe. Label containers by set or theme for quick swaps, catnip set, feather wands, fetch balls, so you can grab a ready-to-go box and start playtime fast. Worth every paw-print.

    How to reintroduce novelty when you rotate cat toys: play scripts and placement tactics

    - How to reintroduce novelty when you rotate cat toys play scripts and placement tactics.jpg

    Treat a tucked-away toy like a little happening. Pick a time when your cat is alert but not zonked, do a short demo of movement, and put the toy where it tempts them to poke and sniff. Remember the scent and wash tips from Storage/Cleaning/Safety before you bring anything back, and use staging, timing, and a tiny script so the toy feels brand new.

    Play-session scripts

    A) 5-minute pre-bed chase , tease the toy just out from under a blanket for 20 to 30 seconds, then flick it free so your cat makes a quick sprint. Slow the motion at the end and let them "catch" it. Finish with soft praise and a gentle pet. Your cat’s heart racing, whiskers forward, tail flicking, perfect.

    B) 10-minute tease-and-release , do 60 to 90 seconds of high-energy wand play (a teaser wand is a stick with dangling toys), then give 30 to 60 seconds of rest so your cat can reset. Repeat a few times. After the last burst, leave the toy partly visible on the floor for independent stalking.

    C) Staged ambush , place the toy half visible at a corner or tunnel entrance, drag it out slowly for a second or two, then stop. Wait quietly for your cat to investigate and strike. Use a calm voice and reward with a tiny treat to close the session.

    Advanced placement and hiding tactics

    • Tuck near a sunny window perch so light, sight, and sound help lure investigation.
    • Partially hide behind sofa edges or under a low blanket to create a peek-and-pounce angle.
    • Nest inside a tunnel entrance, a shoe, or a shallow box corner for a surprise find.
    • Set on a low bookshelf ledge or beside a favorite scratching post to mix elevation and scent.
      Vary height, concealment, and the toy’s approach angle to mimic real prey and trigger stalking.

    Try these quick combos: a short interactive chase that ends with the toy placed half-hidden as a hunt, and a mid-day solo enrichment where a returned toy is staged inside a puzzle feeder (a toy that drops kibble when nudged) for independent play.

    Stop and back off if your cat avoids contact, pins ears back, swats hard, or freezes. Those are signs of stress or overstimulation. Clean any toy first per Storage/Cleaning/Safety before it goes back into rotation.

    Worth every paw-print.

    Rotating toys for kittens, seniors, high-energy cats, and multi-cat households

    - Rotating toys for kittens, seniors, high-energy cats, and multi-cat households.jpg

    Match your toy rotation to your cat’s life stage and your home setup. Kittens want fast-changing, chew-safe play; seniors like easy-to-reach, gentle puzzles; and busy or multi-cat homes do best with duplicate favorites and zoned rotations to keep peace and movement.

    Kittens and teething

    Keep a small stash of chew-safe rubber (soft, chewable material) and reinforced fabric toys (seams that stand up to tiny teeth). Swap toys often because kittens get bored fast, and add small puzzle feeders (treat-dispensing toys that are easy to nudge) for brain work and snack motivation. Supervise wand play so a curious kitten doesn’t tangle in string, and retire or repair anything with torn fabric or exposed stuffing, little teeth can shred seams in no time. Your kitten’s whiskers will twitch as the toy skitters across the floor. Cute, chaotic, and educational.

    Multi-cat and high-energy household tactics

    Make duplicates of high-value toys so no one has to guard the prize. Zone your rotations by room and stagger when toys come back out, so multiple cats don’t all rush the same item at once. Set up a few play stations with different toy types, one room for chase, another for puzzle play, so activity spreads out and tension drops. For wand toys, always supervise active sessions to prevent tangles and damage, and swap in fresh toys before a session gets too intense.

    Try these quick templates:

    • Kitten template , frequent swaps with chew-safe bits, short supervised wand bursts, and small puzzle feeders for developmental play.
    • Senior template , longer windows for slow, curious investigation, low-effort puzzles at reachable heights, and soft toys that don’t need big jumps.
    • Multi-cat / high-energy template , duplicate high-value items, zone your returns across rooms, and stagger reintroductions to match each cat’s peak energy so play stays fun, not frantic.

    Worth every paw-print.

    DIY and budget-friendly toy rotation projects, tracking templates, and a quick rotation checklist

    - DIY and budget-friendly toy rotation projects, tracking templates, and a quick rotation checklist.jpg

    Rotate, repair, and repurpose before buying new. It saves money and, honestly, your cat often gets more excited by a refreshed toy than a shiny new gadget. Keep a tiny log so you can spot what really gets their whiskers twitching.

    Project A – Crinkle balls
    Make a noisy, irresistible ball by scrunching clean, food-safe paper into a tight ball, wrapping it with masking tape (low-tack adhesive tape), and tucking a small scrap of foam (soft padding) or folded cloth inside for a little give. Materials: clean paper, masking tape, small foam or cloth scrap. Safety note: toss at the first sign of tears. No loose bits that can be swallowed.

    Project B – Sock pouches
    Turn an old sock into a quick catnip pouch: stuff it with catnip or silvervine (a plant that many cats love), then stitch the opening closed with reinforced seams. Materials: clean sock, catnip or silvervine, needle and thread. Safety note: double-stitch the seam and retire the pouch if stitching comes undone.

    Project C – Cardboard puzzle box
    Cut sliding compartments into a shallow box and hide a favorite toy in each slot so your cat has to work to get it out. Materials: sturdy cardboard, box cutter (sharp utility knife), tape. Safety note: sand or cover any sharp edges and supervise the first few plays so your cat can’t chew off loose strips.

    Quick tracking tip
    Keep a simple log with these fields: date, set name, toy ID, engagement score (1–5), and a one-line behavior note. Use your phone notes or a tiny spreadsheet, whatever you’ll actually keep up with. Run each toy set for several cycles before deciding to repair, retire, or donate so real trends show up.

    Sample tracking template:

    Date Set Name Toy ID Engagement (1-5) Notes
    2026-02-01 Crinkle Pack CB-01 4 Chased across living room carpet
    2026-02-03 Sock Pouches SP-02 2 Lost interest after 3 plays

    Maintenance and safety checklist

    • Inspect toys weekly for frays, tears, or loose pieces. Toss anything unsafe.
    • Launder washable toys when they smell or after rough play.
    • Refresh sealed scent pouches (small fabric bags with cat-safe scents) if the smell fades.
    • Before putting a new set back in rotation, run a short 5-minute play test and record the engagement in your log.

    A tiny pro tip: for busy days, toss an unbreakable ball or two before you leave, that's ten minutes of safe, focused play. I once watched Luna leap six feet for a crinkle ball. Worth every paw-print.

    Final Words

    Start with a small, curated set and swap on a 48–72 hour cycle to keep toys feeling fresh. Balance chase, wrestling, soft-carry, and scent items so hunting instincts stay sparked.

    Tuck extras in sealed bins, run a quick 5-minute reintroduction, check for loose bits, and wash washable toys as needed. Your cat's whiskers will tell you if it’s working.

    Follow this quick protocol and you'll see more pouncing, calmer multi-cat flow, and longer-lasting toys. A simple routine that saves time and shows how to rotate cat toys to prevent boredom. Worth every paw-print.

    FAQ

    FAQ — Rotating Cat Toys

    How to rotate cat toys?

    Rotating cat toys means keeping a small curated set and swapping toys every 48–72 hours to preserve novelty. Mix chase, wrestling, soft-carry, and scent items; store extras in a closed bin and reintroduce with play.

    How often should I rotate cat toys?

    Rotating frequency should follow a 48–72 hour baseline, shorten cycles if attention fades quickly, or lengthen them when a cat investigates deeply; try several cycles to find the rhythm that keeps play lively.

    How many toys should a cat have?

    How many toys a cat should have is a small active set (about three to six varied toys per set) plus a tucked-away stash so each return feels fresh and interesting.

    How do I entertain my cat if he gets bored easily with toys?

    Entertaining a bored cat means rotating toys, short interactive sessions (five minutes), hiding returned toys, using puzzle feeders (food-dispensing toy), refreshing scent, and checking wear to keep play safe and fun.

    Are Da Bird, Cat Tunnel, Cat Dancer, or SnugglyCat Ripple Rug good for rotating?

    These toys work great in rotation: Da Bird for supervised wand chases, Cat Tunnel for ambush play, Cat Dancer for high-energy pounces, Ripple Rug for scent and search games; rotate and wash per materials.

    Where can I find rotation ideas on YouTube or Reddit?

    Finding rotation ideas on YouTube and Reddit means watching short demo videos for play scripts and hiding tricks, and reading community threads for DIY fixes, timing tips, and real-life test results.

    Do cats like spinning in circles?

    Cats spinning in circles is usually playful or tied to chasing tails; brief spins are normal, but repetitive or dizzy-seeming spinning can signal a problem and should prompt a vet check.

    Related Articles

  • why does my cat pounce on toys: reasons

    why does my cat pounce on toys: reasons

    Ever watch your cat pounce on a toy and wonder if it’s hunting, showing off, or just being dramatic? Their whiskers twitch, their back legs coil, and then bam. It’s a tiny wild moment right in your living room.

    There are three simple reasons. First, instinct (the predatory sequence, the steps cats use to catch prey: stalk, set up, pounce, toss). Second, play for practice and pure joy. Third, they need to burn off extra energy. Toys become tiny training grounds for all three.

    Read on to see how that hunting script actually plays out, what normal pouncing looks like, and quick toy and timing tips to keep play safe, lively, and less sock-destroying. Ever timed a ten-minute toss before you leave? Works like a charm.

    why does my cat pounce on toys: reasons

    - Core reasons why my cat pounces on toys.jpg

    Your cat usually pounces on toys for three simple reasons: instinct, play, and to burn off extra energy. Instinct means the predatory sequence (the step-by-step hunting routine: stalk, position, pounce, toss). Play is practice and fun. And that extra energy needs an outlet, fast, focused bursts of action.

    If you want the mechanics, see The predatory sequence; for safety signs, see When pouncing is normal and when it needs attention; for toys and timing, see Best toys and Indoor enrichment.

    At the root is that predatory sequence (again: stalk, position, pounce, toss). Cats run that script on toys to rehearse hunting moves, conserve effort, and score short, intense exercise sessions. Procedural cues and timing (how cats learn the order and rhythm of those moves) are covered in The predatory sequence.

    Worth every paw-print.

    The predatory sequence that leads cats to pounce on toys

    - The predatory sequence that leads cats to pounce on toys.jpg

    Play pounces follow a short, repeatable hunting routine: alert and fixate, slow stalking, a hindquarter settle and wiggle, then a focused launch and capture or toss. Watch closely and you’ll see each beat, like a tiny performance that keeps your cat sharp and joyful.

    Stalking
    Stalking (the quiet, careful approach) is when your cat sizes up distance. Look for a low body posture, tiny forward steps, ears forward, and eyes locked on the target. This stage is where they decide how much energy to spend, so slow or still toys are perfect practice. Try hiding a plush or nudging a ball a little bit to invite that patient creep.

    The hindquarter wiggle and positioning
    Right before takeoff the back end settles and wiggles – a short power-load shimmy that lines up the hips and stores spring. Hindquarters (the cat’s back end that powers jumps) will shift, the tail may flick, and the hind feet dig in. Bigger or farther targets mean a deeper crouch and a longer wiggle, so those extra moves tell you your cat is setting up for a bigger leap.

    The pounce, toss and follow-up
    The actual pounce is an explosive burst: leap, bat or grab, then hold, bite, or toss the toy while testing the catch. Cats often bat and toss like real prey to reposition for a quick bite. Kittens usually master the basic mechanics by about nine weeks, and their accuracy improves over the next few months as muscle control and timing tune up.

    Match toys to each stage to keep play satisfying and safe. Low, slow-moving plush and hidden toys invite stalking. Feather and teaser wands (think fishing rod for cats) provoke the wiggle-and-launch rhythm with short, angled pulls. Stationary plush mice let cats practice capture and toss. Motion toys and lasers mimic erratic prey, but finish the session with a tangible toy so your cat gets a real catch. In short, supervised sessions cue small increases in distance or speed, praise or give a tiny treat for clean captures, and pause play when form slips to help build precision. Worth every paw-print.

    Ever watched Luna leap six feet for a toy? It’s the best. Keep it short, keep it fun, and your cat will stay sharp and feline fine.

    Why kittens vs adult cats pounce on toys differently

    - Why kittens vs adult cats pounce on toys differently.jpg

    Kittens pounce a lot because it’s practice and play all rolled into one. They’re roughhousing with littermates, learning timing and coordination, and testing bite-and-toss moves when they play with you. They’ll do the same hop-and-bat again and again, tiny lessons that build muscle and hunting instincts, and you can almost hear the satisfying thud when a plush mouse hits the floor.

    Adults follow the same hunting script, but the tempo changes. They do fewer repeats and prefer short, deliberate bursts of action. Think stalking-style toys (a slow, quiet approach to prey) over non-stop chase games, adults pick moments when they’re primed for a brief, intense sprint, not an all-day marathon. Ever wonder “Why does my cat pounce on toys?” Timing is the big clue.

    Senior cats still love to pounce, but tweak the setup a bit. Lower jumps, softer plush targets, and shorter sessions help limit joint stress (pressure on their joints). Gentle wand pulls, low-trajectory balls, and cushioned landing spots keep play safe and fun while helping mobility and weight control. Worth every paw-print.

    When pouncing on toys is normal and when why my cat pounces on toys could need veterinary attention

    - When pouncing on toys is normal and when why my cat pounces on toys could need veterinary attention.jpg

    Short, repeatable pouncing that follows the stalking sequence (stalk, pounce, grab, calm) is normal. Your cat is practicing hunting moves, getting a quick burst of exercise, and bonding with you. If the play is redirectable, stays brief, and your cat settles afterward, it’s healthy behavior , practice play, basically.

    Watch for warning signs that something’s off. These include sudden spikes in aggressive pouncing, biting that leaves marks, big changes in appetite or litter-box use (litter-box means where your cat pees or poops), and constant restlessness or pacing , that last one can sometimes point to hyperthyroidism (overactive thyroid gland). Also pay attention if pouncing seems tied to pain, like limping after a jump.

    If these actions show up suddenly or get worse over several days, get help. For a basic list of warning signs and simple steps you can try at home, see ASPCA – Common Cat Behavior Issues.

    Practical next steps you can do right now: keep a simple log with date, time, what happened right before the pounce, and how long it lasted. Video is huge when it’s safe to record , a short clip tells a vet so much. Note any recent household changes (new pet, loud noises) and list current meds.

    Try gentle de-escalation at home: stop play, put the toy down, give a quiet timeout, then redirect to a safe chewable or plush toy. If injuries happen, eating or litter habits change, or the behavior keeps escalating past a few days, call your vet sooner. Medical issues like hyperthyroidism (overactive thyroid gland) or pain can drive hyperactivity, so share your notes and clips with your clinician and ask about a behaviorist referral (trained animal behavior specialist) if they recommend one.

    Sometimes it’s nothing more than zoomies. Sometimes it’s a clue. Trust your gut, and bring the evidence , dates, videos, and a short rundown , to your vet. Worth every paw-print.

    Best toys and a toy comparison table for cats that pounce on toys

    - Best toys and a toy comparison table for cats that pounce on toys.jpg

    Feather and teaser wands, plush mice, laser pointers, motion-activated gadgets, puzzle feeders, and heavy-duty plushies are the go-to playthings for indoor pouncers. Pick wand toys and feather toys to train the full stalk-to-pounce rhythm. Look for durability and safe materials like tough nylon (a strong, scratch-proof fabric) or reinforced synthetic fiber (long-lasting, like a fishing-line weave). Watch small parts , loose eyes, bells, or glued-on bits can be swallowed by eager biters, so avoid them.

    Ever watched your kitty stalk a feather? It’s pure joy. Short, focused sessions are best , cats tire of endless chases, and you want each play to end in a win.

    Toy-specific session tips and endings

    Wand/feather – Play in short bursts. Let your cat stalk, then pull the toy fast so it wiggles and launches. Finish by dropping a plush or toy mouse so the hunt ends with a real catch and that satisfying thud.

    Plush mouse – Hide it under a towel or tuck it behind a box, then reveal it slowly. That slow, patient stalk before the pounce is great practice for hunting skills and very rewarding for kittens and indoor hunters.

    Laser pointer – Use for quick chase bursts only. Always end the session by letting your cat grab a tangible toy so they don’t get frustrated chasing an unreachable dot. You want fun, not feline confusion.

    Motion-activated toys – Limit continuous cycles to about 5 to 10 minutes. Rotate them in and out of the toy box so a once-boring toy feels new again. Great for solo play and mental sparks when you’re out.

    Puzzle feeders – Turn meal time into slow hunting by scattering kibble or treats inside. It slows eating, adds mental work, and rewards the hunt , perfect for bored or overweight cats.

    Durable plush (no small parts) – Choose toys with reinforced seams and no detachable bits for safe, vigorous pouncing and tossing. For rough players and seniors alike, a tough plush is worth every paw-print.

    Worth every paw-print.

    Toy Type Why it gets them pouncing Best use / age
    Wand / feather Mimics real prey movement so cats practice stalking then pouncing Interactive play for all ages
    Plush mouse Stationary target that invites slow stalking and a satisfying catch Kittens and indoor hunters
    Laser pointer High-energy chase bursts; super engaging but mentally tricky Use sparingly; best for adult cats
    Motion-activated toy Solo play that surprises and stimulates hunting instincts Great for alone time; rotate every few days
    Puzzle feeder Combines hunting with feeding for slow, rewarding play Overweight or bored cats
    Durable plush (no small parts) Safe target for rough pouncing and tossing; reinforced seams matter Senior-friendly and tough players

    How to stop rough or overstimulated pouncing on toys

    - How to stop rough or overstimulated pouncing on toys.jpg

    Play can flip from fun to frantic in a heartbeat. Ever watched your kitty go from soft chases to wild lunges? If play gets rough, act fast to calm them and teach gentle moves.

    How to de-escalate rough play

    • Watch for the warning signs. Tail lashing, flattened ears, a hard, fixed stare, or sudden nips mean it’s time to pause play now. Those little signals are your cat saying, “Too much.”

    • Stop play immediately. Put the toy down and turn away so your cat loses access to the reward. Don’t shout or grab, just remove the fun and stay calm.

    • Give a short, calm timeout. Thirty seconds to a few minutes in a quiet spot (lower the lights, move away from other pets) helps arousal drop. Keep things boring. That’s the point.

    • Redirect to a safe substitute. Offer a chewable (soft, durable toy) or a plush toy (like a tiny mouse) and never use your hands as toys, oops, I mean seriously, keep fingers off. Teach biting to happen on toys, not skin.

    • Bring play back slowly. When your cat looks relaxed, try very low-intensity play, gentle wiggles or a slow teaser. End the session with a clear catch or reward (a plush mouse or a tiny treat) so the last thing they remember is calm.

    If rough play keeps happening, start logging incidents, dates, triggers, what you were doing, videos if you can. Then check in with your vet or a behaviorist (a certified cat behavior specialist) to get targeted help.

    Indoor enrichment and long-term strategies for cats that pounce on toys

    - Indoor enrichment and long-term strategies for cats that pounce on toys.jpg

    Try a simple play schedule you can actually stick to: two active 5 to 10 minute wand sessions each day , one after you wake up and one before bed , plus a quick 3 to 5 minute sprint in the evening, or a tiny midday burst for really high-energy cats. The wand toy (a stick with feathers or ribbon you flick around) mimics prey and lets your cat leap, bat, and pounce in short, satisfying rounds. Predictable windows make it easier for you and your cat to know when playtime happens, so neither of you gets frustrated.

    These short, prey-like bursts are great for indoor hunting enrichment. Your cat’s whiskers will twitch as the toy zips past, and those mini-chases burn calories and help build lean muscle , good for weight control and keeping them sharp. Ever watched your kitty stalk a sock for five glorious minutes? That kind of focused play really helps.

    Rotate toys weekly so each one feels new again (toy rotation means swapping a few toys in and out). Add simple environmental perks: cardboard boxes for ambush spots, low fabric tunnels for quick sprints, and elevated perches for watching and stalking from above. Little changes make big differences , a new view or a hidden box can turn ho-hum into full-on pounce mode.

    Use puzzle feeders (a device that releases kibble when your cat bats or nudges it) to slow meals and add brain work to feeding. Motion-activated devices (battery toys that move on their own) are fun for solo hunting, but keep their run-time short and mix them with quiet, battery-off toys so your cat stays curious. Phase in new items slowly , one change every 3 to 7 days , so your cat learns to engage without getting overstimulated.

    For long-term behavior shaping, try clicker training (a small handheld clicker that marks the exact moment your cat did the right thing) and teach a "drop" cue for soft releases instead of biting. Reward small improvements and slowly increase or decrease the challenge over weeks. I once taught a rescue to drop a toy for a treat , took patience, but it worked, and the pride was real.

    In homes with multiple cats, stagger play sessions so one cat doesn’t redirect its excitement toward a roommate, and make sure there are multiple puzzle toys or feeding stations to avoid competition. Keep a simple log: play frequency, session length, and any rough incidents. If rough play or injuries continue after consistent training for several weeks, check in with your vet or a certified behaviorist for a tailored plan.

    Worth every paw-print.

    Quick FAQs about why my cat pounces on toys

    - Quick FAQs about why my cat pounces on toys.jpg

    Q: Why does my cat pounce on toys?
    A: Mostly instinct and the need to move. Cats have a predatory drive (their natural hunting instinct), so short, focused play helps them shine. Try 10–15 minutes of active play twice a day and you’ll see a calmer, happier kitty. See [The predatory sequence](The predatory sequence) for the mechanics.

    Q: What commonly triggers pouncing in the house?
    A: Movement that looks like prey, sudden noises, or something new in the room, like a new pet or piece of furniture, usually sets them off. Your cat’s eyes lock on tiny, quick motions; that’s all it takes. For a deeper list of triggers, check [When pouncing is normal and when it needs attention](When pouncing is normal and when it needs attention).

    Q: How can I tell play aggression from normal hunting play?
    A: Try this simple test. Stop the game and offer a wand toy (a stick with feathers or string) within 10 seconds. If your cat calms down and goes for the wand, it’s likely normal play and redirection worked. If your cat bites hard enough to break skin or keeps attacking after you redirect, that’s a problem and you should take action. More on this at [When pouncing is normal and when it needs attention](When pouncing is normal and when it needs attention).

    Q: What are the best toys to encourage healthy pouncing?
    A: Wand-and-feather toys (think fishing rod for cats), plush mice, and puzzle feeders (food-dispensing toys) are winners. Rotate toy types each week so play stays fresh and exciting. Your cat will love the chase, and you’ll love the quieter afternoons. See [Best toys and a toy comparison table](Best toys and a toy comparison table) for specifics.

    Q: When should I see a vet about pouncing behavior?
    A: Call your vet if pouncing causes injury, starts suddenly, comes with appetite or litter-box changes, or happens more than twice a day for several days. Those can be signs something else is going on. Better safe than sorry, your vet can help figure out why.

    Final Words

    In the action, we named the three main reasons cats pounce, instinct, play, and burning off extra energy, and walked through the predatory sequence: stalk, position, pounce, toss. (Quick, sensory, useful.)

    We compared kittens and adults, flagged red flags that mean a vet check might help, matched toys to each stage, and gave calm-down steps plus long-term play plans so toys last and cats stay busy.

    If you've been asking why does my cat pounce on toys, it’s usually normal, and with a little planning, it can be safe, satisfying, and downright fun.

    FAQ

    Frequently Asked Questions

    Why does my cat pounce on toys?

    Your cat pounces on toys because instinct (predatory sequence: stalk, position, pounce, toss), playful practice, and to burn off pent-up energy. See the predatory sequence; when pouncing is normal and when it needs attention; best toys and indoor enrichment.

    Why does my cat pounce on me, bite, or pounce then run away?

    When your cat pounces on you it’s usually play, overstimulation, redirected hunting, or attention-seeking. Stop play, withdraw, offer a toy, then reward calm. See how to stop rough or overstimulated pouncing on toys.

    How do you tell which of your cats is the alpha?

    Tell by watching resource control, who starts or wins conflicts, who eats first, and favored-spot claims. “Alpha” can oversimplify. See indoor enrichment for multi-cat adjustments.

    What is the 3-3-3 rule for new cats?

    The 3-3-3 rule means three days to settle, three weeks to start bonding, and three months to feel fully adjusted; it helps set expectations and patience. See indoor enrichment for schedules and tips.

    What is a red flag behavior in cats?

    A red flag behavior is a sudden change such as new aggression, repeated targeted biting, litter-box issues, appetite loss, or extreme restlessness; these may signal pain or illness. See when pouncing is normal and when it needs attention.

    What toys are best for pouncing?

    Best toys for pouncing are feather wands, plush mice, motion-activated devices, puzzle feeders, durable plushes, and short laser bursts that finish with a catchable toy. See best toys and a toy comparison table.

    Related Articles

  • Best Scratch Posts for Indoor Cats: Top Picks

    Best Scratch Posts for Indoor Cats: Top Picks

    Think your cat loves the sofa more than its toys? You’re not the only one. Indoor kitties often pick couch chaos when they don't have a sturdy scratch post to claim. Ever watched your cat dig in like it’s digging for treasure? Oof, right.

    We tested top-rated scratch posts for stability (how wobble-proof it is), the scratching surface – sisal (rough natural fiber like coarse rope), footprint (how much floor space it uses), and how long they actually hold up to sharp claws, so you don’t end up buying something your cat shreds in a week. We looked for posts that feel solid, stay upright, and give that satisfying scratch every time.

    Match the post to your room and your kitty’s stretch style. Some cats go full-body vertical, like tiny panthers, while others prefer a low lounge for full-flop naps. Our picks cover both: SmartCat, MidWest, Modkat, PetFusion, plus budget winners that really last. Worth every paw-print.

    Best Scratch Posts for Indoor Cats: Top Picks

    - Best Scratch Posts  Quick Buying Answers and Top Picks.jpg

    Top pick – SmartCat The Ultimate Scratching Post.
    Runner-up – MidWest tall post.
    Best budget – Amazon Basics or Frisco.
    Best for large cats – MidWest.
    Best horizontal – Modkat.
    Best lounge – PetFusion.

    We looked at top-rated indoor scratch posts for stability, scratching surface, footprint, and how long they hold up so you don’t buy something your cat ruins in a week. Match the model to your room and your cat’s stretch style , some cats love to go full-body vertical, others prefer a low lounge to knead and flop on. Ever watched your kitty stretch up like a tiny panther? That helps decide which post to buy.

    Quick picks, short notes:

    • SmartCat The Ultimate Scratching Post – Simple, sturdy, and built to last; mid-range $50 – $150. Best for vertical stretching.
    • MidWest tall post – Heavy-duty, built for big cats who want a full-body stretch; mid-range $50 – $150. Best for large cats.
    • Amazon Basics Cat Scratching Post – Cheap, tall, and easy to put together with a toy on top; budget under $50. Great starter option.
    • MECOOL Premium Basic – Comes in compact sizes, well-wrapped sisal for kittens or tiny apartments; mid-range $50 – $150. Best for small spaces and kittens.
    • Modkat Horizontal Scratcher – Sleek wooden lounger for floor-level play, a bit pricier but looks nice; premium $150+. Best horizontal option.
    • PetFusion Ultimate Cat Scratcher Lounge – Big corrugated cardboard lounge that doubles as a bed and scratcher; premium $150+. Best for chill loungers.

    Here’s a handy table with the specs so you can eyeball height, base size, material, and where each one shines.

    Model Height Base Material Best for Price range
    SmartCat Ultimate About 32 inches 16 x 16 inches Sisal rope (natural plant fiber, rough and durable) Vertical stretching Mid-range $50 – $150
    MECOOL Premium Basic Two heights: 22 inches or 34 inches 11.8 x 11.8 inches Sisal rope (tightly wrapped for long wear) Compact spaces / kittens Mid-range $50 – $150
    Amazon Basics About 31.5 inches 15.75 x 15.75 inches Sisal-covered post, fabric base (soft fabric for footing) Budget buyers Budget under $50
    Modkat Horizontal 26.6 – 30 inches long Low-profile base Wood (smooth, sturdy surface) Floor-level lounging (supports ~11 lb) Premium $150+
    MidWest Large Cat Up to about 41 inches (tall models) Wide, sturdy base Thick sisal rope (extra-durable plant fiber) Large, heavy cats Mid-range $50 – $150
    PetFusion Lounge About 41 inches lounge length About 19.3 x 19.3 inches top Corrugated cardboard (layered cardboard that cats shred and love) Lounge-style scratcher Premium $150+

    Want help choosing? Think about how your cat stretches, how much floor space you have, and whether you need something budget-friendly or ultra-sturdy. For busy days, toss an unbreakable ball or point the post toward a sunny window , that’s ten minutes of safe, happy play. See How to Choose for key features and materials.

    How to Choose a Scratch Post for Indoor Cats (Height, Base, Material, Stability)

    - How to Choose a Scratch Post for Indoor Cats (Height, Base, Material, Stability).jpg

    This short guide helps you pick a scratching post without reading a whole manual. Peek at the Top Picks table for exact model sizes and match them to your room and your cat’s favorite stretch style.

    Height matters. Aim for about 3 feet (36") or taller so your cat can stand up and fully extend. Kittens do better with lower posts (about 18-28"), and big breeds need taller posts so they don’t feel cramped. If your cat can’t stretch all the way, they’ll try something else, like your couch.

    Base and stability beat fancy bells and feathers for everyday use. Go for a base that’s about 1-3 ft wide to cut down tipping. Check the screws and assembly hardware, and look for anti-tip brackets or floor-mount options (brackets that bolt the post to the floor or wall). Give a firm wiggle test: if it wobbles when your cat swipes, it’s not a keeper.

    Think about levels and footprint next. Multi-level posts or a perch add climbing and nap spots. Low loungers save floor space in small apartments. For multi-cat homes, mix tall posts and low pads so everyone has a spot to claim.

    Worth every paw-print.

    Materials Comparison

    Sisal rope (natural coarse fiber cats love to sink claws into) is the go-to for long wear. Cardboard (corrugated paper with soft texture) is comfy and cheap but wears faster. Carpet (loop or cut-pile synthetic flooring) feels familiar but can fray. Wood (solid or plywood platforms) works great for low, horizontal scratchers.

    Examples you might see in the Top Picks: SmartCat uses sisal, PetFusion offers cardboard loungers, and Modkat has wood options.

    Lifespan snapshot:

    • Sisal: 12+ months with heavy use
    • Cardboard: 1-6 months depending on how rough they play
    • Carpet: about 6-12 months, variable

    Quick checklist before you buy:

    • Height: kittens 18-28", most adults 36"+, giant breeds taller.
    • Base: aim for 1-3 ft width for stability.
    • Substrate: sisal rope (durable) is my top pick.
    • Weight capacity: check weight limits for big cats or heavy jumpers.
    • Anti-tip: look for brackets or floor mounts for extra safety.
    • Replaceable parts: rope wraps or pads that you can swap out extend life.
    • Levels: 2+ levels help climbing, playing and sharing.
    • Footprint: choose slim verticals or wall panels for tight spaces.

    Quick fit test:

    1. Measure your cat from shoulder to paw while they stand and compare that reach to the post height.
    2. Place and firmly wiggle the post to test stability.
    3. Let your cat try it. Watch whiskers twitch and paws sink in, minimal wobble and a good grip mean success.

    A tiny pro tip: toss an unbreakable ball or tug the teaser near the new post for a few minutes to encourage use, works wonders, trust me.

    Best Scratch Posts for Indoor Cats: Top Picks

    - Best Scratch Posts for Different Cat Types and Homes (Kittens, Large Cats, Multi-Cat, Apartments).jpg

    If you're skimming for the best scratching posts for indoor cats, I get it. For the quick version, check How to Choose for the one-line advice on matching post height (so your cat can fully stretch) and base stability (so it won't wobble).

    Then peek at the Top Picks table above to compare models side by side and find the size and sturdiness that fit your space and budget. Worth a quick look, your kitty will thank you with purrs and head bumps.

    Training, Placement, Maintenance and Replacement: Long-Term Care for Indoor Scratch Posts

    - Training, Placement, Maintenance and Replacement Long-Term Care for Indoor Scratch Posts.jpg

    Keeping scratch posts in good shape makes them last longer and keeps your cat safe. A little routine goes a long way. Place new posts where your cat already likes to scratch, try a dab of catnip or a wand toy to draw them in, and swap between options like the PetFusion lounge or a low MECOOL post to keep playtime fresh.

    Numbered training plan (5 steps) , practical actions for training cats to use scratch post:

    1. Put the post next to the couch or your cat’s favorite nap spot so they find it where they already hang out.
    2. Rub a little catnip on the surface or spray it lightly, and give a tiny treat when they touch it. Positive rewards speed learning.
    3. Use a wand toy to mimic prey and move it up and down the post so scratching feels like play. Think fishing rod for cats.
    4. Praise and reward every successful scratch; do short practice sessions each day until it’s a habit. Patience pays off.
    5. In multi-cat homes, keep a spare post or two so nobody has to crowd the same spot.

    Scratch post maintenance tips , quick checklist:

    • Do a weekly visual check for heavy fraying or loose fibers.
    • Tighten screws and hardware (screws, bolts) every month.
    • Replace sisal wraps (coarse rope made from agave fibers) or cardboard pads (corrugated scratching surface) when they wear.
    • Vacuum or brush to remove debris and catnip dust.
    • Rotate posts between rooms to renew interest.
    • Retire or replace surfaces that are shredded or have become slippery.

    When to Replace

    Condition Action
    Frayed sisal Replace rope wrap or retire post
    Wobbling post Tighten hardware; if still wobbly, retire
    Shredded cardboard Replace pad or swap in a new lounge
    Toy failure Replace toy or remove for safety

    Check warranty and replaceable parts before you buy so you can get new ropes or pads down the road. That saves money and keeps your kitty claw-tastically happy.

    Budget to Premium: Price Bands & Buying Checklist

    - Budget to Premium Price Bands, Warranty Notes, and Where to Buy Best Scratch Posts for Indoor Cats.jpg

    Peek at the Top Picks table for exact prices and dimensions, then pick the price band that fits your cat’s play style and the room you’ll put it in. Think about who uses it – one sleepy senior, a zooming kitten, or a crew of fluffballs – and how much space you have. At shopping time, the return window, availability of replacement parts, and the warranty fine print usually decide long-term value (for example, covers manufacturer defects 12 months; cushions and normal wear excluded).

    Price bands

    • Budget: under $50 , simple cardboard (thick paperboard that cats love to shred) and basic sisal posts (natural fiber rope for scratching). Great for testing what your cat likes.
    • Mid: $50-$150 , sturdier posts wrapped in sisal (durable scratch material) and better platforms. Good for most single-cat homes.
    • Premium: $150 and up , big towers, designer loungers, and comfy cushion pads (soft removable pads). Best for multi-cat households or long-term use.

    Buying checklist at checkout

    • Return policy and length. Compare the time window and watch for restocking fees or conditions.
    • Availability of replaceable parts. Can you buy new rope, pads, or replacement posts later (so you don’t toss the whole thing)?
    • Warranty length and coverage. Read the exclusions and the steps to get service or a replacement.
    • Assembly complexity and tools required. Does it come pre-assembled or will you need extra tools and time?
    • Shipping and return costs. Check for bulky-item fees and who pays return shipping if it doesn’t work out.

    A quick tip: match the warranty and replaceable-parts options to how long you want it to last, not just the dimensions. Ever watched a cheap post collapse in a week? Yeah, you’ll thank yourself for planning ahead. Worth every paw-print.

    Final Words

    Pick the SmartCat Ultimate for reliable full-body stretches. MidWest makes a sturdy runner-up, and Amazon Basics or Frisco cover budget needs.

    We compared stability, substrate (sisal (coarse plant fiber)), footprint, and longevity, then added placement, training, and maintenance tips so play stays fun and safe. Quick size checks like a 3-foot stretch and a 1–3 foot base help match fit.

    Match a Top Picks model to your space, swap textures to keep interest, and keep a spare for busy days. These recommendations are the best scratch posts for indoor cats.

    FAQ

    Frequently Asked Questions

    Best scratch posts for indoor cats reddit

    The best scratch posts for indoor cats on Reddit are tall sisal (rough plant fiber) towers like SmartCat, sturdy MidWest posts, and budget picks such as Amazon Basics or Frisco, praised for texture and stability.

    <details>
      <summary>Heavy Duty Cat Scratching Post</summary>
      <p>The best heavy-duty scratching posts are wide-based, thick-sisal (rough plant fiber) towers like MidWest and SmartCat; pick thicker rope and a 1–3 ft base to stop tipping and handle big cats.</p>
    </details>
    
    <details>
      <summary>Best scratch posts for indoor cats amazon</summary>
      <p>The top scratch posts sold on Amazon are Amazon Basics for budget shoppers, SmartCat for value, and Frisco lines for variety; check return policy and replaceable parts before you order.</p>
    </details>
    
    <details>
      <summary>Best scratching post for cats nails</summary>
      <p>The best scratching posts for cat nails are sisal-covered posts (sisal: rough plant fiber) because the coarse texture helps shed nail sheaths and keeps claws trimmed and healthy.</p>
    </details>
    
    <details>
      <summary>Best horizontal cat scratcher</summary>
      <p>The best horizontal cat scratcher is a sturdy wood (solid board) or thick cardboard (corrugated paper) model like Modkat for wood options or PetFusion lounge for cardboard comfort and lounging.</p>
    </details>
    
    <details>
      <summary>Is SmartCat The Ultimate Scratching Post a good pick?</summary>
      <p>The SmartCat Ultimate Scratching Post is a top pick for indoor cats thanks to its tall reach, sisal (rough plant fiber) cover, sturdy base, simple assembly, and balanced price for quality.</p>
    </details>
    
    <details>
      <summary>Which budget or popular models should I consider (Frisco, Amazon Basics, MECOOL, PetFusion)?</summary>
      <p>The budget and popular models to consider are Amazon Basics and Frisco for low cost, MECOOL for compact height options, and PetFusion for a large cardboard lounge that doubles as a bed.</p>
    </details>
    
    <details>
      <summary>Best scratching post for large cats</summary>
      <p>The best scratching posts for large cats are tall, heavy-base models like MidWest or SmartCat with thick sisal rope (rough plant fiber) and solid hardware so your big buddy can stretch without wobble.</p>
    </details>
    

    Related Articles

  • Soft Nail Caps for Cats: Sizes, Safety, Brands

    Soft Nail Caps for Cats: Sizes, Safety, Brands

    Want to protect your sofa without resorting to declawing?
    Soft nail caps are tiny plastic or vinyl (vinyl is a soft, flexible plastic) covers you glue over a cat’s claw. They let the nail retract and grow, and they blunt scratches so your couch gets pats instead of rips. It’s a humane, low-stress option when you pick the right size and check them often.

    How do they work? Think of them like little soft caps that sit over the tip of the nail. When your cat stretches and scratches, you still get the satisfying thud of paws, but the claws won’t shred upholstery. Cats can play, climb, and knead just like normal.

    Picking the right size matters. Measure the width of your cat’s nail at the base and match the kit’s size chart – most kits include several sizes. If a cap is too loose it’ll fall off; too tight and it’s uncomfortable, so aim for a snug fit.

    Putting them on is simple. Trim any long tips, wipe the claw clean, squeeze a tiny drop of the special glue into the cap, then press it onto the nail and hold for a few seconds. Use only glue made for nail caps and follow the kit instructions closely. Supervise your cat for the first hour so they don’t chew at the caps.

    Check and replace them regularly. Look at claws every 2 to 4 weeks and swap caps that are loose or worn, most fall off naturally with nail growth around 4 to 6 weeks. If a paw is red, swollen, or your cat seems in pain, remove the cap and call the vet.

    Who’s this good for? Indoor cats that tolerate gentle handling, busy owners who want safe short-term protection, and shelters looking to prevent furniture damage. Some kitties hate having their paws handled, though, so go slow and use treats, ever watched a cat decide five seconds is enough? Uh, you know.

    When you shop, choose kits with multiple sizes, vet-approved glue, clear instructions or a tutorial video, and extra caps and glue. A good return policy helps too.

    Worth every paw-print.

    Try it for a month and see how it goes, your arms (and couch) might thank you. I once watched Luna leap six feet for a toy and tap a capped paw like it was nothing; pure joy.

    Soft Nail Caps for Cats: Sizes, Safety, Brands

    - Quick Answer Are Soft Nail Caps a Viable Alternative to Declawing.jpg

    Soft nail caps are tiny covers glued over a cat’s claw so the nail can still retract and grow like normal. They’re made from plastic (sturdy molded polymer) or vinyl (soft, flexible plastic), and they sit on the tip of the nail to blunt scratches. Ever watched your cat stalk a toy and thought, “Please don’t shred the couch”? These can be a humane, non-surgical alternative to declawing for many indoor cats. Are nail caps safe? For indoor use, the short answer is yes, when they’re applied and checked as recommended.

    Quick facts you’ll actually use:

    • Typical lifespan: 4–6 weeks.
    • If a cap’s still on at week 8, replace it.
    • Common kit sizes: 40–120 caps.
    • Typical price range: about $15–$25.

    Who they work best for: indoor cats that need furniture or people protection. Not great for outdoor cats who depend on claws for climbing, hunting, or defense, those kitties need their full grip.

    How to get started:

    • Measure: see Size Chart
    • Apply: see Step-by-Step
    • Compare: see Brands

    Worth a try if you want a claw-tastic, low-stress way to save your sofas and your hands.

    How Soft Nail Caps for Cats Work and Safety Considerations

    - How Soft Nail Caps for Cats Work and Safety Considerations.jpg

    Soft nail caps are tiny covers that slip over the sharp tip of a claw, blunting the bite against furniture while still letting the nail retract (pull back into the paw) and grow normally. Your cat can stretch and scratch like usual, but fabrics and skin take less of a beating. It feels odd at first for us humans; most cats hardly notice.

    Most caps are made from vinyl resin (a soft, flexible plastic) and are set in place with an adhesive (glue) that becomes inert once it cures (hardens). Look for products labeled non-toxic, and actually read the ingredient claims and directions before you buy. Safety varies by brand, so take a minute, this is not one of those products you want to wing.

    Two common mistakes to avoid: overfilling a cap with glue, which can trap goop on fur, and leaving caps on past eight weeks, which can make nails feel tight or uncomfortable as they grow. Trim the nail first so the cap sits flat; if you leave too much nail, the cap won’t fit right. Oops, little things like that happen, but they’re easy to fix.

    Check paws weekly for chewing, excessive licking, redness, swelling, or a limp, those are your red flags. If you see any of those signs, remove the cap and call your vet. Also keep an eye on how many caps are falling off.

    If caps keep popping off, sizing is usually the issue, or the nail wasn’t trimmed properly. Get a helper to steady your cat, or ask a groomer or vet tech to show you the right angle and amount of glue. Talk with your veterinarian if you notice signs of infection, repeated failures, or if you’re applying caps to kittens or special-needs cats, some animals may need sedation (mild calming medicine) for a safe application.

    Worth every paw-print.

    Measuring and Size Chart for Soft Nail Caps for Cats

    - Measuring and Size Chart for Soft Nail Caps for Cats.jpg

    Getting the right fit keeps caps from popping off and saves you a lot of re-gluing. Most brands use this weight guide: XS (up to 5 lbs), S (6-8 lbs), M (9-13 lbs), L (13+ lbs). Some makers add an X-Small or Kitten size for under 5 lbs so tiny toes get a snug fit.

    Trim each nail so the cap sits flat. Then slide a cap on without glue to test the fit , that dry fit is the best clue if it will stay. If a brand lists nail width in millimeters (mm; tiny units used to measure small widths), measure the trimmed nail with calipers (a tool that measures width) and match the mm to the chart.

    For polydactyl cats (cats with extra toes), measure every extra toe by itself and expect to mix sizes in one order. Extra toes are often bigger or smaller than the rest and need their own fit check. Glue only after you’ve tested every nail.

    Worth every paw-print.

    Size Typical Cat Weight Notes on Fit and Nail Width (mm)
    XS / Kitten ≤ 5 lbs Tiny toes. Check the brand’s mm chart for kitten widths and do a dry fit on each nail before gluing.
    S 6-8 lbs Small adult cats. Trim nails so caps sit flat and trial-fit each nail without glue.
    M 9-13 lbs Average adults. If the brand lists mm, measure the trimmed nail with calipers and match it.
    L 13+ lbs Large cats. You might need firmer caps; test trimmed nail width and do a careful dry fit.

    Step-by-Step Nail Cap Application for Cats

    - Step-by-Step Nail Cap Application for Cats.jpg

    First, gather your supplies: nail caps, adhesive (cat-safe glue that hardens , like a tiny, quick-setting glue made for pets), applicator tips (small nozzles for precise drops), nail clippers (pet trimmers for tiny nails), towels, lint-free wipes (wipes that don’t leave fibers), and treats. Having everything within arm’s reach makes the whole thing quicker and calmer , and your cat will thank you with fewer squawks.

    Pick a quiet, relaxed time, like right after a nap or a meal. If you can, get a helper to gently hold your cat and hand out treats. Take it one paw at a time. Short breaks are fine , nobody likes a marathon when stress levels rise.

    1. Lay out the kit so you don’t have to hunt mid-session.
    2. Trim each nail to the recommended length using the clippers. Be careful of the quick (the pink part with blood vessels); clip a little at a time.
    3. Wipe the nail surface clean with a lint-free wipe so glue sticks better.
    4. Do a dry fit: slide a cap onto each nail without glue to make sure the size is right. It should fit snugly, not squeeze.
    5. Put a tiny bead of glue into the cap , just a dot. Too much glue can touch fur and make a mess.
    6. Slide the cap over the nail and hold for 5 to 10 seconds until it feels tacky. Keep your voice soft and give a treat if your cat relaxes.
    7. Repeat for the rest of the nails, pausing if your cat fusses. One paw at a time is perfectly fine.
    8. Let the adhesive cure fully according to the manufacturer’s directions , check your kit for exact curing times so you don’t rush it.

    Watch your cat closely for the first 24 to 48 hours and check capped nails once a week. Plan to replace caps every 4 to 6 weeks, or by week 8 at the latest if they’re still on. If caps keep popping off, double-check that you used the right size and that the nails were trimmed flat before trying again. And if you see redness, swelling, or signs of pain, stop and call your vet , better safe than sorry.

    Worth every paw-print.

    Comparing Top Soft Nail Caps for Cats: Brands, Kits, and Value

    - Comparing Top Soft Nail Caps for Cats Brands, Kits, and Value.jpg

    Quick take: if you want something practical that balances how long it lasts, how easy it is to put on, and the price, there are real differences between brands. Some kits are built for multi-cat value, some fit tiny toes, and a couple focus on firmer, longer-lasting materials. Pick what matters most to you and your fluffball.

    Soft Claws Cleat Lock System is the go-to pick for most cats. Kits usually include 40 caps, two adhesive bottles, and two applicator tips. The caps are vinyl resin (soft, flexible plastic) and come in Pink and Clear. The little cleat ridges inside each cap help keep them on for about 4 to 6 weeks, so you’ll reapply less often. Easy to find in stores and online, too.

    Purdy Paws Soft Cat Nail Caps are a color-lover’s dream and great for busy homes. Their kits often have 120 caps plus six glue tubes and six applicator tips, so you’re stocked for a long time. Testers liked the flexible caps and the smooth glue flow, which makes application faster for fussy or anxious cats. Lots of choices if you want variety and quick swaps.

    Kitty Caps and Zepto cover the small-to-big spectrum and offer budget-friendly options. Kitty Caps are great for very small cats, with an X-Small size for under five pounds, and most kits come with 40 caps. Some folks say the glue applicator needs a firmer push, so heads-up on that. Zepto is the best value for multi-cat households, usually offering 120 caps and six glue tubes, with sizes from XS to L mapped to weight ranges.

    Well & Good (Petco) and ScratchPause lean toward firmer, more durable choices. Well & Good kits (20 clear and 20 pink, plus two glue tubes and two applicator tips) are stiffer and a bit pricier, which can make them harder to fit on tiny nails. ScratchPause uses a tougher plastic blend (harder plastic that resists chewing and scratching) and comes in multiple colors if you want caps that last longer.

    One pick for most homes: Soft Claws Cleat Lock System. The cleat design, reliable 4 to 6 week wear, and easy availability make it a solid, claw-tastic choice for keeping furniture safe and kitties happy. Worth every paw-print.

    Pros, Cons, and Veterinary Perspective on Soft Nail Caps for Cats

    - Pros, Cons, and Veterinary Perspective on Soft Nail Caps for Cats.jpg

    Thinking about a middle ground between declawing (surgical removal of part of the toe) and doing nothing? Soft nail caps are tiny vinyl covers you glue over the tip of the nail to blunt the point. They don’t remove the toe. They just make scratches less sharp. Nice idea, right?

    Pros

    • Humane, non-surgical alternative. Caps dull the sharp tip instead of removing the toe, so your cat keeps all their toes and you avoid surgery.
    • Protects people and furniture. Scratches are softer, so couches, curtains, and human skin take less of a beating.
    • Can cut down how often you need to trim nails, which helps busy owners or folks who hate clipping.
    • Good for hairless or skin-sensitive cats who get irritated or injured from scratching.

    Cons

    • They’re visible on the paws. Some people don’t like the look.
    • Not great for outdoor cats who rely on full grip for climbing, hunting, and defending themselves.
    • Some cats will chew or pick at them, which creates a risk of accidental ingestion.
    • They need reapplication every 4 to 6 weeks as the nail grows out, so there’s ongoing upkeep.

    What vets and animal groups say
    Many veterinarians consider nail caps a reasonable option when owners can’t keep up with regular trimming. Animal welfare groups generally prefer non-amputation choices like this. Still, check with your vet first, especially for kittens, seniors, or cats with special needs. And stop using caps right away if you see persistent licking, swelling, limping, or any discharge from the toe, those are signs something’s wrong.

    Quick tip
    Want a real-life moment? I once watched Luna leap to bat a feathery wand while her caps made a gentle thud on the couch instead of shredding it. Worth every paw-print.

    Maintenance, Troubleshooting, and When to Replace Soft Nail Caps for Cats

    - Maintenance, Troubleshooting, and When to Replace Soft Nail Caps for Cats.jpg

    Check your cat’s paws once a week for these signs:

    • Extra licking or chewing , for example, "my cat keeps nibbling at one paw."
    • Redness, swelling, or the paw feeling warm to the touch.
    • Limping or favoring one paw when walking.
    • Any discolored or foul-smelling discharge around the nail.

    Replacement timeline

    • Swap caps every 4 to 6 weeks as your cat’s nails grow.
    • If a cap is still stuck by week 8, remove and replace it to avoid discomfort.

    Troubleshooting quick fixes

    • Loose caps usually mean the size is wrong or the nail wasn't trimmed flat first.
    • Do a dry-fit: slide a cap on without glue to test the fit. You want it snug but not tight.
    • If caps keep coming off, trim the nail a tiny bit shorter or try the next size down.
    • Early pawing or chewing is common for a day or two while your cat adjusts; it usually fades.

    Removal and when to call a pro
    Peel caps off gently with gloved fingers (nitrile (thin disposable glove) is fine) or use the manufacturer’s removal solvent (mild, pet-safe liquid that loosens glue) if one is provided. Never cut into the nail. Most cats move around normally right after removal, but keep an eye on them. If your cat keeps limping, caps fall off over and over, or you notice redness, pus, or any sign of infection, call your veterinarian or a professional groomer for help.

    Alternatives to Declawing: Combining Soft Nail Caps with Scratch Management

    - Alternatives to Declawing Combining Soft Nail Caps with Scratch Management.jpg

    Soft nail caps make a lot of sense when you use them with other non-surgical tricks to protect furniture and keep your cat’s paws intact. Think of caps as one tool in a toolbox: they blunt the damage while other things teach and redirect your cat’s natural need to scratch. That way you’re fixing the problem, not just hiding it.

    Good pairings include a few simple habits and gear:

    • Soft nail caps (small vinyl covers glued to the tip of the nail) plus regular trimming. Trim on a set schedule so caps don’t trap overgrown nails.
    • Several scratching posts, both vertical and horizontal, sprinkled with catnip for interest. Variety keeps cats curious.
    • Pheromone diffusers (plug-ins that release a synthetic calming scent) to soothe high-strung scratchers.
    • Protective furniture covers during transition periods, until your cat learns new spots to scratch.

    A practical combo: caps + scratching posts + a pheromone diffuser + a weekly or biweekly trim routine. It covers wear-and-tear, scent-driven choices, and natural nail growth. Kits usually run about $15 to $25, and over time they can cost less than constant professional trims, especially if you have multiple cats and need extra caps and glue tubes.

    For multi-cat homes, mix up post types and stagger cap replacement so you’re not recapping everyone on the same day. That keeps stress down and supplies lasting longer. Outdoor cats usually need full grip for climbing and defending themselves, so caps aren’t ideal there; trimming, training, and environmental fixes work better for outdoor kitties.

    Small, steady changes plus a few caps can save curtains, skin, and a few broken hearts. Seriously, my neighbor’s cat stopped shredding the couch after we added a wide horizontal post and a set of caps. Worth every paw-print.

    FAQs About Soft Nail Caps for Cats

    - FAQs About Soft Nail Caps for Cats.jpg

    Q: Are nail caps safe for kittens?
    A: Many kits include X-Small or Kitten sizes for tiny toes (≤ 5 lbs). Soft nail caps (vinyl – a soft, flexible plastic) can be fine, but check with your vet before using them on kittens under 12 weeks. Follow the Measuring and Safety/Veterinary Perspective sections to get the right fit and age guidance. Ever tried them on a wiggly kitten? Ask your vet first. Example: "Can I try caps on Milo at 10 weeks? Ask the vet first."

    Q: How long do caps last and when should I replace them?
    A: Most caps wear off in 4 to 6 weeks. If a cap is still on by week 8, take it off and replace it so the nail doesn’t grow into the toe. Short and simple. Example: "Week 8 and it’s still snug , replace it."

    Q: What if a cap falls off or the toe looks odd?
    A: Check the toe for redness, swelling, or any discharge. Clean the nail, try a dry fit to make sure the size’s right, then reapply with skin-safe adhesive (the little glue in the kit). If the toe stays irritated or caps keep falling off, stop using them and call your vet. Better safe than sorry. Example: "The toe looked red with a bit of goo , stop and call your vet."

    Q: Could a cat swallow cap fragments and what are the warning signs?
    A: Swallowing pieces is rare but possible. Watch for vomiting, gagging, coughing, or unusual sleepiness and call your vet right away if you see those signs. If your cat seems off after play, don’t wait. Example: "He vomited after play , call the vet now."

    Q: Where can I find full how-to, measuring, safety, and maintenance instructions?
    A: See the full How-To, Measuring, Safety/Veterinary Perspective, and Maintenance sections for step-by-step guidance. Maintenance now covers bathing: avoid long soaks, use quick gentle wipes, and re-check caps after any bath. Little tip: a quick paw wipe before play helps too. Example: "Wipe gently, don’t soak the paws."

    Final Words

    Grab a calm minute: soft nail caps are tiny vinyl resin (a flexible plastic) covers glued on with adhesive (glue) that let the nail retract and grow, and they’re a viable non-surgical option for many indoor cats.

    Typical life is 4–6 weeks, replace by week 8, kits run 40–120 caps, and price usually sits around $15–$25.

    Choose the right size, follow the step-by-step routine, check paws weekly for chewing, limping, swelling, or discharge, and add good scratching posts to your mix.

    Done well, soft nail caps for cats save money, cut furniture damage, and bring calmer, play-filled days to busy multi-cat homes.

    FAQ

    Cat nail caps pros and cons

    The pros of cat nail caps are a humane alternative to declawing, protection for furniture and skin, and less frequent trimming. The cons are regular 4–6 week maintenance, possible chewing, a cosmetic look that some dislike, and unsuitability for outdoor cats.

    Cat claw caps cruel? Do vets recommend cat claw caps? Are soft nail caps safe for cats?

    Soft nail caps are widely viewed as a humane, non-surgical option when fitted properly. Many vets recommend them for indoor cats, but watch for irritation and seek veterinary advice if any problems arise.

    Best nail caps for cats and where can I buy soft nail caps?

    The best-for-most pick is Soft Claws Cleat Lock System (40-cap kits, 4–6 week wear). Purdy Paws and Zepto suit different budgets. Kits are available at pet stores, online retailers like Amazon, and some veterinary clinics.

    Nail caps for kittens — are they suitable and what sizes help?

    Nail caps can be suitable for kittens when you use kitten or XS sizes (often for cats ≤5 lbs). Consult your vet for kittens under 12 weeks and monitor for chewing or irritation during early wear.

    How to apply cat nail caps?

    Trim nails, dry-fit caps, add a tiny bead of the provided glue, slide the cap on and hold 5–10 seconds, then let the adhesive cure per the kit directions. Monitor your cat for 24–48 hours after application.

    How long does it take for cat nail caps to fall off?

    Typical wear time is 4–6 weeks; replace by week 8 if still present. Kit counts range about 40–120 caps and most kits cost roughly $15–$25.

    Related Articles

  • Cat Feeding Stations: Designs and Safety Tips

    Cat Feeding Stations: Designs and Safety Tips

    Think your cat’s food bowl is harmless? Think again. A good feeding station keeps kibble dry, cuts down on midnight raccoon visits, controls portions, and makes cleanup a breeze , a mini dining room for your cat. Ever watched your kitty sniff the air like a food critic? It’s kind of adorable.

    Let’s compare a few styles. Wooden units (wood, like sturdy furniture-grade material) look nice and hide messes, but they can be heavy. Enclosed shelters with a microchip option (microchip, a tiny pet ID chip that lets only your cat in) stop nosy critters and picky housemates. Portable DIY options (easy to carry or build at home) are great if you move things around or want something cheap and replaceable.

    Keep safety simple. Put bowls on raised platforms (keeps food off damp floors), use ground anchors (stakes or ties that stop tipping or dragging), measure meals with portion scoops, and pick washable non-porous bowls (smooth, won’t soak up bacteria). Do that and mealtime stays tidy, safe, and stress-free. Worth every paw-print.

    Cat Feeding Stations: Designs and Safety Tips

    - Top practical feeding-station choices and immediate safety rules.jpg

    A cat feeding station is a little sheltered spot that keeps food dry from rain and wind, helps you control portions, keeps out unwanted visitors, and makes cleanup easier. Think of it as a tiny dining room for your cat, no soggy kibble, no surprise wildlife buffet, and less mess on the porch. Ever watch your cat sniff the air like a food critic? This helps.

    Action-first: if your yard has big predators, go with an elevated unit (a raised platform that keeps bowls off the ground). Where raccoons or opossums are common, pick an enclosed shelter with a small entry or a microchip-activated flap (microchip = the pet ID chip that can open the door for your cat only). For short-term needs, a portable DIY tote or a folding-table shelter works great and packs away when you don’t need it.

    For safety, serve scheduled, measured meals to cut down on nighttime wildlife visits, small portions, set times, fewer midnight scavengers. Add weight or use ground anchors (stakes or screw-in anchors that hold things down) so the station won’t tip or get carried off. Keep dry food locked in sealed containers so critters and moisture can’t get at it.

    Quick feeder tips: use washable, non-porous bowls (non-porous means they won’t soak up smells or germs) with removable inserts so cleanup is fast. Stainless steel or ceramic work well and they don’t hold odors. Little things like that save you time and keep food fresher.

    If you want the research numbers and tradeoffs, check the Pest/Wildlife and Multi-cat sections for more detail. Worth every paw-print.

    Design families and a single comparison table for cat feeding stations

    - Design families and a single comparison table for cat feeding stations.jpg

    Feeding stations usually land in three simple groups: wooden/cedar units, enclosed shelters (some with microchip-activated flaps), and portable budget or DIY options like plastic totes, folding-table shelters, or gravity-feeder platforms. This quick guide helps you match cost, how permanent it is, and how much wildlife it keeps out so you can choose faster. Think of it as a friendly nudge toward the style that fits your yard, schedule, and feline crew.

    The table below is a short cheat-sheet: pick wooden for looks and permanence, choose enclosed shelters for selectivity and weather protection, or go DIY for low cost and easy moving.

    Wooden / cedar feeding stations

    Cedar units look lovely in a yard and feel solid under paw. Cedar (aromatic, rot-resistant wood) naturally resists decay and gives a nice smell, and builders usually use rustproof fasteners like stainless steel (an iron alloy that resists rust). Prices run mid to high depending on size and finish. Great for homeowners who want something that blends with the landscape and lasts a long time.

    Enclosed feeding shelters and microchip access

    Enclosed shelters have small-entry designs and optional microchip-activated flaps (microchip = the pet ID chip many pets already have). Those small openings and chip doors keep out raccoons and other visitors while keeping food dry. They’re a favorite for city cat groups, rescues, or anyone feeding multiple cats and needing controlled access. Pair with a weatherproof roof and some insulation and your bowls stay cozy even in nasty weather.

    Portable and budget DIY builds

    Budget builds include Rubbermaid-style plastic totes (plastic tote = inexpensive hard plastic), folding-table shelters that pop up fast, and gravity-feeder platforms that sit on a small table. These are cheap, light, and easy to move, perfect for short-term feeding, lost-cat stakeouts, or when you’re trying out a spot. They’re usually less durable and less hidden than purpose-built units, but they get the job done.

    Materials & finishes (quick notes)

    Use low-VOC sealers (low-VOC = paints or sealers with fewer volatile compounds) and non-toxic paints so fumes won’t bother cats. Pick rustproof stainless hardware and weather-rated fasteners for joints, and avoid interior finishes that chip or flake. Basic waterproofing goes a long way: raise the base so wood stays off wet ground, add a sloped roof to shed rain, and use removable inserts for easy cleaning. These small choices keep food dry, reduce mold, and make maintenance faster. Worth every paw-print.

    Design Type Typical Cost Range Wildlife Resistance Best Use
    Wooden / Cedar $200–$800+ Moderate Permanent yard setup, blends with landscaping
    Enclosed shelters (microchip options) $150–$600 High (with small entry or chip flap) Urban clusters, rescues, multi-cat control
    Portable / DIY (totes, folding tables) $10–$100 Low to Moderate Short-term use, lost-cat searches, tight budgets
    Built-in pet feeder cabinet $300–$1,000 Moderate Indoor or sheltered porch, integrated storage

    Materials, finishes, and waterproofing (consolidated under Designs)

     those belong exclusively in the DIY section.jpg

    We moved material and finish notes into Designs -> H3 Materials & Finishes so the pros and cons, pet-safe finish picks, and waterproofing basics live in one place. That way we don’t repeat info and you can find testing tips in one spot.

    • Wood – cedar (a rot-resistant wood with a noticeable scent; mid to high cost; needs a sealant). Cedar smells nice, and it helps keep pests away. Add a light sealer and it will last longer. My cat can’t resist rubbing against cedar posts.

    • Plastic – hard polymer (a tough, moldable plastic made from long-chain molecules; lightweight and low-cost; can fade in strong sun). Great for easy-clean feeders and toys. Just know UV can dull the color over time.

    • Metal – stainless steel (an iron alloy with chromium that resists rust; very durable; use marine-grade near the coast). Sturdy and sleek. Near salt spray, pick marine-grade metal to avoid corrosion.

    Finish picks: go water-based and low-VOC. Water-based polyurethane (a clear, low-odor protective coat) or acrylic sealers give protection without heavy fumes. Cleaner smell. Safer for curious noses and paws.

    Simple waterproofing tips:

    • Flashing at roof seams (thin metal strips that keep water out). Cheap, quick, and very effective.
    • Exterior-grade caulk for joints (sealant that stays flexible outdoors). A single bead seals gaps and stops leaks.
    • Short gravel/drainage pads under raised bases (a shallow rock bed to lift wood off wet soil). Helps wood stay dry and keeps pests away. For busy days, a gravel pad is an easy one-time fix.

    Want details and testing notes? See Designs -> H3 Materials & Finishes for the full quick-notes and testing tips.

    Ergonomic feeding station setup: bowl selection and height guidance

    - Materials, finishes, and waterproofing (consolidated under Designs).jpg

    Measure from the floor up to your cat's shoulder, then add a couple inches for comfort. That simple trick gets the bowl at a natural reach so your cat does not have to bend too far. Small cats usually like bowls raised about 4 to 6 inches, medium cats about 6 to 8 inches, and large or senior cats about 8 to 10 inches. For arthritic kitties or very tall breeds, nudge the bowl a bit higher so they do not stoop; elevated bowls help the neck relax and make meals less of a stretch.

    Ever watched your cat eat with a hunched back? Not fun. Raising the bowl slightly can turn mealtime into a relaxed, dignified moment, less strain on the neck and shoulders, and fewer awkward paw adjustments. It helps digestion too, oddly enough.

    Pick shallow, wide dishes to cut down on whisker fatigue; think plates rather than deep cups. Whisker fatigue happens when whiskers keep brushing hard sides, and that can make your cat fussy or stressed. Look for whisker-friendly designs with low walls and wide rims so whiskers can spread comfortably. Removable inserts are great, you can swap sizes or clean easily without rebuilding the whole station.

    Material matters for durability and cleaning. Stainless steel (an iron alloy with chromium that resists rust) is tough and usually dishwasher-safe. Ceramic (fired clay with a glassy glaze) is heavy and stable, so it stays put. BPA-free plastic (plastic made without a chemical called BPA) is lightweight and budget-friendly, though it may scratch over time. Choose anti-skid bases or a spillproof tray to catch messes, and go for dishwasher-safe, removable inserts so cleanup is fast and your elevated feeding station stays tidy. Worth every paw-print.

    Multi-cat feeding station layouts, portion control, and monitoring

    - Ergonomic feeding station setup bowl selection and height guidance.jpg

    Give each cat a little nook when you can. Quiet spots help nervous eaters relax, and they stop the bold ones from bossing the buffet. Multi-bowl islands work great if floor space is tight. Just space the bowls so whiskers don’t mash together.

    Try staggered timing if mealtime gets rowdy. Feed one or two cats first, then open access to the rest so the food guarding cools down. Little tweaks like that cut hissy fits and make dinners calmer and faster. Worth every paw-print.

    Tech can save the day in tense homes. Microchip-activated feeders (microchip means the pet ID chip that tells a chip-reading flap to open) let only the right cat in. Timed dispensers (units that release measured portions on a schedule) and portion bowls (bowls set for single servings) keep calories in check and stop one greedy cat from eating everyone’s share. Mix methods: ID control for who can eat, timers for exact portions, and shallow, wide bowls so whiskers stay comfy.

    Watch and count. Cameras are handy to learn who shows up and when, just like the study used. If you leave big piles of food out, you can get a decent head count in about 3-5 days. With small measured meals on a schedule it takes longer, about 8-11 days, to see who really came by. That matters when you’re tracking a lost cat or sizing up a colony.

    Bring cats along slowly. Start with supervised trials so each cat learns the routine, then open short, staged access windows before full freedom. Let them sniff a new feeder, swap a towel with a familiar scent, and do a few dry runs while you watch. Calm introductions cut stress. Speaking of towels, my cat once decided the towel smelled like victory, um, and claimed the whole station for a week.

    If one cat still guards, split locations for a while and use cameras to check who tolerates whom. Small changes, patient steps, and a bit of tech make feeding time peaceful. Isn’t it nice when everyone can eat without a drama?

    Pest, wildlife, and outdoor security for feeding stations

    - Multi-cat feeding station layouts, portion control, and monitoring.jpg

    Pick a spot where your cat can eat and bolt to safety in a heartbeat. Put feeders near a sturdy shelter or under a porch overhang so a startled cat can dash and hide; picture whiskers twitching as they scoot away. Keep stations out of obvious wildlife routes like fence lines, creek edges, or open fields where coyotes roam. A simple escape idea: bury or secure a 12-inch diameter, 6-foot long PVC pipe (plastic plumbing pipe) or add a low ramp so cats can slip under or over a feeding platform if something scary shows up. Test it with a flashlight and a treat to make sure the path works.

    Field data helps shape what to try. In one study, cats made 64% of visits, raccoons 22%, coyotes 9%, and skunks 5%. Raising food off the ground tended to reduce coyote visits. Serving small, scheduled ground portions during the day cut down on night-time raccoon and coyote activity because the food was gone before dark. Elevation keeps food out of paw reach for some predators, but crafty raccoons and bold opossums can still climb or manipulate simple setups. Also, theft happened with camouflaged stations, so assume a light unit could be carried off and plan for that.

    Make tipping and theft difficult and make access picky. Use heavy bases or screw-in ground anchors (metal rods that twist into the soil) so a crate or cabinet stays put. Choose tamper-resistant fasteners that need special bits to remove. Microchip-activated flaps (they open only for pets with registered microchips) or small-entry openings help keep non-target animals out. A locked, sealed food box keeps kibble dry and out of sight. Check the Buying Checklist for anti-tip ratings and lock options before you buy, and stash extra food in sealed containers out of view. Worth every paw-print.

    • Screw-in ground anchors or concrete footings (solid poured base) for permanent units
    • Weighted bases (concrete pavers, sandbags) for quick retrofit
    • Microchip-activated flap or small-entry door to limit non-targets
    • Locked, sealed food box for dry food storage and theft deterrence
    • Nighttime removal or indoor storage of dispensers when not in use
    • Camera monitoring for evidence, theft prevention, and behavior checks

    Electrical, cord, and powered feeder safety for indoor and outdoor stations

    - Pest, wildlife, and outdoor security for feeding stations.jpg

    Put powered feeders on dry, level spots away from puddles, sprinklers, and damp corners so motors and electronics don’t get soggy. Think about the whirr of a motor and how sad it sounds when water makes it quit. Use a GFCI outlet (ground-fault circuit interrupter, a device that quickly cuts power if it senses water or a short) for outdoor circuits , it’s an easy, cheap safety win for automatic feeders.

    Tame cords like you would tame a playful kitten. Run them along walls or under trim so they’re out of paw and jaw reach. Bury or clip cords where you can; they’re less tempting to gnawers and less likely to snag. Protect lines with split-loom tubing (flexible plastic conduit) or flat adhesive cord channels (stick-on covers that hide cords) to keep things tidy and trip-free. Mount plugs up off the ground and don’t run cords across walkways where a curious cat or raccoon might pull on them.

    Pick feeders with battery backup and quiet mechanisms so meals stay on time without the thunderous clacks that stress cats. Your cat will notice that noise and might bail. For theft or tampering, keep powered units inside a secured enclosure or shelter (see Pest/Wildlife for anchoring and theft-prevention details) so the electronics stay put and safe. Worth every paw-print.

    Cleaning, maintenance, and hygiene schedule for feeding stations

    - Electrical, cord, and powered feeder safety for indoor and outdoor stations.jpg

    Wipe bowls and removable inserts after each meal. Toss any wet food that's been sitting out, because that smell gets… uh, intense fast and your cat will notice. Rinse and refill water bowls every day so water stays fresh and inviting.

    Once a week, pull out inserts or trays and give them a good scrub. Grease and grime build up slowly, and a weekly wash helps prevent spoilage and keeps other animals from sniffing around. Worth every paw-print.

    Use mild dish soap for regular washing and a diluted vinegar rinse for stubborn smells. White vinegar (diluted) is a natural odor remover and is safe for cats when you rinse well. If your bowls are dishwasher-safe, put stainless-steel or ceramic inserts on the top rack (stainless-steel is a rust-resistant metal; ceramic is glazed pottery) and use a high-heat dry cycle when possible. High heat helps kill microbes.

    For tougher jobs, use a vet-approved disinfectant and follow the product directions. Let everything air dry completely before putting food back. Replace plastic bowls as soon as you see deep scratches or grooves where bacteria can hide. Your cat will thank you with a cleaner nose.

    Monthly checks keep the whole station working right. After storms or heavy weather, inspect seals, roof flashing (flashing is thin metal that directs water away), and raised bases for gaps, rot, or mold. Tighten rustproof fasteners and reseal small cracks with exterior-grade sealant (sealant is a waterproof filler). If the base sits on soggy ground, lift the station with a gravel pad or small risers so it stays dry.

    Store extra kibble in sealed containers indoors so critters don't sniff out dinner. For busy days, give your cat an unbreakable toy or a hurried puzzle feeder before you leave, ten minutes of play and they settle right down.

    Oops, one more tip: check for mildew and sticky residues; a quick clean now saves a big scrub later.

    Task Frequency Tools / Notes
    Wipe and rinse bowls, remove wet food Daily Mild dish soap, soft sponge, fresh water. Note: wipe inserts before replacing.
    Deep clean bowls and removable inserts Weekly Dishwasher (top rack), diluted white vinegar rinse (diluted), scrub brush. Note: use sanitizing cycle and high-heat dry when possible.
    Inspect hardware, seals, and drainage Monthly Screwdriver, rustproof fasteners, silicone caulk (silicone caulk – flexible waterproof sealant). Note: tighten loose screws and reseal small gaps.
    Sealant touch-up and roof check Seasonal Exterior-grade sealant (waterproof), flashing (thin metal strips), small brush. Note: check seams after heavy rain or snow.
    Replace scratched plastic bowls or damaged inserts As needed Stainless-steel or ceramic bowls, replacement inserts. Note: swap at first deep scratches or persistent stains.

    Cat Feeding Stations: Designs and Safety Tips

    - Cleaning, maintenance, and hygiene schedule for feeding stations.jpg

    If you’re building a single-cat nook, aim for an interior floor about 18" x 12" with 12" of headroom so your cat can step in, turn, and eat without feeling cramped. Pick a ground-level build for yards with low predator risk. For areas with coyotes or bold wildlife, use a 36" high gravity feeder platform (36" = 3 feet) to keep bowls out of easy reach and give space underneath for a weighted base.

    Keep three simple rules in mind: ventilate the space so moisture doesn’t hang around, slope the roof so rain runs off, and use removable bowl inserts for quick cleaning. Add a hidden food-storage compartment (sealed tote or small cabinet shelf) that latches shut so kibble stays dry and out of sight. Choose materials that stand up to weather and wipe clean; finish with a low-VOC sealer (low volatile organic compound protective coat) and use rustproof stainless hardware.

    DIY plan (single-cat tote/box + optional gravity platform)

    1. Parts list

      • 1 sheet exterior-grade plywood 3/4" (4' x 8') or two 2' x 4' cedar panels. Plywood is wood made from glued layers for strength, and cedar is naturally rot-resistant.
      • 1 small Rubbermaid-style tote (for hidden dry-food storage). That’s just a sturdy plastic bin with a lid.
      • 2 stainless-steel bowls (dishwasher-safe) with removable inserts. Stainless steel resists rust and is easy to sanitize.
      • 4 exterior hinges and one hasp with padlock option.
      • Screws: #8 or #10 stainless exterior screws, 1 1/4" and 2 1/2" lengths (rustproof fasteners).
      • Roof flashing, exterior-grade caulk (flexible sealant), low-VOC exterior sealer.
      • Optional: folding table or 36" steel platform legs for an elevated build (gravity feeder platform is a raised table-style stand for bowls).
    2. Cut list (single-cat box)

      • Floor: 18" x 12"
      • Back wall: 18" x 12"
      • Side walls: 12" x 12" (two pieces)
      • Roof: 20" x 14" with 2" overhang at front
      • Front panel: cut entry hole 6" wide x 7" tall (or smaller for shy cats)
    3. Assembly steps

      • Fasten the sides to the floor with 1 1/4" screws, then attach the back and front panels. It’s straightforward and nice to see it take shape.
      • Mount the roof with hinges so it opens for cleaning. Add flashing at seams and run a bead of exterior caulk along joints to keep water out.
      • Cut holes for the removable inserts and fit the bowls; add a towel or rubber gasket to reduce wobble. Your cat will appreciate steady bowls when pouncing.
      • Mount the Rubbermaid tote inside the base or under the platform as hidden food storage and latch it closed. Keeps critters and noses away.
      • Sand edges, apply two coats of low-VOC sealer, and let cure per product directions.
    4. Finishing notes

      • Raise the box on small risers or a gravel pad to keep wood off wet ground. Moisture is a slow enemy.
      • If you use the 36" gravity platform, secure legs and add a weighted base or screw-in ground anchors (see Pest/Wildlife for anchors). Stability matters if you’ve got curious raccoons or a determined neighborhood dog.

    Test and tune: run supervised trials so each cat learns the routine and you can spot problems early. Watch behavior on camera for a few days and open staged access windows to fix guarding or fear. If a cat avoids the nook, try familiar bedding, sprinkle a little treats, or shrink the entry by an inch and test again. It often just takes small changes for big comfort wins.

    Buying checklist

    • Anti-tip stability or clear anchoring points on the unit
    • Removable, washable bowl inserts and dishwasher-safe parts
    • Stainless-steel bowls included or recommended (easy to clean, rust-resistant)
    • Rustproof hardware and weather-rated fasteners
    • Locking or microchip-access options for multi-cat homes or wildlife-prone sites
    • Hidden food storage or a sealed tote for dry kibble
    • Clear cleaning instructions and replacement-part availability
    • Warranty or part-replacement policy for peace of mind

    Worth every paw-print.

    Final Words

    In the action, pick elevated or enclosed feeding stations, serve scheduled small measured meals, anchor or weight feeders, and use washable, non-porous bowls with removable inserts.

    We walked through design families (wood (cedar)), enclosed shelters, and DIY options, plus bowl height, whisker-friendly shapes, multi-cat tech like microchip-activated feeders (tiny ID chip) and simple monitoring, with outdoor placement and anchoring tips to keep wildlife away.

    Use these cat feeding stations: designs and safety tips to choose a setup that lasts, reduces stress, and protects your home. It's worth every paw-print.

    FAQ

    FAQ — Outdoor Cat Feeding Stations

    What are the best outdoor cat feeding station designs and safety tips?
    The best designs pair weatherproof shelters, elevated or small-entry enclosures, and scheduled small meals to limit predators and keep food clean. Anchor units and use washable, non-porous bowls for hygiene.
    <dt>How do I make a feral cat feeding station raccoon-proof?</dt>
    <dd>
      Use small-entry shelters, microchip-activated flaps (reading the cat’s implanted ID), timed portions, elevated platforms, heavy anchors, and locked dry-food boxes to reduce nocturnal raccoon visits.
    </dd>
    
    <dt>What design works best for small versus large cats?</dt>
    <dd>
      Adjust bowl height and interior space to the cat’s shoulder: small 4–6 in, medium 6–8 in, large/senior 8–10 in. Use wider, shallow bowls for whisker comfort.
    </dd>
    
    <dt>What are simple DIY feeding station ideas and safety tips?</dt>
    <dd>
      Simple DIY options include plastic-tote shelters, folding-table canopies, and gravity-fed platforms (food flows by weight). Use removable dishwasher-safe inserts, sealable food storage, and add weight or anchors to stop tipping.
    </dd>
    
    <dt>What features should the best cat feeding stations have?</dt>
    <dd>
      Look for removable dishwasher-safe inserts, stainless-steel bowls, rustproof hardware, anti-tip anchor points, microchip or timed access, and smooth, easy-clean surfaces to reduce mess and increase safety.
    </dd>
    
    <dt>How can I reduce wildlife visits and predator risks at an outdoor feeder?</dt>
    <dd>
      Use elevated platforms to deter coyotes and scheduled small ground meals to cut nocturnal raccoon activity; site feeders near shelter, avoid open corridors, and allow escape routes. One study observed cats 64%, raccoons 22%, coyotes 9%, skunks 5%.
    </dd>
    
    <dt>How should I anchor or protect a feeder from tipping and theft?</dt>
    <dd>
      Use heavy bases, ground anchors, tamper-resistant fasteners, concealed locked food boxes, and check anti-tip ratings or mounting points regularly.
    </dd>
    
    <dt>Are microchip-activated feeders worth it for multi-cat or feral feeding?</dt>
    <dd>
      Yes—microchip-activated feeders that read implanted IDs can limit access to target cats, control portions, and reduce non-target visits when used with enclosed shelters.
    </dd>
    

    Related Articles

  • BMI-style calculator for cats: how-to-use-and limitations

    BMI-style calculator for cats: how-to-use-and limitations

    Think a human BMI can size up your cat? Spoiler: not really. Cats are compact, flexible, and full of surprises, so a human-style number only gives a rough idea, not a diagnosis. Still, it can be a handy starting point if you know what it actually measures.

    This BMI-style calculator uses four inputs: body weight, rib-cage circumference (measure around the widest part of the chest at the level of the 9th rib), lower hind-leg length (knee-to-ankle, just the lower leg), and a breed or body-length selection. Those bits together make a single “cat shape” number that tries to guess body type. It’s meant as a guide for curious cat parents, not a vet verdict.

    I’ll walk you through how to measure each part, show the simple formula and a worked example, and point out the calculator’s limits so you can use it wisely. Ever watched your kitty slip between cushions and wondered how on earth you’re supposed to measure that grace? Yep, we’ll cover the tricky bits and a few tips that save time and keep your cat calm.

    Ready? Let’s get measuring and make sure your purring pal is feeling feline fine.

    BMI-style calculator for cats: how-to-use-and limitations

    - How to use a BMI-style calculator for cats immediate inputs, formula, and a worked example (fulfills the search intent).jpg

    This tool estimates a cat’s body condition with a BMI-style index. You’ll need four things: body weight, rib-cage circumference at the level of the 9th rib, lower hind-leg length measured knee-to-ankle, and an optional breed or skeletal-length choice. Think of the index as a shape number for cats , not the same as human BMI, but a useful guide.

    What to measure (quick definitions)

    • Body weight , use lb or kg on a scale.
    • Rib-cage circumference (chest measurement at the widest part of the ribs).
    • Lower hind-leg length (knee-to-ankle length on the back leg).
    • Breed/length selector , pick short, average, long, or a specific breed if listed; it helps interpret the result.

    The formula (plain steps)

    1. Divide the rib-cage measurement by 0.7062.
    2. Subtract the lower hind-leg length.
    3. Divide that result by 0.9156.
    4. Subtract the lower hind-leg length again.
      The final number is the cat’s BMI-style index (a simple shape index for cats).

    Worked example up front , follow along

    • Rib = 30 cm (11.8 in).
    • Leg = 12 cm (4.7 in).
    • Weight = 6.8 kg (15 lb).

    Step-by-step:

    1. 30 cm ÷ 0.7062 = 42.50 (intermediate A).
    2. A − leg: 42.50 − 12.00 = 30.50 (intermediate B).
    3. B ÷ 0.9156 = 33.33 (intermediate C).
    4. C − leg: 33.33 − 12.00 = 21.33 (BMI-style index ≈ 21.3).

    Interpreting that index
    In many online tools, an index of about 21.3 maps to roughly 30% overweight (these mappings vary by tool). If percent overweight = 30%, then ideal weight = current weight × (1 − 0.30). Example: 15 lb × 0.70 = 10.5 lb (6.8 kg × 0.70 ≈ 4.8 kg).

    Typical calculator fields , what to enter

    • Weight , numeric value and unit (for example: 15 lb or 6.8 kg).
    • Rib circumference , chest at the 9th rib (example: 30 cm or 11.8 in).
    • Lower hind-leg length , knee-to-ankle (example: 12 cm or 4.7 in).
    • Breed/length selector , choose the closest skeletal type; if unsure pick “average.”

    Measurements , how to position the cat
    Have the cat standing on a flat surface with legs perpendicular to the floor and head upright so bones line up. Measure rib-cage circumference at the 9th rib , that’s the widest mid-chest band where you can follow the ribs. Measure lower hind-leg length from the back knee joint down to the ankle with the leg relaxed but straight.

    Common mistakes to avoid

    • Don’t measure while the cat is crouched or hunched.
    • Don’t wrap the tape over thick fur instead of snug against fur.
    • Don’t mix units , pick metric or imperial and stick with it.

    Step-by-step measuring and calculation (friendly guide)

    1. Prepare cat and tools , grab a digital or kitchen scale (tare/zero it to remove carrier weight), a flexible cloth tape (cm/in), and a towel or carrier to keep your cat calm.
    2. Position cat correctly , have them stand on a non-slip mat or use a helper to steady them.
    3. Measure rib-cage circumference , place the tape at the 9th rib, snug but not tight; record it.
    4. Measure lower hind-leg length , measure knee-to-ankle along the back leg while it’s straight and relaxed; record it.
    5. Enter numbers and compute with the formula , see the worked example above for the math.
    6. Convert index to actionable numbers , turn percent overweight into pounds or kg to set goals and plan feeding.

    Quick conversion examples

    Current weight Percent overweight Weight to lose
    10 lb 10% ≈ 1.0 lb
    12 lb 20% ≈ 2.4 lb
    15 lb 30% ≈ 4.5 lb

    Limitations and a hands-on reminder
    This index is a useful guide, but don’t treat it like a final diagnosis. A hands-on rib-feel check is important , you should be able to feel ribs with a thin layer of fat, not see them staring back. See the Measurement Tips section in your tool for calm-cat tricks, scale calibration, and handling notes. Ever watched your kitty chase shadows? Use short play sessions and slow weight goals instead of drastic cuts. Worth every paw-print.

    Interpreting BMI-style calculator for cats results: ranges, rib-feel guidance, borderline readings, and immediate actions

    - Interpreting BMI-style calculator for cats results ranges, rib-feel guidance, borderline readings, and immediate actions.jpg

    Most cat BMI-style calculators give three things: a BMI-style index (a number showing weight relative to size), a percent-overweight value (how far your cat is from the calculator’s ideal, in percent), and an ideal-weight estimate (the target weight). Map those numbers to a body condition score, or BCS (a 1 to 9 scale vets use to rate fat and muscle). BCS 3 to 4 is often the healthy zone. Most house cats weigh around 8 to 12 lb (3.6 to 5.4 kg). Big breeds like Maine Coon commonly run 20+ lb. If the calculator and your hands disagree, think of the number as a nudge, not the final word, and double-check with a hands-on check or your vet.

    Palpation matters , palpation means feeling with your fingers to check body shape. With light fingertip pressure along the chest you should feel ribs as low, rounded ridges under a thin fat layer when the cat is ideal (BCS 3 to 4). If ribs and hips look sharp and pop out, that’s underweight (BCS 1 to 2) , ribs feel pointed, with little or no fat. If ribs are hard to find because of a smooth, padded surface, that’s overweight to obese (BCS 6 to 9). Quick rule: BCS 3 corresponds to about 20% body fat (percent of weight that’s fat). Higher BCS numbers mean ribs get more buried and the waist fades. Picture your fingertips clicking just right against ribs. Ever watched your kitty pounce and thought, yes, that’s the one? That feeling.

    Handle borderline calculator results with a calm plan. Define percent-overweight bands like this: 10 to 20 percent is mild, 20 to 40 percent is moderate, and over 40 percent is severe. For a 10 lb (4.5 kg) cat, that’s roughly 1 to 2 lb, 2 to 4 lb, and more than 4 lb to lose. For a 15 lb (6.8 kg) cat, that’s about 1.5 lb, 3 lb, and more than 6 lb. Recheck measurements in 1 to 2 weeks to spot any drift. Call the vet if you see unexplained weight loss greater than 5 percent in 1 to 2 weeks, if your hands-on exam looks worse than the index says, or if your cat shows warning signs like loss of appetite, vomiting, or lethargy. Hands-on checks often trump numbers.

    Simple action steps:

    • Underweight → vet check and appetite strategies, and careful refeeding plans.
    • Ideal → keep the feeding and play routine that’s working.
    • Overweight → measured portions, fewer treats, and more interactive play sessions.
    • Obese → a veterinary weight plan with supervised calorie reduction and follow-up.

    Worth every paw-print. Oops, one more thing , if you’re unsure, take pictures and notes for your vet.

    Limitations of BMI-style calculator for cats: accuracy issues, validation gaps, measurement failures, and merged special cases

    - Limitations of BMI-style calculator for cats accuracy issues, validation gaps, measurement failures, and merged special cases.jpg

    Think of a BMI-style index as a rough shape score, not a full body-composition report (body composition means the mix of fat and lean muscle). It’s a quick screening tool. It hasn’t been tested on every breed or body type, so it can miss important things like percent body fat, where fat sits on the body, or medical causes of weight change. Use it to nudge you toward a hands-on check and a vet exam, not as a final answer.

    Breed, fur, and muscle throw the math off. Thick fur can hide fat pockets so a fluffy cat might look trim but still carry extra fat under the coat. Big-boned cats matter too: adult Maine Coons often run 20 to 25 lb (9 to 11 kg) even when fit, while Siamese adults usually fall around 8 to 12 lb (3.6 to 5.4 kg), with males toward the upper end. Muscle and fat feel very different. A muscular hunter-type cat can score “heavy” even with low fat. And older cats with sarcopenia (age-related muscle loss) may keep the same scale weight while losing muscle and gaining fat. Weird, right? But true.

    Measurement mistakes are a huge source of error. Small tape placement changes change the index a lot. For example, with a 30 cm rib reading and a 12 cm leg length the index is about 21.3. Move the rib tape to 32 cm and the index jumps to about 24.4. That’s a 14 to 15 percent change from just a 2 cm slip. Crouched posture, a loose tape, or entering inches when the calculator expects cm will mess things up even faster. And remember: normal daily swings of about ±50 to 150 g (about 2 to 5 oz) happen, so tiny changes usually aren’t a crisis.

    Note: Treat calculator results as estimates and combine them with a hands-on body condition score (BCS) and a veterinary exam before changing food or starting a weight plan. Use fingertip palpation (use your fingertips to feel ribs without pressing hard), look for a visible waist from above, and track trends over several weeks instead of reacting to one number. Worth every paw-print.

    Kittens

    Adult BMI-style indices don’t apply to growing kittens. Kittens grow fast and follow different curves, so follow veterinary growth charts. For precise targets, use your vet’s pediatric chart. Ever watched a kitten explode into energy? That’s growth.

    Seniors and sarcopenia

    Older cats can lose muscle while keeping or gaining fat, which hides true body composition. Look for muscle loss over the spine and hips while weight stays the same. That’s a red flag. Talk to your vet about diet and care if you see this.

    Pregnancy and lactation

    Pregnant and nursing queens need more calories and different targets. Don’t use adult weight-loss goals on a mom cat feeding kittens. Ask your vet about energy needs during pregnancy and nursing.

    Breed-specific notes

    For breed extremes, read the result in context. A 22 lb Maine Coon might be healthy. A 12 lb Siamese might need trimming. Let skeletal size and overall shape guide interpretation, not just the index.

    Measurement tips

    • Weigh at the same time each day, ideally before feeding.
    • Zero or tare your scale and remove carrier weight when possible.
    • Use a soft tape measure and place it at the same rib position each time.
    • Try two-person holds or the carrier-weigh method to keep your cat calm.
    • Be careful with units. If the tool wants cm, don’t enter inches.
    • Repeat measurements and watch trends over weeks, not hours.

    Next, take a breath and give your cat a treat. Small, steady tracking beats frantic number-checking. And hey, isn’t it nice when a simple check helps you spot a real change early?

    Alternatives and complements to a BMI-style calculator for cats: BCS, professional testing, and photo methods

    - Alternatives and complements to a BMI-style calculator for cats BCS, professional testing, and photo methods.jpg

    A quick, practical swap for a BMI-style index is the body condition score, or BCS. Do a simple BCS at home by looking down from above to see if your cat has a waist, and from the side to check for a tummy tuck. Then run your fingertips over the ribs to feel how buried or obvious they are. Use a 1 to 9 mental scale: low numbers mean too thin, middle numbers mean about right, higher numbers mean extra padding. Jot that BCS next to the number from your calculator so you’ve got two ways of seeing the same story. Ever feel like a detective? This part is the fun bit.

    If you want more exact numbers, try professional body composition testing. DEXA (dual-energy X-ray absorptiometry) is the clinical gold standard – it’s an X-ray that separates fat from lean tissue and gives a reliable percent body fat. Some clinics or university hospitals offer it. Bioelectrical impedance (a way to estimate body fat by running a tiny electric current through the body) can be cheaper and faster, but it’s less reliable in pets because hydration, fur, and posture change readings. These tests usually need a referral and cost more than a routine exam, so consider them when the calculator and hands-on check disagree, or when a medical issue is suspected.

    Photo-based guides and silhouette charts are low-effort helpers that work well with the others. Take consistent top and side photos with the cat standing, compare them to published silhouettes, and note small changes over weeks. Combine those pictures with your home BCS and the BMI-style index to watch trends. Photos plus a fingertip check often spot problems before the scale does.

    Body Condition Score (BCS) explained

    BCS uses a 1 to 9 scale where about 3 to 4 is usually ideal. It relies on visual clues like a waist and tummy tuck, plus fingertip palpation of ribs and hips. Write the BCS next to your calculator result so you and your vet see the same picture.

    Professional body composition testing

    DEXA gives accurate measures of fat and lean mass and is used in clinics and research. Bioelectrical impedance is easier to get but can be off in cats because fur, hydration, and posture affect the reading. Pick DEXA when you need precise body composition numbers or when other checks don’t agree. Worth every paw-print.

    Using BMI-style calculator for cats results safely: turning estimates into an action plan, monitoring template, rechecks, and red flags

    - Using BMI-style calculator for cats results safely turning estimates into an action plan, monitoring template, rechecks, and red flags.jpg

    First, turn the index into daily calories. A 10 lb (4.5 kg) cat at ideal weight usually needs about 180 to 200 kcal per day (kcal means kilocalories, the same as the food label). For weight loss aim for roughly 80% of maintenance , so about 160 kcal/day for that 10 lb cat. If your food is 350 kcal per can or cup, do the math: 160 ÷ 350 = 0.457. That means feed just under half a can or cup each day (about 0.46 of the can/cup). Scale that math to your cat’s ideal-weight target from the calculator and write the kcal target on the food bag or at the feeding station so everyone at home follows the same plan. Ever watched your kitty beg from across the room? This makes it easier to stay consistent.

    Cat weight (lb) Estimated maintenance kcal/day Estimated kcal/day for weight loss (≈80%)
    8 150 kcal 120 kcal
    10 185 kcal 150 kcal
    12 205 kcal 165 kcal
    15 240 kcal 192 kcal

    Keep weight change slow and steady. Aim for about 0.5 to 2 percent of body weight lost per week depending on starting weight and health. That pace is safe for most cats. Rapid loss can cause hepatic lipidosis (fatty liver disease), which is dangerous, especially if an overweight cat suddenly stops eating. If your cat is obese or has other health issues, check with your veterinarian before cutting calories or changing diets. My tip: tiny portion tweaks plus extra playtime usually beat drastic cuts, and your cat will thank you with a happier bounce.

    Track and recheck on a regular schedule. Weigh weekly for the first month after you start changes, then switch to every 2 to 4 weeks once things are steady. Keep a simple log: Date | Weight (lb/kg) | BCS (1–9) | Daily kcal given | Notes (appetite, litter box, energy). BCS means body condition score (a 1 to 9 scale showing thin to obese). Take photos from the top and side every 2 to 4 weeks to spot subtle shifts , the pictures tell stories numbers sometimes miss.

    If a reading seems off, follow these steps:

    1. Re-weigh using the 6-step method in How-to.
    2. Perform a BCS and record findings.
    3. Start a daily food and activity log.
    4. Adjust portions or food formulation per calorie guidance and recheck in 2 to 4 weeks.
    5. Schedule a veterinary consult if red flags appear or there’s no improvement.

    Call your veterinarian right away for these red flags: unexplained weight loss greater than 5 percent in 1 to 2 weeks, loss of appetite for more than 48 hours, repeated vomiting or diarrhea, marked lethargy, trouble breathing, or sudden, rapid weight gain. If an overweight cat stops eating at all, get help fast to avoid hepatic lipidosis. Keep calm. Track trends. Use the numbers as a map, not the whole story.

    - Alternatives to a separate Monitoring section brief logtemplate and link to the safety section.jpg

    Need a copy-ready monitoring log and clear red-flag action steps? See Using results safely.

    That section includes a bold, one-line CSV (comma-separated values) card you can copy or print. It also lays out step-by-step recheck (a repeat check) and red-flag actions so all monitoring guidance stays together. Perfect for quick checks or for handing someone a printable card. Quick and tidy, like a cat's swipe.

    Worth bookmarking.

    Final Words

    In the action: we gave required inputs (weight, rib-cage at the 9th rib, lower hind-leg length, plus optional breed selector), showed the formula, and ran a worked example with the math so you can get percent-overweight and an ideal weight fast.

    We covered correct placement, common mistakes, rib-feel palpation, the 6-step how-to, and a monitoring plan.

    Use the BMI-style calculator for cats: how to use and limitations as one tool, pair it with hands-on checks and your vet, and you’ll keep your cats playful, healthy, and feline fine.

    FAQ

    Cat BMI — Frequently Asked Questions

    What does a cat BMI chart show?

    The cat BMI chart shows a BMI-style index (measurement-based ratio) and percent-overweight, comparing rib-cage and leg measurements with body weight; use it alongside visual BCS and hands-on palpation for context.

    How do I calculate BMI for cats?

    You calculate a cat’s BMI-style index by dividing the rib-cage measurement (cm) by 0.7062, subtracting leg length (cm), dividing that result by 0.9156, then subtracting leg length again.

    What inputs do cat weight calculators accept (kg, age, male, food)?

    Cat weight calculators accept weight (kg or lb), rib-cage circumference (cm/in), lower hind-leg length (cm/in), age/kitten selector, sex/breed option, and sometimes daily food calories (kcal) for planning.

    What is a normal weight for a cat in kg?

    Normal weight for most domestic cats is about 3.6–5.4 kg (8–12 lb); larger breeds like Maine Coon often reach 9–11 kg (20–25 lb), so check breed norms when comparing.

    What are the limitations of a BMI calculator for cats and what are BMI limits?

    Limitations of a BMI calculator include breed and skeletal variation, thick fur hiding fat, sarcopenia (age muscle loss), and measurement errors; percent-overweight bands: 10–20% mild, 20–40% moderate, >40% severe.

    How should I use calculator results with physical checks?

    You should use calculator results as estimates and compare them with BCS and a rib-feel check (palpating ribs under light fat); big mismatches or rapid change merits a vet visit.

    Related Articles

  • Cat Weight Chart: Tell If Your Cat’s Overweight

    Cat Weight Chart: Tell If Your Cat’s Overweight

    Think your cat is just "fluffy" and not overweight?
    You’re not alone. About 61% of pet cats carry a few extra pounds, and that hidden weight often lives under all that soft fur. Ever watch your kitty tuck into a sunbeam and wonder if that belly is just fur or something more?

    Weighing your cat is a good start, but a scale doesn’t tell the whole story. Use a simple weight chart (like a map for healthy size) and run your fingers lightly along your cat’s ribs. You should feel the ribs without pressing hard, with a thin layer of fat over them. Also check their BCS (body condition score, a 1-to-9 rating that helps you judge thinness versus chubbiness) for a clearer read.

    This guide shows you how to read the weight chart, do a quick BCS check, and spot signs that it’s time to talk to your vet. That way your kitty stays playful, leaps for toys, and purrs longer.

    Worth every paw-print.

    Cat Weight Chart: Tell If Your Cat's Overweight

    - How to Use a Cat Weight Chart to Tell if Your Cat Is Overweight.jpg

    Weigh your cat and use the chart below as a quick check. If your cat is over the top range, more than 10% above its ideal weight, or has a BCS 6 or higher (BCS means body condition score), suspect overweight and read the BCS and vet sections next. Ever feel surprised by the number on the scale? You are not alone.

    Body size changes a lot with skeletal frame (bone size), sex, age, and whether your cat is spayed or neutered (surgery to prevent breeding). Neutered cats often gain weight more easily. Most housecats fall around 8 to 12 lb (3.6 to 5.4 kg; kg means kilograms). Small breeds commonly weigh under about 8 lb (3.6 kg). Big breeds like Maine Coons can be healthy much heavier, often up to 20 to 25 lb (9.1 to 11.3 kg). About 61% of pet cats are overweight or obese, so don’t worry if the numbers shock you.

    Weight by itself does not tell the whole story. Use the chart as a helpful starting point, then check body condition visually and feel your cat’s ribs (see the BCS section) and visit your veterinarian for a hands-on exam and guidance before starting any diet or exercise plan. That way you get a safe, tailored plan that works for your furry friend.

    Breed Typical adult weight (lb) Typical adult weight (kg) Notes on build or age modifiers When to suspect overweight
    Small breeds 4 to 8 lb 1.8 to 3.6 kg Delicate bones; reaches adult size sooner Above 8 lb, more than 10% over ideal, or BCS 6 or higher (body condition score)
    Average domestic shorthair 8 to 12 lb 3.6 to 5.4 kg Most housecats; weight gain more likely after neuter Above 12 lb, more than 10% over ideal, or BCS 6 or higher (body condition score)
    Large breeds 13 to 20 lb 5.9 to 9.1 kg Sturdier skeletons; males often heavier Above 20 lb, more than 10% over ideal, or BCS 6 or higher (body condition score)
    Maine Coon 12 to 25 lb 5.4 to 11.3 kg Very large frame; many healthy Maine Coons reach 20 to 25 lb Above 25 lb, more than 10% over typical for sex/age, or BCS 6 or higher (body condition score)
    Siamese / Oriental 6 to 10 lb 2.7 to 4.5 kg Slender build; extra fat shows quickly Above 10 lb, more than 10% over ideal, or BCS 6 or higher (body condition score)
    Mixed-breed average 8 to 14 lb 3.6 to 6.4 kg Big variability; check bone size and frame Above 14 lb, more than 10% over ideal, or BCS 6 or higher (body condition score)
    Kittens (age bands) 1 to 6 lb 0.5 to 2.7 kg Grows fast; use age-specific charts for accuracy Weight above the age band or unusually rapid gain
    Senior cat guideline 8 to 12 lb 3.6 to 5.4 kg Watch for unexplained weight loss; body composition changes with age Above 12 lb, more than 10% over ideal, or BCS 6 or higher (body condition score)

    Cat Body Condition Score (BCS) Explained: Read a BCS to Find Overweight Cats

    - Cat Body Condition Score (BCS) Explained Read a BCS to Discover Overweight Cats.jpg

    A body condition score (BCS) is a quick, hands-on way to judge how much fat and muscle your cat has (a simple physical fat-and-muscle check). Two common systems are used: a 1–5 scale where 3 is healthy, and a 1–9 scale where 4–5 is ideal. Use the harmonized thresholds: overweight means more than 10% above ideal weight, and obese means 20% or more above ideal weight. On the 1–9 scale, a score of 6 or higher flags overweight and 7 or higher points to obesity. On the 1–5 scale, 4 is overweight and 5 is obese.

    Get hands-on by feeling and looking. At a healthy BCS you should be able to feel the ribs through a thin layer of fat – think of a soft glove over the ribs. From above, a clear waist is a good sign. From the side, a tucked belly looks healthy. If the waist bulges or you have to press hard to find ribs, that usually means extra fat. Long-haired cats hide their shape – try checking while bathing when the fur lies flat. Common fat spots are the inner legs, under the chin, and along the tailhead.

    Ever watch your cat suddenly zoom and then flop? That tuck-and-pounce energy usually comes from a healthy weight. I once watched Luna leap so high she nearly took flight – worth every paw-print.

    Visual and Palpation Steps

    1. Feel for ribs – ribs should be felt with a light fat covering, not buried.
    2. Check the waist from above – look for a slight indentation behind the ribs.
    3. View the belly from the side – a tucked belly suggests healthy weight; a sag or bulge suggests excess.
    4. Palpate spine and hips – feel these bones with your hands (palpate means to touch and examine). They should be noticeable but not sticking out sharply.
    5. Assess neck and chest fat – thick pads under the chin or at the base of the neck are warning signs.

    BCS gives more context than a single number on the scale. If your cat scores in the overweight range (6 or higher on the 1–9 scale or 4 on the 1–5 scale) or you estimate your cat is over 10% above ideal weight, book a vet exam to confirm and get a safe plan. It’s nicer for everyone when our kitties feel lighter and feline fine.

    How to Weigh a Cat at Home and Track Weight Using a Cat Weight Chart

    - How to Weigh a Cat at Home and Track Weight Using a Cat Weight Chart.jpg

    Start calm. Put your bathroom or kitchen scale on a flat, steady surface and weigh yourself first. Step off, then scoop up your cat and step back on the same scale. Subtract your weight from the combined number to get your cat’s weight (for example, you 150 lb, you plus cat 158 lb, cat = 8 lb). Small cats often give cleaner numbers on a baby scale (small scale for infants) or a digital pet scale (a scale made for animals).

    If your cat hates being held, try the carrier method. Weigh the empty carrier, then weigh the carrier with your cat inside and subtract the carrier weight. Wrap nervous cats lightly in a towel, burrito-style, to help them feel secure and less likely to squirm. It really helps, and your cat might even start purring mid-weigh-in.

    Weigh at the same time of day on the same scale for reliable tracking. Before breakfast or after a litter-box break usually works best. Weigh more often when you have a goal: weekly if you’re actively trying to lose or gain weight, monthly for routine checks. Use calming treats, a towel wrap, or the carrier method to reduce stress and get repeatable numbers. Record each reading and bring the series to your veterinarian when you want help or advice. Printable trackers, photo logs, and the fuller template table are available only in the "Monthly Cat Weight Chart Template" section.

    Signs and Health Risks Shown on a Cat Weight Chart: How to Tell if Your Cat Is Overweight by Symptoms

    - Signs and Health Risks Shown on a Cat Weight Chart How to Tell if Your Cat Is Overweight by Symptoms.jpg

    Start with touch and sight. Run your hands along their ribs , if the ribs feel buried under soft fat, that’s a big clue. Look from above; if the waist is missing and the belly hangs past the hip line, your kitty is packing extra weight. Ever noticed little fat pads on the inner thighs, at the tail base, or under the chin and on the face? Those are giveaways.

    For long-haired cats, press the fur flat during a bath or while brushing so you can see the shape beneath the coat. It helps a lot. My cat hides a pudge under fluff until I smoosh the fur and go, whoa.

    Extra pounds do more than change a cat’s look. Overweight cats are more likely to get diabetes (when the body can’t control blood sugar), skin infections, sore joints that make jumping and cleaning harder, and more urinary tract problems. Studies show excess weight can cut a cat’s life by about five to ten years, so this is about more playtime and more quiet purrs, not just appearances.

    Sudden weight changes are a red flag. Rapid weight loss, refusing food (anorexia), or extreme tiredness need immediate vet attention because things like kidney disease (when kidneys stop filtering waste), diabetes, hyperthyroidism (overactive thyroid), or cancer (uncontrolled cell growth) can be the cause. Ever watched your cat suddenly stop eating? Don’t wait. Call your vet and bring recent weights and notes on eating, litter box use, and activity , they’ll help figure out what’s wrong.

    Simple checks make a big difference. Weigh your cat monthly, or use the vet’s scale if you don’t have one at home. Tip: weigh your carrier alone, then weigh it with your cat and subtract to get the cat’s weight. Track the numbers and jot down behavior changes.

    Act early and you’ll likely save stress, money, and precious purr time. Worth every paw-print.

    Calculating Ideal Weight from a Cat Weight Chart: Formulas and Worked Examples

    - Calculating Ideal Weight from a Cat Weight Chart Formulas and Worked Examples.jpg

    Here’s a simple, cat-friendly trick to find a target weight. Use this formula: Ideal weight = current weight × (1 − % overweight). First change the percent into a decimal (30% → 0.30), subtract that from 1, then multiply by your cat’s current weight. Easy, right? You’ll get a practical goal based on the cat weight chart instead of guessing.

    For example, a 15 lb cat that's about 30% over ideal: 15 × (1 − 0.30) = 15 × 0.70 = 10.5 lb. Yep , that’s your target.

    Numbers are helpful, but they don’t tell the whole story. Look at body condition and health checks too. Use these common thresholds when you read results: overweight means more than 10% above ideal, and obese means 20% or more above ideal. If your BCS (body condition score, a 1–9 scale that shows fat and muscle) is 6 or higher, assume your cat is more than 10% above ideal. Chat with your veterinarian about a safe weekly loss rate and a plan to monitor progress before you cut calories or ramp up activity , losing weight too fast can cause hepatic lipidosis (fatty liver disease), which is dangerous.

    Example Calculations

    Example 1 – 12 lb cat at 20% overweight:
    20% → 0.20; Ideal = 12 × (1 − 0.20) = 12 × 0.80 = 9.6 lb.

    Example 2 – 15 lb cat at 30% overweight:
    30% → 0.30; Ideal = 15 × (1 − 0.30) = 15 × 0.70 = 10.5 lb.

    Example 3 – 22 lb Maine Coon at 15% overweight:
    15% → 0.15; Ideal = 22 × (1 − 0.15) = 22 × 0.85 = 18.7 lb.

    Quick tips: weigh your cat on the same scale, at the same time of day, wearing the same amount of fluff. Ever watched your kitty’s whiskers twitch as the scale reads? Cute and useful. And, um, if you’re unsure, grab the vet , they’ll help set a safe plan and cheer your cat on.

    Feeding Plans and Portion Control Linked to a Cat Weight Chart

    - Feeding Plans and Portion Control Linked to a Cat Weight Chart.jpg

    A typical 10 lb cat usually needs about 180 to 200 kcal per day (kcal means kilocalories, the food energy listed on pet labels). For safe weight loss, aim for roughly 80 percent of maintenance – about 160 kcal/day for that 10 lb example. Then tweak up or down based on your cat’s size, age, and how much they run around.

    Measured meals make a big difference. Free-feeding and extra human snacks add sneaky calories fast, and before you know it your cat has gained weight. Measure portions so you have real numbers to compare to the cat weight chart and to track progress instead of guessing.

    Check with your veterinarian before cutting calories or switching foods, and transition over 7 to 10 days to avoid tummy upset. Rapid calorie cuts can make a cat stop eating, which risks hepatic lipidosis (fatty liver disease) – a serious problem that needs immediate vet care. Slow and steady wins the race; regular weigh-ins help keep your cat safe and springy.

    Quick checklist

    • Calculate your daily kcal target from current weight and activity using the cat weight chart and ideal-weight math.
    • Read the food label for kcal per can or per cup – that number is what you’ll divide into.
    • Measure portions with a kitchen scale or measuring cup so servings stay consistent.
    • Use scheduled meals instead of free-feeding; split the daily amount into at least two meals.
    • Cut treats and human food; swap high-calorie bites for low-calorie options like small pieces of lean cooked chicken or a few extra minutes of play.
    • Transition foods slowly over 7 to 10 days by mixing increasing amounts of the new food each day, and watch appetite closely.

    Converting calories to cans is easy: target kcal ÷ kcal per can. Example: 160 kcal/day ÷ 350 kcal per can = 0.457 can/day. That’s just under half a can, so split it into two or three small meals across the day.

    If your cat refuses food or loses weight too fast, call your vet right away so tests and a safe plan can start. Worth every paw-print.

    Exercise, Play, and Enrichment Tied to a Cat Weight Chart for Safe Weight Loss

    - Exercise, Play, and Enrichment Tied to a Cat Weight Chart for Safe Weight Loss.jpg

    Aim for two 15-minute interactive play sessions every day (2 × 15 minutes/day). Those short bursts, sprint-chase, high leap, quick pounces, burn real energy and pair best with a vet-recommended calorie plan (your vet’s portion and kcal target). Many vets suggest diet plus play, so treat those mini-sessions like medicine time and pop them on the calendar.

    Try play that mimics hunting: drag a wand so your kitty bolts and twists, toss a soft ball for short sprints, or use a motorized teaser (a battery-powered toy that zips unpredictably). Add environmental changes: a tall cat tree for climbing, window perches for bird-watching, and food puzzle feeders (bowls that hide kibble so meals become work-and-play). Rotate toys every few days so the fun doesn’t go flat, your cat will thank you with the kind of zoomies that make you laugh.

    Go slow if your cat is sedentary or very heavy. Start with gentle 5–10 minute rounds and build to the 15-minute goal over weeks, watching for limping, heavy breathing, or refusal to move. If your cat seems stiff, check paws and joints and ease off, uh, slow and steady wins the race here.

    Weigh your cat regularly, every 1–2 weeks is a good rule, and check the BCS (body condition score, a simple vet scale that shows fat versus muscle). If weight loss stalls or your cat looks painful, call the vet and tweak the plan. Your team might adjust calories, swap activities, or suggest pain relief so play stays fun and safe.

    Worth every paw-print.

    When to See a Vet: Using a Cat Weight Chart for Diagnosis, Tests, and Prescription Options

    - When to See a Vet Using a Cat Weight Chart for Diagnosis, Tests, and Prescription Options.jpg

    If your cat suddenly loses weight, stops eating, or shows other red flags like heavy breathing, extreme sleepiness, or trouble jumping, book a vet visit right away. If your cat scores in the overweight range on a Body Condition Score (BCS) or seems more than 10% over their ideal weight, a checkup is a smart move. Rapid weight loss or not eating is urgent because of hepatic lipidosis (fatty liver disease), which can be life threatening.

    At the clinic your vet will do a formal weight check and confirm the Body Condition Score (BCS) with hands-on exams, think gentle rib and hip checks, not poking around. They’ll usually run bloodwork to check glucose (for diabetes), T4 (thyroid hormone test), and kidney values (creatinine, BUN), and may add urine testing or imaging like x-rays or ultrasound if something looks off. These tests help find medical causes of weight change and rule out conditions that make dieting unsafe.

    Treatment is tailored to your cat. For obese cats vets often prescribe therapeutic, prescription weight-loss food or a specific diet plan and set a realistic, steady loss rate so your cat stays healthy. You’ll come back for follow-up weights every 2 to 4 weeks or on whatever schedule your vet recommends, those check-ins keep progress on track.

    One more thing: overweight cats face higher risks with anesthesia, so your vet may delay elective procedures until weight and overall health improve. Worth every paw-print.

    Monthly Cat Weight Chart Template, Progress Tracking, and FAQs for "How to Tell if Your Cat Is Overweight"

    - Monthly Cat Weight Chart Template, Progress Tracking, and FAQs for How to Tell if Your Cat Is Overweight.jpg

    Use this printable monthly chart to track weight, BCS (body condition score), waist size, and a photo filename so you can spot small changes over weeks. Take one quick photo from above and one from the side each week, and measure the waist right behind the ribs (inches and centimeters). Try to aim for slow, steady loss under your vet’s guidance. A common safe target is about 0.5% to 2% of body weight per week, depending on how overweight your cat is. If nothing changes after 8 to 12 weeks, double-check your calorie math (target kcal (food calories) versus the food label), make sure you measured the same way each time, and call your vet to rule out medical issues.

    Below are quick answers to common questions owners ask when using a weight chart. Think of these as little checkpoints to help you stay realistic and make fixes fast.

    • What is a safe weekly weight loss?
      Aim for roughly 0.5% to 2% of body weight per week, following your vet’s advice and how obese your cat is.

    • How often should I weigh my cat?
      Weigh weekly while actively losing weight, then move to monthly for maintenance. Use the same time of day and the same scale every time.

    • Can I give treats?
      Yes, but sparingly. Count their kcal (food calories) into the daily total. Swap high-calorie treats for extra play instead.

    • My cat stopped eating – what now?
      Call your vet right away. Fasting can cause fatty liver (hepatic lipidosis), which is serious.

    • How do I feed in a multi-cat home?
      Create separate feeding stations or use microchip feeders (feeders that only open for each cat’s chip) so portions stay accurate.

    • When is weight gain normal?
      Growth in kittens, muscle gain from exercise, or weight change after spay or neuter can be normal.

    • Are prescription diets necessary?
      Sometimes. Your vet may recommend a therapeutic weight-loss formula (vet-prescribed) for obese cats.

    • How long will it take to reach the goal?
      It depends on how much weight your cat needs to lose. Small weekly losses add up. Expect months, not weeks.

    Date Weight (lb/kg) BCS Waist measurement (in/cm) Photo filename Notes
    ____/____/____ ____ lb / ____ kg ____ ____ in / ____ cm photo01.jpg ____
    ____/____/____ ____ lb / ____ kg ____ ____ in / ____ cm photo02.jpg ____
    ____/____/____ ____ lb / ____ kg ____ ____ in / ____ cm photo03.jpg ____
    ____/____/____ ____ lb / ____ kg ____ ____ in / ____ cm photo04.jpg ____
    ____/____/____ ____ lb / ____ kg ____ ____ in / ____ cm photo05.jpg ____
    ____/____/____ ____ lb / ____ kg ____ ____ in / ____ cm photo06.jpg ____
    ____/____/____ ____ lb / ____ kg ____ ____ in / ____ cm photo07.jpg ____
    ____/____/____ ____ lb / ____ kg ____ ____ in / ____ cm photo08.jpg ____
    ____/____/____ ____ lb / ____ kg ____ ____ in / ____ cm photo09.jpg ____
    ____/____/____ ____ lb / ____ kg ____ ____ in / ____ cm photo10.jpg ____
    ____/____/____ ____ lb / ____ kg ____ ____ in / ____ cm photo11.jpg ____
    ____/____/____ ____ lb / ____ kg ____ ____ in / ____ cm photo12.jpg ____

    Final Words

    in the action. Weigh your cat, compare to the chart, then use a BCS check and vet guidance if needed , those are the fast, practical steps this post walked through. You’ve got the table, home-weighing tricks, and BCS cues.

    We also covered calories, portion control, two 15-minute play sessions a day, and tracking tips to make steady, safe change. Bring data to your vet for tests or prescription plans when needed.

    With small, consistent steps you’ll keep paws healthy and playful. Check the cat weight chart: how to tell if your cat is overweight and celebrate every pounce.

    FAQ

    Cat weight — Frequently asked questions

    How do I use a cat weight chart to tell if my cat is overweight?

    Weigh your cat, compare the weight to the chart, and suspect overweight if the cat is more than 10% above its ideal weight or has a BCS of 6 or higher (BCS = body condition score).

    What are normal cat weight ranges in kg by breed, sex, and age?

    Normal weights vary by breed, sex, and age: most domestic adult cats are about 3.6–5.4 kg (8–12 lb); small breeds are often under ~3.6 kg; large breeds like Maine Coon can be healthy up to about 9–11 kg (20–25 lb).

    Is 12 lbs overweight for a cat?

    A 12 lb (≈5.4 kg) cat is usually within the normal range for many domestic cats (8–12 lb), but check body build and BCS; suspect overweight if the cat is more than 10% above ideal weight or has a BCS of 6 or higher.

    Is 17 lbs too heavy for a cat?

    A 17 lb (≈7.7 kg) cat is likely too heavy for most breeds; only large breeds such as Maine Coon may be healthy at that weight. Use BCS and a veterinarian exam to be sure.

    Is 20 lbs too heavy for a cat?

    A 20 lb (≈9.1 kg) cat is generally too heavy for most cats but can be within a healthy range for very large breeds (Maine Coon may be healthy up to about 20–25 lb). Check BCS and consult your veterinarian.

    What weight counts as obese for a cat?

    Obesity in cats is roughly defined as about 20% or more above ideal weight, or a BCS of 7 or higher on a 1–9 scale (or 5 on a 1–5 scale). Obesity increases the risk of diabetes, joint problems, and can shorten life expectancy.

    How do male and female cat weights usually differ?

    Male cats often weigh a few pounds more than females, especially if neutered. Skeletal size, age, and breed affect ideal weight, so use BCS and the chart for a fair assessment.

    What are typical weights for kittens and senior cats?

    Kittens grow quickly: about 2 months ≈ 0.9–1.8 kg (2–4 lb), 4 months ≈ 1.8–2.7 kg (4–6 lb), and around 6–9 months they approach adult size. Senior cats may lose muscle mass, so BCS matters more than pounds alone.

    How do I weigh my cat at home?

    Weigh yourself, then weigh yourself while holding the cat, and subtract: for example, owner 150 lb and owner+cat 158 lb → cat = 8 lb. Use the same scale and similar time of day for consistency.

    Related Articles

  • how to test the durability of cat toys at home

    how to test the durability of cat toys at home

    Let’s be honest, most cat toys are glorified confetti , tiny fluff, cheap fabric, and a squeak that disappears in a day. They look fun until your cat turns them into a stuffing explosion. I want to help you stop buying duds and keep your kitty safe.

    This quick at-home test routine shows you what to check before a toy becomes a hazard. You’ll run six simple checks: pull (tensile – how much pulling force a seam can take), seam and stitch (how seams are sewn and held together), bite simulation (chew test to see if stuffing or parts come loose), abrasion (wear from rubbing), drop/shock (impact resistance), and wash test (how it stands up to machine or hand washing). Each one takes just a minute or two.

    Take a few before-and-after photos as you test, follow the step-by-step moves, and you’ll know when to repair a toy or retire it for good. Think of it as toy triage , quick fixes for the keepers, and a polite goodbye for the shredded ones!

    Ever watched your kitty pick a favorite toy only to shred it in a day? Yeah, me too. I once saw Luna leap, snag, and unstuff a mouse in under sixty seconds , hilarious and annoying all at once!

    Quick-reference: fast durability checks for your cat toys

    - Quick-reference fast durability checks for your cat toys.jpg

    This quick checklist helps you decide in minutes if a toy can stay, needs a repair, or should be retired. Focus on keeping loose stuffing, glued-on bits, tiny fragments, and exposed batteries away from your cat. Before you start, snap a clear before photo with the date, and plan to take an after photo with the date for your records. Ever watched your kitty pick a favorite toy only to shred it in a day? Yeah, me too.

    1. Pull test (tensile test)
      Clamp the toy (a holder that keeps the toy steady) and pull steadily with a luggage or hand scale (a small portable scale for measuring force). Pull until you feel resistance. Fail if seams gap, threads snap, or stuffing peeks out. Repeat three times to be sure.

    2. Seam and stitch check
      Run your fingers along all seams, tug corners, and gently wiggle glued-on eyes or noses. Fail if stitches loosen, glue peels, or parts wobble free. Do this check three times; small loosening can get worse fast.

    3. Bite and chew simulation
      Wearing a glove, give short, controlled bites or tugs to the surface like your cat would. Fail if the surface breaks, small pieces come off, or stuffing shows. Repeat this three times. Caution: gloves protect your fingers but don’t assume the toy is safe for unsupervised play.

    4. Abrasion test
      Rub a small hidden area with sandpaper (rough paper used to wear material) or an old toothbrush to mimic chewing. Fail if the fabric thins, tears, or stuffing appears. Try this test three times so you catch slow wear. Think of it as a mini stress test.

    5. Drop and shock check
      Drop the toy onto carpet from waist height and let it roll or tumble a few times. Fail if plastics crack, seams split, or batteries shift. Repeat five times to simulate real play. If batteries move, retire the toy right away.

    6. Wash and dryer test
      Run a gentle cold cycle in the washer (follow the label if there is one) and inspect after drying. Fail if adhesives loosen, stuffing compacts, or any odor or mildew shows up. Repeat one to three times depending on how often you plan to wash the toy.

    7. Stuffing escape and puncture probe
      Press a blunt probe (a rounded tool like the eraser end of a pencil) at three points to test puncture resistance. Fail if the probe makes holes or exposes filling. Repeat three times. If stuffing can escape, you don’t want that near a curious cat.

    Tools: clamp (holds items steady), luggage/hand scale (portable force scale), sandpaper, towel, washer and dryer, blunt probe (rounded tool like a pencil eraser).

    See the detailed sections below for full step-by-step protocols, safety notes, and repair tips. Worth every paw-print.

    DIY pull, seam and bite tests for plush and stuffed cat toys at home

    - DIY pull, seam and bite tests for plush and stuffed cat toys at home.jpg

    Below you’ll find a friendly seam-strength test and simple repair tips so your toys stay safe and fun.

    Seam-strength test method

    Step-by-step protocol:

    • Secure one end of the toy in a clamp (a tool that grips fabric firmly).
    • Attach a luggage or hand scale (a pocket-sized force scale that measures pulling force) to the other end.
    • Pull steadily along the seam until it gives. Pay attention to the feel and sound , you might hear a tiny pop , and watch for threads fraying, stitches popping, or stuffing peeking out.
    • Repeat three times on the same seam area to check consistency.
    • Record the peak force reading on the scale (or mark pass/fail) and write a short note about where it failed.

    Suggested data log format:

    Toy ID Date Trial 1 (lb/kg) Trial 2 (lb/kg) Trial 3 (lb/kg) Failure type Notes
    Mouse-01 2026-01-17 6 lb 6.5 lb 6 lb Stitch popped Seam at tail; needs repair

    Bite simulation and stuffing escape check

    Put on a thick glove (leather or a heavy work glove) and give short, controlled tugs and light biting motions to the toy surface to mimic chewing. Look for surface breakdown, loose fibers, or exposed stuffing (the fluffy filler inside). If glued-on eyes or noses loosen, remove them before any unsupervised play.

    Count how many tugs or bites until something fails and note the exact failure point (seam, eye, limb). Run three trials for repeatability. Example log line: "Trial 2 – stuffing exposed at neck after 8 tugs."

    Repairs

    Quick how-to tips:

    • Backstitch (a strong overlapping stitch for durability): stitch along the seam, lock the first and last stitches, then trim threads. Use polyester thread (strong and less likely to snap).
    • Ladder stitch (invisible seam stitch): weave the needle through folded edges so the repair hides on the outside. Great for keeping toys looking tidy.
    • Trim stray threads close to the knot and double-knot repaired ends so they don’t snag.
    • For loose glued-on bits, remove glue residue, then either embroider the feature (thread-made eyes or nose) or sew on a replacement securely.

    A few quick safety notes: test repairs by hand before giving a toy back to a chewer, and keep suspicious toys out of unsupervised reach.

    Worth every paw-print.

    Abrasion, chewing simulation and puncture testing you can do at home

    - Abrasion, chewing simulation and puncture testing you can do at home.jpg

    Want a quick, hands-on way to check if your cat toy will survive playtime? Try this simple at-home protocol. Take dated before-and-after photos so you can see what changed. Ever watched your kitty attack a toy and wondered if it will last? This helps answer that.

    Tools list:

    • Sandpaper (120-240 grit) (coarse paper used to wear a surface).
    • Blunt probe (rounded pencil eraser or short plastic rod).
    • Spray bottle with water or a cat-safe saliva substitute (a water-based spray that mimics moisture).
    • Camera or phone for dated photos.
    • Small towel for handling during dry cycles.

    Step-by-step checks

    1. Take a before photo. Name it like "2026-01-17_before.jpg" so your files are easy to sort. Snap a clear shot of the test spot and note the date.
    2. Abrasion test: Give 20-50 consistent sandpaper strokes on a hidden seam or the underside. Keep the strokes even and in one direction. Count them so you can repeat the same number next time.
    3. Puncture test: At three separate spots, press the blunt probe straight in with steady pressure. Don’t twist. Just press as if a curious paw were poking it.
    4. Saliva-soak cycles: Spray the same test spots quickly three times, letting the moisture sit for a few seconds each time. Think of this like a quick lick session, then let the toy dry completely in open air or sunlight.
    5. Dry and sniff: After the toy is fully dry, sniff each sample for any lingering odor. Yep, give it a little whiff. It tells you if moisture got trapped inside.

    Log what you see
    Take an after photo named "2026-01-17_after.jpg". Write a short note for each spot, for example: "thinned fabric," "small hole at probe 2," or "no change." Keep the before-and-after photos together so you can compare over time and decide if the toy is still safe to play with.

    Quick tips

    • Test on a hidden area so your cat still loves the toy.
    • Do the checks in the order above for a consistent record.
    • If stuffing leaks or fabric keeps thinning, retire the toy. Worth every paw-print.

    Washing machine, dryer and water-resistance tests for cat toy durability at home

    - Washing machine, dryer and water-resistance tests for cat toy durability at home.jpg

    A quick washing machine test shows if plush and fabric toys actually survive the laundry or start shedding tiny, dangerous bits. Use a gentle cycle for plush, cold water for toys with adhesives (glue), and skip dryer heat for glued or stuffed toys unless the label explicitly says it’s okay. Wipe rubber and plastic toys clean to remove grime and bacteria; wet testing can reveal mold or mildew, so let toys dry completely before storing.

    Run one wash cycle first as a trial. For tougher toys try one to three cycles, and inspect after each run. Take a date-stamped before photo and an after photo with your phone so you can compare, and jot down any loose threads, torn seams, stuffing compaction (stuffing that’s flattened or packed), softened glue, or lingering smells. Food-dispensing toys need a thorough rinse and full drying so moisture does not hide in crevices and cause mildew.

    For a safe dryer check, use a short low-heat tumble only if the toy label allows it, and watch for trim or glue coming loose. A simple water-resistance test is to spray seams and hidden pockets, then feel inside for trapped dampness after the toy dries. Air-dry plush toys in the sun or on a rack, and store clean toys in a dry bin between play sessions so they stay fresh.

    A few practical tips: pop small fabric toys into a mesh laundry bag to protect them and your machine, use mild detergent, and never use bleach. Inspect rubber or silicone (flexible, non-toxic material) toys for cracking or sticky breakdown after wetting, and check plastic toys for loose small parts and battery compartment leaks. Your cat’s whiskers will twitch when a toy still looks and smells like playtime , that’s the goal, right?

    Worth every paw-print.

    Material Wash setting Dryer allowed? Notes
    Plush / fabric Gentle cycle, cold water Low heat only if label says safe Check seams, remove glued bits (adhesives), air-dry to avoid mildew; use mesh bag
    Rope / sisal Hand wash or gentle cycle in mesh bag Air-dry recommended Sisal (natural fiber) may fray or shrink; inspect for loose strands and loose knots
    Rubber / silicone Wipe or rinse with warm soapy water No dryer Check for cracking or sticky breakdown after wetting; avoid high heat
    Plastic / hard toys Wipe clean or top-rack dishwasher if label allows Air-dry Inspect small parts and battery compartments for leaks or looseness; rinse food-holding crevices

    Testing electronics, noise-makers and battery compartments in cat toys at home

    - Testing electronics, noise-makers and battery compartments in cat toys at home.jpg

    Electronic toys need a quick safety check before they ever meet your cat’s paws. Start with simple checks for loose batteries, wobbling motors, and scary buzzes because those things can hurt or frighten a kitty. Take a dated before photo (phone photo with the date visible), run the tests, then take an after photo so you’ve got proof if anything fails , or if you need to return it.

    Battery compartment and fastener safety check

    1. Shake test: give the toy a firm shake and listen for rattles. If you hear parts moving, that’s a red flag.
    2. Tug test: gently pull on the battery-cover edge and any snaps or clips. If something pulls free, don’t give it to your cat.
    3. Screw check: make sure covers are screw-locked (screws holding the cover) or snap-locked (clips that click closed); toss the toy if the cover opens or a battery (power cell) is exposed.

    Motor/noise and drop-cycle durability

    Run the toy through about 10 on/off cycles and listen closely. Use a smartphone sound meter app to spot high-pitched or very loud noises; watch the decibel readout (decibels, dB, measure sound level) and trust your ears, if it makes a sharp whining or buzzing your cat might bolt. Ever watched your kitty freeze at a high whine? Not fun.

    Next, do five light drops onto carpet to mimic real play. Look for plastic cracks, loose screws, rattling insides, or any change in how the motor sounds. The motor (the tiny spinning part that makes things move) should stay steady and quiet.

    Fasteners, glue, and wire routing matter. Glue that peels or tabs that stick out invite chewing and can let fingers reach batteries. Store wand toys and electronic toys between play sessions so strings and wires aren’t left out, and retire any toy that shows exposed batteries, persistent rattling, or sharp plastic edges. Trust me, it’s nicer to replace a toy than to deal with a scared or hurt cat.

    Durability scorecard, documentation methods and when to retire cat toys

    - Durability scorecard, documentation methods and when to retire cat toys.jpg

    Keep a tiny log so you can compare toys over time and have proof if a maker asks for a refund. Take a clear before photo and date it, run three repeatable trials per test, then take an after photo with the date and a one-line note about what changed. Use simple pass/fail rules: retire toys with loose stuffing, glued-on bits coming off, open seams (where fabric is stitched together), small pieces that could be swallowed, or exposed batteries.

    Make a quick scorecard – a simple points checklist works great. Give each test a max score, record what you saw, and write one short note. Run pull, bite, abrasion (surface wear from rubbing), wash, and final safety checks three times, then average the scores so you’ve got repeatable data to compare toys or share with manufacturers. Keep a field note like “neck seam opened after 2 pulls.” Rotate a core collection weekly so favorites don’t wear out too fast, and plan at least two 15-minute play sessions a day for active cats , that helps spread the wear.

    How often to test depends on the cat. Heavy chewers get weekly checks. Toys used outdoors or in multi-cat homes get checked every two weeks or monthly. Kitten toys should be checked before every solo-play session. Record dates, trial counts, and photo filenames in a tiny spreadsheet or a notebook so trends jump out fast.

    Test Max points Observed points Notes
    Pull 20 ____ Seam strength (where pieces are stitched together), stitch type
    Bite 20 ____ Surface break, stuffing exposure (loose filling)
    Abrasion 20 ____ Fabric thinning, fray – abrasive wear
    Wash 20 ____ Glue softening, odor, compaction (stuffing packing down)
    Final safety check 20 ____ Loose bits, batteries, sharp edges, long strings

    Retire toys right away if you see stuffing that can be pulled out and swallowed, glued bits coming loose, brittle plastic fragments, exposed batteries, persistent mildew or odd smells, or long strings and cords that could tangle a curious kitty. Worth every paw-print.

    Special considerations for heavy chewers, kittens, senior cats and material choices to test at home

    - Special considerations for heavy chewers, kittens, senior cats and material choices to test at home.jpg

    By cat profile:

    • Heavy chewers: raise the bar. Do more pulls and deeper bite trials, and run a full check each week that includes pull, bite, and abrasion tests. Quick example: "Give it 10 firm tugs, then try a 5-second bite hold to see if seams or edges split." Worth the extra minutes if your cat is a chew monster.

    • Multi-cat or outdoor: inspect every two weeks. More mouths and rougher weather speed wear, so toys need more frequent checks and tougher tests.

    • Low-use or display: check once a month. Less play means slower wear, but sunlight, dust, and old glue can still make things unsafe.

    • Kittens: do a visual inspect before every solo session. Tiny bits become big problems fast. Ever watched a kitten harvest every fuzz from a toy? Yeah.

    Seniors need softer, low-impact play. Pick plush or foam (soft, spongy material) toys that cushion joints, keep sessions short, and avoid hard, noisy toys that can startle reduced-mobility cats. Three minutes of gentle batting, then a nap. Cozy and calm wins.

    Material notes are in the Washing machine/Material table, but here are the highlights to keep in mind: sisal (coarse plant fiber, like a rough rope), cardboard (stiff layers of paper), cork (light, slightly springy bark), and tightly braided rope tend to fray into harmless fibers instead of shattering. Watch plastics. Brittle plastic can fragment into sharp bits, so give those tougher puncture and abrasion checks. Quick check: press edges, look for hairline cracks, then bend slightly to see if it flakes.

    Repairs are covered in the Repairs section. The key moves: reinforce seams with strong stitches, trim loose threads, and use pet-safe glue on non-electronic parts. Repair example: "Sew three tight stitches across a split seam, knot, and tuck the thread." If a toy has batteries or wiring, replace the part or retire the toy instead of gluing it back together.

    Safety first, but also fun. A tiny check now can save a big scare later.

    Final Words

    In the action: run the quick pull, seam, bite, abrasion (rubbing) and wash checks, take before/after photos with dates, and tick the scorecard, fast decisions keep cats safe.

    We covered clamp + luggage-scale tensile (pull) testing, safe bite checks, sandpaper abrasion, wash/dryer trials, battery compartment and noise checks, plus repair tips and rotation for heavy chewers, kittens, and seniors.

    Use these steps to practice how to test the durability of cat toys at home and enjoy longer, happier play sessions, worth every paw-print.

    FAQ

    Frequently Asked Questions — Cat Toys

    How long do cat toys last?

    The lifespan of cat toys depends on material and play style. Plush toys often wear out in weeks to months; rope, sisal (natural fiber), or rubber toys can last months to years with regular checks and rotation.

    What materials are unsafe for cat toys?

    Unsafe materials include brittle plastic (hard plastic that flakes), small glued-on parts like eyes or noses, loose stuffing (polyester fill), small magnets, and exposed batteries—these can be swallowed or cause choking.

    Why does my cat keep breaking his toys?

    Your cat may break toys because of play style (chewing, pouncing), weak construction (poor seams, glued parts), or old wear. Choose tougher materials, supervise rough play, and inspect, repair, or retire damaged toys regularly.

    Do catnip toys lose their potency?

    Yes. Catnip toys lose potency as essential oils evaporate. Store toys airtight, refresh by adding fresh catnip or crumbled leaves, and replace toys after a few months if your cat’s reaction fades.

    Related Articles

  • Redirecting Play Aggression in Cats: Practical Steps

    Redirecting Play Aggression in Cats: Practical Steps

    Think play bites are harmless kitten fun? They teach your cat to treat your hands like toys, which ends in scratches, a sting, and owners who feel tense and frustrated. Ever watched a paw-eye pounce and felt your heart jump? Not exactly relaxing.

    Try this quick six-step interruption routine to stop the madness. Notice the tail twitch or the sudden laser-focus. Stop contact – pull your hand away calmly. Oops, let me rephrase that: remove your hand without yelling. Offer a toy, like a wand (a stick with a dangling lure) or a small ball, to redirect the hunt. Reward calm with soft praise or a tiny treat.

    Do two short sessions a day, just a few minutes each, and your cat will learn toys earn the prize, not fingers. It beats frantic wrestling and keeps both of you relaxed. Plus, no more bandages.

    Worth every paw-print.

    How redirecting play aggression in cats provides immediate, practical steps

    - How redirecting play aggression in cats provides immediate, practical steps (lede).jpg

    When play gets too rough or frantic, act fast. Here’s a simple interruption routine you can use right away to stop the “hands-as-toys” habit and keep everyone safe.

    1. Notice the warning signs: tail twitching (a quick flick at the tip), ears flattened against the head, pupils wide (dilated pupils , big, scared-looking eyes).
    2. Stop contact immediately. Pull your hands away.
    3. Offer a toy from a distance. Try a wand (a stick toy with feathers or a lure) or a rolling ball.
    4. Help the cat shift focus to the toy. Move it like prey so the hunting drive follows the toy, not your skin.
    5. Reward calm focus with a tiny treat or a short win of play.
    6. Only go back to supervised interaction once your cat is calm.

    Start that six-step sequence the instant you see those signs. For safety, step backward so you’re out of reach, use a soft, calm voice, then present a long-handled wand or a rolling ball to redirect the hunt. Aim for two 10-minute interactive sessions a day to burn energy , that’s a good baseline for most cats. Take short breaks whenever you spot warning signs so play never slides into overstimulation.

    Rewarding calm focus (a tiny treat or a quick, successful pounce) helps the cat learn that toys earn attention, not hands or feet. And please, don’t use your fingers as targets , teach toys to be the fun thing. Toys and rewards are part of this plan; full toy lists, rotation schedules, and training exercises live in the toys/enrichment and training sections.

    If the aggression is new, getting worse, or shows up with no clear trigger, check the "When to consult…" section for guidance on veterinary and behavior referrals.

    Recognizing signs of play aggression in cats: kittens versus adult cats

    ).jpg

    Play aggression looks like chasing, pouncing, batting, wrestling, mouthing, and sometimes biting or scratching, basically hunting practice that got a little too excited. Watch the early signals: a quick tail-tip flick, ears pinned back, or huge, wide pupils , that startled, big-eye look. Those clues mean the cat is nearing overstimulation (when a cat gets too excited or irritated and can’t keep playing safely). Pause play or switch to a long-handled toy (like a teaser wand, a stick with feathers or ribbons) before your hands become the target. Ever catch your cat mid-flinch? That’s your sign to stop.

    Kittens usually wrestle and explore with their mouths more, think sloppy, curious mouthing and tumbling play. Adults tend to give harder bites or fast, focused swipes once they hit that overstimulated zone. Fear-related aggression is different: that’s defensive, with hissing, a low crouch, and attempts to get away, not chasing you for fun. If attacks start suddenly, get more frequent, or you see puffed-up fur or long-lasting aggression, check the "When to consult…" section for vet and behavior thresholds and what to bring to an appointment.

    Worth every paw-print.

    Sign Kittens (typical) Adults (typical)
    Pouncing / wrestling Playful tumble sessions, rough-and-tumble practice Short, intense pounces; more focused strikes
    Mouthing / biting Exploratory mouthing, softer bites Harder, sharper bites that can hurt
    Tail / ear signals Quick tail flicks, ears may swivel back Tail lashes, ears pinned flat when overstimulated
    Vocalizations Excited chirps, playful squeaks Growls or short, sharp yowls if annoyed
    Escalation severity Often brief and calms with redirection Can escalate to painful swipes or repeat attacks without intervention

    Causes and triggers behind redirecting play aggression in cats

    - Recognizing signs of play aggression in cats kittens versus adult cats.jpg

    Play aggression shows up when a fun play session turns into biting, scratching, or pouncing on people. It’s usually because your cat gets overstimulated (too much excitement all at once) or frustrated and their arousal (physical-ready-to-hunt feeling) spikes. You’ll see whiskers pushed forward, pupils blown wide, and muscles coiled like a spring. The scene is almost cinematic, your cat’s ready to hunt, but there’s no proper target.

    When that build-up has no safe outlet, the closest moving thing becomes the target, often a hand or foot. That’s why a simple incident log helps so much: note the time, what you were doing, and any sounds or sights you noticed. Patterns pop up fast , certain toys, play styles, or times of day might be the problem. Once you see the pattern, you can change the setup.

    Redirected aggression happens when a cat can’t reach the original trigger (like another cat outside the window) and takes out the frustration on whoever’s nearby. Think of it as misdirected anger (aggression aimed at the wrong target). Visual triggers are a big one, passing outdoor cats, birds, or even reflections. Try closing blinds, using opaque window film, or moving your cat’s favorite perch away from the trouble spot. Give them an alternate lookout with a partially blocked view so they can still watch without fixating.

    Some background factors make overstimulation more likely: confinement, sudden loud noises, poor kitten social play (that’s when kittens learn bite strength and self-control), and pain or illness. So take medical causes seriously. Change how you play: short bursts, a long-handled wand toy (like a fishing pole for feathers), and clear pauses the moment warning signals appear, tail flicks, ears flattening, or growls.

    If this behavior is new, getting worse, or seems to come from nowhere, check the "When to consult…" section for veterinary and behavior referral. It’s better to rule out pain or health issues early. And hey, small changes often make huge differences, worth every paw-print.

    Expanded technique and safety details for handling play-aggressive episodes (references lede)

    - Causes and triggers behind redirecting play aggression in cats.jpg

    The lede gives a quick six-step interruption sequence you should use first. Think of that as your emergency script, then move on to these extra tips for keeping distance, relocating the cat, and helping them recover.

    Keep your body language calm and predictable while you interrupt. Step back slowly so you’re out of reach. Turn your body a little to the side (less confrontational than facing square-on) and don’t loom over the cat. Ever watched your kitty chase shadows? These little changes make a big difference.

    Watch the cat’s cues closely:

    • Rapid tail-lashing, ears pinned flat, big pupils, or a sudden freeze all mean back off and use a diversion.
    • If you can safely offer a toy from where you stand, do it. If not, move people and other pets away so the cat has space to de-escalate.

    When the cat calms, use a controlled relocation and a low-stimulation plan for the next 24 to 72 hours before any full reunion. If the cat keeps acting out, has repeated episodes, or the attacks seem stronger than usual, check the "When to consult…" section for vet and behavior-referral thresholds and prep.

    Safe diversion tools and methods

    Long-handled wand toys (a wand toy is a stick with a lure, like a fishing pole for feathers) are my top pick for interrupting play aggression because they let you stay out of reach. Motion-activated toys (battery-powered toys that start moving when they sense touch or motion) can grab attention across a room without a human nearby. Scent toys like catnip or silvervine (silvervine is a plant that excites many cats, similar to catnip) are nice for gentle redirection when movement-based play is too intense.

    Placement and angle tips:

    • Hold the wand about 2 to 3 feet away and a little to the side so the cat chases sideways motion, not your hands.
    • Present motion toys across the room, not toward people, so the cat runs away from household members.
    • Toss a scented toy gently ahead of the cat’s path to encourage a calm chase-and-capture.
    • Avoid fast, jerky flicks that mimic a prey ambush when the cat is already fired-up.

    Relocation steps for the offending cat

    1. Close off a quiet room with food, water, litter, and favorite bedding; open the door and lure the cat in with a toy or a trail of treats.
    2. If you need to pick up the cat, use a towel or blanket as a calm wrap (blanket over shoulders, gentle scoop). Never force the cat by grabbing.
    3. Leave the cat alone to cool down for a short period , minutes to a few hours depending on how intense things were , and check from outside the room quietly.
    4. Reintroduce calmly: offer a short play or treat session through the door or with a wand while supervising, then allow brief supervised freedom once the cat has been calm for at least 30 minutes.

    Detailed post-incident recovery

    Keep the environment low-stimulation for 24 to 72 hours: dim lights, speak softly, and avoid sudden handling. Offer short, supervised interactions only after you’ve seen at least 30 minutes of relaxed behavior. Rebuild positive associations with brief play-plus-treat sequences, and if multiple incidents happen, pause reintroduction for several days. If the problem keeps happening or gets worse, see the "When to consult…" section for next steps , vet checks or a behavior referral can really help.

    Redirecting Play Aggression in Cats: Practical Steps

    - Expanded technique and safety details for handling play-aggressive episodes (references lede).jpg

    Heads-up: we moved the basic toy tips and the "types of toys to prioritize" list into the Safe diversion tools and methods section, so I won't repeat them here. Toy maintenance and how to rotate toys (store toys out of sight, cycle groups every 3–7 days, repair or replace worn parts) now lives in the Toys & Enrichment reference, and the DIY repair link is over in the resources list.

    So what you get here are the fresh, practical bits you actually want: quick toy-rotation rules, a short checklist of toy features to look for, and concrete tips like how to finish a laser session with a real catch so your cat feels rewarded.

    Quick toy-rotation rules (toy rotation = switching toys to keep them novel)

    • Store toys out of sight between play sessions. Cats notice "new" things faster when everything else is hidden.
    • Cycle toy groups every 3 to 7 days. Keep 4 to 6 toys in rotation so each one feels special.
    • Repair or retire worn toys. If stuffing is coming out or seams are loose, fix it or toss it for safety.
    • Keep one “surprise” toy for emergency excitement. Your cat will go wild when it reappears.

    Toy features checklist (short, practical cues)

    • Durable materials: tough fabric or puncture-proof fabric (material that resists claws) so toys last.
    • Safe construction: no small loose bits or exposed wires that could be swallowed.
    • Tactile variety: feathers, crinkle, or soft fur for different textures your cat loves.
    • Right weight and size: heavy enough to pounce, light enough to carry in the mouth.
    • Replaceable parts: shafts, feathers, or tails you can swap out when worn.

    Finish the laser game (no endless dot)
    Laser pointers are great for chase reflexes, but they can frustrate a cat if there is never a catch. So end the session with something tangible (a plush toy or a crinkly ball). Try this exact move: "Stop the dot, toss a plush mouse, let your cat pounce and grab for the reward." Your cat will calm down happier and less likely to redirect that energy onto hands or ankles. My Luna races over every time, um, no joke.

    Quick recap: hide toys between sessions, swap groups every few days, aim for safe, textured toys, and always finish laser play with a real capture. Worth every paw-print.

    Training to reduce play biting: clicker work, bite inhibition, and cueing in cats

    - Redirecting play aggression in cats using toys, enrichment, and environmental design.jpg

    Play biting is normal kitty hunting practice, but ouch, when paws-turn-into-teeth we want safer fun. Reward-based training teaches your cat what gets treats or toys, not skin. Clicker work is great here: use a clicker (a small handheld device that makes a sharp click to mark the exact moment your cat does the right thing) plus a tiny tasty treat or a quick toy burst to say, "Yep, that was perfect."

    Start by pairing a clear cue like "leave it" or a recall cue (call-and-return) with rewards. When your cat disengages from your hand and goes for a toy, click and reward. That teaches bite inhibition (learning to soften or stop biting) and shifts hunting energy onto appropriate objects. Think of it like teaching impulse control with tiny, fun wins.

    Core drills mix click-and-reward with target training (teaching the cat to touch a small target, like a stick or a dot) to gently steer attention away from people. Fetch training is awesome too , it lets cats run the whole hunt sequence: chase, capture, deliver. We never start play with hands or feet. Ever. Use long-handled toys and tossable balls so the target is the toy, not your skin.

    If progress stalls, shorten sessions, lower the intensity, and take smaller steps. We want confidence and wins, not frustration. Swap to wand play at a distance and reward quick disengages. If biting suddenly gets worse, or you notice new aggression, pause and check with your vet or a certified behaviorist , could be pain, stress, or a medical issue.

    Ever watched your kitty stalk a feather and then pounce like a tiny tiger? Here’s how to turn that into safe, repeatable behavior.

    Step-by-step training exercises

    1. Click the instant your cat looks away from your hand or focuses on a toy.
    2. Reward immediately with a tiny treat or a short toy chase so the timing is clear.
    3. Hold a treat under your closed fist; when the cat sniffs but does not bite, click and reward from your other hand to shape "leave it."
    4. Move the treat a little farther away; click and reward when the cat picks the toy or target instead of your hand.
    5. Teach recall by calling the cat, clicking when they come, and rewarding away from the original target so they learn to leave the prey behind for a payoff.
    6. Gradually fade food into toy rewards so the play itself becomes the reward over time.

    Session structure and progress tracking

    Keep sessions short: 5 to 10 minutes, several times a day. Short bursts beat one long drill. Celebrate small wins: fewer bites per session, quicker cue responses, and calmer play.

    Track results simply. This helps spot patterns and triggers, like a particular toy or time of day that sparks rough play.

    Date Duration Trigger (toy, time) Action Result (bites, calm, disengage)

    Quick tips and reminders

    • Never use your hands as the main toy. Use teaser wands, balls, or fetch toys.
    • Reward the behavior you want, not the one you don’t. Click and reward when they choose the toy.
    • Short, frequent sessions build habits. Ten 1-minute wins beat one long, frustrating session.
    • If biting spikes or seems pain-related, contact your vet or a behaviorist. Better safe than sorry.

    Worth every paw-print. Try this for a week and you’ll likely see small, sweet changes , more calm play, fewer snaps, and more joyful cat pounces.

    Redirecting Play Aggression in Cats: Practical Steps

    - Training to reduce play biting clicker work, bite inhibition, and cueing in cats.jpg

    Right after an incident, separate the cat that lashed out calmly and give the startled cat a quiet chance to come back and sniff the room on its own. Close doors slowly, move other pets and people out of sight, and keep voices low so fur and nerves can settle. Let the offended cat decompress in its own safe spot with food, water, a litter box, and a favorite bed , sensory comfort helps them feel safe again.

    When you start reintroducing everyone, do it in stages. Let pets and people who weren’t involved interact first, then try one-on-one play and treats with each household member, and bring the previously targeted cat in last. Keep sessions short and upbeat , little play bursts, tasty treats , so each meeting ends on a positive note. Watch body language closely (flattened ears, tail flicks, low growls) and stop at the first sign of tension.

    If things don’t calm after a few tries, move to a full, slow reintroduction: separate cats into different parts of the house and give duplicate resources (extra food bowls, litter boxes, perches) so there’s no competition. Swap scents on towels or toys, and let visual contact return slowly over days through a cracked door or baby gate. Use pheromone diffusers (small devices that release calming cat scent signals) in known conflict areas and supervise every shared moment until you’re confident they’re safe together.

    Set up the long game to prevent repeats: add vertical space and hiding spots so cats can escape or observe from above, control sightlines by blocking windows or moving perches, and keep regular play sessions to burn off hunting energy. For busy days, toss an unbreakable ball before you head out , that’s ten minutes of safe play and a calmer house. Is your cat still redirecting aggression or repeating attacks? Check the "When to consult…" section for veterinary checks and behavior-referral thresholds.

    Worth every paw-print.

    When to consult a veterinarian or feline behaviorist about redirecting play aggression in cats

    - Preventing and managing redirected play aggression in multi-cat households.jpg

    If your cat’s aggression is new, is getting worse, seems to come from nowhere, or you notice signs of pain or illness, call your vet right away. A medical exam (to check for injury, infection, or pain) helps rule out physical causes before you start behavior work. Better to be safe than sorry.

    Clear referral thresholds:

    1. New-onset aggression or a big change in behavior.
    2. Attacks that happen more often over days.
    3. Aggression with no obvious trigger, those surprise swipes that come out of nowhere.
    4. Any signs of pain, limping, loss of appetite, or other medical changes.

    If home strategies aren’t helping, consider a certified feline behaviorist (a specialist trained in cat behavior science). Typical reasons to call one:

    • No steady improvement after 2 to 4 weeks of consistent steps – same redirection, play schedule, and safe separation routines.
    • Worsening intensity: harder bites, repeated incidents, or anyone getting hurt.
    • Ongoing multi-cat or household conflict that keeps flaring despite staged reintroductions.

    Severe cases sometimes need prescription medication (vet-prescribed drugs, like short-term anti-anxiety meds that help reduce fear or over-arousal) as part of a broader plan with your vet and a behaviorist.

    What to bring and what to expect at appointments
    Bring facts and short videos, not guesses. Video clips that show the body language and the situation are worth gold. A simple behavior diary helps a lot. Also bring recent medical records and a list of toys and when and where you usually play. Jot down recent changes in the home too – new people, pets, or things outside the windows.

    Checklist for visits:

    • Short video clips of incidents, showing context and body language.
    • Behavior diary/log with dates, times, triggers, what you tried, and what happened.
    • Recent medical records and vaccination history.
    • List of toys, play schedules, and usual play areas.
    • Notes about recent environmental changes (new people, pets, or sights outside windows).

    At the appointment expect a calm review of the history, a physical exam, and clear next steps. That might mean a behavior plan, training exercises, tests, or medicines. The vet and behaviorist will usually work together and follow up to tweak the plan as needed.

    Behavior diary template:

    Date Time Trigger Action taken Outcome

    Final Words

    in the action: you’ve got a fast emergency protocol, the six-step interruption sequence, timing tips (two 10-minute interactive sessions daily), and clear vet red flags.

    You learned how to spot warning signs, what triggers redirecting episodes, safe positioning and relocation steps, toy rotation and training routines, and multi-cat reintroduction plans.

    Stick with the plan. Keep toys handy and track progress. redirecting play aggression in cats really works, and your household will be calmer and happier. Worth every paw-print.

    FAQ

    How do I stop redirecting play aggression in cats?

    Spot warning signs (tail twitching, flattened ears, dilated pupils), stop contact, offer a toy at distance, encourage play, reward calm, then resume supervised interaction. Do two 10-minute interactive sessions daily.

    How can I redirect my cat’s play aggression away from my hands and toward toys?

    Stop hands-as-toys training, use long-handled wand toys (a teaser wand), try motorized toys, end laser play by giving a tangible catch, and reward calm focus to reinforce toys instead of hands.

    How do I redirect play aggression between cats?

    Separate cats immediately, let the victim explore alone, stage reintroduction with the offender last, provide separate resources, block sightlines, add vertical space, use pheromone diffusers, and supervise interactions.

    How long does redirected aggression last in cats?

    Episodes usually last minutes; calm often returns after about 30 minutes of quiet, but repeated incidents may persist for days. Consult a veterinarian or feline behaviorist if attacks are new, more frequent, or have no clear trigger.

    What is the 3-3-3 rule for cats?

    The 3-3-3 rule describes adjustment phases: three days of intense stress, three weeks to settle into routines, and three months to reach full comfort and trust in a new home.

    What are warning signs of play aggression in kittens versus adult cats?

    Kittens do more wrestling and mouthing; adults give harder bites or targeted swipes. Common overstimulation signals for both include tail twitching, flattened ears, and dilated pupils.

    When should I consult a veterinarian or feline behaviorist about redirected play aggression?

    Consult a veterinarian or certified feline behavior specialist when aggression is new, worsening, frequent, or shows signs of pain. Bring videos, a behavior diary, recent medical records, and your toy/play schedule to appointments.

    Related Articles