Category: Cat Diet

  • How-to-Get-My-Cat-to-Drink-More-Water

    How-to-Get-My-Cat-to-Drink-More-Water

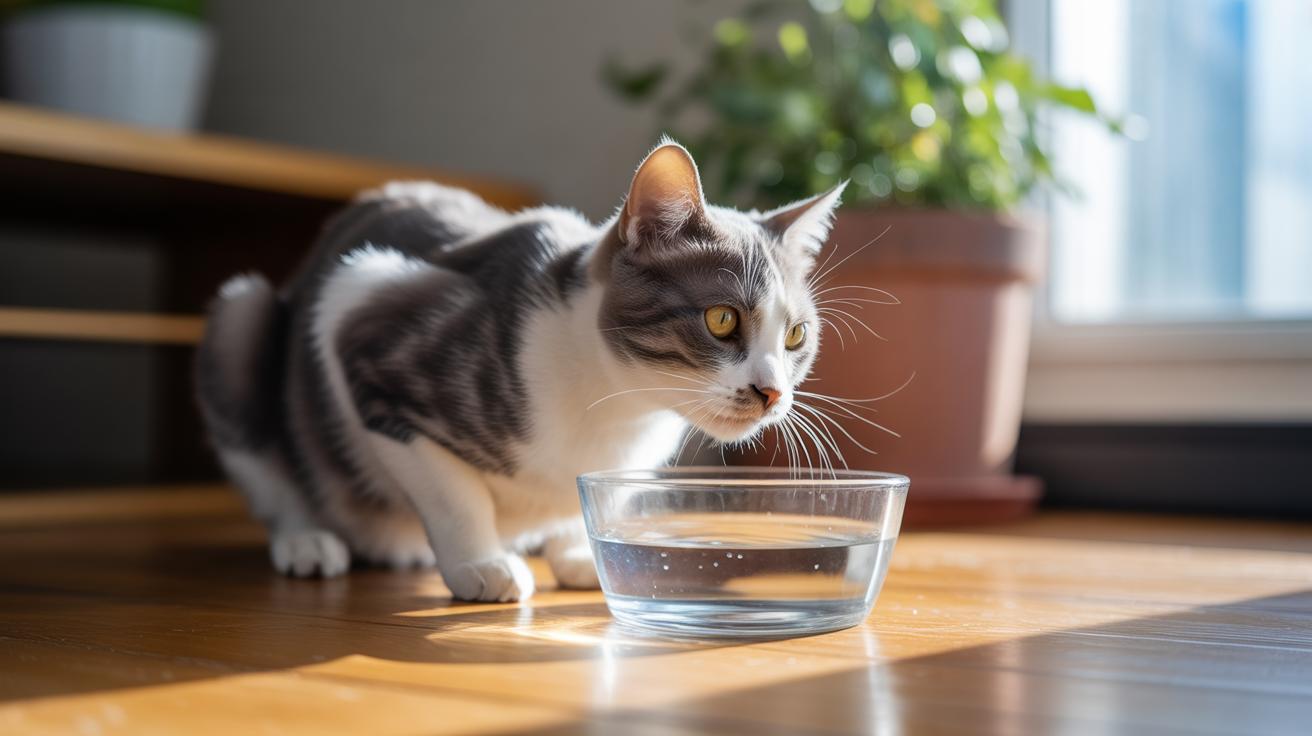
    Does your cat stroll past a full water bowl like it’s invisible, while you worry that hydration (drinking enough water) matters more than most of us realize? You’re not alone. Ever watched your kitty sniff and walk away? It’s a small panic for us and a mystery for them.

    \n

    I once watched Luna totally ignore a shiny new bowl until one tiny drip from the tap made her pounce, ears up, tail like a question mark. That little moment taught me cats often prefer motion, sound, or scent over a perfectly full dish.

    \n

    Tiny tweaks can make a big difference. Try a different bowl shape, set up moving water, or add a splash of tuna water (liquid from canned tuna) to spark interest. Think of it like giving their thirst a little nudge.

    \n

    This post lays out vet-approved, easy tips: quick emergency steps if you’re worried, the best bowls and fountains to try, simple diet tweaks, and easy tracking so you can see progress. You’ll get practical fixes that help your cat drink more and let you breathe easier, purrfect, right?

    \n

    Worth every paw-print.

    \n

    Quick, vet‑approved emergency checklist for immediate cat hydration

    \n

    \"-

    \n

    Short, vet-approved steps you can do right now to get water into a thirsty cat. These are for immediate home care , if anything feels off, call your vet.

    \n

      \n

    1. Offer fresh, clean water now. Change the water and rinse the bowl so it looks and smells inviting.
    2. \n

    3. Add a second wide, shallow bowl near food (cats like shallow bowls; they feel safer). Put it in a quiet spot so your cat isn’t spooked.
    4. \n

    5. Offer wet food (canned food with high moisture) or moisten kibble by adding a little warm water. It’s an easy way to boost hydration without forcing anything.
    6. \n

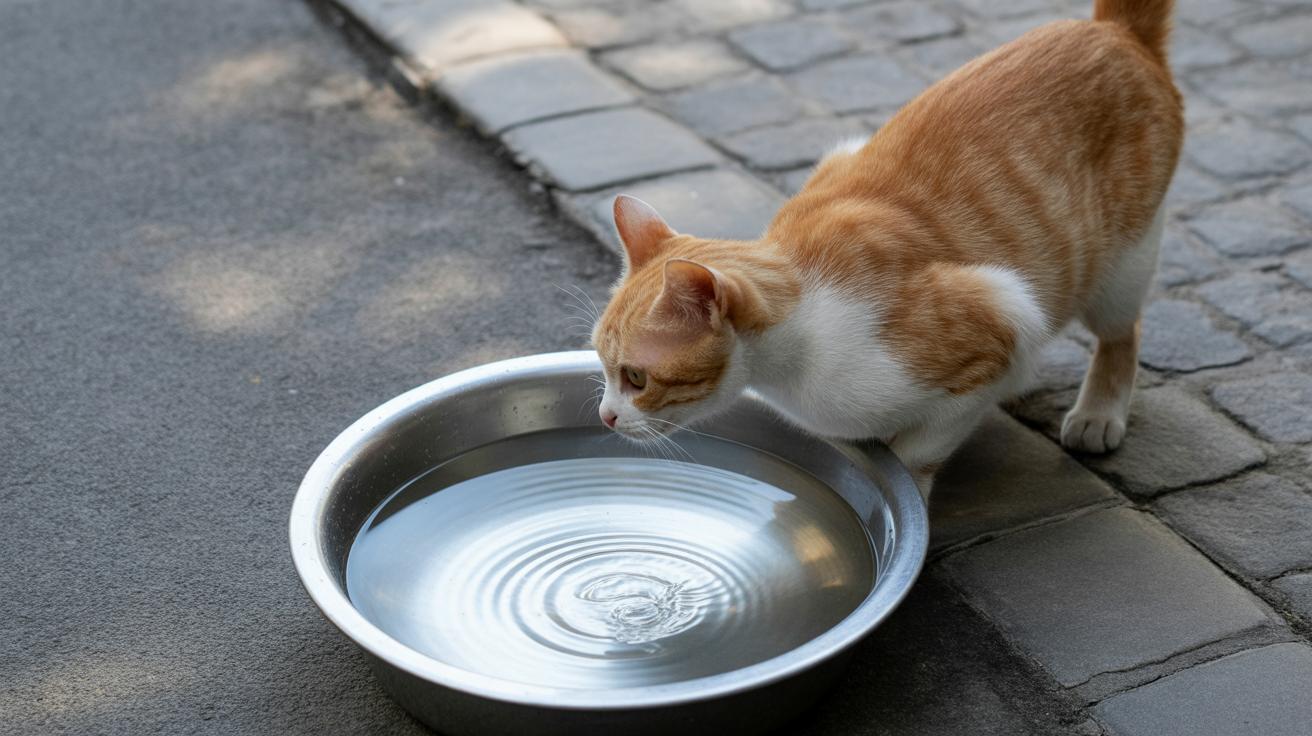
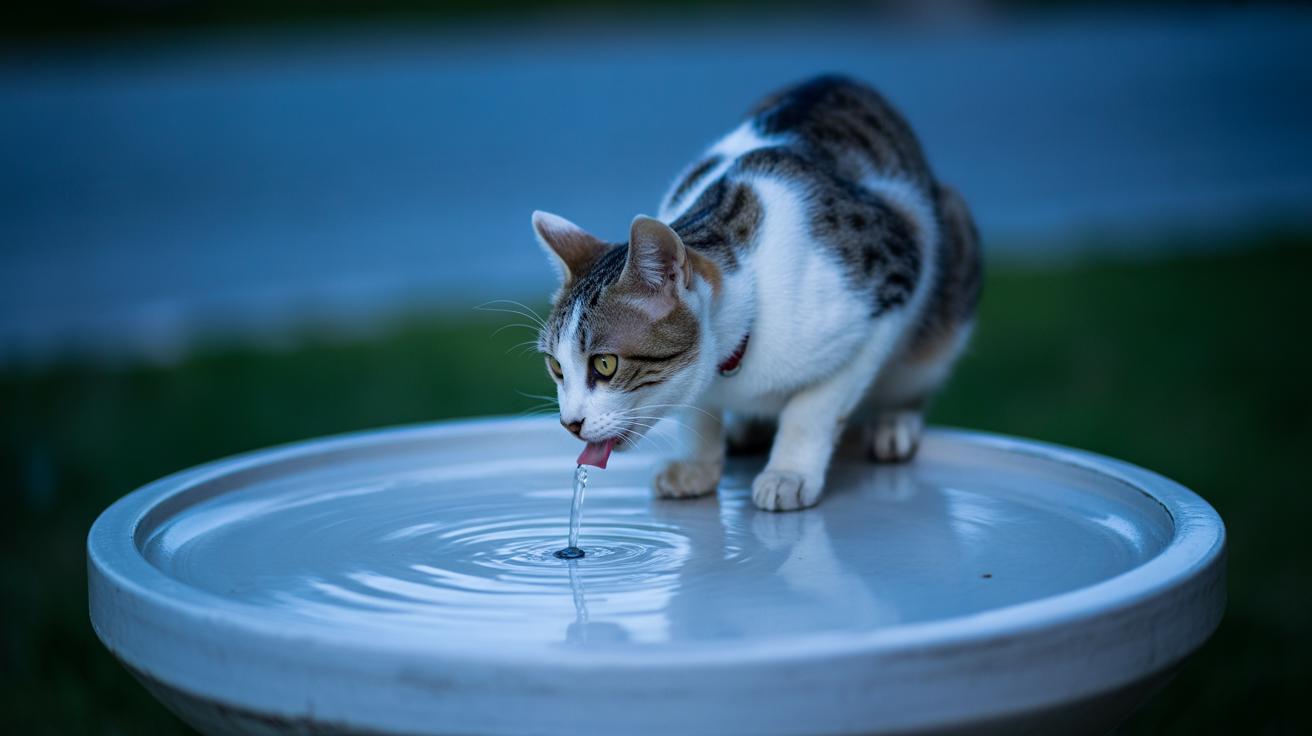
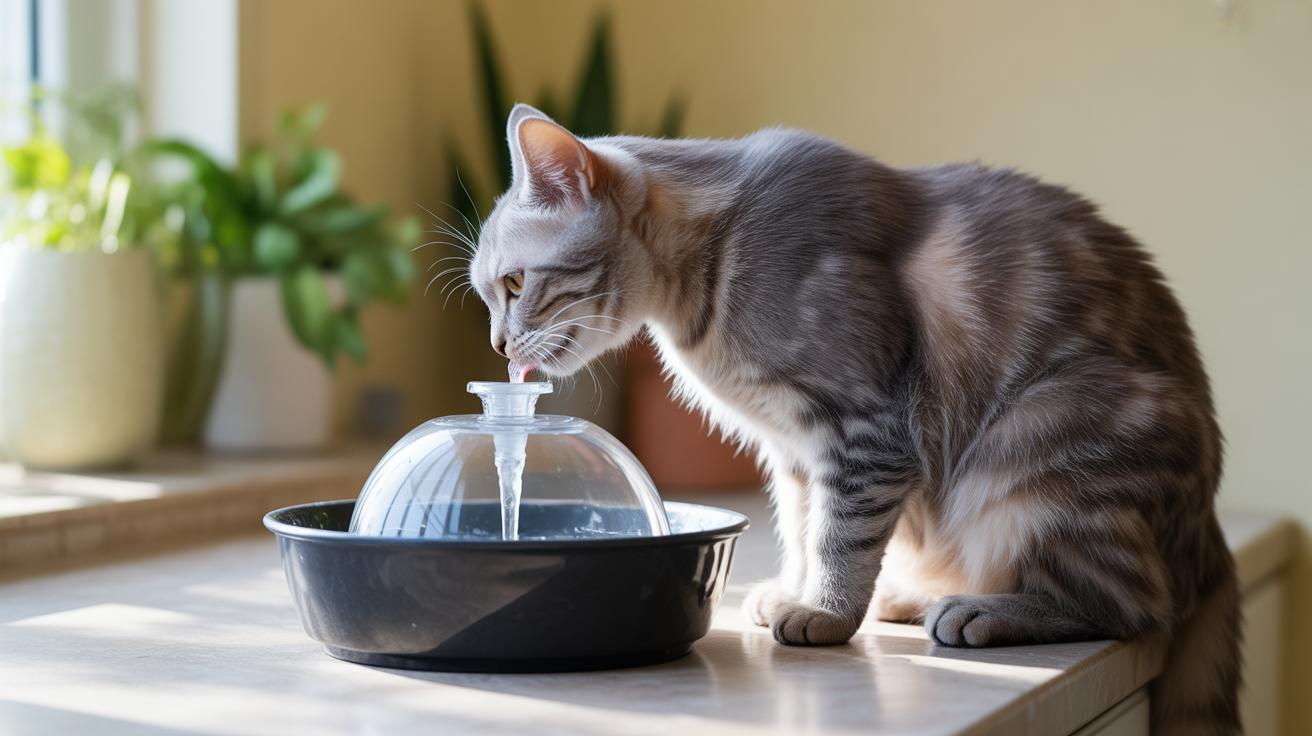
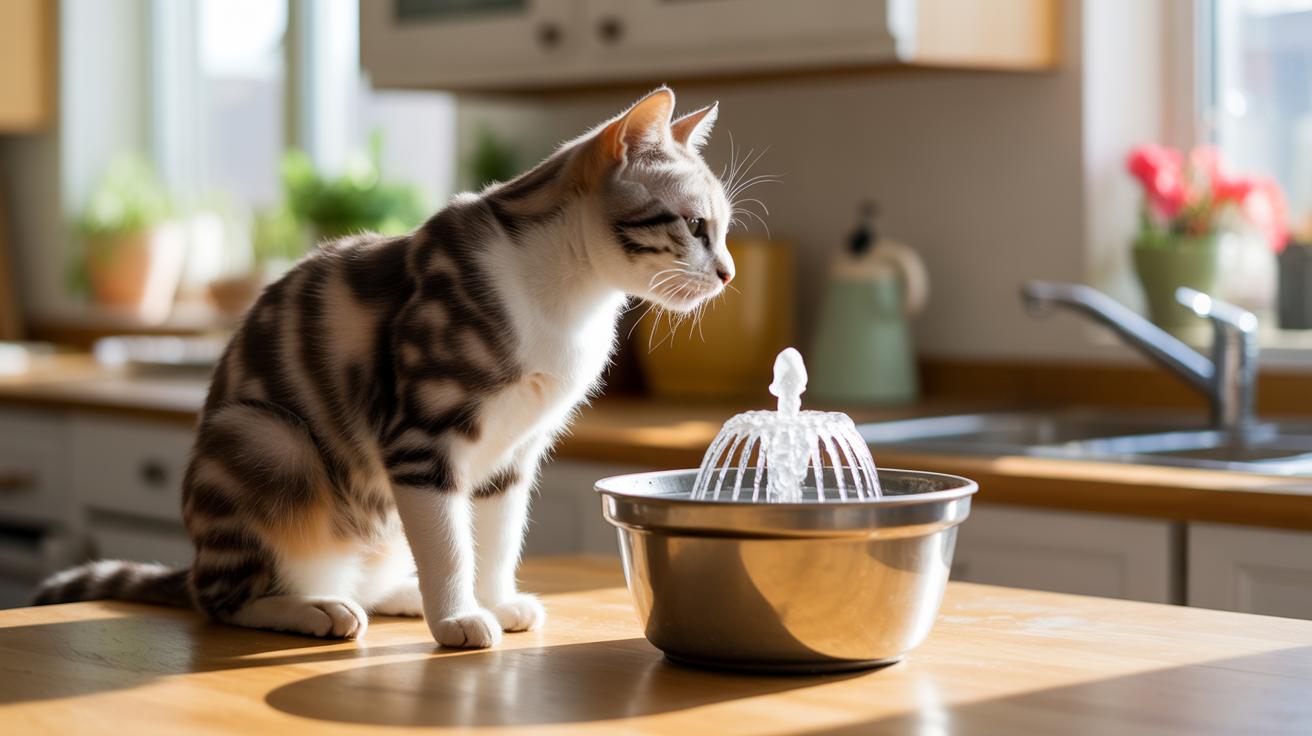
    7. Turn on a pet fountain (recirculating water bowl) or leave a very gentle tap drip , many cats prefer moving water. Ever watched your kitty nose at a drippy sink? Magic.
    8. \n

    9. Flavor water very sparingly with tuna water (liquid from canned tuna) or low-sodium broth (low salt chicken or beef broth) to tempt picky drinkers. A little goes a long way.
    10. \n

    11. Monitor intake , note how much and when your cat drinks so you can tell the vet if things change (tracking helps detect problems sooner).
    12. \n

    13. Keep calm and try different options for short sessions. Rotate bowls, fountain, and wet food; some cats need a few tries before they take to a new thing.
    14. \n

    \n

    See 'Bowls, fountains, location and cleaning,' 'Monitor and measure cat water intake,' 'Use diet to increase hydration,' 'Troubleshooting plan,' and 'Medical causes' for more detail.

    \n

    Immediate vet flags:

    \n

      \n

    • Refusal to drink for more than 24 hours.
    • \n

    • Persistent vomiting.
    • \n

    • Collapse or unresponsiveness.
    • \n

    • Sudden large change in drinking or urination , polyuria/polydipsia (peeing a lot or drinking a lot).
    • \n

    \n

    health signs-and-when-to-call-the-vet-for-water-changes”>Recognize cat dehydration signs and when to call the vet for water changes

    \n

    \"-

    \n

    Catching dehydration early can make a big difference. Cats evolved to get most of their water from prey, so they drink less than dogs and mild dehydration can sneak up on you. Watch their eating, litter box trips, and energy , sudden changes are usually the clearest clue something’s wrong. Ever watched your kitty chase shadows? That same twitchy energy disappearing is worth noticing.

    \n

    Here are common signs of dehydration to watch for. If you think your cat might be low on fluids, try the quick skin‑tent test (instructions after the list).

    \n

      \n

    • Tacky or dry gums (lift the lip gently to check).
    • \n

    • Skin tenting – skin that stays lifted for a second or more.
    • \n

    • Lethargy or less interest in play or food.
    • \n

    • Sunken eyes or a dull-looking gaze.
    • \n

    • Dark, concentrated urine or fewer trips to the litter box.
    • \n

    • Sudden changes in appetite or eating habits.
    • \n

    • Very rapid breathing, weakness, or wobbliness.
    • \n

    • Collapse, pale gums, or unresponsiveness , this is an emergency.
    • \n

    \n

    \n

    \n

    \n

    \n

    \n

    \n

    \n

    \n

    \n

    \n

    \n

    \n

    \n

    \n

    \n

    \n

    \n

    \n

    \n

    \n

    \n

    \n

    \n

    \n

    \n

    \n

    \n

    \n

    \n

    \n

    \n

    \n

    \n

    \n

    \n

    \n

    Sign What to look for Urgency
    Mild skin tent Pinch loose skin over the shoulder blades (scruff) and watch how fast it returns – 1 to 2 seconds Watch closely. Try offering water or wet food
    Dry gums Gums feel sticky or less moist when you touch them Moderate concern. Monitor drinking and eating
    Reduced urine Fewer litter box visits; urine looks darker and stronger-smelling Moderate. Call your vet if it continues
    Lethargy Sleeping more, not interested in toys or food Moderate-high. Call the vet if it’s sudden
    Rapid breathing Breaths are fast and shallow, even at rest High. Seek immediate care
    Collapse / pale gums Can’t stand, gums look pale or white Emergency. Get urgent vet attention

    \n

    Quick skin‑tent test: gently lift a small patch of loose skin over the shoulder blades and let go. If the skin snaps back right away, hydration is probably OK. If it stays up or returns slowly, that suggests dehydration. The test isn’t perfect for very overweight cats or very old cats, or when a thick coat hides the result. In those cases you’ll want a vet exam and simple tests like bloodwork (a basic blood test to check hydration and organ function) or urinalysis (a urine test that checks concentration and infection).

    \n

    If you’re wondering how much water a cat should drink, or whether a stressed, older, or suddenly thirsty cat needs a medical workup, check the monitoring and medical sections and call your veterinarian for guidance. Worth every paw-print to be safe.

    \n

    Medical causes that affect how much water a cat drinks

    \n

    \"-

    \n

    Medical problems are a common reason a cat’s drinking habits change, so if your cat suddenly gulps more or avoids the water bowl, don’t shrug it off. Older cats, say 11 years or older, are at higher risk. About one in three cats will face kidney problems in their life, and that often shows up as odd thirst or more frequent peeing. Let’s look at the main medical culprits and what vets check for.

    \n

    Kidney disease

    \n

    Chronic kidney disease makes the kidneys worse at concentrating urine, so your cat pees more and then drinks more to keep up. Tests like BUN (blood urea nitrogen, a blood marker that rises when kidneys struggle), creatinine (another kidney blood marker), and SDMA (a sensitive blood marker for early kidney stress) help vets spot trouble. Extra water can help flush the system and ease symptoms while your vet makes a treatment plan. Worth every paw-print.

    \n

    Diabetes mellitus

    \n

    Diabetes pulls water out of the body because extra glucose in the blood drags fluid along, so you get polydipsia (drinking a lot) and polyuria (peeing a lot). A simple blood glucose test confirms it, and treating the diabetes usually brings drinking back toward normal. Ever watched your kitty suddenly zoom after a nap? Diabetes can take the fun out of that, but it’s treatable.

    \n

    Urinary and dental problems

    \n

    Urinary tract infections, bladder stones, or crystals can change drinking habits; often cats drink more because extra water helps flush irritants. Dental pain does the opposite , a cat with sore teeth or gums may avoid cold or hard liquids and drink less. Stress or competition at the water bowl from other pets can also make a timid cat cut back.

    \n

    Recommended vet tests and what they reveal:

    \n

      \n

    • Blood chemistry panel (BUN/creatinine) , shows kidney function and whether filtering is reduced.
    • \n

    • SDMA (blood test) , flags early kidney stress before other markers change.
    • \n

    • Urinalysis (exam of urine) , checks how concentrated urine is and looks for infection or crystals.
    • \n

    • Urine culture , grows and identifies bacteria so the vet can pick the right antibiotic.
    • \n

    • Blood glucose , screens for diabetes by measuring sugar in the blood.
    • \n

    • Dental exam and radiographs (dental x-rays) , finds tooth or jaw pain that might make a cat drink less.
    • \n

    \n

    How-to-Get-My-Cat-to-Drink-More-Water

    \n

    \"-

    \n

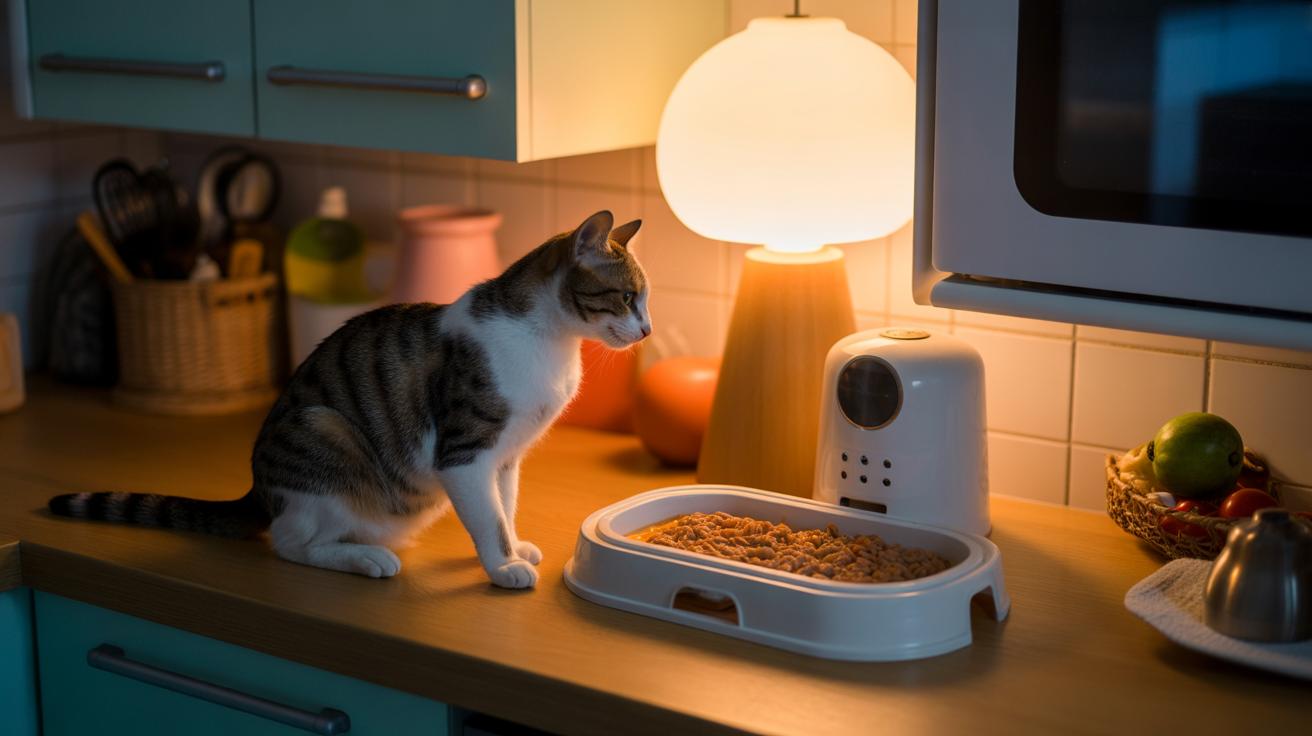
    Wet food is the easiest way to up your cat’s daily water. Most wet food is about 70 to 80 percent water, so canned or pouch meals with gravy give shy drinkers a steady trickle of fluids without asking them to lap from a bowl. Think of food as hydration, not just calories. Ever watched your cat’s whiskers twitch as a gravy-slick chunk slides across the plate? Cute and useful.

    \n

    Switch slowly over 7 to 14 days so their tummy doesn’t protest. Mix a little wet food into the old food and increase it each meal. Try different textures , pate (smooth, blended wet food), chunks in gravy, or loaf (firmer, sliceable wet food) , because cats can be picky. If a straight swap fails, try mixing wet into kibble (kibble = dry, crunchy cat food) or moistening kibble with warm water until it softens.

    \n

    A splash of low-sodium broth (low-salt cooking stock) can help if they need extra flavor. Check the ingredients and never use anything with garlic or onion because those are toxic to cats. Don’t force changes. Pushing food can make your cat refuse meals for a bit. Be patient and keep portions small and tempting.

    \n

      \n

    1. Transition over 7 to 14 days: mix more wet food into each meal until the swap is complete.
    2. \n

    3. Rotate flavors and textures so your cat can find a favorite.
    4. \n

    5. Gradually add warm water to dry food until the kibble softens and holds moisture.
    6. \n

    7. Add a little low-sodium broth for flavor, but avoid any broth with garlic or onion.
    8. \n

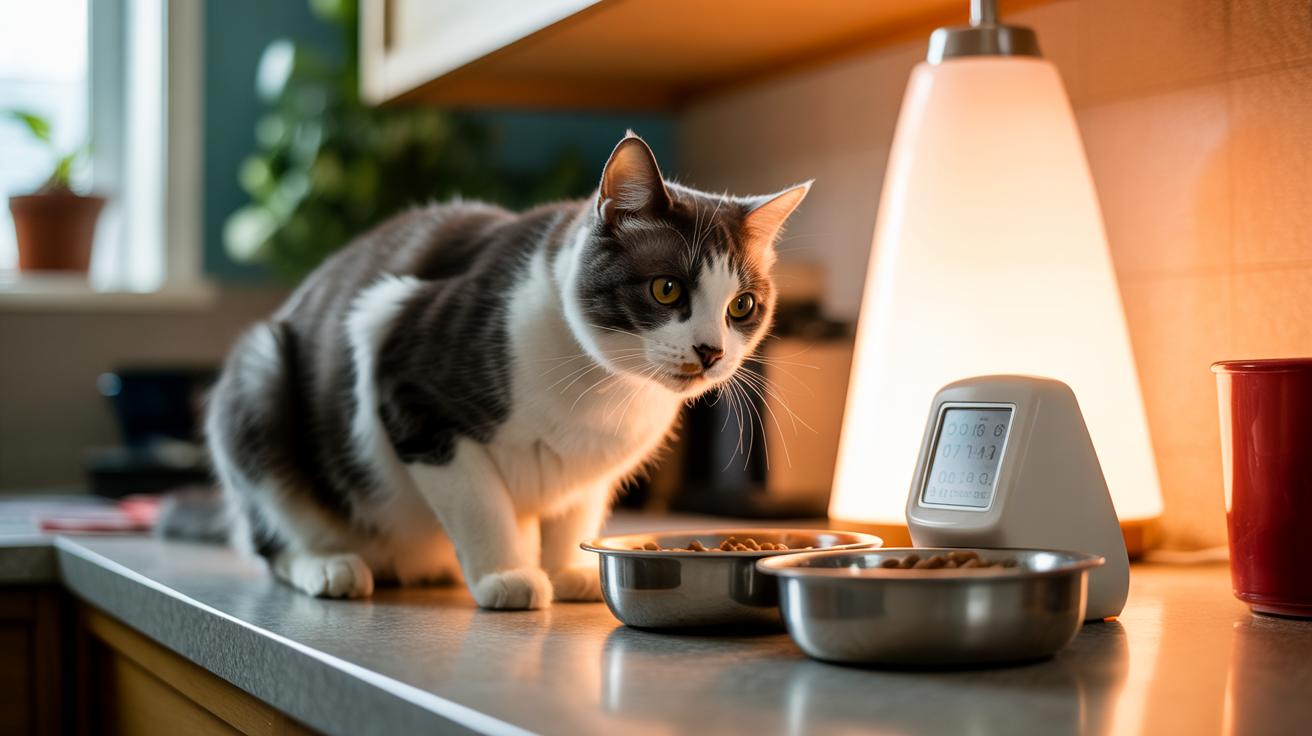
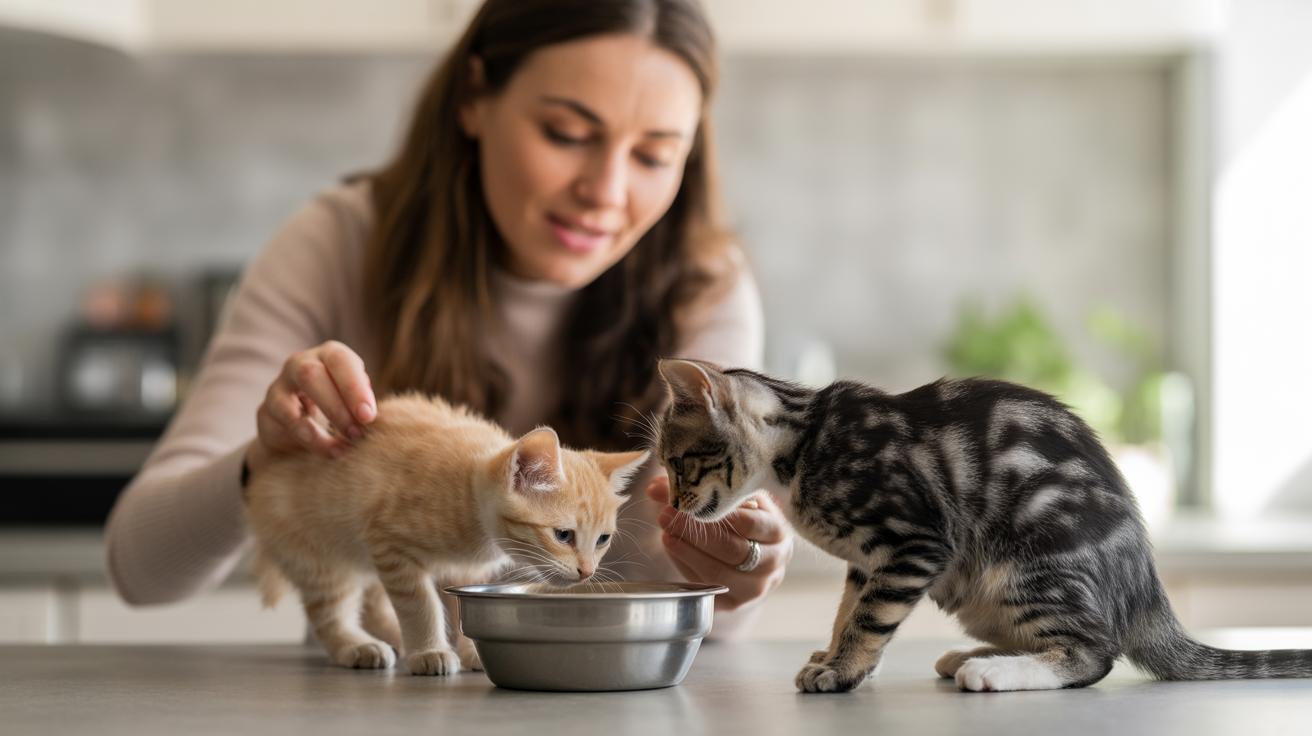
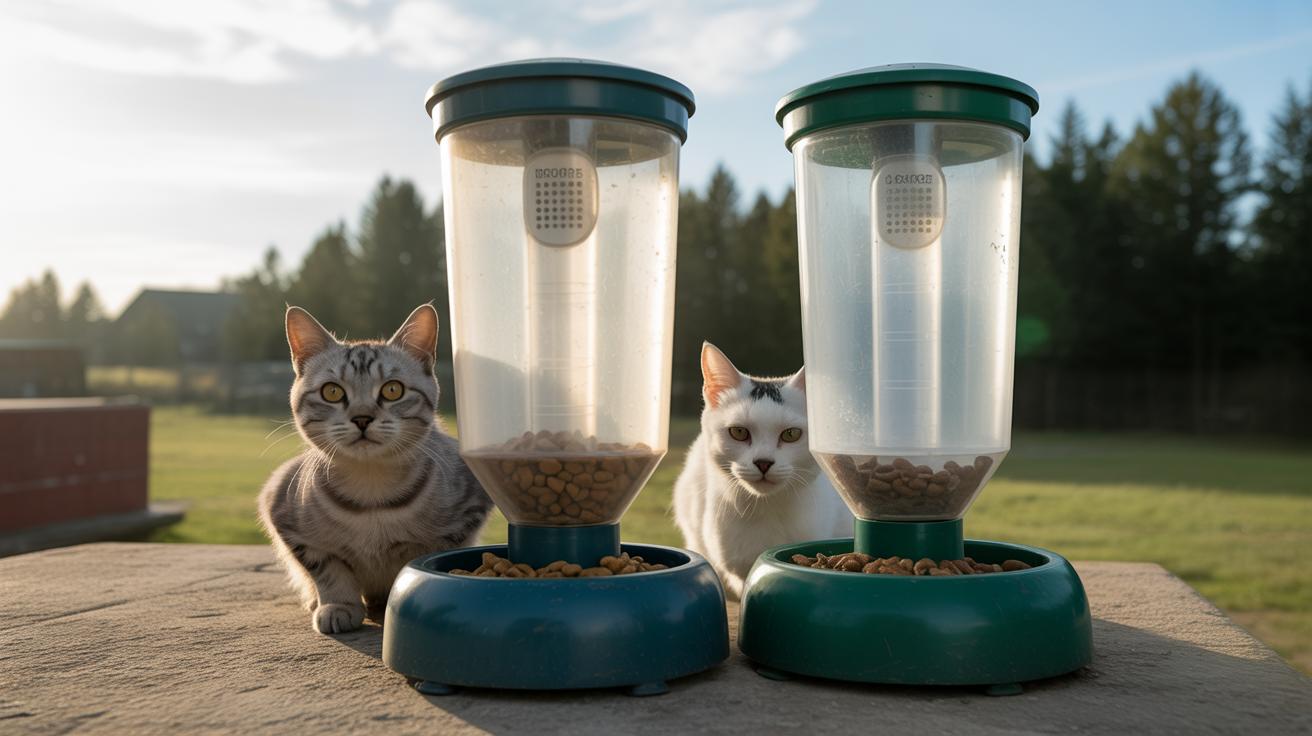
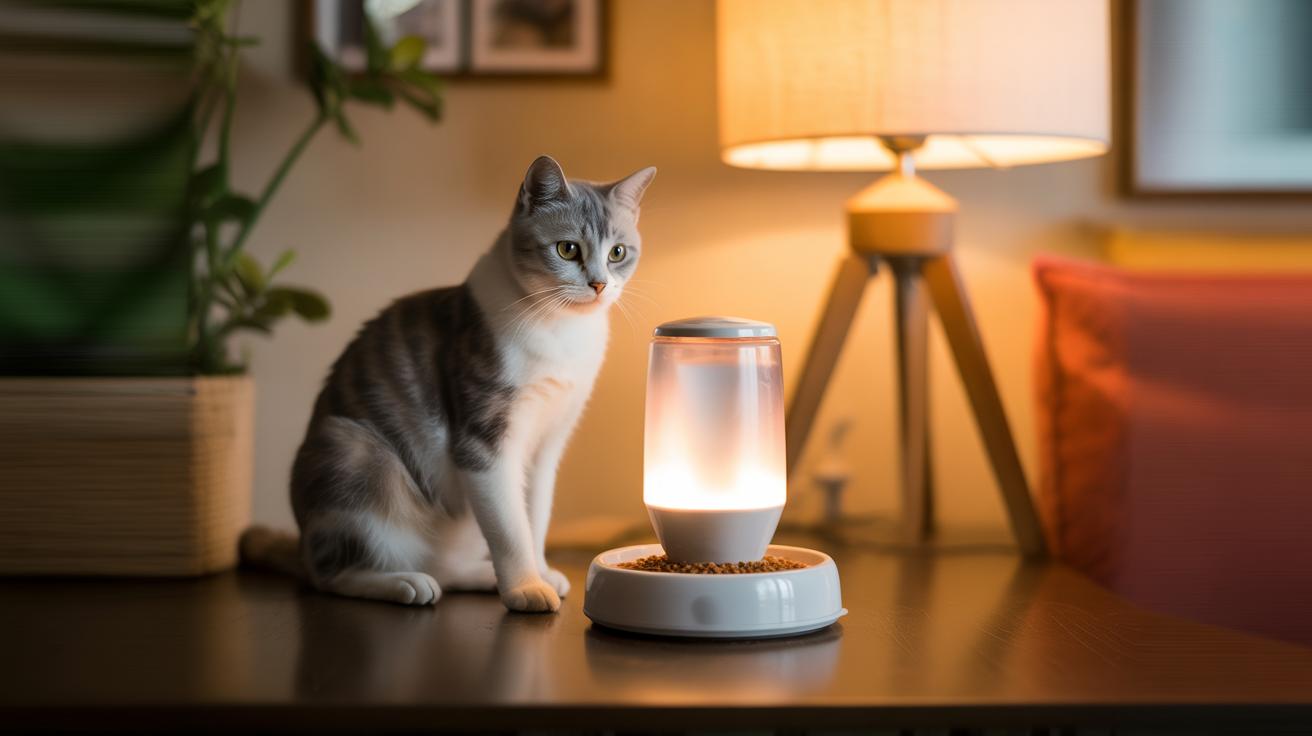
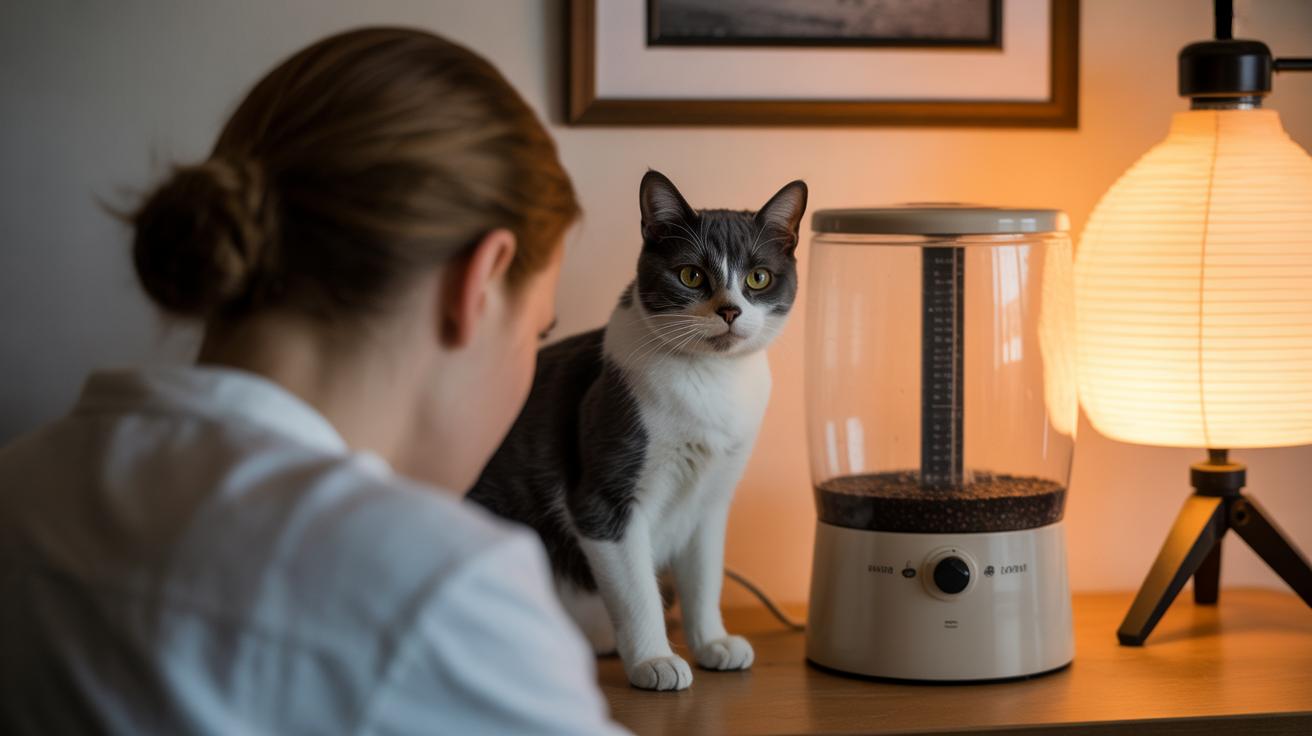
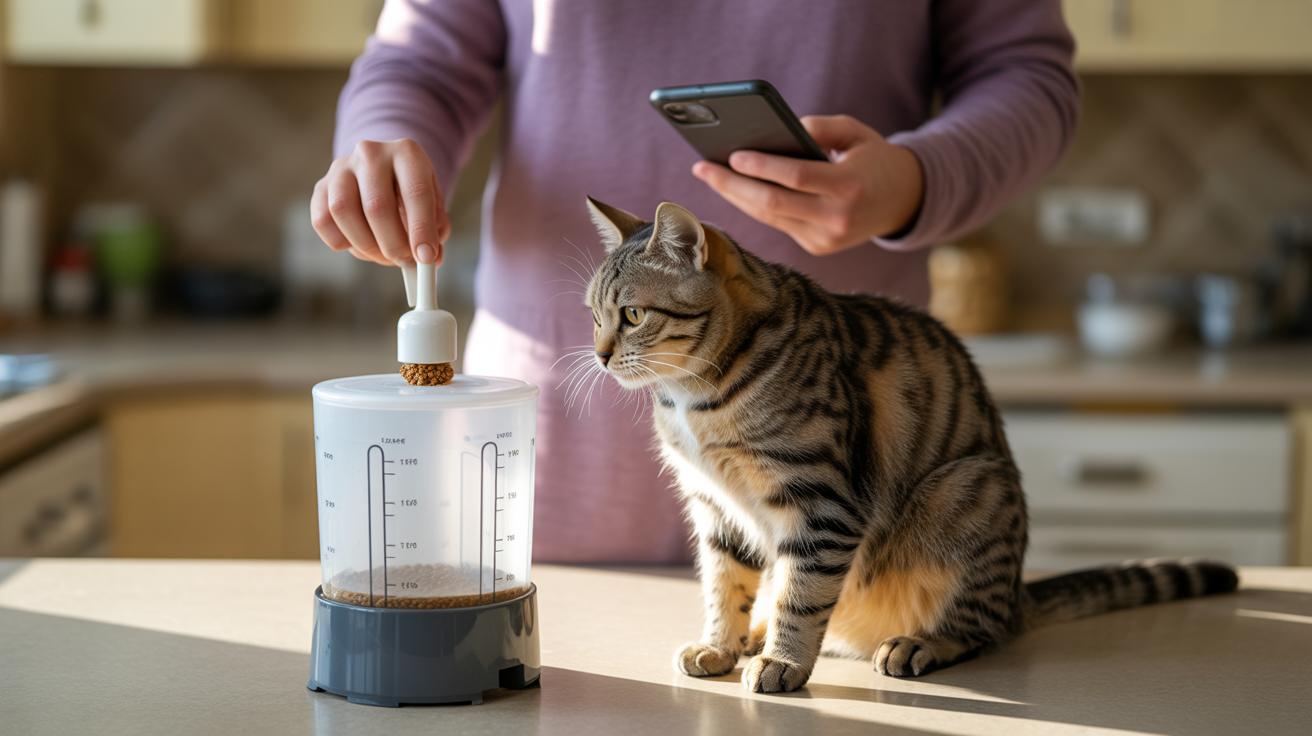
    9. Put a water bowl next to feeding spots or use a timed feeder (automatic food dispenser) with a bowl beside it.
    10. \n

    11. Offer a small wet meal after a short play session or first thing in the morning to boost drinking around activity.
    12. \n

    \n

    Try a simple routine: tiny wet meals after play bursts, a wet mid-day snack, and a wet evening meal. If you’ve tried these steps for two weeks and you’re still wondering how to get my cat to drink more water, check the troubleshooting and monitoring tips or call your vet. Worth every paw-print.

    \n

    Bowls, fountains, location and cleaning to encourage drinking

    \n

    \"-

    \n

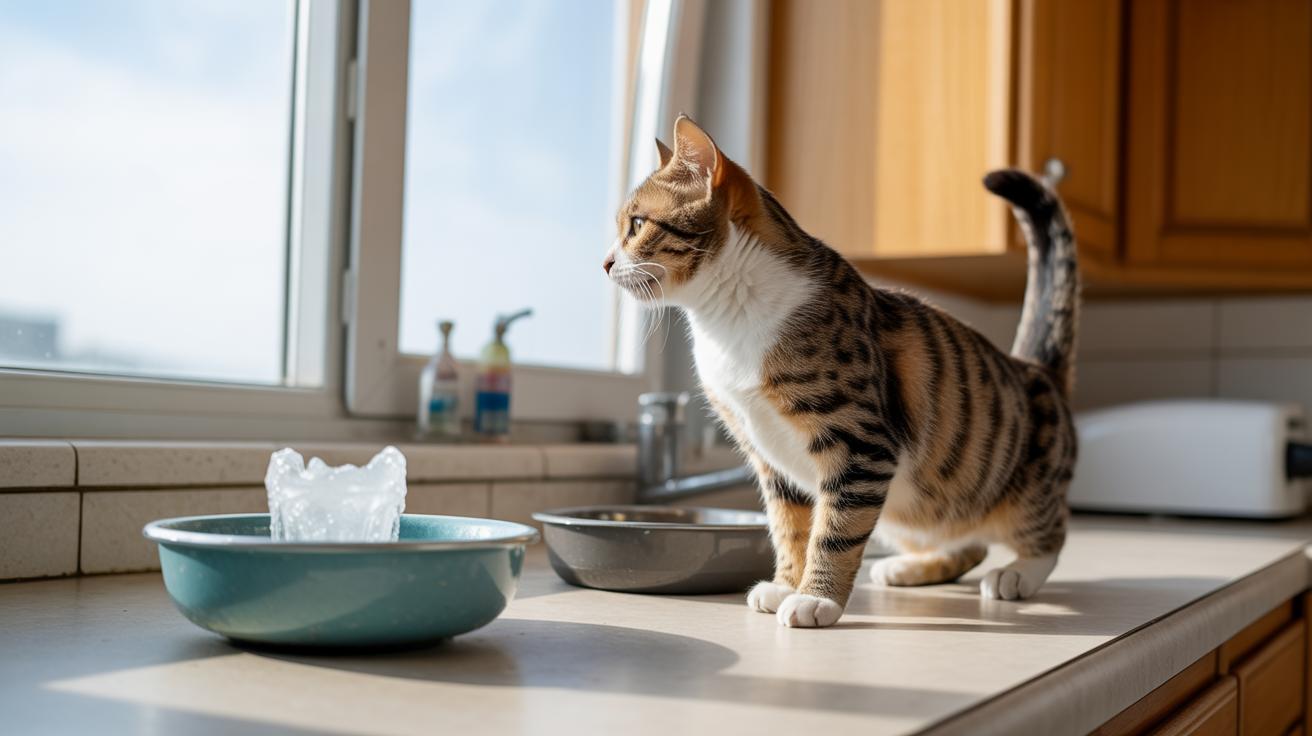
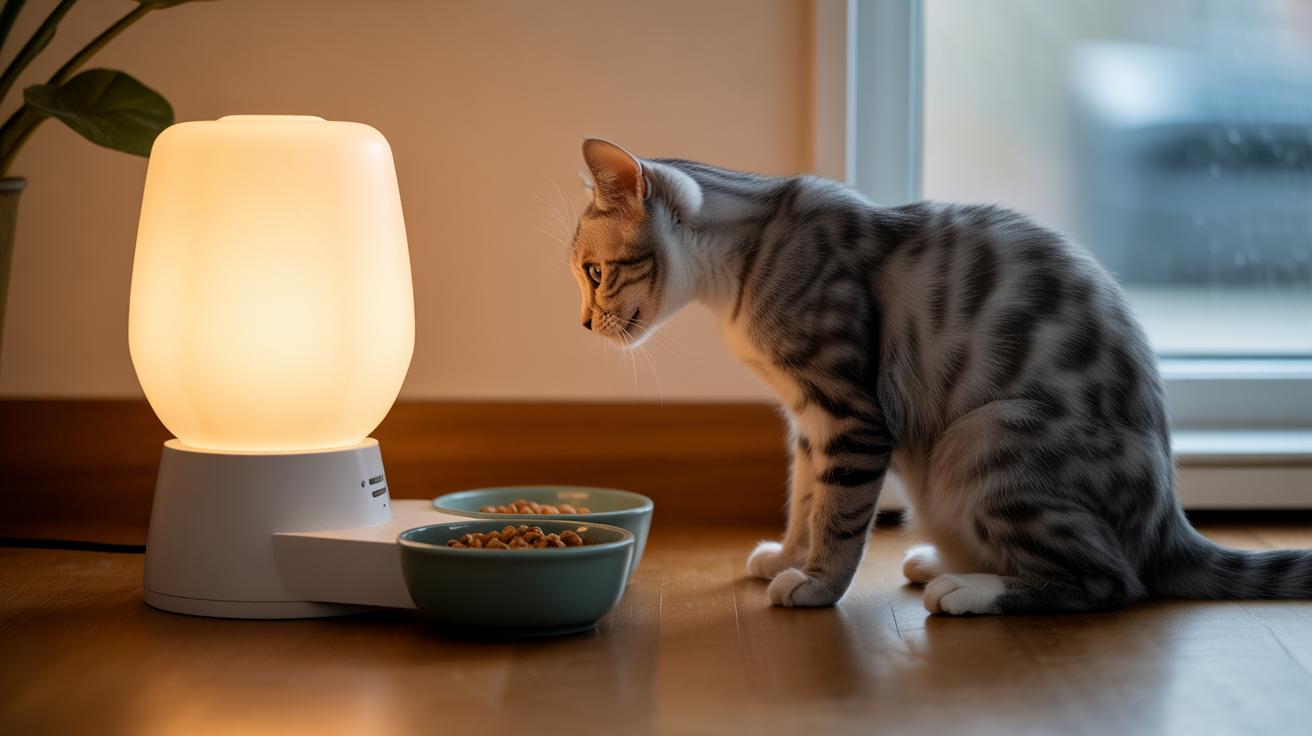
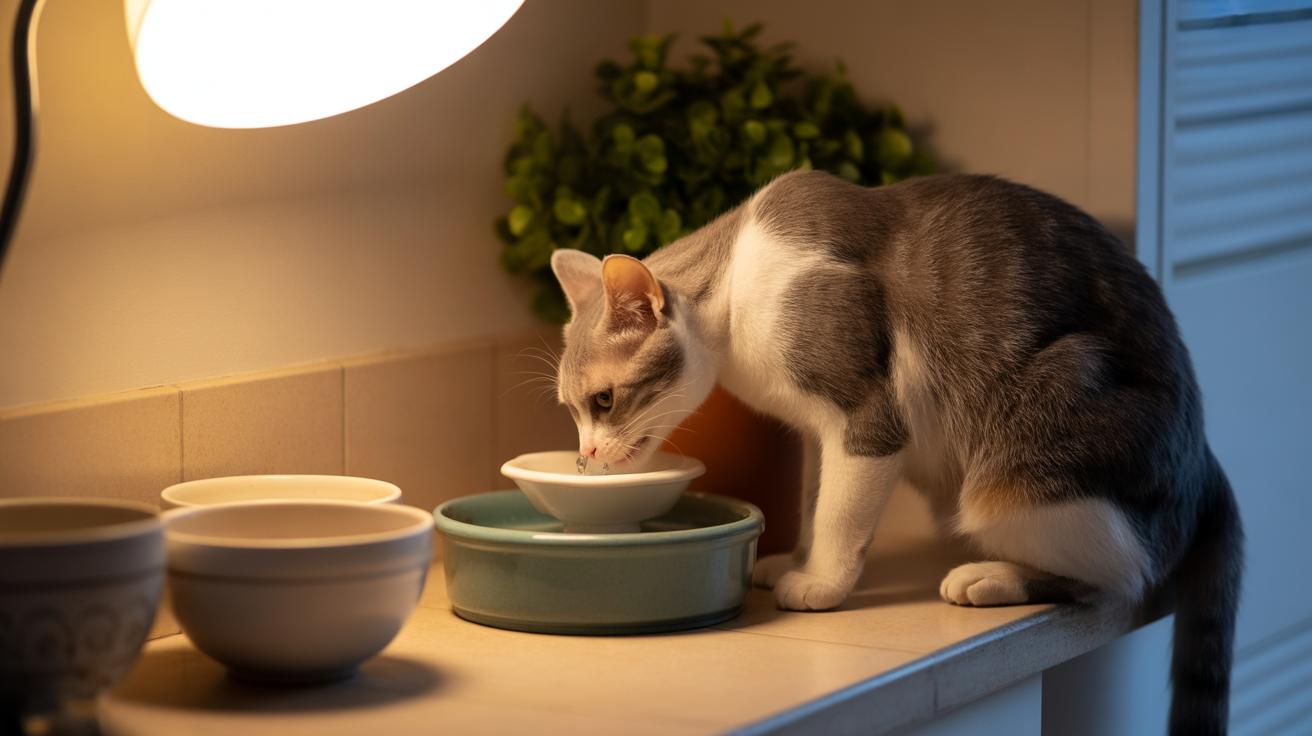
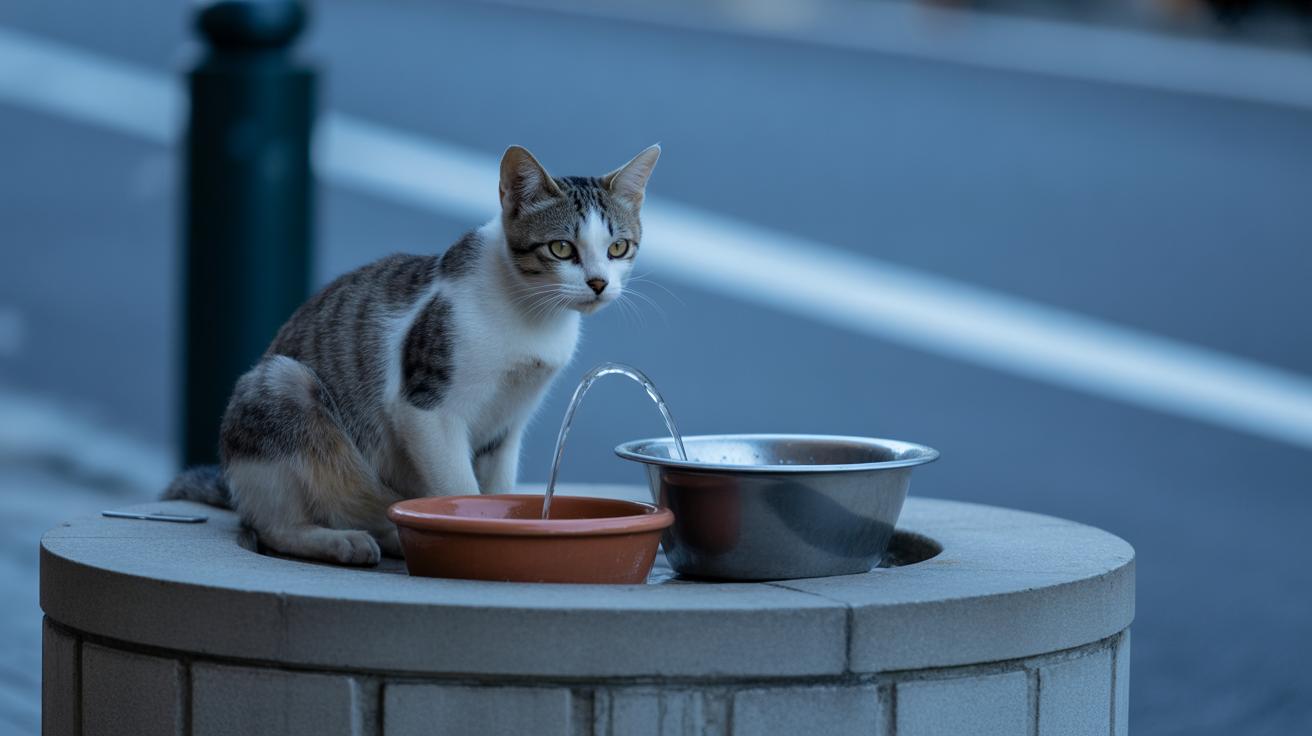
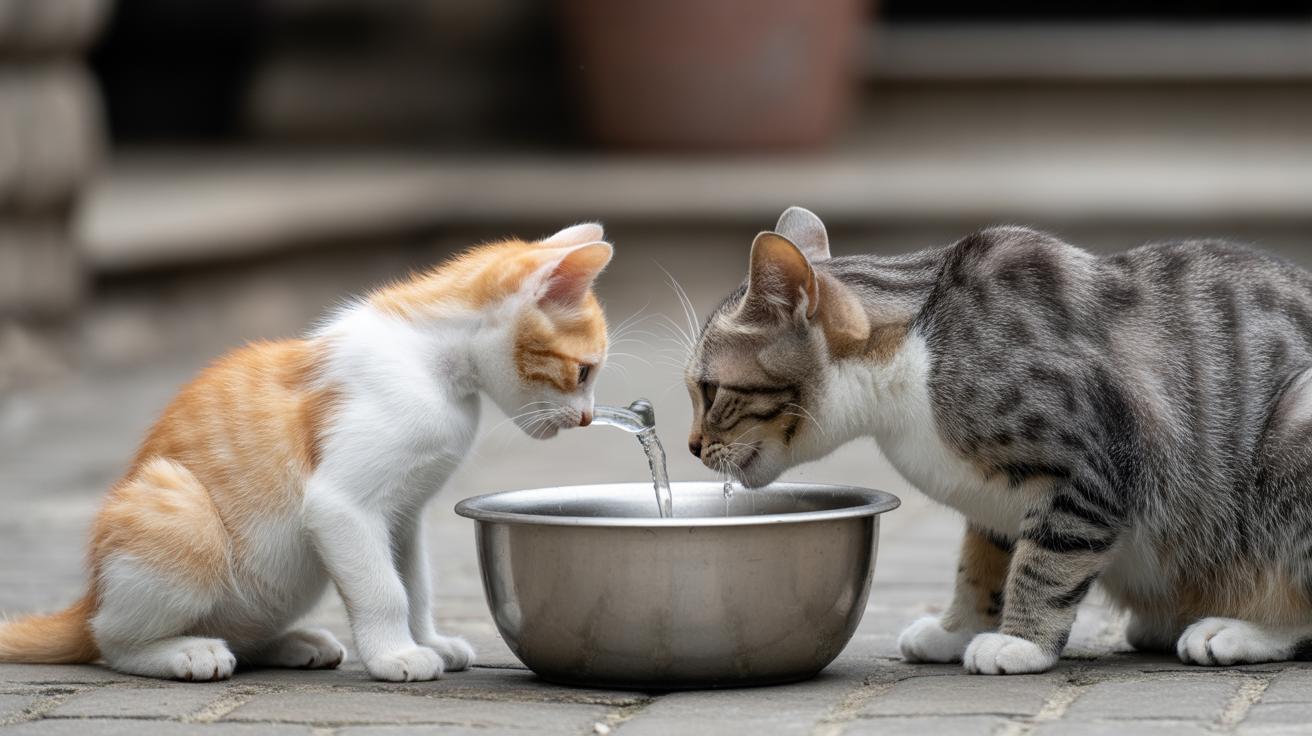
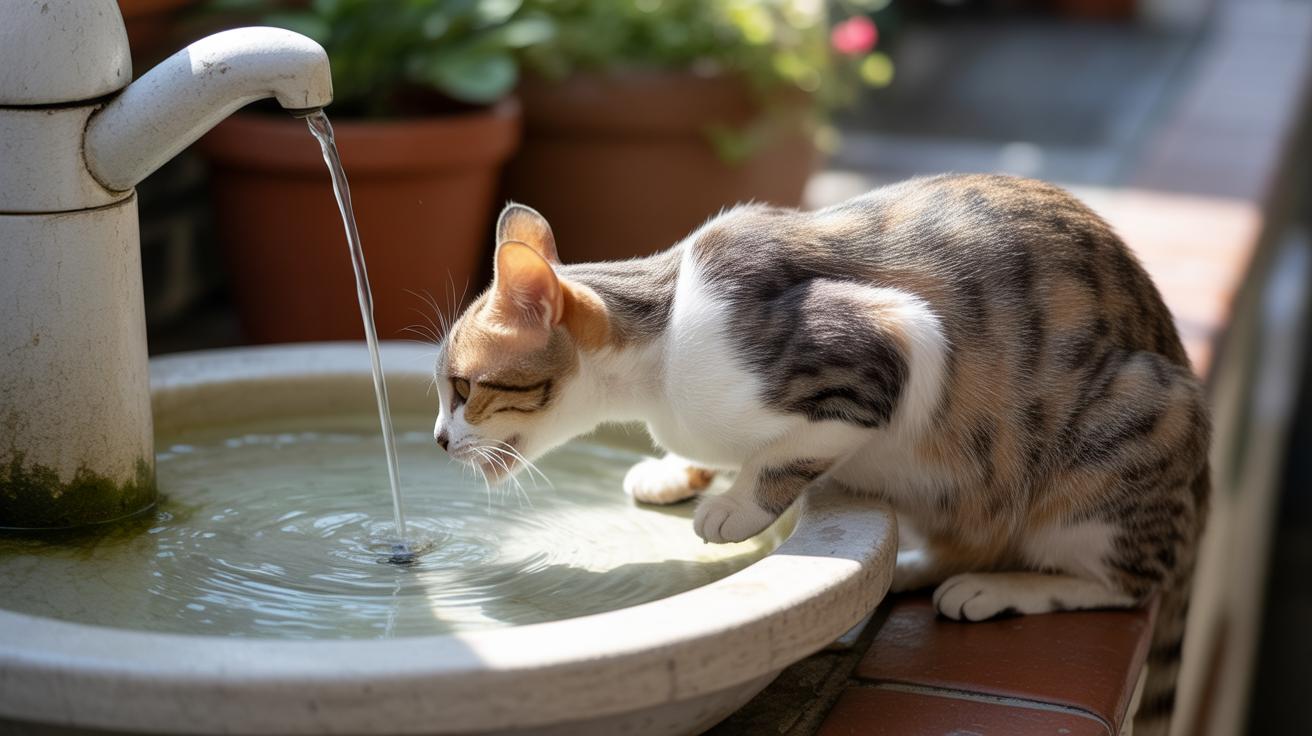
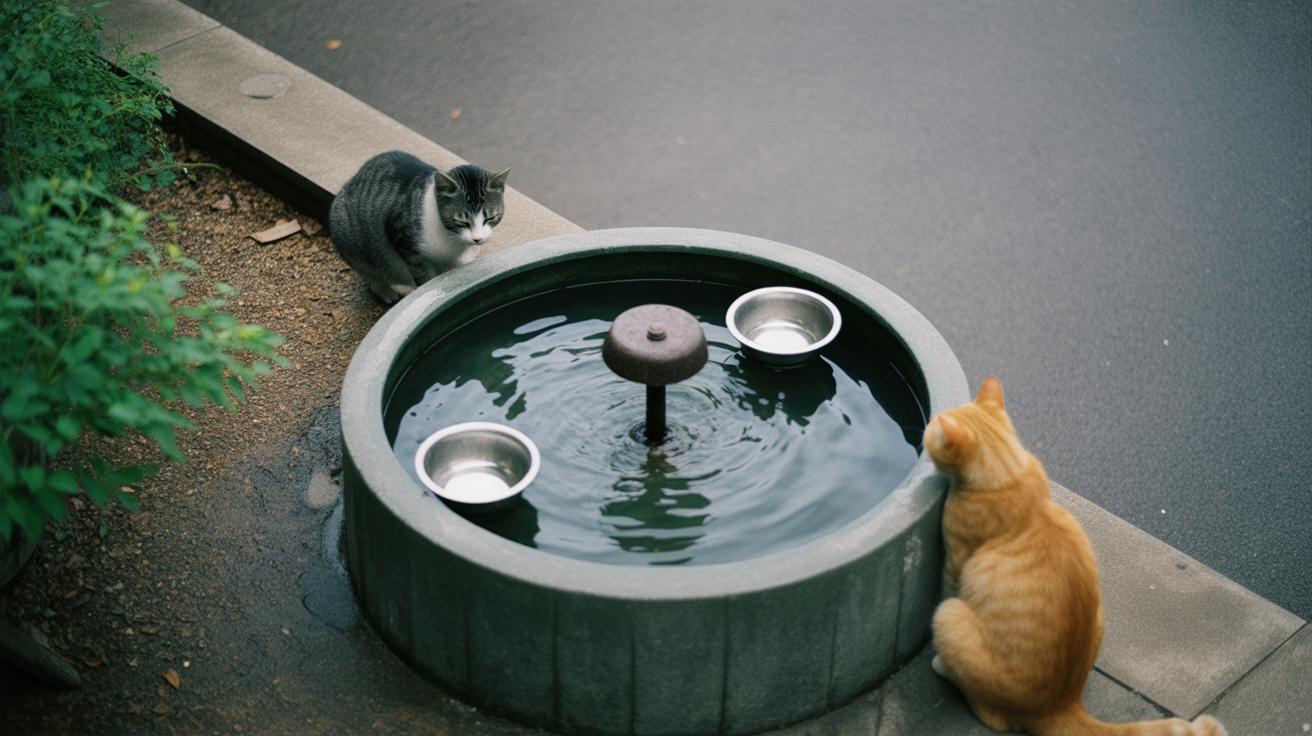
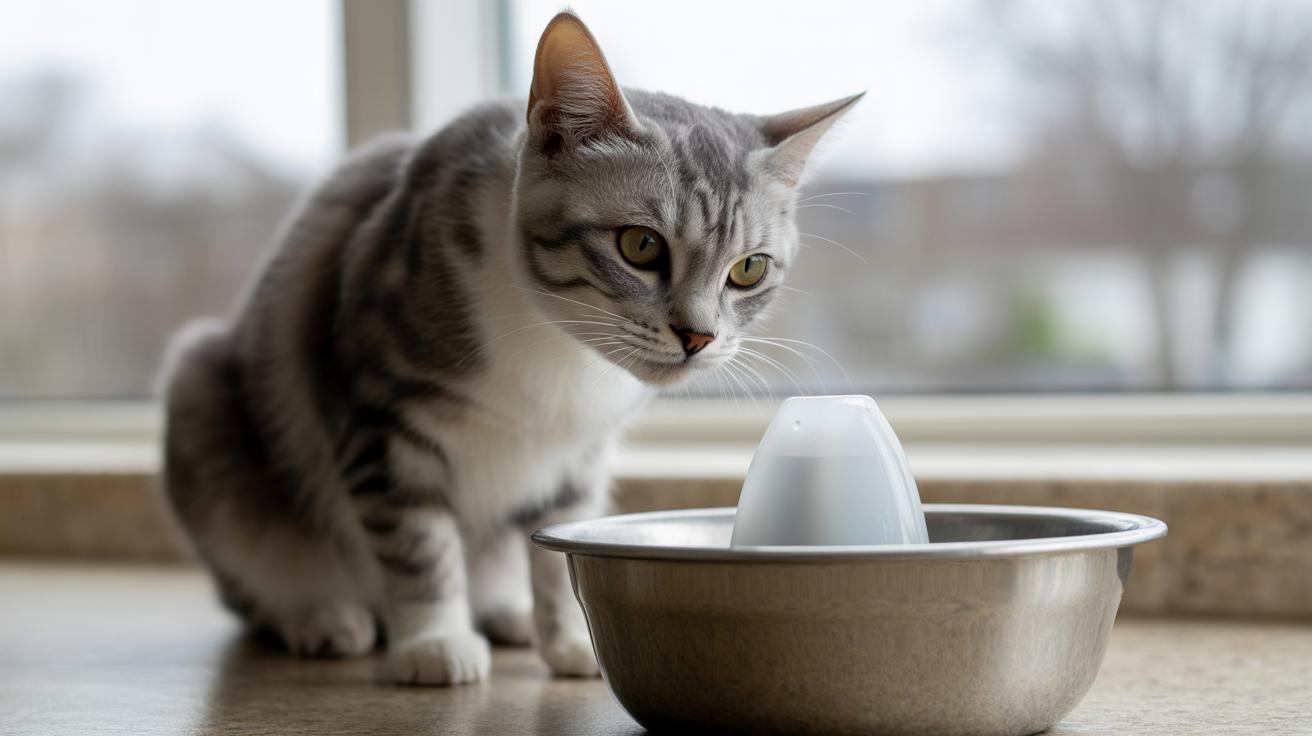
    Lots of cats prefer moving water, so a quiet recirculating fountain can be a real winner. Look for a fountain with a quiet motor and replaceable filter (tiny cartridges that trap debris and odors). The steady little flow and cleaner smell often lure a picky cat in. A ceramic water fountain can look nice and keep the water tasting neutral, but match the style to how your cat likes to drink.

    \n

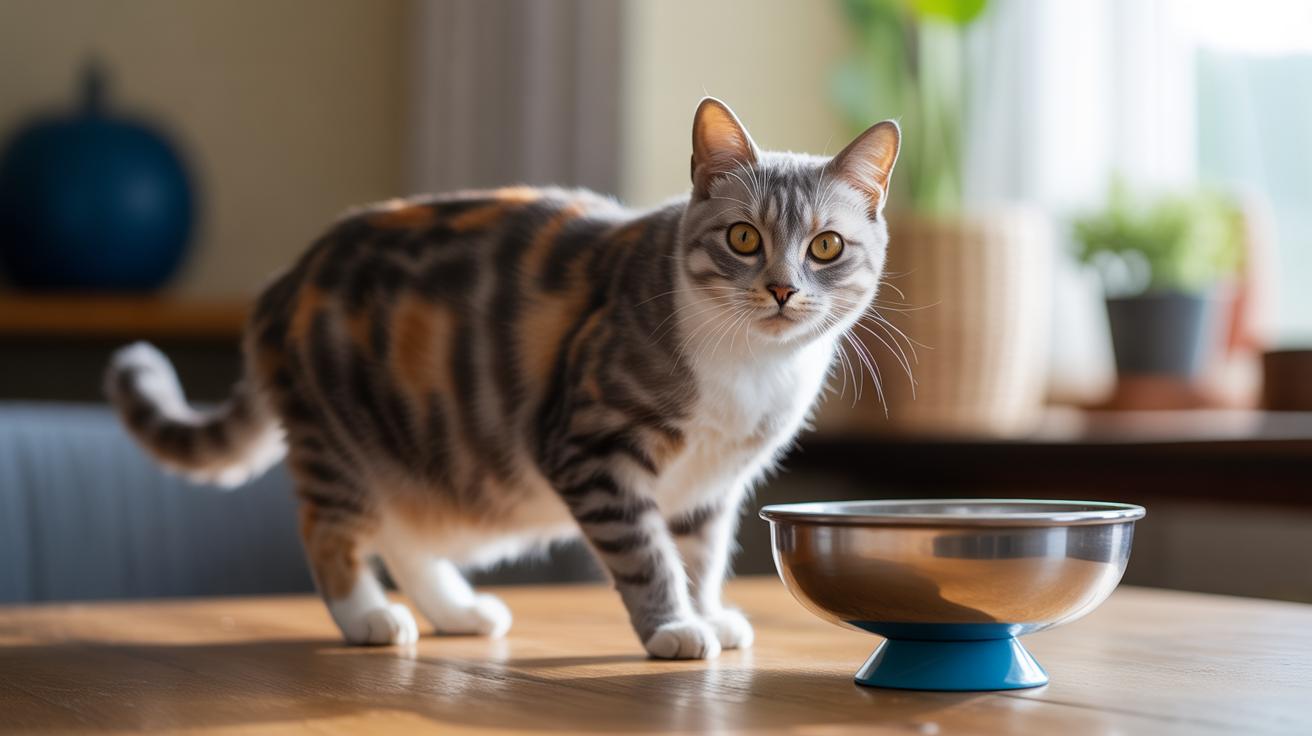
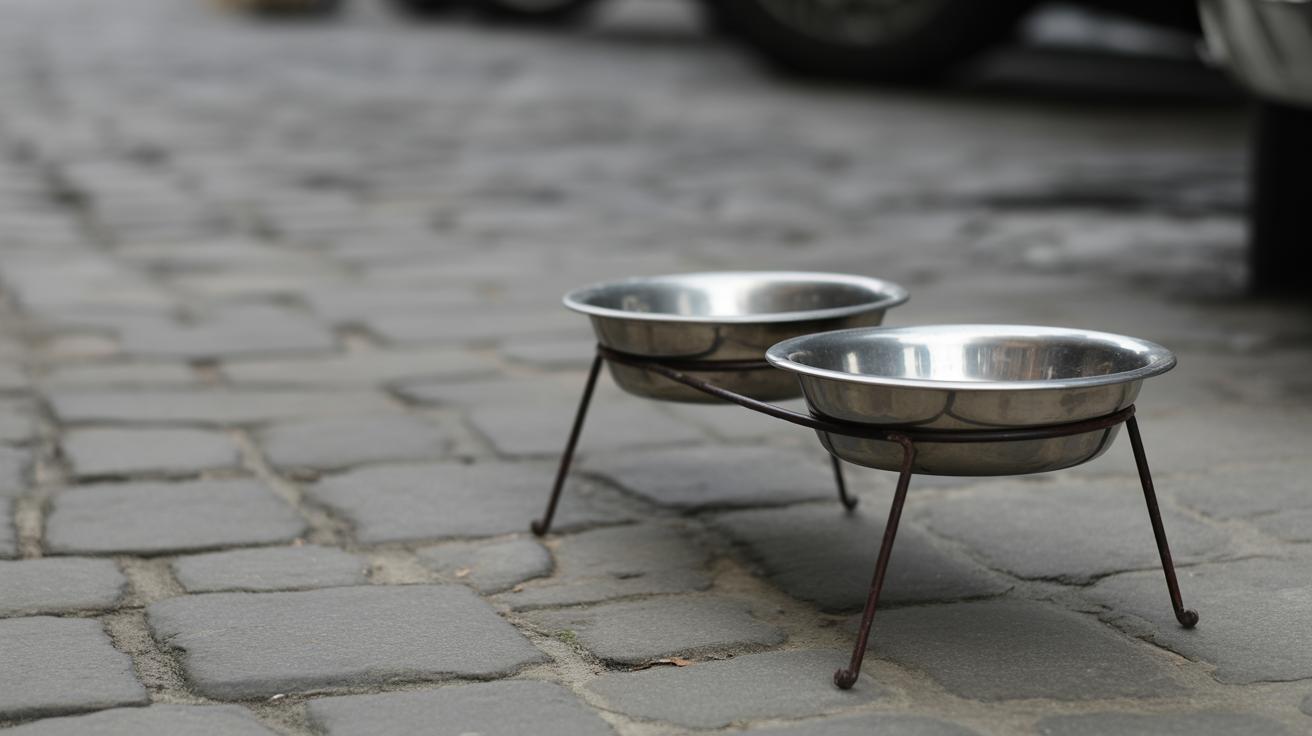
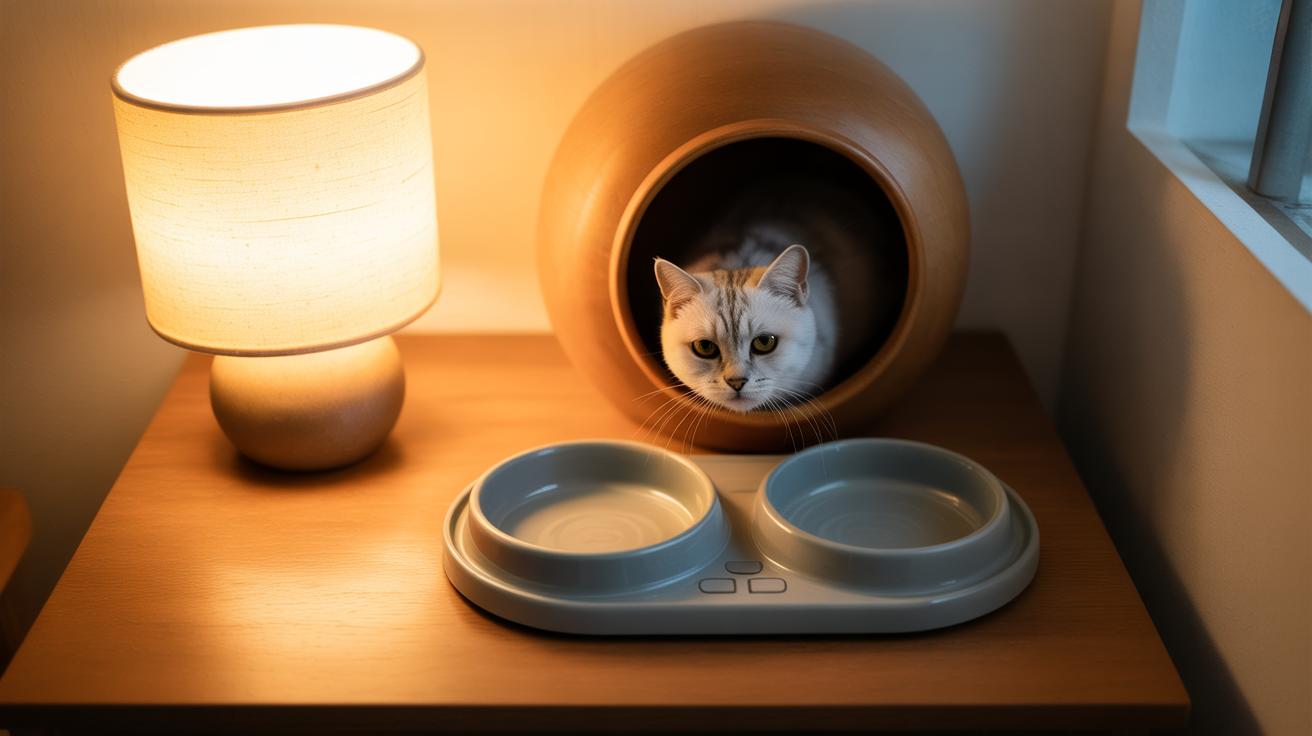
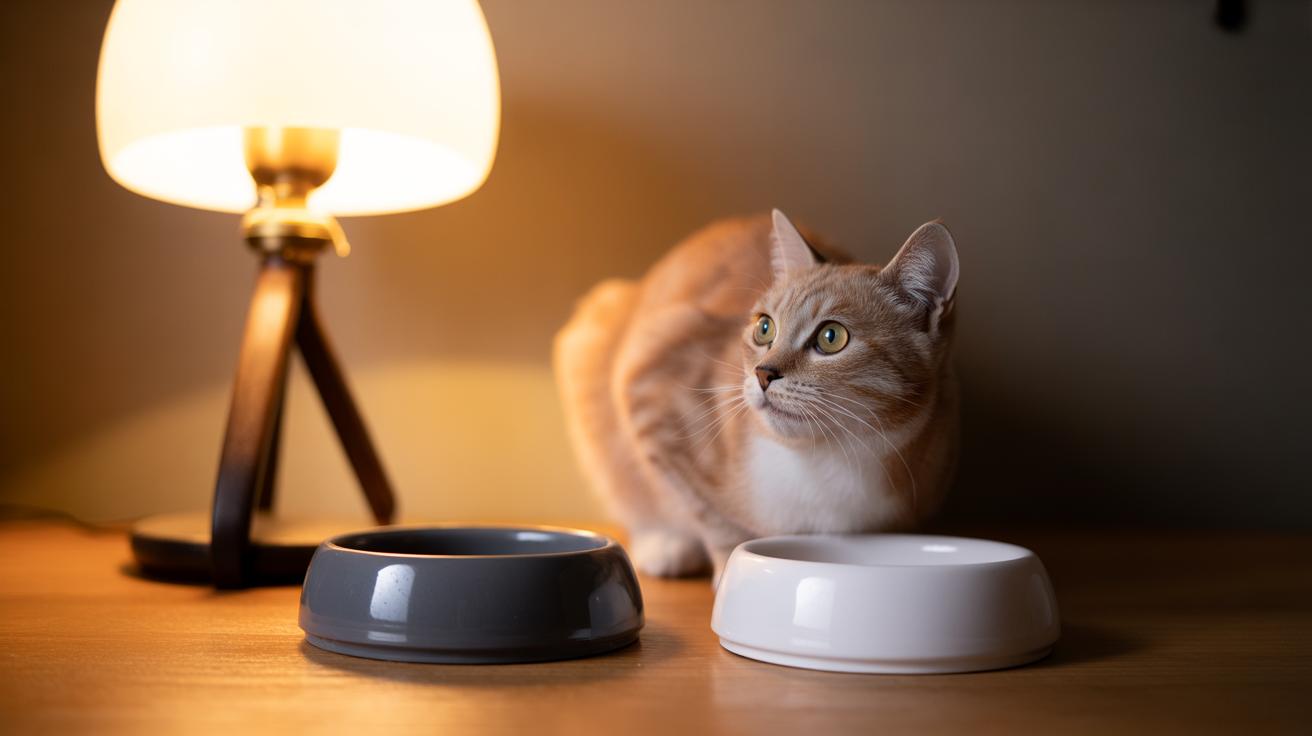
    Pick bowl shapes and materials that keep whiskers comfy and water tasting fresh. Wide, shallow ceramic bowls (baked clay) or glass are good because whiskers won’t brush the sides and they don’t hold odors. A stainless steel bowl (rust-resistant metal alloy) is tough and hygienic and won’t leach smells like some plastics (polymer: common hard plastic that can trap odors). Some cats want a bowl filled to the brim. Others prefer a slow trickle. Try both and see which one makes your cat’s whiskers twitch.

    \n

    Ever watched your kitty nose a new bowl like it’s a treasure? Try these simple tips and you’ll get more sips:

    \n

      \n

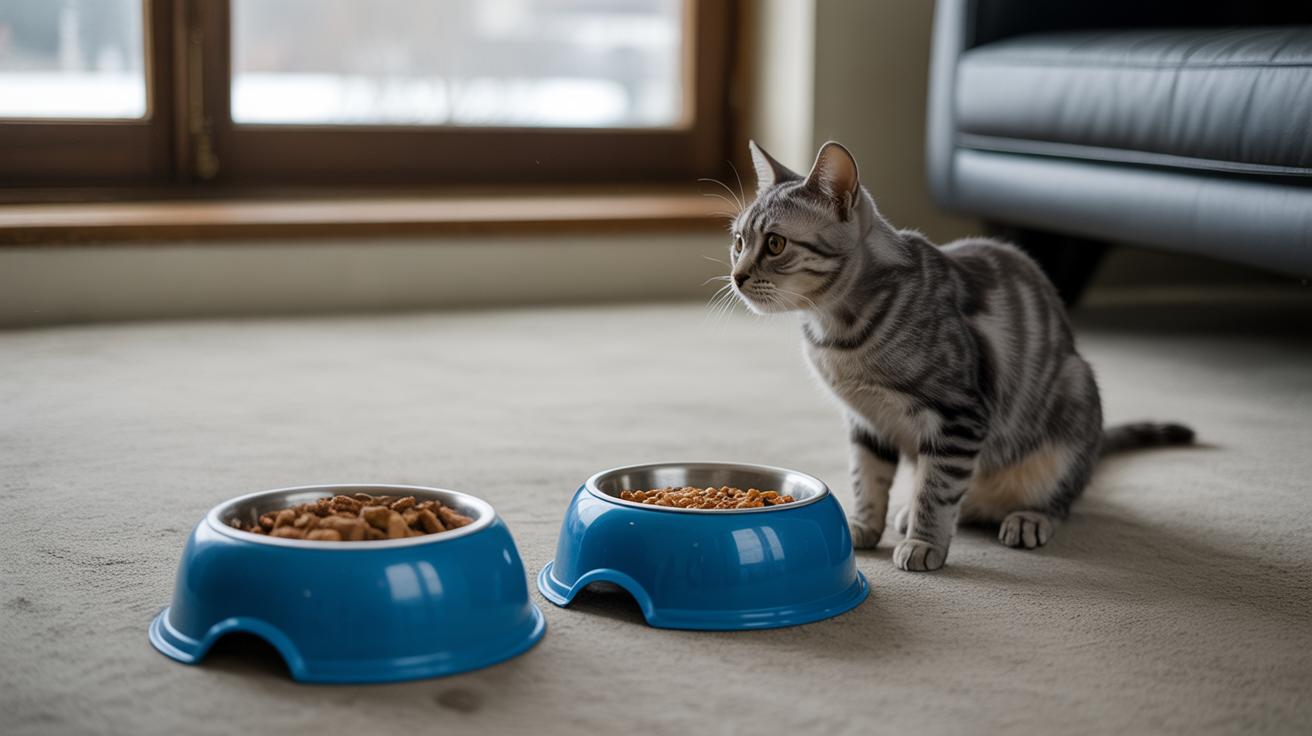
    • Use wide, shallow bowls so whiskers don’t touch the rim.
    • \n

    • Fill one bowl to the top if your cat seems to like a full dish.
    • \n

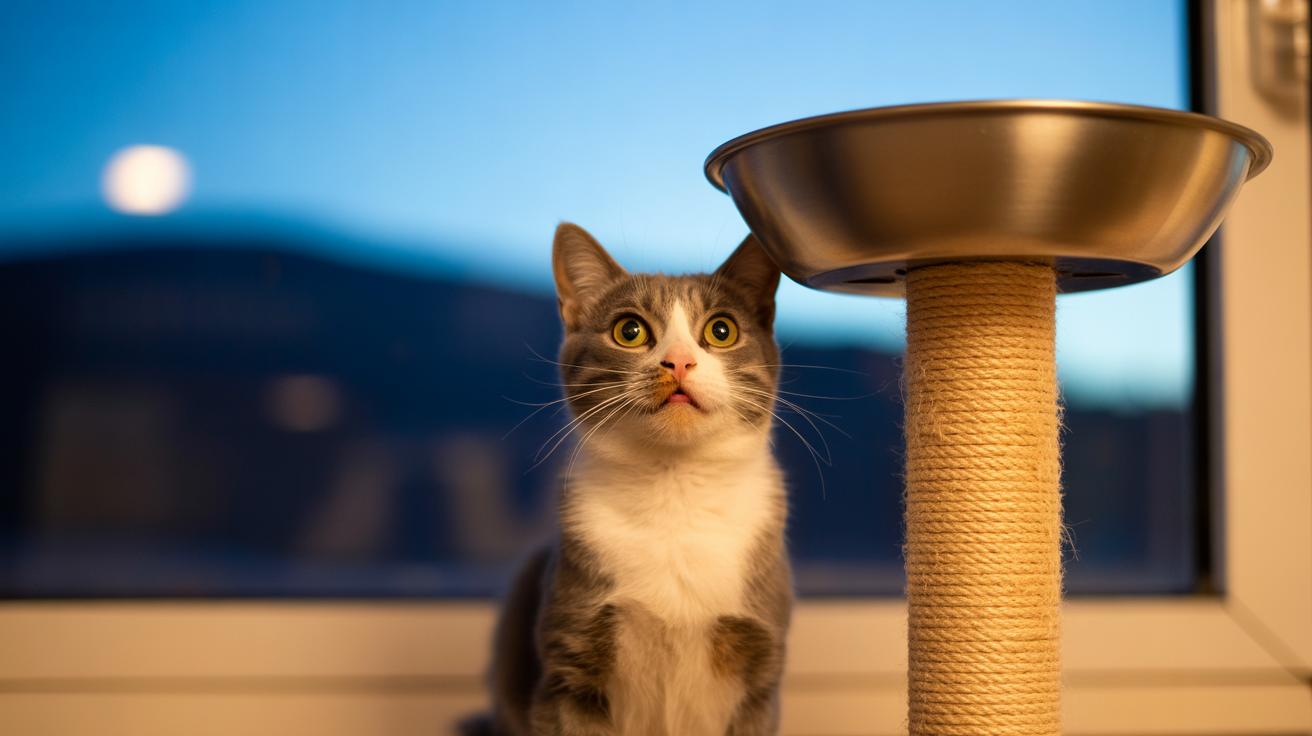
    • Place multiple water stations in quiet spots – think low-traffic corners or near favorite napping areas.
    • \n

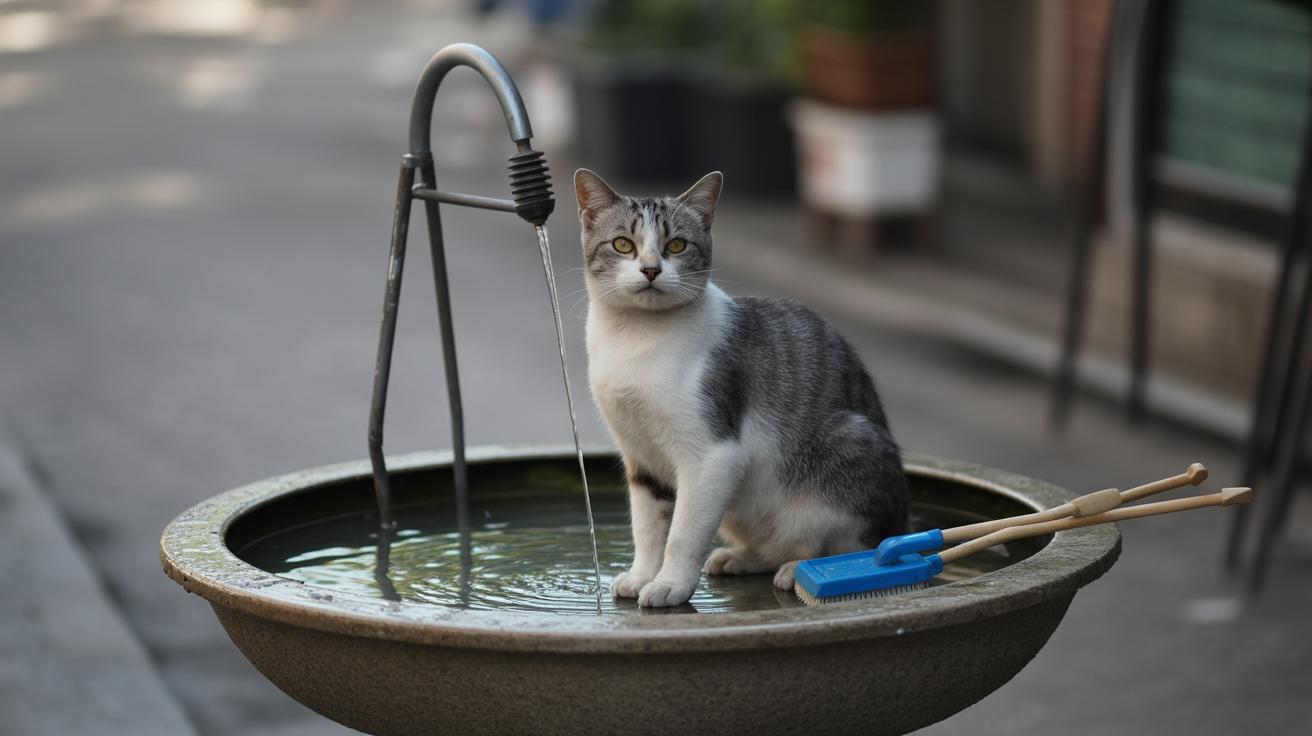
    • Wash and rinse daily when you’re cleaning a cat water bowl to keep the taste fresh.
    • \n

    • Replace fountain filters on the maker’s schedule and follow the manual’s maintenance tips.
    • \n

    • Choose a model with a quiet motor so the pump won’t scare a skittish cat.
    • \n

    • Keep water bowls well away from litter boxes and busy doorways.
    • \n

    \n

    Keep a short maintenance routine. Empty and scrub bowls weekly with mild soap. Top up fountains every day. Swap filters on the timeline the manufacturer recommends. These little habits cut down on slime and odors that make cats walk away. Worth every paw-print.

    \n

    \n

    \n

    \n

    \n

    \n

    \n

    \n

    \n

    \n

    \n

    \n

    \n

    \n

    \n

    \n

    \n

    \n

    \n

    \n

    \n

    \n

    \n

    \n

    \n

    \n

    \n

    Option Pros Cons
    Ceramic bowl Neutral taste, easy to clean Can chip if dropped
    Stainless bowl Durable, hygienic Can be noisy on hard floors
    Filtered fountain Attracts drinkers with moving water; filters odors Needs power and regular filter changes
    Non-electric shallow dish Works without power, simple No moving water appeal

    \n

    Safe flavoring and additive options to entice drinking

    \n

    \"-

    \n

    Want your cat to drink more? Tiny, safe tweaks can turn plain water into something kitty can’t resist. A little scent goes a long way , your cat’s whiskers will twitch at the fishy or savory smell. Ever watched a cat paw at an ice cube like it’s a toy? Cute, right.

    \n

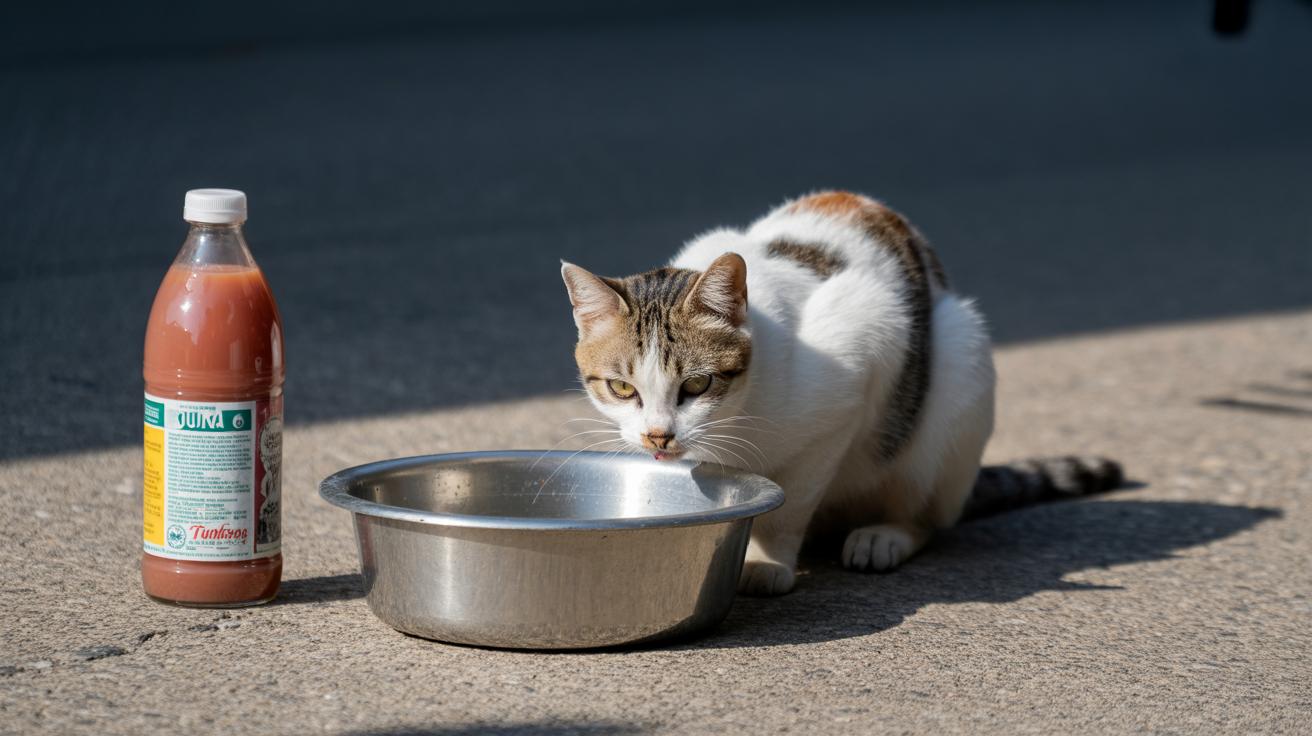
    Try adding a teaspoon of tuna juice (liquid from tuna packed in water) or just a few drops of low-sodium chicken broth (low salt cooking stock) to the bowl. Keep portions tiny and only offer these treats now and then. Freeze broth or tuna juice into ice cubes for a cool splash and a fun batting toy that doubles as hydration. Check the ingredient list, and run new flavors by your vet, especially if your cat has kidney disease (reduced kidney function) or heart disease (conditions that affect the heart).

    \n

    Avoid these things , they can hurt more than help. High-salt liquids, anything with garlic or onion, tuna packed in oil, and regular cow’s milk can make cats sick or drive thirst the wrong way. Many cats are lactose intolerant, so milk often causes tummy trouble, not better hydration. When in doubt, ask your veterinarian before adding anything other than plain water.

    \n

      \n

    • Tuna juice (from tuna packed in water) – use sparingly; strong scent, tiny amount per bowl
    • \n

    • Low-sodium chicken broth (low salt cooking stock) – no garlic or onion; use only a few drops
    • \n

    • Broth or tuna-juice ice cubes – fun, cooling, and interesting to bat at
    • \n

    • Garlic- or onion-flavored broths – toxic to cats, avoid entirely
    • \n

    • Salty commercial broths – can worsen kidney or heart conditions, so skip them
    • \n

    • Cow’s milk or cream – many cats are lactose intolerant and will get an upset stomach
    • \n

    \n

    Worth every paw-print.

    \n

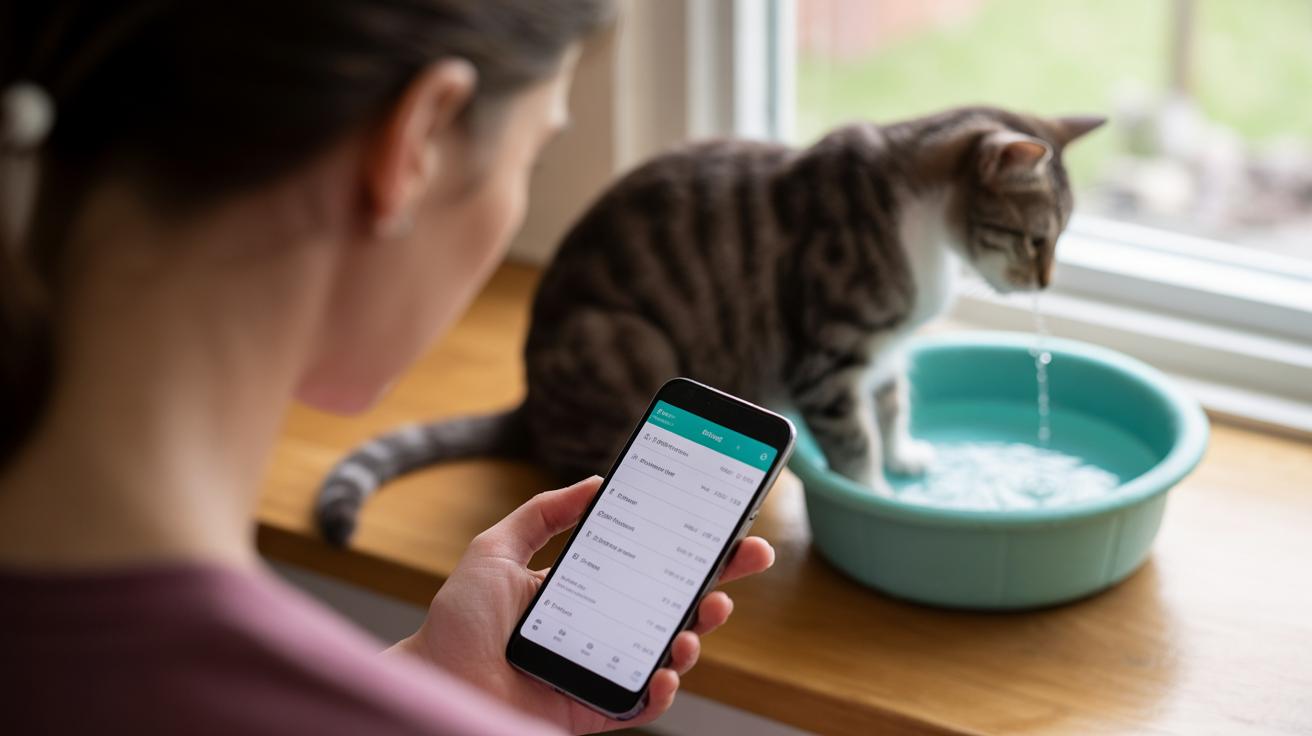
    Monitor and measure cat water intake: ml/kg rule and tracking methods

    \n

    \"-

    \n

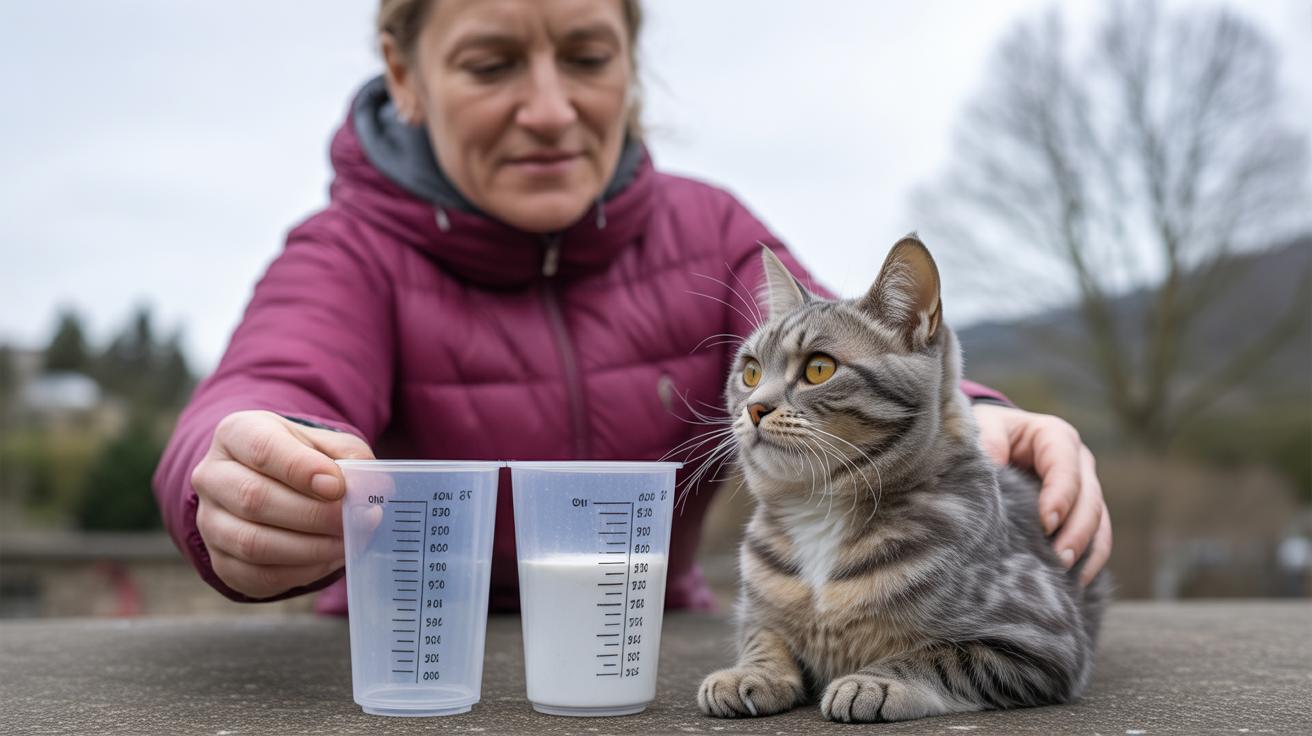
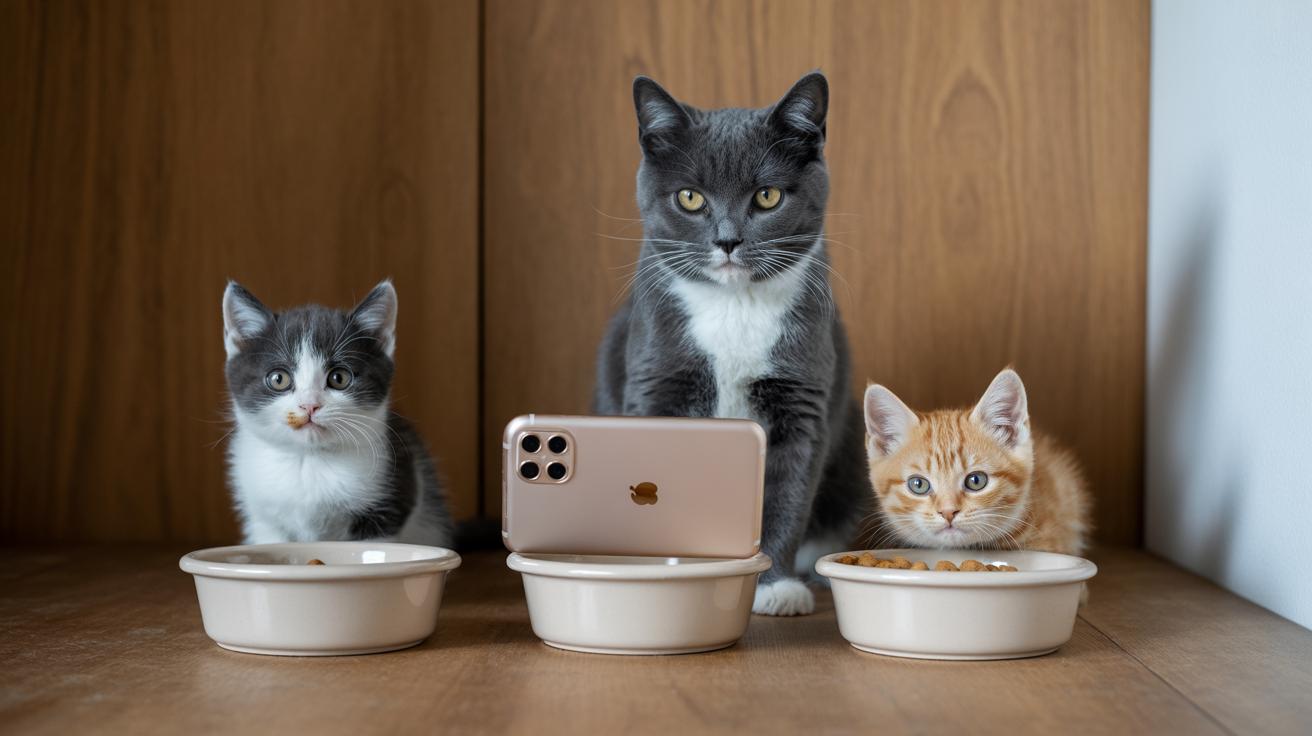
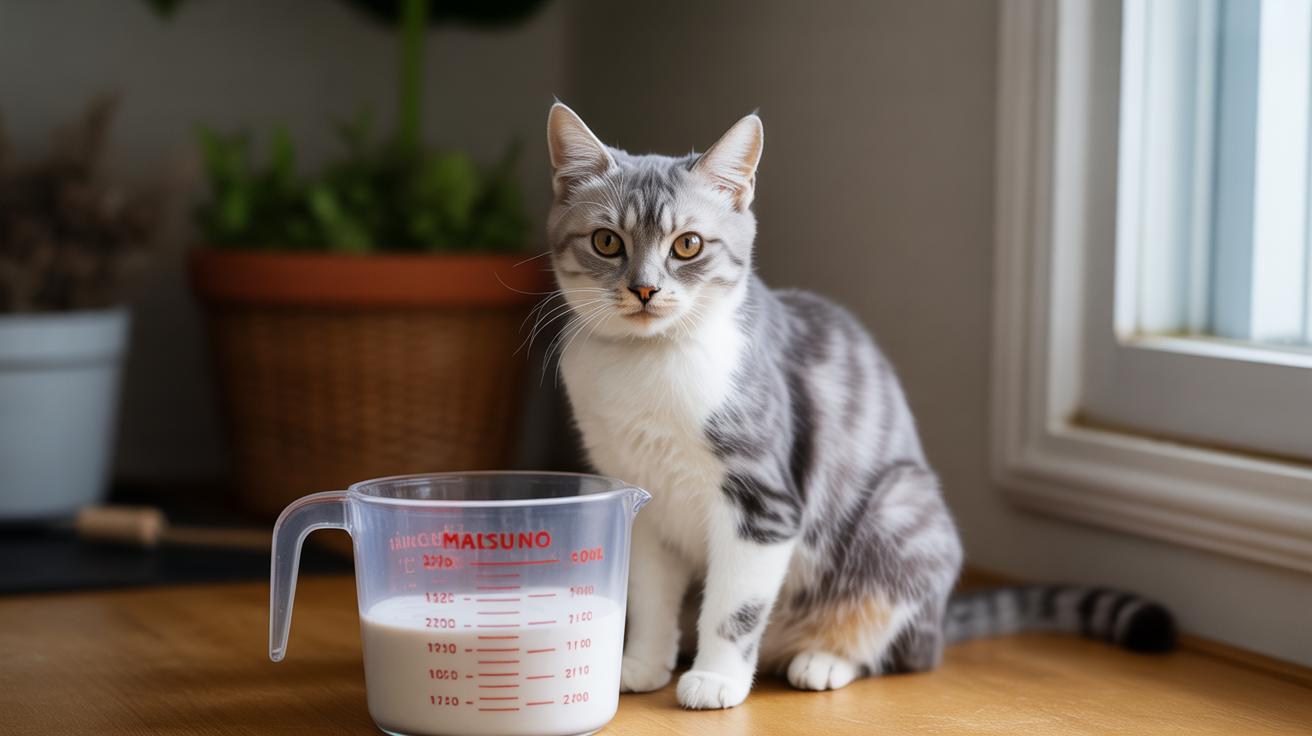
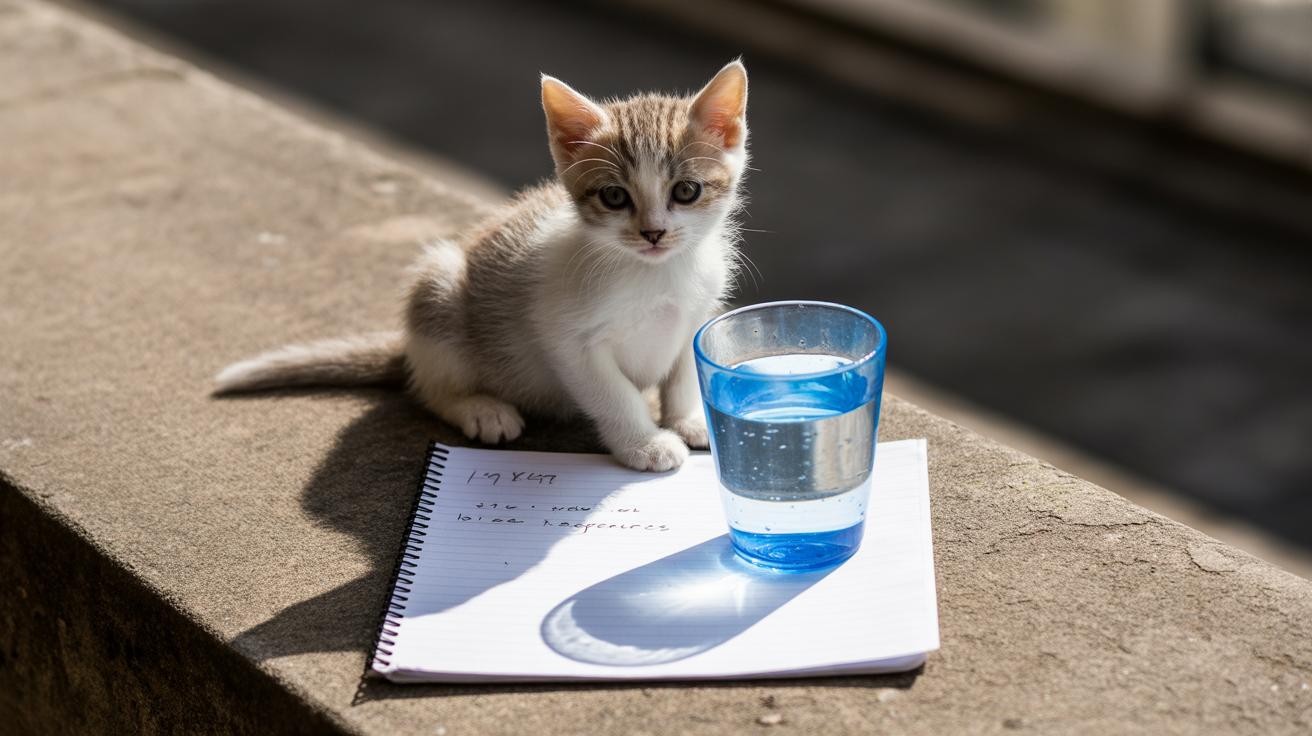
    Keep an eye on daily drinking so you catch slow drops or sudden spikes early. A simple guideline to use is the ml-per-kg hydration rule (ml = milliliters, kg = kilogram, about 2.2 pounds). Most adult cats need roughly 50-60 ml per kg per day from food and water combined. If your cat eats a lot of wet food, they’ll get more fluid from meals, so expect less bowl drinking.

    \n

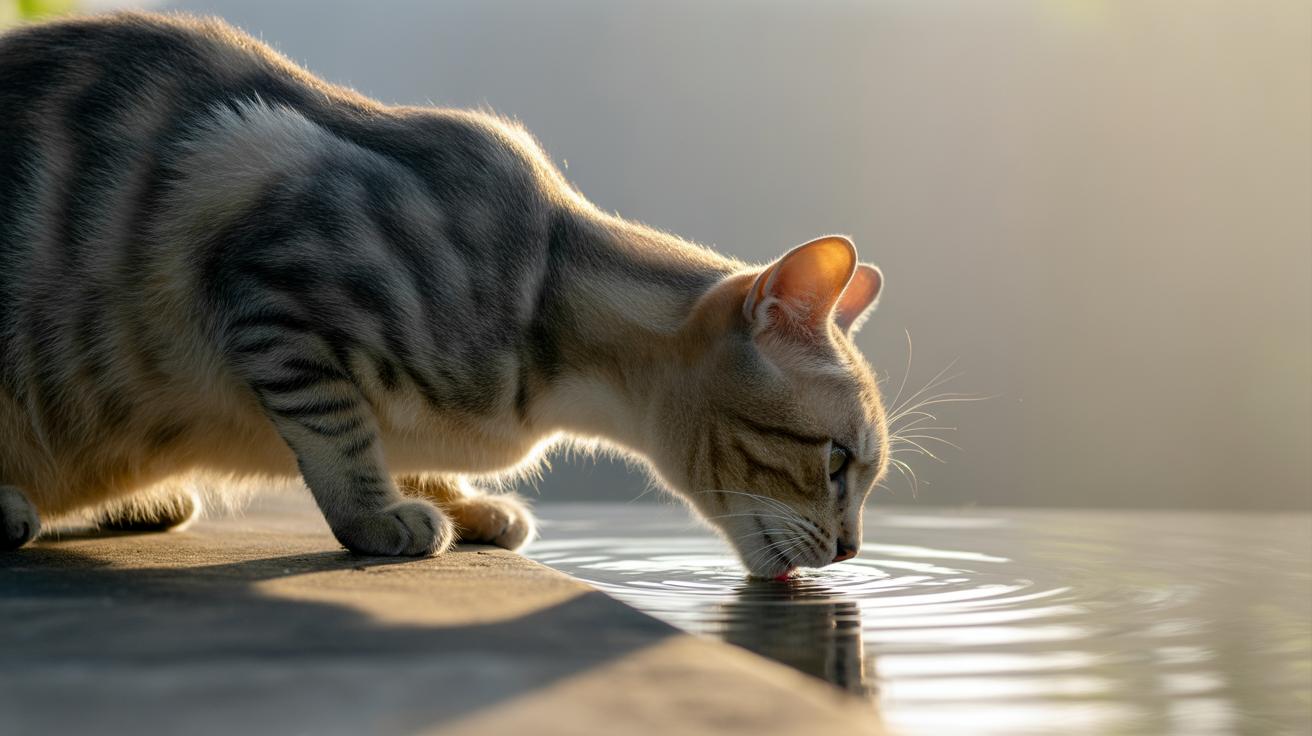
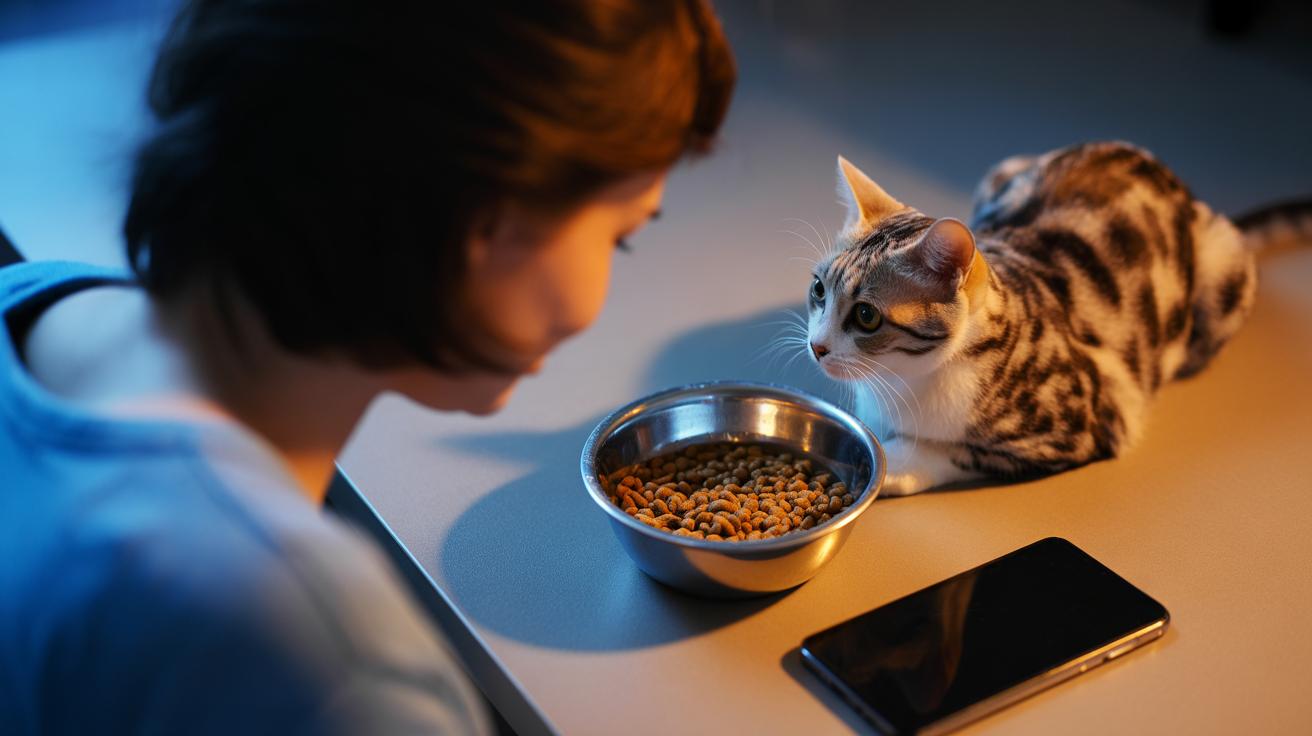
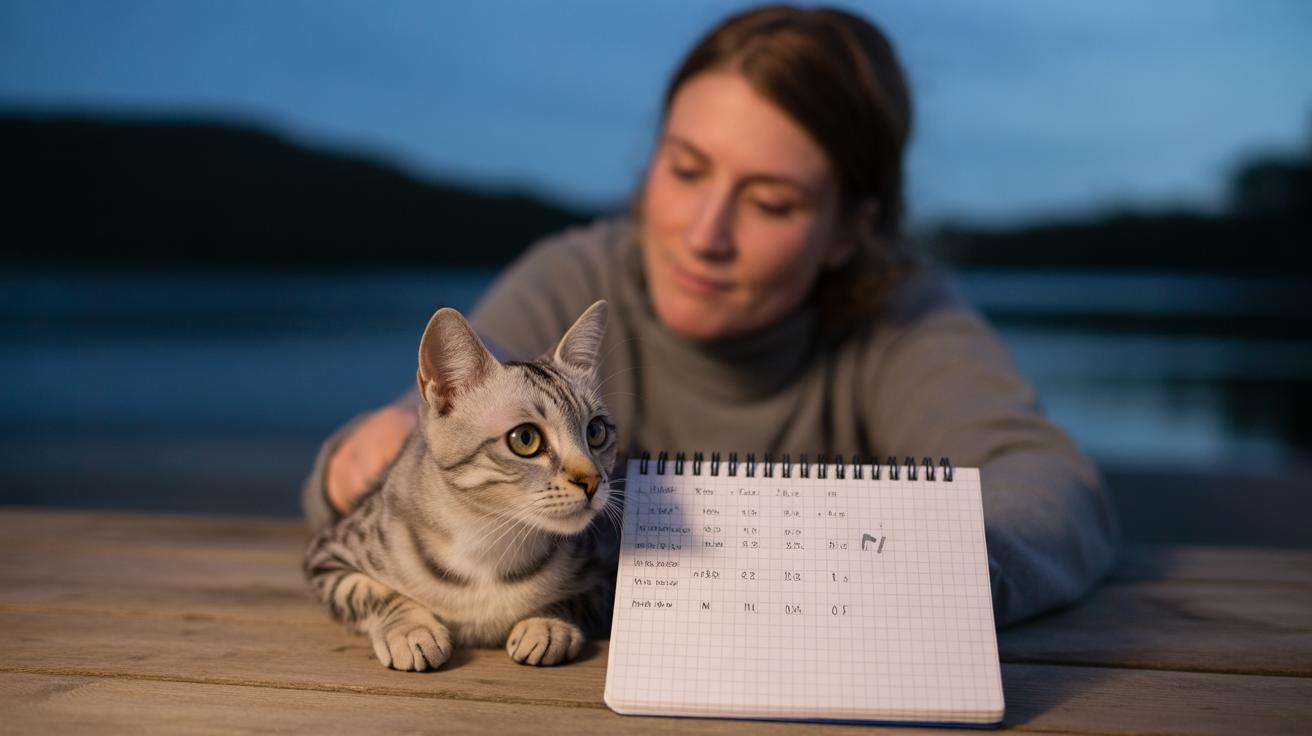
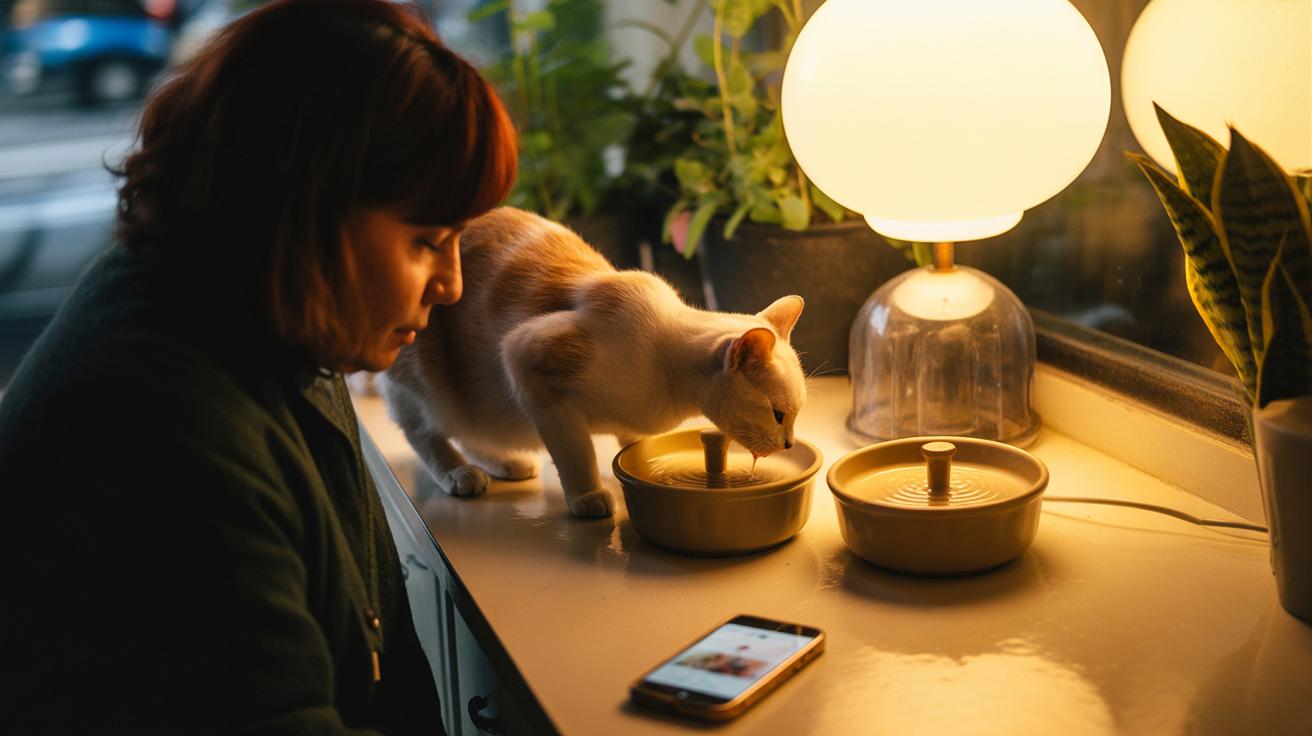
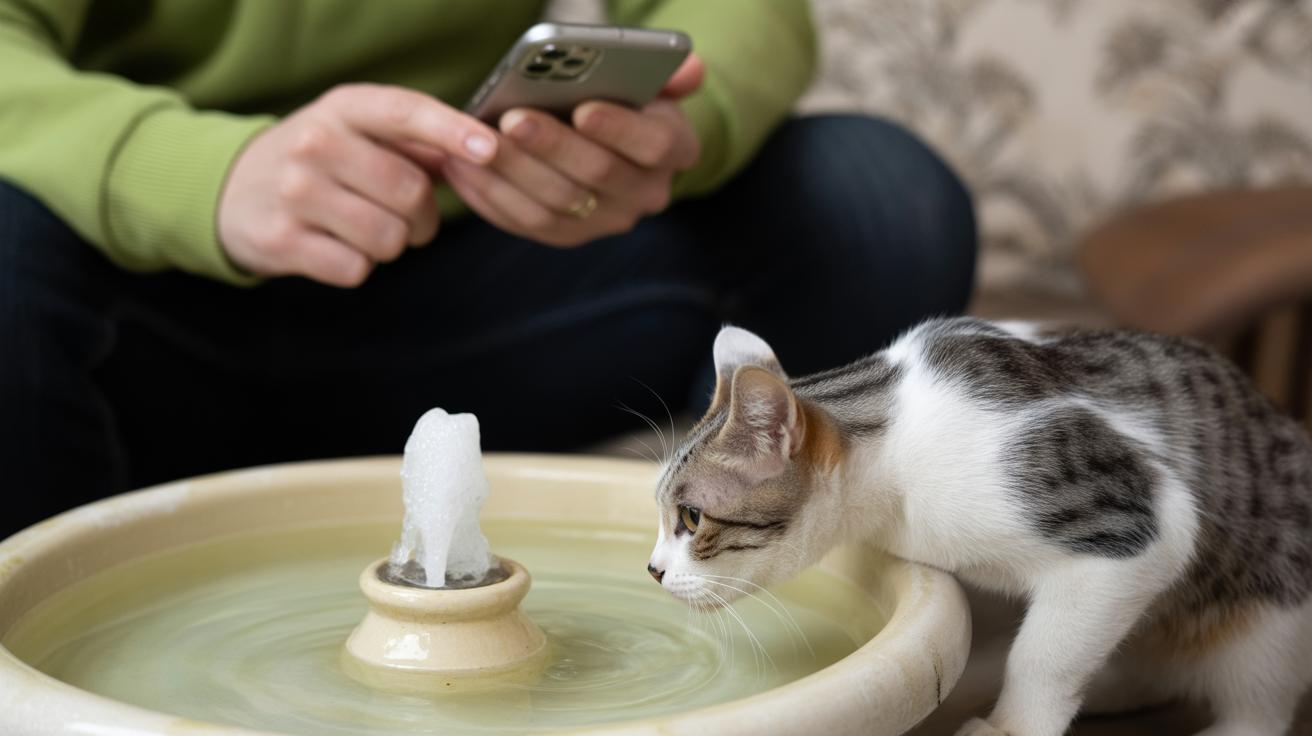
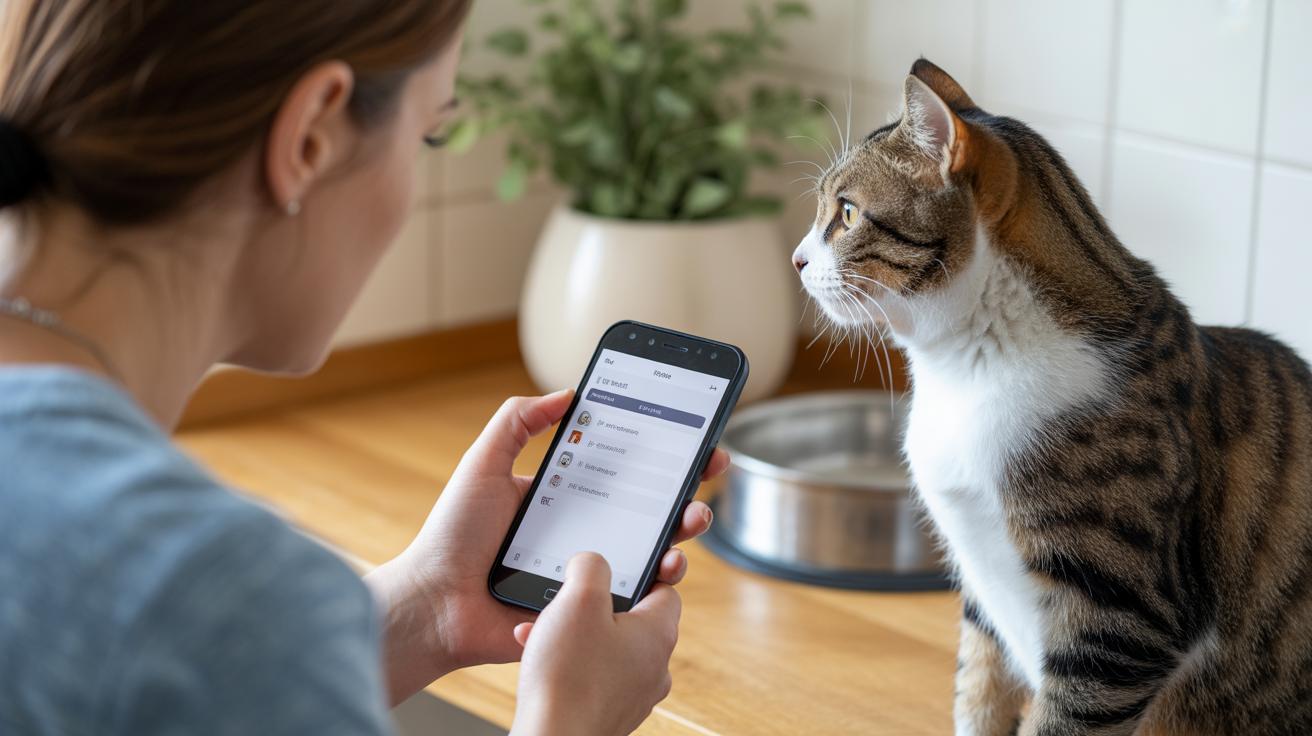
    You can use digital bowls or smart water monitors (bowls that log each sip to an app) to make tracking easy. No fancy gear? No problem. A notebook or a spreadsheet works just fine. Ever watched your cat lap water, all delicate nibbles and tiny splashes? Those tiny sips add up.

    \n

    Also watch the litter box. Big changes in peeing often match changes in drinking, so numbers and litter-scoop clues together tell a better story.

    \n

    Steps to track daily intake

    \n

      \n

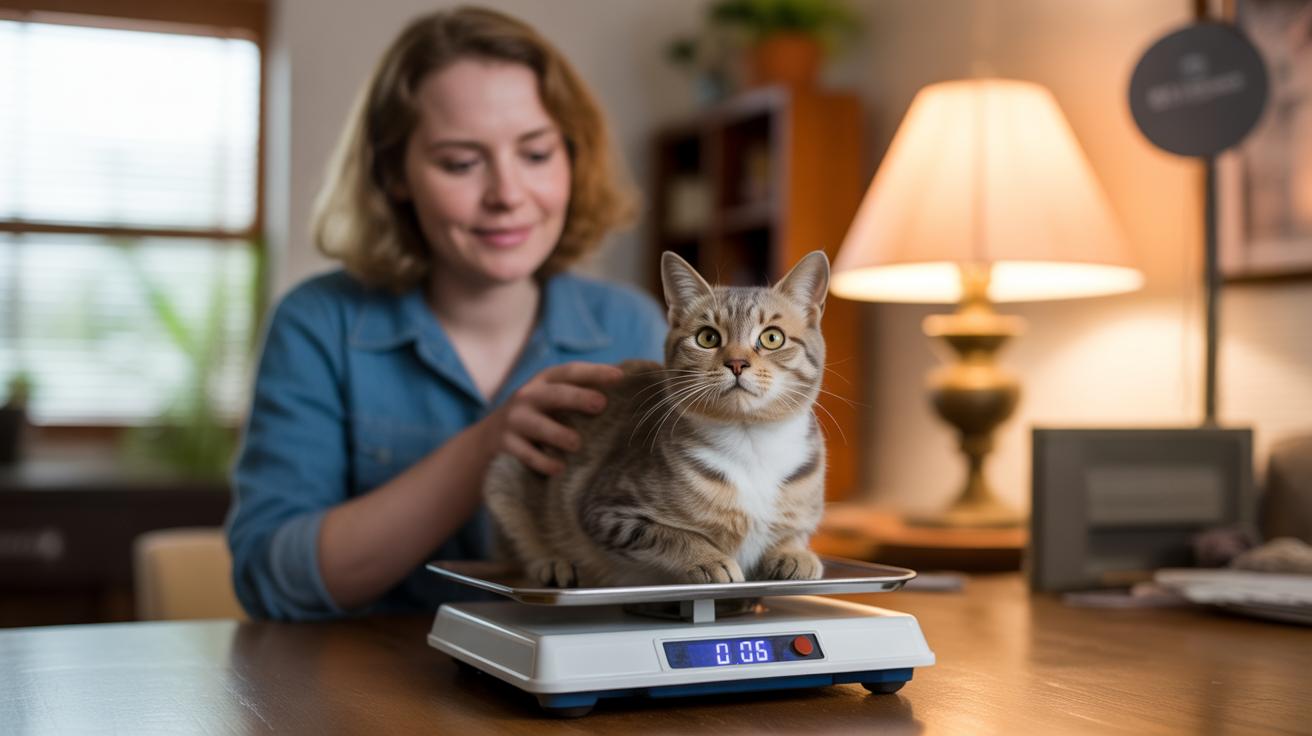
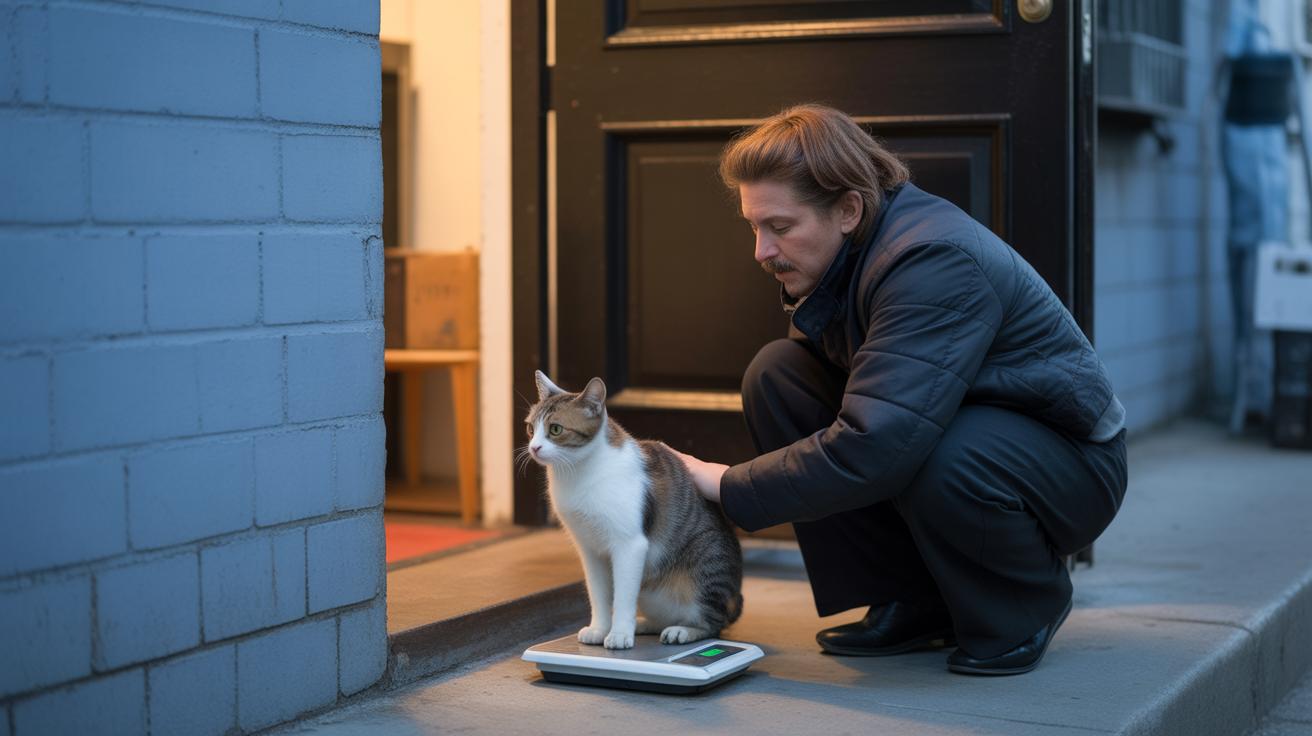
    1. Weigh your cat so you know their body mass in kg (kilogram = kg, about 2.2 pounds).
    2. \n

    3. Measure the bowl’s usable volume by filling it to the level you normally use and noting that amount (ml = milliliters).
    4. \n

    5. Record start-of-day and end-of-day volumes to calculate how much your cat drank that day.
    6. \n

    7. Compare the daily total to the ml-per-kg rule and track values for a week to find your cat’s baseline. Actually, make that two weeks if your schedule is weird, more data helps.
    8. \n

    \n

    \n

    \n

    \n

    \n

    \n

    \n

    \n

    \n

    \n

    \n

    \n

    \n

    \n

    \n

    \n

    \n

    \n

    \n

    \n

    \n

    \n

    cat weight (kg) Approx. total water (ml/day)
    2 kg 100-120 ml
    3 kg 150-180 ml
    4 kg 200-240 ml
    5 kg 250-300 ml

    \n

    If you notice a sustained increase or decrease in drinking, or the water numbers don’t match litter box changes, call your veterinarian so they can check for medical causes while you keep monitoring. Worth every paw-print.

    \n

    Troubleshooting plan: stepwise actions if your cat still won’t drink

    \n

    \"-

    \n

    If the usual tricks aren’t working and you’re thinking, “How do I get my cat to drink more?” here’s a friendly, two-week plan you can follow. It moves from easy swaps to small temptations, then finishes with simple measurements so you’ll know what to tell your vet. Think of it as a gentle escalation, one paw at a time.

    \n

      \n

    1. Day 1-3 – Swap bowl types. Try glass, ceramic, and stainless. Some cats prefer a wide, shallow bowl because it doesn’t tickle their whiskers; a second bowl can help too.
    2. \n

    3. Day 1-3 – Move bowls to quiet, low-traffic spots and keep them far from the litter box. Cats like space between eating, drinking, and bathroom areas. Ever watched your kitty side-eye a noisy hallway? Yeah, that matters.
    4. \n

    5. Day 4-7 – Introduce a quiet filtered fountain (a recirculating water fountain) or run the tap for a short time when your cat is awake. The sound and motion can be irresistible. Try short sessions so it stays novel.
    6. \n

    7. Day 4-7 – Offer a few broth or tuna-juice ice cubes for play and cooling novelty. Use tuna in water (the liquid from the can) or low-sodium chicken broth (broth is a savory, watered-down stock). The ice cubes add scent and fun, especially on warm days.
    8. \n

    9. Day 8-11 – Add tiny amounts of tuna water or low-sodium broth to one bowl to make it more tempting. Tiny amounts, not soaking everything, just a hint of aroma to pique interest.
    10. \n

    11. Day 8-11 – Gradually moisten dry kibble or give a small wet-food meal after a play session to encourage licking and drinking. Think of wet food as a nudge toward extra hydration.
    12. \n

    13. Day 12-14 – Start measuring. Track daily water intake and litter-box output (how often and how much your cat urinates) and compare to a baseline you recorded before you started. Note any patterns, like more drinking after play or first thing in the morning.
    14. \n

    15. Day 12-14 – If there’s no steady improvement, book a vet visit for bloodwork (blood tests) and urinalysis (a urine test). Bring your notes so the vet can see what you tried and when.
    16. \n

    \n

    Red flags: if your cat refuses to drink for 24 hours, vomits a lot, becomes weak, or collapses, seek urgent veterinary care right away. Those signs can mean something serious.

    \n

    Kittens and post-op cats: sometimes syringe or dropper feeding is used short term, but only with your vet’s ok. Warm the fluid to about body temperature, draw a small amount (5-10 ml) into the syringe, and place it at the side of the mouth so tiny amounts can drip in and your kitten can swallow. Never force big gulps or tilt the head back. Go slow and watch for coughing or breathing trouble (aspiration, breathing fluid into the lungs).

    \n

    You’ve got this. Small changes often make a big difference, and if they don’t, your vet will appreciate the clear notes you bring in. Worth every paw-print.

    \n

    Special populations: getting kittens and senior cats to drink more water

    \n

    \"-

    \n

    We folded this separate section into other headings so the same tips don’t appear twice. It keeps things clean and easier to follow, you know, less scrolling.

    \n

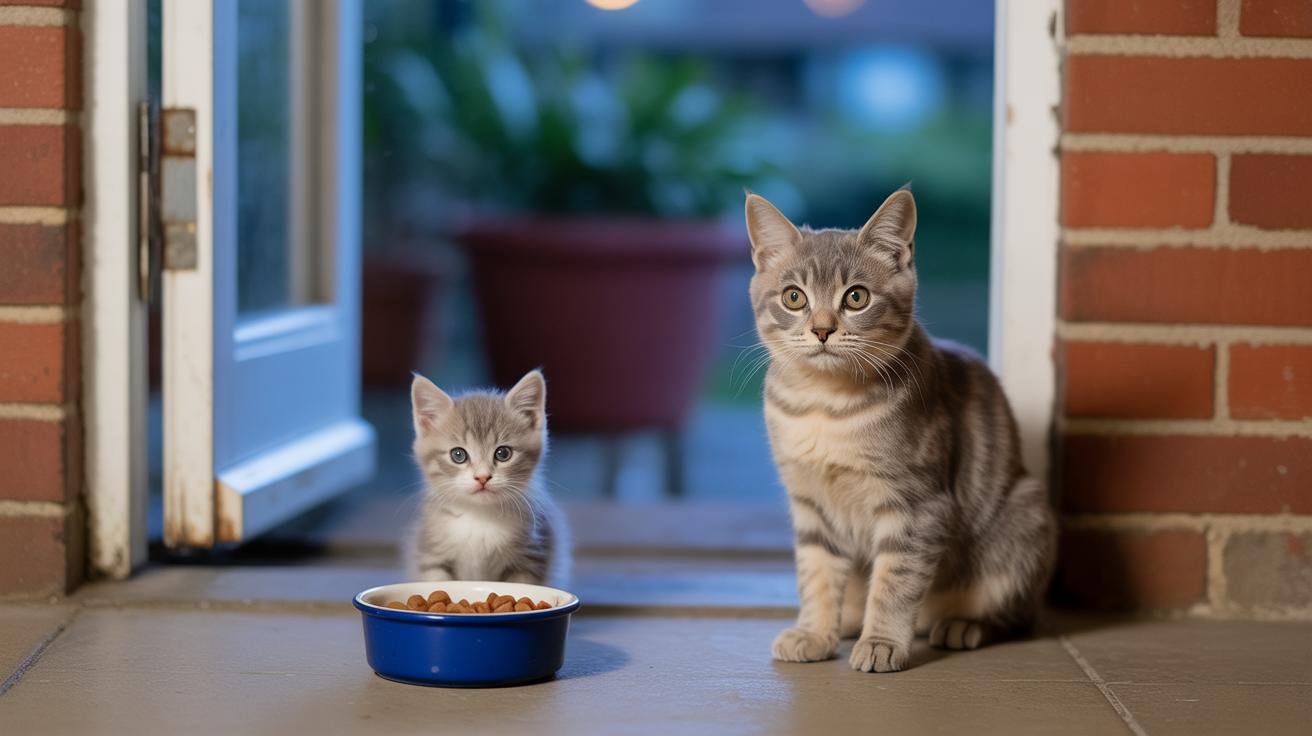
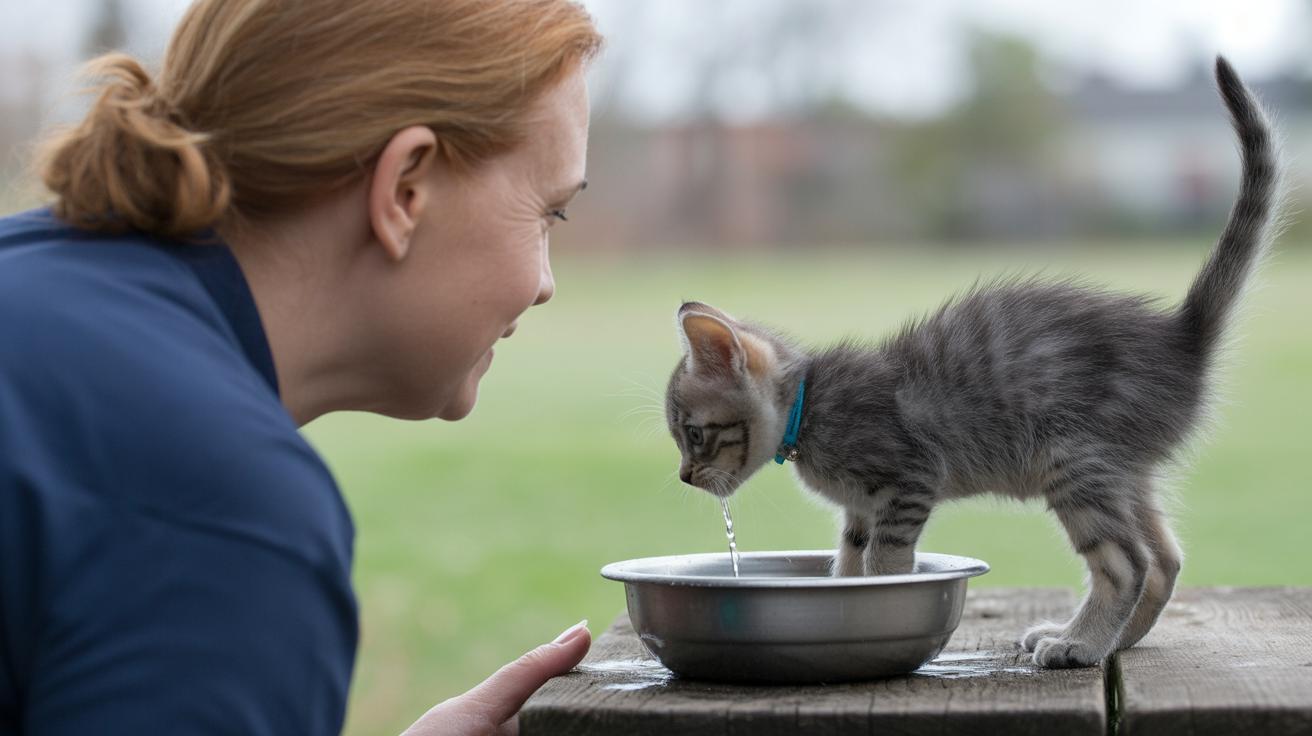
    Kitten tips moved to How-to-Get-My-Cat-to-Drink-More-Water. Suggested text: Offer shallow dishes kittens can reach easily. Leave water out between short feeds so they can lap when they want. Playful snack sessions often trigger a quick lap after play, and you might catch that adorable, tiny splash.

    \n

    Syringe basics are now part of the Troubleshooting syringe paragraph. Quick how-to: only use a syringe (a small plastic tube with a plunger) with your vet’s okay. Give tiny 5 to 10 ml (milliliters) doses of warm, body-temp fluid (about the warmth of your cat), and place the tip at the side of the mouth so the kitten can swallow without coughing. Be gentle, slow, and stop if the kitten gags.

    \n

    Senior-cat tips were split between Medical causes and Bowls, fountains, location and cleaning. For medical causes, note that older cats often need more water because of kidney or metabolic changes (how their body handles fluids). Watch for changes in thirst and offer wet meals when it makes sense.

    \n

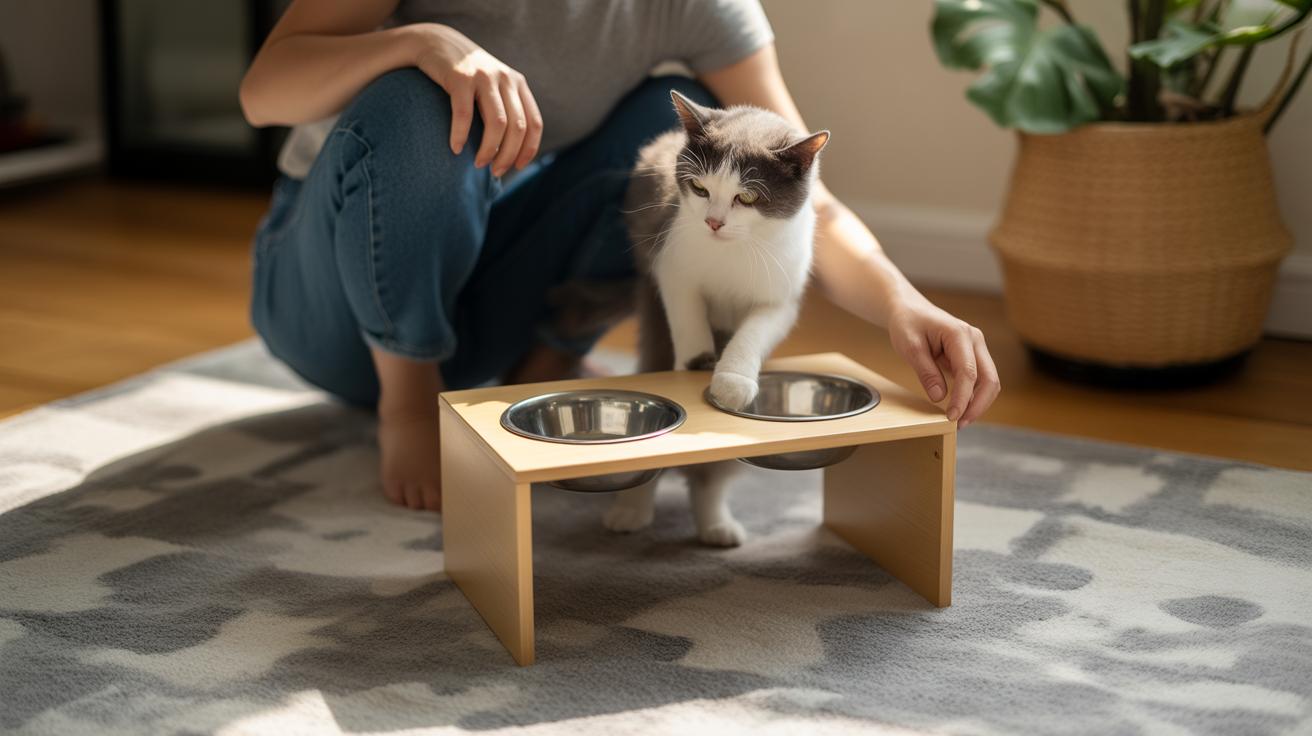
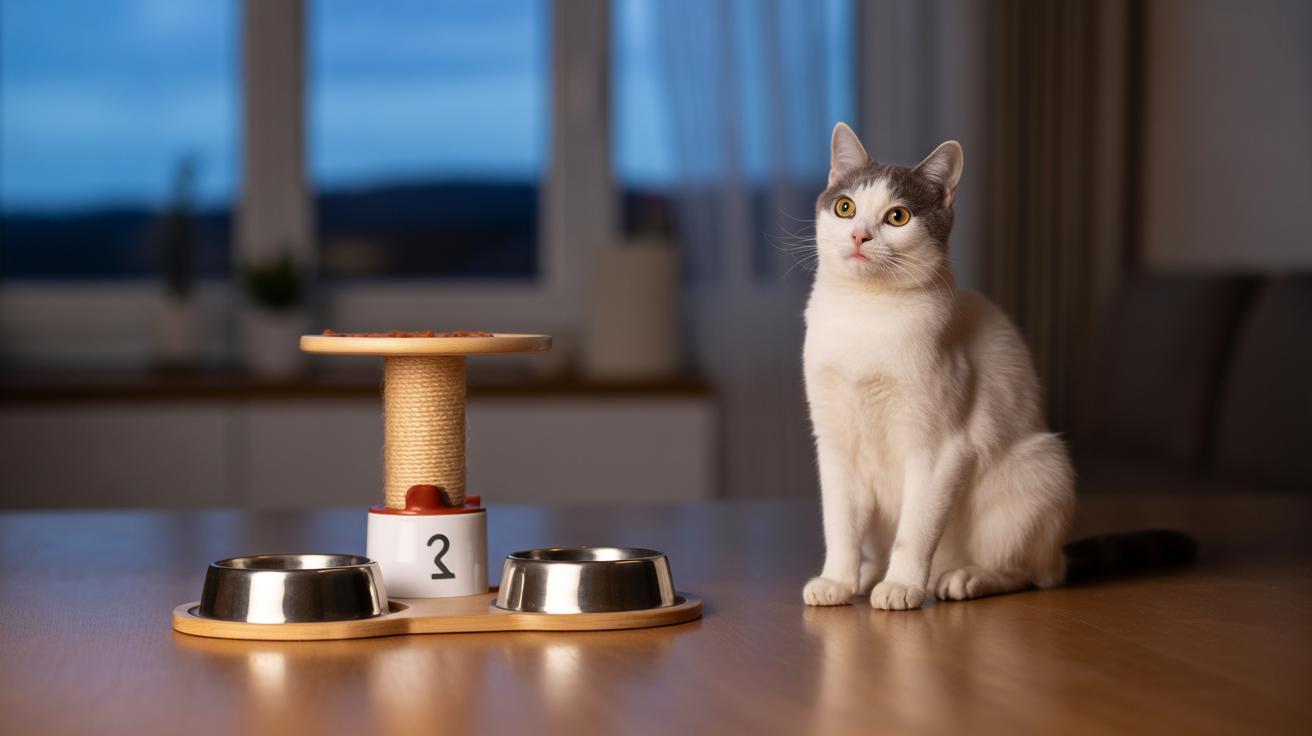
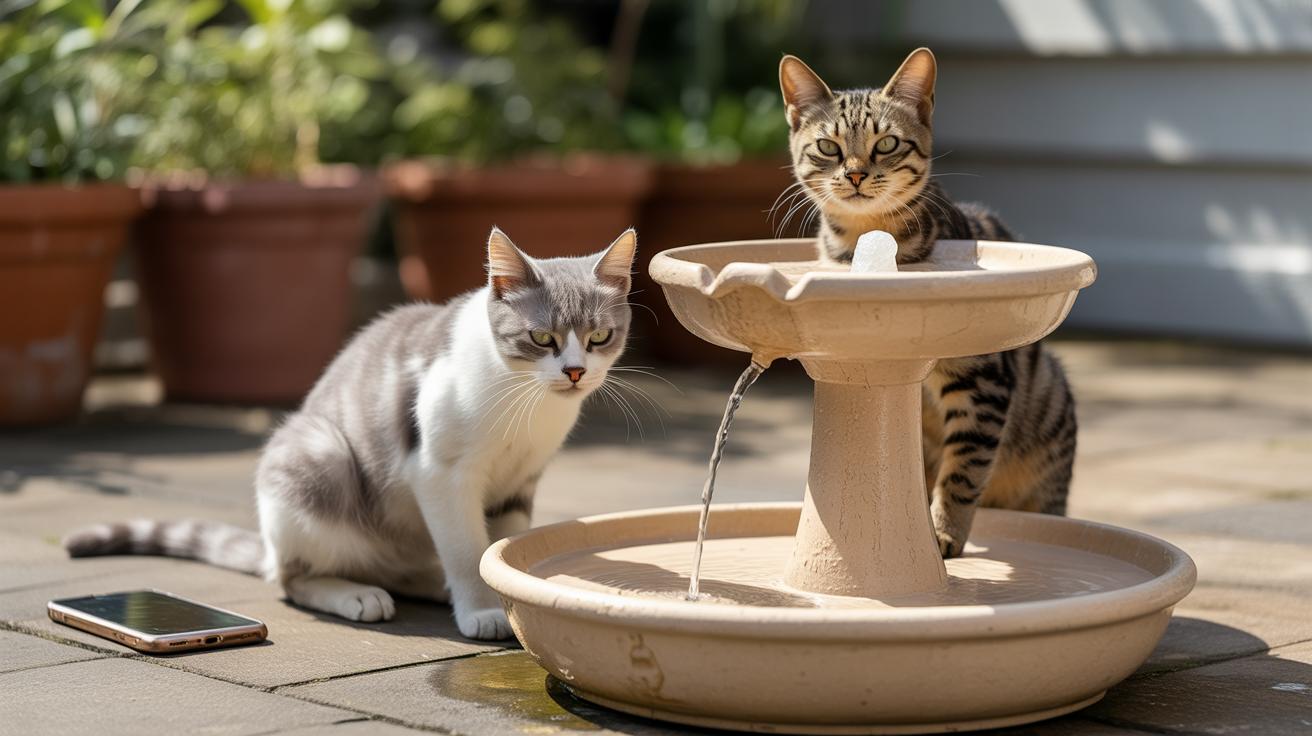
    For bowls, fountains and placement: add extra water stations near favorite nap spots. Use elevated bowls (raised dishes that reduce neck strain) for arthritic necks, and pick a quiet fountain for timid elders who avoid busy areas. Clean fountains and bowls often so shy cats aren’t put off by scum or funky smells.

    \n

    Monitoring stays under Monitor and measure cat water intake. Weigh pets regularly and log daily water and litter-box habits so trends stand out. Call your veterinarian if drinking steadily drops or you notice weight loss.

    \n

    We also removed duplicate bullet lists and the extra syringe paragraph so there’s one concise set of instructions in the right spots. Cleaner. Easier. Worth every paw-print.

    \n

    Seasonal, travel and boarding tips to maintain hydration

    \n

    \"-

    \n

    Hot days make dehydration more likely, so put out extra water where your cat likes to nap. Use chilled bowls and even a few ice-cube treats made from low-sodium broth (broth with very little salt) or tuna water (the liquid from tuna packed in water). Those clinking cubes get curious noses moving and cool the tongue.

    \n

    Play for a few minutes, then offer a small wet snack or a full bowl, your cat will often lap up water after a fun session. Shady, low-traffic spots invite slow, peaceful sipping. In short: more bowls, cooler water, and short, tasty snacks help keep them hydrated.

    \n

      \n

    • Familiar bowl from home so the cat smells something safe
    • \n

    • Measured water in a sealed container (pre-measured for travel days; sealed to avoid spills)
    • \n

    • A can or two of wet food (canned food with gravy) for emergency meals
    • \n

    • Broth or tuna-juice ice cubes for novelty and cooling (low-sodium, no garlic or onion)
    • \n

    • Small syringe (without a needle) for kittens or frail cats, only use if your vet says it’s okay
    • \n

    • Contact vet details and local emergency clinic info
    • \n

    • A simple emergency plan: who cares, where they go, and how much to give
    • \n

    \n

    When you’re traveling, bring a small travel fountain or a pet water bottle for travel (a collapsible bottle with an attached drinking tray). Toss in the bowl your cat uses at home so things smell familiar.

    \n

    If you board your cat, ask the staff about their hydration routine, how often they give fresh water, where they place bowls, and if they offer cool treats or wet food. Ask who checks on each cat and how they handle heat. That little conversation can save a lot of worry.

    \n

    Quick tip: freeze a few extra broth cubes in a zip bag and pop one in during the hottest part of the day. My cat once batted an ice cube under the sofa for later, uh, so you might want a shallow dish too.

    \n

    Worth every paw-print.

    \n

    Final Words

    \n

    In the action, you’ve got a vet‑approved emergency checklist for fast hydration steps, clear signs to watch, medical causes, diet and bowl fixes, safe flavor ideas, ways to measure intake, a 2-week troubleshooting plan, plus kitten, senior and travel tips.

    \n

    Quick tip: start with extra fresh stations, wet food, and a quiet fountain, then measure intake and move through the escalation steps if things don’t improve.

    \n

    You’ll find helpful, practical answers for how to get my cat to drink more water, and a calmer, healthier multi‑cat home is within reach.

    \n

    FAQ

    \n

    \n

    \n

    How do I hydrate a cat that won’t drink or make a sick cat drink water?

    \n

    Offer wet food (high water content), try flavored water or a pet fountain, and — only under veterinary guidance — give small amounts of fluids with a feeding syringe. Contact your veterinarian if the cat refuses all fluids for more than 24 hours or shows signs of illness.

    \n

    \n

    \n

    \n

    How can I get my cat to drink more water?

    \n

    Provide fresh water in several wide, shallow bowls placed in quiet spots, serve wet food regularly, run a quiet pet fountain, and rotate safe flavors sparingly while monitoring intake.

    \n

    \n

    \n

    \n

    How can I trick or entice my cat to drink water?

    \n

    Try adding safe flavors like tuna water or low‑sodium chicken broth, offering broth ice cubes, and avoid milk and broths with garlic, onion, or high salt.

    \n

    \n

    \n

    \n

    How do I get my cat to drink water from a fountain?

    \n

    Choose a quiet fountain with a gentle flow, place it in a calm location, keep the flow shallow, and introduce the fountain gradually during play or mealtime so the cat becomes comfortable.

    \n

    \n

    \n

    \n

    My cat won’t drink water but eats wet food or drinks milk — is that okay?

    \n

    If your cat eats wet food (about 70–80% water), total fluid intake may be adequate. Milk is not a safe substitute. Monitor urine output and behavior, and contact your vet if you notice changes.

    \n

    \n

    \n

    \n

    What is the 3-3-3 rule for cats?

    \n

    The 3-3-3 rule for new cats: three days of hiding, three weeks of cautious exploration, and about three months for a cat to feel fully at home.

    \n

    \n

    \n

    \n

    \n”

  • healthy weight guidelines for cats: target weights

    healthy weight guidelines for cats: target weights

    Think your chunky kitty is just fluffy? Not quite. A little extra weight can slow their pounces and steal years of playful life. Check out our guide on Cat Training Treats.

    Too much weight raises the chance of diabetes (a blood-sugar disease), makes joints ache, and can lead to other health problems. Your cat might nap more, sneeze less in play, or struggle to jump up on a favorite perch, little signs that matter.

    This post gives clear target weights for common breeds, shows an easy wellness Body Condition Score check (BCS: a quick look and gentle feel to compare fat and muscle against your cat’s bones and overall shape), and points out the signs that mean a vet visit is urgent. Ever watched a cat try to squeeze into a box and fail? That’s a hint.

    Read on for simple, practical steps to keep whiskers twitching and paws springy. Worth every paw-print.

    Healthy Cat Weight: Immediate Benchmarks, Core Risks, and When to See a Veterinarian

    - Healthy Cat Weight Immediate Benchmarks, Core Risks, and When to See a Veterinarian.jpg

    There’s no single perfect weight for every cat. Most house cats sit around 8 to 12 lb (3.6–5.4 kg). Big-boned breeds like the Maine Coon often run 12 to 18+ lb, and Ragdolls can reach about 20 lb. Sleek breeds, like the Siamese, tend to be lighter. Age, sex, spay/neuter status, and diet all affect healthy weight ranges—, and medical history all help decide a healthy target.

    Body Condition Score (BCS) is the quick clinical way vets judge whether a cat’s body fat and muscle fit its frame. (BCS = compares fat and muscle to the cat’s bones and overall shape.) You can think of it like trying on clothes , does the coat look fitted, or is it snug and bulging? Vets will feel for ribs and check the waistline. Ever watched your kitty’s whiskers twitch as they chase a toy? That kind of play helps tell the story, too.

    Extra weight raises real health problems:

    • Diabetes and insulin resistance (when the body doesn’t respond well to insulin, so blood sugar stays high).
    • Arthritis and joint pain (extra pounds speed up wear and make movement sore).
    • Shortened lifespan (overweight cats often pick up more chronic illnesses).
    • Higher anesthesia and surgical risk (fat changes drug dosing, recovery, and wound healing).

    Top reasons to call your vet now: sudden, unplanned weight loss; a fast gain of more than 10% of body weight; not eating for 48 to 72 hours; or big changes in activity, appetite, or litter-box habits. A quick weigh-in is helpful, but BCS plus a medical check gives a clearer picture than the scale alone. See Monitoring for urgent-care details and step-by-step red-flag guidance.

    If you want a simple next step, try this: feel your cat’s ribs gently , you should feel them under a light layer of fat, not see them sticking out. Small changes now can make a big difference later. Worth every paw-print.

    How to Assess Cat Weight at Home: Body Condition Score, Home Weighing, and Practical Checks

    - How to Assess Cat Weight at Home Body Condition Score, Home Weighing, and Practical Checks.jpg

    Scales give you a number, but how your cat looks and feels tells the full story. The Body Condition Score helps you see whether weight is muscle or extra padding. Ever watched your kitty chase a sunbeam and wondered if they look a little heavy or just fluffy? This is the quick way to know.

    The nine-point Body Condition Score

    Body Condition Score (BCS) is a 1 to 9 scale vets use to judge fat and muscle on a cat’s frame, not just pounds. Two cats can weigh the same and look very different under the fur, so BCS shows the real picture.

    Scores 1 to 3 mean underweight. Bones stick out, there’s almost no fat, and muscle wasting (when muscles shrink and feel hollow) is common. Your cat may look bony and frail.

    Scores 4 and 5 are the sweet spot. You should feel ribs with light pressure under a thin fat layer, see a waist from above, and notice a tummy tuck from the side. Muscles look filled out, not sunken. Think of it like a softly padded sweater over a lean frame.

    Score 9 means obesity. There’s a heavy fat pad, no waist, a big belly bulge, and fat over the ribs so you can’t feel them. This can make moving and jumping harder.

    When you palpate (feel with your hands), ribs should be felt without pressing hard , they shouldn’t be sharp ridges. The lumbar spine and pelvic bones should not stick out. The belly should tuck up behind the ribs. To tell fat from muscle loss, notice texture: fat feels soft and squishy. Muscle wasting makes the spine and shoulders feel thin and hollow.

    Weighing at home and a simple trick

    A reliable home method is to weigh yourself, then weigh yourself holding the cat and subtract. Example: you weigh 150 lb, you plus cat weigh 158 lb, so the cat is 8 lb. Use the same scale, similar clothing, and the same time of day for each check so results are consistent.

    Vet scales are often more precise, but trends matter more than a single reading, so pick one method and stick with it. If you use a bathroom scale, take two or three readings and average them to cut down on wiggle-room error.

    Three quick daily checks

    • Run your hands lightly over the ribcage. Ribs should be felt under a thin layer of fat, not sharp or buried.
    • Look down from above. You should see a narrowing behind the ribs , a little waist.
    • Watch appetite and activity. A sudden drop in eating or play can be a sign something’s wrong.

    Worth every paw-print.

    Cat Weight Ranges and Breed-Specific Healthy Weights

    - Cat Weight Ranges and Breed-Specific Healthy Weights.jpg

    Breed, frame, age, and sex all help set what a healthy weight looks like for your cat. Big-boned or long-framed cats can carry more pounds without being overweight, so don’t just trust the scale. Pair numbers with a Body Condition Score (BCS, a simple way to check fat versus muscle; see How to Assess) to tell whether those pounds are muscle, fat, or both.

    Breed Typical healthy weight (lbs) Notes
    Domestic shorthair 6–12 Most land 8–12 lbs; size varies by frame and activity.
    Maine Coon 12–18+ Very large frame; males often heavier. Usually muscular.
    Ragdoll Up to ~20 Big and sturdy; 12–20 lbs can be healthy depending on frame.
    Persian 7–14 Compact body with dense coat; fur can hide extra weight.
    Sphynx 6–12 Lean, feels muscular since there’s little to no fur.
    British Shorthair 9–18 Rounder, stocky build with heavier bone and muscle.
    Exotic Shorthair 8–13 Like Persians but a bit chunkier; coat masks contours.
    American Shorthair 7–12 Medium, balanced frame; males usually larger than females.
    Devon Rex 6–9 Small, lithe body with fine muscle tone.
    Siamese 6–10 Sleek and long-bodied; tends toward the lighter end.

    Numbers are a starting point, not the whole story. Use BCS (see How to Assess) to read fat versus muscle, and watch trends over weeks instead of fixating on one weigh-in. Your cat should have a visible waist and a slight tummy tuck, and you should be able to feel ribs with a thin layer of fat over them.

    Males and neutered cats often run heavier, and many breeds hit their peak weight around 6–10 years. If your cat is above the listed range but feels solid and athletic with a clear waist, that weight can still be healthy for that frame. If a thick coat hides the shape, gently run your hands over the ribs and spine to check, think of it as a quick, respectful hug.

    When in doubt, weigh, score, and check with your vet so any plan to lose or gain weight fits your cat’s age, activity level, and medical history. Worth every paw-print.

    Calorie Needs and Safe Weight-Change Targets for Cats

    - Calorie Needs and Safe Weight-Change Targets for Cats.jpg

    A good rule of thumb is about 20 kcal per pound of body weight per day for most adult cats. Kcal (calories) is what we mean here. It’s just a starting point, not a strict law. Use it to get close, then tweak based on your cat’s age, activity level, and health history.

    For example, a 10-lb adult needs roughly 10 × 20 = 200 kcal/day for maintenance (the calories to keep current weight). If your target weight is 8 lb, that’s 8 × 20 = 160 kcal/day. Clinicians often reduce current intake by about 20-25% while moving toward the goal. So a 20% cut from 200 kcal lands at 160 kcal , neat, right? As your cat loses weight, recalc monthly using new weight × 20 kcal and adjust portions so calories follow the new target, not the old one.

    Go slow. Cutting calories too fast or letting a cat stop eating can cause hepatic lipidosis (a serious liver condition that happens when a cat suddenly stops eating and their body breaks down fat too quickly). Don’t crash-diet your cat. Work in small steps, watch appetite and behavior, and keep your vet involved. If appetite drops or weight changes unexpectedly, see Monitoring for hepatic lipidosis signs and refeeding guidance for next steps.

    Measure food accurately. Use a gram food scale (a small kitchen scale that reads grams) or the manufacturer’s calibrated scoop, and always check the label for kcal per cup or per can. Don’t forget treats , they add up fast , so include them in the daily kcal total. Try to measure with the same tool at the same time of day for consistent tracking.

    Think of this like tuning a radio – small knob turns, then listen and adjust. Your cat’s whiskers twitch, they pounce a bit more, and you tweak again. Worth every paw-print.

    Feeding Strategies, Diet Types, and Treat Control for Healthy Cat Weight

    - Feeding Strategies, Diet Types, and Treat Control for Healthy Cat Weight.jpg

    Measured meals at set times help keep cats full and protect their muscle. Aim for higher protein (protein helps build and keep muscle) and skip free feeding. Think of each meal like a short hunting session, structured feeding trims the waistline, cuts down on begging, and makes portions predictable.

    Wet food often wins for weight work. It usually has more protein and fewer carbohydrates (carbohydrates are sugars and starches), plus extra water so your cat feels full on fewer calories. Dry kibble packs more kcal (kcal means food calories) per cup and can be handy for timed dispensers. Prescription weight-loss diets (vet-prescribed medical formulas) are made to reduce calories while keeping protein and nutrients balanced; use them only with your veterinarian, especially if your cat has diabetes or other metabolic issues. Wet diets can help slow, steady weight loss and protect muscle during the process. Ask your vet about the right plan.

    Portion control tools make success repeatable. Use a gram kitchen scale, manufacturer-calibrated scoop, or an automatic feeder that sends out set portions. In homes with multiple cats, feed in separate rooms or use microchip feeders (they read a cat’s implanted microchip and open only for that cat). Swap high-fat treats for low-calorie options, or use regular kibble as rewards during play so you’re not adding extra calories.

    Slow eating helps, too. Try a slow-feeder bowl or turn mealtime into a hunt with puzzle toys. Scatter tiny piles of food across a flat surface so fast eaters have to move between bites, or put small portions in each cup of a muffin pan. Ever watched your cat’s whiskers twitch as she stalks a scattered crumb? Cute, and calorie-smart. I once watched Luna leap six feet for a muffin-pan piece, worth every paw-print.

    For step-by-step how-tos on feeder toys, slow-feeder bowls, and the muffin-pan trick, check how to use feeder toys for slow feeding and start implementing these today.

    Exercise and Enrichment to Support a Healthy Weight for Cats

    - Exercise and Enrichment to Support a Healthy Weight for Cats.jpg

    Short daily play sessions of about 5 to 10 minutes can make a big difference. They burn calories, keep muscle tone, and satisfy your cat’s hunting instincts, think whiskers twitching, a quick pounce, the little victorious thud when they catch the toy. Quick bursts of chase or pounce several times a day are easier to fit into a busy schedule than one long workout, and they help stop boredom that leads to extra snacking.

    Turn play into routine so it feels natural, not a chore. Try a morning wiggle, a midafternoon tease, and a brief evening chase. Ever watched your cat suddenly focus like a tiny tiger? It’s delightful. Small, regular sessions win over marathon play once in a blue moon.

    Sample 4-week activity plan for an indoor cat

    Week 1: Two 5-minute wand sessions daily. A wand toy (a stick with feathers or a lure) lets your cat stalk and leap. End each session with a “capture” , a stuffed toy or a couple pieces of kibble (dry cat food) so they feel successful.

    Week 2: Keep the wand routines and add one meal in a food puzzle (a toy that makes your cat work for kibble) or a slow feeder (a dish that spaces out bites). It makes eating part of play, so calories are earned.

    Week 3: Add a short supervised harness walk or two focused climbs on the cat tree (two climbs of 3 to 5 minutes). Rotate toys to keep things novel, new smells and textures make play irresistible.

    Week 4: Combine a morning wand session, an afternoon puzzle meal, and an evening short walk or climb. Track active minutes each day and tweak what your cat likes best. Small, steady increases beat huge one-off workouts.

    Older cats need gentler moves. Swap full-speed chases for short wand taps, slow target games, or gentle climbs on low platforms. If your cat has arthritis or mobility limits, check with your vet about safe options and see importance of play for senior cats for low-impact ideas. See Monitoring for how to track progress and when to adjust activity.

    Monitoring Progress: Weekly Weighing, BCS Tracking, Red Flags and Veterinary Partnership

    - Monitoring Progress Weekly Weighing, BCS Tracking, Red Flags and Veterinary Partnership.jpg

    Weigh your cat once a week and do a full Body Condition Score (BCS) check about once a month. BCS (Body Condition Score – a quick visual and hands-on way to tell fat versus muscle) shows whether the pounds you see slipping away are fat or muscle. Weekly weights help you spot trends. Keep the same routine so numbers stay comparable.

    Keep a simple log you’ll actually use: date, weight, a short BCS note, grams of food offered, treats (grams), and minutes of daily play. Try weighing Sunday morning after your cat uses the litter and before breakfast. Jot the full BCS once a month and glance at the trend at month’s end. Ever watched your kitty’s whiskers twitch as the scale moves? Little details matter.

    Change food portions slowly and only after you see a consistent trend for 2 to 4 weeks. Small adjustments. Then watch the weight and the BCS. It’s safer, and less stressful for your cat.

    Red flags that need quick veterinary contact:

    • Not eating for more than 48 to 72 hours (prolonged anorexia – not eating).
    • Rapid, unexplained weight loss of about 5% or more in a short time.
    • Sudden, severe lethargy, repeated vomiting, or big changes in litter-box habits.
    • Fast weight gain of 10 to 20% (this can mean fluid buildup or other issues).

    One serious risk to know is hepatic lipidosis (fatty liver disease – when fat floods the liver faster than it can process). It can happen when a cat stops eating. You might notice yellowing of the gums or skin (jaundice), high liver values on bloodwork (liver enzymes), vomiting, and severe weakness. Vets use blood tests and sometimes imaging to diagnose, and they treat quickly because a cat can tip into liver failure fast.

    Safe refeeding and early vet care are methodical. If a cat is at risk, vets usually start a controlled calorie plan with small, frequent meals or assisted feeding (syringe or feeding tube – a small tube that delivers food directly to the stomach). They’ll monitor daily weights and appetite and run serial bloodwork to follow liver enzymes and electrolytes. Hospital care often includes IV fluids (intravenous fluids), anti-nausea meds, and assisted feeding when anorexia is prolonged or liver values rise. If a feeding tube is placed, calories are increased in measured steps until your cat is reliably eating by mouth.

    Work with your veterinarian to set a target weight, agree on a monitoring cadence (weekly weights, monthly BCS, labs as needed), and pick clear escalation thresholds so you both know when to act. Worth every paw-print.

    Underweight and Growing Cats: Causes, Safe Gain Plans, and Warning Signs

    - Underweight and Growing Cats Causes, Safe Gain Plans, and Warning Signs.jpg

    Sometimes a cat is thin because eating hurts. Dental disease can make chewing painful. Or the stomach and intestines (gastrointestinal problems) or parasites (tiny critters like worms) stop food from being used. An overactive thyroid gland (hyperthyroidism) can burn calories too fast. Kidney disease (when the kidneys can’t clean the blood well), cancer, stress, or meal-time competition at home can all steal weight. And yes, sometimes it’s just not enough calories for growth or recovery.

    For steady, safe weight gain, vets recommend slow changes to food and feeding style. Offer canned, nutrient-dense food (more protein and calories per bite). Try vet-approved high-calorie toppers and give smaller, more frequent meals so the stomach never gets empty and bored. Warm a small scoop briefly to boost aroma and interest. Hand-feeding short sessions or spoon-feeding can re-teach eating. If a cat won’t or can’t eat reliably, vets may use assisted feeding like syringe feeding (pushing food gently with a syringe) or a feeding tube (a small tube that delivers food straight to the stomach) under professional care. Rotate textures, pâté, chunks in gravy, soft morsels, to find what makes your cat lick its lips, and measure portions so you know the daily calories delivered.

    Watch for these red flags. If your cat stops eating for more than 48 to 72 hours, call the vet, don’t wait. Prolonged anorexia can lead to hepatic lipidosis (fatty liver disease) and becomes an emergency. Rapid weight loss, getting more tired, or trouble swallowing also needs quick attention.

    Your vet will usually make a stepwise refeeding plan with target calories, regular weigh-ins, and repeat exams and labs. Common tests include bloodwork (CBC, a complete blood count, and a chemistry panel to check organs), thyroid testing, a stool test for parasites (fecal parasite check), a dental exam, and imaging like X-rays (radiation images) or ultrasound (sound waves that make pictures of the organs) to look for hidden problems. Gains are staged over weeks to months, not days, so muscle and appetite come back safely. Worth every paw-print.

    Final Words

    In the action, we ran through immediate weight benchmarks, how to check body condition at home, breed-specific ranges, calorie math, feeding tactics, play plans, and the monitoring steps that flag urgent vet care.

    We gave practical tools: the weigh-yourself trick, BCS (body condition score) palpation cues, the 20 kcal-per-pound starting rule, slow feeders, short daily play sessions, and treat control for multi-cat homes.

    Keep a simple log and work with your veterinarian, because healthy weight guidelines for cats make steady progress doable. Small steps, big purrs.

    FAQ

    Frequently Asked Questions

    What is the normal weight for a cat in kg?

    The normal weight for a cat in kg varies by breed and build. Many domestic cats fall about 3.6–5.4 kg (8–12 lb), with large breeds commonly heavier.

    What is a cat weight chart by age and how does normal cat weight vary by age?

    A cat weight chart by age shows typical weights for kittens, adults, and seniors. Domestic adults often sit 3.6–5.4 kg; kittens grow fast. Use BCS (body condition score, a fat vs muscle check) for accuracy.

    What are the average male and female cat weights in kg?

    Average male and female cat weights differ. Males often range about 4–5.5 kg (9–12 lb), females about 3.6–4.5 kg (8–10 lb). Breed, age, and neuter status shift those numbers.

    How do I use healthy weight guidelines or a calculator, and how much should I feed a cat by weight?

    Using healthy weight guidelines, estimate maintenance at roughly 20 kcal per pound (kcal = food‑energy unit). Then reduce intake about 20–25% for slow weight loss, adjust monthly, and check with BCS and your veterinarian.

    What is the 3-3-3 rule for cats?

    The 3-3-3 rule for cats describes adjustment phases: three days hiding and settling, three weeks learning home routines, and three months to feel secure and show true personality.

    Is 12 pounds or 20 pounds too heavy for a cat?

    Whether 12 or 20 lb is too heavy depends on breed and frame. Twelve pounds may be overweight; twenty pounds often means obesity unless the cat is very large. Use BCS (body condition score, a fat vs muscle check) to judge.

  • diet for active cats: feeding guidelines

    diet for active cats: feeding guidelines

    Think your active cat can eat the same as a couch cat? That’s a really common mistake. Ever watched your kitty bolt across the room and wondered where all that energy comes from?

    Active cats usually need about 30 kcal per lb (kcal = food Calories on labels), not the 20 kcal per lb many owners assume. So a 10-lb (pound) sprinter needs roughly 300 kcal a day, not 200. That extra hundred calories can be the difference between happy zoomies and slow, bored loafing.

    I’ll give you clear feeding targets, simple calorie math, and protein (muscle-building nutrient) focused tips so you can fuel the zoomies, protect lean muscle, and avoid accidental weight gain. No more guessing, um, promise.

    Worth every paw-print.

    At-a-glance feeding targets for adult active cats

    - At-a-glance feeding targets for adult active cats.jpg

    Quick rule of paw: aim for about 20 kcal per pound of your cat’s ideal body weight for everyday maintenance, and about 30 kcal per pound for very active or outdoor adults. (kcal = kilocalories, the “Calories” you see on pet-food labels.)

    So, math in plain terms: a 10-lb adult at maintenance needs roughly 200 kcal/day (20 × 10). A highly active 10-lb cat needs about 300 kcal/day (30 × 10). Simple. Really.

    Use your cat’s ideal body weight for planning, not their current overweight weight. For precise needs, use the RER formula: RER = 70 × [body weight in kg]^0.75 (RER = resting energy requirement; kg = kilograms). Then apply activity multipliers, check the Calorie calculation and portion sizes section for those numbers and step-by-step guidance. And, um, ask your vet if you’re unsure.

    Macronutrient headline: more protein for muscle (protein builds and preserves muscle), enough fat for steady energy (fat = concentrated calories), and limited carbs so you don’t overload calories. Think of it like fueling zoomies and long naps, balanced, muscle-supporting, and not too many extra carbs. Worth every paw-print.

    Calorie calculation and portion sizes for active cats (sample portion chart)

    - Calorie calculation and portion sizes for active cats (sample portion chart).jpg

    Base your cat’s daily food on their total calorie need, not just what the bag says. Start with the RER formula: RER = 70 × (body weight in kg)^0.75. RER means resting energy requirement (the bare minimum calorie amount your cat needs at rest). Then pick an activity factor with your veterinarian and multiply RER by that number to get MER (maintenance energy requirement, the daily calorie goal for an active cat). Think of the product label as a rough map. Measure, watch, and adjust.

    Quick conversion tips: assume dry kibble is about 400 kcal per cup (kcal means food calories) and a 3-oz wet can is about 80 kcal, but always check your brand’s label. Use a standard 8-oz measuring cup for quick scoops, or better yet weigh food on a kitchen scale for accuracy. Log treats and toppers too. Start with the calculated totals, then check weight and body health condition after 2 to 3 weeks and tweak portions by about 10 to 20 percent if your cat is gaining or losing too quickly.

    Pick the activity multiplier with your vet based on what your cat actually does, short indoor zoomies? Use a lower multiplier. Outdoors patrols or working cats? Use a higher one. Weigh-ins every couple weeks keep you from guessing. Worth the few minutes. Your cat will thank you with extra purrs.

    Body weight (lb) Activity level Calories/day (approx) Dry food (cups/day, assume 400 kcal/cup) Wet food (oz/day, assume 3-oz cans about 80 kcal)
    6 lb Maintenance / Active 120 / 180 kcal 0.30 / 0.45 cups 4.5 oz / 6.75 oz
    8 lb Maintenance / Active 160 / 240 kcal 0.40 / 0.60 cups 6 oz / 9 oz
    10 lb Maintenance / Active 200 / 300 kcal 0.50 / 0.75 cups 7.5 oz / 11.25 oz
    12 lb Maintenance / Active 240 / 360 kcal 0.60 / 0.90 cups 9 oz / 13.5 oz
    14 lb Maintenance / Active 280 / 420 kcal 0.70 / 1.05 cups 10.5 oz / 15.75 oz
    16 lb Maintenance / Active 320 / 480 kcal 0.80 / 1.20 cups 12 oz / 18 oz

    Protein, fat and micronutrient priorities in diets for active cats

    - Protein, fat and micronutrient priorities in diets for active cats.jpg

    Active cats need food built around high-quality, easy-to-digest protein. Think named meats first – chicken, turkey, salmon – not vague words like "meat" or "animal." Named proteins usually mean a better mix of amino acids (the building blocks of muscle) so your cat keeps its lean muscle through all that zooming and play. Look for an on-package statement that the food is complete and balanced (AAFCO – Association of American Feed Control Officials) and check the guaranteed analysis numbers, like crude protein and crude fat percentages. Higher protein numbers usually help maintain muscle during heavy play and training.

    Fat is your cat's concentrated fuel. It gives steady calories between sprints and helps the body absorb fat-soluble vitamins. Look for clear fat sources on the label and sensible calorie density so you’re fueling zoomies without adding too many carbs. Omega-3s – EPA and DHA (long-chain fish oils that reduce inflammation) – are especially useful. They support joints, soothe exercise-related inflammation, and keep coats shiny. It’s nice when food lists digestibility claims too – digestibility means how much of the food your cat actually absorbs.

    Supplements can plug real gaps, but use them carefully. Fish oil, specific amino-acid supplements, and probiotics can help when a diet falls short, but too many extras can unbalance nutrition and cause problems. Avoid homemade or vegetarian diets unless a board-certified veterinary nutritionist wrote the recipe – cats have unique needs and missing one nutrient can cause serious issues. When in doubt, ask your veterinarian before adding supplements or changing core foods. Seriously, ask them.

    Taurine, omega-3s and amino-acid priorities

    Taurine is a must-have amino acid for cats – it’s essential for heart and eye health. Low taurine causes real disease, so double-check that the diet supplies it. EPA and DHA (omega-3 fatty acids from fish oil) calm exercise-related inflammation, help joint comfort for active cats, and keep fur glossy and soft. Favor foods with named animal proteins, digestibility claims, and that AAFCO complete-and-balanced line – those three things together usually point to better protein quality.

    If your cat trains hard, competes, or has special medical needs, chat with your vet about targeted supplements and consider a nutritionist consult before trying homemade plans. Ever watched your kitty chase shadows? Feeding smart makes those moments even better. Worth every paw-print.

    Wet vs dry food and hydration strategies for active cats

    - Wet vs dry food and hydration strategies for active cats.jpg

    Wet food usually wins when it comes to moisture and taste. That rich, savory smell and soft texture get many thirsty cats to eat more fluids, which is perfect after a big play session when they need a quick rehydrate-and-recover meal. Ever watched your kitty lap up every last bit? Yeah, that.

    Dry kibble (dry, crunchy cat food) is handy. It’s easy to portion, stays fresh on the counter longer, and that satisfying crunch appeals to some chewers. If your cat is active, pick high-protein, low-carb (low-carbohydrate) kibbles so they get the energy they need without extra carbs.

    Simple hydration tricks that actually work: give at least one canned meal a day, canned food adds real moisture. Stir in a splash of warm water or a little low-sodium broth (broth with very little added salt) to make meals juicier and more tempting. For busy days, toss an unbreakable wet meal before you head out, that’s ten minutes of safe play and fluid intake.

    Place water where your cat already prowls. Put multiple fresh-water bowls around the house so your cat “finds” water during patrols. Try a cat water fountain (a circulating dish that keeps water moving and smelling fresher) and swap bowl types, some cats prefer shallow dishes, others a deeper bowl. Enrichment feeders (puzzle-style bowls that slow eating) can also help, movement during mealtime often makes cats sip more afterward.

    Food safety and timing matter. Don’t leave wet or raw-fed portions at room temperature for more than about two hours, and pop opened cans into the fridge right away. Dry kibble can sit out longer, but follow the maker’s guidance and toss any stale or contaminated food. For conversion math and portion tables, see the Calorie calculation and portion sizes section.

    Meal timing, pre- and post-exercise feeding for active cats (sample schedules and treat limits)

    - Meal timing, pre- and post-exercise feeding for active cats (sample schedules and treat limits).jpg

    Keep it simple. For most adult cats, two measured meals a day, once in the morning and once in the evening, matches their wake-and-hunt rhythm and makes portion control easy. If your cat bursts into short, intense play sessions, try three smaller meals spaced through the day so they have steady fuel without one heavy plate that sits on the tummy. Ever watched your kitty chase shadows? This helps them stay energized without overeating.

    Give a tiny pre-play snack about 15 to 30 minutes before a high-energy session to top off quick energy. A spoonful of wet food (canned food with extra moisture) or a few kibbles (dry food pieces) works great. Then after play, offer the main meal within 20 to 40 minutes to help recovery and hydration. Wet food is especially nice here because it adds moisture.

    Avoid a big meal right before a sprint. Small snack, lots of praise, then the main meal after cool-down. Really.

    Sample feeding schedules for active cats

    1. Two-meal adult schedule with a pre-evening-play snack
      Morning: give half the daily calories at wake. Evening: offer a small snack about 20 minutes before a 10 to 15 minute play burst, then serve the rest of the meal after your cat winds down.

    2. Three-meal spacing for highly active indoor cats
      Breakfast: 30% of daily calories (calories mean the energy your cat uses). Midday mini-meal: 20% before a short training or play session. Dinner: the remaining 50% after evening play.

    3. Mixed feeding plus puzzle-feeder approach for grazing plus measured meals
      Serve two measured canned meals and put the leftover dry portion in a puzzle feeder (a toy that hides food and makes your cat work for it) so your cat gets bits of food while staying busy.

    Treats should stay under about 10% of daily calories (yes, count them in the total). Pick high-protein, low-calorie treats for training so you don’t tip the balance. Worth every paw-print.

    Monitoring body condition, weight tracking and when to adjust an active cat’s diet

    - Monitoring body condition, weight tracking and when to adjust an active cats diet.jpg

    Use a simple body condition score (BCS) , a quick scale to judge fat versus muscle , and do hands-on checks to see where your cat sits. You should be able to feel the ribs with a light touch but not see them as sharp ridges. From above you want to see a clear waist. From the side there should be a gentle abdominal tuck (a slight upward curve under the belly). If the ribs are hard to feel, your cat is carrying extra fat; if the ribs are very obvious, your cat may need more calories (energy in food) or a vet visit.

    Weigh your cat once a week at the same time of day , morning before food is best , and write the numbers down so you spot trends, not one-off blips. Small changes are safer: tweak portions by about 10-20% and check back after two weeks to see how things move. For planned weight loss, most vets prefer gradual programs that cut total daily calories by up to about 25% while protecting lean muscle (muscle that helps your cat move) and keeping activity steady.

    Watch for red flags that mean a vet check is needed:

    • sudden changes in appetite
    • unexplained weight loss or gain
    • big changes in water use
    • vomiting or diarrhea
    • trouble jumping or moving like they used to
    • a dull, rough coat

    Obesity is common , about 61% of U.S. cats are overweight or obese , and extra weight raises the risk of diabetes and joint problems. So if something feels off, sooner vet attention can save a lot of trouble and help your cat get back to full zoomies. Ever watch them sprint from the kitchen to the couch and think, wow , lets keep them that happy?

    Special feeding considerations for active kittens, seniors, outdoor and working cats

    - Special feeding considerations for active kittens, seniors, outdoor and working cats.jpg

    Kittens are tiny calorie engines. Aim for about 50 to 60 kcal per pound of ideal body weight (kcal = food Calories). Feed small, frequent meals , about 3 to 4 times a day while they grow, so they have steady energy for play and development. Ever watched a kitten crash mid-play? That sudden nap is often hunger.

    Nursing queens need extra calories and usually more frequent feedings, so check with your veterinarian to set daily targets during pregnancy and lactation (nursing). Keep a close eye on body condition and litter-box output (poop frequency and consistency). Rapid weight swings or loose stools mean slow the changes and call your vet.

    Active outdoor or working adults often need about 30 kcal per pound of ideal body weight because they burn extra energy patrolling, hunting, or doing chores. Adjust calories for seasonal workload , colder months usually call for more fuel, light-duty times need less. Use the cat’s ideal weight when you calculate needs, not a temporary heavy or thin number, and measure portions so you don’t overshoot during busy seasons.

    Senior active cats may still need similar calories, but they can lose appetite, drop weight, or develop dental or medical issues that make eating hard. Offer softer food or smaller kibble pieces if teeth hurt, and consider therapeutic formulas (special vet diets for health problems) when your vet recommends them. When you change diets, do it gradually over about 7 to 10 days by mixing increasing amounts of the new food with the old, and watch weight, litter-box output, appetite, coat shine, and energy. If any of those checkpoints shift suddenly, call your veterinarian for a plan , better safe than sorry.

    Final Words

    Quick numbers: about 20 kcal (food calories) per pound of ideal body weight for maintenance, and about 30 kcal per pound for active or outdoor cats. A 10-lb cat = ~200 kcal/day maintenance, ~300 kcal/day when active.

    Use ideal body weight, not current obese weight. See the Calorie calculation section for the RER (resting energy requirement) and activity multipliers.

    Aim for higher protein, enough fat, limited carbs. Hydrate with wet meals or a fountain, time feedings around play, and track weight as you tweak. Keep this diet for active cats: feeding guidelines handy , happy, active kitties.

    FAQ

    Frequently asked questions

    How much dry food should I feed my cat per day and how does that compare to wet food?
    How much to feed depends on calories: about 20 kcal per pound of ideal body weight for maintenance and about 30 kcal per pound for active/outdoor cats. Dry kibble ≈ 400 kcal per cup; a 3-oz wet can ≈ 80 kcal.
    <dt>What does a cat diet chart by age look like?</dt>
    <dd>
      Kittens need roughly 50–60 kcal per pound and 3–4 meals daily. Adults need about 20 kcal per pound (30 kcal/lb for active/outdoor cats). Seniors may need portion or diet adjustments depending on health.
    </dd>
    
    <dt>How do I calculate my cat's calorie needs with a feeding calculator?</dt>
    <dd>
      Start with RER = 70 × (body weight in kg)^0.75 (resting energy requirement), then multiply by an activity factor to get daily calories. Ask your vet to choose the right multiplier for your cat.
    </dd>
    
    <dt>What can I feed a cat without commercial cat food and are homemade diets safe?</dt>
    <dd>
      You can feed a cat homemade diets, but they must be balanced and ideally formulated by a veterinary nutritionist. Plain human meals often lack taurine and other essential nutrients, so work with a pro to ensure safety.
    </dd>
    
    <dt>What are the cat nutritional requirement percentages for protein, fat and carbs?</dt>
    <dd>
      Cats need a diet high in animal protein, moderate-to-high fat, and minimal carbohydrates. Look for named animal protein sources, digestibility claims, and an AAFCO "complete and balanced" label.
    </dd>
    

  • Raised Cat Bowls: Pros and Cons

    Raised Cat Bowls: Pros and Cons

    Think a raised cat bowl fixes every feeding problem? Not quite. It helps a lot of cats, but not all of them, um, claw-tastic solved.

    If your cat is older, has arthritis (joint inflammation that makes moving painful), or gags or vomits after meals, a raised bowl (also called an elevated feeder) can make mealtime easier. It reduces neck and joint strain. It can cut down on post-meal vomiting. And it eases whisker fatigue (when whiskers keep rubbing the bowl sides and stress your cat), so meals stay calmer and cleaner.

    For a healthy, spry young cat, though, a raised bowl usually gives little benefit. Ever watch a kitten eat like a tiny gymnast? They’re fine on the floor.

    Next, I’ll walk you through the clear pros and cons and give a quick verdict so you can decide fast. Quick tip: if mobility or gagging is an issue, it’s worth trying; if not, you might save your money.

    Raised Cat Bowls: Pros and Cons

    - Quick verdict Should you use a raised cat bowl.jpg

    Raised cat bowls are great for older cats, kitties with arthritis or mobility limits, and cats that gag or vomit after eating. Healthy young cats often don’t get much practical benefit, so you might skip them for a spry kitten.

    Quick verdict: this is a short decision-first snapshot to help you decide fast. More detail follows below.

    Pros

    • They lift the bowl to a gentler angle that can ease neck and joint strain for arthritic or senior cats. Your cat may eat with less hunching and more comfort.
    • Some vets and owners notice fewer post-meal vomiting episodes when food is raised, so it can help tummy trouble in some cats.
    • Pairing a raised feeder with a wide, shallow dish reduces whisker contact and whisker fatigue (when whiskers keep hitting bowl sides and stress the cat). Sensitive kitties often prefer it.
    • Elevating the dish keeps food off the floor, so there’s less spilled kibble and fewer crunchy trails through the house.
    • Many raised stands are adjustable, so you can set rim height to your cat’s measured chin position for a custom fit. Ever tried measuring your cat’s chin height? It’s easier than you think.
    • A stand makes floor cleaning simpler since the bowl sits on a platform instead of directly on the ground. Less scooting, more sparkle.
    • Choose a good bowl material and it’ll last. Stainless steel (rust-resistant metal) is hygienic, and silicone (flexible, non-slip rubber-like material) is durable and soft on paws.

    Cons

    • Some cats refuse a new elevated spot at first and need time to adapt. Patience and treats help, but a stubborn kitty might hold out.
    • For picky eaters a raised posture can slow them down, and that change might annoy some cats. If your cat eats fast, watch for stress.
    • If the height is wrong it can make swallowing awkward for some cats, so proper measurement matters.
    • Deep or narrow bowls on a stand can still cause whisker contact if the design is poor, so pick a wide, shallow dish when possible.
    • Lightweight or wobbly stands can tip if they’re not weighted or anti-slip, and nobody likes a toppled bowl.
    • You might spend extra on adjustable stands and replacement parts that a healthy young cat doesn’t need, so consider cost vs benefit.
    • If your cat gags or vomits after switching, stop the trial. The raised bowl may simply not suit that cat.

    Worth every paw-print.

    Read the deeper guides on Measuring and choosing height, How elevated bowls work, Whisker fatigue, Materials, stability, and cleaning, and Risks and transition checklist to pick and trial the right raised feeder.

    How elevated cat bowls work: mechanism, clinical evidence, and vet guidance

    - How elevated cat bowls work mechanism, clinical evidence, and vet guidance.jpg

    Elevated bowls change the angle between your cat’s head, neck, and torso so the bowl rim sits closer to the chest. That reduces neck flexion (how much the neck bends) and lessens throat compression. When the rim is closer to the chest it can straighten the line of the esophagus (the food tube), so eating is less of a stretch for stiff or sore kitties. Picture your cat lowering its head less and taking food with an easier, more natural swallow.

    Some vets and studies report fewer post-meal vomiting episodes with raised feeders, but results aren’t the same for every cat. In plain terms: it helps some cats, doesn’t change others, and in a few cases there’s no clear difference. Think of the evidence as suggestive, not conclusive. Factors like age, neck stiffness, dental pain, or underlying illnesses can change the outcome.

    Vets recommend an individualized assessment and a careful trial. Before you try a raised bowl, measure your cat’s standing chin height – floor to bottom of chin – in centimeters and inches (for example, 20 cm / 7.9 in). Note baseline meal duration (how long each meal takes), count any vomiting or regurgitation events (regurgitation is food that comes up without forceful vomiting), and watch normal feeding posture. If your cat has a history of aspiration (food or liquid getting into the lungs) or reflux (acid or stomach contents coming back up), talk with your veterinarian first.

    During a trial, compare meal time and vomiting frequency to your baseline and make small adjustments to rim height. Start with the rim about level with the standing chin or a little lower, then raise or lower in small steps while tracking results for a week or two at each height. Look for signs like coughing, extra pawing at the mouth, or harder chewing , if those show up, stop the trial and call your vet. Keep notes, and you’ll see if the change feels like relief or just a new way to play with food.

    Quick tip: for busy days, try the raised bowl for a few meals before committing. Sometimes your cat’s reaction tells the whole story. Worth a try for stiff or older cats , could be claw-tastic for comfort.

    Whisker fatigue and bowl design for flat-faced and whisker-sensitive cats

    - Whisker fatigue and bowl design for flat-faced and whisker-sensitive cats.jpg

    Whisker fatigue happens when your cat’s long facial whiskers brush or press against a narrow or deep bowl rim over and over. It can feel like tiny pokes around the muzzle and make eating fussy or stressful. Whiskers grow and shed in cycles, so small changes in how the rim touches them can change comfort over weeks as whiskers wear or get replaced. how often do cat whiskers fall out

    When you pick a raised bowl, pay attention to three simple measurements: bowl diameter, rim depth, and rim-to-food distance. Aim for a bowl diameter at least 1–2 cm (about 0.4–0.8 in) wider than your cat’s whisker span (the distance from whisker tip to whisker tip) so whiskers don’t rub the sides. Choose a shallow rim under 2 cm (0.8 in). And keep the rim-to-palate distance small. By rim-to-palate distance I mean the gap from the bowl lip to the roof of the mouth. That way your cat doesn’t have to shove its nose into the dish.

    Flat-faced breeds, called brachycephalic (flat-faced breeds like Persians or Exotics), need the shallowest and widest dishes so they can reach food without jamming their nose into the rim. Long-whiskered cats want extra side room so those lovely whiskers can splay out without brushing the bowl. Think of it as giving them breathing room while they eat.

    Test a bowl by watching your cat from the side and the front. Whiskers should spread naturally and not touch the rim. The head should stay relaxed while your kitty eats. Ever watched your cat’s whiskers twitch as a morsel rolls away? That’s the moment you’ll know the fit is right.

    Worth every paw-print.

    Measuring and choosing the right raised cat bowl height (step-by-step, metric and imperial)

    - Measuring and choosing the right raised cat bowl height (step-by-step, metric and imperial).jpg

    Start by measuring – it’s the baseline for any change and helps you pick a stand that actually fits your cat. Simple, honest measurement saves you a lot of trial and error later.

    Small and kitten sizing

    Have the kitten stand naturally on a flat floor and gently hold its chin level while you measure from the floor to the bottom of the chin with a tape measure or ruler. Record the number in centimeters (cm – metric unit) and inches (in – imperial unit) and note the date. For tiny kittens, try an initial low elevation of about 5-8 cm (2.0-3.1 in) above the floor so the rim doesn’t force the head up. Watch how the kitten reaches and chews during the first few meals and jot down any awkward stretching or pawing.

    Average adult cats

    Measure floor-to-chin while the cat stands relaxed, and record to the nearest 0.5 cm or 1/8 in. (Quick conversion: 1 in = 2.54 cm.) Pick a stand that lets you set the rim at the recorded chin height, or up to 2 cm (about 3/4 in) lower if the cat seems to prefer a slight downward angle. Test it at mealtime – the head should stay neutral, not tipped back or hunched forward. Write the measured values and your chosen rim position in a log so you can compare later.

    Large breeds and seniors

    Big breeds and older cats with stiff necks need a bit more fine-tuning. Start at the recorded chin height and then adjust in small steps of 1-2 cm (1/8-1/4 in) while watching chewing and swallowing. Raise or lower until the cat eats without pawing at the mouth or stretching the neck. Test during a meal, tweak in those small increments, and keep your notes. Worth every paw-print.

    Ever watched your kitty suddenly have an easier bite after a tiny change? Yeah, me too.

    Risks, adaptation signals, and the 7–14 day monitoring checklist

    - Risks, adaptation signals, and the 714 day monitoring checklist.jpg

    When you move your cat to a raised bowl, keep an eye on them. Small changes in behavior give big clues about whether the new bowl helps or causes problems. Log what you see every day for 7–14 days after the first use so you have clear before and after notes. Use the first week as your main signal window, and stretch to two weeks if things are still fuzzy.

    Track these things each meal or at least once daily:

    • Meal duration (how many minutes each meal takes).
    • Amount consumed (grams or a fraction of the usual portion).
    • Vomiting and regurgitation events (vomiting is forceful expulsion; regurgitation is food that comes back up without heaving).
    • Drooling episodes (note when it happens and how often).
    • Stool consistency (firm, soft, diarrhea, or other changes).
    • Energy level and activity (normal, low, or unusually restless).
    • Any avoidance of the bowl (refusing to approach or eat from it).

    Write down times and short notes, like “ate half portion, drooled after 5 minutes.” A quick scale photo or a one-line diary entry helps a lot. Ever watched your kitty hesitate, sniff, then walk away? Jot that down.

    Call your veterinarian right away if you see repeated forceful vomiting, signs of choking or aspiration (coughing, gagging, or breathing trouble during meals; aspiration means food getting into the airway), refusal to eat for 24 hours or more, rapid weight loss, or any breathing changes during or after eating. Bring your daily log when you go, because those recorded metrics help the vet figure out next steps. Worth every paw-print.

    Materials, stability, and cleaning for raised cat bowls (hygiene and durability)

    - Materials, stability, and cleaning for raised cat bowls (hygiene and durability).jpg

    Choose materials with your eyes open. Stainless steel (a rust-resistant metal) is tough, fights bacteria, and is usually dishwasher-safe. Ceramic (hard fired clay) looks nice but can chip, and low-quality glazes might have lead. Silicone (flexible, rubber-like material) and bamboo (a fast-growing wood-like plant) are lightweight and gentle on floors. Plastic (a synthetic material) can scratch and trap odors, so if you go that route pick BPA-free (no bisphenol A). Trade-offs matter, think about long-term wear, not just the cute pattern.

    Wash bowls every day with hot, soapy water. For stainless models you can also use a dishwasher cycle. Once a week do a deeper sanitize if the material allows, boil the bowl or soak it in a dilute bleach solution (1 part household bleach to 30 parts water) and rinse thoroughly. Follow the maker’s care instructions; some materials don’t like intense heat or harsh cleaners.

    Replace any bowl or stand that has cracks, deep scratches, chips, or staining that won’t come out. Those spots hide bacteria and weaken the piece. Worth every paw-print to keep things safe.

    Antimicrobial coatings (a surface treatment that slows bacteria) are handy between washes, but treat them as extras, not replacements. They wear down over time and can’t take the place of scrubbing and regular sanitizing. Follow the product’s care notes and swap items when the coating looks worn.

    Look for stability when you buy and set up a raised feeder. Anti-tip designs with a low center of gravity, a secure bowl attachment, non-slip feet, and a weight capacity higher than your cat’s size keep the setup from wobbling or flipping during enthusiastic meals. Ever watched your cat nudge a wobbly bowl? Not fun. Choose a base that hugs the floor and stays put.

    Buying checklist and 6-step transition plan (actionable criteria + reference to Risks monitoring)

    - Buying checklist and 6-step transition plan (actionable criteria + reference to Risks monitoring).jpg

    This quick summary lists the must-have features and a simple six-step trial plan to help your cat settle into a new elevated feeder. For exact measuring steps see Measuring and choosing height. For the 7-14 day logging routine and warning signs see Risks monitoring checklist.

    • Stable anti-tip design and a low center of gravity so the stand won’t tip when your cat jumps up. Keeps food where it belongs, not on the floor.
    • Adjustable height range that includes your measured chin height (see Measuring and choosing height) so your cat eats comfortably.
    • Bowl material options: stainless steel (durable metal that resists rust), ceramic (heavy, chip-resistant like a coffee mug), silicone (soft, flexible like a rubber spatula). Pick what fits your cat and your cleaning routine.
    • Bowl diameter and rim shaped to clear whiskers and avoid contact, see Whisker fatigue (whisker fatigue is the stress cats feel when their whiskers constantly rub against bowl sides).
    • Secure bowl attachment that locks to the stand so bowls don’t pop out during enthusiastic eating.
    • Non-slip feet or rubber base to stop sliding on tile or hardwood floors. No skids, fewer spills.
    • Weight capacity rated above your cat’s size so the stand stays put even if your kitty leans or hops on it.
    • Replacement bowls, spare parts, or a manufacturer warranty available so you’re not stuck if something wears out.
    1. Measure your cat’s target feeding height first. See Measuring and choosing height for exact steps.
    2. Mount the bowl firmly at that height and lock it in place.
    3. Put in familiar food and let your cat approach at its own pace. Ever watched them sniff, circle, then pounce? Cute.
    4. Keep the first meals calm and short to lower stress. Soft lighting, quiet room, short visit.
    5. Adjust height slowly, only after your cat seems relaxed and eating normally. A little change at a time works best.
    6. Use the Risks monitoring checklist to log meals and behavior daily for 7-14 days and check for any red-flag signs. If you see worrying changes, consult your vet.

    Worth every paw-print!

    Final Words

    Quick call: raised bowls help older cats, arthritic pets, or cats that vomit, but healthy young cats usually don't gain much. They can cut spills in busy multi-cat homes.

    We covered how elevation shifts neck posture and what vets advise. You'll get measuring steps, whisker-fit tips, material and cleaning notes, stability checks, and a 6-step transition with a 7–14 day monitoring plan.

    Try a careful trial and log results; most cats adapt and meals feel calmer. For a quick decision guide on raised cat bowls: pros and cons, use the checklist here. Your furniture (and sanity) might thank you.

    FAQ

    Are elevated cat bowls good or bad?

    Elevated cat bowls are good for cats with arthritis, neck strain, or frequent vomiting and usually unnecessary for healthy young cats; try a careful trial and watch for feeding comfort and changes.

    What are the pros and cons of raised cat bowls?

    Pros include improved posture, fewer spills, less whisker contact with shallow wide bowls, and reduced post-meal vomiting in some cats. Cons include adaptation stress, slower eating, and limited benefit for healthy cats.

    Do vets recommend elevated cat bowls?

    Veterinarians recommend elevated bowls on a case-by-case basis, advising assessment of age, vomiting history, arthritis, or swallowing issues and suggesting a monitored trial while consulting your vet.

    Is it better for cats to eat out of elevated bowls? Are cat bowls supposed to be elevated?

    Elevated bowls are better for cats with neck, joint, or digestion problems, while most healthy cats do fine eating from floor bowls; measure and trial to check what your cat prefers.

    Do cats prefer deep or shallow bowls?

    Cats prefer shallow, wide bowls to avoid whisker contact and awkward head pressure; flat-faced breeds especially need shallow, wide openings to eat comfortably without pressing their face into the rim.

    Are ceramic elevated cat bowls safe and how do they compare to other materials?

    Ceramic elevated bowls look nice and are stable, but can chip and low-quality glazes risk leaching. Stainless steel resists bacteria and chipping, while silicone and BPA-free plastics offer other trade-offs.

    Will elevated bowls help with whisker fatigue?

    Elevated bowls reduce whisker fatigue when paired with shallow, wide designs that clear a cat’s whisker span; check diameter and observe head posture to confirm reduced whisker contact.

    How do I pick the best raised cat bowl?

    Choose an adjustable, anti-tip stand matching your cat’s measured chin height, a shallow wide bowl that fits whiskers, durable dishwasher-safe material, non-slip feet, and secure bowl attachment.

    How should I transition my cat to an elevated bowl?

    Transition by measuring chin height, starting at a low elevation, keeping food the same, offering short trials, recording meal time and vomiting daily for 7–14 days, and contact your vet if red-flag signs appear.

    Related Articles

  • Cat Feeding Stations: Designs and Safety Tips

    Cat Feeding Stations: Designs and Safety Tips

    Think your cat’s food bowl is harmless? Think again. A good feeding station keeps kibble dry, cuts down on midnight raccoon visits, controls portions, and makes cleanup a breeze , a mini dining room for your cat. Ever watched your kitty sniff the air like a food critic? It’s kind of adorable.

    Let’s compare a few styles. Wooden units (wood, like sturdy furniture-grade material) look nice and hide messes, but they can be heavy. Enclosed shelters with a microchip option (microchip, a tiny pet ID chip that lets only your cat in) stop nosy critters and picky housemates. Portable DIY options (easy to carry or build at home) are great if you move things around or want something cheap and replaceable.

    Keep safety simple. Put bowls on raised platforms (keeps food off damp floors), use ground anchors (stakes or ties that stop tipping or dragging), measure meals with portion scoops, and pick washable non-porous bowls (smooth, won’t soak up bacteria). Do that and mealtime stays tidy, safe, and stress-free. Worth every paw-print.

    Cat Feeding Stations: Designs and Safety Tips

    - Top practical feeding-station choices and immediate safety rules.jpg

    A cat feeding station is a little sheltered spot that keeps food dry from rain and wind, helps you control portions, keeps out unwanted visitors, and makes cleanup easier. Think of it as a tiny dining room for your cat, no soggy kibble, no surprise wildlife buffet, and less mess on the porch. Ever watch your cat sniff the air like a food critic? This helps.

    Action-first: if your yard has big predators, go with an elevated unit (a raised platform that keeps bowls off the ground). Where raccoons or opossums are common, pick an enclosed shelter with a small entry or a microchip-activated flap (microchip = the pet ID chip that can open the door for your cat only). For short-term needs, a portable DIY tote or a folding-table shelter works great and packs away when you don’t need it.

    For safety, serve scheduled, measured meals to cut down on nighttime wildlife visits, small portions, set times, fewer midnight scavengers. Add weight or use ground anchors (stakes or screw-in anchors that hold things down) so the station won’t tip or get carried off. Keep dry food locked in sealed containers so critters and moisture can’t get at it.

    Quick feeder tips: use washable, non-porous bowls (non-porous means they won’t soak up smells or germs) with removable inserts so cleanup is fast. Stainless steel or ceramic work well and they don’t hold odors. Little things like that save you time and keep food fresher.

    If you want the research numbers and tradeoffs, check the Pest/Wildlife and Multi-cat sections for more detail. Worth every paw-print.

    Design families and a single comparison table for cat feeding stations

    - Design families and a single comparison table for cat feeding stations.jpg

    Feeding stations usually land in three simple groups: wooden/cedar units, enclosed shelters (some with microchip-activated flaps), and portable budget or DIY options like plastic totes, folding-table shelters, or gravity-feeder platforms. This quick guide helps you match cost, how permanent it is, and how much wildlife it keeps out so you can choose faster. Think of it as a friendly nudge toward the style that fits your yard, schedule, and feline crew.

    The table below is a short cheat-sheet: pick wooden for looks and permanence, choose enclosed shelters for selectivity and weather protection, or go DIY for low cost and easy moving.

    Wooden / cedar feeding stations

    Cedar units look lovely in a yard and feel solid under paw. Cedar (aromatic, rot-resistant wood) naturally resists decay and gives a nice smell, and builders usually use rustproof fasteners like stainless steel (an iron alloy that resists rust). Prices run mid to high depending on size and finish. Great for homeowners who want something that blends with the landscape and lasts a long time.

    Enclosed feeding shelters and microchip access

    Enclosed shelters have small-entry designs and optional microchip-activated flaps (microchip = the pet ID chip many pets already have). Those small openings and chip doors keep out raccoons and other visitors while keeping food dry. They’re a favorite for city cat groups, rescues, or anyone feeding multiple cats and needing controlled access. Pair with a weatherproof roof and some insulation and your bowls stay cozy even in nasty weather.

    Portable and budget DIY builds

    Budget builds include Rubbermaid-style plastic totes (plastic tote = inexpensive hard plastic), folding-table shelters that pop up fast, and gravity-feeder platforms that sit on a small table. These are cheap, light, and easy to move, perfect for short-term feeding, lost-cat stakeouts, or when you’re trying out a spot. They’re usually less durable and less hidden than purpose-built units, but they get the job done.

    Materials & finishes (quick notes)

    Use low-VOC sealers (low-VOC = paints or sealers with fewer volatile compounds) and non-toxic paints so fumes won’t bother cats. Pick rustproof stainless hardware and weather-rated fasteners for joints, and avoid interior finishes that chip or flake. Basic waterproofing goes a long way: raise the base so wood stays off wet ground, add a sloped roof to shed rain, and use removable inserts for easy cleaning. These small choices keep food dry, reduce mold, and make maintenance faster. Worth every paw-print.

    Design Type Typical Cost Range Wildlife Resistance Best Use
    Wooden / Cedar $200–$800+ Moderate Permanent yard setup, blends with landscaping
    Enclosed shelters (microchip options) $150–$600 High (with small entry or chip flap) Urban clusters, rescues, multi-cat control
    Portable / DIY (totes, folding tables) $10–$100 Low to Moderate Short-term use, lost-cat searches, tight budgets
    Built-in pet feeder cabinet $300–$1,000 Moderate Indoor or sheltered porch, integrated storage

    Materials, finishes, and waterproofing (consolidated under Designs)

     those belong exclusively in the DIY section.jpg

    We moved material and finish notes into Designs -> H3 Materials & Finishes so the pros and cons, pet-safe finish picks, and waterproofing basics live in one place. That way we don’t repeat info and you can find testing tips in one spot.

    • Wood – cedar (a rot-resistant wood with a noticeable scent; mid to high cost; needs a sealant). Cedar smells nice, and it helps keep pests away. Add a light sealer and it will last longer. My cat can’t resist rubbing against cedar posts.

    • Plastic – hard polymer (a tough, moldable plastic made from long-chain molecules; lightweight and low-cost; can fade in strong sun). Great for easy-clean feeders and toys. Just know UV can dull the color over time.

    • Metal – stainless steel (an iron alloy with chromium that resists rust; very durable; use marine-grade near the coast). Sturdy and sleek. Near salt spray, pick marine-grade metal to avoid corrosion.

    Finish picks: go water-based and low-VOC. Water-based polyurethane (a clear, low-odor protective coat) or acrylic sealers give protection without heavy fumes. Cleaner smell. Safer for curious noses and paws.

    Simple waterproofing tips:

    • Flashing at roof seams (thin metal strips that keep water out). Cheap, quick, and very effective.
    • Exterior-grade caulk for joints (sealant that stays flexible outdoors). A single bead seals gaps and stops leaks.
    • Short gravel/drainage pads under raised bases (a shallow rock bed to lift wood off wet soil). Helps wood stay dry and keeps pests away. For busy days, a gravel pad is an easy one-time fix.

    Want details and testing notes? See Designs -> H3 Materials & Finishes for the full quick-notes and testing tips.

    Ergonomic feeding station setup: bowl selection and height guidance

    - Materials, finishes, and waterproofing (consolidated under Designs).jpg

    Measure from the floor up to your cat's shoulder, then add a couple inches for comfort. That simple trick gets the bowl at a natural reach so your cat does not have to bend too far. Small cats usually like bowls raised about 4 to 6 inches, medium cats about 6 to 8 inches, and large or senior cats about 8 to 10 inches. For arthritic kitties or very tall breeds, nudge the bowl a bit higher so they do not stoop; elevated bowls help the neck relax and make meals less of a stretch.

    Ever watched your cat eat with a hunched back? Not fun. Raising the bowl slightly can turn mealtime into a relaxed, dignified moment, less strain on the neck and shoulders, and fewer awkward paw adjustments. It helps digestion too, oddly enough.

    Pick shallow, wide dishes to cut down on whisker fatigue; think plates rather than deep cups. Whisker fatigue happens when whiskers keep brushing hard sides, and that can make your cat fussy or stressed. Look for whisker-friendly designs with low walls and wide rims so whiskers can spread comfortably. Removable inserts are great, you can swap sizes or clean easily without rebuilding the whole station.

    Material matters for durability and cleaning. Stainless steel (an iron alloy with chromium that resists rust) is tough and usually dishwasher-safe. Ceramic (fired clay with a glassy glaze) is heavy and stable, so it stays put. BPA-free plastic (plastic made without a chemical called BPA) is lightweight and budget-friendly, though it may scratch over time. Choose anti-skid bases or a spillproof tray to catch messes, and go for dishwasher-safe, removable inserts so cleanup is fast and your elevated feeding station stays tidy. Worth every paw-print.

    Multi-cat feeding station layouts, portion control, and monitoring

    - Ergonomic feeding station setup bowl selection and height guidance.jpg

    Give each cat a little nook when you can. Quiet spots help nervous eaters relax, and they stop the bold ones from bossing the buffet. Multi-bowl islands work great if floor space is tight. Just space the bowls so whiskers don’t mash together.

    Try staggered timing if mealtime gets rowdy. Feed one or two cats first, then open access to the rest so the food guarding cools down. Little tweaks like that cut hissy fits and make dinners calmer and faster. Worth every paw-print.

    Tech can save the day in tense homes. Microchip-activated feeders (microchip means the pet ID chip that tells a chip-reading flap to open) let only the right cat in. Timed dispensers (units that release measured portions on a schedule) and portion bowls (bowls set for single servings) keep calories in check and stop one greedy cat from eating everyone’s share. Mix methods: ID control for who can eat, timers for exact portions, and shallow, wide bowls so whiskers stay comfy.

    Watch and count. Cameras are handy to learn who shows up and when, just like the study used. If you leave big piles of food out, you can get a decent head count in about 3-5 days. With small measured meals on a schedule it takes longer, about 8-11 days, to see who really came by. That matters when you’re tracking a lost cat or sizing up a colony.

    Bring cats along slowly. Start with supervised trials so each cat learns the routine, then open short, staged access windows before full freedom. Let them sniff a new feeder, swap a towel with a familiar scent, and do a few dry runs while you watch. Calm introductions cut stress. Speaking of towels, my cat once decided the towel smelled like victory, um, and claimed the whole station for a week.

    If one cat still guards, split locations for a while and use cameras to check who tolerates whom. Small changes, patient steps, and a bit of tech make feeding time peaceful. Isn’t it nice when everyone can eat without a drama?

    Pest, wildlife, and outdoor security for feeding stations

    - Multi-cat feeding station layouts, portion control, and monitoring.jpg

    Pick a spot where your cat can eat and bolt to safety in a heartbeat. Put feeders near a sturdy shelter or under a porch overhang so a startled cat can dash and hide; picture whiskers twitching as they scoot away. Keep stations out of obvious wildlife routes like fence lines, creek edges, or open fields where coyotes roam. A simple escape idea: bury or secure a 12-inch diameter, 6-foot long PVC pipe (plastic plumbing pipe) or add a low ramp so cats can slip under or over a feeding platform if something scary shows up. Test it with a flashlight and a treat to make sure the path works.

    Field data helps shape what to try. In one study, cats made 64% of visits, raccoons 22%, coyotes 9%, and skunks 5%. Raising food off the ground tended to reduce coyote visits. Serving small, scheduled ground portions during the day cut down on night-time raccoon and coyote activity because the food was gone before dark. Elevation keeps food out of paw reach for some predators, but crafty raccoons and bold opossums can still climb or manipulate simple setups. Also, theft happened with camouflaged stations, so assume a light unit could be carried off and plan for that.

    Make tipping and theft difficult and make access picky. Use heavy bases or screw-in ground anchors (metal rods that twist into the soil) so a crate or cabinet stays put. Choose tamper-resistant fasteners that need special bits to remove. Microchip-activated flaps (they open only for pets with registered microchips) or small-entry openings help keep non-target animals out. A locked, sealed food box keeps kibble dry and out of sight. Check the Buying Checklist for anti-tip ratings and lock options before you buy, and stash extra food in sealed containers out of view. Worth every paw-print.

    • Screw-in ground anchors or concrete footings (solid poured base) for permanent units
    • Weighted bases (concrete pavers, sandbags) for quick retrofit
    • Microchip-activated flap or small-entry door to limit non-targets
    • Locked, sealed food box for dry food storage and theft deterrence
    • Nighttime removal or indoor storage of dispensers when not in use
    • Camera monitoring for evidence, theft prevention, and behavior checks

    Electrical, cord, and powered feeder safety for indoor and outdoor stations

    - Pest, wildlife, and outdoor security for feeding stations.jpg

    Put powered feeders on dry, level spots away from puddles, sprinklers, and damp corners so motors and electronics don’t get soggy. Think about the whirr of a motor and how sad it sounds when water makes it quit. Use a GFCI outlet (ground-fault circuit interrupter, a device that quickly cuts power if it senses water or a short) for outdoor circuits , it’s an easy, cheap safety win for automatic feeders.

    Tame cords like you would tame a playful kitten. Run them along walls or under trim so they’re out of paw and jaw reach. Bury or clip cords where you can; they’re less tempting to gnawers and less likely to snag. Protect lines with split-loom tubing (flexible plastic conduit) or flat adhesive cord channels (stick-on covers that hide cords) to keep things tidy and trip-free. Mount plugs up off the ground and don’t run cords across walkways where a curious cat or raccoon might pull on them.

    Pick feeders with battery backup and quiet mechanisms so meals stay on time without the thunderous clacks that stress cats. Your cat will notice that noise and might bail. For theft or tampering, keep powered units inside a secured enclosure or shelter (see Pest/Wildlife for anchoring and theft-prevention details) so the electronics stay put and safe. Worth every paw-print.

    Cleaning, maintenance, and hygiene schedule for feeding stations

    - Electrical, cord, and powered feeder safety for indoor and outdoor stations.jpg

    Wipe bowls and removable inserts after each meal. Toss any wet food that's been sitting out, because that smell gets… uh, intense fast and your cat will notice. Rinse and refill water bowls every day so water stays fresh and inviting.

    Once a week, pull out inserts or trays and give them a good scrub. Grease and grime build up slowly, and a weekly wash helps prevent spoilage and keeps other animals from sniffing around. Worth every paw-print.

    Use mild dish soap for regular washing and a diluted vinegar rinse for stubborn smells. White vinegar (diluted) is a natural odor remover and is safe for cats when you rinse well. If your bowls are dishwasher-safe, put stainless-steel or ceramic inserts on the top rack (stainless-steel is a rust-resistant metal; ceramic is glazed pottery) and use a high-heat dry cycle when possible. High heat helps kill microbes.

    For tougher jobs, use a vet-approved disinfectant and follow the product directions. Let everything air dry completely before putting food back. Replace plastic bowls as soon as you see deep scratches or grooves where bacteria can hide. Your cat will thank you with a cleaner nose.

    Monthly checks keep the whole station working right. After storms or heavy weather, inspect seals, roof flashing (flashing is thin metal that directs water away), and raised bases for gaps, rot, or mold. Tighten rustproof fasteners and reseal small cracks with exterior-grade sealant (sealant is a waterproof filler). If the base sits on soggy ground, lift the station with a gravel pad or small risers so it stays dry.

    Store extra kibble in sealed containers indoors so critters don't sniff out dinner. For busy days, give your cat an unbreakable toy or a hurried puzzle feeder before you leave, ten minutes of play and they settle right down.

    Oops, one more tip: check for mildew and sticky residues; a quick clean now saves a big scrub later.

    Task Frequency Tools / Notes
    Wipe and rinse bowls, remove wet food Daily Mild dish soap, soft sponge, fresh water. Note: wipe inserts before replacing.
    Deep clean bowls and removable inserts Weekly Dishwasher (top rack), diluted white vinegar rinse (diluted), scrub brush. Note: use sanitizing cycle and high-heat dry when possible.
    Inspect hardware, seals, and drainage Monthly Screwdriver, rustproof fasteners, silicone caulk (silicone caulk – flexible waterproof sealant). Note: tighten loose screws and reseal small gaps.
    Sealant touch-up and roof check Seasonal Exterior-grade sealant (waterproof), flashing (thin metal strips), small brush. Note: check seams after heavy rain or snow.
    Replace scratched plastic bowls or damaged inserts As needed Stainless-steel or ceramic bowls, replacement inserts. Note: swap at first deep scratches or persistent stains.

    Cat Feeding Stations: Designs and Safety Tips

    - Cleaning, maintenance, and hygiene schedule for feeding stations.jpg

    If you’re building a single-cat nook, aim for an interior floor about 18" x 12" with 12" of headroom so your cat can step in, turn, and eat without feeling cramped. Pick a ground-level build for yards with low predator risk. For areas with coyotes or bold wildlife, use a 36" high gravity feeder platform (36" = 3 feet) to keep bowls out of easy reach and give space underneath for a weighted base.

    Keep three simple rules in mind: ventilate the space so moisture doesn’t hang around, slope the roof so rain runs off, and use removable bowl inserts for quick cleaning. Add a hidden food-storage compartment (sealed tote or small cabinet shelf) that latches shut so kibble stays dry and out of sight. Choose materials that stand up to weather and wipe clean; finish with a low-VOC sealer (low volatile organic compound protective coat) and use rustproof stainless hardware.

    DIY plan (single-cat tote/box + optional gravity platform)

    1. Parts list

      • 1 sheet exterior-grade plywood 3/4" (4' x 8') or two 2' x 4' cedar panels. Plywood is wood made from glued layers for strength, and cedar is naturally rot-resistant.
      • 1 small Rubbermaid-style tote (for hidden dry-food storage). That’s just a sturdy plastic bin with a lid.
      • 2 stainless-steel bowls (dishwasher-safe) with removable inserts. Stainless steel resists rust and is easy to sanitize.
      • 4 exterior hinges and one hasp with padlock option.
      • Screws: #8 or #10 stainless exterior screws, 1 1/4" and 2 1/2" lengths (rustproof fasteners).
      • Roof flashing, exterior-grade caulk (flexible sealant), low-VOC exterior sealer.
      • Optional: folding table or 36" steel platform legs for an elevated build (gravity feeder platform is a raised table-style stand for bowls).
    2. Cut list (single-cat box)

      • Floor: 18" x 12"
      • Back wall: 18" x 12"
      • Side walls: 12" x 12" (two pieces)
      • Roof: 20" x 14" with 2" overhang at front
      • Front panel: cut entry hole 6" wide x 7" tall (or smaller for shy cats)
    3. Assembly steps

      • Fasten the sides to the floor with 1 1/4" screws, then attach the back and front panels. It’s straightforward and nice to see it take shape.
      • Mount the roof with hinges so it opens for cleaning. Add flashing at seams and run a bead of exterior caulk along joints to keep water out.
      • Cut holes for the removable inserts and fit the bowls; add a towel or rubber gasket to reduce wobble. Your cat will appreciate steady bowls when pouncing.
      • Mount the Rubbermaid tote inside the base or under the platform as hidden food storage and latch it closed. Keeps critters and noses away.
      • Sand edges, apply two coats of low-VOC sealer, and let cure per product directions.
    4. Finishing notes

      • Raise the box on small risers or a gravel pad to keep wood off wet ground. Moisture is a slow enemy.
      • If you use the 36" gravity platform, secure legs and add a weighted base or screw-in ground anchors (see Pest/Wildlife for anchors). Stability matters if you’ve got curious raccoons or a determined neighborhood dog.

    Test and tune: run supervised trials so each cat learns the routine and you can spot problems early. Watch behavior on camera for a few days and open staged access windows to fix guarding or fear. If a cat avoids the nook, try familiar bedding, sprinkle a little treats, or shrink the entry by an inch and test again. It often just takes small changes for big comfort wins.

    Buying checklist

    • Anti-tip stability or clear anchoring points on the unit
    • Removable, washable bowl inserts and dishwasher-safe parts
    • Stainless-steel bowls included or recommended (easy to clean, rust-resistant)
    • Rustproof hardware and weather-rated fasteners
    • Locking or microchip-access options for multi-cat homes or wildlife-prone sites
    • Hidden food storage or a sealed tote for dry kibble
    • Clear cleaning instructions and replacement-part availability
    • Warranty or part-replacement policy for peace of mind

    Worth every paw-print.

    Final Words

    In the action, pick elevated or enclosed feeding stations, serve scheduled small measured meals, anchor or weight feeders, and use washable, non-porous bowls with removable inserts.

    We walked through design families (wood (cedar)), enclosed shelters, and DIY options, plus bowl height, whisker-friendly shapes, multi-cat tech like microchip-activated feeders (tiny ID chip) and simple monitoring, with outdoor placement and anchoring tips to keep wildlife away.

    Use these cat feeding stations: designs and safety tips to choose a setup that lasts, reduces stress, and protects your home. It's worth every paw-print.

    FAQ

    FAQ — Outdoor Cat Feeding Stations

    What are the best outdoor cat feeding station designs and safety tips?
    The best designs pair weatherproof shelters, elevated or small-entry enclosures, and scheduled small meals to limit predators and keep food clean. Anchor units and use washable, non-porous bowls for hygiene.
    <dt>How do I make a feral cat feeding station raccoon-proof?</dt>
    <dd>
      Use small-entry shelters, microchip-activated flaps (reading the cat’s implanted ID), timed portions, elevated platforms, heavy anchors, and locked dry-food boxes to reduce nocturnal raccoon visits.
    </dd>
    
    <dt>What design works best for small versus large cats?</dt>
    <dd>
      Adjust bowl height and interior space to the cat’s shoulder: small 4–6 in, medium 6–8 in, large/senior 8–10 in. Use wider, shallow bowls for whisker comfort.
    </dd>
    
    <dt>What are simple DIY feeding station ideas and safety tips?</dt>
    <dd>
      Simple DIY options include plastic-tote shelters, folding-table canopies, and gravity-fed platforms (food flows by weight). Use removable dishwasher-safe inserts, sealable food storage, and add weight or anchors to stop tipping.
    </dd>
    
    <dt>What features should the best cat feeding stations have?</dt>
    <dd>
      Look for removable dishwasher-safe inserts, stainless-steel bowls, rustproof hardware, anti-tip anchor points, microchip or timed access, and smooth, easy-clean surfaces to reduce mess and increase safety.
    </dd>
    
    <dt>How can I reduce wildlife visits and predator risks at an outdoor feeder?</dt>
    <dd>
      Use elevated platforms to deter coyotes and scheduled small ground meals to cut nocturnal raccoon activity; site feeders near shelter, avoid open corridors, and allow escape routes. One study observed cats 64%, raccoons 22%, coyotes 9%, skunks 5%.
    </dd>
    
    <dt>How should I anchor or protect a feeder from tipping and theft?</dt>
    <dd>
      Use heavy bases, ground anchors, tamper-resistant fasteners, concealed locked food boxes, and check anti-tip ratings or mounting points regularly.
    </dd>
    
    <dt>Are microchip-activated feeders worth it for multi-cat or feral feeding?</dt>
    <dd>
      Yes—microchip-activated feeders that read implanted IDs can limit access to target cats, control portions, and reduce non-target visits when used with enclosed shelters.
    </dd>
    

    Related Articles

  • Cat Feeding Schedule for Indoor Cats: Kittens-Seniors

    Cat Feeding Schedule for Indoor Cats: Kittens-Seniors

    Do two meals a day really work for indoor cats?
    A lot of people feed morning and night, then wonder why their fluffball snacks all evening or meows at 3 a.m. It’s confusing, and it can feel a little frantic when dinner time becomes performance art.

    Cats are made to hunt little meals throughout the day. Small, frequent servings match that instinct and keep their energy steady, which makes weight control easier and moods calmer. Ever watched your kitty chase a shadow and act like it’s the best game ever? That’s the hunting brain at work.

    I once watched Luna leap across the couch for a single kibble, whiskers forward, eyes huge, and it changed how I feed her. So now we do several tiny feedings and play short hunts with a teaser wand (think fishing rod for cats). It’s simple, it’s fun, and yes, she’s feline fine.

    I’ll walk you through age-based schedules for kittens, adults, and picky seniors, plain calorie math for portions (calories are the energy in food), and quick tips for busy owners to make mealtime predictable and less frantic. For busy days, try a timed feeder or a puzzle feeder to spread meals without extra work. Worth every paw-print.

    How a feeding schedule answers timing, portions, and routines

    - How a feeding schedule answers timing, portions, and routines.jpg

    Short answer: Most indoor adult cats do best with several small meals spaced about every 5 to 6 hours during their awake time. It mimics their natural snacking pattern, helps keep energy steady, and makes hunger cues easier to predict. Ever watched your cat nose the bowl and stroll off like nothing happened? Timing helps fix that.

    A simple calorie rule of thumb is about 20 kcal per pound of body weight (kcal meaning food calories). So a 10-pound cat needs roughly 200 kcal a day. For exact portion math, see the Portion sizes and calorie planning section. For trade-offs between food types, check Wet vs dry vs mixed feeding. Meal-feeding (set meals at set times) works best when you can measure portions and be consistent. Limited grazing (measured dry food left out for calm snacking) is a good fallback if you’re busy or your cat prefers nibbling through the day.

    Why small, frequent meals? Cats are natural hunters who eat little and often. Small meals keep blood sugar steadier and cut down frantic begging. It also helps with weight control for couch-potato cats and fuels the zoomies for playful ones. Try it for a week and watch the difference in energy and mood. Worth every paw-print.

    Quick tips: weigh your cat every few weeks and watch body condition rather than just the scale. If your cat needs special care, kitten growth, senior health issues, or a medical diet, check with your vet and adjust calories and timing. And uh, if your cat launches a stealth attack on the food bag, consider measured meals or a slow feeder.

    Routine Type Age / Activity Meals per day Typical meal times Approx. daily calories Notes
    Young kitten Neonate / early weaned Frequent, small (6+) Every 2 to 4 hrs 250 to 450 kcal/day Vet-guided feeding for fast growth
    Older kitten 8 to 16 weeks 4 7:00, 11:00, 15:00, 19:00 300 to 400 kcal/day High energy, keep an eye on weight
    Adult, sedentary Low activity adult 2 7:00, 19:00 About 160 to 200 kcal/day Smaller portions, monitor body condition
    Adult, active High activity adult 4 7:00, 12:00, 17:00, 22:00 About 200 to 260 kcal/day Good for playful or outdoor-access cats
    Senior / health-adjusted 10+ years or medical needs 2 to 4 smaller meals Example: 7:00, 11:00, 16:00, 21:00 About 160 to 220 kcal/day Adjust per vet advice and appetite

    Routine ideas for busy people: try timed feeders for midday meals, or leave measured dry food in a puzzle feeder so your cat works a bit for snacks. Think of a puzzle feeder like a slow-motion hunting game, keeps them busy and satisfied. Next, mix wet and dry if your cat needs extra hydration or calorie control. In truth, consistency matters more than perfection. Try one schedule for a month, tweak, and enjoy the calmer mealtimes.

    Life-stage feeding schedule: precise step-down timelines and meal counts by age

    - Life-stage feeding schedule precise step-down timelines and meal counts by age.jpg

    Think of this as a friendly roadmap: a step-down timeline (a gradual move from many tiny meals to fewer, fuller ones) that follows a cat from neonatal (newborn) through kitten, adolescent, adult, and senior stages. It helps meal frequency match growth, energy, and digestive maturity. Ever watched your kitty’s whiskers twitch as food hits the bowl? That’s the moment this schedule aims to create, predictable, balanced, and a little joyful.

    • Neonatal / early-weaned (newborn kittens needing round-the-clock care): near-constant, very small feeds under veterinary guidance (ask a vet about formula amounts). Example: feed every 2-4 hours while under vet or foster care, tiny portions so they don’t overfill a tiny tummy.

    • 8-12 weeks (fast-growing kittens): 4 meals/day. Example times: 7:00, 11:00, 15:00, 19:00. Keep meals higher in calories to support growth. Your kitten will gobble fast and nap harder, cute chaos.

    • 3-4 months (still growing, but steadier): 3 meals/day. Example times: 7:00, 13:00, 19:00. Shrink each portion slightly as growth evens out. You’ll notice longer play bursts between meals.

    • 4-6 months (transition phase): move to 2-3 meals/day over 1-3 weeks. Transition tip: shift the midday meal later, then merge it with the evening feed so the cat lands at two meals smoothly. Take it slow and watch appetite.

    • Adult (~1 year+): generally 2 meals/day at dawn and dusk. Example times: 7:00 and 19:00. Some very active adults do better on four smaller meals if you can fit them in. Think of it as breakfast and dinner that keep the zoomies in check.

    • Senior / pregnant / nursing: adjusted counts depending on need. Seniors (older adult cats) often do well with 2-3 small meals: 7:00, 12:00, 18:00. Queens (pregnant or nursing mom cats) usually need more frequent meals or free access to food under veterinary direction.

    Worth every paw-print.

    Every cat is an individual. If appetite, weight, or energy changes, slow the step-down, add a meal, or call your veterinarian. Sudden eating changes, quick weight loss, or unexplained gain should prompt a clinic check so feeding adjustments match medical needs and keep your cat feeling their best.

    Portion sizes and calorie planning for indoor cats

    - Portion sizes and calorie planning for indoor cats.jpg

    Start with two simple steps: figure out your cat’s maintenance calories, then match that number to the kcal values on the food label. Think of kcal as the calories listed on pet food (kcal = kilocalories). It’s the same energy number you see on human food, just for cats. Use your cat’s ideal body weight when you do the math, not the weight they are right now if they’re under- or overweight. That helps you plan portions that move them toward a healthy size.

    Find kcal per cup for dry food, or kcal per can/serving for wet food on the label or the maker’s website. Also use the cat’s ideal weight in kg (kg = kilograms). If you can’t find kcal, check for kcal per 100 g and convert. Little tip: labels sometimes hide the grams-per-cup info, so you might need to weigh a level cup yourself.

    Use RER then MER. RER (resting energy requirement, the quiet-cat baseline) = 70 × (body weight in kg)^0.75. Then multiply RER by a life-stage or activity multiplier to get MER (maintenance energy requirement, the calories to keep weight steady). Typical multipliers: indoor neutered adult 1.0 to 1.2 (low activity), active adult 1.2 to 1.4, growing kitten 2.5 to 3.0 (big growth needs). Pregnant or nursing cats need a lot more, ask your vet for exact numbers.

    Worked example A – dry food. Say dry food = 400 kcal/cup and one cup weighs 100 g. If MER = 250 kcal/day then: cups = 250 ÷ 400 = 0.625 cups. Grams = 0.625 × 100 g = 62.5 g. If a single kibble (a piece of dry food) weighs about 0.2 g (weigh a small sample to check), you’d get roughly 62.5 ÷ 0.2 ≈ 313 pieces. Fun to count, but weighing is easier.

    Read labels like a detective. For dry food look for kcal per cup or kcal per 100 g. For wet food look for kcal per can or per 100 g. If a label gives kcal per cup but not grams per cup, weigh one level cup on a kitchen scale (tare the bowl first) so you can convert cups to grams. To count kibbles, weigh a known scoop or count pieces in a small, weighed sample so you know grams per piece.

    Worked example B – canned food. If a can is 170 g and has 150 kcal per can, and MER = 200 kcal/day, then cans needed = 200 ÷ 150 ≈ 1.33 cans. Grams = 1.33 × 170 g ≈ 226 g. Easy math. Your cat will probably be thrilled with the extra slurps.

    Mixed feeding is just arithmetic. Subtract the calories from the wet portion, then top off with measured dry. Worked example C – mixed: target MER = 240 kcal/day. Give 1 wet can = 150 kcal. Remaining = 90 kcal. Dry = 400 kcal/cup → 90 ÷ 400 = 0.225 cups → grams = 0.225 × 100 g = 22.5 g → roughly 22.5 ÷ 0.2 ≈ 113 kibbles if each is 0.2 g. If your cat leaves food, begs, or seems hungry, tweak portions or try a different food and re-weigh after a week to see how weight changes.

    If anything feels off, or your cat has special needs, check the Managing weight section and the lede for a quick calorie anchor, and talk with your veterinarian for a tailored plan. Worth every paw-print.

    Wet vs dry vs mixed feeding for indoor cats

    - Wet vs dry vs mixed feeding for indoor cats.jpg

    Wet food is great for keeping cats hydrated. It usually has fewer kcal (food calories) per gram, so your cat eats more weight for the same energy. That extra moisture helps cats that don’t drink enough and can support urinary and kidney health. And honestly, many cats love the soft texture, soft slurps, happy whiskers. Because wet food brings water, you’ll often measure by can or grams instead of cups, and meal timing can be tighter; for spoilage windows, refrigeration tips, and cleaning, see the Practical feeding schedule tools section.

    Dry food is calorie-dense (more kcal in less weight), so it’s handy when you need longer gaps between meals or want easy portioning into automatic feeders. It’s convenient, shelf-stable, and simple to scoop for measured servings, but some brands pack more starch and some cats will graze and overeat if kibble is left out. If your cat is a secret snack thief, use portion-controlled devices or puzzle feeders to slow intake and keep body condition steady.

    Mixed feeding gives you the best of both worlds: one or two measured wet meals for hydration, plus weighed dry to hit a daily calorie target and stretch feeding windows. A simple method: subtract the wet meal calories from the daily goal, then divide the remainder into measured dry meals or puzzle-fed portions. If you’re home most days, meal-feeding gives tight control. If you’re away, measured limited grazing paired with a timed feeder keeps things sane.

    Practical tip: think of feeding like budgeting calories, wet food covers the hydration, dry helps balance the rest. Ever watched your cat choose the wet bowl over the kibble? Cute, and telling. Worth experimenting a week or two to see what keeps your kitty healthy and purring.

    Implementing and transitioning to a feeding schedule for indoor cats

    - Implementing and transitioning to a feeding schedule for indoor cats.jpg

    Start by saying the goal out loud: move from free-feeding or a messy meal routine to predictable, portioned meals that match your cat’s calories and behavior. If your cat has medical needs, call your veterinarian first. Some conditions need slower changes or clinic guidance. Quick wins: measure the total daily food, pick two times you can keep, and expect a short adjustment period.

    7-day diet transition schedule

    When switching foods, mix old and new over 7 to 10 days. A common plan is 75:25 (old:new) to 50:50 to 25:75, then full new food. If your cat shows GI (stomach and intestine) upset , vomiting, watery stool, belly pain, or sudden appetite loss , slow the pace. Pause for about 48 hours, then try a smaller step.

    1. Day 1 , Weigh or measure the full daily portion (use a kitchen scale or measuring cup) and note how much your cat usually eats. Pick meal times you can stick to, for example 7:00 and 19:00.
    2. Day 2 , Offer the measured daily amount divided into your two meals. Start the 75:25 old-to-new mix at both meals and watch stool and appetite.
    3. Day 3 , Move to 50:50 at each meal. Start removing free food between meals for short stretches, about 4 to 6 hours.
    4. Day 4 , Keep 50:50. Add a quick 5-minute play burst before each meal to build anticipation and help digestion.
    5. Day 5 , Shift to 25:75 old-to-new. Stop free-feeding altogether and serve only scheduled meals.
    6. Day 6 , Serve only the new food at meals. Observe energy, litter-box habits, and weigh your cat if you can.
    7. Day 7 , Lock in the two-meal routine. If GI signs showed up at any point, go back one step and talk to your vet.

    Training cues and setting mealtime routines

    Pick a clear cue so your cat learns the signal: a bowl clink, a short whistle, or a specific spot. Use the same place every time and add a tiny pre-meal play session (2 to 5 minutes) so your cat links movement with food. Cats love ritual. Ever watched a kitty stalk a feather like it’s the hunt of the century? That kind of focus helps.

    Dawn and dusk match natural cat rhythms, but choose times that fit your schedule. Use smartphone reminders or a simple app to keep you honest. For midday coverage, consider a timed or automatic feeder (a device that drops measured meals). For cats with health issues, coordinate timing and portions with your veterinarian so food, meds, and monitoring line up.

    Worth every paw-print.

    Feeding schedule for multi-cat homes and feeder selection

    - Feeding schedule for multi-cat homes and feeder selection.jpg

    Living with several cats can turn mealtime into a circus. You get food stealing, crowding at bowls, and one cat gobbling down another’s special food. That unequal sharing leads to stress, wrong portions, and diet slip-ups. You’ll want a plan that keeps portions accurate, cuts down on mealtime squabbles, and fits your daily routine.

    Use a mix of devices and smart placement to fix it. Microchip feeders (a reader that checks a tiny ID chip implanted under the skin, or a collar tag) open only for the right cat. Timed feeders (feeders that release meals on a schedule) help when you’re out. Portion-controlled feeders (dispense set grams or calories) stop over- or under-feeding. Match the feeder to the food form and any vet-prescribed diet, and try one model first with your most food-motivated cat to see how it goes. Ever watched your greediest cat test a new gadget? Fun, and informative.

    Microchip and portion-controlled feeders

    Microchip feeders learn who’s who and unlock only for that cat, which is perfect for different prescriptions or calorie targets. They work best with measured dry portions, though some accept sealed wet trays (single-serve wet food sealed to stay fresh). Give each diet its own feeder so foods don’t mix. And don’t place feeders in tight hallways where a bold cat can camp and guard the entry.

    Station placement and monitoring strategy

    Plan one feeding station per cat, plus an extra for shy or new cats. Spread stations across rooms or use low barriers so timid cats can eat without being stared at. Use camera checks or feeder app logs to confirm who’s eating and how much (feeder analytics show portions and times). For help picking models, cleaning routines, and safe spoilage windows, see the Practical feeding schedule tools section.

    Worth every paw-print.

    Managing weight, signs, and safe weight-change protocols

    - Managing weight, signs, and safe weight-change protocols.jpg

    Too much food usually shows up as steady weight gain, a rounder silhouette, and the loss of that tucked waist you used to see. About 60 to 61% of cats in America are classified as overweight or obese, so you’re not alone. Your cat might nap more, move less, vomit after meals, or breathe harder during play. And that’s not just annoying, obesity raises the chance of diabetes (a high blood sugar condition) by about 4.5 times, musculoskeletal problems (issues with bones, joints, and muscles) by around 7 times, and shortens lifespan by roughly 2 times.

    Underfeeding looks different. Think steady weight loss, a dull coat, sunken flanks, weakness, or frantic, nonstop begging. Sudden or lasting appetite shifts, eating a lot or almost nothing, can point to parasites (worms or tiny bugs), hyperthyroidism (an overactive thyroid gland), or other metabolic problems. If your cat is losing weight while eating the same food, or gaining despite tiny portions, don’t shrug it off, book a vet visit.

    Feel your cat regularly. If you can’t feel the ribs with gentle pressure or the waist is gone, that’s a red flag. Watch behavior too, when an active cat turns lethargic or quits playing, call your veterinarian. Ever watched your kitty chase shadows one day and barely move the next? That change matters.

    Check weight and body condition on a schedule. Weigh at home or at the clinic monthly while you’re changing the diet, and about every three months when things are stable. Do a quick body check each week: run your hands along the ribcage (you should feel ribs with a light covering of fat), look for a visible waist behind the ribs, and note any abdominal tuck. Log weight, portion sizes, and activity so you and your vet can spot trends and tweak the plan.

    Safe weight change needs a veterinarian’s supervision. A simple template: work with your vet to set an ideal weight and a target weekly loss, calculate new daily calories to hit that target, reduce calories gradually (a modest percent at a time while keeping protein levels up), and reweigh monthly to adjust. If an overweight cat stops eating for more than 24 to 48 hours, or you see rapid weight loss, repeated vomiting, severe lethargy, trouble breathing, or signs of pain, seek emergency veterinary care, hepatic lipidosis (fatty liver disease) and other dangers can develop fast. Worth every paw-print.

    Practical feeding schedule tools, device recommendations, cleaning, and sample day plans

    - Practical feeding schedule tools, device recommendations, cleaning, and sample day plans.jpg

    Let’s start with the gear that actually makes a feeding schedule stick. Puzzle feeders (toys that release food when a cat nudges or bats them) stretch meal time and slow down gulpers , you’ll love watching whiskers twitch as kibble rolls. Pick puzzle feeders that accept measured grams or small kibble pieces (dry cat food pieces) so you can hit calorie targets. Timed automatic dispensers (programmable bowls that drop set portions at set times) are great if you work odd hours; look for portion presets, a reliable timer, and a battery backup (battery power if the electricity fails). Microchip feeders (feeders that read an implanted ID chip or a collar tag) keep multi-cat homes peaceful when diets must stay separate. For wet food, single-serve sealed trays or disposable sealed bowls make portioning easy and cut bacterial risk.

    Quick checklist for devices:

    • Let you set portion size in grams or scoops.
    • Easy to clean with removable parts.
    • Battery backup or power-failure plan.
    • Match the food form you use (kibble vs sealed wet trays).

    Keep gear clean and food safe so your schedule actually works. Rinse bowls and feeder bowls daily with hot, soapy water; do a deep clean of removable feeder parts once a week, soaking and scrubbing to remove oil build-up. Opened wet food should sit at room temperature for up to 4 hours, then toss it; if your house gets warm above about 77°F (25°C), shorten that to 1 to 2 hours. Store unused sealed wet food in the fridge and warm it briefly at mealtime if your cat prefers it closer to room temperature.

    Plan for equipment failures before they happen. Check batteries monthly and keep a small stash of pre-measured meals in sealed bags so you can swap to manual bowls if a unit stops or the power goes out. If a feeder dies mid-day, switch to measured bowls or a puzzle feeder and give a slightly smaller portion now and later rather than leaving food out all day. True story: my Luna’s feeder died once on a Monday , we switched to puzzle feeders and she was happily busy for half an hour while I reset the device.

    Sample day plans

    Two-meal adult plan , morning and evening routine for indoor cats: 7:00 (breakfast) and 19:00 (dinner). Portion anchor: about 20 kcal per pound daily split evenly (a 10-lb cat gets ~100 kcal at each meal). Use a manual bowl or a timed automatic dispenser set to those times. Add a 2 to 5 minute play burst before each meal to cue appetite and burn off a little energy.

    Four-meal kitten plan , high-energy feedings for growth: 7:00, 12:00, 17:00, 22:00. Portion anchor: follow your vet or the feeding chart on the food for daily kcal, then split into four equal meals. Use small bowls or multiple puzzle feeders that accept wet-food trays or measured kibble so your kitten gets both nutrition and mental stimulation.

    9-to-5 owner plan , midday feeding strategies when you’re at work: 6:30 (before leaving), 12:30 (timed feeder or puzzle feeder), 18:30 (main meal), optional 22:30 snack. Portion anchors: combine a measured morning wet meal, a timed mid-day dry portion in an automatic feeder, and an evening wet meal. Device mapping: manual bowl at home, a reliable automatic feeder for the lunch drop, and a puzzle feeder for mid-day enrichment if the automatic is unavailable.

    A few final practical tips: weigh portions with a small kitchen scale so you’re not guessing, and keep a simple log for a week to see if your cat maintains weight. Ever watched your cat chase shadows after a meal? That little burst of movement means the schedule is working. Worth every paw-print.

    Final Words

    Put the plan into action: aim for multiple small meals spaced about every 5 to 6 hours, and use the 20 kcal-per-pound anchor (so a 10-lb cat needs roughly 200 kcal/day).

    We covered life-stage step-downs, exact meal counts, portion math and label reading, wet vs dry tradeoffs, gentle food transitions, multi-cat feeder strategies, weight checks, and ready-to-use sample day plans.

    Try the templates, set reminders or feeders, watch how your cats respond, and tweak as needed. It's worth every satisfied purr. Follow these steps and your cat feeding schedule for indoor cats will be predictable, stress-reducing, and fun for everyone.

    FAQ

    What is the feeding schedule for indoor cats?

    The feeding schedule for indoor cats is multiple small meals about every 5-6 hours during their active day. Use about 20 kcal per pound; a 10-lb cat needs about 200 kcal/day.

    What is the 3-3-3 rule for new cats?

    The 3-3-3 rule for new cats breaks settling into three stages: three days to decompress, three weeks for routine building, and three months to feel fully at home.

    How much should you feed an indoor cat per day?

    About 20 kcal per pound; a 10-lb cat needs roughly 200 kcal per day.

    How many hours in between should my cat eat?

    Most adult indoor cats should eat about every 5-6 hours, which fits a four-meal day like 7:00, 12:00, 17:00, 22:00.

    How many times should I feed my cat wet food?

    Usually one to two measured wet meals per adult cat per day, included in the daily calorie plan; kittens eat wet food more often.

    What is a cat feeding schedule by age?

    Step-down frequency by age: near-constant neonatal; 8–12 weeks four meals; 3–4 months three meals; 4–6 months two to three; adults two; seniors and nursing cats adjusted with vet guidance.

    What should a feeding schedule for weight loss look like?

    A weight-loss schedule uses measured, reduced-calorie meals with regular weigh-ins and veterinary supervision; feed smaller, frequent meals and track weekly changes to keep progress safe.

    Do you have a cat feeding schedule template or sample routine?

    A sample four-meal adult routine: 7:00, 12:00, 17:00, 22:00. Choose meal-feeding for portion control or limited grazing for relaxed eaters and owner schedules.

    How should I combine wet and dry food in a feeding schedule?

    Split measured daily calories between a wet meal and scheduled dry portions; wet aids hydration, dry gives flexible timing and longer intervals.

    Related Articles

  • How-to Get a Cat to Drink More Water

    How-to Get a Cat to Drink More Water

    Think your cat drinks enough? Most cats don't sip nearly as much as they should. A thirsty cat is sneaky. It takes tiny licks, whiskers twitching as beads of water roll off the rim. Ever watched yours ignore a full bowl but go wild for a dripping faucet? I have, Luna did that, and it was equal parts hilarious and worrying.

    Here’s a simple, low-stress plan you can try right away. Put out fresh, wide bowls (wide so whiskers don’t rub the sides). Add a second, quiet water station in another room. Try a pet fountain (a small pump that keeps water moving), offer a little tuna water (the liquid from canned tuna, in tiny amounts), and swap one meal a day for wet food (canned food that adds moisture). Do these and you’ll see more sips in hours and better drinking habits over days.

    Worth every paw-print.

    Practical plan that gets a cat to drink more water

    - Practical plan that gets a cat to drink more water (Immediate, Short-term, Vet escalation + prioritized quick wins).jpg

    Immediate (0-24 hours)
    Put out fresh water in a clean bowl and add one extra bowl in a quiet spot your cat can sneak off to. Try a small pet fountain or a slow faucet drip to make sipping more interesting. Keep bowls wide and shallow so whiskers don’t brush the sides, and top them off near the rim if your cat seems picky about whisker contact. Swap the water every day so it tastes fresh , you might see a tiny, hopeful sip within hours.

    Quick checklist

    1. Offer fresh water and change it daily.
    2. Add a second drinking station in a calm area.
    3. Try a pet fountain or a gentle faucet drip.
    4. Serve wet food or gently add water to food over a few days.
    5. Use a wide, shallow bowl (whisker-friendly).
    6. Clean bowls daily and keep the fill near the rim if your cat prefers it.
    7. Measure intake: fill once in the morning with 250–500 mL (about 8–17 fl oz) and check in the evening to see how much was drunk.
    8. Offer a little tuna water or low-sodium chicken broth (low salt broth safe for pets) for a short time , stop if your cat turns away or shows an aversion.

    Short-term (1-7 days)
    Rotate bowl types and locations to see what your cat likes , ceramic, stainless, or plastic can smell or feel different to them. Try different wet-food flavors and textures; some cats prefer pâté, others chunky. If you use a fountain, clean the filter weekly or as the maker recommends (filter = the mesh that traps hair and gunk). These small tests usually tell you what your cat will happily drink from without causing stress. If your cat refuses food or seems upset, go back to what worked before.

    Measuring and habit tips
    Keep it simple. A consistent morning fill and evening check gives a good idea of daily intake. For busy days, leave out a sturdy bowl or a safe toy that nudges water , that can buy you ten minutes of quiet, hydrated play. Ever watch your kitty hesitate, then dive in? Yeah, it’s oddly satisfying.

    When to call the veterinarian
    Call your vet right away if your cat is straining to urinate (frequent, painful attempts) or making sounds while trying to go. Get urgent veterinary care within 12-24 hours if there is no urine output, repeated vomiting, collapse, or extreme listlessness. Book a regular vet appointment within 48 hours if low drinking continues despite your changes.

    Timing and red flags
    Many cats improve in 24-72 hours with these tricks. If you see no measurable change in 48 hours, stop guessing and see the vet. Emergency signs that need immediate attention are no urination for 12-24 hours, ongoing vomiting, collapse, or severe lethargy , those aren’t things to wait on.

    How wet food and adding water to meals raises cat water intake

    - How wet food and adding water to meals raises cat water intake.jpg

    Short answer: canned and pouch wet food (soft food sold in cans or soft packets) is about 70 to 80 percent water (that means most of a meal is liquid), so a cat eating mainly wet food gets a big chunk of its daily water from the food itself. That usually means less separate bowl-drinking, which can help kidney and urinary health. Plus, wet food smells stronger, so picky noses often perk up , your cat might suddenly act like a food critic.

    Introduce wet food slowly so your cat doesn’t panic. Start by mixing a spoonful of wet food into the usual meal, then raise the amount over several days to a week while watching appetite and stool. Try different textures – pâté (smooth), gravy (saucy), flakes (shredded bits) – because some cats prefer one feel over another. If your cat refuses or seems off, back the mix down and try another flavor or texture.

    Adding water to dry food is an easy next step. For a typical serving, stir in about 1 to 2 tablespoons of warm water per 1/4 cup of kibble (kibble means dry, crunchy cat food) and let it sit 5 to 10 minutes so the pieces soften and soak it up. Increase the water slowly over a few days so the taste and texture change gradually. If your cat stops eating, gags, or seems bothered, stop and go back to the previous routine.

    Room-temperature wet food often wins over cold, because warming gently brings out the aroma and makes it more enticing. Check the moisture content on labels (moisture content means the percent of water in the food) when you compare brands. As for how much water a cat needs, a common guideline is about 40 to 60 mL per kg daily (mL means milliliters), though cats on wet diets usually sip less from a bowl. Watch for clear aversion signs – leaving food, sudden vomiting, or a sharp drop in meals – and pause changes if you see them. Worth every paw-print to do this slowly, you know?

    Best water bowls, fountain features, and cleaning / fill-level guidance

    - Best water bowls, fountain features, and cleaning  fill-level guidance.jpg

    Some cats love fountains because moving water smells fresher and looks like a toy. But fountains have trade-offs. The pump (small water motor) needs power and can fail, filters (paper or charcoal pieces that catch hair and gunk) must be replaced, and parts come apart for cleaning. A plain bowl has zero mechanics and is rock-solid reliable. Try both and see which your cat prefers, knowing fountains take a bit more upkeep.

    Clean any drinking dish at least once a week, and more often if you have multiple cats. Take a fountain apart and wash the bowl, spout, and pump housing with mild dish soap, scrub crevices with a soft brush, rinse well, and let everything air dry so no soap stays behind. Swap filters per the product directions, and check the pump for slimy buildup that can slow flow or make the water smell bad.

    Pick materials that keep water tasting neutral. Ceramic (fired clay, smooth and temperature-holding), glass (nonporous and easy to sanitize), and stainless steel (a sturdy metal that resists rust) are great choices. Plastic (lightweight but it scratches) can trap odors and bacteria in tiny scratches, so skip chewed or pitted plastic bowls.

    Bowl shape and depth matter because of whisker stress. Your cat’s whiskers are super sensitive, and rubbing them on bowl sides can feel uncomfortable. Choose wide, shallow dishes so whiskers clear the edges; saucer-style bowls about 4 to 6 inches across work well. Some kitties actually like water near the rim so they don’t touch the lip while sipping. Ever watched your cat tilt its head and sip like it’s doing a tiny balancing act? Yeah.

    For fill levels and multi-cat homes, top bowls up daily and follow fountain reservoir marks so pumps don’t run dry. If you have two or more cats, give them either a bigger reservoir or multiple water stations so no one has to guard the tap. A good rule is one water station per cat plus one extra. Swap the water every day for the freshest taste, small habits, big peace of mind.

    Safe ways to flavor and entice cats to drink more water

    - Safe ways to flavor and entice cats to drink more water.jpg

    Quick note: moving water and room-temperature liquids often tempt picky cats, but those tips belong in the bowls and fountains or wet-food sections. Here we’ll stick to safe flavoring and product advice.

    Tiny tastes work best. Try a teaspoon of tuna water (from water-packed tuna, the liquid only, not the oil) or a teaspoon of low-sodium (less salt) chicken broth with no garlic or onion. Put a little in the bowl and watch your cat’s whiskers twitch as they taste. If your cat gags, spits, or vomits, stop right away.

    Introduce any new flavor in tiny amounts so the experience stays positive. You want curiosity, not a scared kitty. Ever watched a cat decide a new smell is either a treasure or trash? Same idea.

    Safe-additive checklist:

    • Read labels for salt content and for garlic or onion ingredients. Garlic and onion are toxic to cats, even in small amounts.
    • Avoid human sugary drinks, caffeinated drinks, and alcoholic beverages, soda, coffee, energy drinks, and booze can all harm cats.
    • Talk with your veterinarian before using commercial feline hydration mixes or electrolyte solutions (rehydration mixes for pets). Your vet can confirm the right product and dose.
    • Check any product label for sugar, caffeine, and other unsafe ingredients before offering it.
    • If a new additive makes your cat gag, spit, drool, or vomit, stop immediately and call your clinic.

    For busy days, a small flavored splash can buy you ten minutes of safe sipping before you head out. Worth every paw-print.

    How to monitor hydration and spot clinical signs (advanced methods, clinical checks, device pros/cons)

    - How to monitor hydration and spot clinical signs (advanced methods, clinical checks, device proscons).jpg

    Start simple. Watch bowl levels, check the litter box, and notice how your cat acts after a meal. Ever watched your kitty chase a drip and think, huh, that’s a lot of sipping? Those small habits tell you a lot.

    Pair one steady, hands-on method with a device that actually fits your routine so you’re not chasing alerts all day. A quick daily check , top off the bowl in the morning and eyeball it at night , plus one reliable gadget usually keeps things sane.

    Smart bowls, feeders, wearables and apps are great for extra data, but they come with trade-offs. Devices can miss sips from other bowls, give false spikes in multi-cat homes, or drift as batteries run low. They need cleaning and occasional calibration (resetting the scale or flow sensor, the part that measures water movement). Treat app numbers like helpful hints. Cross-check with a morning fill and an evening look to make sense of trends.

    Do a few simple clinical checks at home. Skin tent test (pinch the loose skin over the shoulder to see how fast it returns) is quick and useful. Look at gum moisture and color , gums should feel moist and look pink. Check capillary refill time (press a gum until it blanches, then release; color should come back in under 2 seconds). These are low-tech and powerful.

    Weigh your cat on the same scale once a week (the scale is the simple weighing device you already have at home). Small drops in weight often show up before big clinical signs, so that tiny loss matters.

    Use realistic intake targets when you read device reports. Most adult cats drink about 40 to 60 mL per kilogram of body weight per day. That means a 4 kg cat sips roughly 160 to 240 mL daily. If your cat eats wet food, remember those meals add about 70 to 80 percent water, so bowl drinking will be less.

    Cat weight (kg) Typical intake (mL/day)
    3 kg 120 – 180 mL
    4 kg 160 – 240 mL
    5 kg 200 – 300 mL

    Call the clinic right away for severe signs: skin that snaps back very slowly, very dry gums, not urinating for 12 to 24 hours, repeated vomiting, collapse, or extreme listlessness. If a device shows a steady decline and your hands-on checks (skin tent, gums, weight) look worse, contact your vet within 24 to 48 hours for an exam.

    If the app and your own checks don’t match, trust the physical exam and get help. Isn’t it nicer when a toy , or a bowl , just behaves? Worth every paw-print.

    Special guidance for kittens, senior cats, and cats with kidney or urinary conditions

    - Special guidance for kittens, senior cats, and cats with kidney or urinary conditions.jpg

    Kittens need lots of tiny chances to sip. Offer a shallow dish or a few ice cubes (ice is a novelty treat that melts into drinkable water) and put a bowl where they nap and another where you feed them. Try a small, sturdy fountain only when you can watch it so they don’t tip it over. If a very young kitten refuses all fluids, seems weak, or vomits, call your vet right away , kittens can dehydrate fast (lose body water) and may need pediatric care within 12 hours.

    Senior cats, about 11 years and up, often prefer gentler setups. Warm wet food a little to wake up the aroma; you’ll see more interest that way. Add a quiet water station on each floor and raise bowls on a low platform so sore hips or necks aren’t strained. Weigh seniors weekly and keep an eye on litter-box visits , steady small weight loss or a drop in urination after starting a new medication are good reasons to check in with the clinic.

    For cats with kidney disease (when kidneys can’t filter well), urinary crystals (tiny mineral bits in urine), cystitis (bladder inflammation), or diabetes (a blood-sugar problem), moist food and easy water access are key. Extra fluids help dilute urine and support kidney filtration (filtration is the kidney’s job to clean waste from the blood). Keep any flavor add-ins very mild and vet-approved , salty broths or garlic and onion are not safe. Track daily water intake and urine output so you can give your vet clear numbers.

    When drinking and diet changes aren’t enough, vets may suggest subcutaneous fluids (fluids given under the skin) or in-clinic IV care (fluids into a vein). You might learn to give subcutaneous fluids at home from your clinic , many people do, and it can really help. Expect some appetite and energy boosts within 24 to 48 hours after fluids, but the full plan depends on the underlying condition. Get immediate care if your cat isn’t urinating for 12 to 24 hours, keeps vomiting, collapses, or becomes extremely lethargic.

    How-to Get a Cat to Drink More Water

    - Behavioral tricks, enrichment, placement, and training techniques that increase drinking.jpg

    A cat’s thirst comes down to behavior and the setup. Motion, new things, and a quiet safe spot make water more interesting. Small, playful changes usually work better than nagging. Ever watched your kitty ignore a full bowl? Yep, we’ve all been there.

    • Teach them to like fountains or faucets step by step. Start with the fountain off so they can sniff it safely. Put a few treats nearby to build trust, then run a tiny trickle of water and stay close. Slowly increase the flow and the runtime as they get comfortable. For a faucet, let a slow drip run while you supervise and encourage a gentle paw tap with a toy. Think of it like faucet training wheels. Example: Try leaving the fountain off for a day. Say, "Go on, sniff it; it’s safe." Then run a whisper of water.

    • Set up multiple drinking stations and watch for 24 hours. Put small bowls in different rooms and at different heights, but always away from litter boxes and busy doorways. Cats like choices. You might find one bowl gets all the action while others sit cold.

    • Use hydration-focused puzzle feeders. These are toys that release food or liquid rewards when solved. Fill them with tiny wet-food portions or a drop of low-sodium broth so playtime leads to sipping. It’s like a reward loop: solve, snack, sip.

    • Rotate bowl types and heights every few days and test each setup for 24 hours to see what sticks. Try ceramic (baked clay), glass (smooth, heavy glass), and stainless steel (metal that resists rust). Some cats hate plastic, some prefer the heavy feel of glass, your cat will tell you.

    • Ice-cube novelty for kittens or picky sippers. Freeze tuna-water or diluted low-sodium broth into ice cubes and offer them as a short, supervised treat. Great for curious kittens and scent-driven sippers. My cat went wild for tuna ice once, true story.

    • Pair a short play session with fresh water. Do a minute of focused play right before offering water so your cat learns that activity often leads to drink time. Example: "One-minute zoomies, then water" , toss a feather for 60 seconds, then place the bowl. Works like a charm, usually.

    • Try only one new trick at a time and give it time. Wait 24-72 hours before adding another change so your cat doesn’t get overwhelmed. Patience pays off.

    Introduce changes slowly, watch preferences in the first 24 hours for each setup, and combine a favorite bowl, a preferred station, and a quick play-to-water routine for the best result. If your cat’s drinking doesn’t improve within 48 hours, or you notice lethargy, vomiting, or very little/no urination, contact your veterinarian right away.

    How-to Get a Cat to Drink More Water

    - Troubleshooting flow diagnose cause  quick test  safe immediate fix  when to escalate (with timeframes).jpg

    If your cat has been drinking less, don’t panic. Small changes at home often kick-start sipping again, and we’ll walk through quick checks and fixes you can try right away.

    Immediate (0-24 hours) checklist – Try alternate bowls/locations:

    • Swap the bowl. Use a wide, shallow ceramic bowl or stainless steel (stainless steel – won’t hold smells). Cats hate whisker stress, so give them room to drink.
    • Move one bowl to a quiet room for 24 hours so your cat can approach without noisy appliances or foot traffic.
    • Turn a water fountain off and let it sit dry for a bit so the cat can safely sniff and inspect it. Sometimes the motion or noise is off-putting.
    • Safe immediate setup: place a wide shallow bowl filled near the rim in a calm spot, and put a second water station away from the litter box and loud machines. Two stations can cut competition and anxiety.
      Example: "Try a shallow ceramic dish; wide, comfy, no weird smells."

    When to escalate: if there’s no measurable increase in drinking within 48 hours, or you notice less urine (urine output – how much pee you see in the litter), call your vet.

    Appetite, smell, dental, or nasal issues
    Short checks and flavoring tips live in the Wet Food / Flavoring section (wet food – canned or pouched food). But a quick note here: if your cat has mouth pain, drooling, bad breath, sneezing, or nasal discharge, book a dental or nasal check with your clinic. Those things make eating and drinking painful.
    When to escalate: if your cat refuses both food and water for 24 hours, or clearly shows mouth pain, get a vet appointment within 24-48 hours.
    Example: Warm wet food like leftover chicken – about 10 seconds in the microwave; stir and test so it’s not hot.

    Medication effects and possible systemic illness
    Quick test: check any new meds or recent dose changes and write them down. Keep a simple log and measure intake by filling bowls in the morning and checking them again in the evening. That gives you numbers to tell the vet.
    Safe immediate fix: add wet food and another water station, keep that intake log, and call the clinic before you change or stop any meds.
    When to escalate: if drinking drops sharply or you also see low energy, vomiting, or weird litter-box habits, contact your vet within 24-48 hours.

    Emergency red flags and timing
    Many simple fixes show benefit in 24-72 hours, and if nothing improves in 48 hours, reach out to your vet for a consult. But get urgent care right away for really serious signs: straining to urinate, no urine for many hours, repeated vomiting, collapse, or extreme listlessness. These are emergencies. Worth every paw-print.

    Final Words

    In the action, this post gave a hands-on plan: quick wins to try now, short-term follow-ups, diet tips with wet food, fountain and bowl choices, safe flavoring, monitoring tricks, and clear vet timeframes.

    Immediate tricks often work fast. Try fresh bowls, a fountain, wet food, or tuna water (small amounts). Measure intake with a morning fill and evening check to track progress.

    Stick with the easiest changes first and watch for signs that need help. Following these steps on how to get a cat to drink more water should bring relief and purr-fectly hydrated kitties soon.

    FAQ

    Frequently Asked Questions — Cat Water Intake

    How can I encourage my cat to drink more water?

    Offer fresh water daily, place multiple bowls around the house, try a small cat fountain, feed wet food, offer low-sodium broth (no onion/garlic), and do short play sessions before offering water.

    How to get a cat to drink water from a fountain?

    Start with a low flow, place the fountain near a favorite spot, keep it very clean, run it in short supervised sessions, and reward curious sniffing or approach with treats.

    My cat isn’t drinking water but is eating wet food — is that okay?

    Often yes: wet food contains about 70–80% water. Watch urine output and litter-box habits, and offer extra water sources if your cat has urinary or kidney risks.

    How should I make a sick or post-op cat drink water, and should I force fluids?

    Avoid forcing fluids. Offer wet food, low-sodium broth, and only syringe small sips if your vet advises. Contact your vet and consider prescribed subcutaneous (under-the-skin) fluids if intake remains low.

    How do I get a kitten to drink water instead of milk?

    Use shallow dishes at room temperature, gradually swap bottle feeds to a shallow bowl during the 4–8 week weaning window, try ice-cube play to encourage lapping, and check with your vet.

    How can you tell if your cat is dehydrated?

    Signs include skin tenting, dry or tacky gums, sunken eyes, low urine output, lethargy, and slow capillary refill. Seek urgent vet care for severe signs like collapse or no urine.

    Why does my cat drink so little water?

    Cats naturally drink less because of desert ancestry and because wet food supplies much moisture. Bowl material, shape, smell, dental pain, medications, or age can also reduce voluntary drinking.

    How do I measure and track my cat’s water intake?

    Pour a known volume (250–500 mL) each morning, record the evening leftover to calculate daily intake, log values daily, and add wet-food moisture to your totals.

    Related Articles

  • How Much Water Should a Cat Drink a Day?

    How Much Water Should a Cat Drink a Day?

    Is your cat really getting enough water? Ever watch those tiny, earnest slurps at the bowl and wonder if it’s enough? Water needs can be sneaky. Some cats sip barely anything, while others drink like champs.

    Adult cats should drink about 50 to 60 ml per kg per day (ml = milliliter – a small measure of liquid; kg = kilogram – a unit of weight). That’s roughly 1 ounce per pound. So a 10-pound cat will usually drink about 7 to 9 ounces a day. Easy rule to use right now.

    Quick notes: if your cat eats mostly wet food, they get extra moisture from their meals and may drink less. If they eat dry food, expect more drinking. Kittens often drink more per pound because they’re growing, and seniors can drink more or less depending on health. If you see sudden changes in drinking, fewer litter-box visits, or your cat seems tired, call your vet, hydration can change fast.

    Keep an eye on those tiny slurps. It’s one of the quickest ways to keep your kitty feeling feline fine.

    Daily water guideline for cats (precise amounts by weight)

    - Daily water guideline for cats (precise amounts by weight).jpg

    If you’re wondering how much water your cat should drink each day, here’s an easy rule: about 50 to 60 ml per kg per day (ml means milliliter – a small measure of liquid; kg means kilogram – a unit of weight). Multiply your cat’s weight in kg by 50-60 to get milliliters. That’s roughly 1 ounce per pound (oz means ounce – about 30 ml), so a 10-pound cat usually drinks around 7 to 9 ounces daily. Think of these as baseline guidelines for adult cats, quick checks before you tweak for your cat’s life and health.

    Weight (kg) Weight (lb) Recommended ml/day Recommended oz/day
    1.4 3.1 70 2.4
    2.7 6.0 135 4.6
    4.0 8.8 200 6.8
    4.5 9.9 225-270 7.6-9.1
    6.0 13.2 300 10.1

    For a worked example: a 5 kg adult cat drinks 5 kg × 50-60 ml/kg = 250-300 ml/day (about 8.5-10.1 oz/day). Easy math. Ever watched your kitty sip slowly, then suddenly race to the bowl? Hydration can change day to day.

    Remember to treat these as starting points. Diet (wet vs dry food), age, activity, weather, and medical issues all change real needs. Kittens and seniors usually need different amounts, and some health problems call for more water or stricter limits. In later sections we cover diet tweaks, kitten and senior adjustments, and medical factors so you can tailor this to your own furball.

    How food type (wet vs dry) affects how much water a cat drinks

    - How food type (wet vs dry) affects how much water a cat drinks.jpg

    Wet food (canned or pouch food) gives your cat a lot of built-in water, while dry food or kibble (dry, crunchy cat food) has very little. That means a cat eating mostly wet food usually sips far less from a water bowl than a cat on dry food. Ever watched your kitty drink after batting at a soggy pouch? It’s a subtle thing, but it adds up.

    Food moisture content matters when you do the math. Moisture content (the percent of the food that’s water) is typically about 8% for dry food and around 80% for wet food. To turn grams of food into milliliters of water, multiply the food weight by the moisture fraction , grams × moisture percent as a decimal = ml water (1 gram of water ≈ 1 ml). If the package doesn’t list moisture, use 8% for dry and 80% for wet as a rule of thumb.

    Quick example: 100 g of wet food at 78% moisture gives 100 × 0.78 = 78 ml of water. Take that food-provided water and subtract it from the total daily need listed in "Daily water guideline for cats" to find how much extra bowl water your cat should have.

    How to calculate water provided by food

    1. Convert food grams to water ml using moisture % (moisture content = percent of the food that’s water).
    2. Use the baseline total daily need in "Daily water guideline for cats" as the amount your cat should get.
    3. Subtract the food-provided ml from that baseline to get the additional bowl water required.

    Simple, right? For busy days, toss an unbreakable water bowl out before you leave , that’s peace of mind and hydrated whiskers.

    Estimating water needs by weight and age (kittens, adults, seniors)

    - Estimating water needs by weight and age (kittens, adults, seniors).jpg

    Kittens need more water per kilogram than adults. Use the same 50 ml per kg figure from the main guideline and apply it to kittens (ml = milliliters, kg = kilogram, about 2.2 pounds). Ever watched a kitten lap water like a tiny fountain? Here’s a quick worked example: 1.4 kg × 50 ml/kg = 70 ml/day, quick and simple.

    Age/Weight Estimated water need (ml/day)
    Kitten , 1.4 kg (about 3.1 lb, up to ~3 months) 70 ml/day
    Kitten , 2.7 kg (about 5.9 lb, ~6 months) 135 ml/day

    For adult calculations and a worked adult example, see the "Daily water guideline for cats" section. And if you want to subtract water already in food, check "How food type (wet vs dry) affects how much water a cat drinks" instead of redoing that math here.

    Older and overweight cats can hide dehydration (when the body lacks enough water) and their thirst signals may be weaker, so watch for subtle shifts. You might notice your cat skipping bowls, taking tiny hesitant sips, or just seeming less thirsty than usual.

    Watch these cues closely:

    • slowed skin-tent return (skin takes longer to fall back after a gentle pinch; a simple dehydration check)
    • sticky or dry-feeling gums (gums should feel moist)
    • reduced frequency of drinking or long gaps between drinks

    If you spot any of these signs, check drinking patterns more often and talk with your vet if the changes stick around. Keeping a quick log of when and how much your cat drinks can be really helpful.

    Worth every paw-print.

    Measuring and tracking your cat’s daily water intake

    - Measuring and tracking your cats daily water intake.jpg

    Keeping a short log makes it easy to spot slow changes in drinking, and it answers the big question: how to measure how much water your cat drinks without guessing. A week of simple daily checks gives you a realistic average. That average is what you’ll compare to the "Daily water guideline for cats." Small shifts can mean a big health change, especially for seniors or cats with medical issues.

    Here’s an easy way to measure. At the start of a 24-hour period, pour a known amount of water from a measuring jug (marked in milliliters, milliliters (ml) are small units for liquid volume) into your cat’s bowl and write down the start ml. After 24 hours measure what’s left, then subtract: start ml minus end ml equals consumed ml. You can use a digital kitchen scale instead (grams, grams (g) are weight units; for water 1 g = 1 ml). Repeat this each day for seven days and note any changes in food type or bowls. Want less fuss? Try a smart fountain or app (automatic trackers that log frequency, time, and ml).

    When you have seven days of numbers, find the daily average and compare it to the guideline in "Daily water guideline for cats." Watch for big swings, steady declines, or sudden spikes. If your average is well below the guideline, or you see abrupt changes plus other signs, check the Recognizing dehydration section or contact your vet. Better safe than sorry.

    Ever watched your kitty sneak a sip and act like it was secret mission? Those tiny behaviors matter. Add quick notes like food moisture percent, bowl swaps, or if your cat spent the day hiding , all of that helps explain odd numbers later.

    Tools and practical setup for tracking

    • Measuring jug (clear ml markings; good for pouring an exact start amount)
    • Digital kitchen scale (measures grams for people who prefer weighing over pouring)
    • Notebook or spreadsheet (simple logging; a few columns is all you need)
    • Smart fountain or app (hands-off tracking, handy for busy days but may confuse results if pets share bowls)

    Tracking log template (copy for one week):

    Date Start ml End ml Consumed ml Food moisture % Notes

    A week’s worth of this makes a great handoff for your vet or a clear snapshot for you. Worth every paw-print.

    How Much Water Should a Cat Drink a Day?

    - Recognizing dehydration and overhydration in cats.jpg

    Dehydration in cats can be sneaky. You might notice your kitty acting quiet, eating less, or just not being her usual spunky self. Those small changes are early signs of dehydration and worth paying attention to fast.

    Acting quickly matters because low body water changes how organs work and can get serious. If you see several signs together, don’t wait to see if it clears up. A vet visit is the smarter move.

    Common signs of dehydration in cats include:

    • Lethargy or weakness; your cat moves slowly or hides more than usual.
    • Gums that feel tacky, sticky, or dry when you touch them.
    • Reduced skin elasticity; skin that stays up instead of snapping back.
    • Sunken eyes or a dull, tired gaze.
    • Less interest in food or skipping meals.
    • Fewer urine spots in the litter box, or darker urine.
    • Faster breathing or a racing heart after little activity.
    • Sudden changes in drinking , either drinking a lot, or oddly stopping.
    • Swelling, coughing, or trouble breathing can mean too much fluid and need urgent vet care.

    Want a simple at-home check? Try the skin tent (pinch test). Gently pinch a small fold of skin at the back of the neck or between the shoulder blades, lift to make a tiny tent, then let go. If the skin snaps back right away, hydration is probably fine. If it takes several seconds to return, that suggests dehydration.

    Check the gums too. Press a fingertip on the gum until it turns pale, then watch how color and moisture come back. The gums should feel moist, not sticky, and color should return quickly. These are quick, rough checks , not replacements for veterinary exams.

    Numeric red flags to watch: drinking over 100 ml per kg per day on a mostly dry diet, or over 50 ml per kg per day on a mostly wet diet, is considered polydipsia (excessive drinking) and should prompt a vet consultation. ml per kg means milliliters per kilogram of body weight. For example, a 10 pound cat (about 4.5 kg) hitting 100 ml per kg would be drinking roughly 450 ml a day on a dry-food diet. Also call the vet if your cat suddenly stops drinking or shows several clinical signs at once.

    Too much fluid is a risk too, so be aware of overhydration signs like swelling, coughing, or breathing trouble and seek prompt care if you see them. In truth, small changes in drinking or behavior are often the first clue that something’s off.

    Quick tip: wet food is an easy way to boost water intake, and a pet fountain can spark curiosity and sips. Ever watched your cat lap happily from a fountain? It’s oddly satisfying.

    Medical conditions and tests that affect a cat’s water needs

    - Medical conditions and tests that affect a cats water needs.jpg

    Some health problems make a cat drink more, or sometimes less. Chronic kidney disease (kidneys slowly losing their ability to filter and concentrate urine) often means your cat can’t concentrate urine well, so they drink extra to replace lost fluids. Diabetes mellitus (high blood sugar) makes cats drink and pee a lot , that thirsty little furball habit. Other things that change water needs include urinary tract disease, hyperthyroidism (an overactive thyroid that speeds the body up), Cushing’s disease, vomiting, diarrhea, nursing, hot weather, or very active play.

    When you talk with your vet they’ll ask a focused history , how often your cat drinks and pees , check weight and gum color, and run tests to find the cause. Common checks are urine specific gravity (USG, how concentrated the urine is), bloodwork for kidney markers like creatinine and BUN (waste products that rise when kidneys aren’t filtering well), and blood glucose (blood sugar). Thyroid testing is added when signs point that way. Numeric thresholds for when to call a vet live in the "Recognizing dehydration" section and won’t be repeated here.

    Test results change what your vet recommends. A low USG usually points to poor kidney concentrating ability or sugar in the urine, and that often leads to more testing. Abnormal creatinine or BUN suggests reduced kidney function; vets commonly respond with fluid therapy, diet changes, and closer follow-up. High blood glucose from diabetes typically starts glucose control measures and a hydration plan. For chronic kidney disease, your vet might suggest scheduled subcutaneous fluids (fluids given under the skin), a renal prescription diet (food formulated to support kidneys), and more frequent home checks.

    Worth every paw-print.

    Common veterinary tests and what they mean

    • Urine specific gravity (USG): measures how concentrated urine is; low values suggest poor kidney concentrating function or excess sugar in the urine.
    • Kidney blood markers (creatinine, BUN): creatinine is a waste product that rises when kidneys aren’t filtering well; BUN (blood urea nitrogen) is another waste indicator used to gauge kidney health and staging.
    • Glucose testing: checks blood sugar; high levels point to diabetes mellitus and help shape treatment and hydration plans.

    Practical strategies to encourage a cat to drink more water

    - Practical strategies to encourage a cat to drink more water.jpg

    A few small changes at home can make a big difference in getting your cat to sip more. These are quick wins that fit busy schedules and picky personalities, try one or two, then compare results to the baseline in "Daily water guideline for cats."

    • Offer fresh water every day, and swap the water at least once daily. Cats notice clean water, no dust or fur, and they’ll drink more when it looks and smells fresh. Rinse bowls with mild soap and hot water now and then to keep things inviting.

    • Put several water stations around the house so your cat finds a bowl near where she naps or prowls. Short walks to a bowl matter for picky kitties, you know. Keep water away from food and the litter box to reduce contamination worries.

    • Try a pet water fountain (a small pump that keeps water moving) or let a faucet drip gently. Running water often feels fresher and tempts cats to lap, watch those whiskers twitch as the ripples form. Ever seen a shy cat get excited by a little splash? It’s cute.

    • Choose wide, shallow bowls in stainless steel (durable metal) or ceramic (glazed clay) because they don’t trap odors the way some plastics do. A wide bowl also keeps whiskers from touching the sides, more comfy lapping. Avoid scratched plastic bowls that can hold smells or irritate chin skin.

    • Use flavor boosters sparingly to spark interest: a teaspoon of low-sodium chicken broth (no onion or garlic) or a splash of plain tuna juice can help. Make it an occasional treat so you don’t upset their diet or add too much sodium.

    • Offer wet food or drop an ice cube in the bowl on hot days; wet food adds built-in moisture and ice cubes add fun. Many cats love pawing at a melting cube, soft nibbles and a little chase. For busy days, a wet food meal can be an easy hydration boost.

    • Try different bowl heights and spots. Raised bowls can help older cats with neck comfort, while kittens and many adults prefer low, floor-level dishes. Think of it like choosing a comfy chair.

    • Consider a smart fountain or timed refills if you’re away (smart fountain = a fountain with sensors and app control). These keep water moving and fresh, give you refill reminders, and help maintain steady sipping when you’re out of the house.

    Worth every paw-print. Compare any change to the baseline in "Daily water guideline for cats" to see what really helps.

    Special situations: kittens, pregnant/nursing cats, seniors, hot weather and travel

    - Special situations kittens, pregnantnursing cats, seniors, hot weather and travel.jpg

    Kittens need more water for their size, so check the "Daily water guideline for cats" table for worked examples instead of relying on just one number. Young cats sip a lot and can lose fluids faster if they get sick or play nonstop. Offer small, shallow bowls and feed wet food (canned or pouch food with high moisture) to boost their built-in water intake. My kitten prefers a saucer-like dish; she can lap without whisker stress.

    Pregnant and nursing cats need extra fluids because making milk and growing kittens raises their demands. Ask your vet (veterinarian) for a target increase so you know how much more to offer each day. Call your clinic; they can tell you how much extra to aim for during pregnancy.

    Senior cats can quietly lose body water while acting normal, so watch weight and appetite more closely. Keep water bowls easy to reach and use raised bowls (a slightly elevated feeding bowl to reduce neck strain) if bending down is hard for your older cat. Little changes like that make drinking easier, and that can be a big help.

    Heat and travel bump up fluid needs too. Pack a nonspill bowl (spill-resistant travel bowl), extra water, and offer wet food more often on hot days or long drives. Plan short drinking breaks so your cat gets regular sips.

    Travel tips:

    • Use a portable nonspill bowl for motion-safe drinking
    • Bring spare bottled water for the trip
    • Pause every hour or two for a quick drink break and a stretch
    • Carry travel-safe wet-food pouches or trays (single-serve, easy to open)

    Watch for the signs listed in "Recognizing dehydration" and call your vet if several appear together. Ever watch your cat hide that they’re thirsty? Yeah, don’t wait, reach out if you’re unsure.

    When to contact a veterinarian and what to record before a visit

    - When to contact a veterinarian and what to record before a visit.jpg

    If your cat suddenly drinks a lot more or a lot less than usual, call the vet. Call sooner if drinking changes come with vomiting, diarrhea, extreme tiredness (lethargy, meaning your cat seems weak or less active), eyes that look sunken (hollow), or gums that feel tacky (a bit sticky to the touch). Check the numeric triggers in "Recognizing dehydration" (specific numbers that show mild, moderate, or severe dehydration) to help decide how urgent it is. Senior cats (usually over 10 years) or cats with known health problems deserve an earlier call.

    Not sure? Call; a quick phone consult can clear things up fast. When you call, focus on trends and recent changes instead of one single reading , for example, say "she drank much less for two days" or "he had three big drinks today." Have your water log (a simple diary of daily water intake), notes on appetite, vomiting frequency, stool changes, any meds, and when signs began. A short video or photo of the behavior, eyes, or gums can be super helpful. For common tests and emergency treatments, see "Medical conditions and tests" for the specifics.

    Final Words

    Daily baseline: 50–60 ml per kg (about 1 oz per lb). The post gives conversions, a five-row weight table, and a worked 5 kg example so you can do the math.

    We covered wet vs dry food math, age and medical tweaks, week-long tracking, and signs that mean call the vet. Fountains, extra bowls and tiny flavor boosts help raise sipping.

    Start with the baseline and adjust for diet or life stage. If you’re asking how much water should a cat drink a day, compare your cat’s average to the table. Happy hydrating. Your cat will purr.

    FAQ

    Frequently Asked Questions

    How much water should a cat drink a day?

    A cat should drink about 50–60 ml per kg of body weight per day (roughly 1 ounce per pound). Examples: a 4 kg cat ≈ 200–240 ml/day; a 10 lb cat ≈ 7–9 oz/day. These are guideline estimates.

    How much water should a cat drink a day if they eat wet food?

    Wet food is about 80% moisture, so a cat fed mainly wet food will drink less from a bowl. Subtract the approximate ml provided by the food from the 50–60 ml/kg baseline to estimate bowl water intake.

    How much water does a 4 kg or 10 pound cat need per day?

    A 4 kg cat needs about 200–240 ml/day (≈6.8–8.1 oz). A 10 lb (≈4.5 kg) cat needs roughly 225–270 ml/day (≈7.6–9.1 oz). All values are guideline estimates.

    How many times a day should a cat drink water and should they have access all day?

    Cats should have fresh water available all day. They sip frequently in short bursts rather than taking a few large drinks; multiple fresh water stations can help ensure adequate intake.

    How much water can a cat drink at once?

    Amounts vary by size and thirst, but most cats take small sips. Sudden large gulps or prolonged drinking can indicate a problem—measure intake and consult your vet if concerned.

    Do indoor cats drink a lot of water?

    Indoor cats often drink less than outdoor cats because of lower activity and cooler temperatures, but individual needs depend on diet, age, and health—track intake to be sure.

    How do I tell if my cat is drinking enough water?

    Measure daily bowl consumption, check skin tent (pinch skin briefly to see how quickly it snaps back) and gum moisture, then compare week averages to the 50–60 ml/kg guideline.

    How do you hydrate a cat that won’t drink?

    Offer wet food, a pet water fountain, small amounts of low-sodium broth or tuna juice, ice cubes, or syringe fluids only under veterinary guidance. Contact your vet if the cat refuses to drink for more than a day or shows other signs of illness.

    Related Articles

  • Best Cat Water Fountains for Encouraging Hydration

    Best Cat Water Fountains for Encouraging Hydration

    Ever think your cat drinks enough? Most don’t. Many sip too little, and that can raise their chance of urinary problems.

    The best fountains get cats drinking by offering moving, fresh-smelling water. The gentle gurgle and tiny ripples make whiskers twitch and invite a sip. Ever watched your kitty perk up at a dancing surface? It’s adorable.

    Good fountains pair shallow, wide bowls (so whiskers don’t brush the sides) with quiet pumps (small electric motor that moves the water) and filtration (filters out hair and gunk). Look for safe materials too, like stainless steel (rust-proof metal) or BPA-free plastic (plastic made without BPA).

    We tested top fountains for quietness, materials (what they’re made of), filtration (how well they clean the water), capacity (how much water they hold), and cleanability (how easy they are to take apart and wash). Then we picked the ones that did the best job.

    We’ll share our top picks and simple setup tricks to get even picky cats drinking more. Worth every paw-print.

    How the best cat water fountains for encouraging hydration actually increase drinking

    - How the best cat water fountains for encouraging hydration actually increase drinking.jpg

    The best cat water fountains work because lots of cats prefer running water. The gentle gurgle and moving surface smell fresher to them, so they’re more likely to sip. More sipping can lower urinary risks that come from drinking too little. If your cat looks dehydrated, call your vet. Watch for less drinking, lethargy, or a drop in litter-box output.

    Cats tune in to a few simple things: motion, cleanliness, and comfort. A bubbling stream or soft flow looks and sounds fresh, and that grabs their attention. Moving water hides stale smells and slows bacterial growth (bacteria multiply faster in still water). Wide, shallow bowls cut down on whisker fatigue (that annoying rubbing of whiskers against bowl sides), so your cat won’t pull back mid-sip. Think of a fountain like a tiny stream your cat can nudge with a paw – sensory play plus hydration. Ever watched your kitty bat at the spout?

    Quick wins when you’re picking or setting up a fountain:

    • quiet pump (low noise so you don’t scare them)
    • shallow, wide bowl for whisker comfort
    • robust filtration (removes hair and debris)
    • multiple stations so shy or lower-rank cats can drink without competition
    • easy-to-clean parts

    Practical tips: put more than one fountain or bowl around the house, and keep a non-electric backup water bowl for outages. Routine cleaning makes the fountain inviting , rinse and top off daily, deep-clean weekly, and change filters as the maker suggests. Try swapping materials if your cat avoids plastic: stainless steel (durable metal) or ceramic (baked clay) often win picky noses. Small habits like these make it a lot easier to encourage your cat to drink more with fountain solutions.

    Worth every paw-print.

    Best Cat Water Fountains for Encouraging Hydration

    - Top rated best cat water fountains for encouraging hydration (ranked picks and brief rationale).jpg

    We compared top cat water fountains for quietness, materials, filtration, capacity, how easy they are to clean, and price so you can pick the right one fast. We tested real models, including the Petlibro Dockstream and a few Petkit fountain styles, to see how cats actually react. Capacity numbers are in the table below and maintenance/service details are in Maintenance → Consolidated maintenance numbers.

    Petlibro Dockstream (Top overall)

    Petlibro Dockstream, 84 oz , a near-silent wireless pump (rechargeable battery) and helpful app features (drink tracking and alerts). Great if you want a smart, quiet fountain that doesn’t bother you or your cat. Check Maintenance → Consolidated maintenance numbers for service cadence.

    Uahpet Smart Pet Fountain (Runner-up)

    Uahpet Smart Pet Fountain, 71 oz , cordless design with a stainless-steel bowl option (rust-resistant metal) that’s dishwasher-safe and simple to clean. Solid pick for picky kitties who turn their nose up at plastic.

    Felaqua Connect by Sure Petcare (Hi-tech)

    Felaqua Connect, 34 oz , uses microchip access control (lets only registered pets drink) and offers optional app monitoring. Perfect for multi-cat homes where you want to track who’s drinking and when.

    Drinkwell Pagoda (Style and ceramic)

    Drinkwell Pagoda, 70 oz , ceramic bowl (smooth, breakable) with a two-tier flow that cats often find irresistible. Looks nice on a counter and gives your cat a little waterfall to chase.

    Veken 2.8 L (Best budget)

    Veken 2.8 L, 94 oz , huge capacity for the price and simple filtration (charcoal filter). Quiet enough for most rooms and means fewer refills on busy days.

    PetSafe Drinkwell 360 (Best for multi-pet homes)

    PetSafe Drinkwell 360, 128 oz , 360-degree access with multiple spouts so several pets can drink at once without crowding. Great for households with more than one thirsty friend.

    Raindrop Fountain (Quiet pick)

    Raindrop Fountain, 60 oz , designed to be ultra-quiet with an available stainless bowl option (rust-resistant metal) and easy, cat-friendly flow styles. Pick this if silence is your priority.

    PawsPik SS-01 (Best stainless steel)

    PawsPik SS-01, 108 oz , food-grade stainless steel construction (safe, easy to sanitize) and dishwasher-safe parts. Top choice if hygiene or metal bowls are important to you.

    Petcube Fountain (UV-C / high hygiene)

    Petcube Fountain, 45 oz , includes UV-C purification (short-wavelength light that reduces microbes) and offers ceramic or stainless drinking basins. Good for owners who want extra germ control.

    Catit Flower & Cat Mate (Compact / budget mentions)

    Catit Flower and Cat Mate, about 70–100 oz , compact, affordable starters that are simple to set up and keep clean. A friendly intro fountain for first-timers or small spaces.

    Model Capacity (oz / L) Key feature(s) Best for Price range
    Petlibro Dockstream 84 oz / 2.5 L Quiet wireless pump (rechargeable), app features (drink tracking) Smart, quiet homes $60–$90
    Uahpet Smart Pet Fountain 71 oz / 2.1 L Dishwasher-safe stainless option (rust-resistant metal) Stainless-steel preference $50–$80
    Felaqua Connect 34 oz / 1.0 L Microchip access, app monitoring (per-pet tracking) Multi-cat tracking $120–$180
    Drinkwell Pagoda 70 oz / 2.0 L Ceramic two-tier design (smooth, breakable) Style-forward homes $40–$70
    Veken 2.8 L 94 oz / 2.8 L High capacity, budget price, charcoal filtration Value seekers $25–$40
    PetSafe Drinkwell 360 128 oz / 3.8 L 360° access, multiple spouts Multi-pet homes $50–$90
    Raindrop Fountain 60 oz / 1.8 L Nearly silent, stainless option (rust-resistant metal) Quiet cat households $40–$80
    PawsPik SS-01 108 oz / 3.2 L Food-grade stainless steel (safe, easy to sanitize) Hygiene-focused homes $80–$140
    Petcube Fountain 45 oz / 1.35 L UV-C purification (reduces microbes), ceramic option High-hygiene preference $120–$200
    Catit Flower & Cat Mate ~70–100 oz / ~2–3 L Compact, easy setup Starters, small spaces $20–$40

    Best Cat Water Fountains for Encouraging Hydration

    - Best cat water fountains for encouraging hydration a practical buying guide.jpg

    Capacity numbers are in the Top Picks table and lifecycle figures live in Maintenance → Consolidated maintenance numbers. Just a heads-up so you know where to look for the nitty gritty.

    Go with stainless steel (food-grade metal, won’t leach and easy to clean) or ceramic (baked clay, heavy and often dishwasher-safe) for the basin. Those surfaces fight bacteria better than plastic and usually hold up after lots of cleanings. Your cat’s whiskers will thank you.

    Aim for two-stage filtration: a prefilter (a coarse net that catches hair) plus activated carbon (a charcoal-like layer that reduces odors and odd tastes). Swap filters on the schedule the maker suggests, or your fountain starts to smell like a forgotten bowl. Nobody wants that.

    Pick power and pump style for your home. Battery models give you placement freedom; plug-in units skip battery fuss and tend to run quieter. Pumps are either gravity-fed (no motor, uses simple water flow) or submerged (an underwater pump with adjustable flow). For shy drinkers, choose a quiet, low-flow setup. My shy tabby started sipping once I switched to a quiet stainless steel fountain with low flow , soft trickle, not a gurgle, and she finally relaxed.

    Quick tips: match capacity to how many cats you have and how often you’ll clean. Look for adjustable flow and a replaceable filter. And if your cat likes to flip things, heavier ceramic can help. Worth every paw-print.

    Filtration, flow rate, and materials in the best cat water fountains for encouraging hydration

    - Filtration, flow rate, and materials in the best cat water fountains for encouraging hydration.jpg

    Good filtration and the right flow keep water tasting fresh and cut down on how often the pump needs service. See Maintenance → Consolidated maintenance numbers for exact filter-replacement cadence and pump-life estimates.

    Many fountain filter stacks have 2–5 stages. Common setup: a foam or mesh prefilter (a coarse screen that stops fur and grit), an activated carbon filter (charcoal-like material that soaks up odors and weird tastes), and mineral-trap layers (tiny nets that catch hard-water buildup). Some fancier models add UV-C sterilization (short-wavelength light that reduces microbes) for extra peace of mind.

    Strong filtration plus the correct flow rate means less debris in the basin and less strain on the pump, so the motor usually lasts longer. It also keeps your cat more interested , fresh, moving water smells and tastes better to most kitties.

    Model-specific notes about noise, height, and materials live with each product blurb and in the Picks table, so you won’t see the same cleaning and material advice repeated here. Quiet designs aim to hum less; taller spouts can make a gentle trickle that some cats prefer, while others like a steady stream.

    Think layers: foam, carbon, mineral traps. Each stage catches a different kind of yuck, and together they keep the water nicer for your furball. Worth every paw-print.

    Maintenance schedule for the best cat water fountains for encouraging hydration (cleaning, filters, pumps)

    - Maintenance schedule for the best cat water fountains for encouraging hydration (cleaning, filters, pumps).jpg

    Keeping a cat fountain clean is one of the easiest ways to keep your cat drinking. Fresh-tasting water cuts down on bacteria, keeps the pump happy, and means more sips for better urinary health. Plus, watching your cat take that first crisp sip is oddly satisfying.

    Think of maintenance as a tiny ritual: quick daily checks, a weekly scrub, and a monthly deep clean. Do those and your fountain will hum along, your cat will stay hydrated, and you’ll avoid surprise clogs and funky smells.

    Weekly and monthly routine you can actually stick to
    Once a week, take the fountain apart, wash the parts, and swap or rinse any prefilter (a foam or mesh filter that catches hair and debris). Every month, do a deeper clean: soak plastic (hard plastic) or ceramic (porcelain-like) pieces in a mild vinegar solution if you see mineral buildup, scrub tight spots, and replace a carbon-style filter (charcoal filter that removes tastes and odors) according to the maker’s instructions. If you have hard water or more than one cat, change carbon filters closer to every two weeks.

    Quick checklist , weekly cleaning steps

    • Disassemble all removable parts.
    • Wash bowl, lid, and spouts with mild dish soap and warm water.
    • Soak parts with white vinegar and water at about 1:3 if you see scale, then rinse very well.
    • Clean the impeller (small rotor inside the pump) and pump housing (pump = motorized unit that moves the water).
    • Replace or rinse the prefilter (foam or mesh). Install a fresh carbon filter when it’s due.
    • Dry everything, reassemble, and top off the reservoir (the water tank).

    Pump care, battery notes, and annual tasks
    Open the pump at least once a month to clear hair and gunk from the impeller and its housing so the motor runs smoothly. For cordless fountains, follow the maker’s battery schedule; for example, Dockstream runs about 30 days per full charge and Petcube models can run up to about three weeks on battery power, but check the product page for exact specs. Expect to replace a stock pump about every 1 to 1.5 years if you notice reduced flow, louder noise, or frequent clogging. Keep a spare pump and a few extra filters on hand so downtime is short and your cat never loses moving water.

    Worth every paw-print.

    Consolidated maintenance numbers
    A quick reference so you can set calendar reminders and plan for replacement costs.

    1. Pump life: typical stock pump lifespan about 1 to 1.5 years with routine cleaning.
    2. Filter replacement: roughly every two weeks up to monthly depending on water quality and how many cats you have.
    3. Battery runtimes (examples): Dockstream about 30 days per full charge; Petcube up to about three weeks. Check model pages for exact numbers.
    4. Cleaning cadence: weekly quick clean; monthly deep clean and descale as needed.
    Metric Representative Range/Example
    Pump life ~1 to 1.5 years (with routine cleaning)
    Filter cadence ~2 weeks to monthly (depends on use and water quality)
    Battery runtime examples Dockstream ~30 days / Petcube up to ~3 weeks (model-dependent)
    Typical deep-clean cadence Weekly quick clean; monthly deep clean and descale as needed

    Placement and multi-cat setups with the best cat water fountains for encouraging hydration

    In homes with more than one cat, the bossy kitties can keep shy ones away from the water bowl, and that means some cats barely sip. Spread water out. Give each cat easy access to a fountain or set up several fountains around the house so lower-ranking or nervous cats don’t get pushed out.

    Pick spots away from food and litter boxes. Cats like their water separate from smells and mess, and a clean, quiet place helps them relax while drinking. Put fountains on a flat, steady surface and use anti-slip mats so the fountain does not slide when a curious cat taps it. Aim for low-traffic rooms where a skittish drinker can hang out in peace.

    Think about how much water you need, not just the fancy features. Match fountain capacity to how many cats you have and how long you want between refills. For exact size comparisons, check the Top Picks table so you don’t have to guess which capacity fits your household.

    Plan for power and backups. Cordless or battery models (runs on batteries) and gravity-fed models (works by gravity, no pump) are great where outlets are scarce, while plug-in units (use a wall outlet) avoid battery fuss but need a nearby plug. The pump (a small electric motor that moves water) will eventually need cleaning or replacing, so keep at least one non-electric bowl on hand for power outages and routine hiccups. For battery runtimes and pump-life expectations, see Maintenance → Consolidated maintenance numbers for the numbers to plan around.

    Worth every paw-print.

    Troubleshooting common issues with the best cat water fountains for encouraging hydration

    - Placement and multi-cat setups with the best cat water fountains for encouraging hydration.jpg

    Most fountain problems come from simple upkeep. A few quick checks will tell you if it’s an easy fix or needs more work.

    • Check the water level. Low water often makes the pump noisy, so top it off and listen for a quieter, steady hum. Your cat will notice the change too, trust me.
    • Listen for new buzzing or rattling. Pay attention if the sound only shows up when the pump runs, or if it keeps going even when you move the fountain.
    • Inspect the impeller for obstructions. The impeller (small rotor that spins the water) can get hair, grit, or slimy gunk stuck in it. A quick clean usually brings it back to life.
    • Confirm seals and clips are seated. Make sure lids and snap-fit parts (the pieces that keep water from leaking) click into place. You should hear or feel a satisfying snap.

    Actionable tip: isolate a noisy pump by removing it and testing briefly in a separate bowl of water. If it still buzzes in the bowl, the motor is likely the problem. If it runs quietly, check the impeller and the pump housing again. I once fixed Luna’s fountain this way and saved myself a new pump, hooray for small wins.

    Quick test line you can say while watching: "Pump in bowl – still buzzing? Probably the motor."

    For full step-by-step cleaning, pump servicing, and parts sourcing see Maintenance → Consolidated maintenance numbers.

    Transition tactics to get picky cats using the best cat water fountains for encouraging hydration

    - Troubleshooting common issues with the best cat water fountains for encouraging hydration.jpg

    Some kitties need a gentle nudge to try a water fountain. Try tiny, reversible changes in flow, material, and location so your cat still feels in charge. These are easy, testable steps you can try over days or weeks. Think of it as a little experiment to help your cat drink more.

    1. Put the fountain next to their usual water bowl for a few days so the spot feels familiar. Your cat will notice the same place, the same smells, and feel less worried about a new thing.

    2. Start with a low, gentle flow or a puddle-style shallow dish. A wide, low bowl feels less scary to whiskers and lets them drink without crouching.

    3. Offer both the fountain and the familiar bowl at the same time for 1 to 2 weeks so your cat can choose. Let them be the boss for a bit.

    4. Try different materials: stainless steel (durable metal), ceramic (baked clay), or avoid plastic (lightweight polymer) if your cat seems put off by it. Some cats prefer the cool feel of metal or the neutral smell of ceramic.

    5. Pair the fountain with something tasty. Put wet food nearby or add a tablespoon of water to meals so drinking becomes a positive thing. For busy days, toss an unbreakable ball and set the fountain out before you head out, ten minutes of safe play and a better chance they sip.

    6. Consider sensor-mode activation (Dockstream radar, a motion sensor that turns the fountain on when your cat approaches) or other motion-activated settings. Shy drinkers often like the fountain to come alive only when they’re near.

    Be patient. Transitions can take weeks or even months, and that’s okay. Watch for more sips, slow blinking, and a relaxed posture, those are signs your cat is warming up to the fountain. Worth every paw-print.

    Vet-backed hydration tips tied to the best cat water fountains for encouraging hydration

    - Transition tactics to get picky cats using the best cat water fountains for encouraging hydration.jpg

    If your cat eats mostly dry food, a running-water fountain can nudge them to drink more. Vets say extra sipping helps lower urine concentration (more water in their pee), which supports kidney and urinary tract health. You might even hear that gentle trickle and watch your cat tilt their head, cute and useful.

    Keep an eye out for dehydration. Call your veterinarian right away if you notice any of these:

    • vomiting or diarrhea
    • excessive, ongoing panting
    • dry or sticky gums
    • sunken eyes
    • poor skin elasticity (skin tents or takes a long time to return)

    Quick check: gently lift the skin at the scruff of the neck. It should snap back; if it stays up, that’s a red flag.

    If your cat has kidney or urinary disease, talk with your veterinarian about which fountain styles suit their medical needs and about a safe drinking plan. Some fountains have filters (they catch hair and debris) or adjustable flow settings – ask which features matter for your cat’s condition.

    For busy days, try topping up an extra bowl or placing a fountain where your cat already hangs out, small changes add up. Worth every paw-print.

    Final Words

    Fountains get cats sipping more. Fresh, moving water taps into their instinct for running water, which helps urinary health and offsets dry-food diets, real payoff for multi-cat homes.

    We covered why flow, shallow bowls, and materials matter, how to pick quiet, stainless (steel that's easy to clean) or ceramic (pottery that's dishwasher-safe) options, and the upkeep routine that keeps fountains appealing. Quick wins: multiple stations, backup water for outages, and frequent cleaning.

    If you notice reduced drinking, lethargy, or less litter-box output, call your vet. Pick one of the best cat water fountains for encouraging hydration and enjoy happier, healthier kitties.

    FAQ

    Frequently Asked Questions — Cat Water Fountains

    Do vets recommend cat water fountains and which ones do they suggest?

    Vets generally recommend cat water fountains because running water often boosts drinking and urinary health. Many suggest quiet, easy-to-clean stainless steel (rust-resistant metal) or ceramic (baked clay) models. Contact your veterinarian if you have specific health concerns.

    Do fountains help cats drink more water?

    Yes. Fountains provide moving, fresher water and often use shallow, wide bowls that reduce whisker stress. Increased intake can lower urinary risks and help balance a dry-food diet.

    What is the best cat water fountain for drinking?

    The best fountain fits your cat: a quiet pump, good filtration (activated carbon/charcoal), stainless or ceramic construction, the right capacity for your household, and parts that are dishwasher-safe or include UV-C hygiene features.

    Which cat water fountain models are top-rated or popular?

    Top-rated and popular fountains include Petlibro Dockstream (quiet, smart), Veken 2.8 L (budget high-capacity), PetSafe Drinkwell 360 (multi-pet), PawsPik SS-01 (stainless), Raindrop (ultra-quiet), and Petcube (UV hygiene).

    • Petlibro Dockstream
    • Veken 2.8 L
    • PetSafe Drinkwell 360
    • PawsPik SS-01
    • Raindrop
    • Petcube

    Are stainless steel cat water fountains better than plastic ones?

    Stainless steel is usually more hygienic and often dishwasher-safe. Plastic is lighter and cheaper but typically needs more frequent cleaning. Ceramic (baked clay) is another good option that resists bacteria and stays stable.

    Where can I find reviews or buy the best cat water fountains?

    Top-rated fountains are available on Amazon, brand websites, and review outlets like Consumer Reports. When shopping, check quietness, materials, capacity, and read user reviews for real-world reliability.

    Related Articles

  • automatic cat feeder: benefits and setup for indoor cats

    automatic cat feeder: benefits and setup for indoor cats

    Think your cat’s mealtimes are under control? Think again. I used to assume the same until Luna stared at an empty bowl right when I had a meeting. Oops.

    Automatic cat feeders (timed food dispensers – machines that drop measured meals at set times) give steady, portion-controlled meals (measured amounts). They help indoor cats stay a healthy weight and cut down on begging at odd hours. Your cat’s whiskers twitch as kibble makes that tiny clack into the bowl. Nice.

    They’re like a reliable dinner buddy that shows up on schedule, even when you’re working weird hours or running late. Ever watched two cats stage a standoff at one dish? These feeders can keep peace by separating meals and timing portions, so nobody steals a second breakfast. Feline fine, right?

    Setup is simple. Pick a flat spot, load the hopper, set the times, and test one cycle. Watch for jams (when kibble gets stuck) and choose fresh food so you don’t end up with stale kibble (old, soft food). If you have multiple cats, try one feeder per cat or feeders with individual bowls to avoid feeding fights (rivalry over food). Worth every paw-print.

    automatic cat feeder: benefits and setup for indoor cats

    - Quick start should you use an automatic feeder.jpg

    Yes, for most indoor cats, an automatic feeder gives steady, portion-controlled meals and helps with weight when used the right way. Think of it as a reliable dinner buddy for your cat when you’re busy or working weird hours.

    The three big wins are clear. Portion control: measured servings that help curb overeating. Schedule consistency: meals go out at set times, even if your work shift changes. Less spoilage: sealed hoppers (the covered kibble bin) keep food fresher than an open bowl.

    There are a few risks to watch for. Devices can fail when you’re away, which is stressful. Some cats are grazers and will try to outsmart the feeder and overeat. And if more than one cat uses the same dispenser, you can get guarding or fights.

    1. Is your cat a single, self-controlled eater? → Features
    2. Do you need wet-food support or refrigerated servings? → Model types
    3. Are you setting up a schedule or calibrating portions? → Setup and Schedules
    4. Worried about jams, power, or app errors? → Maintenance
    5. Managing two or more cats? → Multi-cat

    Writers and editors: this bit is just a teaser, not the how-to. Keep all setup steps, calibration details, portion tables, troubleshooting workflows, and feature comparisons in their named sections below. Put procedures, portion math, test runs, and comparison charts only in their dedicated spots so readers can find them fast.

    automatic cat feeder benefits for indoor cats: portion control, routine, and weight management

    sections Each checklist item must be framed as a quick decision and linked to its deeper.jpg

    Portion-controlled automatic feeders give set amounts of food at set times. An automatic feeder is a timed dispenser that opens and drops food on schedule. The hopper (covered kibble bin) keeps food sealed until it’s time to eat, so kibble stays fresher than an open bowl. You’ll even notice a soft whir when a portion drops , little reassurance for you and your cat.

    • Meals showing up at the same time every day builds a calm routine, and begging usually fades. Ever watched your kitty sit by the feeder like clockwork?
    • Short trips and changing work hours get easier when meals are automatic. Pop out for an hour or work a late shift and not worry about who feeds dinner.
    • Predictable feeding can ease mealtime anxiety and make the house quieter between meals. Your cat knows what to expect and relaxes.
    • Many feeders work well alongside a water fountain (a steady trickle so your cat drinks more), helping hydration stay steady with scheduled meals.

    Measuring servings matters. When you weigh portions to match your cat’s calorie target, weight management actually becomes doable for busy homes. It’s practical: set it once, check progress, tweak as needed. For extra help, choose a feeder with clear portion sizes and tracking.

    A feeder only stops overeating if portions are set right and cats can’t access extra food. In multi-cat homes, problems pop up: misprogrammed portions can still mean overeating, shared dispensers can lead to guarding, and mechanical glitches might leave a cat hungry when you’re away. Consider a microchip-activated feeder (opens only for the cat with that chip) or feeders with locking bowls to prevent freeloaders and fights.

    Worth every paw-print. I once watched Luna wait for that soft whir and then launch into the happiest pounce , saved me from a late-night snack fight and kept her at a good weight.

    automatic cat feeder features to look for when selecting a model for indoor cats

    (use internal anchors to these sections, not external URLs).jpg

    Start with the things that actually matter to your cat and your peace of mind: precise portion control, a hopper sized for your home, reliable power, a lid that locks out scavengers, and a dispenser that won’t jam mid-meal. These basics keep meals consistent and your floors kibble-free.

    For portioning, choose a programmable portion control (lets you set measured amounts on a schedule) that you can tweak in small steps so daily calories add up just right. Look for anti-jam mechanisms (designs that stop kibble from getting stuck); motors hate when pieces bridge or dust builds up and then everything stalls. Power options are big: AC power (household plug) with a battery backup (batteries that run the unit when the power goes out) keeps meals coming during outages. A locking lid keeps curious paws or raccoons from emptying the hopper (food storage bin), and clear portion readouts help you see what each dispense actually weighs.

    Think about food type and capacity next. Most feeders are made for dry food, which is cheaper and low maintenance. Wet-food models need a refrigerated compartment or single-meal cartridges (single-use food pods) and usually need daily cleaning, so plan for that. Hopper sizes matter: small hoppers (about 0.5 to 2 liters) fit a single cat, while larger ones (3 to 6+ liters) work better for multi-cat homes. Dual-bowl or dual-drum designs (two separate food drums) let you feed two cats different amounts or schedules without them sharing one bowl.

    Smart features and pet-ID options are the nice extras. App-connected feeders send missed-meal alerts and let you change the schedule from your phone, hello, feed-from-work convenience. RFID (radio-frequency ID tag) or microchip (implantable pet ID chip) feeders open only for the tagged cat, which cuts down on freeloaders and food guarding, super handy when one cat is on a diet.

    Quick feature checklist

    • Capacity: hopper size matches single or multi-cat needs.
    • Portion control precision: programmable portion control (sets exact amounts) with small repeatable steps.
    • Power: AC with battery backup (household plug plus batteries recommended).
    • Locking mechanism: lids that secure against curious paws and critters.
    • Wet-food compatibility: refrigerated bowl or single-meal cartridges and easy cleaning.
    • Anti-jam: dispenser design that resists kibble bridges and dust.
    • App/notifications: missed-meal alerts and remote scheduling.
    • RFID/microchip support: pet-ID access to prevent guarding or freeloading.

    A little planning now saves a lot of “where did all the food go?” later. Worth every paw-print.

    how to set up an automatic cat feeder for indoor cats: step-by-step calibration and placement

    (Features).jpg

    1. Choose the spot.
      Pick a flat, sheltered place where your cat actually eats. Aim for low foot traffic, away from the litter box and humid spots. Keep it out of direct sun so the hopper (covered kibble bin) doesn’t sweat and clump the food. Your cat’s whiskers should be able to twitch freely as kibble falls into the bowl.

    2. Load food and set hopper capacity.
      Pour in the kibble your cat already likes. Set the hopper size so portions match how you store food , small hoppers are great for single cats, bigger ones for multi-cat homes. If you’re not sure, start smaller; stale kibble is nobody’s friend.

    3. Program portions and meal times.
      Use the maker’s suggested portion settings to begin, and schedule meals around your cat’s usual routine. You’ll probably tweak sizes after a few tests. Think of this like dialing in a radio station , a little turn here and there until it sounds right.

    4. Run a dry-run for several cycles.
      With the bowl in place, run at least three test dispenses. Listen for jams, partial drops, or strange clunks. If it sounds wrong or food gets stuck, fix that before trusting the feeder with real meals.

    5. Observe your cat for 3-7 days.
      Let your cat try the feeder while you watch meals and behavior. Note how much they eat, if they guard the unit, or if pieces are left behind. If your cat seems stressed, or one cat blocks others, pause and retrain with supervised feedings.

    Placement and safety considerations

    Set the feeder on a non-slip mat so it doesn’t scoot during a frantic pounce. Keep it away from water bowls so splashes don’t reach electronics. Tuck cords out of paw reach and secure them so curious kitties can’t chew or trip. For long outages, use a UPS (uninterruptible power supply) or a battery backup so meals keep coming when the power doesn’t. Safety first, so your cat stays fed and you stay calm.

    Portion calibration method

    Weigh an initial portion on a kitchen scale (grams per serving). Note that number. Adjust the feeder dial or app to that setting. Test three cycles and weigh each dispense. Take the average grams and change the setting in 1-5 g steps until the average matches your target. It’s a little fiddly, but the satisfying clink of perfect portions is worth it.

    Testing and observing the cat’s response

    Watch your cat for 3-7 days and pay attention to patterns: quick snacking, leftover kibble, or a cat camped by the feeder. Signs of guarding include hissing, blocking other cats, or staying by the unit and growling. If you see stress or overeating, switch back to manual meals for a bit and retrain the routine so everyone feels safe.

    Worth the paw-print: when the feeder’s set right, you’ll get calmer mornings and a happier cat. Ever watched your kitty leap for a kibble like it’s a trophy? Me too, and that little victory never gets old.

    feeding schedules and portion guidance for indoor cats using automatic cat feeders

    (Model types).jpg

    Our goal is simple: help your indoor cat keep a healthy weight, lose pounds if needed, or get extra calories for growing kittens. Think in daily calorie targets: kcal (kilocalories, the energy in food). Then convert those calories into grams of your kibble (kibble = dry cat food) using the kcal per 100 g number on the bag. An automatic feeder just controls timing – the math and watching your cat make it work.

    1. Adult maintenance , 2 to 3 measured meals per day.
      Pick a daily calorie target, then convert to grams. Formula made easy: grams per day = target kcal × 100 ÷ (kcal per 100 g on the bag). Example: target 200 kcal/day and your kibble is 350 kcal/100 g → 200 × 100 ÷ 350 ≈ 57 g/day. Split that into three meals and you get about 19 g per meal. Simple, right?

    2. Weight loss plan , 1 to 2 smaller meals a day, with vet guidance.
      Drop calories slowly so your cat doesn’t get cranky or lose muscle. Same conversion applies. Example: target 160 kcal/day on the 350 kcal/100 g kibble → 160 × 100 ÷ 350 ≈ 46 g/day; two meals = 23 g each. Weigh your cat weekly and adjust gradually.

    3. Grazing but controlled , 4 to 6 small portions a day.
      If your cat wolfs down one meal, try spreading food into many tiny dispenses. For big eaters, six dispenses of 10 to 15 g can keep daily calories steady and stop bingeing. The feeder becomes a portioner, not a free-for-all.

    4. Kittens and growth , 3 to 6 meals per day on higher-calorie kitten food.
      Kittens need more energy and more frequent feedings. Use the food maker’s kitten calorie chart, convert to grams the same way, and spread feeds across the day for steady growth. Your kitten will thank you with zoomies and purring.

    Keep a two-week food log: note the time, grams dispensed, and how much your cat actually ate, plus a weekly body weight or body-condition note. Ever watched your kitty ignore half a meal? Write that down. This log helps you see trends and catch problems early.

    Check with your veterinarian if your cat is under 1 year, over 10 years, has health issues, or if weight isn’t changing as planned. They’ll pick the right calorie target and timetable for safe changes. And um, quick tip: a food scale is worth it for accuracy.

    Worth every paw-print.

    maintaining and troubleshooting your automatic cat feeder for reliable use

    s (Setup  Schedules).jpg

    Keep a simple cleaning rhythm so the feeder stays friendly for food and fur. Empty and wipe the hopper (covered kibble bin) and bowls once a week for dry food (kibble means the dry cat food pellets). Do a deeper clean of removable parts like drums (the rotating food chamber) and lids once a month. If you use wet food, wash the wet-food compartment every day and keep leftovers in the fridge between feeds to stop spoilage and smells. A clean feeder means fewer clunks, fewer fly-by nose-turns, and happier, less picky kitties.

    Daily

    • Wipe bowl rims and clear visible crumbs so food doesn’t build up.
      Weekly
    • Empty and wipe the hopper and clean exterior surfaces to cut dust and oil.
      Monthly
    • Fully disassemble and deep-clean removable parts following the maker’s directions.
      Batteries
    • Swap or top off batteries every 3–6 months or when the unit gives low-battery alerts.
      Firmware
    • Install firmware updates (the software inside the feeder) when the app or maker posts them to fix bugs and tighten timers.
      Part inspection
    • Look for cracked plastic, frayed cords, or worn gears and replace parts if you spot damage.

    Five common problems and quick fixes

    • Jammed kibble: Oversized kibble or a packed hopper can block feeding. Try smaller pellets or clear the hopper (you might need to break up a compacted pile).
    • Stuttering motor: Dust and debris around gears make motors (the little mechanical heart that turns the drum) falter. Clean the gear area and test again.
    • Missed meals: If the clock is off, re-sync the time and run a test dispense. Timers can slip after power loss.
    • App disconnects: Re-pair the feeder to Wi‑Fi and reboot your router, most drops are just a glitch in the signal.
    • Intermittent power: Weak batteries or a loose AC plug (wall adapter) cause spotty power. Replace batteries and check connections.

    When to stop using the feeder and call support
    Stop using the unit and contact the maker if you see smoke or smell burned plastic, if parts crack, if repeated errors persist after resets, or if your cat goes hungry despite test dispenses. Don’t wait, safety first. Call for repair or replacement.

    Quick troubleshooting flow

    Start with the basics so you don’t call tech support for something simple. Ever pressed the manual button and it worked? Good clue.

    1. Check power: confirm the AC plug (wall adapter) is snug and check battery status.
    2. Check hopper: open it and clear any visible blockages or oversized kibble.
    3. Manual test: press the manual-dispense button to see if the motor runs and food drops.
    4. Reset: reboot the unit and re-sync the app following the maker’s instructions (sometimes a quick reboot fixes everything).
    5. Contact manufacturer: if the motor still fails or errors keep happening, report the issue and request repair or replacement.

    Worth every paw-print when it runs smoothly.

    choosing the best automatic cat feeder for indoor cats: model types, price ranges, and quick comparisons

    (MaintenanceTroubleshooting).jpg

    Think of automatic feeders in three simple price groups that usually line up with what they do and the food they handle. Budget dry feeders run about $30-$80 and are basic programmable units for dry kibble. Mid-range units, $80-$200, bring bigger hoppers (food bin), finer portion control, and some app features. Premium models, $200-$400+, add app connectivity, refrigerated wet-food options, and things like RFID (radio-frequency ID tag) or microchip (implantable pet ID chip) access so one cat’s dinner doesn’t get eaten by another.

    Wet-food feeders cost more and need a bit more care because they have refrigerated bowls or single-meal cartridges and usually require daily cleaning. Dry-only feeders are cheaper and lower maintenance. If you want sealed cartridges or coolers, expect to clean more often. Worth it if your cat loves pate.

    Match the feeder to how your cat eats and how many cats you have. One cat on dry kibble? A small hopper (about 0.5-2 L) with reliable portion control will save money and hassle. Two or more cats call for dual-drum or multi-station designs and larger hoppers (about 3-6 L) so you’re not refilling every day. For wet food, pick a refrigerated unit and clear the bowls daily. Think about power too: plug-in power (AC) with battery backup keeps meals on schedule during outages, and anti-jam dispensers help the motor keep spinning. Little features, locking lids, easy-clean parts, and clear portion readouts, make life easier for you and safer for your cat.

    Ever watched your cat stalk the kibble like it’s prey? That’s the fun part. Use the quick table below to match a basic model type to your cat’s habits and your budget, then dive into reviews and check hopper size and portion accuracy before you buy.

    Model Type Best for Typical Price Range Key feature to check
    Budget dry feeder Single cat, dry kibble, tight budgets $30-$80 Simple portion control and hopper size (0.5-2 L)
    Mid-range smart feeder Owners who want app control and better portions $80-$200 Portion precision, plug-in power (AC) + battery backup, anti-jam
    Dual / multi-cat feeder Two or more cats needing separate portions $80-$300 Dual drums or separate channels; 3-6 L hopper capacity; RFID or microchip options (for separate access)
    Wet-food / refrigerated feeder Owners who serve wet meals and want freshness $200-$400+ Refrigerated bowl or sealed cartridges; easy daily-clean design

    safety, behavior tips, and multi-cat strategies when using an automatic cat feeder

    (Multicat).jpg

    Place the feeder on a stable, non-slip surface away from the litter box and any water bowls so the electronics stay dry and the food stays tidy. Tuck cords out of reach and use a mat to catch stray kibble. Lock the hopper lid (the covered kibble bin) so curious paws or a determined raccoon don’t turn dinner into a mess.

    If you’ve got more than one cat, make sure each cat gets a fair shot at dinner. Try an RFID feeder (radio-frequency ID tag) or a microchip-enabled unit (reads your cat’s implanted pet ID chip) so only the right cat gets a portion. Scatter feeding stations in different rooms or corners so shy cats aren’t bullied. Dual-drum feeders (two separate food chambers) or separate-channel feeders help you give distinct portions or different diets with less drama.

    Introduce the machine while you’re home. Start with manual dispenses so your cat learns that the clack or rattle means food is coming. Pair that sound with praise or a quick petting session. After a few supervised tries, switch to scheduled feeds. Watch how everyone reacts for about a week, whiskers twitching and happy pounces are good signs.

    A few quick tips:

    • Use an RFID or microchip feeder to stop freeloaders.
    • Place multiple feeding stations to reduce traffic jams and fights.
    • Set up video monitoring to spot guarding or stress when you’re away.
    • Stagger meal times if cats need different diets or portioning.
    • Pair feeders with enrichment (puzzle toys or a short play session) to cut boredom and guarding.

    Keep an eye out for warning signs: persistent hissing, blocking the feeder, dramatic weight gain or loss, or a cat camping by the unit. If that happens, stop the feeder plan and switch to a pet sitter or a timed human-feed routine until everyone calms down. Worth the effort.

    Final Words

    You’ve got what you need to act. Automatic feeders offer portion control, steady meal times, and less kibble spoilage. Huge wins for indoor cats and busy schedules.

    We covered which features matter, how to set and calibrate a feeder, sample schedules, maintenance tips, model trade-offs, and multi-cat safety tricks (RFID, extra stations).

    If you’re ready, this guide on automatic cat feeder: benefits and setup for indoor cats will help you pick a model that keeps whiskers twitching and furniture safe. Worth every paw-print.

    FAQ

    Are automatic feeders good or bad for cats?

    Automatic feeders can be good for most indoor cats, providing consistent, portion-controlled meals that help manage weight. Watch for misprogramming, jams, or stress in multi-cat homes, and supervise during setup.

    How often should I set my automatic cat feeder?

    Set the feeder to match your cat’s needs: most adult indoor cats do well with 2–3 measured meals daily, or 4–6 small dispenses for grazing or weight control.

    Can automatic feeders handle wet food or both wet and dry?

    Feeders handle dry kibble easily. Wet-food compatibility requires refrigerated bowls or single-serve cartridges (sealed meal packs) and daily cleaning; most wet options cost more and need steady power.

    How do automatic feeders work for multiple cats and what’s best for multi-cat homes?

    Use RFID (ID tag readers), dual-drum models, or multiple stations so each cat gets its own portions. This helps prevent guarding and keeps portions separate.

    Can I use an automatic feeder without WiFi or for a 7-day trip?

    Yes—many feeders have onboard timers and battery backup and don’t need WiFi. Whether a feeder lasts 7 days depends on hopper size and kibble amount; wet food will not stay fresh without refrigeration.

    What are the key setup steps for indoor cats when starting an automatic feeder?

    Place the feeder on a flat, sheltered spot, program portions and times, run dry tests to check dispensing, and observe your cat for 3–7 days to confirm behavior and intake.

    Related Articles