Author: hans

  • Cat Tunnel Toy Guide: Choose a Safer Tunnel for Better Play

    Cat Tunnel Toy Guide: Choose a Safer Tunnel for Better Play

    A good cat tunnel toy is wide enough for your cat to enter and turn without squeezing, stable enough not to roll under a full-speed pounce, and simple enough to inspect. Start with a straight, two-exit tunnel made from tightly woven fabric over a fully covered spring frame. Choose a larger internal diameter for a broad, long-haired, or mobility-limited cat, and remove dangling balls, elastic, or ties if your cat chews or pulls attachments.

    A tunnel can support hiding, stalking, chasing, and ambush play, but it is not automatically safe because it is soft or collapsible. Supervise the first sessions. Check the entrances, peek holes, frame channels, stitching, and attachments after hard play, and retire the tunnel if wire becomes exposed, fabric tears through, an exit collapses shut, or a piece goes missing.

    Quick Choice: Match the Tunnel to the Cat

    Cat or household Useful starting design Priority check
    First-time tunnel user Straight, quiet, two open ends Cat can see a clear route through and choose whether to enter
    Large or long-haired cat Wide straight or gentle-curve tunnel Shoulders and coat clear the smallest internal opening
    Rough player Simple tunnel with dense fabric and no hanging toy Frame ends stay enclosed after pouncing, rolling, and biting
    Noise-sensitive or cautious cat Low-crinkle fabric with a short sight line No startle, freezing, flattened ears, or immediate retreat
    Multi-cat home Two or more full-size exits; optional side opening No cat can guard the only way out
    Small apartment Collapsible straight or U-shaped tunnel Secure storage loops cannot become chewable cords during play
    Senior or mobility-limited cat Short, wide, stable tunnel without a high lip Easy entry, backing out, and turning on a nonslip surface

    Retail play tunnels are often around 9–10 inches in diameter, while some models marketed for larger cats offer an opening near 11 inches. Those are shopping references, not safety standards. A cat’s shoulder width, coat, mobility, and confidence matter more than weight or a “large” label.
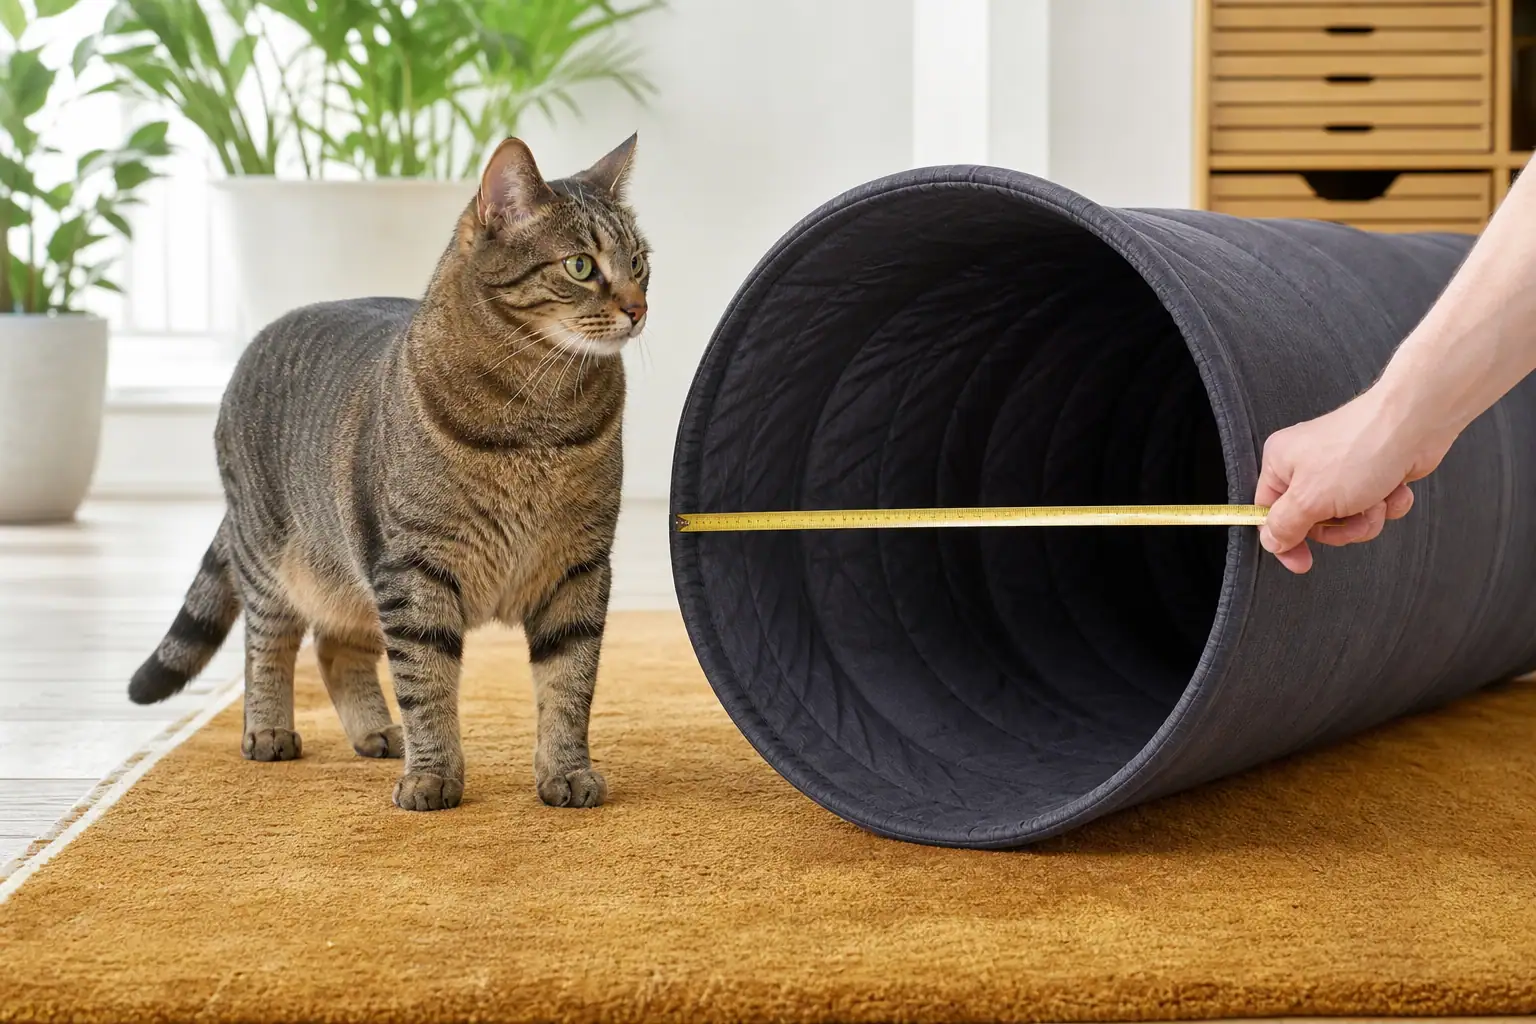
    Owner comparing a cat's shoulder clearance with the opening of a wide play tunnel
    Check the smallest internal opening and leave visible clearance around the cat.

    Why Cats Like Tunnels

    A tunnel combines two resources cats often value: partial concealment and a route for play. It can become a hide, a runway, a place to watch from cover, or the middle of a stalk-and-pounce sequence. That makes it more flexible than a toy that performs only one movement.

    The peer-reviewed AAFP and ISFM Feline Environmental Needs Guidelines identify safe places and opportunities for play and predatory behavior as core parts of a healthy feline environment. They also recommend multiple hiding places and more than one entry for safe places in multi-cat homes so another cat cannot easily block access.

    That does not mean every cat will charge straight in. Hiding can be restful, playful, or a way to cope with uncertainty. Respect the cat’s choice. A relaxed tunnel user may loaf inside, watch with neutral ears, chase a lure through, or leave casually. A cat that crouches tightly, flattens the ears, lashes the tail, startles at every crinkle, or refuses to pass an exit may need a quieter, wider, shorter setup—or no tunnel at all.

    Size and Shape: Test the Smallest Opening

    Manufacturers may list the widest entrance while the actual pinch point is a fabric collar, center junction, sharp curve, or flattened section. Check the entire route. Your cat should be able to walk through without compressing the shoulders, dragging the back, or forcing the belly over a tall rim.

    1. Measure the tunnel, not the package. Confirm the internal diameter at the ends and the narrowest middle point. Product photos can make a short, narrow tube look generous.
    2. Make a no-pressure comparison. While your cat stands naturally, note shoulder width and standing height. Choose an opening visibly larger than both; add more clearance for long fur, a belly that hangs low, arthritis, or an uncertain cat.
    3. Open it fully on a nonslip floor. Watch one voluntary pass without a chase toy. The frame should keep its shape, and the cat should not brush, stumble, or become wedged while turning or backing out.
    4. Recheck under play speed. A tunnel that works for walking may roll, bunch, or collapse during a sprint. Stop if an entrance folds toward the cat’s face or the whole tunnel travels across the floor.

    Choose geometry by use rather than novelty. A straight tube has the clearest sight line and is easiest to inspect. A gentle S or U creates ambush cover without a complex junction. A three-way tunnel gives more escape choices but adds a heavily stressed center seam. A donut tunnel bed can double as a resting place but needs a wide passage, a washable cover, and enough structure that a cat lying on top does not trap one inside.

    A wall-mounted cat tunnel system is a different product category. Treat every bracket, connector, height transition, load rating, and landing surface as furniture hardware—not as a soft floor toy. Floor-level tunnels are the safer starting point for kittens, seniors, and cats with balance or mobility concerns.

    Construction Checks for Cats That Play Rough

    Most collapsible tunnels use a spiral wire or spring-steel frame inside a sewn fabric channel. The frame makes the tunnel pop open, but it also creates the most important hidden failure point. Run your fingers around every ring before use. You should not feel a sharp end, a gap in the covering, a protruding coil, or a hard point pushing through thin fabric.

    • Frame channel: Favor a wide, securely stitched sleeve that fully separates wire from teeth, claws, and skin. Reject any exposed metal or frame end that can migrate toward an entrance.
    • Fabric: Tightly woven polyester, nylon, canvas-like fabric, or similarly dense material is easier to inspect than loose mesh or long faux fur. Mesh improves airflow but can snag claws and tears quickly once a strand breaks.
    • Entrances: Look for smooth bound edges with no loose piping. The entrance ring should stay open when the cat bumps it from the side.
    • Junctions and peek holes: These take concentrated force. Spread the seams under good light and check for skipped stitches, thinning fabric, and a wire that sits too close to the cut edge.
    • Floor grip: A light tunnel can skid on tile or wood. Place it on a rug or nonslip mat, away from stairs, glass, heaters, doors, and furniture with dangerous gaps.
    • Attachments: Dangling balls, feathers, ribbons, elastic loops, and storage ties are separate toys with separate risks. Remove them for a cat that mouths cord, strips plush, or pulls until stitching fails.

    Never describe a fabric tunnel as indestructible. For a cat that attacks the frame rather than running through the tunnel, the design is a poor match no matter how heavy the cloth is. Switch to an open box, sturdy cat cave, or another form of cover. The Titan Claws durable cat toy guide explains how to identify the part your cat defeats first and choose around that failure pattern.
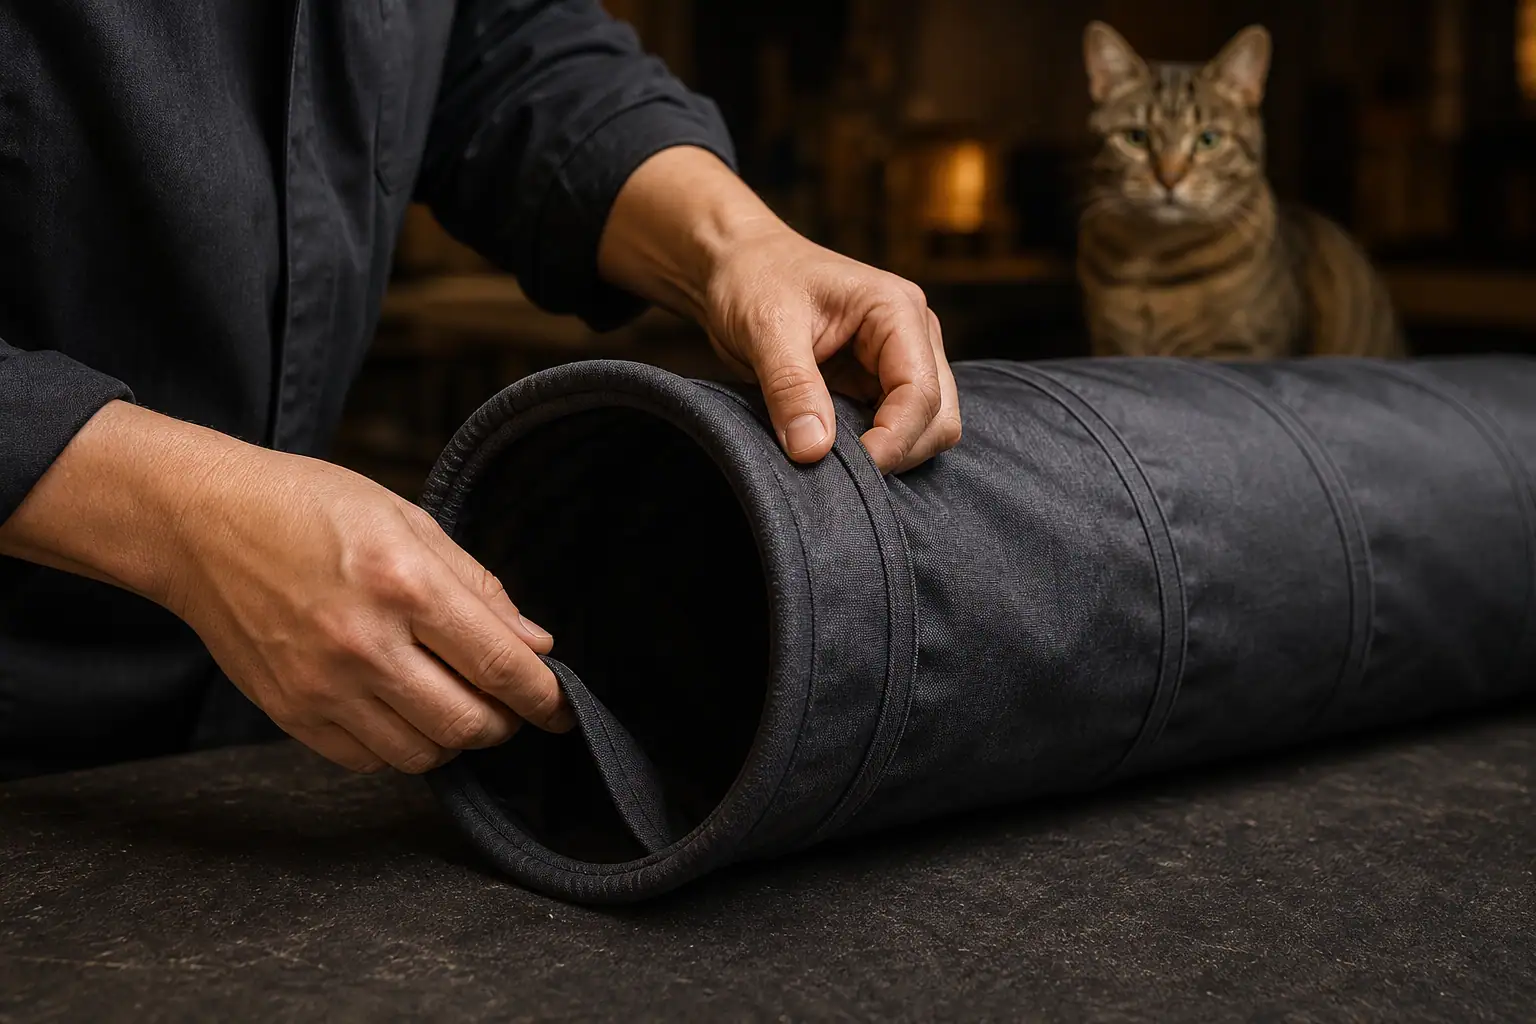
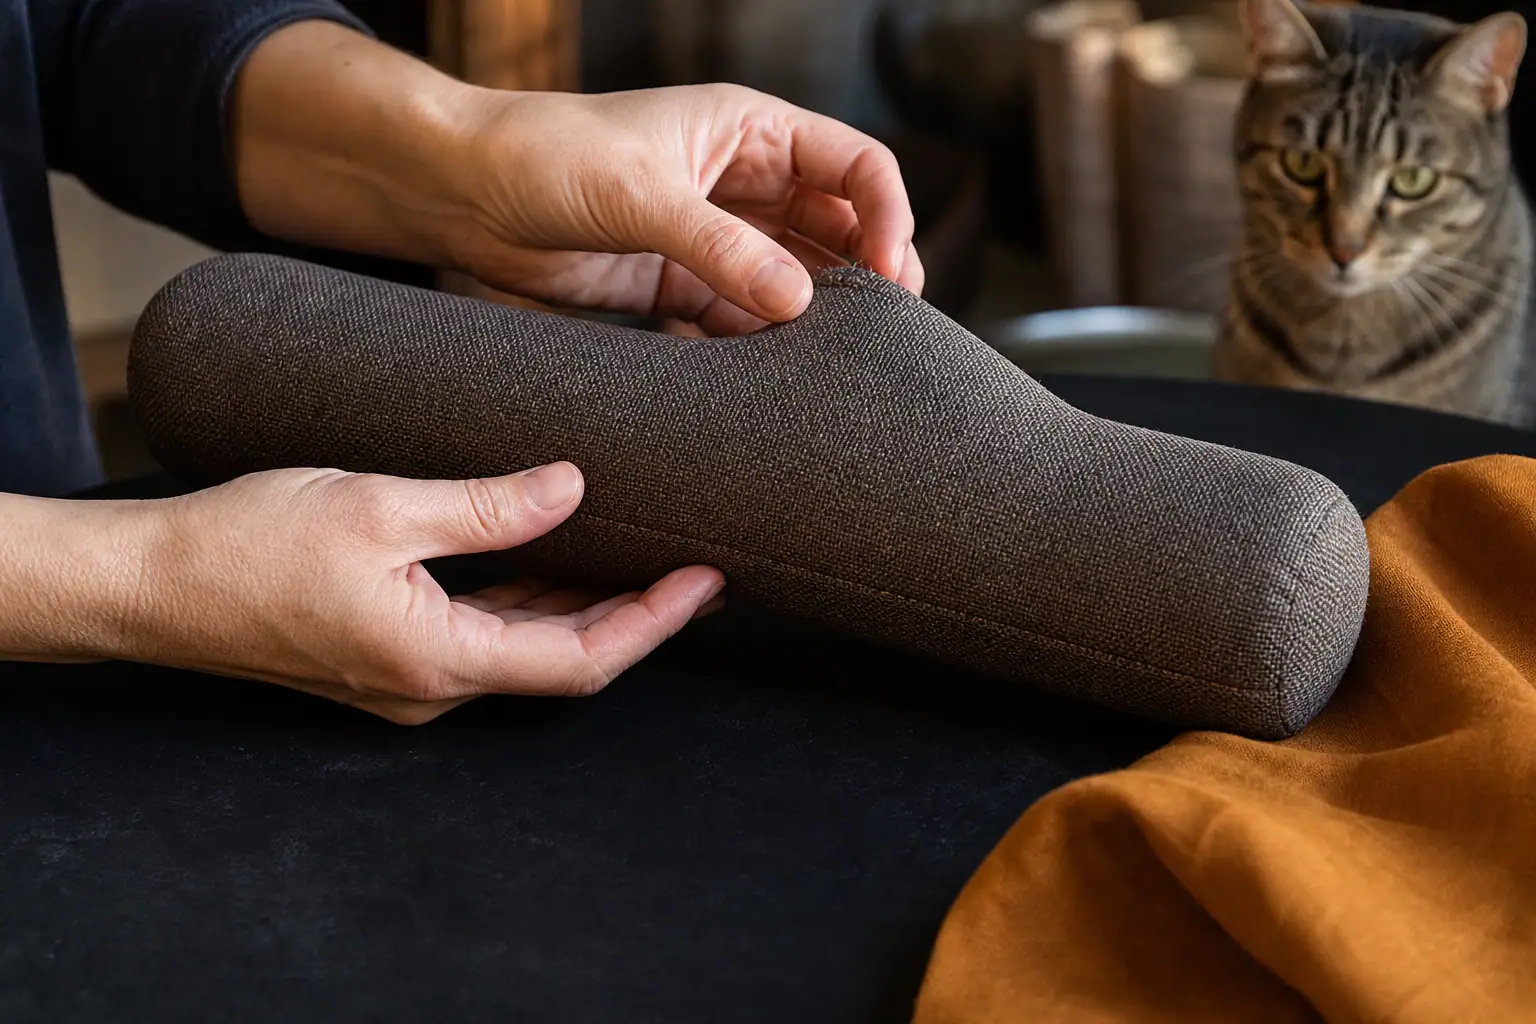
    Hands inspecting the covered spring frame and bound entrance of a cat tunnel
    The frame channel, entrance binding, peek holes, and junctions deserve close inspection.

    Introduce the Tunnel Without Forcing It

    Pop-open frames, unfamiliar smells, and crinkle layers can make a new tunnel intense. Set it up when the cat is elsewhere, secure it on a rug, and leave both ends unobstructed. Let it air out if it has a strong packaging odor. Do not push the cat inside or close an exit to make exploration happen.

    1. Place one familiar blanket or a few treats near an entrance, not deep inside.
    2. Reward looking, sniffing, and approaching. The cat does not need to enter on day one.
    3. When the cat is relaxed, move a wand lure past the far exit so attention travels through the tunnel. Keep cord and hands outside.
    4. Allow a catch in the open after a short chase. The tunnel should create cover, not become a place where the cat can never capture the target.
    5. End while the cat is still comfortable. Fold and store the tunnel only after the cat has left the area.

    If your cat is easily startled, start with a quiet open-ended tunnel or a cardboard box with two large doors. The Titan Claws guide to toys for anxious cats offers a slower, choice-first introduction process.

    Three Better Cat Tunnel Games

    1. Stalk, pass, and catch

    Move a wand lure slowly across one entrance, pause out of sight, then travel beyond the opposite exit. Let the cat stalk from cover and catch the lure in open space. Do not flick string around the cat inside the tunnel, where it can wrap around a paw or become hard to retrieve.

    2. Side-window ambush

    For a tunnel with a properly bound peek hole, pass a large toss toy across the outside of the opening. Keep fingers away from the window. This gives the cat one quick pounce without teaching that hands appearing beside the tunnel are prey.

    3. Two-station search

    Place the tunnel between two open play stations: a cardboard scratcher at one end and a large kicker or food puzzle several feet beyond the other. The cat chooses whether the tunnel is a route, a hide, or something to ignore. Rotate the surrounding activity while keeping the safe route familiar.

    For a complete session, use the tunnel for stalking and chasing, then move the final catch into open space and let arousal fall. Our interactive play routine covers the hunt-catch-cool-down sequence. If two cats turn tunnel ambushes into relentless chasing, blocked exits, hissing, or one cat hiding afterward, separate the play stations and review the signs in our cat rough play guide.
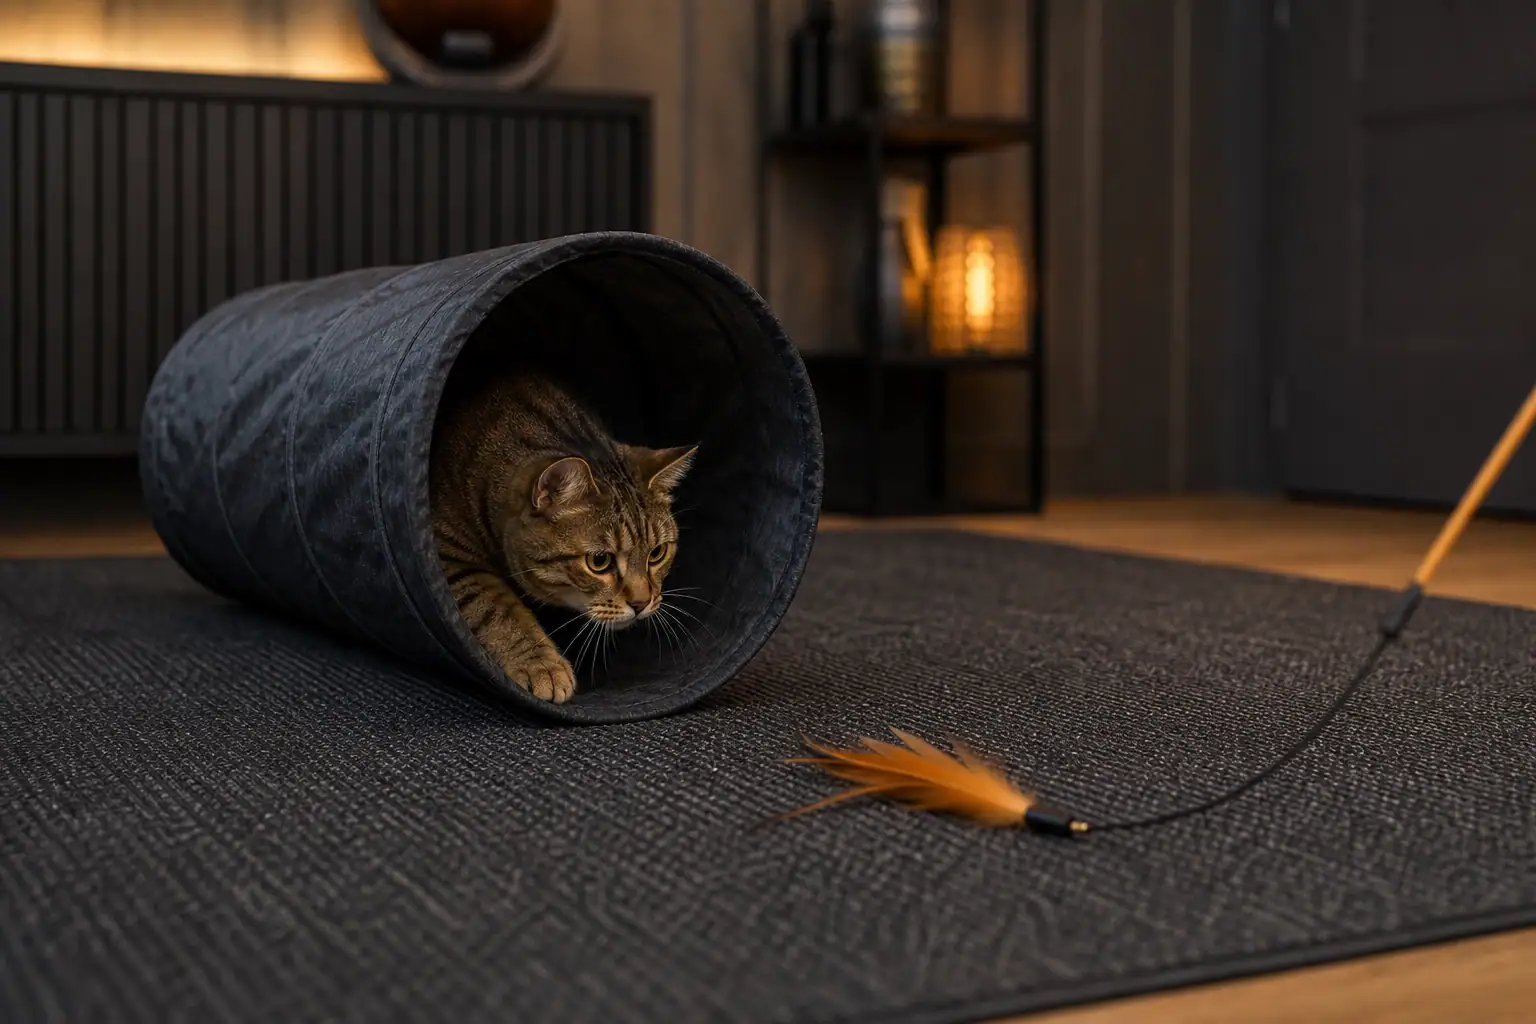
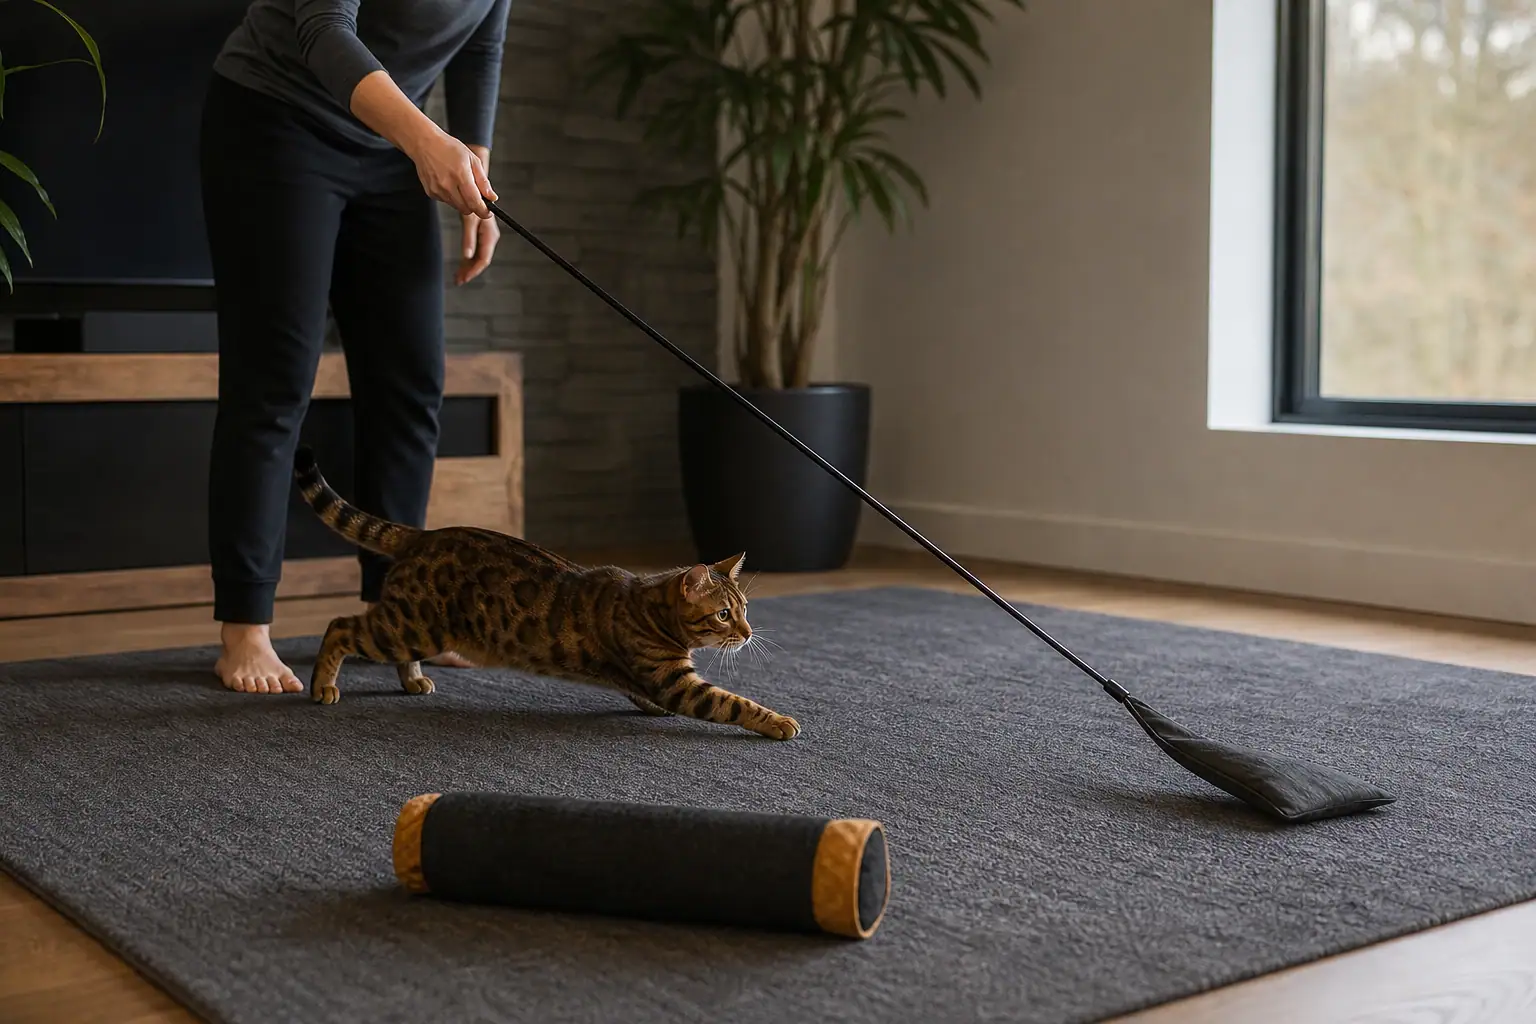
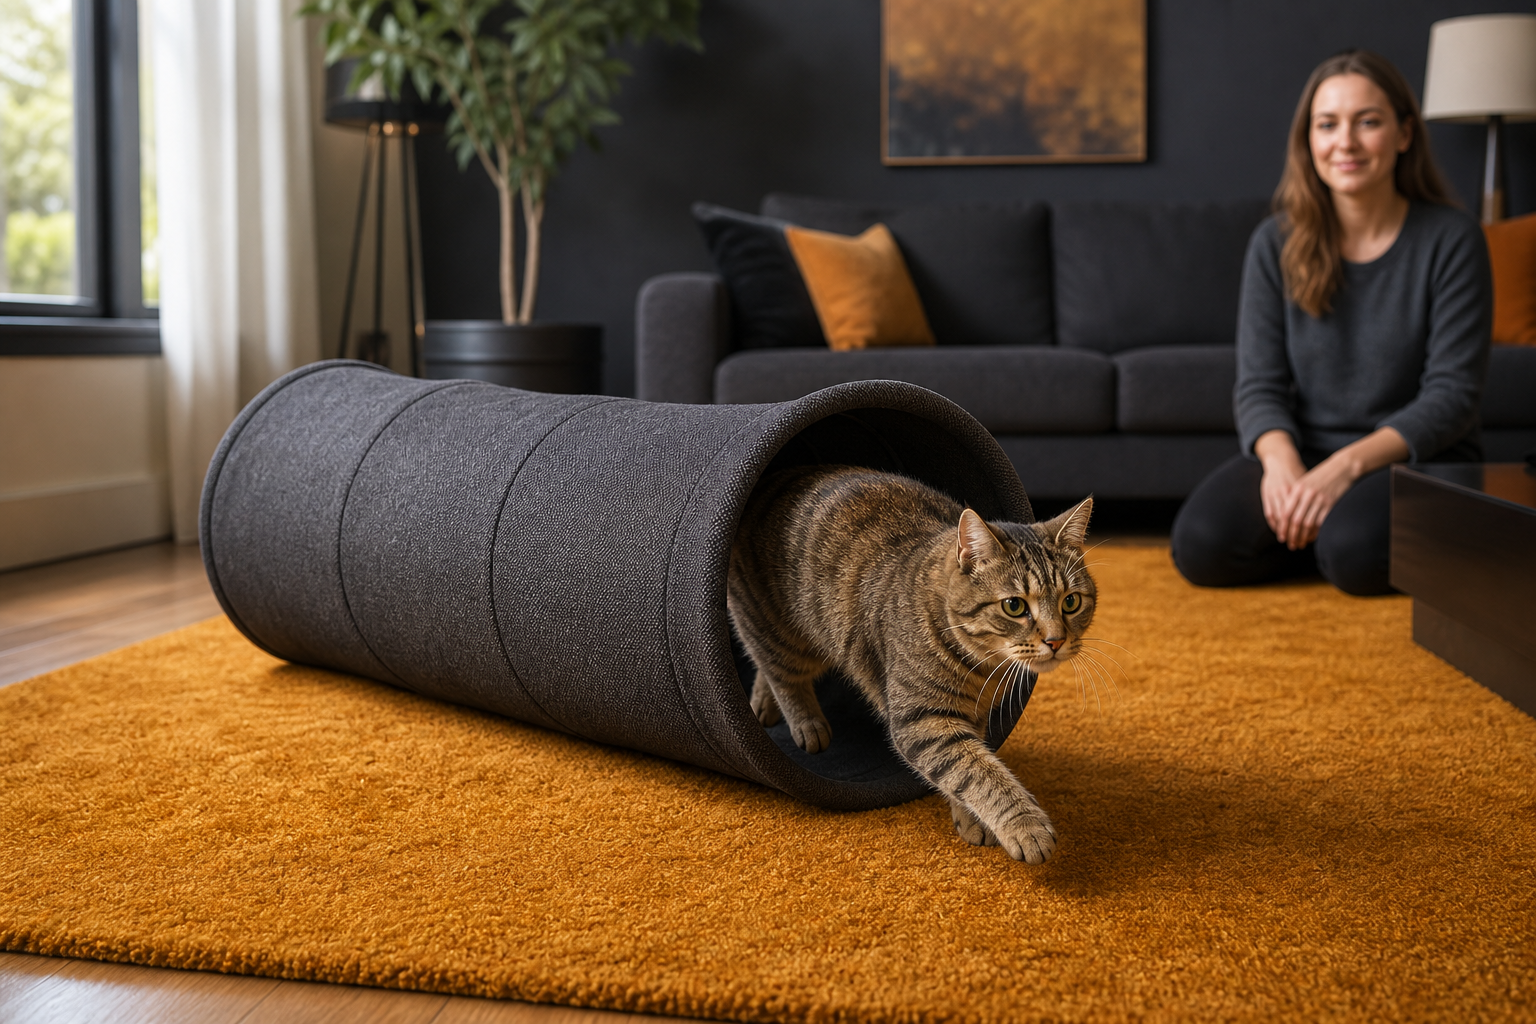
    Cat stalking through a stable tunnel toward a wand lure moving beyond the exit
    Move the lure beyond the exit and allow the catch in open space.

    Inspect, Clean, and Retire the Tunnel

    Inspect a tunnel before the first use and after any hard session. Collapse it only far enough to expose folds and high-wear areas—never while the cat is close. Check both sides of every entrance, each peek hole, the central junction, the full frame channel, storage loops, and the floor where loose pieces would land.

    What you find Decision
    Surface dust; fabric, frame, and seams intact Clean according to the care label, dry fully, and recheck
    One loose storage tie or dangling attachment Remove the tunnel until the part is safely removed or repaired
    Small fabric tear away from the frame Stop use; repair only if the result is smooth, strong, and fully inspectable
    Wire visible, a hard point pressing through, or frame distortion Retire immediately
    Entrance no longer stays open or tunnel rolls dangerously Retire or replace with a more stable design
    Missing thread, fabric, foam, plastic, or attachment Remove all pieces and contact a veterinarian if ingestion is possible
    Persistent dampness, mildew, urine, feces, or an odor that remains after approved cleaning Retire the tunnel

    Follow the maker’s care label because spring frames, stiffeners, crinkle film, foam beds, and adhesives tolerate water and heat differently. The CDC’s pet-supply cleaning guidance distinguishes routine cleaning from disinfection and says cleaning is usually sufficient for most pet items. It recommends soap or detergent and warm water for hard items, appropriate machine settings for washable soft items, thorough rinsing, and complete drying.

    Do not improvise with essential oils or strongly scented sprays. Do not soak a wire-framed tunnel unless the label permits it, and do not return a damp tunnel to the cat. Moisture can remain between fabric layers or around the frame after the surface feels dry. Our material-by-material cat toy cleaning guide helps separate washable fabric, spot-clean-only parts, and items that should be replaced.

    Cornell’s Feline Health Center advises avoiding toys with small pieces or linear parts such as feathers and string that may separate and be ingested. If part of a tunnel, tie, ball, feather, or frame cover is missing, stop play and search the area. Contact your veterinarian promptly if you know or suspect your cat swallowed it; foreign-body obstruction can be life-threatening, and time can matter.
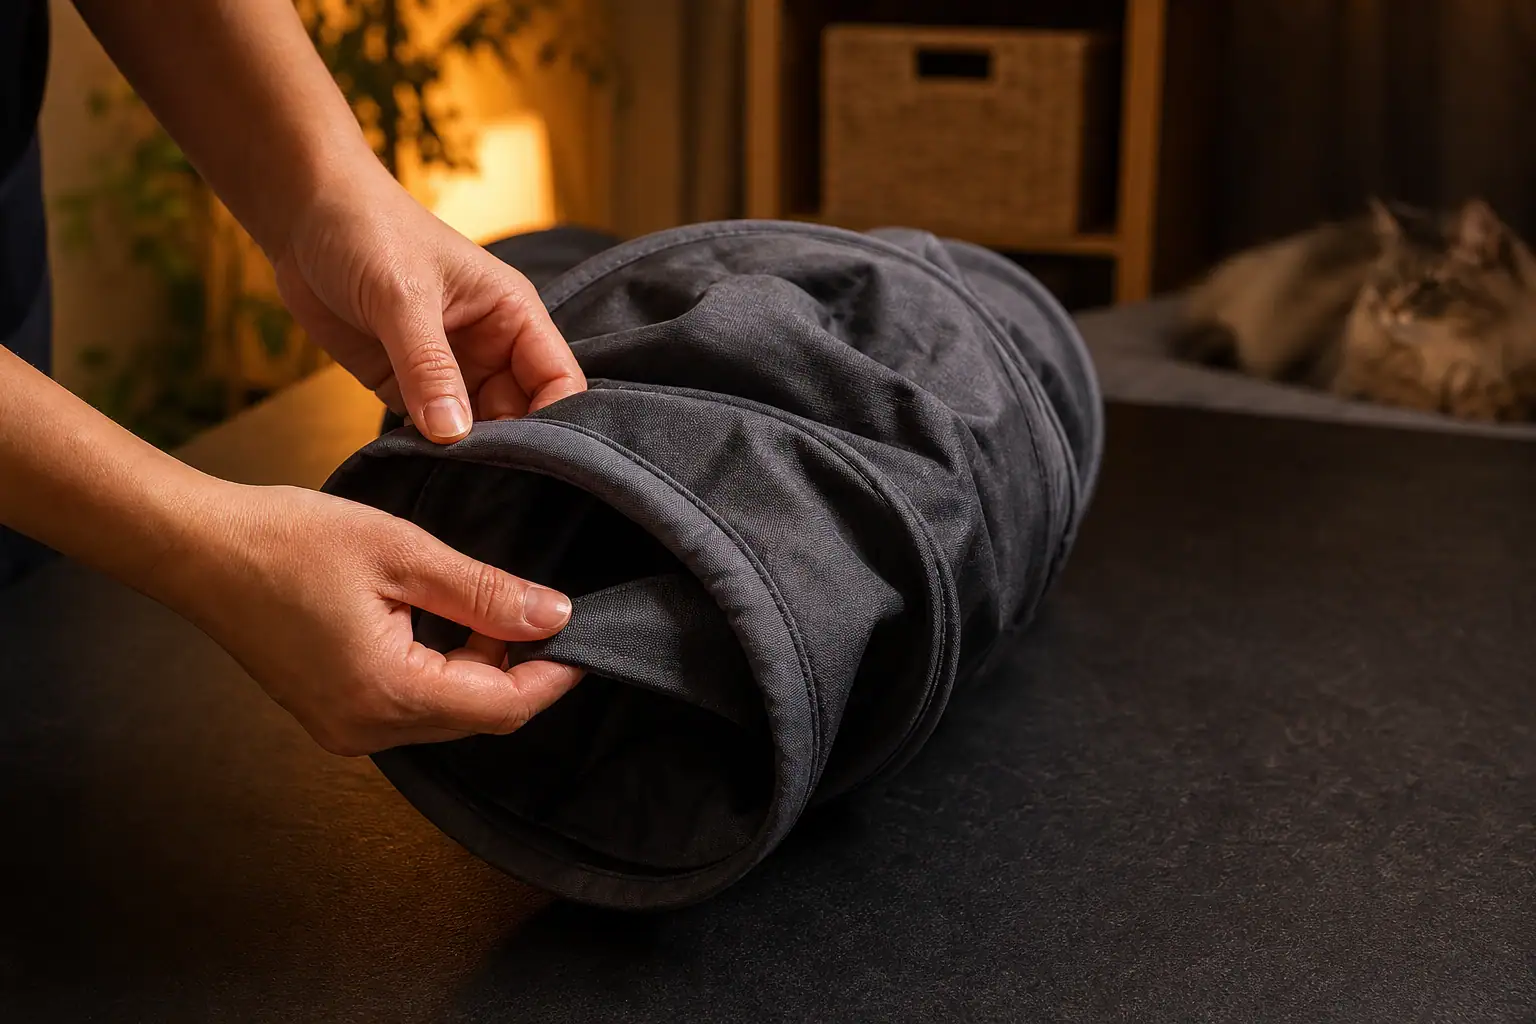
    Hands checking the entrance seam and frame channel of a fabric cat tunnel after play
    Inspect entrances, frame channels, folds, and attachments after hard play.

    Cat Tunnel Toy Buying Checklist

    • Measure the smallest internal opening, not just the widest entrance.
    • Choose visible clearance around the cat’s shoulders, back, belly, and coat.
    • Prefer two full-size exits; add escape options in multi-cat homes.
    • Start with a straight, quiet tunnel for cautious, senior, or first-time users.
    • Confirm the frame is fully enclosed in a wide, securely sewn channel.
    • Check entrances, peek holes, and center junctions for concentrated stress.
    • Use dense, inspectable fabric for rough players; treat mesh and plush as tradeoffs.
    • Remove chewable ties, elastic, ribbons, feathers, and dangling balls when necessary.
    • Place the tunnel on a nonslip surface away from stairs and hard obstacles.
    • Follow the care label and make sure every layer is completely dry.
    • Supervise initial use and any cat known to rip, chew, or swallow toy parts.
    • Retire at exposed wire, frame distortion, torn channels, collapsed exits, or missing pieces.

    Bottom line: the best cat tunnel toy is not the one with the most branches or accessories. It is the tunnel your cat can enter, turn in, and leave easily; the one that stays stable during real play; and the one you can inspect all the way around. Choose fit and exit geometry first, construction second, and novelty last.

    Cat Tunnel Toy FAQs

    Are cat tunnels good for cats?

    They can be. A well-fitted tunnel offers concealment and supports stalking, chasing, and ambush play. It should remain a choice, not a place where a cat is pushed, cornered, or blocked by another pet.

    What size cat tunnel should I buy?

    Measure the smallest internal opening and compare it with your cat’s natural shoulder width and standing height. Choose visible clearance rather than a tight fit, especially for a large, long-haired, senior, overweight, or mobility-limited cat. Many retail tunnels are roughly 9–10 inches across, but individual fit matters more than that common range.

    Are crinkle tunnels safe for cats?

    Crinkle material is not automatically unsafe, but it can frighten noise-sensitive cats and becomes a problem if the lining tears or the cat tries to eat it. Supervise the introduction, inspect layers and seams, and choose a quiet tunnel if the sound causes stress.

    Can I leave a cat tunnel out overnight?

    Only after you have repeatedly observed safe use and removed ingestible attachments. Do not leave it out for a cat that chews the frame channel, pulls ties, tears fabric, or guards an exit. Store a collapsible tunnel securely when it cannot be used safely without supervision.

    How many exits should a cat tunnel have?

    Two full-size open ends are a strong default. In a multi-cat household, a side opening or branching route can add escape choices, but only if the junction is wide, stable, and strongly constructed. Avoid any setup where one cat can trap another inside.
    Sources

  • Large Cat Kicker Toy: How to Choose the Right Size

    Large Cat Kicker Toy: How to Choose the Right Size

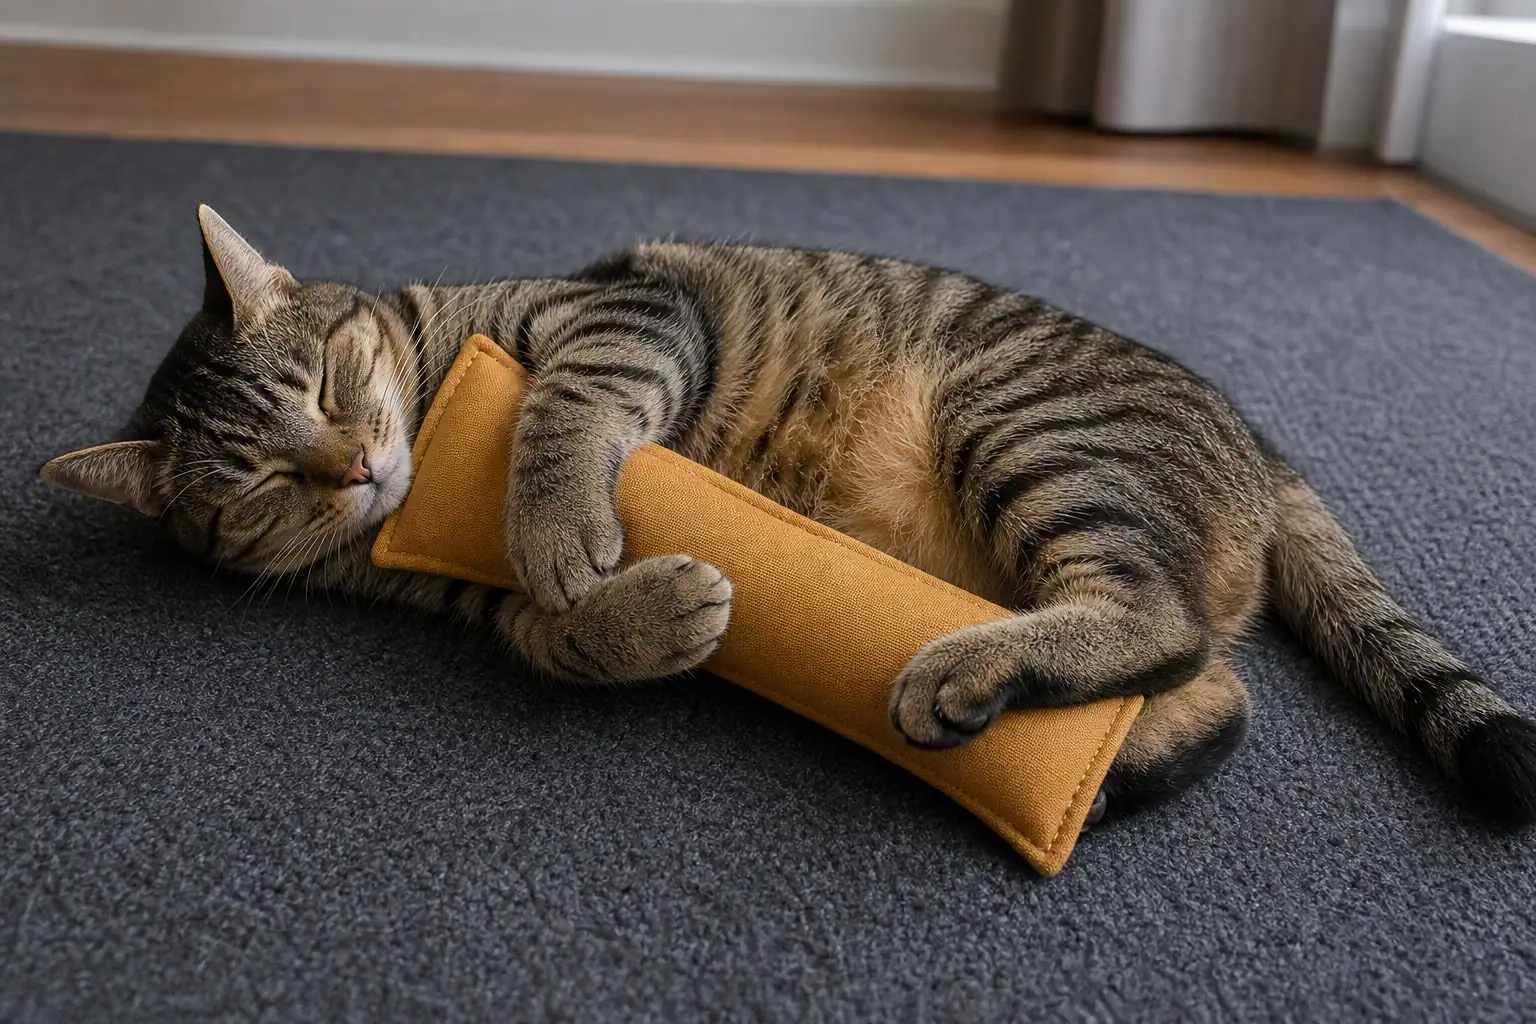
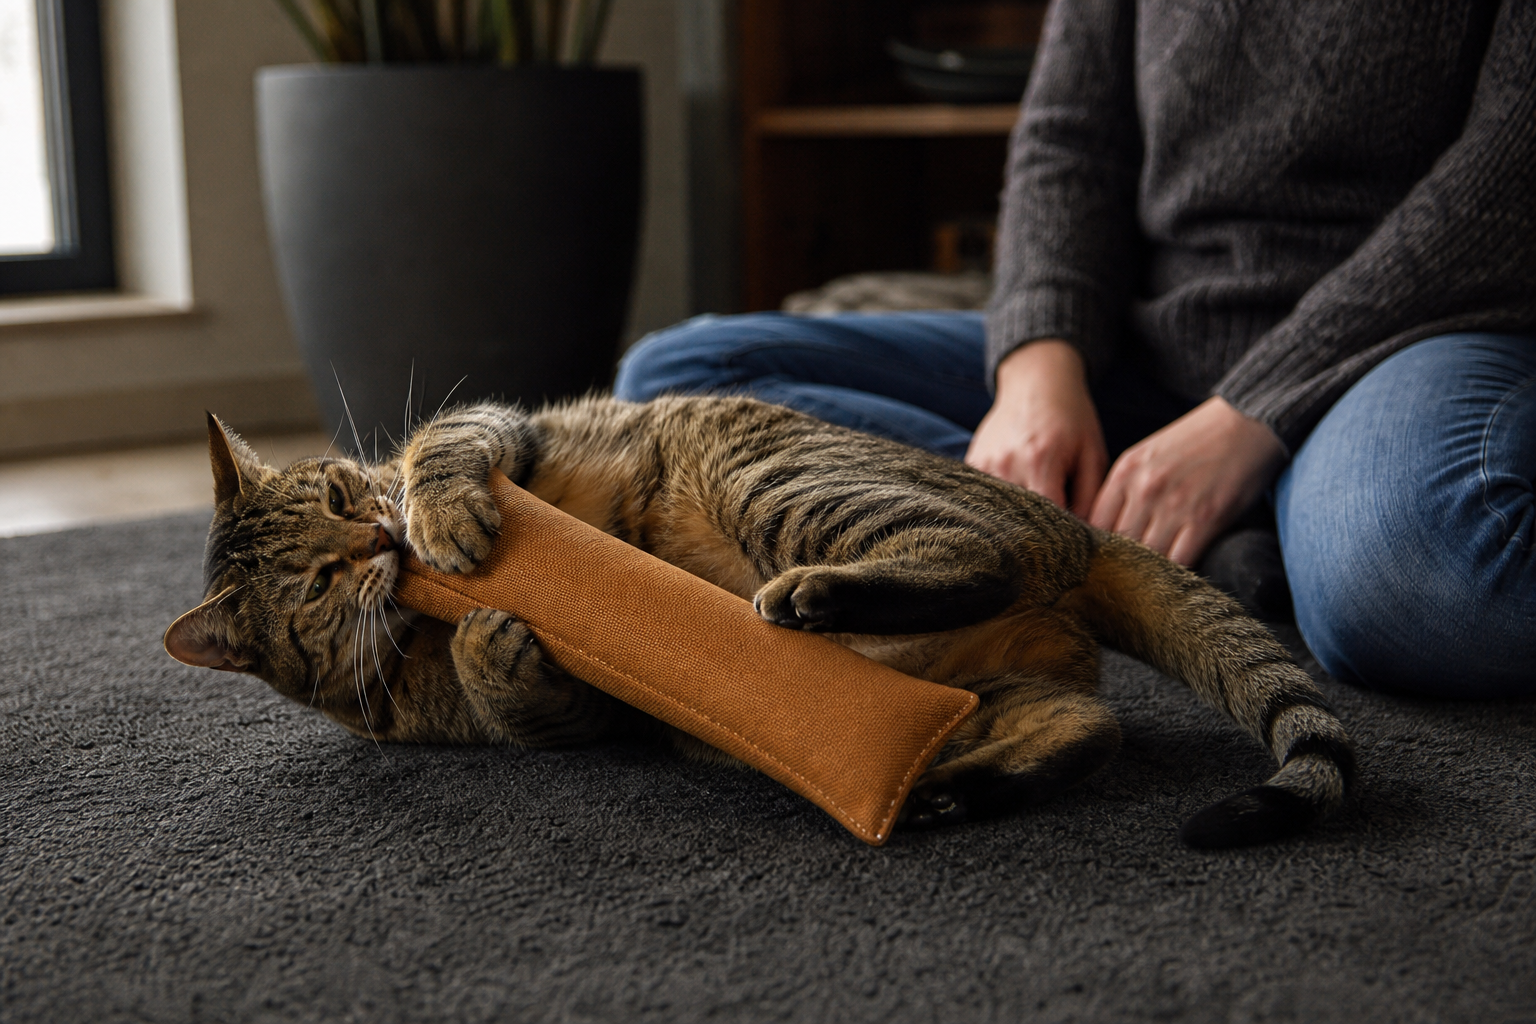
    A large cat kicker toy should be long enough for your cat to hug with the front legs while the back feet strike its lower half. For many adult cats, a simple 10-to-15-inch fabric kicker is a sensible range to test. Long-bodied cats may need more usable length, while a bulky or rigid 15-inch toy can still be a poor fit. The cat’s grip and kicking position matter more than the word “large” on the label.

    Look for an elongated, compressible body; tightly woven fabric; reinforced seams; contained filling; and no easy-to-remove tails, bells, eyes, or trim. Supervise the first sessions, inspect after hard play, and retire the toy when fabric thins, a seam opens, filling appears, or any piece goes missing. No kicker is indestructible.

    What Counts as a Large Cat Kicker Toy?

    “Large” is a shopping description, not a standardized cat-toy size. Retail kickers described for adult or large cats commonly span roughly 10 to 16 inches, but listed length can include a floppy tail, fins, ears, or other decoration that does not support the cat’s back feet. Compare the usable body length: the filled, grippable section between the end seams.

    A kicker is different from a small toss toy. Its job is to become a wrestling target. The cat holds the upper section with the front legs, bites or mouths it, and rapidly pushes against the lower section with alternating hind feet—the movement often called bunny kicking. A toy can be fun for batting yet too short for that full-body position.

    Cat or use case Starting length to compare What to confirm during play
    Kitten or small adult About 7–9 inches Easy to hug and move; too large to swallow or wedge deeply in the mouth
    Average adult cat About 10–12 inches Front legs hold the upper body while both back feet contact the lower body
    Large or long-bodied adult About 13–16 inches Enough usable body below the front-paw grip; still light and narrow enough to control
    Powerful rough player Fit first, then compare construction Tightly woven shell, simple shape, reinforced seams, no exposed or detachable extras

    These ranges are starting points, not veterinary standards or safety guarantees. Two cats of the same weight can have different body length, mobility, grip, and preferences. A Maine Coon does not automatically need the longest toy in the store, and a small cat may choose a longer kicker if it can still compress and control it.

    Cat demonstrating front-paw grip and back-foot contact on a long kicker toy
    Use a two-point fit test: secure front-paw grip plus solid back-foot contact below it.

    Use the Two-Point Fit Test Instead of Weight Alone

    You do not need to pin down a cat with a tape measure. Buy from a seller with clear dimensions, then observe a calm, supervised floor session. Judge the toy at two contact points: the front-paw grip and the back-foot strike.

    1. Start on the floor. Place the kicker away from your hands and let the cat approach. Do not push it against the cat or hold the far end during biting.
    2. Watch the front legs. The cat should be able to wrap both front legs around the upper third or half. If the body is too wide or overstuffed to compress, extra length will not fix the grip.
    3. Watch the back feet. When the cat curls around the toy, both hind feet should reach solidly below the front-paw grip. If they strike empty air or land on one thin tail, the usable body is too short.
    4. Check control. The cat should be able to pull, roll with, and release the toy. A huge, dense kicker that pins the cat or cannot be repositioned is not a better large kicker.
    5. Inspect after the test. Look at the exact places held by the front claws, bitten by the mouth, and raked by the back claws. Those are the toy’s real stress zones.

    If the toy is just a little short, do not add ribbon, cord, or a homemade tail. Those additions do not create a supportive kicking surface and introduce more failure points. Move to a longer one-piece body. If you sew, the Titan Claws DIY cat kicker pattern includes size adjustments and reinforced seam instructions.

    Choose Construction for the Way Your Cat Actually Plays

    Size gets the back feet onto the toy; construction determines whether the toy remains safe and useful under repeated grabbing, biting, and raking. Marketing terms such as “tough,” “heavy duty,” and “bite resistant” do not tell you how the seams, fabric, attachments, and filling will fail.

    • Shell: Favor a tightly woven canvas, cotton twill, denim, or similarly substantial fabric that is easy to examine. Loose knits, shedding faux fur, open weave, and thin plush can hide or develop damage quickly.
    • Shape: A plain tube or rectangular pillow offers a continuous kicking surface and fewer weak points. Decorative fins, legs, ears, cords, and tassels give a rough cat small targets to pull.
    • Seams: Look for short, even stitching and reinforced closures. Pay special attention to end seams and curves. A decorative cover over a seam is not proof that the structure underneath is sound.
    • Filling: The body should yield under the paws but rebound enough to stay between the front and back legs. Skip toys with loose beads, hard pellets, or unidentified pieces you can feel moving inside.
    • Closures: Refillable pockets are convenient, but zippers and hook-and-loop edges need close inspection. For a cat that targets openings, a fully sewn body may be the better tradeoff.
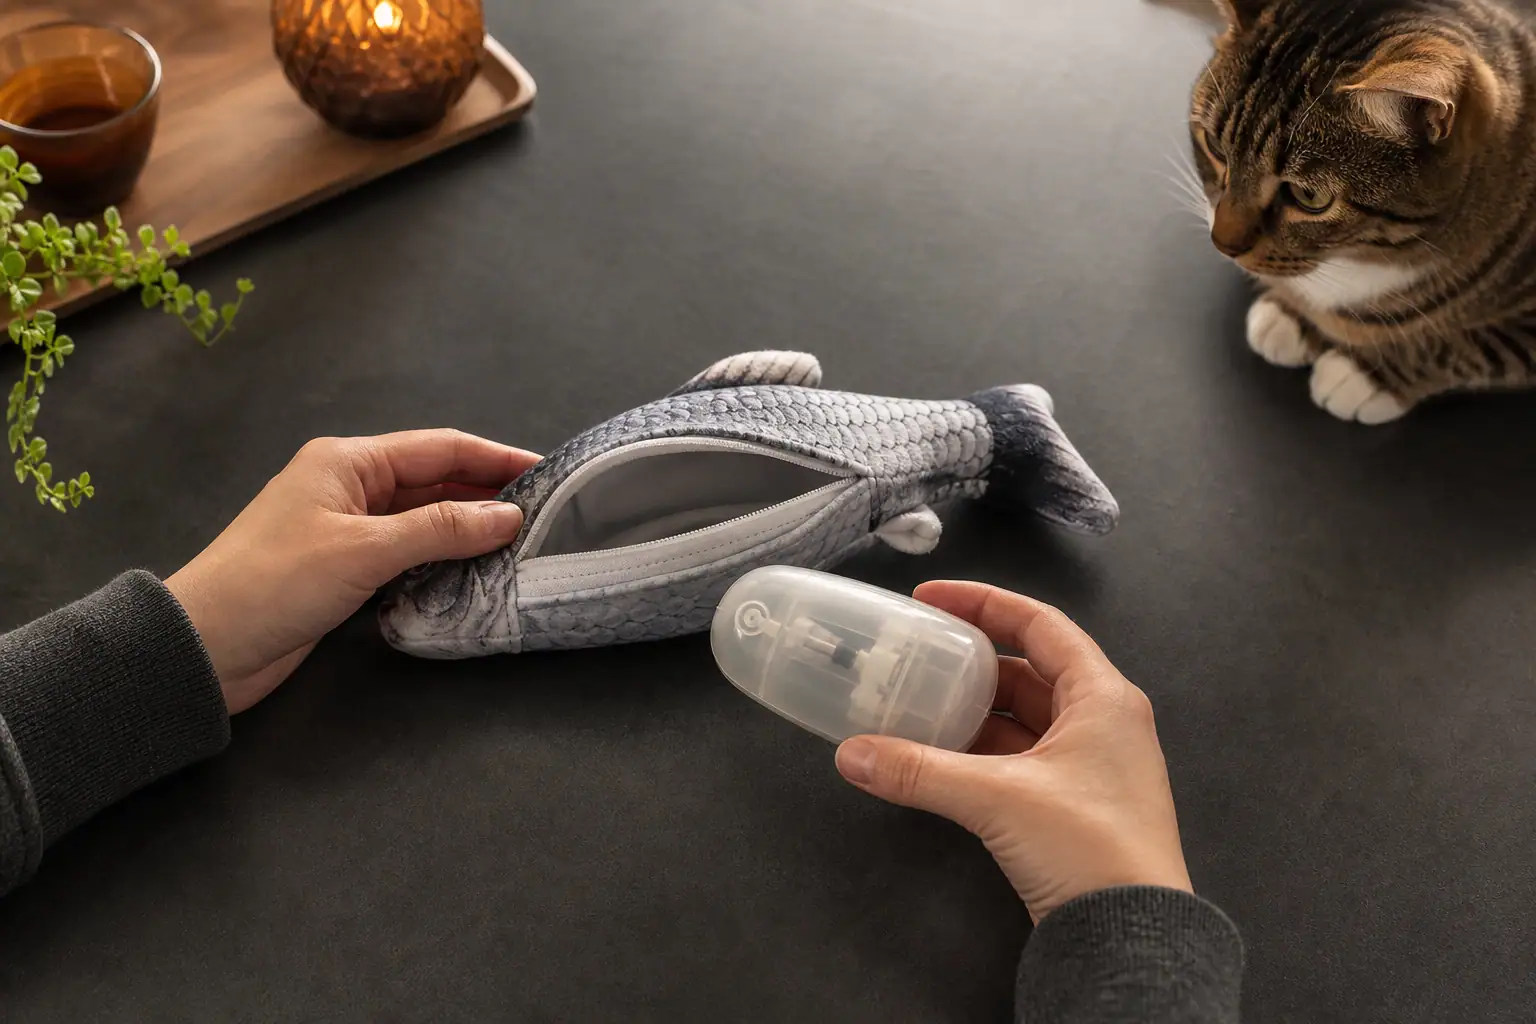
    • Electronics: A moving fish-shaped toy is a powered device as well as a kicker. Inspect the battery compartment, motor housing, charging port, and fabric cover; remove it if the cat reaches any hard internal part.

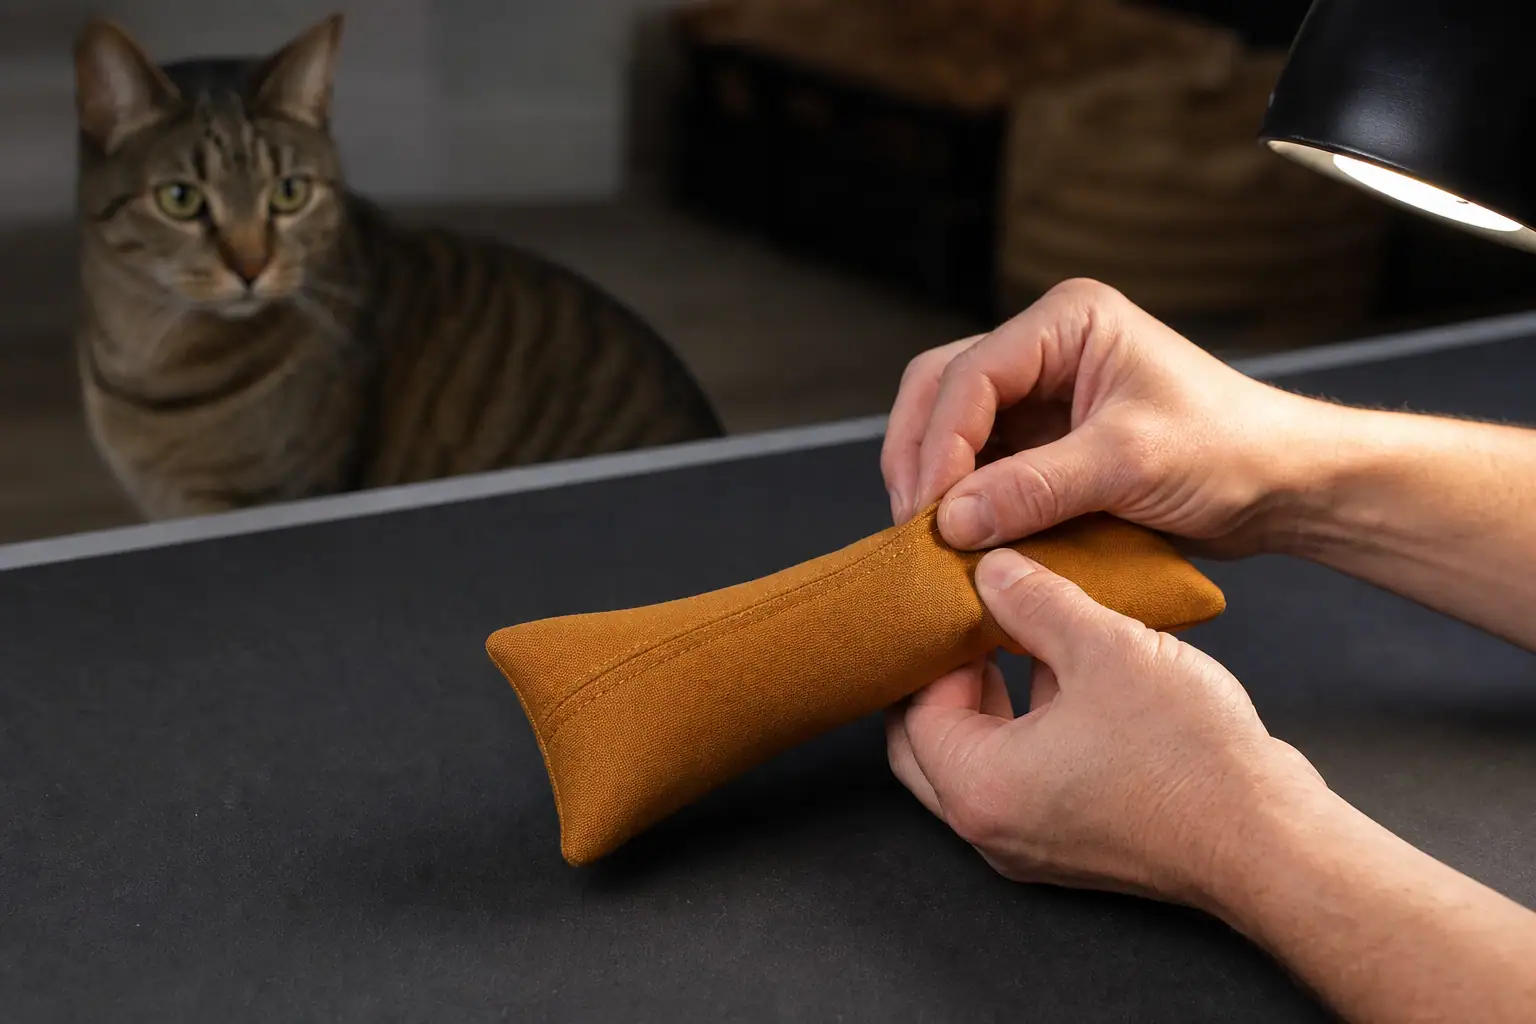
    For a rough player, the simplest design is usually the easiest to audit. Our broader durable cat toy guide explains how to compare fabric, seams, parts, and realistic wear claims. If you are weighing a familiar long plush option, the KONG Kickeroo safety and fit review highlights product-specific tradeoffs.

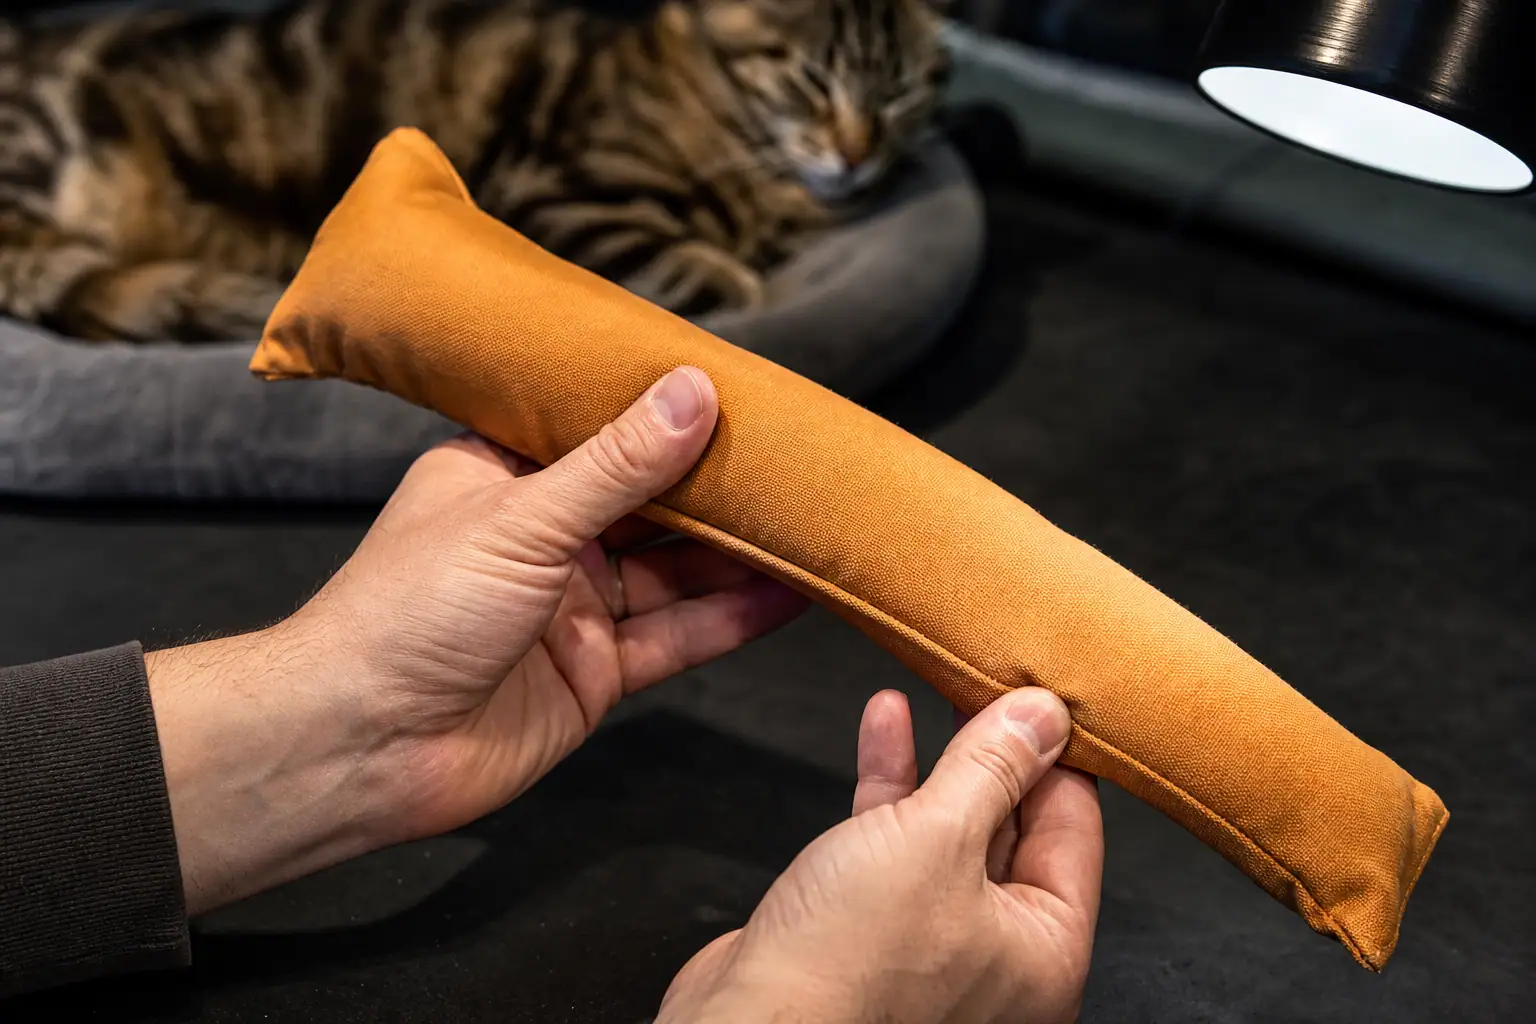
    Close view of tightly woven fabric and reinforced seams on a large cat kicker toy
    A plain shell, visible reinforced seams, and contained filling make wear easier to spot.

    Catnip, Silver Vine, or No Scent?

    A kicker does not need catnip to work. Shape, movement, texture, and the cat’s individual play style may be enough. A scent-free large cat kicker toy is also easier to wash and may suit a cat that becomes too intense around plant attractants.

    Responses vary. In a study of 100 domestic cats published in BMC Veterinary Research, cats were exposed to catnip, silver vine, Tatarian honeysuckle, and valerian; some cats that did not respond to catnip did respond to alternatives. That makes scent a preference to test, not a quality test for the toy.

    • Choose no scent if your cat ignores herbs, becomes overaroused, tries to eat plant material, or needs a regularly washable toy.
    • Choose a fully enclosed catnip fill if your cat responds calmly and the toy has no accessible herb pocket.
    • Consider silver vine as an alternative enrichment scent, but introduce it in a small, controlled session and stop if behavior becomes frantic or defensive.
    • Do not apply essential oils, concentrated fragrance oils, or an unknown “herbal blend” to the toy.

    Test any scented kicker with one cat at a time. In a multi-cat home, an exciting scent can create competition even when the toy itself fits both cats. Give each cat space, a separate play opportunity, and a clear exit.

    Turn the Kicker Into the Catch, Not the Whole Hunt

    A large kicker is excellent for the grab, bite, and hind-foot phase of play, but it does not move like escaping prey on its own. Pair it with an owner-controlled chase so the session includes more of the hunting sequence.

    1. Use a wand or another distance toy to create short stalk-and-chase opportunities.
    2. Move unpredictably along the floor and behind cover rather than waving the lure in the cat’s face.
    3. Allow several catches. The Feline Veterinary Medical Association’s environmental-needs guidance recommends intermittent capture so play does not become frustrating.
    4. Slide or gently toss the kicker away from your body as the final capture target.
    5. Let the cat hold and kick without putting your fingers at either end.
    6. End when the cat releases or begins to slow, then offer a small food reward or calm foraging activity if it suits the cat’s diet.

    Veterinary behavior literature from The Ohio State University connects feline play with stalking, chasing, pouncing, and biting, recommends toys that keep distance from human hands and feet, and suggests rotating toys to maintain interest. The Titan Claws hunt-catch-cool-down routine turns those principles into a repeatable session.

    Keep the kicker in a small rotation rather than leaving every toy on the floor. One kicker, a chase toy, a simple toss toy, and a food puzzle do different jobs. Store string and wand toys securely after use; leave out only toys that your individual cat has repeatedly used without chewing off or swallowing pieces.

    Inspect, Clean, and Know When to Retire It

    Inspect a kicker before and after every hard session. Use good light and both hands. Flex the body, spread each seam gently, rub high-wear areas against the grain, and compare both ends. A tooth puncture can be hard to see until the fabric is bent.

    What you find Decision
    Light surface fuzz; shell still thick; all seams closed Trim loose fuzz flush, recheck, and continue supervised use
    One loose stitch with intact fabric Remove from play until properly reinforced; inspect the full seam
    Thin spot, puncture, spreading weave, or repeated seam failure Retire the toy
    Open seam or visible filling Stop immediately, collect loose material, and retire it
    Missing fabric, thread, filling, trim, or a hard component Remove the remains, search the area, and call your veterinarian for advice
    Persistent odor, damp interior, or a damaged powered component Retire it rather than returning it to play

    Follow the maker’s care label. A scent-free fabric toy may be washable, but the surface drying first does not prove that dense filling is dry. After cleaning, check for shrinkage, twisted fill, hardened areas, color transfer, and opened seams. The Titan Claws guide to cleaning cat toys by material helps decide between spot cleaning, washing, and replacement.

    If you know or suspect that your cat swallowed string, fabric, stuffing, or another toy part, contact a veterinarian or emergency clinic promptly. VCA’s foreign-body guidance lists vomiting, decreased appetite, abdominal pain or tenderness, straining to defecate, lethargy, and behavior changes among warning signs. Do not pull thread or string from the mouth or rectum; it may be anchored internally.

    Hands flexing and inspecting the seams of a large fabric cat kicker toy
    Flex the bite, grip, kick, and closure zones under good light after hard play.

    Quick Buying Checklist

    • Compare the filled, usable body length—not a decorative tail or total package dimension.
    • Start around 10–12 inches for many adults and 13–16 inches for larger or longer cats, then verify fit.
    • Confirm that front paws can grip while both back feet reach the lower body.
    • Reject a toy that is too wide, rigid, dense, or heavy for your cat to control.
    • Favor tightly woven fabric, a simple shape, reinforced seams, and contained filling.
    • Avoid detachable trim, long tails, ribbons, bells, glued eyes, and loose small parts for rough players.
    • Treat catnip or silver vine as optional enrichment, not proof of quality.
    • Supervise the first sessions and every session for cats that rip or ingest toys.
    • Inspect the grip, bite, kick, seam, and closure zones after hard play.
    • Retire the toy at thinning, punctures, open seams, exposed filling, or missing pieces.

    Bottom line: the best large cat kicker toy is not simply the longest one. Choose enough usable body length for a two-point front-paw-and-back-foot fit, then prioritize control, inspectable construction, and the way your cat actually attacks it. Use it as a satisfying capture target, maintain it like play equipment, and replace it before damage becomes access to the inside.

    Large Cat Kicker Toy FAQs

    Do cats need kicker toys?

    Cats need appropriate opportunities for play and predatory behavior, but no single product is mandatory. A kicker is particularly useful for cats that like to grab, bite, wrestle, and strike with their hind feet because it moves that force away from human hands and feet.

    What is the best kicker toy for a large cat?

    Choose by demonstrated fit and construction. The cat should grip the upper body while both hind feet contact the lower body, and the toy should remain light and compressible enough to control. A plain, tightly woven, reinforced 13-to-16-inch body is a useful category to compare for many large cats, but individual testing matters more than breed or weight.

    Can I use a large dog toy as a cat kicker?

    Do not assume a dog toy is suitable. It may be too heavy, rigid, thick, strongly scented, or fitted with parts intended for a different style of play. Evaluate the specific materials, fill, seams, size, and your cat’s ability to release it; ask your veterinarian when the cat has unusual chewing or ingestion behavior.

    Is a cat kicker toy without catnip still useful?

    Yes. Many cats respond to the shape, movement, and texture. A scent-free version can be easier to clean and a better fit for cats that ignore catnip or become overexcited around it.

    Sources

  • DIY Cat Kicker Toy: A Tougher, Safer Sewing Pattern

    DIY Cat Kicker Toy: A Tougher, Safer Sewing Pattern

    You can make a DIY cat kicker toy from one 13-by-10-inch rectangle of sturdy fabric, polyester thread, and washable stuffing. Fold the fabric into a long tube, sew two reinforced seams, fill it so it is firm but still bendable, and close the opening with two rows of stitching. The finished toy is about 12 inches long and 4 inches wide—large enough for many adult cats to hug with the front legs and kick with the back feet.

    This version is deliberately plain. A cat does not need ribbon tails, plastic eyes, bells, glued trim, or a zipper to enjoy a kicker. Those details create extra places for a rough player to pull, chew, or expose the filling. No homemade toy is risk-free or indestructible, so supervise the first sessions and inspect the toy after hard play.

    What a Cat Kicker Toy Is—and Why the Shape Matters

    A kicker is a long, soft capture toy. A cat can wrap the front legs around it, bite or mouth the upper section, and strike the lower section with rapid alternating back-foot kicks. That sequence gives the cat an appropriate target for the grab-and-kick part of play while keeping your forearm out of the job.

    The best size is based on the cat, not a magic measurement. The toy should span much of the distance from the cat’s chest toward the hips when held lengthwise. It must be wide enough to stay outside the mouth rather than behave like a small prey item, yet soft enough for the front paws to compress and hold. For an average adult, a finished 10-to-12-inch length and 3½-to-4½-inch width is a useful starting range.

    Cat and play style Suggested cut rectangle Approximate finished size
    Kitten or small adult 11 × 8 in 10 × 3 in
    Average adult 13 × 10 in 12 × 4 in
    Large adult or long-bodied rough player 15 × 11 in 14 × 4½ in

    These are practical starting dimensions, not safety guarantees. Watch the first play session. If the cat cannot hold the toy while the back feet reach it, adjust the length. If the whole toy can be shoved far into the mouth, make the next one wider. If you have a very small kitten, a cat who eats fabric, or a cat with dental or mobility problems, ask your veterinarian about an appropriate play setup.

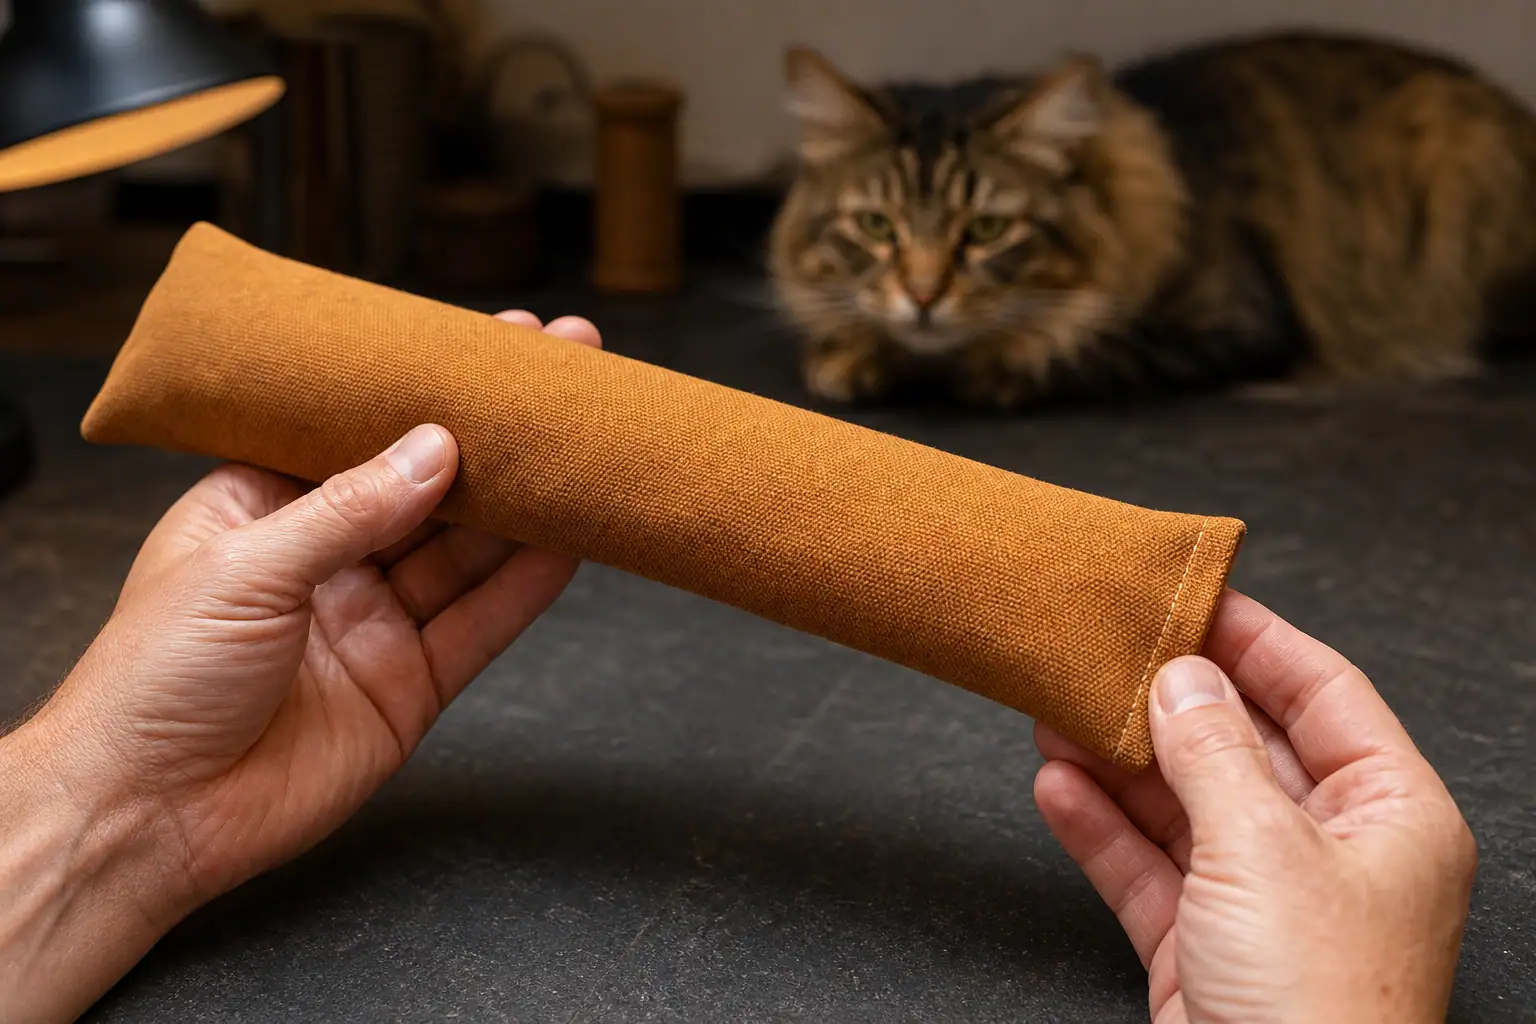
    Canvas, polyester thread, fiberfill, ruler, scissors, and catnip for a DIY kicker toy
    Keep the build simple: tightly woven fabric, strong thread, plain filling, and optional dried catnip.

    Materials for a Tougher DIY Cat Kicker Toy

    Choose simple, known materials that remain easy to inspect. Upcycling is useful only when you know what the fabric is, can wash it first, and can remove every fastener and decoration.

    • Outer fabric: one rectangle of tightly woven cotton canvas, midweight denim, or sturdy cotton twill. Avoid loose knits, stretchy fabric, lace, faux fur that sheds, and fabric already weakened by holes or worn patches.
    • Thread: all-purpose polyester thread. It tolerates repeated flexing better than old, brittle thread from an unknown sewing kit.
    • Filling: new polyester fiberfill or clean strips of tightly woven fabric. Use pieces large enough to retrieve if a seam opens; do not use foam beads, plastic pellets, dried beans, rice, loose cotton wool, or shredded plastic.
    • Optional scent: one or two teaspoons of dried catnip as a modest starting amount. Skip it for cats who become agitated around catnip or who try to eat the fabric.
    • Tools: ruler, fabric scissors, clips or pins, and either a sewing machine or a sturdy hand-sewing needle.

    Do not add yarn, tassels, ribbon, elastic, feathers, buttons, beads, bells, safety eyes, wire, pipe cleaners, hook-and-loop tape, or a zipper. Even a cute attachment is a new failure point. Veterinary guidance on foreign-body ingestion in cats identifies thread, string, wool, rubber bands, and small toys among objects cats may swallow; string-like material can be especially dangerous.

    If you want more detail on fabric strength, seam placement, and inspectable construction, see the Titan Claws guide to materials for durable cat toys. “Durable” still means maintained and replaced when damaged—not indestructible.

    DIY Cat Kicker Toy Pattern: Step by Step

    The directions below make the average-adult size. Use a ½-inch seam allowance throughout. Read all seven steps before cutting, and keep pins, needles, thread clippings, and the unfinished toy away from your cat.

    1. Prepare and inspect the fabric. Wash and dry it with an unscented routine, press it flat, and hold it up to light. Reject pieces with thin spots, snags, glued decoration, metallic print, or holes. Cut one 13-by-10-inch rectangle on the straight grain.
    2. Fold the tube. Fold the rectangle lengthwise with the right sides together so the two 13-inch raw edges meet. The folded piece will measure 13 by 5 inches. Clip or pin the open long edge and one short end.
    3. Sew the main seam. Starting at the folded corner, sew across the clipped short end and then down the open long edge with a ½-inch seam allowance. Backstitch at both ends. Leave the other short end fully open for turning and filling.
    4. Add a backup seam. Sew a second straight line ⅛ inch inside the first line, toward the body of the toy. Finish the raw edges together with a compact zigzag if your fabric frays. Clip the two sewn corners without cutting either stitch line.
    5. Turn and check. Turn the tube right-side out and push the corners out with a blunt tool. Do not use open scissors. Run a finger along both sewn seams, tug gently in several places, and restitch any spot that spreads.
    6. Fill without overpacking. Add small handfuls of fiberfill, distributing them from the closed end toward the opening. The tube should feel evenly full but still bend into a shallow curve. If using catnip, scatter a small amount between layers of filling rather than leaving one dense pocket.
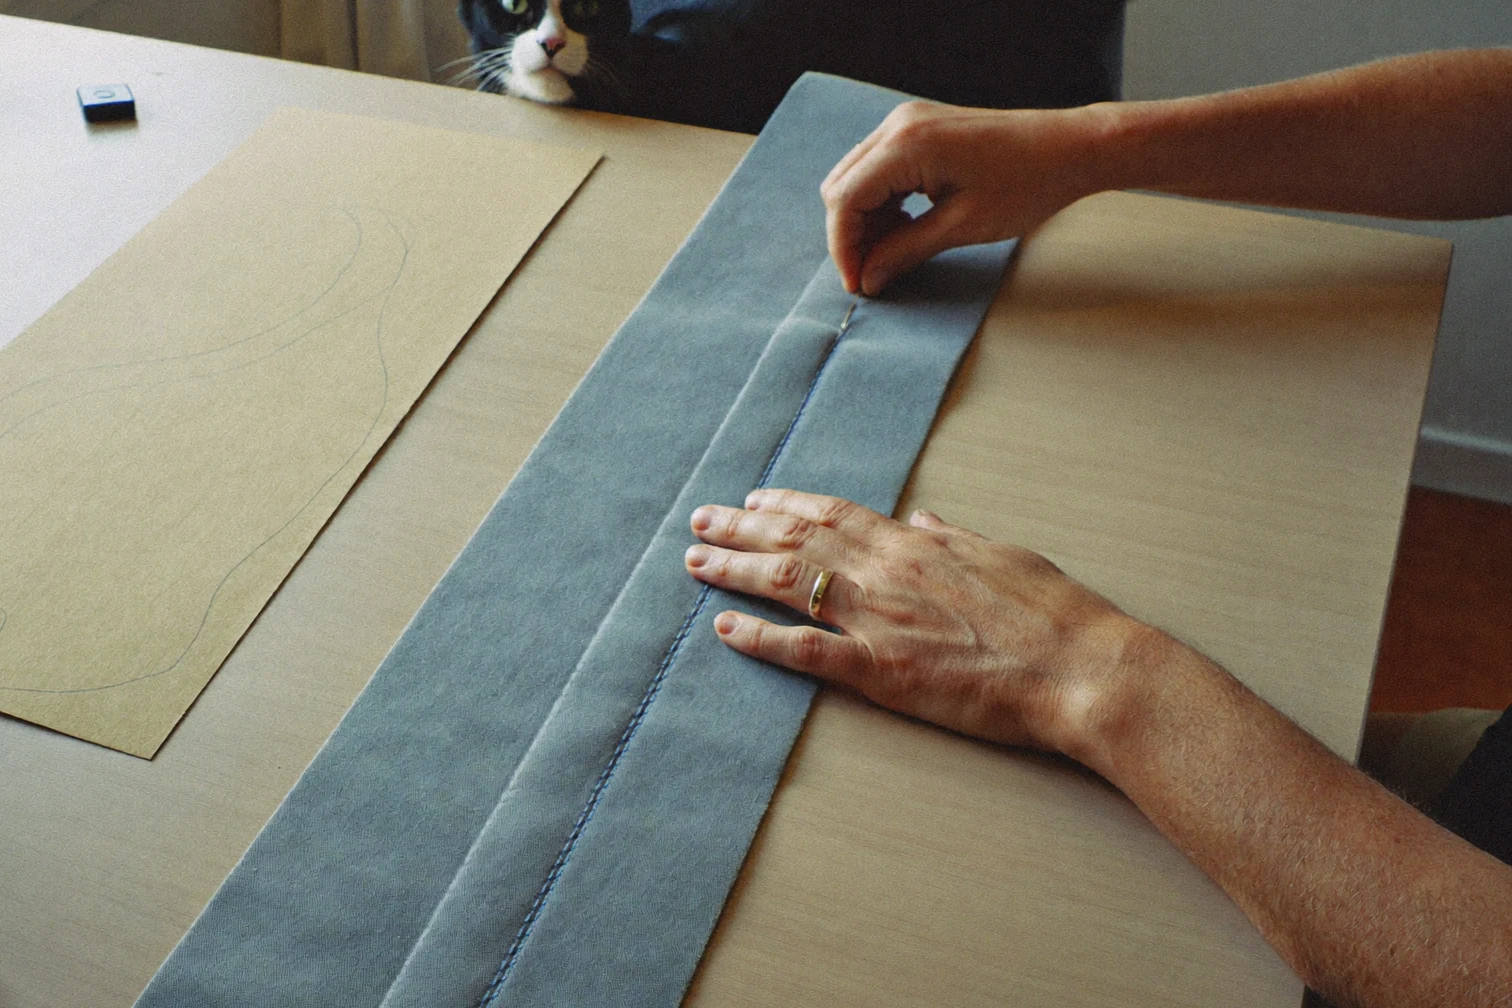
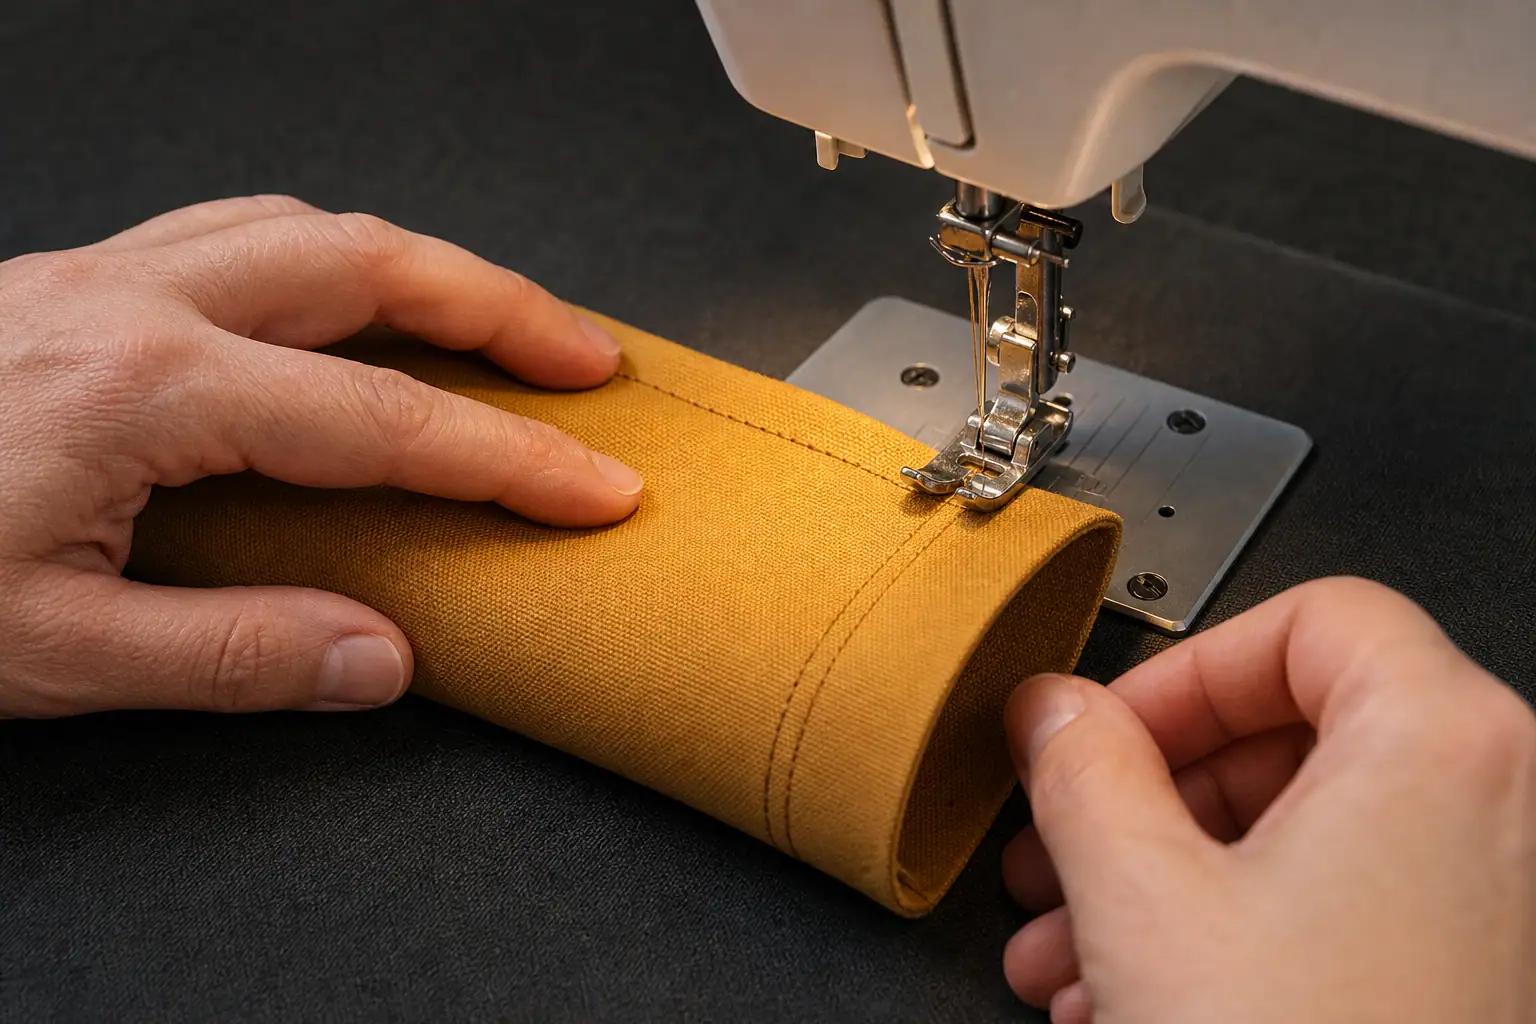
    7. Close the high-stress end. Turn the open raw edges ½ inch to the inside. Machine-stitch across the opening, then sew a second parallel row ⅛ inch behind it. For a neater finish, first hand-close with a small ladder stitch and then add a second secured line. Backstitch or knot securely and trim every thread tail flush.
    Two parallel rows of stitching reinforcing a canvas cat kicker toy seam
    A second parallel stitch line provides backup at the long seam and closure.

    Hand-sewing option: use the same pattern and a short backstitch rather than a loose running stitch. Backstitch forms a more continuous seam because each new stitch overlaps the previous one. Sew the second line as described above, make small knots buried inside the seam allowance, and account for the needle and every pin before the toy reaches the cat.

    The two-minute post-build test

    • Squeeze the entire toy and listen or feel for hidden hard or sharp objects.
    • Bend it several times; the seams should remain flat without gaps.
    • Pull firmly—but not violently—across each seam and at both corners.
    • Rub the surface with a dry white cloth; stop if color or surface coating transfers.
    • Check that no thread tail, pin, needle, decoration, or loose filling remains.
    • Count and put away all sewing tools before inviting the cat into the room.

    If the toy fails your hands, it is not ready for teeth and claws. Open the closure, correct the problem, and repeat the test.

    Catnip, No Catnip, and a Washable Version

    Catnip is optional. Some cats ignore it, and a cat’s response can range from relaxation to intense excitement. VCA’s kitten behavior guidance notes that sensitivity varies and young kittens may not respond yet. If catnip makes your cat frantic, defensive, or more likely to rip at the toy, make the kicker without it.

    For a frequently washed kicker, leave herbs out and use washable fiberfill. Wash the finished toy separately on a gentle cycle only if the fabric and filling are washable, then air-dry it completely. Damp stuffing can stay wet long after the surface feels dry. Check for shrinkage, twisted filling, and opened stitches before reuse. Our cat-toy cleaning guide explains when spot cleaning, hand washing, machine washing, or replacement makes more sense.

    A refillable pocket sounds convenient, but zippers and exposed hook-and-loop closures give a determined chewer more edges to work on. A safer refresh is to rub a little dried catnip on the intact outside immediately before supervised play, shake off the excess, and store the toy dry afterward.

    How to Introduce the Kicker Without Teaching Hand Biting

    1. Place the toy on the floor and let the cat investigate. Do not press it into the cat’s face.
    2. Use a separate wand or toss toy to begin a stalk-and-chase sequence while keeping hands at a distance.
    3. After a few successful catches, slide or gently toss the kicker away from your body as the final capture target.
    4. Let the cat grip, bite, and kick the toy. Do not hold the other end during biting; your moving fingers can become part of the target.
    5. End while the cat is still controlled, then offer a small food reward or calm foraging activity if it fits the cat’s diet.

    This is a capture toy, not a complete play routine. Cats benefit from opportunities to stalk, chase, pounce, catch, and disengage. The Titan Claws hunt-catch-cool-down routine shows how to combine a moving lure with a satisfying finish. For more low-cost projects, compare the material and supervision levels in our guide to homemade cat toys.

    Cats Protection advises checking toys regularly, replacing worn ones, and not leaving cats alone with toys that could be shredded, eaten, or cause entanglement. Treat your first few sessions as a field test: stay close enough to stop play, but keep your hands out of the kicking zone.

    Cat holding a homemade kicker toy that reaches from chest toward the back legs
    The right fit lets the front legs hold the toy while the back feet contact its lower half.

    Inspect, Repair, or Retire? Use This Decision Guide

    Inspect the kicker before and after every rough session. Roll it between both hands, flex the ends, and spread each seam slightly under good light. A quick glance from across the room will miss small tooth holes and broken stitches.

    What you find What to do
    Light surface fuzz, no thinning, all seams closed Trim fuzz flush, recheck, and keep for supervised play.
    One loose exterior stitch, fabric around it fully intact Remove the toy. Reinforce both seam lines before the next use.
    Small puncture or worn/thin fabric Retire it. A patch adds edges and may hide spreading damage.
    Open seam or visible filling Stop play immediately, collect loose material, and retire the toy.
    Missing fabric, thread, or filling Confine the remains, check the play area, and contact your veterinarian for advice.
    Wetness, odor, or filling that will not dry fully Retire it rather than sealing moisture inside.

    Vomiting, reduced appetite, abdominal pain, lethargy, straining to defecate, or pawing at the mouth after suspected ingestion needs prompt veterinary attention. Do not pull visible string from a cat’s mouth or anus; call a veterinarian or emergency clinic because anchored string can injure internal tissue.

    Hands bending and checking every seam of a homemade canvas cat kicker toy
    Flex the toy and spread each seam under good light before and after rough play.

    DIY Cat Kicker Toy Quick Checklist

    • Size the toy so the cat can hug it and reach it with the back feet.
    • Use intact, tightly woven canvas, denim, or twill with known contents.
    • Use simple fiberfill or large fabric strips—not beads, pellets, rice, beans, or loose cotton.
    • Sew two lines along structural seams and across the closure.
    • Trim all thread tails and account for every pin and needle.
    • Skip ribbons, yarn, tassels, elastic, bells, plastic eyes, zippers, and glued trim.
    • Keep filling firm enough to hold shape but soft enough to grip.
    • Introduce the kicker on the floor, away from hands and feet.
    • Supervise early and rough sessions.
    • Inspect before and after play; retire punctured, opened, thinning, or incomplete toys.

    Bottom line: the safest useful DIY cat kicker toy is not the fanciest one. Make it large enough for the cat, simple enough to inspect, and strong enough to pass a firm seam test. Then supervise, maintain it, and retire it before a small defect becomes an exposed-filling problem.

    Sources

  • Cat Rough Play: How to Tell Play From Fighting and Calm It Down

    Cat Rough Play: How to Tell Play From Fighting and Calm It Down

    Cat rough play is often normal when it is mutual, quiet, brief, and easy for either participant to leave. Stalking, chasing, pouncing, wrestling, mouthing, and rabbit-kicking are all part of feline play. It becomes a problem when claws or bites injure someone, one cat repeatedly tries to escape, the interaction stays tense, or the behavior suddenly changes.

    Do not judge a wrestling match from one dramatic moment. Watch the pattern: Do both cats choose to return? Do they trade roles? Are there pauses? Can the smaller or less confident cat walk away? Rough-looking play can be healthy; one-sided pursuit is not made safe just because the more energetic cat intends to play.

    Is Rough Play Normal for Cats?

    Yes. Play lets cats rehearse parts of hunting and social behavior without the full intent or force of a real attack. Kittens are especially likely to chase, grab, bite, and wrestle, but many adult cats keep a vigorous play style. A cat may also direct the same sequence toward a toy or a person’s moving ankle.

    The important word is inhibited. In healthy social play, cats adjust their force and respond when a partner pauses, protests, or leaves. The UC Davis School of Veterinary Medicine notes that play aggression is common in kittens and young cats, but is too rough when biting is uninhibited, claws are not controlled, or the target is a weaker, older, or ill cat.

    Do kittens grow out of rough play?

    Activity often changes with age, but do not wait for a painful habit to disappear on its own. A kitten who learns that hands, feet, or a reluctant housemate are acceptable targets may keep practicing that pattern as a larger, stronger adult. Teach the safer rule now: human skin ends the game; appropriate toys keep it going.

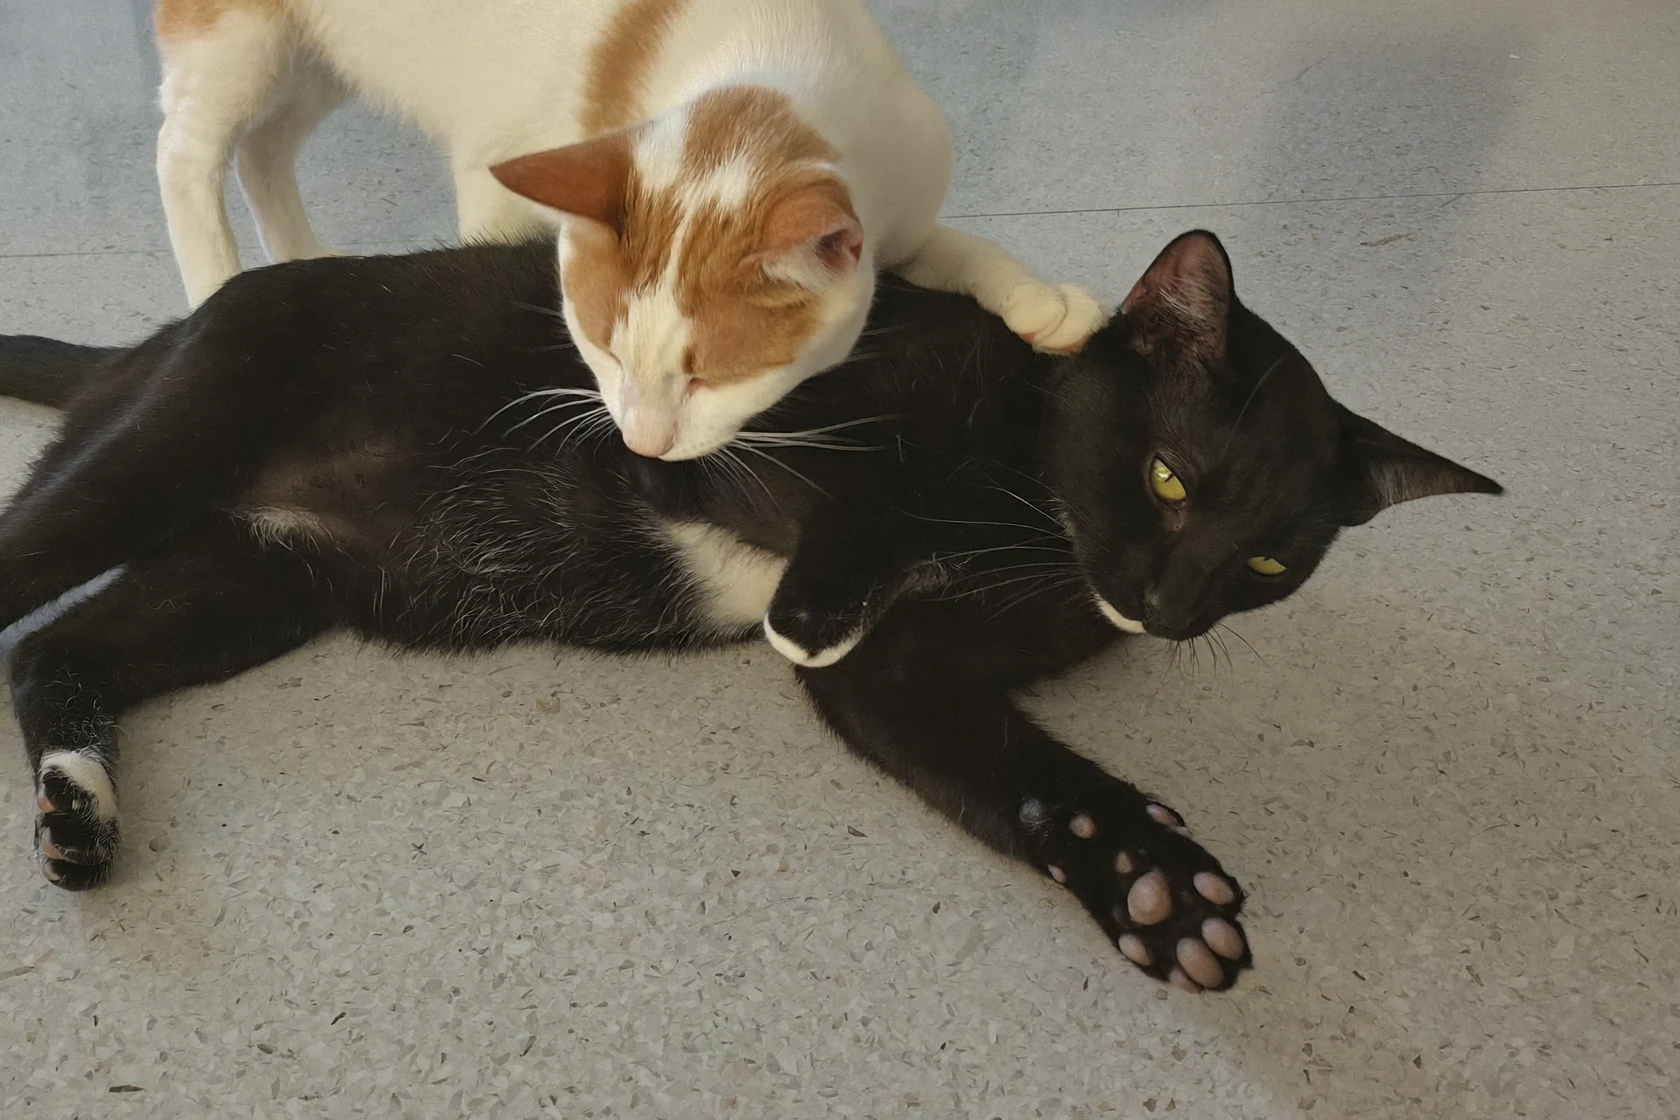
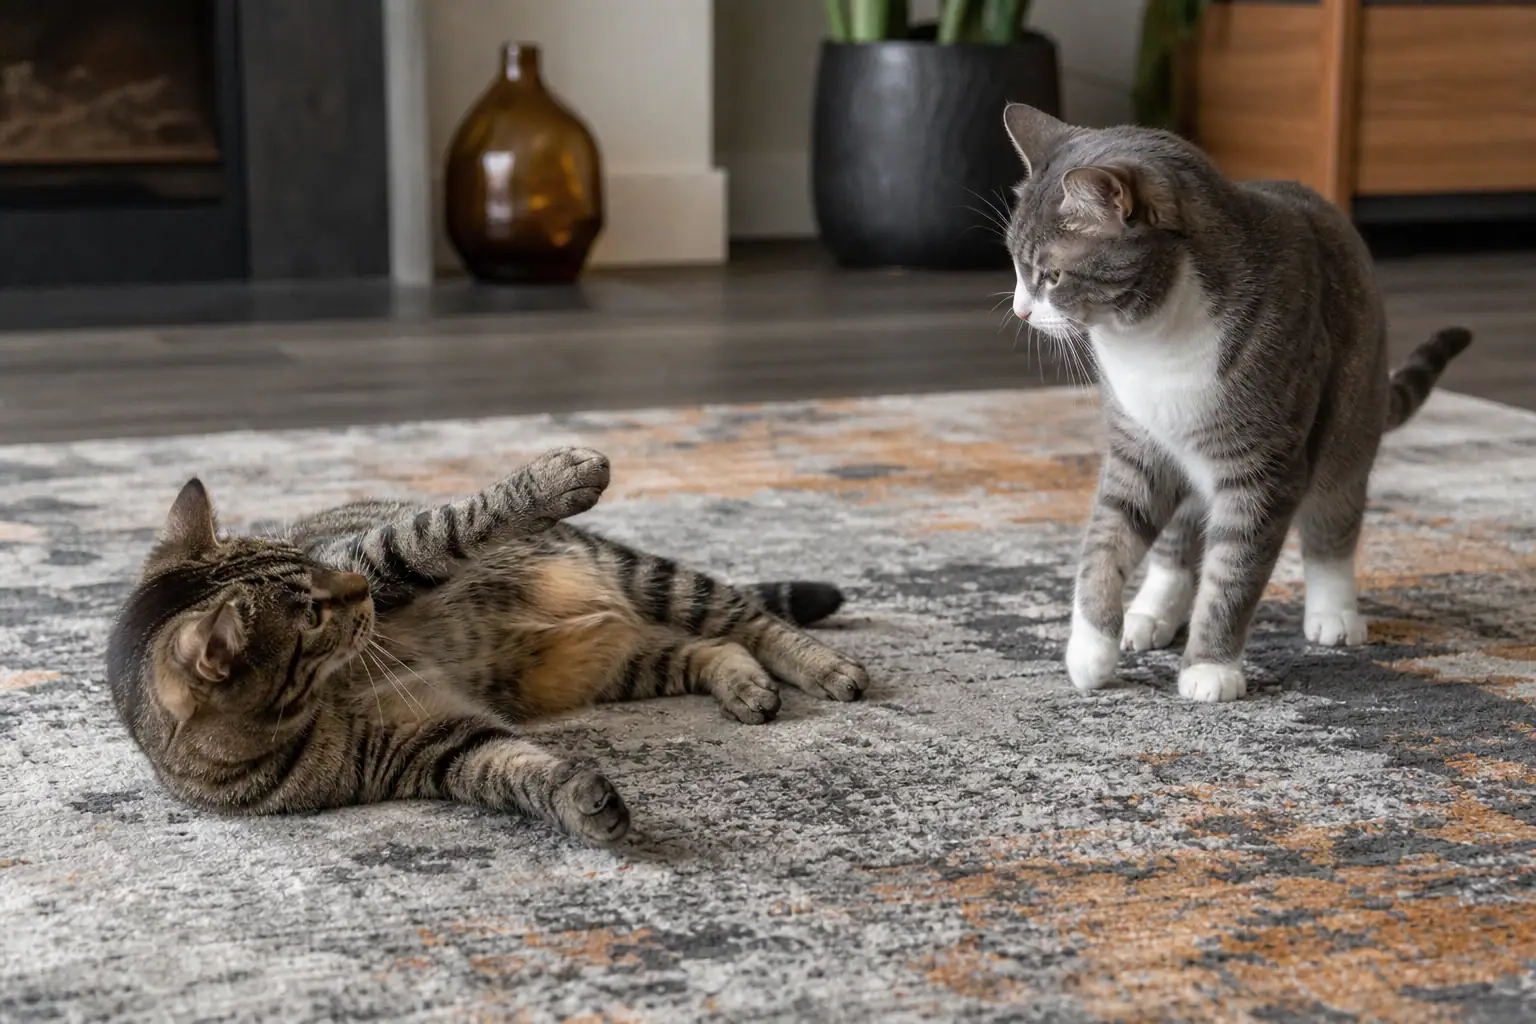
    Two cats pausing during mutual rough play with relaxed body language
    Look for reciprocity, pauses, choice, and relaxed recovery—not one dramatic wrestling pose.

    Cat Play vs. Fighting: Read the Whole Interaction

    There is no single foolproof sign. Wrestling, biting, pinning, chasing, and a belly-up posture can occur in play, tension, or a mixture of both. In a 2023 Scientific Reports study of 105 cat pairs, reciprocal wrestling was associated most closely with playful interactions, while vocalization and chasing were associated more with agonistic interactions. The researchers also identified an intermediate category—evidence that “playing or fighting” is sometimes the wrong binary question.

    What to watch More consistent with mutual play Reason to pause or intervene
    Choice Both cats approach, return, or re-start the game One cat hides, freezes, or repeatedly tries to leave
    Roles Chasing, pinning, and being on top change sides The same cat always pursues, corners, or pins
    Sound Mostly quiet, perhaps with an occasional brief protest Repeated growling, yowling, screaming, or persistent hissing
    Body Loose movement, normal-looking coat, quick pauses Rigid posture, flattened ears, puffed fur, arched back, or sustained tail lashing
    Response to “stop” The other cat backs off when a partner pauses or protests Pursuit continues after the other cat disengages
    Afterward Both recover quickly and behave normally around each other Hiding, guarding routes or resources, staring, avoidance, or renewed conflict

    A single hiss can be a boundary rather than proof of a broken relationship. What matters is whether the other cat respects it. The 2024 AAFP Intercat Tension Guidelines advise looking beyond the bout at the cats’ everyday relationship. Cats who rest together, groom or rub one another, touch noses, and comfortably share space provide different context from cats who routinely block, stare at, avoid, or hide from one another.

    Try the consent-and-recovery test: separate the moment into three questions. Did both cats choose the interaction? Did each cat retain the ability to stop? Did both return to relaxed behavior afterward? If any answer is consistently no, manage it as a welfare problem rather than entertaining roughhousing.

    Why a Cat Starts Playing Too Rough

    Rough play is a description, not a diagnosis. The same bite or pounce can have different causes, so look for the trigger and timing before choosing a response.

    • Unmet play needs: A young or high-energy cat may ambush ankles or overwhelm a quieter cat when there are too few acceptable outlets for chase, grab, and kick behavior.
    • Learned hand play: Fingers under a blanket and hand wrestling teach a kitten that skin is a moving target. The game becomes less cute when adult teeth and claws arrive.
    • A play-style mismatch: One cat wants repeated contact while the other prefers a short chase or no social play at all. Age, size, health, and confidence can widen that mismatch.
    • Overarousal: Fast, continuous movement can push a cat past controlled play. Watch for tail lashing, skin twitching, fixed staring, hard grabbing, or bites that intensify.
    • Stress or redirected arousal: An outdoor cat at the window, a loud noise, a new pet, or another frustrating event can prime a cat to strike the nearest person or animal.
    • Pain or illness: A cat who suddenly resists touch, lashes out when moved, or changes behavior needs a veterinary check. The Merck Veterinary Manual lists pain, fear, frustration, resource conflict, and play among the possible contributors to aggression.

    Keep a simple one-week log: time, location, target, what happened just before the episode, body-language signs, and what ended it. Patterns such as pre-dinner ankle ambushes, window-triggered attacks, or one cat being cornered near a litter box make the next step much clearer. A short video taken from a safe distance can also help your veterinarian or a qualified behavior professional assess the interaction.

    How to Stop Rough Play Directed at People

    The goal is not to suppress normal play. Give it a predictable route that never ends on human skin.

    1. Stop using hands and feet as toys. Everyone in the home needs the same rule, including under blankets and around corners.
    2. Preempt the usual ambush. Before the time or place where attacks occur, start an owner-guided game with a wand or toss toy. Move the lure away from the cat like prey rather than pushing it into the cat’s face.
    3. Create a chase-catch-kick sequence. Let the cat stalk and chase, allow several successful catches, then offer a larger fabric kicker for grabbing and rabbit-kicking. End with a small meal, treat, or calm foraging activity when appropriate for the cat’s diet.
    4. End skin contact immediately and calmly. If teeth or claws touch you, freeze instead of yanking away, disengage as safely as you can, and remove attention for a brief reset. Do not restart until the cat is calm.
    5. Use shorter sessions. Stop while play is still controlled. Two or more brief sessions at the cat’s naturally active times are often more useful than one exhausting, frantic session.
    6. Reward the behavior you want. Continue play when the cat targets the toy, and use treats or praise for going to a mat, perch, or puzzle instead of stalking people.

    For cats who love fast pursuit, our guide to cat toys that move explains how to match motion to stalkers, sprinters, grabbers, and destroyers. If you use a lure on a line, follow the storage and inspection rules in the Titan Claws feather wand safety guide.

    Do not hit, scruff, chase, shout at, or spray the cat. Physical or frightening punishment can add fear and arousal without teaching an acceptable target. Do not deliberately startle a highly aroused cat at close range, and do not pick up a cat that is already biting or redirecting aggression.

    Owner redirecting an energetic cat from ankles to a wand toy
    Preempt ankle ambushes with distance play, then hand off to a sturdy capture toy.

    What to Do When One Cat Plays Too Rough With Another

    First protect the cat who is trying to leave. Add vertical routes, hiding options with more than one exit, and separate resting, feeding, water, scratching, and litter resources so one cat cannot control every route. Give the higher-energy cat individual play before the time rough interactions usually begin.

    1. Interrupt early. At fixed staring, repeated non-mutual chasing, cornering, or ignored protests, redirect each cat toward a separate activity while there is still room to think.
    2. Use a barrier, not your hands. If tension escalates, place a cushion, large piece of cardboard, or other solid visual barrier between the cats. Do not reach into a fight or grab an aroused cat.
    3. Give both cats space to settle. Move them to separate, fully equipped areas without forcing immediate contact. Wait for normal posture and routine to return.
    4. Prevent rehearsal. Supervise likely conflict periods and use temporary separation when nobody can watch.
    5. Reintroduce gradually after real conflict. Repeated fighting, fear, or avoidance calls for a structured plan from a veterinarian or qualified feline behavior professional, not another face-to-face test.

    Do not assume a second kitten will automatically solve rough play. A well-matched companion can provide social play, but a new cat also adds resources, introductions, and relationship risk. Choose another cat only because the household can support one, and match energy and social style carefully.

    Choose Toys That Can Take the Right Kind of Rough Play

    A toy should move teeth and claws away from bodies while supporting a complete play sequence. For many rough players, that means a supervised chase toy plus a separate capture toy—not one delicate lure expected to survive every stage.

    • For chase: Use an owner-held wand, a large toss toy, a tunnel game, or another moving target that keeps hands at a distance.
    • For grab and kick: Choose a kicker long enough for the cat to hold against the chest while the back feet contact the toy rather than your arm.
    • For solo batting: Use simple, appropriately sized toys without detachable decorations, long strands, or brittle pieces.
    • For mental work: Add food puzzles, scent games, cardboard searches, or training so intensity is not the only form of enrichment.

    Durable does not mean indestructible or safe without inspection. Prioritize simple construction, reinforced seams, intact fabric, and a size your cat cannot swallow. Pull gently at attachments, run your fingers over seams, and retire the toy when stuffing, sharp edges, loose threads, cracked plastic, exposed elastic, or missing pieces appear. The Titan Claws guide to kitten toys for rough play covers age-specific choices, while our durable cat toy checklist focuses on inspectable construction and failure points.

    Wands, strings, elastic, feathers, and damaged plush belong in closed storage when active supervision ends. If your cat destroys a new toy quickly, that is not a cue to let the cat “finish it.” Remove it, account for the pieces, and change the material, size, or play format.

    Hands inspecting the seams and surface of a rugged cat kicker toy
    After hard play, check seams, fabric, attachments, and missing pieces before the toy returns to the rotation.

    When Rough Play Needs Professional Help

    Book a veterinary examination when aggression begins suddenly, touch seems painful, mobility changes, appetite or litter-box habits change, or an older or ill cat becomes the target. Seek behavioral help when incidents are frequent, intense, prolonged, hard to interrupt safely, or followed by hiding, resource blocking, urine marking, wounds, or persistent avoidance.

    Separate cats and seek prompt veterinary advice for punctures, limping, eye injuries, breathing changes, uncontrolled bleeding, or suspected swallowed toy pieces. Small punctures can hide beneath fur, so check both cats after an incident without forcing handling on an aroused animal.

    If a person is bitten or scratched, wash the wound with warm soapy water immediately. The CDC advises seeking medical attention for a serious wound, a wound that becomes red, painful, warm, or swollen, uncertainty about rabies vaccination, or a cat that appears sick. Follow local medical advice, especially for punctures to the hand or face or if the injured person has a weakened immune system.

    Quick Cat Rough Play Checklist

    • Both cats choose to engage and can leave.
    • Chasing, pinning, and top/bottom roles are reasonably reciprocal.
    • The interaction is mostly quiet and includes natural pauses.
    • A protest or attempt to disengage makes the other cat back off.
    • Neither cat hides, guards routes, blocks resources, or stays tense afterward.
    • Human hands and feet are never used as moving targets.
    • Daily play provides separate chase, catch, and kick outlets.
    • Toys are large enough, simple enough, and sturdy enough for this cat’s play style.
    • Wands and strand-like toys are stored after supervised use.
    • Sudden behavior change, pain, injuries, or persistent fear gets professional attention.

    Bottom line: healthy cat rough play has choice, restraint, and recovery. Watch the pattern rather than the spectacle. Redirect teeth and claws onto suitable toys, stop one-sided interactions early, and treat sudden or persistent aggression as a health and welfare question—not a discipline problem.

    Sources

  • Hanging Cat Toys: How to Choose, Hang, and Use Them Safely

    Hanging Cat Toys: How to Choose, Hang, and Use Them Safely

    Hanging cat toys can create an exciting stalk, leap, and catch game, but toys on string or elastic should be treated as supervised play equipment—not all-day entertainment. Choose a simple, appropriately sized lure, an attachment you can inspect, and a cord that your cat cannot chew into loose strands. Hang it in a clear play area, watch the entire session, then remove or secure it in closed storage.

    That rule matters even when a product is advertised for independent play. A determined cat can wrap a paw or body in slack line, bite through elastic, pull a small part free, or swallow string. The best hanging cat toy is therefore not the one that stays up longest. It is the one you can control, inspect, and put away before its weakest part fails.

    Are Hanging Cat Toys Safe?

    They can be useful during active supervision. They are a poor choice for unattended access when they include string, ribbon, wire, elastic, feathers, bells, clips, or a small lure. Supervision means an adult is present, watching the cat, and close enough to stop the game—not simply somewhere else in the home.

    The Cornell Feline Health Center advises avoiding toys with small pieces or strand-like parts that may separate during chewing and be swallowed. The AAFP and ISFM feline environmental needs guidelines likewise say that toys with string or potentially ingestible parts should be put away after play.

    Use a different leave-out option when nobody can watch: an intact track toy, a correctly sized sturdy ball, a simple food puzzle, or another toy your individual cat has used safely through repeated checks. If your cat eats thread, wool, fabric, plastic, or other non-food material, ask your veterinarian what types of enrichment are appropriate.

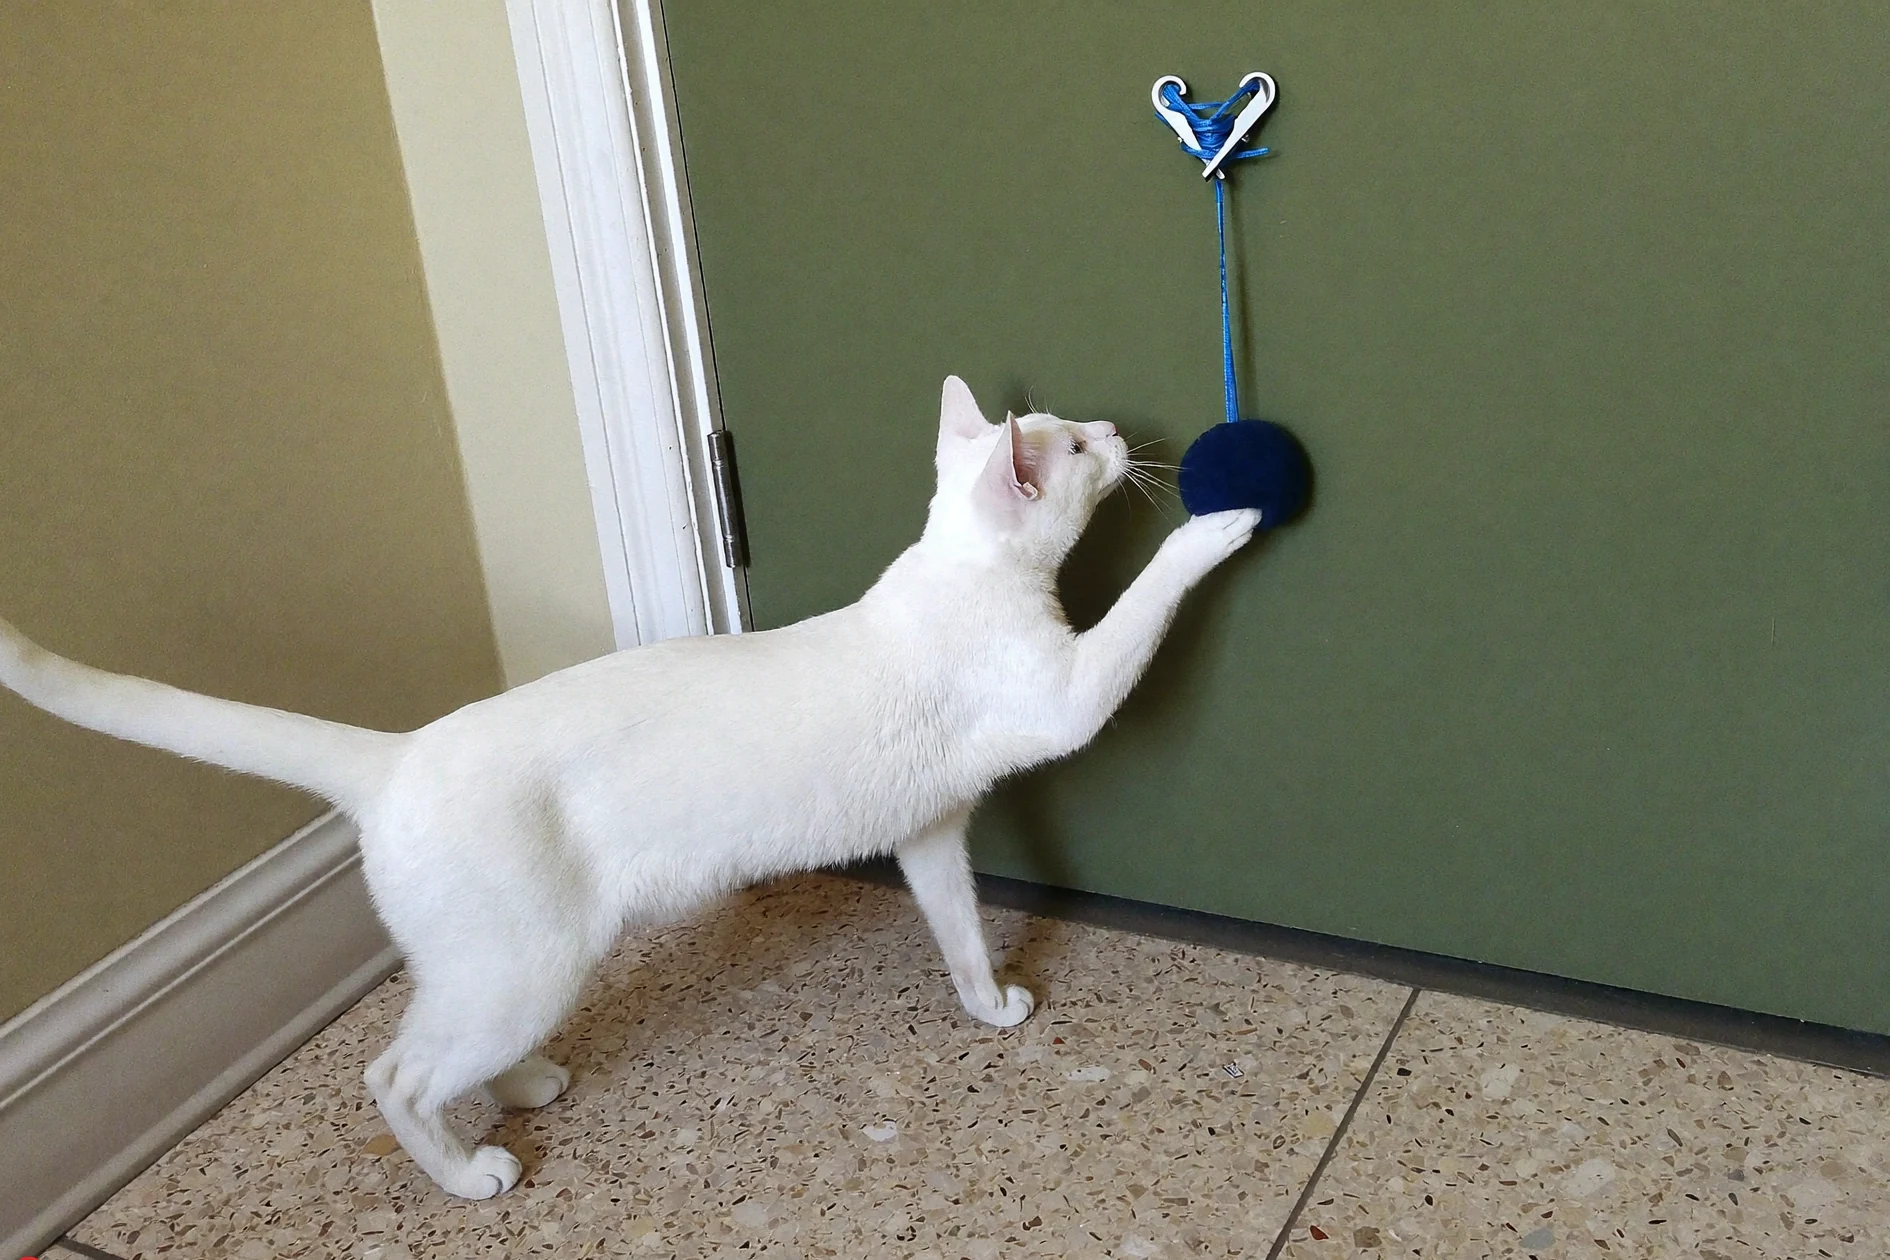
    Owner checking the mount and short cord of a door hanging cat toy
    Check the mount, line, adjuster, and lure by hand before every play session.

    Why cats like dangling toys

    A suspended lure changes direction when it is tapped, retreats when it is pulled, and returns after a miss. That unpredictable motion can resemble small prey and lets a cat stalk, chase, pounce, grab, and sometimes kick. Those behaviors are not frivolous: veterinary environmental guidance identifies opportunities for play and predatory behavior as a core part of a healthy feline environment.

    The movement is only half the game. Let your cat catch the lure regularly. A toy that always springs out of reach can turn a hunting sequence into repetitive frustration. After a catch, pause. If your cat wants to clamp down and rabbit-kick, trade the hanging lure for a larger capture toy rather than allowing prolonged chewing on cord or elastic.

    For more owner-controlled chase technique, see the Titan Claws guide to using a feather wand cat toy safely. If you are comparing suspended toys with powered or rolling options, our guide to cat toys that move covers their different failure points.

    Choose the Right Hanging Style

    Most hanging cat toys use a door frame, wall or window mount, cat-tree attachment, or ceiling anchor. Stores may also call them dangling teasers, bungee toys, retractable toys, or suspended cat toys. None is automatically safe. Choose by the way the whole system behaves when your cat pulls—not by how lively the lure looks in a product video.

    Style What it does well Main checks
    Door-hanging cat toy Easy to install and remove for a supervised session Door cannot swing or close; mount does not drop a hard part; line stays away from hinges
    Wall or window-mounted toy Creates side-to-side batting and can suit a small room Surface and adhesive suit the stated load; mount cannot become a chewable loose piece
    Cat-tree hanging toy Adds motion to a familiar play station Tree stays stable; line cannot reach a neck, leg, platform edge, or nearby gap
    Ceiling-hung toy Offers a wide movement area Purpose-built anchor; no fan, light, sprinkler, or improvised fixture; fully removable after supervised play
    Motorized wall toy Varies motion without constant hand movement Protected battery door, no exposed charging cord, controlled session, automatic motion does not equal unsupervised safety

    Avoid hanging any toy from a ceiling fan, light fixture, curtain rod, blind cord, open door, unstable shelf, or object that can fall. Keep play away from stairs, glass, hot surfaces, breakables, and narrow gaps where a cat can land awkwardly. A door-hanging toy needs a door that cannot move while the cat plays; use a different location in a busy passageway.

    Inspect the Five Failure Points Before You Buy

    1. The anchor: It should match the intended surface, remain visible for inspection, and not rely on an improvised household fitting. A mount that tears free can fall onto the cat; an immovable anchor paired with a long loop creates a different risk.
    2. The line: Skip fishing line, thread, ribbon, yarn, exposed rubber, or thin elastic your cat immediately tries to chew. A covered line is not automatically safe, but damage is often easier to see on a thicker, contrasting material.
    3. The adjustment: Knots, sliders, swivels, clips, crimps, and retractors are all potential weak points. Check whether each one can loosen, trap fur or a claw, or become a small swallowed part.
    4. The lure: Prefer a simple, intact lure that is too large for your cat to swallow whole. Avoid glued eyes, loose bells, brittle plastic, shedding feathers, open seams, exposed stuffing, and narrow tails for hard chewers.
    5. The storage plan: Decide where the complete toy will go after play. If removing it is awkward or the lure still hangs within reach when “put away,” the setup encourages risky access.

    “Heavy-duty elastic” describes resistance to pulling; it does not prove that the toy is safe to chew, impossible to tangle in, or suitable without supervision. For a broader materials and seam check, use our durable cat toy buying checklist.

    Detached hanging cat toy components laid out for inspection
    The anchor, line, adjustment point, lure, and storage plan all matter for rough play.

    How to Hang and Test a Cat Toy

    1. Read the product instructions. Confirm the intended surface, installation method, weight or pull limits if provided, and whether the maker requires supervision.
    2. Clear the play zone. Give your cat a non-slip landing area and an open exit. Move cords, bags with handles, breakables, unstable furniture, and other pets that may crowd the game.
    3. Install without improvised extensions. Extra ribbon, string, rubber bands, wire, and homemade loops add failure points. Do not combine parts from unrelated products unless the manufacturer says they are compatible.
    4. Check every connection by hand. Gently test the mount, line, adjuster, and lure before the cat enters. Stop if anything shifts, opens, frays, exposes adhesive, or develops a sharp edge.
    5. Set the shortest practical line for the game. The lure should remain reachable, but there should not be loose coils or a body-sized loop. Because cats and rooms differ, there is no universal safe hanging height.
    6. Run a short first session. Watch whether your cat bats the lure, chews the line, twists repeatedly, wraps a limb, crashes into the mount, or tries to climb the cord. The cat’s actual behavior decides whether the setup is suitable.
    7. End, inspect, and store. Allow a final catch, trade for an intact kicker or food activity, detach the hanging toy, and put every cord and lure in closed storage.

    Stop immediately if the line touches or loops around the neck, chest, abdomen, tail, or a limb. Calmly support the cat and release tension; do not yank a trapped limb against taut elastic. If your cat is hurt, breathing abnormally, limping, or cannot be freed quickly, seek urgent veterinary help.

    Better Hanging Play for Cats That Destroy Toys

    Rough play changes the job of the hanging toy. It should create the chase, not absorb unlimited biting. A cat that braces, pulls hard, chews the cord, or dismantles attachments needs shorter sessions and an earlier handoff to a large kicker or other supervised capture toy.

    • Choose fewer components. Every bell, feather, clip, tail, and decoration is another part to inspect.
    • Keep the lure visually different from the line so you can see whether the cat is targeting the toy or the cord.
    • Interrupt cord chewing by making the lure move away, then end the session if the cat returns to the line.
    • Keep replacement lures ready, but retire damaged parts before—not after—they break.
    • Play with cats separately if two cats twist the line around each other, compete at the mount, or block one another’s escape.

    Some cats are simply a bad match for hanging elastic. That is useful information, not a failed purchase. Try owner-held wand play, a track toy with a captive ball, a tunnel-and-toss game, or a food puzzle that provides movement without an accessible long line.

    Can You Make a DIY Hanging Cat Toy?

    You can make a supervised dangling lure, but the safer DIY boundary is to keep it in your hand like a wand and store it when the session ends. Do not create a permanent unattended hanging toy from yarn, fishing line, thread, dental floss, ribbon, rubber bands, hair ties, wire, or elastic cord. Familiar household material can still tangle, cut, snap back, or become a linear foreign body if swallowed.

    For a simple supervised project, attach one large, plain fabric lure to a sturdy handle with a short, visible connection you inspect before every use. Skip bells, beads, staples, glued decorations, feathers that shed, and stuffing your cat can pull out. If you cannot verify the anchor and every connection, make a toss toy or cardboard foraging activity instead of suspending it.

    When to Replace the Toy—or Call a Veterinarian

    Retire the line or the entire toy if you see fuzzing, thinning, fraying, exposed elastic, permanent stretching, bite notches, a loose knot, a bent clip, a shifting mount, cracked plastic, leaking stuffing, loose feathers, or any missing piece. Replace it as soon as the damage appears; do not wait for the next hard pull to finish the break.

    If you know or suspect that your cat swallowed string, elastic, ribbon, fabric, a feather, or another toy part, contact your veterinarian or an emergency clinic promptly even if the cat seems normal. Vomiting, retching, reduced appetite, lethargy, hiding, abdominal discomfort, diarrhea, straining, or strand-like material at the mouth or rectum are urgent warning signs. Do not pull visible material and do not induce vomiting unless a veterinarian specifically directs you. Titan Claws’ guide to foreign-body ingestion in cats explains why quick veterinary advice matters.

    Quick Hanging Cat Toy Checklist

    • Will an adult actively watch the full session?
    • Is the mount designed for this surface and away from doors, stairs, fans, blind cords, and breakables?
    • Is the line short, visible, intact, and free of loose loops?
    • Is the lure simple, intact, and too large to swallow whole?
    • Are clips, knots, swivels, adhesives, seams, and retractors easy to inspect?
    • Does your cat attack the lure rather than chew or climb the line?
    • Can your cat land with traction and leave the play area freely?
    • Will you detach and store the whole toy immediately after play?

    Bottom line: Hanging cat toys are best for short, supervised chase sessions. Choose the whole system—anchor, line, connections, lure, room, and storage habit—not just the moving end. Let your cat catch it, switch rough biting onto a better capture toy, inspect every part, and put the dangling toy away when the game is over.

    Sources

  • Cat Play Mat Guide: Choose a Safer Mat for Better Play

    Cat Play Mat Guide: Choose a Safer Mat for Better Play

    A cat play mat is a floor-level play surface that adds texture, cover, movement, or places to hide a toy. The best one is stable under a pounce, easy to inspect and clean, and simple enough for your cat’s actual play style. It should make stalking, chasing, pouncing, grabbing, or resting more interesting without surrounding your cat with loose strings and breakable add-ons.

    For most cats, start with a washable fabric or felt mat with securely finished edges and no exposed filling. Choose a ripple or tunnel-style mat for a cat that likes hiding and ambushing, a padded flat mat for a wrestler or senior cat, and a concealed-motion mat only when you can supervise the moving mechanism. Cats that chew foam, pull seams, or swallow fabric need a stricter material test and closer supervision.

    What counts as a cat play mat?

    The name covers several different products. Some are essentially soft landing zones. Others fold into caves, hide a motorized lure, dispense food, or imitate a baby activity gym with toys hanging overhead. Those designs create different kinds of play and different failure points.

    Mat type Best use Main watchpoint
    Flat padded fabric mat Wrestling, rolling, scent play, and a softer landing surface Opened seams, exposed filling, or a slippery underside
    Ripple, rug, or tunnel mat Hiding, peeking, stalking, and ambushing a lure Frayed openings, failing fasteners, or a tunnel that collapses around a worried cat
    Crinkle mat Sound and texture for cats that enjoy noisy ground prey Torn outer fabric that exposes the inner film
    Concealed-motion mat Chasing a moving target beneath a cover Access to the motor, battery compartment, moving arm, or charging cable
    Mat with hanging toys Reaching and batting during supervised play Elastic, cord, clips, bells, feathers, or a frame that tips
    Lick mat Food-based licking and a slower treat activity Chewed silicone, inappropriate food, and leaving it down after the food is gone

    A lick mat is therefore not a direct substitute for an activity mat: one organizes food enrichment; the other organizes object play. A water-filled sensory mat made for a human baby is not automatically a cat toy either. A claw puncture can expose its liquid or internal pieces, and the maker may not have designed the seams or contents for biting. Use products according to their intended species and instructions.

    Commercial ripple mats show why structure matters. For example, the maker of the Ripple Rug describes large openings, configurable fasteners, finished edges, a nonslip base, and soap-and-water care. Those are useful features to evaluate in any shaped mat, but they are not a promise that every cat will like it or that no cat can damage it. The product page itself tells owners to supervise, inspect, and remove a damaged mat.

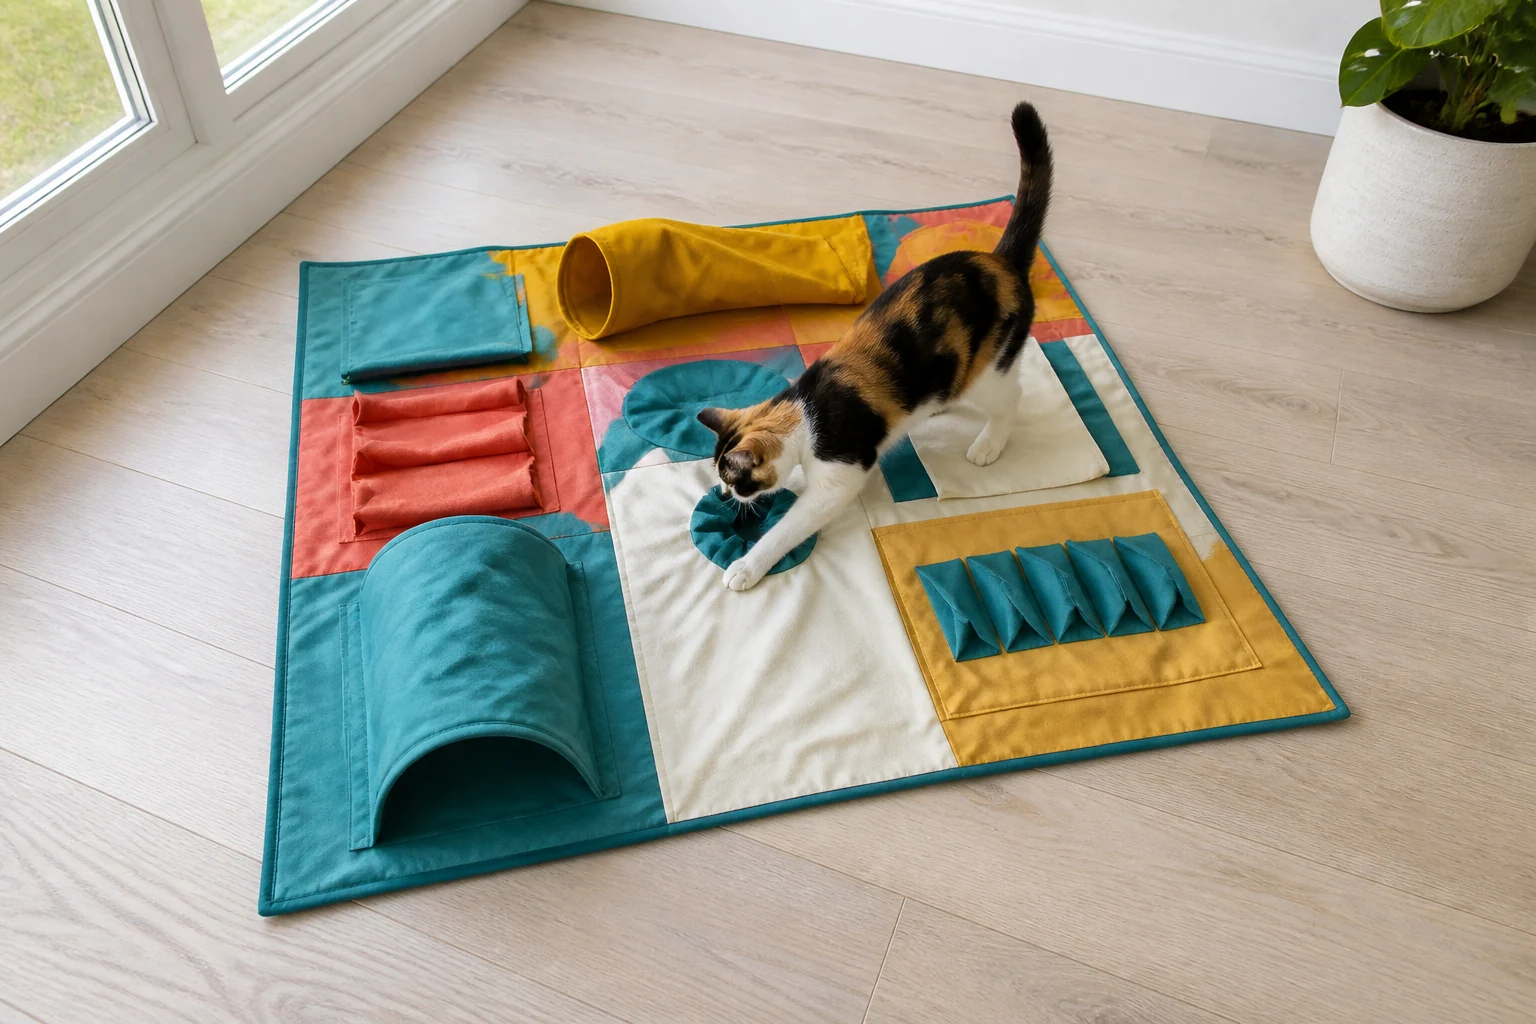
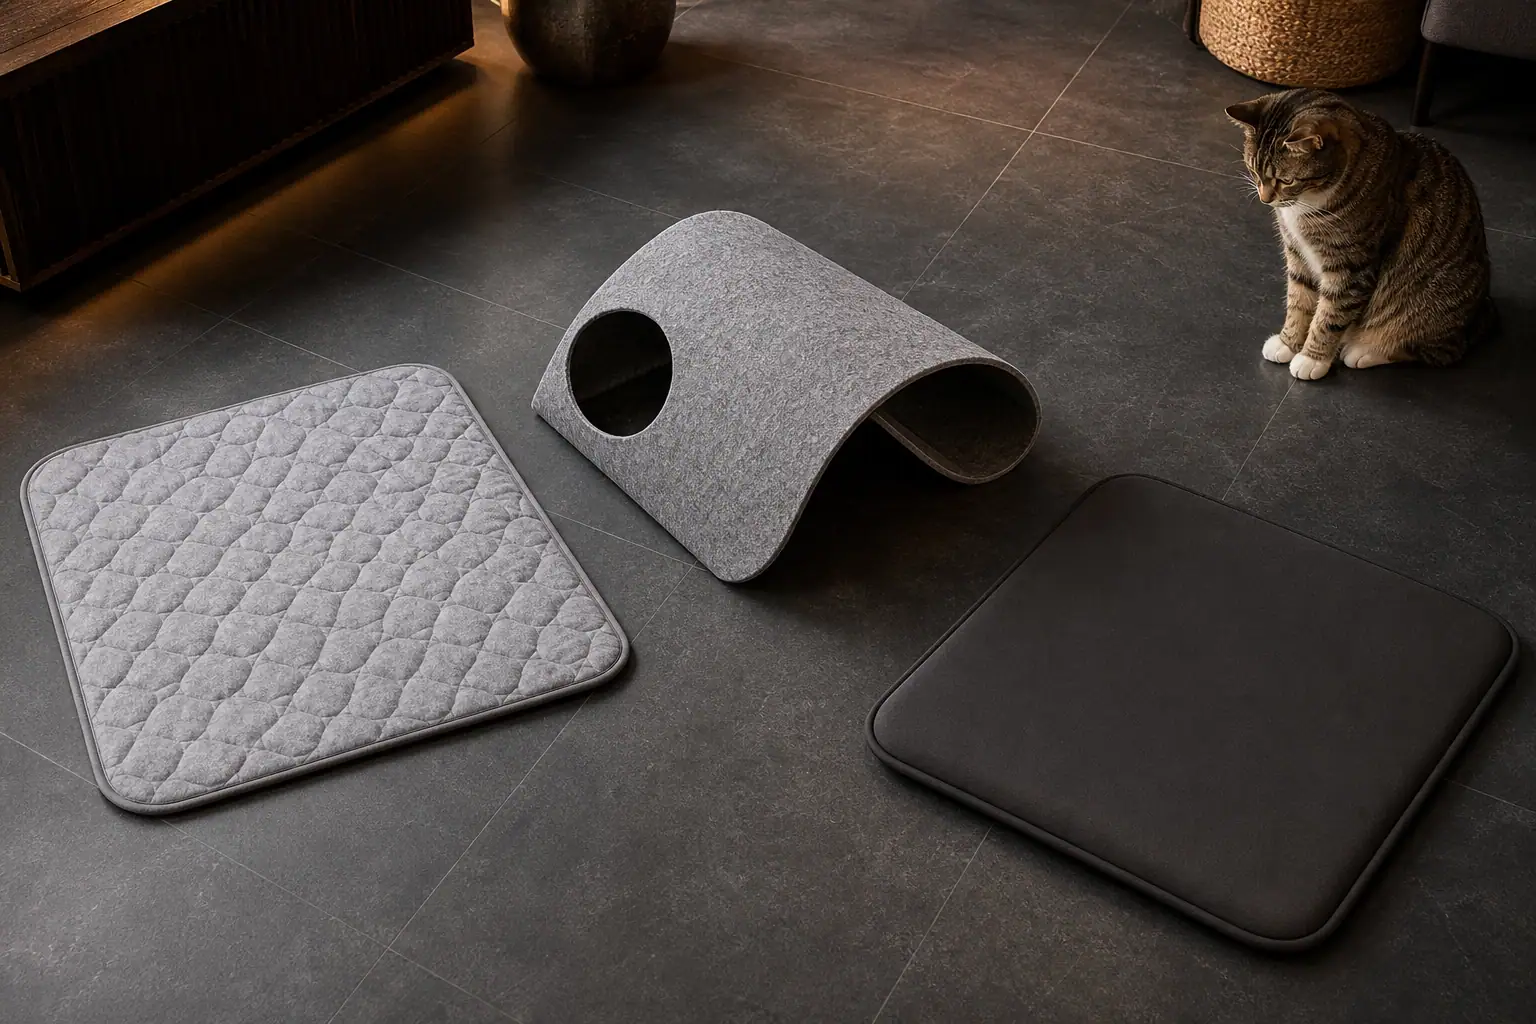
    Three simple cat play mat styles arranged for comparison on a clean floor
    Simple, inspectable mats can add cushioning or hiding structure without relying on detachable decorations.

    How to choose a cat play mat that fits your cat

    Start with behavior, not the product photo. Watch what your cat already does with boxes, rugs, blankets, and toys. The goal is to give that behavior a better surface—not to buy the greatest number of features.

    • For a stalker: choose large sight openings, a low tunnel, or a mat you can reshape. The cat should be able to watch a lure disappear and choose when to pounce.
    • For a rabbit-kicker: prioritize a broad stable base with tough bound edges. Add a separate appropriately sized kicker rather than expecting the mat’s corner or hanging toy to absorb every bite.
    • For a burrower: use a structure with more than one obvious exit. Avoid deep pockets that tighten around the body or trap a collar, leg, or claw.
    • For a high-speed chaser: look for a nonslip underside and enough clear floor around the mat for braking. Do not place it beside stairs, glass, hot appliances, or sharp furniture corners.
    • For a senior or mobility-limited cat: choose a low-entry mat with firm footing and place the lure within comfortable reach. Watching, pawing, and short pounces still count as play.
    • For a rough destroyer: choose the fewest components, visible stitching, no glued decoration, no exposed foam, and no attachments you cannot remove for a safer solo-use setup.

    Size matters in two ways. The mat needs enough area for your cat to enter, turn, and exit without feeling cornered, but it should not take over the room’s escape routes. In a multi-cat home, do not force cats to share one small tunnel. Provide separate play stations and keep doorways, litter routes, food, water, and resting areas accessible.

    A hands-on store or unboxing test

    1. Rub the surface. Reject a mat that sheds tufts, flakes, or grit with light friction.
    2. Flex every edge. Bound edges should stay flat without revealing foam, plastic film, wire, or filling.
    3. Tug each attachment. Bells, feathers, elastic loops, hook-and-loop tabs, and plastic clips are extra failure points. Remove optional attachments when the mat works without them.
    4. Press the base sideways. A pounce should not send the mat skating. Nonslip performance varies by flooring, so test it again at home.
    5. Check exits and openings. Your cat’s head and paws should not become wedged, and claws should not catch in open mesh or loose loops.
    6. Read the care label. Confirm what detaches, whether electronics must be removed, how to wash it, and how completely it must dry before use.

    If your cat has a record of opening seams or chewing novel materials, use the failure-mode approach in our durable cat toy guide. “Durable” should describe construction and fit for a play style, never a guarantee that a toy cannot be damaged.

    Turn the mat into a five-minute hunting game

    A play mat does not need a motor or a dozen attachments to be enriching. Its biggest advantage is cover: it lets prey appear, disappear, rustle, and pause. Feline environmental-needs guidance recommends opportunities to express parts of the predatory sequence, and a mat can make a simple owner-controlled lure more convincing.

    1. Build a low shape. Make one ripple or tunnel and leave clear exits. For a flat mat, fold one corner loosely over a sturdy object so the lure can vanish briefly without trapping the cat.
    2. Begin at the edge. Move a suitable wand lure along the floor outside the mat, away from your cat rather than toward the face.
    3. Let it disappear. Slide the lure behind a ripple or past an opening, then pause. Watching and waiting are part of the game; constant frantic motion is not required.
    4. Offer a pounce. Let the lure reappear with a small movement. When the cat commits, move it only a short distance before allowing a catch.
    5. Make the catch real. Stop pulling. Let your cat hold or kick an appropriate lure briefly while you keep hands away from the capture zone.
    6. Cool down. Run one or two slower passes, allow a final catch, then trade the lure away and store any stringed toy. A small portion of the cat’s normal food can follow if it fits the feeding plan.

    Change only one variable at a time: the mat’s shape, the lure, or the movement pattern. This tells you what your cat enjoys and keeps a cautious cat in control. It also prevents the common mistake of adding sound, scent, motion, dangling parts, and a new surface all at once.

    For a longer session structure, use Titan Claws’ hunt-catch-cool-down routine for interactive play. If your cat needs more variety beyond one floor toy, our cat enrichment starter plan combines play with climbing, foraging, observation, rest, and choice.

    Safety checks for rough play

    Inspect a new mat before every session until you know how your cat attacks it. After that, check it after any hard wrestling and during routine cleaning. Flip the mat over: claws and teeth often damage an edge or underside before the wear is obvious from above.

    • Run your fingers around every bound edge and opening for pulled threads, sharp points, and gaps.
    • Press and flex padded sections to detect broken inserts, shifted filling, or exposed crinkle film.
    • Check hook-and-loop tabs, snaps, zippers, and tunnel supports for loose or separated components.
    • Count removable toys and pieces before and after play.
    • Confirm that a nonslip backing is not peeling into chewable flakes and still grips the actual floor.
    • On an electronic mat, examine the cover, switch, battery door, charging port, moving arm, and cable before powering it. Never allow play while it charges.
    • Smell and feel for dampness, mildew, unusual heat, leakage, or a chemical odor.
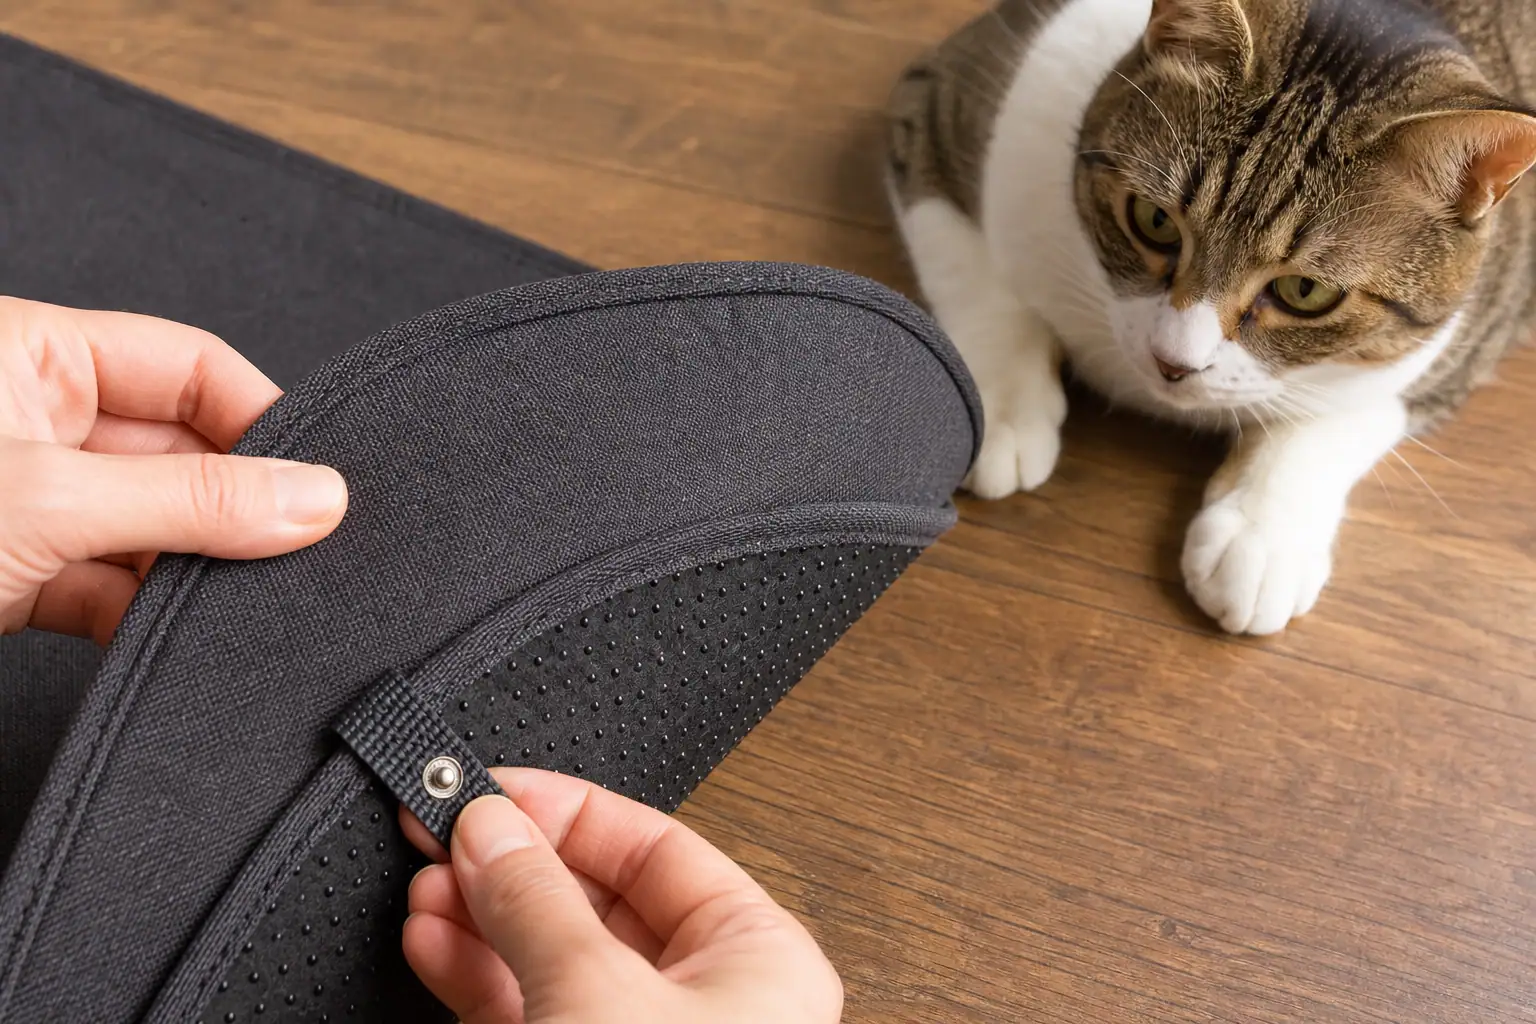
    Owner inspecting the bound edge and underside of a fabric cat play mat
    Check the whole mat—top, edge, fasteners, attachments, and underside—because damage often begins where the cat grips or kicks.

    Cornell’s feline toy guidance advises avoiding small or strand-like parts that can separate and be swallowed. Long, thin objects such as string can become a dangerous linear foreign body. Keep wand strings, elastic, ribbon, and detached fibers out of unsupervised play even when the mat itself remains on the floor.

    If you see your cat swallow a piece, if part of the mat is missing, or if your cat develops vomiting, appetite loss, lethargy, abdominal discomfort, or repeated unproductive straining after chewing the mat, contact a veterinarian promptly. Do not pull visible string from the mouth or anus; get veterinary instructions.

    Can a cat play mat be left out?

    Some simple mats can remain available after they have passed an individual cat’s supervised-use test. Others should be stored after every session. The label “self-play” does not settle that decision.

    Usually lower risk after testing Store after supervised play
    Plain, intact fabric or felt; finished edges; no filling access; no loose attachments; stable on the floor Wands, elastic, cords, ribbons, feathers, bells, or small detachable toys
    Open structure with obvious exits and no collapsing loops Electronic motion mechanism, accessible switch or port, charging cable, or damaged cover
    Material your cat rubs, rests on, or scratches without eating Foam, rubber, fabric, or backing your cat actively chews or tears into pieces

    Observe several sessions before leaving even a simple mat down. Include a period when you are present but not actively moving a toy. A cat may use the same object differently once the exciting lure disappears—resting on it, scratching it, or settling down to chew the edge.

    In a multi-pet home, also watch the other animals. A mat that is uneventful for a cat may become a chew target for a dog, or a tunnel may let one cat block another. “Safe for this cat in this setup” is the useful standard.

    Cleaning, rotation, and setup refreshes

    Follow the exact care label because felt, foam, crinkle inserts, rubberized backing, and electronics tolerate different methods. Remove only the components the instructions say are removable. Use an appropriate mild cleaning product, rinse away residue where the material allows, and dry every layer completely before reshaping or powering the mat.

    • After shedding or catnip: vacuum or brush the surface while checking whether fibers lift with the debris.
    • After a spill or accident: clean promptly and inspect inner layers for retained moisture or odor.
    • After washing: recheck seams, backing, fasteners, inserts, and dimensions. Shrinkage or separation can create new gaps.
    • Between uses: store electronics and stringed attachments in a closed dry place the cat cannot access.

    Refresh a shaped mat by changing the position of one opening or moving the whole play station to another safe room. Rotate the lure rather than buying another mat immediately. A ball, kicker, food puzzle, and owner-controlled wand can each use the mat as a stage. Our cat toy storage and rotation guide can help keep stringed and damaged toys out of the leave-out collection.

    Cat play mat decision checklist

    • Choose a flat, shaped, or motion mat for a specific behavior your cat already enjoys.
    • Prefer secure finished edges, visible construction, stable footing, and clear care instructions.
    • Avoid accessible foam, stuffing, film, wire, cords, loops, and small glued or clipped decorations.
    • Make sure openings and tunnels have easy exits and do not tighten around the cat.
    • Test the mat on your flooring before inviting a full-speed pounce.
    • Introduce one feature at a time and let the cat approach or leave.
    • Use cover and pauses to support stalking; allow catches instead of keeping prey permanently out of reach.
    • Supervise electronic, stringed, dangling, and newly introduced setups.
    • Inspect the top, openings, edges, attachments, and underside after rough play.
    • Clean by the maker’s directions and dry every layer completely.
    • Retire the mat as soon as inner material, a trap point, a sharp part, or a missing piece appears.

    A good cat play mat is not the one with the longest feature list. It is the one that gives your cat a stable place to stalk, pounce, grab, or rest—and lets you see, clean, and remove every part before ordinary wear becomes a hazard.

    Sources

    Editorial note: This article provides general toy-selection and enrichment guidance. It does not replace a product’s instructions or veterinary care after suspected ingestion, entrapment, electrical exposure, or injury.

  • Floppy Fish Cat Toy: Is It Worth It? A Safety-First Guide

    Floppy Fish Cat Toy: Is It Worth It? A Safety-First Guide

    A floppy fish cat toy can be worth trying for a cat that likes to grab, wrestle, and bunny-kick—but it is not a universal hit and it is not a set-and-forget toy. The motor noise and sudden movement scare some cats. Rough players can also reach the hard electronic insert if the cover, zipper, or internal pocket fails.

    Treat the moving fish as a supervised electronic toy, not an indestructible kicker. Choose one with a removable sealed motion module, a secure closure, washable cover, protected charging port, clear instructions, and no glued fins or small decorations. Introduce it switched off, use short flopping bursts, and inspect it after every energetic session.

    What is a floppy fish cat toy, and how does it work?

    A floppy fish cat toy is a fish-shaped plush cover wrapped around a small motorized insert. On common models, tapping or moving the toy triggers a sensor; an internal arm then swings the tail for a short cycle. Many versions recharge by USB and include an internal pocket for a sealed catnip sachet.

    The useful idea is not that a printed fish looks exactly like prey. It is that the toy combines three behaviors in one object: movement to notice, a body to grab, and enough length to rake with the hind feet. That makes it closer to an electronic kicker than to a ball or wand.

    Feature Why it may help What can go wrong
    Touch-activated flopping Movement returns when the cat makes contact A sensitive sensor or abrupt start can frighten a cautious cat
    Plush fish-shaped cover Gives forepaws and hind feet a broad target Thin fabric or weak seams can expose the hard module
    Removable motor Allows the cover to be cleaned separately An insecure zipper or pocket gives teeth access to electronics
    USB charging Avoids routine disposable-battery changes The port, cell, cable, and charging routine add failure points
    Catnip pouch Scent may encourage investigation Not every cat responds, and loose plant material can foul the mechanism

    Specifications vary by brand and revision. Do not assume that charge time, connector, wash method, shutoff behavior, or replacement parts from one listing apply to another. Keep the instructions for the exact model you own.

    Will your cat actually like a flopping fish?

    Play style predicts more than popularity. A cat that already hugs long plush toys and kicks with both hind feet is a better candidate than a cat that only stalks tiny, quiet targets. Cats that chase movement may watch the tail but dislike contact with a vibrating body. Others may enjoy the fish only when its motor is off.

    Published hands-on reviews show that split clearly. In one test, the cats avoided the activated fish and accepted it only after the motor was removed. In another, the cat was interested but overwhelmed by the motion and played most enthusiastically once the battery had died. Those are individual cats, not a controlled trial, but they are a useful warning against treating viral reactions as a guarantee.

    • Good candidate: confidently wrestles kicker toys, investigates vibration, recovers quickly from new sounds, and does not dismantle plush.
    • Possible candidate with a slow introduction: likes ground prey but pauses around noise or sudden movement.
    • Poor candidate: hides from buzzing appliances, bites charging ports or plastic housings, tears directly into seams, or tries to swallow stuffing.
    • Wrong use: a toy expected to entertain an unsupervised cat for hours.

    Catnip is another variable, not a quality test. Research on cat-attracting plants has found meaningful differences among individual cats, so indifference to the included pouch does not mean the fish is defective. Try the motion and shape separately before adding more scent.

    Cats also habituate to an unchanging toy. A study of object play in adult cats found play intensity declined by the third exposure to the same toy. Store the fish between sessions and rotate it with other movement, texture, and foraging games rather than leaving it on the floor until it becomes furniture.

    Removable motion module beside an intact plush fish cat toy during a safety check
    Before play, check the cover, closure, motor pocket, switch, and charging port while the module is switched off.

    Seven checks before you buy

    1. Secure module pocket: the closure should sit flat and remain inaccessible while the cat grips the fish. A covered zipper is preferable to a loose flap.
    2. Sealed electronic insert: reject visible battery cells, loose wiring, cracked housings, or a module that rattles. The cat should never contact the cell or internal mechanism.
    3. Plain, inspectable cover: choose reinforced seams and printed details instead of glued eyes, sequins, plastic fins, bells, or narrow ribbons.
    4. Right size for kicking: the fish should be long and broad enough for your cat to hold without wrapping teeth around the thick electronic center. Small does not automatically mean safer.
    5. Useful controls: look for a physical on/off switch and short automatic cycles. A low-intensity mode or owner-controlled start is helpful for cautious cats.
    6. Specific care instructions: confirm that the motor can be removed and the maker explains whether the cover is hand washable or machine washable. “Washable” is too vague by itself.
    7. Real support: look for a model number, manual, warranty, seller contact, and replacement-cover information. A low price is poor value if a failed port turns the whole toy into waste.

    Read recent reviews for the exact version, focusing on repeated failure patterns rather than the average star score. Search within reviews for zipper, seam, charging port, noise, sensor, and stopped working. Product revisions can change, so check dates and photos.

    If rechargeable mechanisms are new to you, use our broader rechargeable cat toy buying and charging guide to compare battery access, ports, timers, cleaning, and failure behavior.

    How to introduce a floppy fish without startling your cat

    Do not switch it on beside a sleeping cat or toss a flapping object toward the cat. A moving target that advances suddenly can feel more confrontational than prey-like. Give the cat control over distance and let curiosity build.

    1. Inspect and charge out of reach. With the module switched off, check the housing, port, cover, seams, closure, and included scent pouch. Charge only as the model instructions direct, away from the cat.
    2. Present the fish switched off. Set it several feet away in an open room with an easy exit. Let the cat approach, sniff, touch, or ignore it. Do not hold the cat near it.
    3. Test one cycle without the cat. Learn the noise, intensity, duration, and sensor sensitivity yourself. A fish that jumps hard on tile may be gentler on a rug.
    4. Soften the first movement. With the cat at a comfortable distance, partly hide the tail under a blanket edge or behind a box and trigger one brief cycle. Keep your hands away from the moving mechanism.
    5. Allow retreat or capture. If the cat approaches with loose posture, continue briefly. If the cat freezes, flattens the ears, crouches away, lashes the tail, bolts, or hides, switch it off and create distance.
    6. Finish with a safe catch. Let a suitable cat wrestle the switched-off fish under supervision, or transition to a sturdy unpowered kicker. End before interest becomes frantic.
    Cautious cat investigating a switched-off plush fish toy partly hidden by a blanket
    Introduce the fish switched off first. Partial cover and brief movement can feel less confrontational than sudden flopping in the open.

    The Feline Veterinary Medical Association recommends opportunities for predatory play and notes that cats should be able to capture the “prey” intermittently. A motor can start the sequence, but it cannot adjust to your cat’s fear, frustration, or fatigue. For a fuller session structure, follow our hunt-catch-cool-down routine.

    Safety rules for rough players

    The plush cover is the safety barrier. Once a seam opens or the closure can be pulled apart, the fish is no longer a soft toy: it is direct access to a hard moving arm, plastic housing, wiring, battery, and possibly loose stuffing.

    • Supervise every powered session, especially during the first uses and with cats that chew or dismantle toys.
    • Keep the charging cable stored separately; never allow play while the fish is plugged in.
    • Use the toy on a clear, dry floor away from stairs, liquids, breakables, and gaps beneath appliances.
    • Do not let a dog claim it. A plush cover designed for cat play is not built to protect electronics from a strong chewing jaw.
    • Do not add loose catnip beside the mechanism unless the exact instructions allow it. Use only an intact contained pouch that cannot spill or be swallowed.
    • Count and inspect the cover, closure, fins, stuffing, module, switch, and port after play.

    VCA’s toy guidance advises monitoring cats so they do not ingest toy material and keeping swallowable or string-like items out of unsupervised play. If part of the fish is missing, your cat chewed the battery module, or you suspect ingestion, contact a veterinarian or emergency clinic promptly. Do not wait for vomiting, appetite loss, lethargy, or abdominal pain to decide that a missing piece matters.

    For a cat that defeats seams quickly, use the fish only as a short movement cue—if at all—and redirect the grab to a simpler unpowered kicker designed around the cat’s failure pattern. Our durable cat toy guide explains how to match toys to seam ripping, attachment pulling, hard chewing, and full-body tackling.

    Why is my floppy fish cat toy not working?

    Start with the simple checks in the manual. Do not pry open, puncture, solder, or replace parts inside a sealed lithium-battery module.

    1. Switch it off and inspect. Stop if the case, cable, connector, port, or battery looks damaged, wet, distorted, loose, or swollen.
    2. Confirm the charging procedure. Use the supplied cable and specified compatible power source. Check the model’s indicator-light instructions and disconnect after the stated cycle.
    3. Check the physical switch. Some models will charge while off but must be switched on before the touch sensor responds.
    4. Test the module outside the cover. Only if the manual permits it, place the sealed module on a clear surface, keep fingers away from the moving arm, and trigger it as directed. This separates a motor problem from a cover fitted too tightly.
    5. Reinstall it correctly. Align the moving arm with the tail and close every internal pocket and outer zipper fully. Never run it when the electronics remain accessible.
    6. Try the specified trigger. Motion-activated models may need a firm tap rather than nearby movement. Avoid striking the housing or repeatedly forcing a stalled arm.

    If it still will not start, no longer holds a charge, works only when the cable is moved, sounds different, stalls under light pressure, or heats up, switch it off and contact the seller or maker. A loose port or failing cell is a replacement issue, not a cat-toy repair project.

    Cleaning and storage

    Remove the electronic module and catnip pouch before cleaning, but only when the instructions say the cover is removable. Close any hook-and-loop fastener or zipper to protect it. Wash by the stated method, avoid strongly scented products, rinse thoroughly, and let the cover dry completely before reassembly. Never immerse the motor, charge a damp unit, or reinstall electronics into a moist pocket.

    Between sessions, switch the fish off and store it in a closed, dry place. Keep the cable separately so the cat cannot chew it. Periodic storage also preserves novelty. See our material-by-material cat toy cleaning guide for a broader cleaning and drying routine.

    Better alternatives when the fish is a poor fit

    If your cat… Try instead Why
    Loves kicking but destroys the motor pocket A long, dense, unpowered kicker with reinforced seams Provides a full-body catch without electronics inside
    Watches the fish but avoids its noise A quiet fabric lure moved behind cover You control intensity, direction, pauses, and catches
    Chases but does not wrestle A large solid rolling toy on a clear floor Separates pursuit from a vibrating capture
    Ignores catnip Motion, food puzzles, or a carefully chosen alternative cat-attracting plant Scent response differs among cats; play does not require catnip
    Needs solo enrichment An appropriate food puzzle or robust nonmotorized toy proven safe for that individual Fewer electronic and moving-part failure points

    No alternative is automatically safe to leave out. Size, materials, attachments, wear, and your cat’s known behavior still decide the supervision level.

    Floppy fish cat toy checklist

    • Choose it for a cat that already enjoys grabbing and bunny-kicking.
    • Prefer a removable sealed module, secure closure, reinforced plain cover, and physical off switch.
    • Read the exact model’s charging, activation, cleaning, and storage instructions.
    • Introduce it switched off and trigger only one short cycle at first.
    • Use a rug or other clear, dry, stable play surface.
    • Supervise powered play and keep the cable out of reach.
    • Inspect the cover, seams, pocket, module, port, and switch after every rough session.
    • Retire it at the first structural, motor, port, heat, moisture, or battery problem.
    • Use a simple unpowered kicker when your cat needs a tougher catch.

    The best outcome is not a dramatic video. It is a cat choosing to stalk or wrestle comfortably, getting a safe catch, and stopping with the toy still intact. If your cat prefers the floppy fish with the motor off, that is useful information—not a failed purchase.

    Sources

    Editorial note: This article provides general toy-selection, charging, and enrichment guidance. It does not replace the instructions for your model or veterinary care after suspected ingestion, battery exposure, burn, electrical exposure, or injury.

  • Interactive Play for Cats: A Hunt-Catch-Cool-Down Routine

    Interactive Play for Cats: A Hunt-Catch-Cool-Down Routine

    Interactive play for cats is play you actively control so a toy behaves like something the cat can stalk, chase, pounce on, catch, and hold. A wand lure is the easiest tool, but a tossed mouse, rolling ball, tunnel game, or food hunt can work too. The crucial part is not the word interactive on the package. It is the back-and-forth between you, the toy, and your cat.

    Start with one or two short sessions a day and let your cat’s response set the pace. Move the target away rather than pushing it into the cat’s face, build in pauses, allow frequent catches, and finish with a capture your cat can bite or kick. For a rough player, use distance, sturdy capture toys, supervision, and a before-and-after damage check.

    What counts as interactive play?

    People use interactive cat toy to describe almost anything that moves, lights up, dispenses food, or reacts to a paw. Those products can provide enrichment, but person-led interactive play is more specific: you watch the cat and change the game in real time. You can slow down when the cat crouches, freeze the lure when they prepare to pounce, or switch from a flying movement to a floor-level scurry.

    Play type Who controls it? Best use Main limit
    Person-led interactive play You and the cat Chase, pounce, capture, exercise, shared routine Needs your attention and supervision
    Solo play The cat Batting, carrying, wrestling, short independent bursts Some toys are not safe to leave out
    Puzzle or food hunt The cat, with your setup Foraging and problem-solving Must be introduced at an achievable level
    Automatic toy A motor or program Novel movement and occasional supplemental activity Cannot read fatigue, fear, damage, or frustration like a person can

    Play is not just a bonus for indoor cats. The Feline Veterinary Medical Association includes opportunities for play and predatory behavior, along with positive and predictable human interaction, among the pillars of a healthy indoor environment. A 2023 survey of 1,591 cat guardians also found that more games played was associated with higher owner-rated feline quality of life, while more daily play and more games were associated with stronger cat–guardian relationship scores. Those are associations rather than proof of a guaranteed effect, but they support making varied play a regular part of care.

    First identify your cat’s preferred prey game

    The most stimulating toy is the one that produces the behavior your cat already wants to perform. Before buying another gadget, test several movement patterns with a safe wand lure and notice which one changes your cat from watching to participating.

    • Ground hunter: drag the lure along the edge of a wall, rug, or box. Use short scurries and long freezes, as if a mouse is trying not to be seen.
    • Air hunter: make a fabric lure hop onto a low cushion or briefly flutter, then land. Avoid nonstop circles above the cat’s head; prey that never comes within reach is just a ceiling fan with extra steps.
    • Ambusher: slip the lure behind a tunnel, paper bag with handles removed, or furniture corner. Reappear for a moment, then pause close enough for a pounce.
    • Chaser: roll a large ball or toss a soft mouse across—not toward—the cat. Keep the route clear and use a toy too large to swallow.
    • Wrestler: finish the chase with a long kicker or dense capture toy the cat can grip, bite, and rake without reaching your hands.
    • Forager: hide a few pieces of the cat’s measured meal in an easy puzzle or around one room. Increase difficulty only after the cat succeeds.
    Wand lure, kicker, ball, tunnel, and puzzle feeder arranged for different cat play styles
    Build the game around what your cat does after noticing the target: chase, ambush, wrestle, or forage.

    Some cats mix styles; others care deeply about one. Texture, sound, scent, time of day, and where the toy disappears can matter more than price. If your cat ignores one motion pattern, change only one variable at a time. That makes it easier to learn whether the problem was speed, location, toy texture, noise, or timing.

    Use this hunt-catch-cool-down routine

    This 10-minute framework is a starting point, not a quota. A kitten may want several short rounds; a senior or cautious cat may be satisfied after two minutes. Stop while the cat is still comfortable, and see our daily cat play schedule for age, health, and energy adjustments.

    1. Set the stage (one minute). Clear cords, breakables, other pets, and slippery obstacles. Choose a lure and a safe capture toy. Invite the cat; do not carry a resting or hiding cat into the game.
    2. Wake up the hunt (one to two minutes). Start the toy partly hidden and nearly still. A twitch behind a box is usually more convincing than tapping the cat with the lure.
    3. Stalk and chase (two to three minutes). Move away in uneven bursts. Travel around obstacles, freeze, then flee again. Keep jumps low and traction good.
    4. Allow catches (throughout). After a short chase or pounce, let the cat pin the toy. Keep tension off the cord. If the cat releases it, wait before bringing the prey back to life.
    5. Give a final capture (one to two minutes). Let the cat hold the lure or transition to a larger kicker. Do not yank a captured toy from the mouth or paws.
    6. Cool down (one minute). Make the last movement smaller, end on a catch, then put away stringed equipment. If it fits the cat’s diet, you can offer a small portion of the normal meal or a food-puzzle finish.

    A good session has changes in intensity. Staring, creeping, waiting, and repositioning all count as play; the cat does not need to sprint continuously. Cats Protection notes that even one- or two-minute games can be worthwhile and recommends regular short sessions, toy rotation, catches, and wear checks.

    If your cat watches but will not chase

    Watching is not failure. A cat may spend much of a hunt assessing distance and timing. Look for ears and eyes tracking the toy, weight shifting forward, a low crouch, whiskers oriented ahead, or the hindquarters preparing to spring. If you see those signs, slow down and wait.

    If interest never builds, work through this order:

    1. Change the time. Try just before a usual meal or during the cat’s naturally active morning or evening period, not during a deep nap.
    2. Change direction. Prey usually escapes. Move the toy across the cat’s field of view and away, never repeatedly at the face.
    3. Add cover. Let the toy vanish behind a box, tunnel, chair leg, or blanket edge. Partial concealment often creates more interest than speed.
    4. Change the prey profile. Test floor movement, a brief hop, a roll, rustle, or scent. Use a different lure texture before buying a whole new system.
    5. Lower the pressure. Sit sideways, avoid looming, and leave space for the cat to withdraw. In a multi-cat home, try a separate room so one cat cannot block another.
    6. Make success easier. Shorten the distance and freeze after a paw touch. Do not make the cat miss again and again.

    If you are unsure whether the cat is inviting play or asking for space, use the body-language checks in our guide to signs your cat wants to play. Never punish, chase, or tease a cat for declining.

    Choose toys that survive the session—not toys you can forget

    No cat toy is indestructible. A durable toy should buy you more safe play and make wear easier to spot; it does not remove the need to supervise or replace it. For cats that bite hard or bunny-kick, pair the movement tool with a separate, larger capture target.

    • Wand: use a handle long enough to keep teeth and claws away from skin, a secure connection, and a lure sized for the cat’s mouth and play style. Store the full wand and cord in a closed place after use. Our cat stick toy guide covers the hardware in detail.
    • Kicker: look for dense fabric, reinforced seams, no glued decorations, and enough length for the cat to grip with the forelegs while kicking with the hind legs.
    • Ball or toss toy: choose a size the cat cannot swallow or compress into the back of the mouth. Avoid cracked plastic, exposed bells, and pieces that detach under chewing.
    • Tunnel or box: check stability, remove bag handles and staples, and provide an unobstructed exit. Do not collapse the tunnel around the cat.
    • Puzzle feeder: begin open and easy. Count food toward the daily ration, wash food-contact surfaces, and remove the puzzle if the cat chews off pieces. Use our puzzle cat toy introduction steps to prevent frustration.
    Owner inspecting a cat toy seam and wand connection after rough play
    After rough play, check the lure, connector, seams, stuffing, and cord before storing the toy.

    Inspect before and after rough sessions. Check seams, fabric thinning, punctures, stuffing migration, knots, elastic, swivel clips, glue points, feathers, bells, battery doors, and sharp edges. Retire the toy when its shape changes, a seam gaps, a hard part becomes exposed, or pieces begin to loosen. Do not wait for total failure.

    Can automatic toys replace interactive play?

    Automatic toys can add variety, especially when you need to prepare dinner or join a meeting, but they are a supplement rather than a complete substitute. A motor cannot notice that one cat is afraid, another is blocking access, the lure has torn, or the cat has become tired. Many electronic toys also introduce charging cables, battery compartments, wheels, hard shells, and unpredictable starts.

    Use a new automatic toy under direct supervision first. Confirm that it cannot trap paws or whiskers, tip, overheat, expose a battery, wedge under furniture, or shed a chewable attachment. Choose a timer and a clear floor zone, and remove it if play becomes frantic or repetitive. For shopping and setup details, see our automatic cat toy safety guide.

    Laser play also needs special handling because the cat cannot physically capture the dot. If you use one, keep it away from eyes and reflective surfaces, make the chase brief, and transition to a real toy the cat can catch. Read the full laser toy risk and finish routine before using it as a regular game.

    A realistic seven-day interactive play reset

    You do not need seven new toys. Use one reliable wand or toss toy, one capture toy, a box or tunnel, and part of the cat’s normal food for variety.

    Day Small change What to observe
    1 Test a floor-level scurry Does the cat track, stalk, chase, or wrestle?
    2 Add a box corner or tunnel Does concealment create more interest?
    3 Play at a different active time Is engagement stronger before a meal or near dusk?
    4 Switch lure texture or sound Does fabric, rustle, or silence change the response?
    5 Finish with a kicker Does a larger catch reduce grabbing at hands or the cord?
    6 Use an easy food hunt Does the cat prefer searching and paw work to chase?
    7 Repeat the best combination Can you turn the favorite into a predictable routine?

    Write down only three things: time, game, and response. At the end of the week, keep the two combinations that consistently invite relaxed participation. Rotate the other toys out of sight for later instead of leaving every option on the floor until it becomes background clutter.

    When to stop play or call a veterinarian

    Stop the session if your cat repeatedly turns away, leaves, hides, flattens the ears, lashes the tail, growls, pants, limps, or redirects hard bites toward people or another cat. Give space and lower the intensity next time. Do not grab an aroused cat or use hands as the target. If rough attacks are a pattern, follow this plan for cat play aggression toward an owner.

    A sudden drop in play can be a health signal rather than boredom. Contact your veterinarian if a normally playful cat stops engaging, especially with appetite change, hiding, stiffness, lameness, weight change, breathing changes, vomiting, disorientation, or unusual vocalization. Older cats can still enjoy play, but pain, dental disease, arthritis, vision or hearing changes, and other conditions may require a gentler setup or treatment.

    If you think your cat swallowed string, elastic, part of a lure, stuffing, a bell, or another toy component, contact a veterinarian or emergency clinic rather than waiting for symptoms. Vomiting, refusal to eat, lethargy, abdominal pain, and difficulty getting comfortable can accompany a gastrointestinal foreign body.

    Quick interactive play checklist

    • Invite the cat; never force participation.
    • Move the target away, with cover, pauses, and changes of speed.
    • Match the game to chase, ambush, wrestle, forage, or another observed preference.
    • Let the cat catch the toy often and finish with a satisfying capture.
    • Keep hands and feet out of the prey role.
    • Use short sessions and adjust from body language, age, mobility, and health.
    • Supervise wands, strings, ribbons, feathers, electronic toys, and anything that can be shredded.
    • Inspect before and after play; replace at the first unsafe change.
    • Store stringed equipment in a closed place.
    • Ask a veterinarian about sudden behavior or activity changes.

    Great interactive play is less about exhausting a cat and more about making the game readable and winnable. When the toy behaves like catchable prey—and the routine respects the cat’s choices—you learn what genuinely engages your cat instead of hoping the latest gadget will do it for you.

    Sources

  • Rechargeable Cat Toys: A Safer Buying and Charging Guide

    Rechargeable Cat Toys: A Safer Buying and Charging Guide

    Rechargeable cat toys are worth considering when they create the kind of movement your cat already enjoys and keep the battery, motor, port, and moving parts out of reach. A rechargeable rolling toy may suit a ground chaser; a covered-motion toy may suit a patient stalker; and a flapping plush may suit a wrestler only if its removable electronic module remains fully enclosed. Rechargeability saves disposable-battery changes, but it does not make a toy safer, more durable, or more interesting by itself.

    Choose by mechanism and construction before comparing charge time or advertised runtime. Look for a rigid intact housing, protected charging port, clear input instructions, short automatic play cycles, an accessible off switch, cleanable surfaces, and replacement lures or covers where relevant. For a cat that bites housings, tears seams, or pulls attachments free, keep every powered toy supervised.

    This guide does not name a universal “best rechargeable cat toy.” Cats, floors, and failure patterns vary too much for that. Instead, it gives you a practical way to compare electronic interactive cat toys and reject a poor fit before it becomes an expensive object under the sofa.

    Rechargeable cat toys at a glance

    The battery solves only one part of the ownership problem. The better question is whether the whole device delivers catchable, varied play without creating a new chewing, trapping, cleaning, or charging hazard.

    Type Often suits Strong buying signal Main failure point
    Self-rolling ball or mouse Ground chasers and short-distance sprinters Smooth oversized shell, useful low-speed mode, stops when pinned Cracked seam, loose cap, wheel gap, inaccessible dirt
    Covered-motion or peekaboo toy Stalkers that wait, watch, and swat Low stable base, unreachable drive shaft, replaceable wide lure Fabric pulled into mechanism or paw reaching moving parts
    Rotating wand or concealed tail Cats attracted to erratic circular movement Wide stable base, short timer, sturdy replaceable target Feather, elastic, wire, or connector detaching
    Flapping plush or kicker Grabbers and rabbit-kickers Simple washable cover and fully enclosed removable module Opened seam or flap exposing the hard electronics
    Remote-control vehicle Social hunters that respond to owner-driven routes Responsive controls, enclosed wheels, slow mode, repair support Small accessories, wheel pinch points, impacts, lost cable
    Automatic laser Some visually motivated cats Known laser classification, controlled beam path, short timer No physical catch, unsafe beam or reflection, repetitive pattern

    If you are still deciding among mechanisms, start with our broader electronic cat toy safety guide. Rechargeable power is a feature within that category, not a separate play style.

    Cat watching a covered-motion toy beside a rechargeable rolling toy
    Choose the movement first: a patient stalker may prefer covered motion, while a ground chaser may prefer short rolling bursts.

    Choose the movement your cat wants to catch

    Watch your cat play with simple toys before shopping. Does the cat stare under doors, sprint after tossed objects, leap at airborne lures, or clamp and kick a fabric toy? That answer predicts useful motion better than a product page full of modes.

    For a stalker: covered motion

    A target that disappears beneath a mat or into openings creates pauses and uncertainty. Confirm that a paw cannot reach the drive arm, gears, or attachment socket. A broad fabric strip is easier to inspect than a bundle of thin feathers. The base should stay flat when struck rather than revealing its underside.

    For a sprinter: a rolling toy

    Test the slowest mode first on your actual flooring. A ball that is lively on carpet may ricochet on tile, disappear beneath appliances, or frustrate a cat in a cluttered room. Look for a shell too large to swallow, a reliable stop response, and no decorative ears, tail, cap, or loop that can be bitten off.

    For a wrestler: a flapping plush

    The cover is a barrier between teeth and a hard battery module. Check its closing flap, zipper, motor pocket, wing or fin seams, and every glued detail. A removable module helps with cleaning only when the pocket closes securely and the cover dries completely before reassembly. Cats that rapidly open plush seams need a separate unpowered kicker for the catch.

    For responsive play: remote control

    Owner control can make movement more prey-like: flee briefly, pause behind furniture, reverse, then allow capture. Wheels and axles should not trap fur or toes, and the toy should stop instead of continuing to drive when pinned. Our remote control cat toy guide covers room setup and driving technique in more depth.

    The Feline Veterinary Medical Association’s environmental-needs guidance recommends opportunities for play and predatory behavior and says cats should be able to capture the “prey” intermittently. If the powered target cannot safely be grabbed, direct the final pounce to a physical toy or small food reward that suits the cat.

    Check these seven details before you buy

    1. Exact charging instructions: the listing or manual should state the port type, expected input, charge indicator behavior, and when to disconnect. “USB rechargeable” alone is incomplete.
    2. Protected cell and port: the internal battery should not be removable by the cat. The charging port should be recessed or covered and should not sit where teeth, claws, saliva, or floor impacts reach it first.
    3. Useful controls: prioritize a physical off switch, a calm or low-speed mode, and a short timer over a long list of flashy patterns. Check whether motion activation can be disabled.
    4. Failure behavior: find out what happens when the toy is pinned, hits a wall, catches fabric, or becomes low on power. A motor that keeps straining is a poor match for a cat that tackles hard.
    5. Cleanability: hair will collect around wheels, shafts, fabric openings, and seams. Instructions should explain what can be wiped, removed, or washed without wetting the electronics.
    6. Replaceable wear parts: a replaceable cover or broad lure can extend useful life. Skip thin strings, exposed elastic, tiny screw-on caps, and attachments that are unavailable from the maker.
    7. Seller and maker support: look for a real manual, model number, contact details, warranty terms, and replacement guidance. Save the instructions and order record.

    Do not equate a long runtime with better enrichment. A cat may engage for a few focused minutes and ignore the remaining battery. Session length, predictable shutoff, and convenient recharging matter more than the largest hour count on the box.

    Use a safer charging routine

    Charge the toy as an electronic device, not as part of play. The cat should never have access to the cable or toy while it is plugged in. Cornell’s cat-toy guidance specifically advises avoiding accessible electrical cords and toy parts that may separate and be swallowed.

    A six-step charge-and-check routine

    1. End the session and switch off: let the toy cool to room temperature if it has been running or sitting in direct sun.
    2. Inspect while unplugged: reject a cracked or distorted case, loose port, frayed cable, bent connector, moisture, unusual odor, rattling internal part, or visible swelling.
    3. Move to a cat-free station: use a clear, dry, nonflammable surface away from bedding, paper, curtains, food, water, and direct heat.
    4. Follow the product instructions: use the supplied cable and the specified compatible power source. Label the cable so it is not casually swapped with one whose connector merely happens to fit.
    5. Stay present: do not charge while asleep or away. Disconnect when the indicated cycle is complete rather than leaving the toy plugged in indefinitely.
    6. Check before play: unplug, close any port cover, confirm the casing is cool and dry, remove the cable from the room, and run one cycle without the cat.

    The U.S. Consumer Product Safety Commission’s guidance for rechargeable toys recommends adult charging, following the manufacturer’s instructions, staying present, using a nonflammable surface, disconnecting after charging, and immediately stopping use after damage. Those precautions are sensible even though a small cat toy uses less energy than the flying toys addressed in the alert.

    If the toy becomes hot, swells, hisses, leaks, smokes, smells sharp or sweet, or behaves unusually, do not handle it casually or try another cable. Keep people and animals away, follow local emergency guidance if there is heat, smoke, or fire, and ask the manufacturer or local battery-disposal service how to manage a damaged unit.

    Hands checking the charging port and casing of an inactive cat toy
    Charge away from the cat, on a clear nonflammable surface, while checking the port, casing, cable, and temperature.

    Durability rules for cats that play rough

    No rechargeable cat toy is indestructible. In fact, electronics add several likely failure points: a port, case seam, switch, wheel or shaft opening, removable module, and attachment socket. Decide whether the powered toy is meant to be chased, caught, or wrestled—and do not ask a chase-only housing to survive as a chew toy.

    • Plastic gnawer: avoid raised buttons, rubbery port flaps, thin translucent shells, and exposed wheel hubs. Use under direct supervision.
    • Attachment puller: remove products with feathers, narrow elastic, wispy tails, or tiny connectors from the shortlist. Choose a wide replaceable target.
    • Plush opener: inspect the module pocket and every perimeter seam before and after play. Retire the cover when it no longer closes completely.
    • Full-body tackler: choose a low stable device that stops when pinned. Listen for a new rattle, grind, or pitch change after impact.
    • Carrier and hider: choose a device too large to carry into water, drop down stairs, or wedge behind an appliance. Block dangerous gaps during play.

    For a cat that attacks the casing, use the motor only to start the hunt, then switch to a simpler capture toy. The Titan Claws durable cat toy guide helps identify whether your cat usually defeats seams, fabric, attachments, or hard housings.

    Turn battery life into better play, not more play

    A rechargeable toy can run repeatedly without consuming disposable cells, but constant availability quickly makes one motion ordinary. Short, varied sessions preserve novelty and give you a chance to inspect the device.

    1. Set the room: block stairs and appliance gaps; move cords, liquids, breakables, and unstable objects.
    2. Present it switched off: allow sniffing and retreat. Never place a buzzing toy against a hesitant cat.
    3. Start low and slow: use brief movement with pauses. Watching and stalking count as engagement.
    4. Build a catch: let a safe wide lure stay pinned, or redirect the final pounce to an unpowered kicker or food puzzle.
    5. Stop before fatigue: end on a successful catch while body language is still loose. Some cats want three minutes, not fifteen.
    6. Inspect, clean, and rotate: check every seam and opening, wipe as directed, then store the powered toy and cable separately.

    Rotate it with owner-led wand play, boxes, tunnels, climbing, scratching, food puzzles, and quiet exploration. If new gadgets keep losing their novelty, use our seven-day play reset for bored cats before buying another device.

    Can a rechargeable cat toy run while you are away?

    Rechargeable does not mean safe for unattended play. A timer conserves power; it cannot prevent a chewer from opening a seam, a lure from detaching, a rolling toy from reaching stairs, or conflict between cats.

    Only consider leave-out access when every answer is yes

    • Has this exact cat used this exact toy calmly in several supervised sessions?
    • Are the battery, port, switch, wheels, motor, and attachment socket inaccessible to teeth and paws?
    • Is there no reachable string, feather, elastic, wire, small cap, or detachable decoration?
    • Does the toy stop reliably when pinned and after a short cycle?
    • Is the charging cable unplugged and stored in a closed location?
    • Is the play area free of stairs, water, unstable objects, cords, and gaps where the toy or cat could become trapped?
    • Would the switched-off object still be safe to leave with this cat’s known chewing and dismantling habits?

    If one answer is no, store the toy when you leave. Cats that destroy toys, swallow non-food objects, or turn powered housings into wrestling targets need supervised use. For a fuller room-by-room assessment, see automatic cat toys for when you are away.

    Replacement signs and quick answers

    Retire a rechargeable toy when the case cracks or separates; the port or switch loosens; a cover no longer closes; a wheel, shaft, or lure binds; the motor sound changes; the battery drains abnormally fast; the unit becomes warmer than usual; or there is swelling, moisture, leakage, smoke, or an unexplained odor. Do not donate a damaged electronic toy. Follow the maker’s directions and local rules for battery or electronics disposal.

    Count detachable parts after hard play. If a battery, plastic fragment, fabric tab, string, wire, foam piece, or other component is missing—or if your cat bit into a battery module—contact a veterinarian or emergency veterinary service promptly. The ASPCA Poison Control service also provides 24/7 guidance for possible animal poison exposures; a consultation fee may apply. Bring the product, manual, or packaging information if you can do so safely.

    Are rechargeable cat toys better than toys with disposable batteries?

    They reduce routine battery changes and may cost less to power over time, but they add an internal cell, charging port, cable, and charge cycle. Compare the entire toy. A simple replaceable-battery device with a tool-secured compartment may be a better fit than a poorly enclosed rechargeable one.

    Is USB-C automatically safer or faster?

    No. USB-C describes the connector, not the toy’s overall battery quality, charging controls, durability, or compatibility with every power source. Follow the model’s stated input and charging instructions, and keep its supplied cable labeled.

    How long should a rechargeable cat toy run?

    Use the cat’s engagement and body language, not the maximum battery runtime, to set the session. Start with a few slow minutes, add pauses and a physical catch, and stop while the cat remains comfortable. The automatic shutoff is a backstop, not a goal.

    What is the best rechargeable cat toy for a cat that destroys toys?

    Often it is a low, smooth, fully enclosed chase device paired with a separate durable kicker for grabbing—both supervised. Avoid plush motor pockets, thin attachments, exposed wheels, raised port covers, and small caps when those match your cat’s usual failure pattern.

    Can I wash a rechargeable cat toy?

    Only as its instructions permit. Some plush covers can be removed and washed after the module is taken out; many housings can only be wiped. Never immerse electronics, charge a damp unit, or reinstall a module into a cover that is not completely dry.

    Editorial note: This article provides general toy-selection, charging, and enrichment guidance. It does not replace product instructions, local fire-safety guidance, or veterinary care after suspected ingestion, burn, electrical exposure, or other injury.

  • Grey Cat Plush Toy: How to Choose the Right One

    Grey Cat Plush Toy: How to Choose the Right One

    A good grey cat plush toy should match the person and purpose first. For a child or cuddle companion, prioritize a soft washable body, simple securely attached features, and the correct age guidance. For a collector or memorial keepsake, color, markings, posture, eye color, and facial shape matter more. If the plush is meant for a real cat, buy a pet-designed toy instead of assuming a human stuffed animal can withstand teeth and claws.

    Start by choosing one of three directions: realistic, soft and floppy, or rounded and stylized. Then compare the shade of grey, size, fabric feel, filling, facial details, seams, care instructions, and return policy. This guide gives you a fast way to narrow the options—and a separate safety test for homes shared with children and real cats.

    Grey cat plush toy choices at a glance

    The word plush covers everything from palm-sized keychains to large decorative pillows. Search results also mix the British spelling “grey” with the American “gray,” so use both spellings if the selection seems thin.

    Plush style Best for Look for Common tradeoff
    Realistic sitting cat Display, gifting, or matching a real pet Natural proportions, breed-like face, layered markings, stable posture May be firmer and less comfortable to hug
    Floppy cuddle plush Hugging, travel, and bedtime for an age-appropriate child Soft body, even filling, washable construction, embroidered details Shape is less lifelike and may flatten with use
    Rounded or cartoon cat Casual gifts, décor, and plush pillows Simple silhouette, pleasant fabric, resilient fill, clean stitching May not resemble a particular cat
    Mini plush or keychain Bags, desks, and small collectibles Secure loop, compact stitching, no loose accessories Small parts make it unsuitable for young children and many pets
    Pet-designed plush or kicker A real cat’s supervised grabbing and rabbit-kicking Simple shape, reinforced seams, pet-appropriate fill, no glued face Designed for play rather than realistic display

    Do not shop across all five categories at once. A highly realistic grey cat stuffed animal can be a lovely shelf piece but an awkward cuddle toy. A large floppy plush may feel perfect in the arms but fail to capture the exact expression of a beloved cat.

    Three grey cat plush styles: realistic, floppy, and rounded cartoon
    Realistic, floppy, and rounded plushes solve different jobs; choose the silhouette before comparing tiny details.

    Get the shade, markings, and face right

    “Grey” is not one color. Product photos may show cool blue-grey, warm taupe-grey, dark charcoal, pale silver, or a mixed tabby coat. Screen brightness and warm photography can also shift the apparent color. If matching a real cat matters, compare customer photos taken in ordinary daylight and read the written color description instead of trusting one polished image.

    Choose a coat pattern

    • Solid blue-grey: an even cool coat with little visible pattern. This is often used for plushes inspired by Russian Blue–type cats.
    • Grey tabby: darker stripes, forehead lines, ringed tail, and sometimes a pale muzzle or belly.
    • Grey and white: a grey back and head with white paws, chest, blaze, or muzzle.
    • Silver tabby: a pale base with high-contrast dark markings.
    • Long-haired smoke grey: a fluffy silhouette with light and dark fibers blended through the coat.

    If you are trying to resemble a specific pet, outline the three details you notice first. It might be a white chin, green eyes, and a bent tail—not the nominal breed. Search with those traits, such as dark grey cat stuffed animal with green eyes or long-haired grey and white cat plush. A stock plush rarely matches every marking, so prioritize the face and color blocks before small stripes.

    Realistic versus expressive faces

    Realistic designs use a longer muzzle, smaller head-to-body ratio, shaped paws, and a natural sitting or lying pose. Stylized designs enlarge the head and eyes, shorten the limbs, and simplify the coat. Neither is inherently better. A realistic plush usually works better as a keepsake; a softer expressive face often feels friendlier as a general gift.

    Match the size and feel to the recipient

    Check dimensions rather than labels such as small, medium, or jumbo. Sellers may measure from the front paw to the end of the tail, which can make a narrow lying plush sound much larger than it feels. Look for seated height or body length, width, and weight. If only one measurement is listed, ask how it was taken.

    • Under 8 inches: easy to display or carry, but more likely to include small-scale details and too little body for hugging.
    • 8–14 inches: a versatile gift size that fits a shelf, lap, or travel bag.
    • 15–24 inches: better for cuddling or use as a decorative cushion; check weight and washability.
    • Over 24 inches: visually impressive, but harder to store, clean, and dry completely.

    Fabric descriptions are useful only when they are specific. Short-pile plush tends to show markings clearly and collects less debris than shaggy faux fur. Minky-style fabric feels velvety and suits simplified shapes. Long faux fur can make a cat look lifelike but mats more easily and may hide seams or hard inner structure. A product described only as “premium plush” gives you little to evaluate.

    For a child, follow the manufacturer’s age label and inspect the actual construction. The U.S. Consumer Product Safety Commission advises choosing toys that match a child’s abilities and keeping small parts away from children younger than three. The American Academy of Pediatrics recommends well-made stuffed toys with secure seams and parts, no loose ribbons or strings, and no accessible pellet-like filling. Keep stuffed toys and other soft objects out of an infant’s sleep space.

    Inspect construction before cute details

    A plush is only as dependable as its easiest failure point. Run this check before gifting it, and repeat it after washing or heavy use.

    A 60-second plush inspection

    1. Read the label: confirm intended age, fiber and filling information, care instructions, and maker or importer details.
    2. Check the face: embroidered eyes and noses eliminate detachable plastic face pieces. If hard eyes are used, tug them gently and reject any movement.
    3. Trace every seam: look under the chin, between the legs, around the tail, and along the closing seam for gaps, skipped stitches, or protruding thread.
    4. Press the body: feel for unexpected wire, hard pieces, clumped fill, or small pellets collecting at one weak seam.
    5. Pull accessories: bows, collars, bells, whiskers, clothing, keychain hardware, and hook-and-loop parts should match the recipient’s age and use.
    6. Smell and surface-check: avoid a plush with strong unexplained odor, dye transfer, sticky residue, or fibers that shed with a light stroke.
    7. Test cleanability: verify that the care method is realistic for the person receiving it. “Surface clean only” is a poor match for a frequently handled toddler toy.

    A label that says “non-toxic” does not tell you whether a seam will open, an eye will detach, or a long fiber will shed. Likewise, a machine-washable label does not make every decoration machine-safe. Evaluate the complete object and follow its care directions.

    Hands inspecting the seam and embroidered eye of a grey cat plush toy
    Inspect seams, face details, filling, and care instructions before deciding where a plush belongs.

    Can a real cat play with a grey cat stuffed animal?

    A stuffed animal made for people should not automatically become a cat toy. A real cat may bite off a plastic eye, chew synthetic whiskers, open a lightly sewn seam, pull out polyester fill, or reach weighted pellets. Realistic plushes may also contain wire or rigid shaping parts. Keychains, sound modules, batteries, ribbons, clothing, and fragrance add more failure points.

    If your cat merely sleeps beside a human plush and never mouths it, store it when you cannot observe the interaction and inspect it regularly. If the cat bites, kneads aggressively, wrestles, carries, or rabbit-kicks it, replace it with a toy designed for cat play. Do not wait for visible stuffing on the floor; a determined cat can swallow a small piece before you notice the damage.

    Cornell’s Feline Health Center advises avoiding small pieces and strand-like parts that may separate and be ingested. VCA Animal Hospitals specifically warns that stuffing from damaged pet toys can be swallowed and recommends removing a stuffed toy once it is damaged.

    If part of a plush is missing, contact your veterinarian promptly for advice. Seek urgent veterinary care for trouble breathing, repeated gagging or vomiting, marked drooling, abdominal pain, refusal to eat, unusual lethargy, or suspected battery, string, wire, magnet, or sharp-part ingestion. Do not induce vomiting unless a veterinary professional directs you to do so.

    If the plush is for your cat, choose a pet-designed kicker

    A pet plush should match the cat’s play style rather than the color of the cat. Grey fabric can look good in the home, but length, construction, and failure points decide whether the toy fits the player.

    • For carrying: choose a light, simple prey shape large enough not to swallow, without hard eyes, thin tail, or glued decorations.
    • For wrestling and rabbit-kicking: choose a longer kicker the cat can grip with the front paws while reaching it comfortably with the hind feet.
    • For rough chewers: look for dense fabric, reinforced or protected seams, minimal appendages, and a shape you can inspect on every side. Use it only under supervision.
    • For kittens: favor soft, lightweight construction without long fibers or detachable details. Our kitten toy guide matches options to age and play style.
    • For cats that prefer chase: a plush kicker may be the catch at the end of a wand or motion game. Use our guide to cat toys that move to build the chase safely.

    No fabric cat toy is indestructible. Inspect it before and after hard play, and retire it when a seam gaps, thread forms a loop, fabric thins, a hard inner piece can be felt, filling shows, an attachment loosens, or the toy no longer dries fully after cleaning. If your cat routinely dismantles ordinary toys, the durable cat toys guide explains how to shop by the way a toy is likely to fail.

    Clean and store a grey plush without ruining it

    Follow the sewn-in care label first. If it allows machine washing, close any removable fasteners, place the plush in a mesh laundry bag or pillowcase, use the specified cycle, and dry it exactly as directed. Heat can distort synthetic fur, warp internal plastic, set stains, or damage glued details, so do not improvise with a hot dryer.

    For a surface-clean-only plush, test a small hidden area with a barely damp light-colored cloth. Blot instead of scrubbing. Grey fabric can hide dust while showing light lint, so a clean soft clothes brush or low-suction upholstery tool may be more useful than frequent wet cleaning. Avoid fragrance sprays, essential oils, and unapproved disinfectants—especially when a real cat shares the room and may lick the surface.

    Dry the plush completely before returning it to a child, shelf, or pet-accessible area. Turn and press it during drying to find damp areas in the belly and limbs. Store collector plushes away from direct sun, moisture, cooking residue, and a cat’s reach. For a washable cuddle plush, keep a photo of the care label before it fades.

    Quick buying checklist

    • The silhouette matches the job: realistic display, floppy cuddle, rounded décor, or pet play.
    • The grey shade and markings are confirmed in more than one photo.
    • Listed dimensions explain how the toy was measured.
    • The face, posture, and eye color capture the traits that matter most.
    • The fabric length and softness suit the recipient.
    • Seams are even, especially around the tail, chin, legs, and closing point.
    • Age guidance and warnings suit the child, if applicable.
    • Small accessories, pellets, batteries, magnets, and exposed wire are absent when they should be.
    • The care instructions are practical, and replacement or return terms are clear.
    • A plush for a real cat is specifically designed for pet play and matches that cat’s bite-and-kick habits.
    • You are willing to supervise, inspect, and retire a pet toy before it fails.

    Grey cat plush toy FAQs

    Should I search for grey or gray cat plush?

    Use both. “Grey” is common in British English and “gray” in American English, but product listings use them inconsistently. Add the pattern, pose, size, or eye color to improve the results.

    What makes a grey cat plush look realistic?

    Natural body proportions, a smaller head, shaped paws, a defined muzzle, layered coat color, restrained eye size, and a believable sitting or lying posture matter more than extra fluff. Matching one cat requires its distinctive markings and expression, not only the correct shade.

    Are plastic safety eyes always safe?

    No component is universally safe for every age and use. Follow the manufacturer’s age label and inspect the complete toy. Embroidery removes a detachable hard face piece and is generally the simpler choice for young children and pet-accessible homes.

    Can I wash a cat stuffed animal in a washing machine?

    Only if its care label permits it. Internal wire, foam, pellets, sound modules, glued features, and long faux fur can require surface cleaning. Even a washable plush must dry completely before use.

    Is a child’s grey cat plush safe for my cat?

    Do not assume so. Human plushes may include plastic eyes, whiskers, pellets, long fibers, accessories, or light seams that were not selected for feline teeth and claws. Choose a pet-designed plush, supervise first use, and retire it at the first meaningful damage.

    Editorial note: This guide offers general shopping and toy-safety information. Follow product instructions and age guidance, and ask a veterinarian about a cat that swallows non-food objects or has a sudden change in chewing behavior.