Author: Lucas Turner

  • cat clicker: how to choose and use one

    cat clicker: how to choose and use one

    Think clickers are just for dogs? Lots of folks do, but a tiny, repeatable click can work wonders with shy kitties. That clear little sound tells a cat exactly when they did something right, and yes, it can teach them to come, sit, and pounce on cue while keeping you calm and confident. Check out our guide on Best Toys to Reduce Play Aggression.

    So what is a clicker? It’s a small device that makes a consistent sound to mark a moment. Handheld clicker (a little plastic box that clicks) is the classic. Vibration clicker (a buzzy device you can feel) is great for noise-sensitive cats. LED cue (a small light flash) gives a visual “yes” for really skittish felines. Think of the click as a marker (a short sound that marks the exact behavior you want).

    Timing is the secret. Click the instant your cat does the thing you like, then reward within one second. Tiny treats work best, pea-sized bits of chicken or a soft commercial treat, so they stay motivated and not full. Short sessions, just 2 to 5 minutes, a few times a day, make learning fast and fun. Your cat’s whiskers will twitch as the toy rolls or as you call their name, and that tiny click tells them “do that again.”

    How to use it in real life? Capture a behavior first, like a step toward you, click the moment their paw moves, then toss a tiny treat. For sit, wait for a natural pause, click, reward. For come, click the instant they move toward you, then reward where you’re standing so they connect the approach with good things. If your kitty startles easily, start with vibration or LED cues, and sit on the floor so you feel less big and noisy.

    Give it a try. Be patient, keep it playful, and celebrate small wins, your cat will thank you with purrs and dramatic leaps. Worth every paw-print.

    cat clicker: how to choose and use one

    - Quick answer and immediate starter steps.jpg

    A cat clicker is a tiny marker device (a little gadget that signals the exact moment your cat does something you want) that makes the same clear sound every time. Ever watched your kitty time a pounce perfectly? That click tells them, "Yes , do that again." It’s simple, and oddly satisfying.

    For skittish or noise-sensitive cats, try a quiet vibration marker (a small buzzer you feel more than hear) or an LED marker (a little light that blinks when you press it). For most folks, a handheld spring clicker (a small plastic tool with a metal strip that snaps and makes the click) is the default , it’s tactile, reliable, and easy to tuck in your pocket. This is the fastest way to begin clicker training. Here’s how to use a cat clicker:

    1. Load the marker: click, then give a tiny, high-value treat (something your cat really loves, like a small piece of tuna). Repeat until the sound predicts the reward.
    2. Capture or prompt a simple behavior, and click at the very instant it happens. Timing matters.
    3. Reward immediately , within one second , and keep sessions short. Five one-minute bursts or several 3-5 minute sessions work better than one long lesson.
    Action Timing Why
    Load Click, then treat (repeat) Links the sound to a reward so your cat notices the marker
    Click timing Click at the exact instant the behavior occurs Marks the precise moment you want your cat to repeat
    Reward window Give treat within 1 second; treat ≈ tip of a little finger Keeps the connection strong; short, frequent sessions build habit

    You’ll often see a lightbulb moment in minutes. Some tricks click into place after a few short sessions; others take a couple of weeks. Worth every paw-print.

    Key numbers cheat-sheet

    - Key numbers cheat-sheet.jpg

    This is your quick, go-to reference for clicker training numbers, timing, and reps. Use this box so you do not have to repeat counts all over the article. Quick note: "pairings" (click + treat) and "shaping" (rewarding tiny steps toward a goal).

    Short bursts, tiny treats, perfect timing. Ever watched your kitty pounce because of one well-timed click? These numbers help you get that moment more often.

    Metric Suggested value Notes
    Reload / pairings (click + treat) 20–30 Builds the click→reward connection
    Click-to-reward window Within 1 second Timing is everything for clear feedback
    Session format Five 1-minute bursts or 3–5 minute sessions Short, frequent practice beats long sessions
    Early reps per session 10–20 successful clicks Good for the first shaping steps
    Treat size About a fingertip Small bites keep motivation high and calories low
    Treat kcal per bite About 1–3 kcal Track treats so you do not add extra daily calories
    Shaping reps per step 10–20 clicks Click for small approximations until the behavior is steady
    Fading / reset guidance Move to intermittent rewards; reset 2–3 sessions if needed Raise criteria slowly and step back if reliability drops

    Use these numbers as a starting point and tweak for your cat. Worth every paw-print.

    Types & who they suit

    - Types  who they suit.jpg

    There are six common kinds of cat clickers you’ll find: handheld spring clickers (small handheld button that makes a sharp snap), silent/vibration markers (tiny buzzer you feel more than hear), LED or visual markers (light-based signal), automatic or timed clickers (pre-set electronic clicker), smartphone app markers (phone-based sound or flash), and remote clickers (handheld transmitter). They all tell your cat “good job,” but they do it with a snap, a buzz, a blink, or a timed beep, so pick the one that fits your cat’s ears and nerves.

    • Handheld spring clicker (small handheld button that makes a sharp snap)
      Pros: it gives a clear, reliable tone and you get nice tactile feedback when you press it. Cons: some noise-sensitive cats jump or hide, and cheap plastic can wear out. It’s the classic starter clicker.

    • Silent / vibration marker (tiny buzzer you feel more than hear)
      Pros: perfect for shy, anxious, or feral cats who hate noise. Cons: you might miss the faint buzz if you’re distracted. Use this when trust is still being built.

    • LED / visual marker (light-based signal)
      Pros: great for deaf cats or loud rooms, because a flash can beat out chaos. Cons: it needs a clear line of sight and can disappear in bright sunlight. Try it for kittens who watch things with laser focus.

    • Automatic / timed clicker (pre-set electronic clicker)
      Pros: handy for distance work or sequences that need exact timing. Cons: you’ll need to test and tweak the timing so you don’t click late. Works well when you want hands-free precision.

    • Smartphone app marker (phone-based sound or flash)
      Pros: super convenient, can log sessions and offer lots of sounds. Cons: phone lag, notifications, or distractions can mess things up. If your phone buzzes mid-click, your cat will notice.

    • Remote clicker (handheld transmitter)
      Pros: nice for training at a distance when you don’t have a helper. Cons: can be bulkier and may get pressed by accident. Keep it in a pocket with the button covered.

    Match the device to your cat’s temperament and life stage. For most pet cats and new trainers, the spring clicker is the go-to because it’s simple and tactile. For nervous cats or recent rescues, reach for a silent vibe marker so your cat doesn’t flinch. Kittens usually learn fast with any gentle marker, but very young or skittish kittens often prefer a visual or vibe marker until they relax. If you need hands-free timing for complex tricks, try an automatic clicker, just practice the timing.

    Try new sounds and buzzes from a safe distance before you commit, watch for twitchy ears, flinches, or sudden hiding. When you switch marker types, “reload” the new marker using the Key numbers cheat-sheet so your cat quickly learns the new signal. If you can only buy one, get a trusty spring clicker, then swap to a vibe or LED if your cat shows stress.

    When to pick a silent or vibration marker

    If your cat freezes, runs, or flattens its ears when you click, that’s your cue to try a silent or vibration marker. These work especially well for feral or newly rescued cats that are still learning to trust humans. Pair the buzz or light with a treat the same way you would with any marker so the cat links the signal to reward. Check the Key numbers cheat-sheet for how many pairings to use, consistency wins.

    Clicker Type Best for Primary drawback
    Handheld spring clicker (small handheld button that makes a sharp snap) Everyday pet cats and beginners May startle noise-sensitive cats; plastic can wear
    Silent / vibration marker (tiny buzzer you feel more than hear) Shy, anxious, or feral cats Owner might miss the subtle buzz
    LED / visual marker (light-based signal) Deaf cats or noisy training areas Needs clear sightline; less visible in bright light
    Automatic / timed clicker (pre-set electronic clicker) Distance work and timed sequences Requires careful calibration so timing stays precise
    Smartphone app marker (phone-based sound or flash) Tech-forward trainers and session logging Phone lag, notifications, or accidental distractions
    Remote clicker (handheld transmitter) Training at a distance without a partner Can be bulky or accidentally pressed

    cat clicker: how to choose and use one

    - cat clicker features to look for size, durability, volume, and comfort.jpg

    Look for clicker features that make training quick, comfy, and built to last. Think a steady tone or a small vibration (a tiny buzz you can feel), a comfy grip, volume control or a silent mode, and a sturdy spring mechanism (a thin metal strip that snaps) or solid plastic housing (the outer case). Add a clip or lanyard so it’s always at hand, and pick a simple shape that cuts down on accidental presses. Ever watched your kitty twitch when a sound is just right? That’s the goal.

    Before you buy, try the click signal a few steps away to see how your cat reacts, and have several tiny treats ready to pair with the sound. Short, consistent training wins over long noisy sessions.

    • Tone consistency: Click several times. The sound should be the same every press so your cat learns the signal fast. Test: click 8 to 10 times and listen for any changes in pitch or length.

    • Volume control or silent mode: Some clickers let you dial the sound down or switch to a vibration-only option (a gentle buzz). Good for skittish or older cats. Test: flip through the settings and click a few feet away to see which your cat prefers.

    • Grip and ergonomics: It should feel natural in your hand for quick repeats during play. Test: hold it like you’ll use it and mimic short, fast clicks while reaching around a couch or chair.

    • Size and portability: Pocketable clickers make on-the-go sessions easy. Test: slip it in a pocket and walk around to check comfort and accidental presses.

    • Spring durability: The internal spring (that snapping metal strip) needs to last so the click stays sharp. Test: press it repeatedly to check for flimsiness or a slow return.

    • Attachment options: A clip or lanyard keeps the clicker handy when you’re carrying toys or treats. Test: clip it on and walk a short lap to see if it bounces or gets in the way.

    • Price range: You can find solid budget clickers and fancier models with extra features. Decide if a volume dial, vibration mode, or ergonomic design is worth a few extra bucks for you. Test: compare tone, feel, and features across a couple price points.

    • Warranty and return policy: Look for sellers who accept returns if the tone or build doesn’t work for your cat. Test: read the small print before buying so you’re not stuck with the wrong clicker.

    Quick tips: use tiny, tasty treats so your cat associates the click fast. Keep sessions short and fun. Worth every paw-print.

    Start training now: a beginner's cat clicker training plan

    - Start training now a beginners cat clicker training plan.jpg

    Loading phase: sit with your cat and a small dish of tiny, smelly treats (think fingertip-sized pieces of roast chicken or a fishy Churu bite). Have a clicker (a small device that makes a clear click) or use a marker sound (the consistent click that marks a good moment). Press the click and immediately offer a treat. Repeat calmly until your cat looks at you when they hear the sound. You’re simply teaching the sound = good thing. Easy, right?

    Capturing and timing basics: pick a behavior your cat already does on their own , a sit, a head-turn toward your hand, or a nose touch to a target (a small object your cat can touch with their nose). Click the exact instant the behavior happens, then give the treat right away. Click-then-treat timing is everything: click the moment, treat within one second. Do short little practice bursts so your timing gets sharp and your cat stays excited.

    1. Load the marker with quick click → treat pairings.
    2. Capture one simple behavior your cat already offers.
    3. Click at the precise instant the behavior happens.
    4. Reward immediately with a tiny treat (about fingertip size).
    5. Repeat in short bursts and stop while your cat still wants more.

    Cue introduction and progression: once the cat repeats the behavior reliably for the click, start adding a short cue word just before the action , one syllable like “sit” or “touch.” Say the cue as your cat begins to move into the action, click the correct behavior, and reward. That’s how the clicker builds a verbal cue. As your cat gets steadier, add small challenges: take one or two steps back, toss in a soft distraction, or ask for a slightly longer hold. If you want exact repetition targets, check the Key numbers cheat-sheet for suggested pairing and rep counts instead of guessing.

    Session scheduling and reinforcement progression: keep sessions short and frequent , lots of tiny practices beat one long grind. Stop before your cat loses interest; always end on a good response so training stays fun. After a behavior is solid, move from giving a treat every click to a mix of treats, praise, or a quick toy toss so your cat stays motivated without expecting food every time. This is classic clicker training: clear signals, tasty rewards, and gradual increases in challenge. Expect quick wins in minutes for simple stuff, and steady progress over days to weeks for trickier moves.

    Worth every paw-print.

    Sample 7-day starter schedule

    • Day 1: Load the marker with calm click → treat pairings; make the sound predict a reward.
    • Days 2–3: Capture an easy behavior (sit or touch) and reinforce in short bursts.
    • Day 4: Add a one-word cue just before the action; click and reward when your cat does it.
    • Day 5: Practice at a small distance (one or two steps back) and keep sessions short.
    • Day 6: Add a mild distraction (a toy nearby or soft noise) and keep click-then-treat timing tight.
    • Day 7: Reduce treat frequency a bit; mix in praise or a quick toy reward while checking progress.
    • After week one: consult the Key numbers cheat-sheet for exact pairing and rep counts to shape longer sequences.

    cat clicker: how to choose and use one

    - Troubleshooting when your cat ignores the marker or loses interest.jpg

    If your cat ignores the clicker, don’t worry , this is super common. Most of the time it’s simple stuff: you clicked a hair late, the treat wasn’t exciting, the room was noisy or full of distractions, the click sound startled them, or the session was too long and they just tuned out. These are the usual suspects when people ask why the clicker stops working.

    Quick fixes to try right now: move to a quieter spot and sit at your cat’s level so you’re part of the world they see, switch to a stronger-smelling treat or a favorite toy, keep practice bursts short, and have a partner watch you click so someone can confirm your timing. If you changed your marker sound recently, reload the new signal by pairing click then treat a few times (reload = re-teach the click means reward). Think of reloading as making the click exciting again.

    1. Check timing accuracy – click the exact instant the behavior happens. Timing is tiny but everything.
    2. Reduce distractions – try a calmer room with fewer people or loud noises.
    3. Upgrade reward value – use smellier, tastier treats or something your cat really loves.
    4. Shorten session length – stop while your cat is still eager. Ten quick reps beat one long snoozy session.
    5. Health check – make sure your cat doesn’t have a sore mouth, low appetite, or other issues.
    6. Recondition the marker – pair click then treat several times so the sound means the same thing again (marker = the sound that marks the behavior).
    7. Have an observer watch and click – a second pair of eyes can confirm your timing and help you learn.
    8. Try toy rewards – feather wands, quick tosses, or a tiny play burst can beat food sometimes.

    If you stall, break the goal into tinier steps and click small approximations , that’s shaping (making a big trick from lots of little wins). If things still feel stuck, check your cheat-sheet for how many reload pairings and ideal session lengths, and switch rewards if your cat gets bored. Keep it fun and short. Worth every paw-print.

    Advanced cat clicker training: shaping, chaining, and fading the marker

    - Advanced cat clicker training shaping, chaining, and fading the marker.jpg

    Shaping with a clicker (a small device that makes a clear click to mark a behavior) means rewarding tiny steps toward a final move instead of waiting for the whole trick to show up. Click for the little wins, look, approach, touch, then slowly raise the bar so your cat learns the path to success. Think of it like teaching a dance one step at a time; each click says, "Yes, that was it," and your cat figures out the rest.

    Chaining (linking trained parts into one smooth sequence) takes those tiny steps and stitches them together. Teach each subtask, then click and reward as you connect them so the whole action flows. It’s like stringing beads: one bead at a time becomes a necklace that your cat can wear, claw-tastic, right?

    Start simple and practical. Break the goal into very small targets, click precise approximations, and only bump up the requirement once the current step is steady. Keep rounds short and fun so your cat stays curious instead of bored, ten minutes of playful focus beats an hour of meh. If a session goes sideways, toss in a quick easy win to rebuild confidence.

    Fade the clicker (slowly reduce reliance on the click sound and treats) once performance is reliable. Move from treats on every click to a mix of treats, praise, or toy rewards. If reliability dips, go back to denser clicking for a few sessions, then try fading again. Patience here pays off, your cat learns to work for different rewards.

    Example: shaping a cat to jump onto a shelf in 8 steps

    1. Look at the shelf edge when you point (click the look).
    2. Step toward the shelf (click the movement).
    3. Put front paws on the shelf edge (click paw placement).
    4. Shift weight forward onto the front paws (click the shift).
    5. Make a small partial hop with hind feet still on the floor (click the hop start).
    6. Push so the hind feet leave the floor a little (click mid-jump).
    7. Land both front paws fully on the shelf (click the landing).
    8. Settle weight fully on the shelf so your cat looks comfy (click the full position).
    • Fading schedule: begin with continuous treats, then follow the Key numbers cheat-sheet for gradual intermittent rewards and session counts.
    • If performance slips, go back one step and reinforce with more successful clicks per the cheat-sheet.

    If fading causes confusion, first check your timing and reward value, late clicks or weak treats undo progress fast. Click right when the action happens (within a beat), and use treats your cat really loves. Keep sessions short, re-split steps if needed, and remember: steady small successes beat big leaps.

    Worth every paw-print.

    cat clicker: how to choose and use one

    - Safety, alternatives, and recommended cat clicker models and resources.jpg

    Safety first. A marker (the click or sound you pair with a treat) is a signal, not punishment, so never use it to scold your cat. Watch for stress signs like flattened ears, a tucked posture, or a fast-flicking tail, and stop the session if your kitty looks uncomfortable. If your cat just had surgery or is sick, pause training and check with your veterinarian before you start again.

    Keep treats tiny. Use bite-size rewards and shave a little off your cat’s regular meals so you’re not adding extra calories (see the Key numbers cheat-sheet for kcal per treat and daily training allowance). Short sessions win: three to five minutes a few times a day beats one long, frantic round.

    If a clicker isn’t a good fit, pick a consistent substitute: a short verbal marker (one quick word or sound you always use), a vibration marker (a little buzz), or an LED marker (a tiny blinking light). Think of the marker like a camera flash for your cat’s brain , a quick pop that means “yes, good job.” DIY options that work: snap your fingers or tap a small metal lid, as long as the sound is distinct and you pair it reliably with treats. Apps can be handy, but watch for phone lag or incoming notifications that can mess up timing.

    For recommended models, use the single model table elsewhere in this article so you don’t repeat choices. When you pick a model, match the tone, volume control, or vibration to your cat’s noise sensitivity and training goals , some cats love a loud click, others prefer a soft buzz. And hey, if your cat prefers purring to clicking, try different markers and see which one gets those whiskers twitching.

    Final Words

    Load the marker, click the exact instant the behavior happens, and reward within one second. Start with tiny, tasty treats and short bursts so your cat stays curious.

    Pick a clicker type that fits the cat, spring clicker (small handheld you press) for most, silent/vibe (gentle buzz) for shy kitties, and check tone, grip, and durability before you buy. Use the cheat-sheet for counts, follow the week-one plan, and try shaping (rewarding tiny steps) when basics click into place.

    Give it a few quick sessions and you’ll see real progress in days. Think cat clicker: how to choose and use one , happy practice, happy cats.

    FAQ

    How to use a cat clicker?

    To use a cat clicker, first load the marker (a distinct sound that marks the exact moment), click the instant the behavior happens, reward within one second, and keep sessions short and playful.

    Where can I find cat clicker training videos or Cat School resources?

    Cat clicker training videos live on YouTube — search for terms like clicker training cats, kitten clicker training, or Cat School; pick clear, step-by-step demos from trainers or vet-backed channels that show timing and treats.

    How to train a kitten with a clicker?

    Pair the click with tiny tasty treats, capture simple actions like look or sit, click the exact instant, reward immediately, and keep sessions under a few minutes.

    How to train a cat with treats?

    Mark the exact moment with a click or short word, give a fingertip-sized, high-value treat within one second, and repeat in short, frequent bursts until reliable.

    What is the 3-3-3 rule for cats?

    The 3-3-3 rule means three days to settle into a new space, three weeks to show more personality, and three months to feel comfortable and settle into routine.

    How to choose a cat toy?

    Match toy type to play style (chaser, pouncer, chewer), pick durable, non-toxic materials, check size for safety, and test moving or noisy toys from a safe distance.

  • Best Toys to Reduce Play Aggression (Durable Options)

    Best Toys to Reduce Play Aggression (Durable Options)

    Play aggression is normal feline behavior, but it still needs structure. The goal is not to punish your cat for pouncing or biting during play. The goal is to redirect that energy into toys that are durable, safe, and satisfying enough to keep hands and ankles out of the game.

    The best toys for reducing play aggression let your cat stalk, chase, grab, kick, and chew without rewarding rough contact with people. Durable wand toys, kicker toys, puzzle feeders, and track-style chase toys usually do the most work here because they channel hunting energy into predictable routines.

    Dark cinematic photography of a large Bengal cat mid-pounce on a rugged rope toy with dramatic orange rim lighting

    Quick Picks for Reducing Play Aggression

    • Long wand toys: Best for keeping distance between your hands and your cat while still giving them a fast-moving target.
    • Kicker toys: Best for cats that grab with the front paws and bunny-kick with the back legs.
    • Treat puzzles and food balls: Best for turning restless energy into slower, focused problem-solving.
    • Track toys and chase balls: Best for solo play between interactive sessions.
    • Chew-safe rubber toys: Best for cats that bite hard at the end of play sessions.
    Single durable rope cat toy on a worn dark workbench surface, dramatic single-source warm light casting deep shadows

    How to Choose the Right Toy

    Match the toy to the behavior you want to redirect. If your cat attacks feet under blankets, use a long wand toy so the prey stays away from your body. If your cat grabs arms and kicks, offer a larger kicker toy they can hold and wrestle safely. If your cat gets overstimulated quickly, switch from high-speed chase games to treat puzzles or slower batting toys before frustration builds.

    • Choose toys large enough that they cannot be swallowed.
    • Avoid toys with glued decorations, loose feathers, or small plastic parts that can break off.
    • Retire any toy with torn seams, exposed stuffing, cracked plastic, or loose cord.
    • Rotate toys every few days so play stays novel without turning chaotic.

    Best Toy Types for Play-Aggressive Cats

    1. Durable Wand Toys

    Wand toys are usually the fastest way to lower play aggression because they create distance. Use sturdy rods, strong cord, and replaceable lures. Keep the toy moving like prey across the floor instead of waving it in your cat’s face. End the session before your cat starts grabbing at you instead of the toy.

    Cat mid-pounce attacking a rope toy with blurred motion, dark studio background, dramatic orange side lighting

    2. Kicker Toys

    A long, heavily stitched kicker toy gives your cat a safe target for grab-and-kick behavior. If your cat tends to latch onto sleeves, blankets, or hands, a kicker toy is one of the simplest substitutions you can make.

    Cat in peak play mode with claws extended attacking a toy, ears pinned back, tail raised, mid-action with warm orange rim lighting

    3. Puzzle Feeders and Treat Toys

    Puzzle toys reduce arousal by slowing the game down. They work especially well after an active play session, when your cat still wants an outlet but needs something calmer than another chase round.

    4. Track Toys and Durable Balls

    These are good for independent follow-up play. They will not replace interactive sessions, but they can help burn off extra energy during the day and keep boredom from spilling into rough behavior.

    Simple Play Routine That Lowers Aggression

    1. Start with 5 to 10 minutes of wand play that makes your cat chase, stalk, and pounce.
    2. Switch to a kicker toy for the grab-and-kick phase.
    3. Finish with a puzzle feeder, treat toy, or small meal so the session ends on a calm reward.
    4. Repeat one to three times daily depending on your cat’s age and energy level.

    This sequence matters. High-energy chase first, physical capture second, calm reward last. That pattern is much more effective than letting play spiral until your cat bites the nearest moving person.

    Safety Checklist

    • Do not use your hands as toys.
    • Stop the session if your cat starts targeting skin instead of the toy.
    • Store string-based toys away after play.
    • Inspect toys weekly and replace damaged items immediately.
    • Choose tougher materials for strong chewers, but avoid anything so hard it could damage teeth.
    Four destroyed cat toys arranged in a flat lay on a dark surface, including a shredded feather wand, scratched scratcher, deflated plush mouse, and chewed rope toy

    When to Get Extra Help

    If play aggression is escalating into true aggression, breaking skin, or happening without clear play signals, pair the toy changes with a behavior plan. Start with these guides: How to Stop Play Aggression in Cats and Cat Play Aggression: Causes and Solutions. If the behavior is intense, sudden, or paired with pain signs, talk to your veterinarian.

    The Toy Rotation System: Keeping Your Cat Engaged

    One of the most overlooked strategies for reducing play aggression is toy rotation. Cats get bored with the same toys week after week, and boredom leads to frustration and increased destructive play behaviors. By rotating your cat’s toys every few days or weekly, you create the illusion of “new” toys without spending more money.

    Why rotation works: The novelty factor keeps your cat mentally stimulated and excited about play sessions. A toy that sat in the corner for two weeks feels brand new when you reintroduce it, triggering fresh hunting instincts and engagement.

    How to implement a rotation system:

    • Keep 8-12 toys total (3-4 at a time in rotation)
    • Rotate every 3-5 days or weekly depending on your cat’s interest
    • Store toys in a basket or container so they’re out of sight (out of sight = out of mind = more exciting when reintroduced)
    • Watch your cat’s responses to each toy and remove ones they ignore consistently
    • Introduce one “new” (previously stored) toy every few days to maintain interest

    Pro tip: Indoor enrichment activities and outdoor training can complement toy rotation by providing multiple outlets for play energy.

    DIY Cat Toy Ideas: Safe, Budget-Friendly Options

    Not every cat toy needs to come from a pet store. Many household items can become excellent play objects when constructed safely. DIY toys are perfect for testing what your cat responds to before investing in expensive options.

    Safe DIY toy ideas:

    • Crinkle balls: Wrap aluminum foil loosely in paper or fabric, leaving small crinkle sounds. Cats love the texture and sound.
    • String toys: Tie safe fabric scraps or cotton string to a stick or dowel (never leave unsupervised string-based toys unattended)
    • Puzzle feeders from cardboard: Hide treats inside a cardboard box with cut-out holes for your cat to fish treats through
    • Paper bag toys: Crumpled paper bags create crinkling sounds and satisfy hunting instincts. Remove handles for safety.
    • Toilet paper roll balls: Stuff empty rolls with crumpled paper and leave open for safe batting and chewing
    • Ping pong ball in a bathtub: The unpredictable bouncing mimics prey movement without breaking or becoming a choking hazard

    Safety first: Always supervise DIY toy play, avoid small parts that could be swallowed, and never leave string or elastic items unattended.

    Structuring Play Sessions for Maximum Engagement

    How you play with your cat matters as much as what toys you use. Unstructured, chaotic play can actually escalate aggression rather than reduce it. By using intentional play sessions with clear beginnings and endings, you teach your cat when it’s appropriate to be aggressive and when to settle down.

    The ideal play session structure:

    • For kittens: 3-5 minute sessions, 3-4 times daily. Young cats have short bursts of energy.
    • For adult cats: 10-15 minute sessions, 2-3 times daily. This matches natural hunting cycles and keeps them engaged without overstimulation.
    • For senior cats: 5-10 minute sessions, 2 times daily. Gentle, slower-paced play prevents injury and joint strain.

    During play:

    • Let your cat “win” sometimes (catch the toy) to satisfy the hunting instinct
    • Gradually slow movements toward the end of the session to wind your cat down
    • Avoid sudden stops that trigger frustrated pouncing
    • End on a satisfied note, not when your cat is still highly aroused

    After play: Offer a small treat or their next meal to signal the end of play and create a satisfying conclusion to the session. This also takes the “edge off” hunting energy.

    Age-Specific Toy Recommendations

    Your cat’s age significantly affects which toys will reduce aggression most effectively. Here’s how to match toys to your cat’s life stage:

    Kittens (2-6 months): Bouncy, fast-moving toys that respond to their unpredictable energy. String wands, bouncy balls, and small feather toys work best. Kittens are learning hunting skills, so interactive play is crucial for teaching boundaries.

    Junior cats (6 months-2 years): High-energy interactive toys. Wand toys, kicker toys, laser pointers, and fetch toys. This age group has intense play aggression—redirect it with durable, engaging options.

    Adult cats (2-7 years): Varied toys including puzzle feeders, chase toys, and wand toys. Mix interactive and solo play. Mental engagement becomes increasingly important.

    Senior cats (7+ years): Gentler toys that don’t require jumping or rough contact. Soft kicker toys, treat puzzles (slower-paced), and low-energy wand toys. Avoid toys that strain joints.

    When Toys Aren’t Enough: Recognizing Behavioral and Medical Issues

    In some cases, even the best toys won’t reduce play aggression if there’s an underlying behavioral or medical issue. Knowing when to escalate beyond toy-based solutions is important for your cat’s wellbeing.

    Signs that toys alone won’t solve the problem:

    • Your cat targets people obsessively, ignoring toys
    • Play sessions consistently end with your cat biting or scratching aggressively
    • Aggression is increasing despite more toys and play time
    • Your cat shows signs of pain during play (limping, hesitation, excessive grooming)
    • Aggression is accompanied by other behavioral changes (litter box issues, excessive vocalization, hiding)

    Next steps: Schedule a vet check-up to rule out medical issues like pain, hyperthyroidism, or neurological problems. If medical issues are cleared, consult with a certified feline behaviorist who can identify whether the aggression is playful, redirected, or something else entirely.

    Cat training and behavior guides on our site also cover other enrichment strategies beyond toys that can complement your toy rotation and play sessions.

    FAQ

    What toys help most with play aggression?

    Long wand toys, kicker toys, and treat puzzles do the most to redirect play aggression because they match the way cats chase, grab, kick, and wind down.

    Should I let my cat wrestle my hands if they are young?

    No. Hand play teaches your cat that human skin is part of the game. Use toys every time so the target stays consistent.

    How often should I replace toys?

    Replace them as soon as seams split, stuffing shows, cords fray, or hard parts crack. A durable toy is only useful while it stays intact and safe.

  • Understanding Cats Play Fighting vs Aggression

    Understanding Cats Play Fighting vs Aggression

    Is that wrestling between your cats just silly play or a fight that could end in vet bills? Ever watch them tumble and wonder which it is? Check out our guide on Best Toys to Reduce Play Aggression.

    Play is mutual. Claws tucked (sheathed: hidden inside the paw), ears loose, soft nips, and both cats taking turns chasing like kittens after a toy. Your cat’s whiskers might twitch, and there’s a bouncy rhythm to it.

    Aggression looks sharper. You’ll see claws out (unsheathed: extended), ears pinned back, and fur standing up (piloerection: raised fur). Add loud hissing, long, angry yowls, or bites that break the skin, and it’s time to step in.

    I’ll walk you thplay rough easy-to-spot body language, give quick checklists, and share safe, simple steps to break up a fight or call for help, so you’ll know when to smile and when to act fast. Worth every paw-print.

    Understanding Cats Play Fighting vs Aggression

    - Quick lede two-sentence distinction, short checklist, and emergency DODO NOTs.jpg

    Play fighting feels gentle and mutual. You’ll see claws retracted (sheathed – tucked away), ears relaxed, no piloerection (raised fur), and soft nips that don’t break the skin. They take turns being the chaser or the one on top, and there’s lots of switching roles. Ever watch whiskers twitch as a toy mouse rolls? Play looks a bit like that, but with another cat.

    Aggression is sharper and one-sided. Claws come out (unsheathed – extended and ready to scratch), ears are flattened or pinned back, fur stands up (piloerection), and you’ll hear loud hissing or growling. Bites that break skin or cause yelping mean it’s gone past play, and repeated pinning or nonstop chasing is a red flag.

    Quick checklist of reliable markers to watch:

    • Sheathed claws, relaxed ears, soft vocalizing, turn-taking = play.
    • Unsheathed claws, pinned ears, raised fur (piloerection), loud hissing/growling = aggression.
    • Bites that break skin or cause yelping are beyond play – those are injurious bites.
    • Reciprocal chasing and role swaps suggest normal play; repeated pinning does not.

    Safety DO / DO NOT:

    • DO make a loud distraction out of sight – clap lids together or bang a pan to break their focus. It works more often than you’d think.
    • DO use a barrier or a blanket to gently guide one cat into a quiet room and dim the lights so things calm down.
    • DO NOT put your hands between fighting cats. You will get hurt.
    • DO NOT assume a scuffle will safely "work itself out" if it’s loud, bloody, or keeps happening.

    When to get help:
    If behavior changes suddenly, fights leave deep puncture wounds, or the cats keep fighting despite separation, call your vet right away and ask about a behaviorist. If in doubt, get professional help , it’s worth the peace of mind and the paws.

    Feline play body language: micro-signals, thresholds, examples, and the canonical comparison table

    Feline play body language for the full table).jpg

    Tiny moves tell the story – watch patterns, not single frames. Spend 30 to 60 seconds watching an interaction to see if the same signals repeat. One flick or one hiss isn’t the whole picture. If you see a loop like "bat, chase, swap" happen three times in a row, that’s a repeating play loop you can trust.

    Can’t tell by eye? Record it. Capture 30 to 60 seconds of video with audio, hold the phone horizontally, and note what happened right before play started (toy toss, doorbell, treat). Example clip: Record 45 seconds – "toy thrown, Cat A stalks, Cat B chases, soft chittering" – that short clip tells a pro more than a long description.

    Kittens and adults read the rules differently. Kittens (roughest around 8 to 10 weeks) swap roles fast and tolerate harder mouthing. Adults switch roles less and may escalate sooner when space or resources are tight. Example: Kitten Luna, 9 weeks, switches roles every 6 to 10 seconds; Buddy, 3 years, stops after one long pin. Ever watch a kitten pounce and then immediately offer its belly? Cute chaos.

    If signals escalate, act fast and keep it simple. Pause play. Separate calmly. Give them a low-light, quiet break, then reintroduce with a wand toy or extra distance. Short cue: "Pause, separate, wait 5 minutes, try a wand toy."

    Feature Play (what to expect) Aggression (what to expect)
    Tail movements Short, rhythmic flicks or loose sways during back-and-forth play Rapid thrashing, lashing, or a puffed tail showing high arousal
    Whisker position (vibrissae) Forward when focused and stalking; relaxed after a role switch Pushed forward with a hard stare, or pulled back when the cat is scared
    Role reciprocity / turn-taking thresholds Frequent swaps – roughly every 5 to 15 seconds; mutual breaks expected One-sided pinning repeated (more than 3 times) or constant pursuit

    Quick action – interrupt now if any of these happen:

    • Skin-breaking bites, loud yelps, or visible blood – stop and separate immediately.
    • One cat pins another more than three times in a row or never gives turns – pause play.
    • Tail thrashing with growls or fur standing up along the spine (piloerection) – separate and calm the area.
    • Continuous chasing with no escape route for the pursued cat – create space and training redirect.

    For full marker definitions (claws sheathed/unsheathed, pinned ears, piloerection (fur standing up), biting that breaks skin, normal turn-taking), see the Understanding Cats Play Fighting vs Aggression section. If wounds happen or behavior keeps escalating, record the footage and consult your vet or a behavior specialist for help. Worth every paw-print.

    Context, age, and causes: when play among kittens or adults becomes aggression

    - Feline play body language micro-signals, thresholds, examples, and the canonical comparison table.jpg

    Kittens have a short, important social window, about 2 to 9 weeks, when meeting littermates and other cats teaches them how to bite gently and take turns. Play usually peaks around 8 to 10 weeks, with quick role switches and rougher mouthing that’s still normal, think of tiny teeth and tumbling that look fierce but aren’t meant to hurt. Kittens that miss those lessons, like hand-raised ones (raised by people without littermates), often struggle later and may bite harder or have trouble sharing playtime as adults. Ever watched a kitten pounce and then suddenly go too far? That’s often the missing practice talking.

    Adult cats follow different rules. Resource competition, like one food bowl, one litter box, or one sunny perch, raises tension fast; shared resources make a cat feel cornered. Hormones matter too, intact males (not neutered) can be more driven to fight, and neutering before one year often helps reduce that risk. Other common triggers are redirected aggression (a cat sees something outside, gets wound up, then lashes out at a housemate), pain-driven aggression (a sore hip or tooth makes a cat snap), and status or territory disputes (who gets top shelf, who guards the window). Genetics and ongoing household stress, loud noises, unpredictable routines, also push cats from playful wrestling toward real fights.

    Quick context check , a three-step mini-protocol to figure out whether a scuffle is medical, environmental, or social:

    1. Rule out medical causes. Look for limping, sudden changes in appetite or grooming, or any recent vet issues; if in doubt, a vet visit can spot pain or illness that makes a kitty short-tempered.
    2. Check resource distribution. Aim for one litter box per cat plus one, plus several feeding stations and perches so nobody feels trapped or forced to share.
    3. Review recent changes. New pets, guests, remodeling, or sudden noisy street activity can trigger redirected aggression or stress, think of everyday disruptions that might have set them off.

    (For core behavioral markers see the canonical comparison table in ‘Feline play body language.’)

    Emergency & Follow-up: combined immediate protocol, wound care, and when to call a vet or behaviorist

    - Context, age, and causes when play among kittens or adults becomes aggression (see micro-signals table).jpg

    If cats start fighting, don’t stick your bare hands or arms between them. Ever. You will get hurt. Picture fur flying and a terrified yowl, your instinct might be to grab, but don’t. Instead, use low-risk moves that break their focus and get them apart without you becoming a bandage.

    Quick, low-risk interrupts

    • Make a loud noise out of sight: clap pot lids, bang a pan lid, or shake coins in a closed jar to surprise them and break eye contact.
    • Toss a big, soft object near (not at) the cats , a blanket or pillow works , so they look at the thing instead of each other.
    • Hold up a blanket, towel, or piece of cardboard as a visual barrier to guide one cat away calmly. Think of it like a temporary wall.
    • After they separate, scoop a cat up wrapped in a towel (towel as shield) and move it to a quiet room with food, water, a litter box, and a hiding spot; close the door and dim the lights to lower arousal.
    • Short rough play pause? Wait about 5 minutes before checking on them. After a serious scuffle, give them 10 to 20 minutes alone before trying any reintroduction steps.

    Immediate actions (short checklist)

    1. Don’t put bare hands between cats.
    2. Create an out-of-sight loud distraction , lids, a shaken coin jar, anything noisy.
    3. Toss a large soft item near, not at, the cats (blanket, pillow).
    4. Use a barrier (blanket, cardboard, towel) to block view and steer one cat away calmly.
    5. Wrap and scoop a separated cat with a towel as a shield; move it to a quiet room with food, water, litter, and a hiding box; close door and dim lights.
    6. Wait ~5 minutes for brief play bursts; wait 10–20 minutes after a real fight.

    Wound care and when to call a vet
    Cat bites are risky. A bite often makes a deep puncture (a narrow hole that can trap bacteria), so even if it looks small, it can hide infection. Superficial scratches can be cleaned at home with soap and water, but puncture wounds need a vet check.

    • Deep punctures or wounds that gape (open widely) require immediate veterinary care and often antibiotics (drugs that fight bacterial infection).
    • Watch both cats for swelling, warmth, redness, limping, fever, or loss of appetite , those can mean infection or hidden injury.
    • Humans who get bitten by a cat should see a doctor and check their tetanus status.
    • Keep dated photos and simple notes about wounds and treatments; short video clips of the incident are very helpful for vets and behaviorists.
    • If you’re unsure, err on the side of care. It’s nicer to get checked and feel relieved than to worry.

    When to call for help , medical and behavioral
    Call your vet right away if you see any deep puncture bite, heavy bleeding, a wound that opens, or signs of infection. Also call if fighting keeps happening, if a previously calm cat becomes suddenly aggressive, or if a cat is limping or clearly in pain. Get a medical exam first to treat wounds and rule out illness or pain. After medical issues are addressed, consult a behaviorist if the fights continue; bring short video clips and photos of incidents to help them understand what’s happening.

    Concise medical checklist (for follow-up)

    • Cat bites are often deep and infection-prone; punctures need vet assessment.
    • Gaping wounds or heavy bleeding = immediate vet visit.
    • Antibiotics may be prescribed for deep bites or infected wounds.
    • Humans with cat bites should get medical attention and a tetanus check.
    • Monitor both cats for fever, swelling, heat, limping, or appetite loss.
    • Keep dated photos, short notes, and videos of incidents for vets and behaviorists.

    See the "Feline play body language" canonical table for diagnostic markers used during follow-up assessments.

    Understanding Cats Play Fighting vs Aggression

    - Emergency  Follow-up combined immediate protocol, wound care, and when to call a vet or behaviorist (merged cluster).jpg

    Give every cat a way out so nobody feels cornered. Put litter boxes in separate rooms (one per cat plus one extra) and spread feeding spots, water bowls, and beds around the house so shy kitties can slip away. Add vertical territory (cat trees, window perches, wall shelves) so they can sit up high and watch without bumping into roommates.

    Use toys that steer energy away from real fights. Try wand or fishing-pole toys (a human-led teaser, like a fishing rod for cats) for supervised chases, toss ping-pong balls for quick redirection, and leave puzzle feeders (food-dispensing toys) when you’re out so mealtime becomes brain work. Schedule short, focused play sessions two or three times a day, 10 to 15 minutes each, to burn off twitchy energy and get that satisfying pounce practice.

    Make solo play safe and fun. Provide boxes and tunnels with multiple exits so a cat never feels trapped, and pick heavier balls that roll in odd ways to keep play interesting. Pheromone diffusers (a device that releases a calming cat scent) can lower background tension, and spaying or neutering (surgical sterilization) often helps reduce fighting drives.

    Small, practical swaps give big results. Think measurable changes, not vague fixes, more boxes, more perches, staggered meal times, and record short video clips to track behavior over weeks. Use the canonical comparison table in ‘Feline play body language’ when you’re checking whether interactions are play or something more serious. Ever watched your kitty chase shadows and then suddenly remember it’s dinner time? Yep, those little cues matter.

    Worth every paw-print.

    Numbered priority changes to implement:

    1. Add one litter box per cat plus one extra, spread through the home (easy escape routes).
    2. Create at least three vertical spots (trees, shelves, window perches).
    3. Place two or more feeding stations in different rooms to reduce face-offs.
    4. Schedule 2 to 3 interactive play sessions of 10 to 15 minutes daily to burn energy.
    5. Add puzzle feeders (food-dispensing toys) for meal-time enrichment and slow eating.
    6. Set up boxes and tunnels with multiple exits for safe solo play.
    7. Use a pheromone diffuser (calming scent device) and complete spay/neuter (surgical sterilization) if not already done.

    Understanding Cats Play Fighting vs Aggression

    - Prevention and household management to reduce play escalation and aggression (reference micro-signals table).jpg

    Play fighting usually looks rough but isn’t the same as real aggression. Your cat’s whiskers might twitch, paws bat at the air, and you’ll hear soft chuffs or little growls , that’s play. But when bites are hard, tails puff up, or one cat freezes and hides, it’s time to step in. We’re teaching softer mouths, not punishing natural play.

    A simple, gentle plan works best. Try clicker/treat pairing (a clicker is a small handheld tool that makes a short click) to mark calm choices: click when a cat mouths softly, then give a tiny treat so they learn calm equals rewards. If a nip gets too hard, stop play right away and offer a toy instead , redirect the bite to something okay to chew. Never hit or shake a cat after a scuffle; that just makes things scary and can make biting worse.

    Reintroductions should move slowly. Start with scent swapping: rub a cloth on one cat, then let the other sniff it so they get used to each other’s smell. Then try short, supervised visual sessions behind a baby gate or glass door so they can see each other without full contact. Gradually increase supervised time and shared activities over weeks or months , patience really helps. Reward calm moments with quiet praise or a tiny treat so the calm choice gets repeated.

    Keep sessions short and predictable so cats don’t get overstimulated. Ten minutes of focused play is better than an hour of chaos. Scheduled interactive play before free time helps burn energy so kitties are less likely to turn rough during play. For busy days, toss a safe ball or use a wand toy (think fishing rod for cats) before you head out , that’s ten minutes of peaceful downtime.

    Practical steps that actually work:

    • Clicker/treat pairing to mark calm choices (short, frequent sessions).
    • Immediate redirection: swap your hand for a wand toy when a nip happens , it teaches what’s okay to bite.
    • Teach a timeout: stop play and remove attention for 20 to 60 seconds after hard bites (a clear, calm break so they learn cause and effect).
    • Scheduled interactive play for 10 to 15 minutes to burn excess energy before free play.
    • Scent swapping and supervised visual contact before full meetings.
    • Reward calm interactions with treats or a quiet petting session; avoid punishment.

    Watch for progress and keep a simple log. A few short video clips and a note of dates/behaviors help you spot trends , you’ll usually see measurable change over weeks to months. If you’re unsure about scary signs, see Emergency & Follow-up for red flags and check the canonical comparison table in “Feline play body language” for diagnostic markers.

    Worth every paw-print. Keep it calm, keep it kind, and you’ll help your cats play nice , or at least be politely rough.

    Troubleshooting common scenarios: actions per scenario (scenario-driven only; reference prior sections)

    - Training and behavior modification to teach bite inhibition and reduce rough play (reference micro-signals table).jpg

    Quick, action-focused tips for six real-world cat clashes. Find the row that fits your household, do the Immediate action, then follow the short-term steps. Check Emergency & Follow-up for safety protocol and the 'Feline play body language' canonical table for diagnostic markers and micro-signals (tiny cues like ear flicks, tail twitches, or pupil changes). Ever watched your kitty’s whiskers go from calm to twitchy? That’s the sort of thing we want you to spot.

    Scenario Immediate action & next steps (references)
    Sibling kittens wrestling but still grooming each other Let them keep playing but watch closely for one-sided chasing or pinned behavior. Pause play if a kitten yelps. Short-term: add short, supervised wand sessions to burn extra energy and give the overwhelmed kitten separate nap spots. See Emergency & Follow-up for pause protocol and the ‘Feline play body language’ table for micro-signals (tiny body cues).
    New adult introduced with repeated one-sided chasing and growling Stop interactions and separate the cats into different rooms. Begin a slow reintroduction plan. Short-term: do scent swaps, have visual meetings behind a barrier, and run very short supervised encounters over days to weeks. Consult Emergency & Follow-up and the canonical table for signs of escalation.
    One cat repeatedly blocks another from food (resource guarding) Intervene right away by moving food bowls farther apart and adding another feeding station. Short-term: stagger mealtimes so the guarded cat can eat in peace, add high perches (vertical spaces help cats feel safe), and watch for territorial posturing. See prevention tips and the micro-signals table for status cues.
    Play escalates to skin-breaking bites or loud yelps Separate immediately using a loud out-of-sight distraction or a barrier; do not use your bare hands. Short-term: follow the wound-care steps in Emergency & Follow-up and get a vet check if there are punctures; bring video of the incident. Safety first. Really.
    One cat corners another with no escape route Interrupt safely and create exits – open a door, lift a box lid, or slide in a tall object to break sight lines. Give the chased cat a quiet room to recover. Short-term: add boxes and tunnels with multiple exits, spread out resources, and reduce choke points. Reference prevention strategies and the micro-signals table.
    Sudden aggression from a previously calm cat Separate the cats safely and book a vet visit to rule out pain or illness. Short-term: log changes in appetite, litter box use, and behavior; pause any reintroductions and consult a behaviorist if medical causes are cleared. Use the Emergency & Follow-up checklist and record clips for micro-signals review.

    Record short clips of incidents: 30 to 60 seconds with clear audio, hold the phone horizontally, note the trigger and exact timestamps, and zoom in on any wounds if it’s safe to do so. Bring or upload these clips to your vet or behaviorist appointments as outlined in Emergency & Follow-up, and use the 'Feline play body language' canonical table when you review signs. Little videos are worth a thousand meows.

    When to consult a veterinarian or certified behaviorist

    See Veterinary & Behaviorist resources below.

    If your cat is hissing, hiding, or suddenly fighting more than usual, it’s time to get help. Don’t wait until fur flies every day. A vet can rule out pain or illness, and a certified behaviorist can help change the way your cat acts (so you both sleep better).

    Practical referral details:

    • How to find a board-certified veterinary behaviorist: check your national veterinary specialty board (the official list of veterinary specialists in your country) or ask your regular vet for names. A board-certified veterinary behaviorist is a veterinarian with extra training and a specialty certificate in animal behavior (think of them as a behavior expert who’s also a vet).

    • What to bring to the first appointment:

      • Short video clips (30–60 seconds) that show the behavior from a couple of angles. Close-ups and the wider room view both help.
      • A simple timeline of incidents (dates and one-line notes).
      • Recent medical records and vaccination history.
      • A list of past interventions and any current medications.
      • Photos of wounds or of the room where fights happen.
      • Video caption example: "0:05: cat hisses; 0:12: chases sibling into kitchen." Little notes like that make things clear.
    • What to expect at the visit: first they’ll do a medical exam to check for pain or illness. Then you’ll get a behavior plan. Medication may be part of that plan – adjunctive medication (drugs used alongside behavior training to lower fear or aggression). Sometimes meds help your cat feel calm enough to learn new habits.

    • Timeline expectations: expect weeks to months for steady improvement. You might see small wins early, but full change usually takes time and consistency. Be patient. Your cat will thank you with slow blinks.

    • Telemedicine and phone options: many specialists offer remote consults or phone intakes if you can’t get in person. Telemedicine (video or phone visits) is common now. Ask if they’ll do follow-up video check-ins so you can show progress.

    Short timeline example – "Week 1: medical check and baseline video. Week 4: start behavior exercises and medication review."

    Prevention of infection and wound-care first aid

    This is a short, friendly wound-care reminder that puts medical and behavior tips in one place. For the full protocol, see the Emergency & Follow-up section , it has step-by-step first aid, infection risks, and human medical checks like tetanus (a bacterial infection causing muscle stiffness) and antibiotics.

    We removed duplicate "Understanding Cats Play Fighting vs Aggression" content – see the Feline play body language and When to call vet sections for behavior signs and when to escalate. That keeps this page focused on quick, practical care.

    Practical first-aid steps (do these right away):

    1. Stop bleeding by applying gentle pressure with a clean cloth or gauze. Hold for a few minutes until it slows.
    2. Rinse the wound under running water to flush out dirt and saliva. Punctures (deep skin breaks) need extra rinsing.
    3. Clean shallow scratches with mild soap and water, but don’t scrub deep wounds.
    4. Cover minor wounds with a clean bandage to keep them protected.
    5. Separate the biting cat from the other animal until both pets are checked by a vet or behaviorist.

    Keep dated photos, a short written note, and video of the incident for your vet or behaviorist. Example note: "2026-03-05 2:17 PM – backyard skirmish, puncture on left shoulder, bleeding stopped after 2 minutes, cat separated, photos taken." Those little records help your vet see what happened and make the right call.

    Follow local reporting rules if they apply, and check Emergency & Follow-up for the complete wound-care and follow-up checklist. Worth every paw-print.

    Appendix: video-capture best practices and what to show professionals

    - Prevention of infection and wound-care first aid (short cross-reference to Emergency  Follow-up).jpg

    Short checklist below. The full how-to steps moved into Feline play body language, Troubleshooting (recording paragraph), Emergency & Follow-up, and When to consult a veterinarian or certified behaviorist.

    Note: baseline solo clips and wound photos with a ruler or coin for scale were moved into the "What to bring to the first appointment" bullets in When to consult.

    • Record 30 to 60 seconds showing the whole event from start to finish, with audio (a little voice note saying what happened is fine). Example: "0:00-0:45: toy tossed, play escalates." Ever watched your cat go from chill to ninja in seconds? Catch that.

    • Start with a wide horizontal shot (landscape orientation so you see the whole room), then get a close-up (tight view of the cat or action). Also include a 20-30 second solo baseline for each cat – a quiet clip of them alone and calm. Example: "15s Luna alone, calm."

    • Photograph or film any wounds up close and place a ruler or coin next to them for scale (coin shows size clearly – like a quarter). Take a few angles and keep the images sharp.

    • Note exact timestamps and the trigger briefly in a text file or voice memo – for example, "0:05 – knock at door." That helps pros link the moment to the behavior.

    • Save copies and bring or upload the files to your vet or behaviorist appointment. USB, phone files, or secure uploads all work.

    Worth mentioning: even shaky phone footage helps. If you can, steady the phone for a moment or ask someone to film. It makes it easier to read body language, and honestly, your vet will thank you.

    Final Words

    Straight into action: this post gave a crisp two-sentence distinction between play and aggression, a quick checklist, and life-saving DO/DO NOTs for the moment things heat up.

    We then unpacked micro-signals (tiny body cues) with a canonical table, explained age and context, shared an immediate separation protocol and wound-care steps, offered prevention and training tips, and gave scenario-based troubleshooting plus video-capture guidance.

    Use these tools to spot signals faster, act calmly, and protect peace at home. This helps with understanding cats play fighting vs aggression. Happy, safer play ahead.

    FAQ

    Cat play vs. aggression — FAQs

    How can I tell if my cats are play fighting or being aggressive?

    Watch claws, ears, fur, vocal tone, bite force, and role‑taking. Play usually shows sheathed claws, neutral ears, no piloerection (hair standing up), and light bites.

    Is my cat playing or being aggressive with me?

    Look at bite pressure, claws, and vocal cues. Play has sheathed claws, soft nibbles, and quick role switches; aggression has unsheathed claws, hard bites, hissing, or pinned ears.

    Do cats like play fighting with humans and when is it too rough?

    Cats often enjoy play fighting with humans but prefer toys instead of hands. It’s too rough when claws or teeth break skin, the cat freezes or bites repeatedly, or play becomes one-sided.

    What does a wagging tail mean during cat play or fights?

    A wagging tail can mean different things: short, rhythmic flicks or gentle thumps often signal play or focus; rapid flagging, bristling, or hard thrashing signals agitation, fear, or aggression.

    What’s the difference between play biting and aggressive biting?

    The difference is bite intensity and outcome. Play biting is soft and rarely breaks skin, with role swaps; aggressive biting breaks skin, can cause deep punctures (high infection risk), and is usually one-sided.

    Why do cats play fight with each other, and when should I worry?

    Cats play fight to practice hunting and social skills, especially kittens. Worry when interactions are one-sided, repeatedly injure a cat, or cause hiding, blood, or persistent fear.

    What is the 3-3-3 rule of cats?

    The 3-3-3 rule describes three days of hiding, three weeks of cautious sniffing and swapping scents, and three months for most cats to feel fully settled in a new home.

    What are red-flag behaviors that mean I should get professional help?

    Red-flag behaviors include sudden aggression in a previously calm cat, deep puncture wounds or continuous fighting, repeated blocking of resources, and limping or clear signs of pain—contact a vet or behaviorist.

  • Indoor Cat Grooming Tips: Brushing, Nails, Baths

    Indoor Cat Grooming Tips: Brushing, Nails, Baths

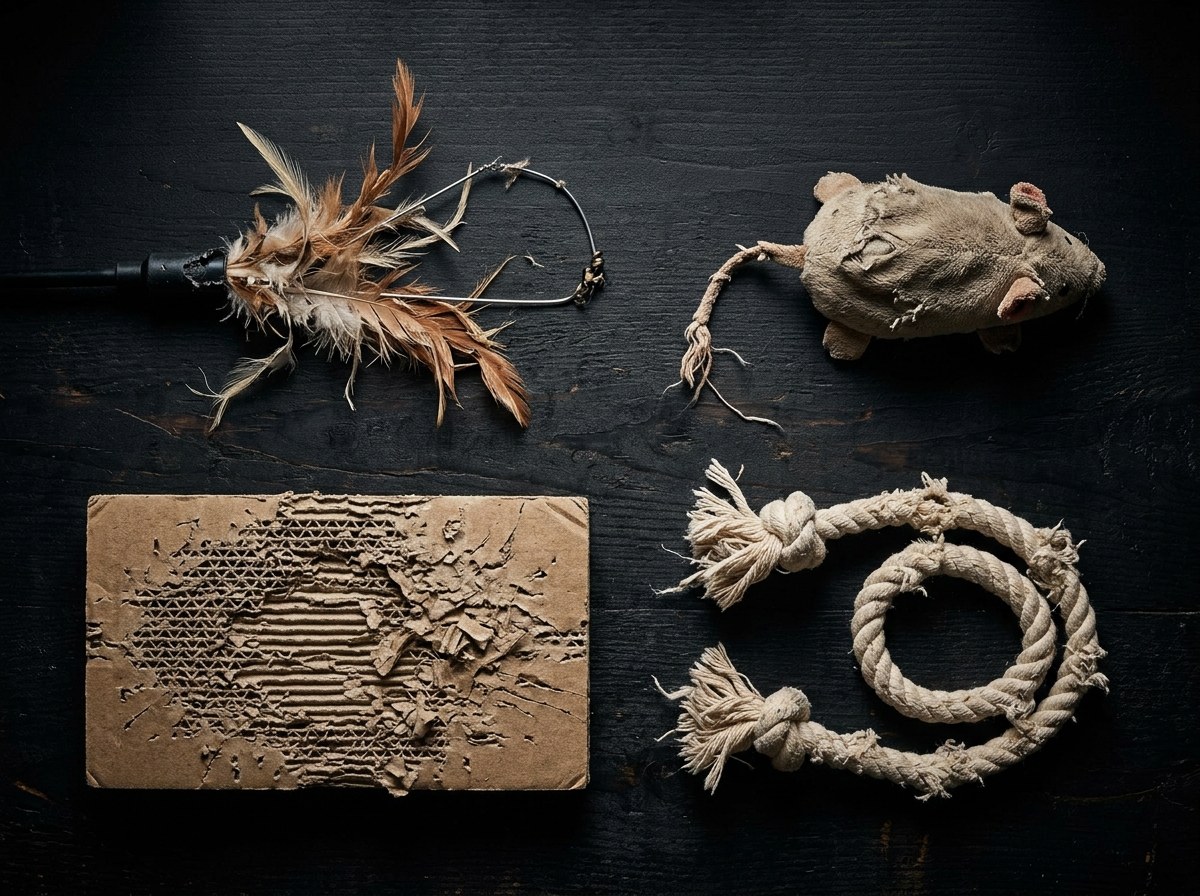
    Think indoor cats don’t need grooming? Think again. Mats, hairballs (small balls of swallowed fur), and overgrown nails can make indoor life itchy, painful, or just plain annoying for your cat. It’s not fancy, just regular care keeps them comfy. Check out our guide on Unbreakable Cat Toys.

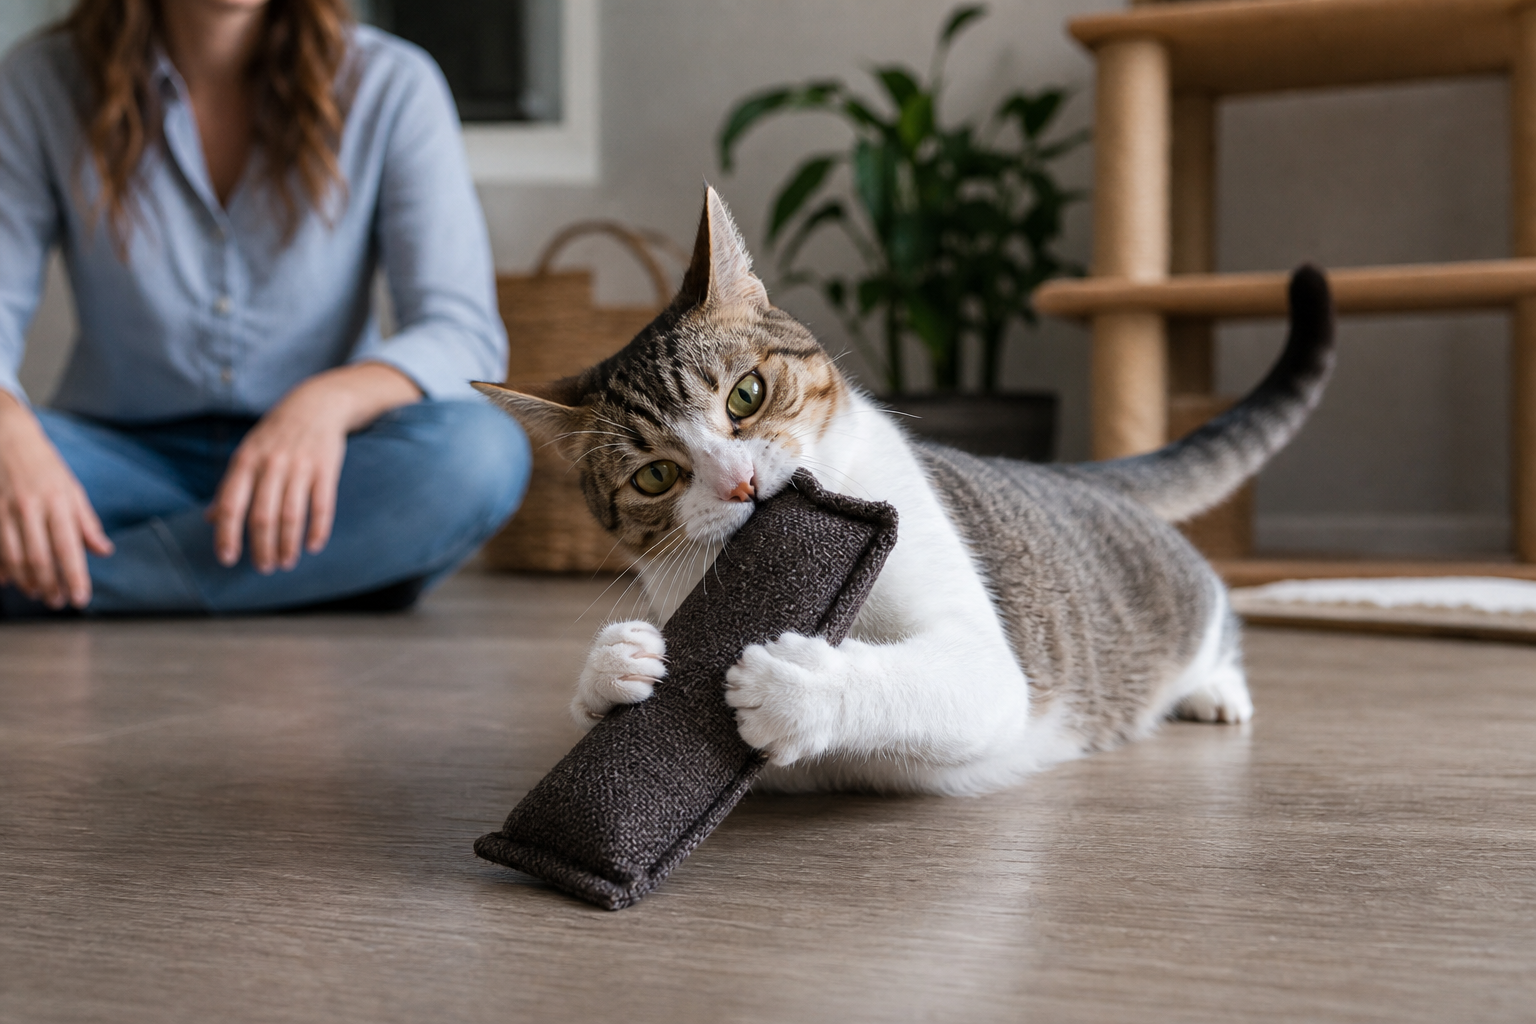
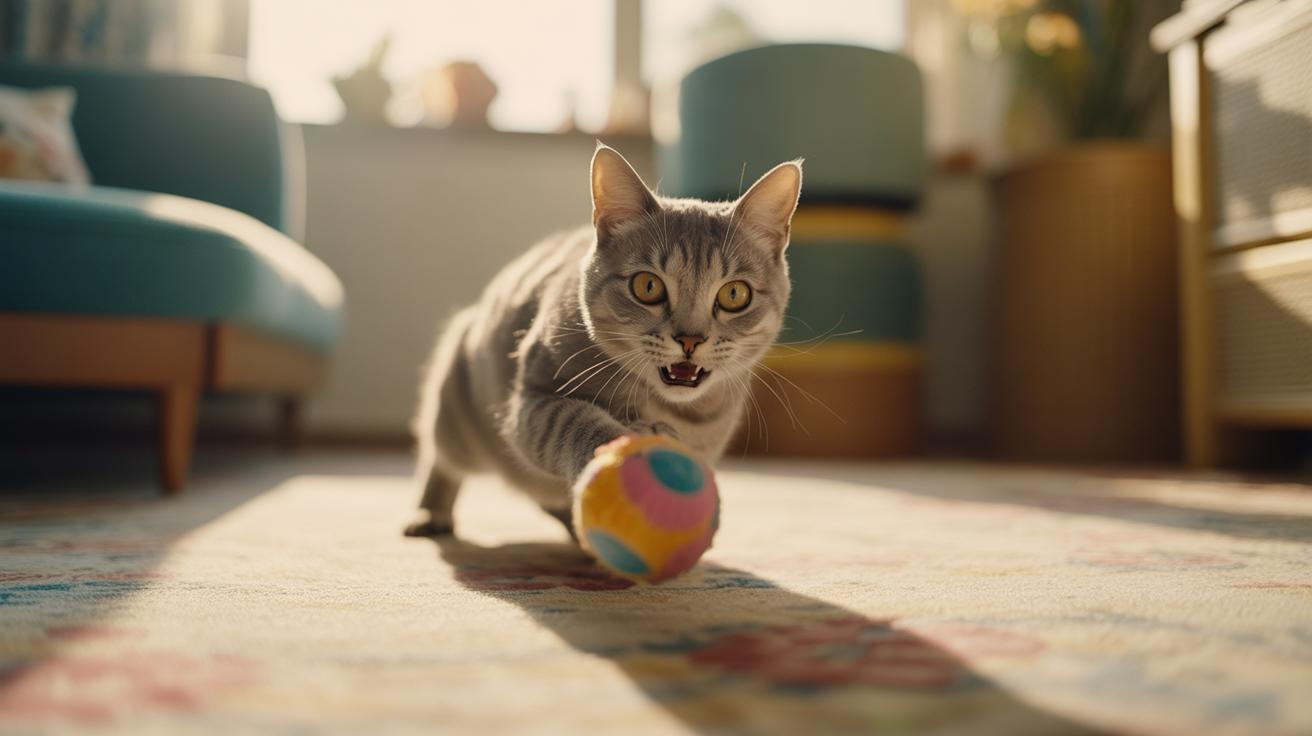
    Short, steady sessions win. Five to ten minutes a few times a week keeps fur tidy and trust strong. Your cat’s whiskers might twitch as the brush slides by. Ever watched your kitty chase a sunbeam? That calm focus makes grooming easier.

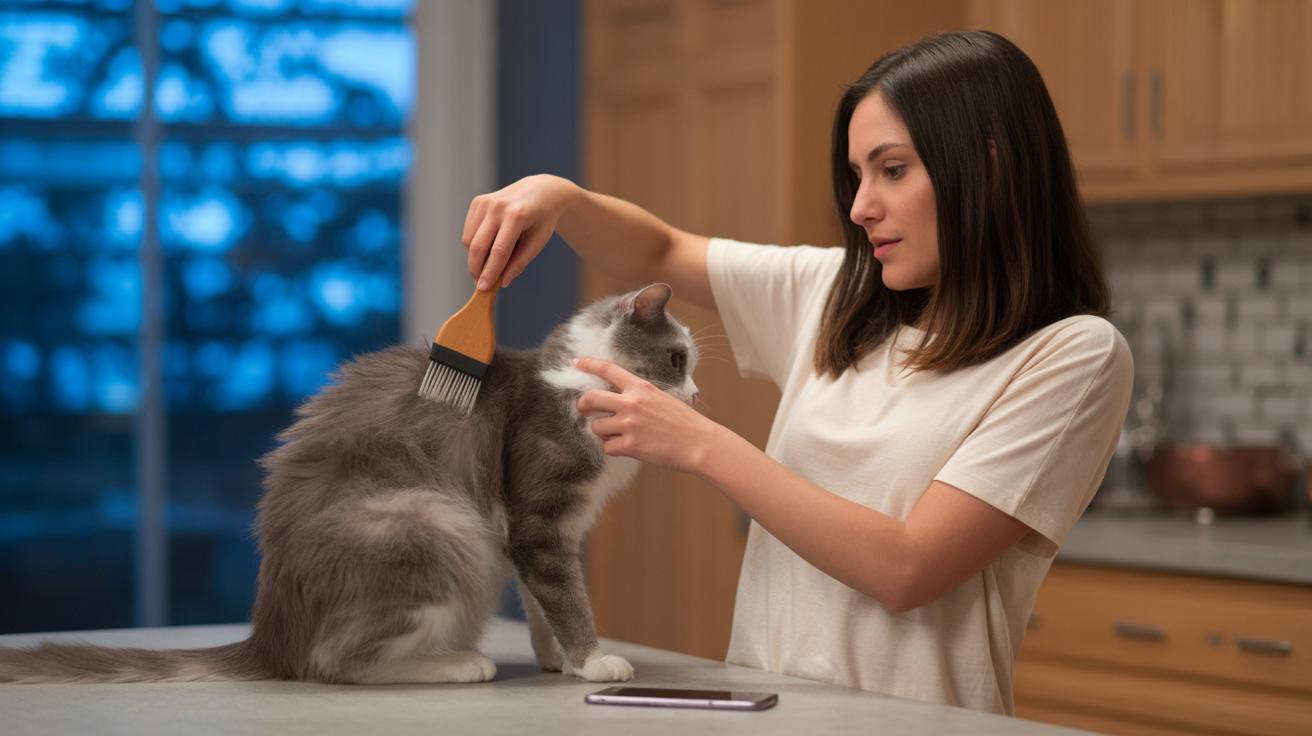
    These tips cover brushing (removing loose fur), safe nail trims (cutting just the sharp tip of the nail), quick baths (a short spot-clean wash), and dematting (removing tight mats of fur). I’ll keep the steps simple so you can fit them into even the busiest day.

    Brushing: Use gentle, slow strokes. Start with the easy spots, praise and give a treat, then work toward the belly if they like it. Short sessions beat long struggles.

    Nail trims: Only clip the clear tip, avoid the pink quick. If your cat freezes, stop and try again later. Finger-time with a soft scratch after can help them relax.

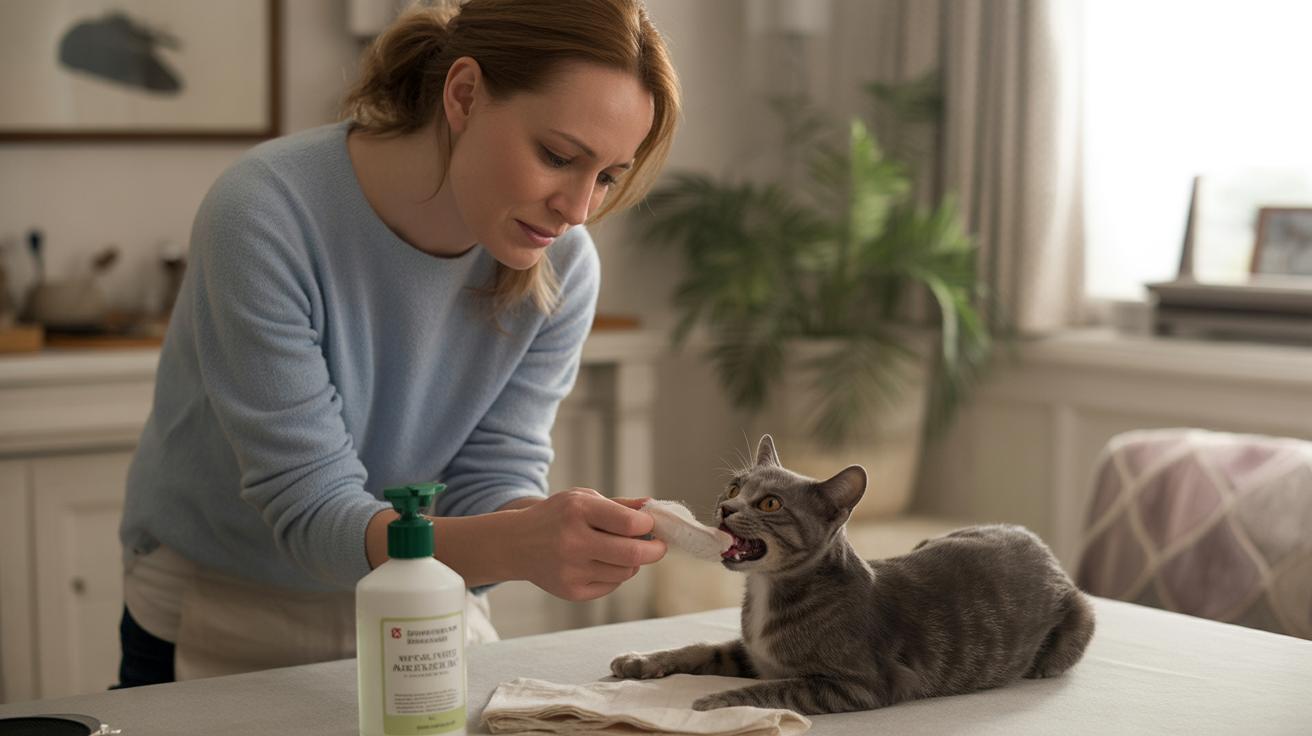
    Quick baths: Warm water, a small amount of cat shampoo, and calm praise. Think spot-cleaning more than spa day. Towel dry and warm them up quick.

    Dematting: For small tangles, tease them apart with your fingers or a dematting comb (a tool with wide teeth). For tight mats, use a mat splitter or see a pro, don’t tug hard, you can hurt the skin. Oops, make that: if it’s stubborn, get help.

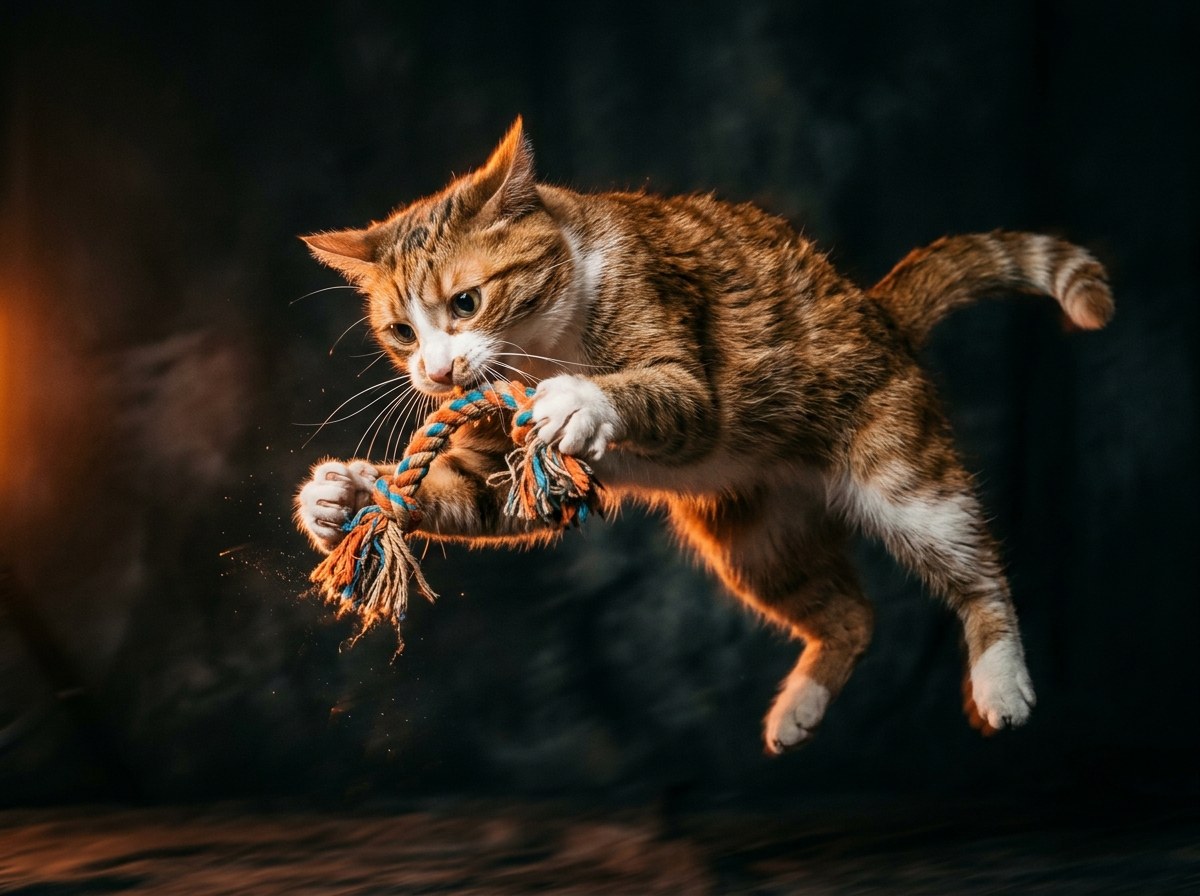
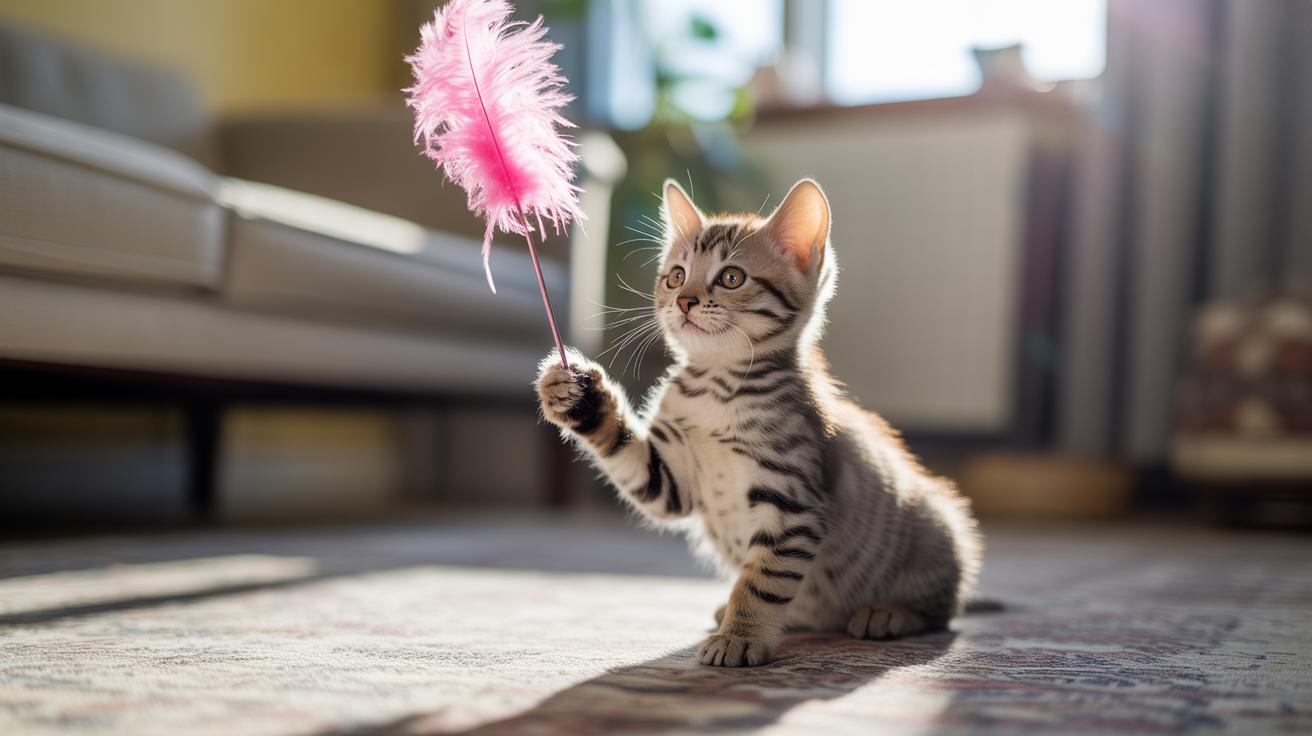
    I once watched Luna leap six feet for a feather toy and land like a tiny acrobat. That happy pounce makes the extra minutes totally worth it.

    Worth every paw-print.

    Quick-start grooming routine for indoor cats

    - Quick-start grooming routine for indoor cats.jpg

    Short sessions win. Aim for 5 to 10 minutes per grooming stint and follow the checklist below. For technique and tools, see Brushing, Bathing, Nails, Dematting, and Shedding sections below. Dematting means removing tight mats of fur that can tug at the skin.

    • Brushing: 5 to 10 minutes, 3 to 4 times per week (daily if heavy shedding) (see Brushing section)
    • Ear check: once a week (see Bathing section)
    • Nails: trim every 2 to 3 weeks (see Nails section)
    • Spot baths / waterless wipes: as needed (see Bathing section)
    • Quick dental wipe or check: once a week
    • Watch for urgent red flags: infected or foul-smelling mats; sudden large patches of hair loss or new lumps; extreme panic or aggression that prevents safe handling

    Keep an eye on how your cat reacts. If your cat freezes or panics, pause and try a calmer approach. You can split the routine into two short sessions if needed. Short, steady handling builds trust.

    Quick grooming order (easy to remember)

    1. Brush the coat briefly
    2. Do a quick ear check
    3. Wipe eyes and face
    4. Check nails and trim if needed
    5. Inspect paw pads
    6. Do a quick dental wipe or apply gel
    7. Spot-clean dirty areas with a wipe
    8. Finish with a small reward

    End on something nice. Give a small treat or 10 to 30 seconds of gentle petting to make the session feel positive. Keep your voice calm and soothing. If your cat tires, stop and try again later. Stick with the routine and it becomes second nature.

    Tips and red flags

    • Use gentle strokes. Think slow, reassuring petting more than a scrubbing session.
    • If you smell a strong, bad odor from mats or see redness, that could mean infection. Get help from your vet.
    • Sudden big patches of hair loss or a new lump need a vet check. Really.
    • If your cat becomes aggressive or very distressed, back off and ask a pro for help.
    Coat Type Basic Frequency Quick Note
    Shorthair 2 to 3 times per week rubber glove (textured grooming glove)
    Longhair daily or every other day de-tangle (brush to loosen knots)
    Double coat / heavy shedder daily during seasonal shed undercoat rake (comb that pulls out loose underfur)
    Kittens / Seniors short daily handling, 5 to 10 minutes adapt for mobility and comfort

    Brushing techniques and tool selection for indoor cat grooming

    - Brushing techniques and tool selection for indoor cat grooming.jpg

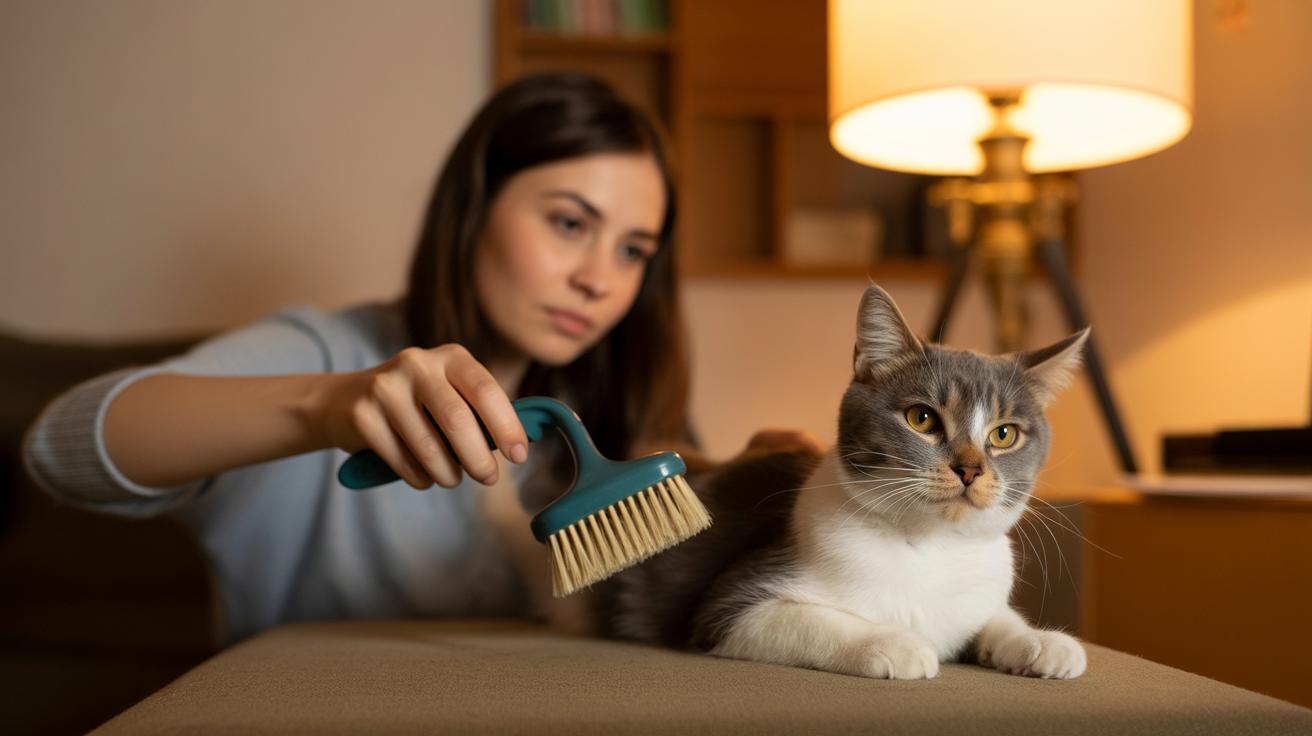
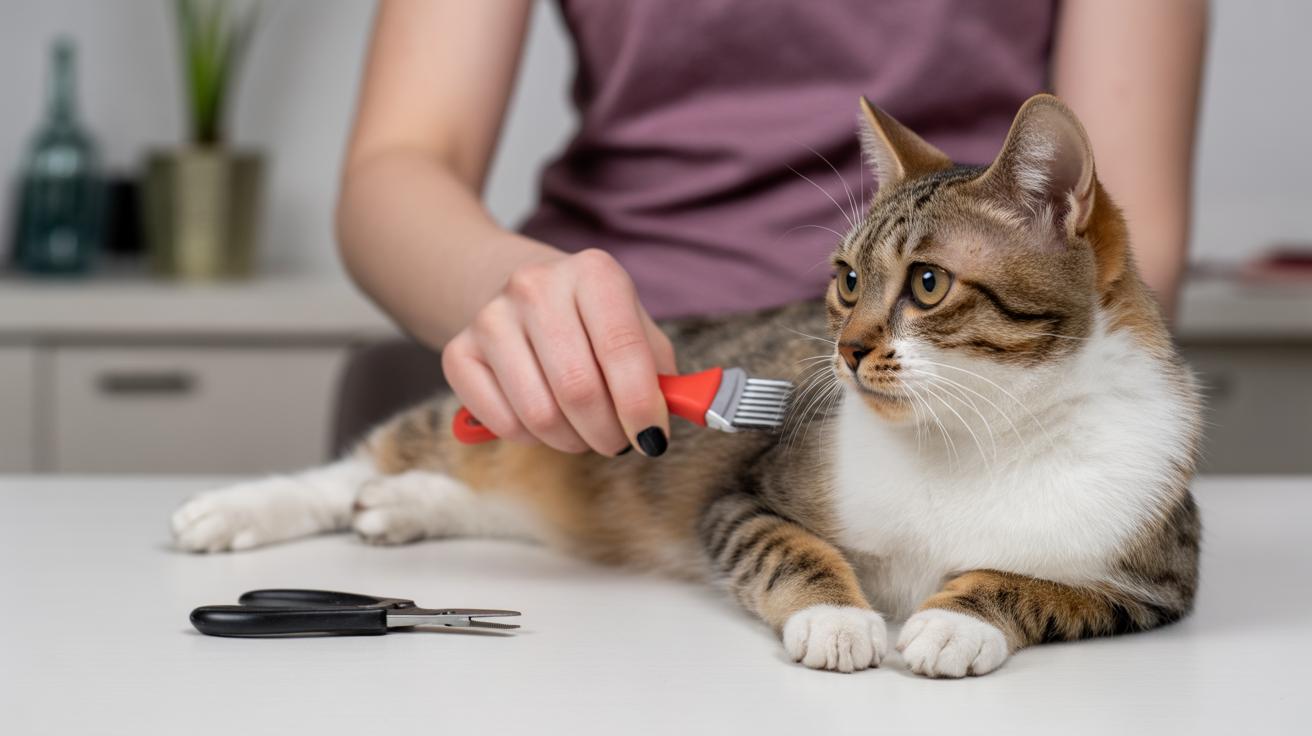
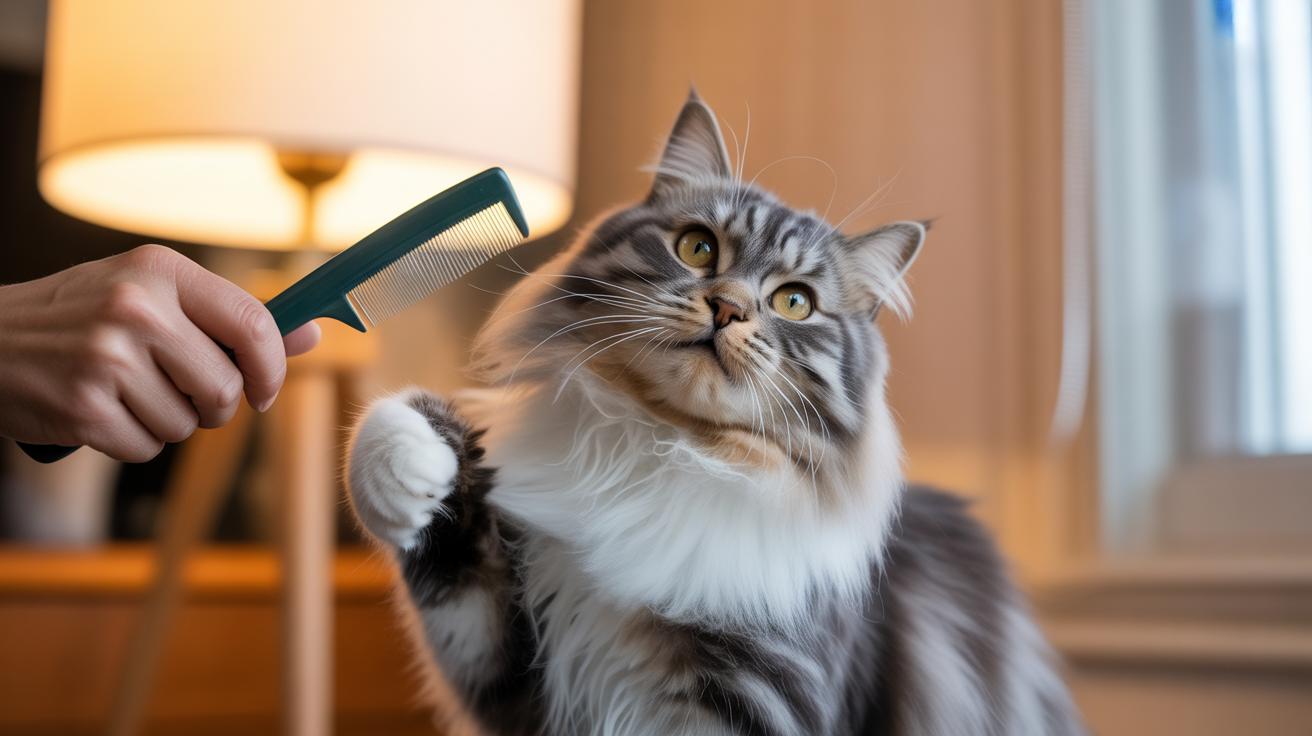
    Brushing is more than a quick tidy. It spreads your cat’s natural skin oils (the slick, protective layer their skin makes), lifts loose hair and flakes, and helps stop skin from getting irritated. Your cat’s whiskers will twitch as the brush glides , that little rhythm can be oddly soothing for both of you. Ever watched your kitty chase a rolling ball right after a good brush? Cute.

    Pick tools by fur type and temperament. Here’s a simple guide to what each tool is, who it’s best for, and what it does.

    Tool Best for What it does
    Slicker brush (fine, bent wire bristles on a flat pad) Medium and long coats Teases out surface tangles and loose hair
    Undercoat rake (comb with wide, deep teeth) Dense double coats Pulls loose inner fur and reduces undercoat bulk
    De-shedding tool (tool that removes loose undercoat hair) Heavy shedders Efficiently removes thick undercoat hair
    Rubber curry / grooming glove (rubber pad with soft nubs) Shorthaired or sensitive cats Lifts loose hair while massaging the skin
    Metal fine-tooth comb (thin metal teeth) All coats Finds tiny mats and checks for debris
    Soft bristle brush (gentle bristles) Kittens and shy cats Smooths and comforts without tugging
    Pin brush (long pins) Long, silky coats Finishes and smooths after detangling
    Dematting comb (wide-tooth) Stubborn tangles Work small sections carefully to break up mats

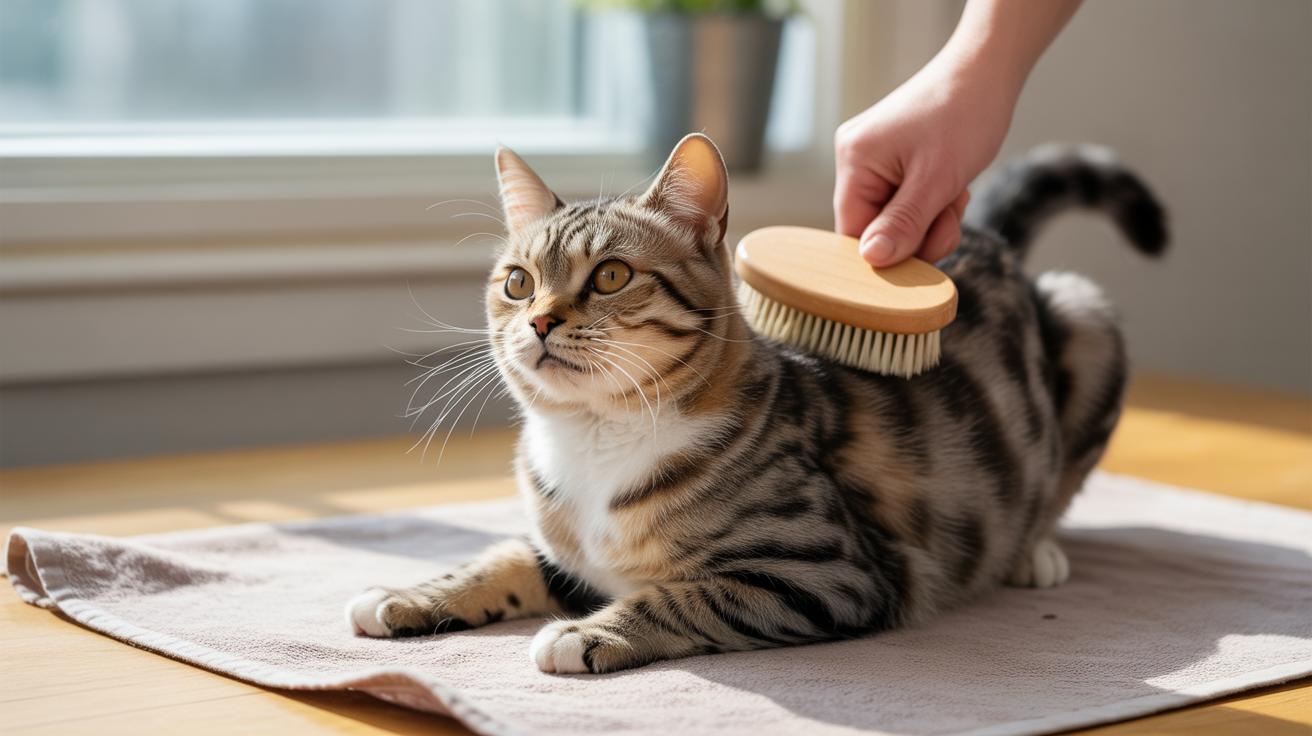
    How often you brush depends on coat type. Shorthaired cats: 2 to 3 times a week. Longhaired cats: daily or every other day. Heavy shedders: daily during spring and summer because they’re shedding extra. For busy days, toss an unbreakable ball before you leave , that’s ten minutes of play and less loose hair later.

    Technique matters. Use slow, gentle strokes in the direction the fur grows. It feels better for them. If you hit a tangle, hold the skin taut under the knot so you’re not pulling on skin, and work from the outer edges toward the base. If a mat’s too tight, don’t yank, try a dematting comb or ask your groomer or vet for help. I once watched Luna leap six feet for a feather toy right after I smoothed a stubborn knot, worth the patience.

    Tool care is simple and important. Pull loose fur from brushes after each use. Wash bristle heads weekly with mild soap and water, then sanitize monthly and let everything air-dry fully. Clean tools last so you don’t rub old oils back onto fresh fur. Little effort, big difference.

    Worth every paw-print.

    Reducing shedding and preventing hairballs with an indoor cat grooming schedule

    - Reducing shedding and preventing hairballs with an indoor cat grooming schedule.jpg

    Many indoor cats bulk-shed in spring and summer when they lose thicker undercoats. Some breeds, though, shed steadily all year. That loose fur ends up in their mouths while they groom, which raises the chance of hairballs.

    Increase brushing during peak-shed to catch loose hair before it’s swallowed. Short daily passes for longhair cats work wonders. Give extra attention to double coats (two-layer coats with a fluffy underfur and a coarser topcoat) so you pull out the loose underfur before your cat swallows it.

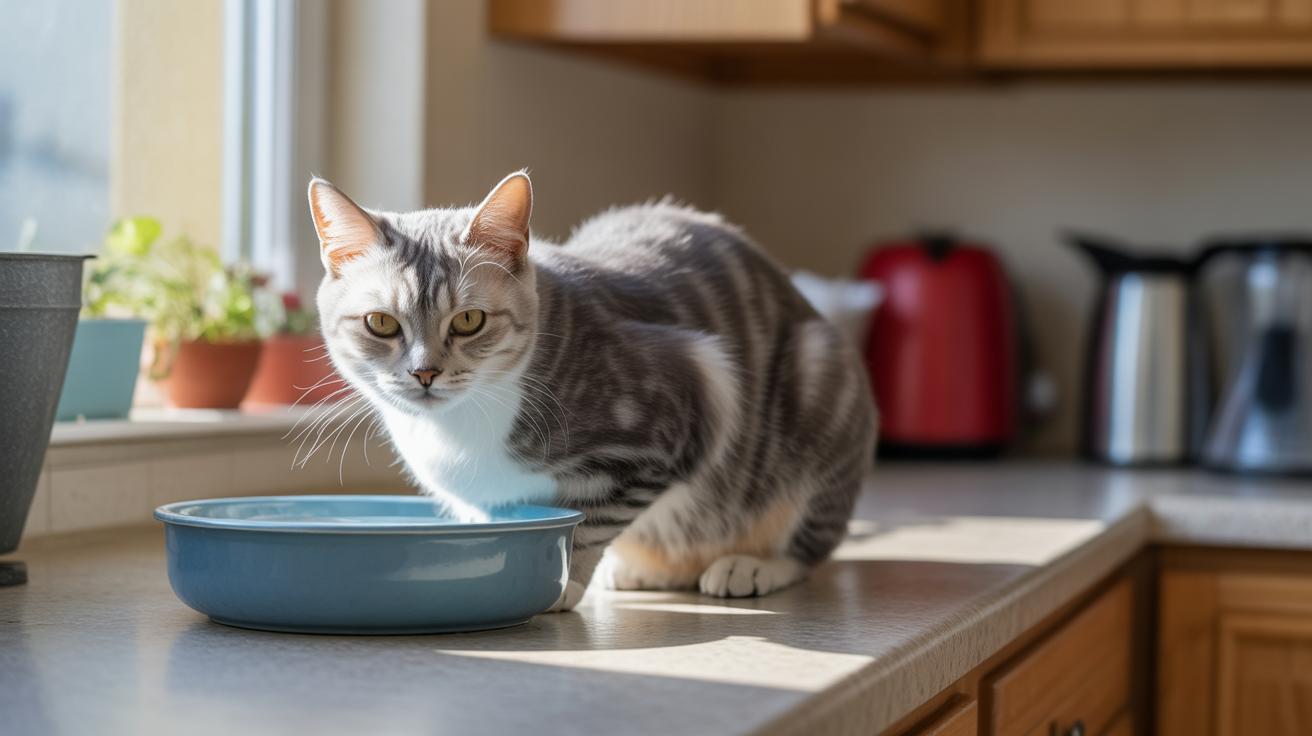
    Food matters, too. High-quality protein and balanced fats help skin and fur stay healthy. Omega-3 and omega-6 fatty acids (essential fats that support skin and coat) often add shine and can cut down on excess shedding.

    Between baths, use waterless shampoos (no-rinse foams or sprays) and moisturizing wipes (oatmeal, aloe, or chamomile blends) to lift dander and loose surface fur. They keep the coat fresher and reduce allergens, and your couch thanks you.

    Task Frequency Purpose
    Daily brushing (longhair / seasonal) Daily Remove loose hair and prevent mats (tangled clumps of fur)
    Weekly full brush + ear, eye, nail spot check Weekly General coat care and quick health check
    Biweekly nail trim Every 2 weeks Prevent overgrowth and snagging
    Monthly tool cleaning + deeper dematting check Monthly Hygiene and early mat removal

    Talk with your veterinarian before starting supplements so they can check for parasites, allergies, or thyroid problems that cause extra shedding. Keep a de-shedding tool (a comb designed to pull loose undercoat) handy during peak months and use waterless products for quick touch-ups between baths. Ever watched your kitty pounce on a rolling tuft of fur? Worth every paw-print.

    Bathing indoor cats safely: how often, waterless options, and step-by-step technique

    - Bathing indoor cats safely how often, waterless options, and step-by-step technique.jpg

    Most indoor cats only need baths rarely. Only bathe when they’re visibly dirty, have fleas, need a medicated bath (shampoo your vet prescribes), or your vet asks. A good rule of thumb is every few months, not every week, unless there’s a medical reason.

    If your cat hates water, try waterless options. Foaming waterless shampoos (no-rinse foam that lifts dirt) work great, and cleansing wipes with oatmeal, aloe, or chamomile (soothing plant extracts) are perfect for quick touch-ups. Think of it like dry shampoo for people , less stress, less drama, and still clean fur.

    Step-by-step Bathing Procedure

    1. Get everything ready first: warm, shallow water and a cat-safe shampoo (formulated for cats; never use dog or human shampoos). Put a towel down in the sink or tub for traction.
    2. Brush and trim loose tangles before you get wet. A gentle brush or a few careful snips around big knots makes the bath less pulling and much calmer.
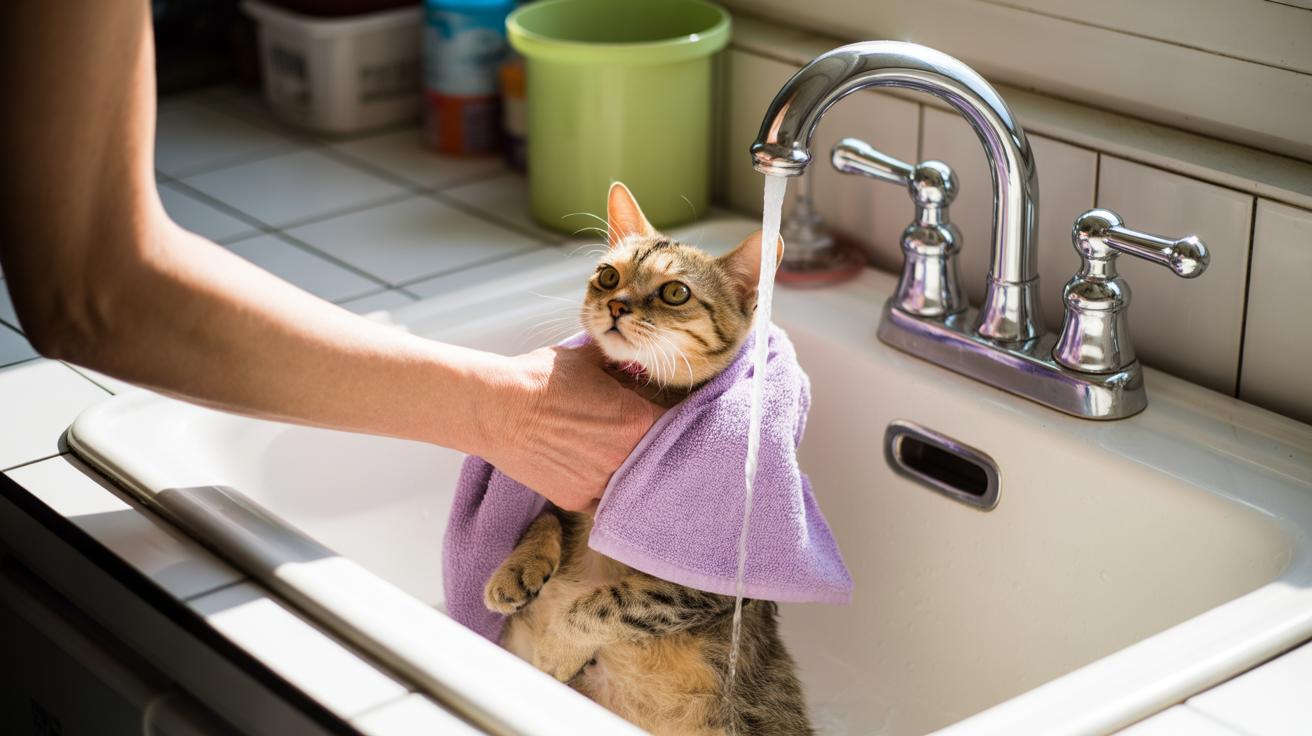
    3. Be slow and calm. Hold your cat’s body securely, talk softly, and wet only the dirty spots at first instead of dunking the whole kitty. Small steps win trust.
    4. Rinse thoroughly with warm water, keeping soap away from the eyes and inner ears. Use a cup or a gentle sprayer on low pressure so it feels more like a warm rain than a storm.
    5. Towel-dry by blotting, not rubbing; that stops matting and hurts less. If your cat tolerates it, use a low, cool pet dryer (a low-heat blow dryer for pets) on a low setting, keeping it moving and held at a distance so it feels like a warm breeze.
    6. End on a positive note , a tiny treat or 10–30 seconds of gentle petting right away. That helps your cat remember bath time as not-so-bad.

    For very nervous cats, try a towel wrap or swaddle: wrap them snugly like a burrito, leave the head free, and blot-dry through the fabric to lower stress. For chill cats, short dryer bursts work well. If your cat panics at any point, stop, breathe, and switch to waterless cleaning , there’s no shame in that, honestly.

    Nail trimming and paw care within indoor cat grooming tips

    - Nail trimming and paw care within indoor cat grooming tips.jpg

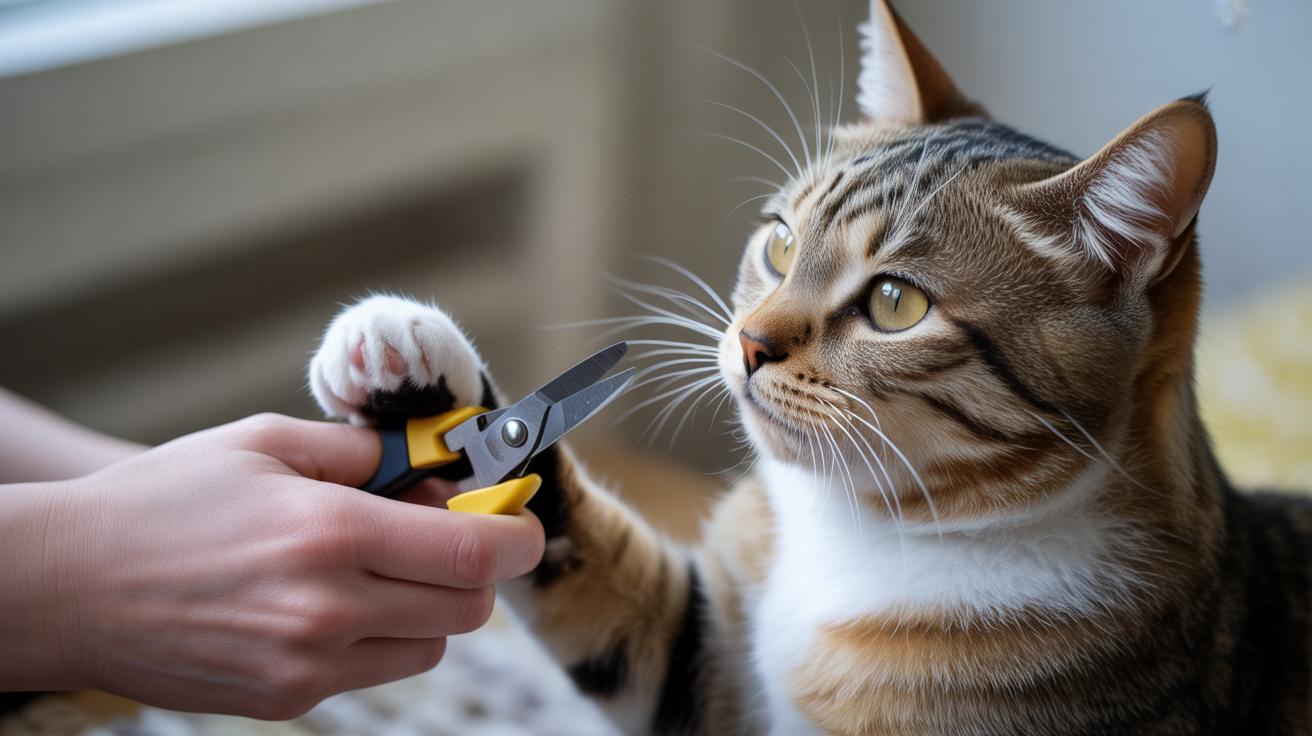
    Trim nails every 2 to 3 weeks, or whenever the tips feel sharp when you run a fingertip across them. The quick (the pink part where blood vessels live) is what you want to avoid in light-colored nails. With dark nails you can’t see the quick, so just shave off the very sharp tip and be extra cautious. Short, regular trims save your couch, your curtains, and your cat from snagged paws. Worth every paw-print.

    Pick a tool that fits your cat’s nails and your comfort level. Guillotine clippers (a small hole with a sliding blade that cuts like a tiny guillotine) work great for tiny nails. Scissor-style clippers (look and feel like mini scissors) handle thicker claws. Rotary grinders (a battery-powered file that sands nail edges) smooth out rough tips and are useful for anxious cats, but they make noise and vibrate, so take it slow and get your cat used to the sound first.

    Get your cat used to paw handling in short, friendly bursts. Hold a paw gently each day and drop a tiny treat when you let go. Mimic the clipper sound with a piece of dry spaghetti or run the grinder near them for a few seconds, then reward calm behavior. Keep sessions under a few minutes. If your cat tenses up, stop and try again later, no pressure, just positive vibes. Ever watched your kitty chase shadows? This is the same slow, playful patience.

    Two-person Nail Trimming Technique

    One person comforts and holds: wrap the cat in a towel if needed, cradle the body to keep things steady, and speak softly. The other person trims quickly and calmly, doing one or two nails at a time, then hands over a treat. Timing and praise build calm behavior fast. If you accidentally cut the quick, press gentle pressure and apply styptic powder or cornstarch to stop minor bleeding. Call your vet if bleeding won’t stop or if you’re worried.

    A tiny tip from me: try trimming after a nap when your cat is relaxed. It’s claw-tastic and much easier for both of you.

    Removing mats and dematting safely as part of indoor cat grooming tips

    - Removing mats and dematting safely as part of indoor cat grooming tips.jpg

    Mats form when dead hair, skin oils, trapped moisture, and missed brushing let fur clump and knot. Left alone, mats tug at the skin, trap dirt and bacteria, make movement painful, and can hide sores or infections. Not comfy for any kitty.

    Start with a calm look and feel. Is it a loose tangle you can tease apart, or a tight mat pressed to the skin? For small tangles, mist a detangling spray (a slip-making conditioner spray) and gently comb with a metal comb (thin metal teeth). Then follow with a slicker brush (fine bent-wire bristles) to smooth things out. Ever watched your cat freeze when you hit a sore spot? Hold the skin taut under the mat so you don’t pinch, and work from the outside toward the base.

    For tougher mats, work in tiny sections and take breaks so your cat doesn’t freak out. If you must use scissors, use blunt-tipped scissors (rounded ends for safety) and cut only the loose outer fur, never angle the blade toward skin. Stop right away if your cat tenses, hisses, tries to bite, or if the skin looks red, swollen, or is bleeding. Better safe than sorry.

    Prevention is kinder and faster than dematting. Keep a steady brushing routine for long coats, do short sanitary trims around the rear and belly for very furry cats, and check trouble spots each week, behind the ears, under the legs, the chest, and the tail base. Short, frequent sessions and treats make grooming less scary for shy cats. For busy days, a quick five-minute brush gives your cat mental and physical enrichment, and reduces matting later.

    Dematting Tools and When to Get Help

    • Dematting rake (comb with curved teeth that reach under the topcoat)
    • Mat splitter (a tool that gently breaks large mats – use with caution)
    • Dematting comb (wide-tooth tool for nubbier tangles)
    • Blunt-tipped scissors (rounded ends for safety – only for confident owners)

    Get professional grooming or veterinary help if mats cover about five percent or more of the body, sit tight against the skin, smell foul, drain, or make your cat limp or hide. Those situations often need sedation or careful clipping to keep your cat safe. If you’re unsure, call your groomer or vet, seriously, it’s worth the peace of mind. Worth every paw-print.

    Grooming adjustments for kittens, seniors, and breed-specific indoor cats

    - Grooming adjustments for kittens, seniors, and breed-specific indoor cats.jpg

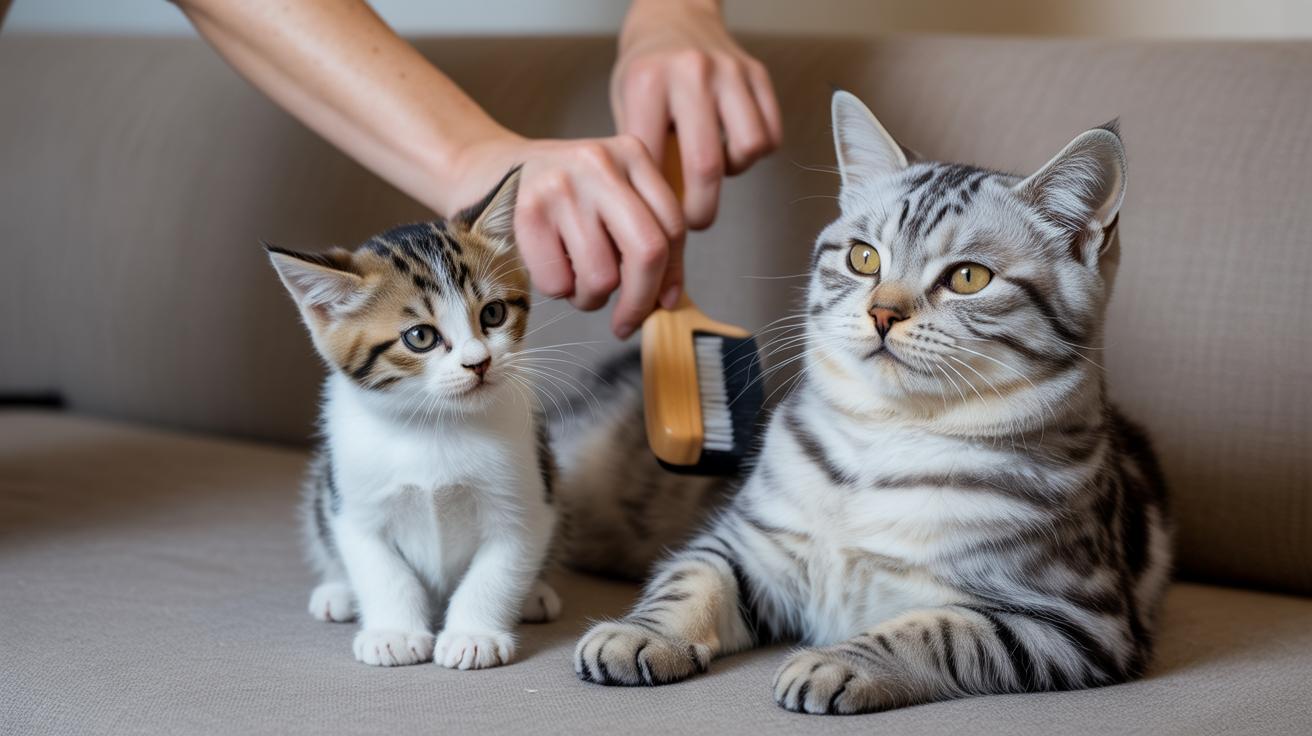
    Start grooming kittens at 6 to 8 weeks with tiny, friendly sessions. Keep them to 1 to 2 minutes several times a day and slowly build up to 5 to 10 minute sits. Let the kitten sniff a soft-bristle brush (soft nylon bristles, gentle plastic hairs) and gently handle their paws so nail trims and vet visits feel normal later. Use tiny treats and praise to make tools a positive thing, short, frequent exposure wins.

    For senior cats, go slower and softer. Use cushioned surfaces so they don’t feel every hard edge, and keep sessions short to avoid tiring them out. Try grooming gloves (a rubber mitt with soft nubs for massaging) instead of stiff brushes so you’re petting more than tugging, and check paw pads and claws for overgrowth or tender spots. If mobility or arthritis (joint pain) limits stretching, split grooming into two brief passes instead of one long one.

    Longhaired cats need daily brushing and frequent mat checks to stop painful tangles from forming, especially underfur (the soft dense layer under the topcoat) and belly areas. Shorthair cats do great with a rubber curry (a rubber brush with short teeth) or a grooming glove, plus a weekly deeper brush to catch loose hair before they swallow it. Gentle, regular handling helps both coat types accept trims, ear checks, and the whole routine, your cat won’t hate you for it, promise.

    Flat-faced breeds, called brachycephalic (flat-faced cats like Persians with short noses), often need extra facial wiping for tear stains and careful watching of breathing during baths. Keep water and steam gentle and brief so they don’t get stressed. Heavily furry or obese cats who can’t reach sanitary areas may need small trims around the rear or belly; a lion trim (short body shave leaving a mane-like ruff) is something to ask a pro about so skin isn’t overexposed or overheated. When you’re unsure, call your groomer or vet and make a calm, cat-friendly plan.

    Worth every paw-print.

    Calming strategies, conditioning, and grooming environment setup for indoor cat grooming tips

    - Calming strategies, conditioning, and grooming environment setup for indoor cat grooming tips.jpg

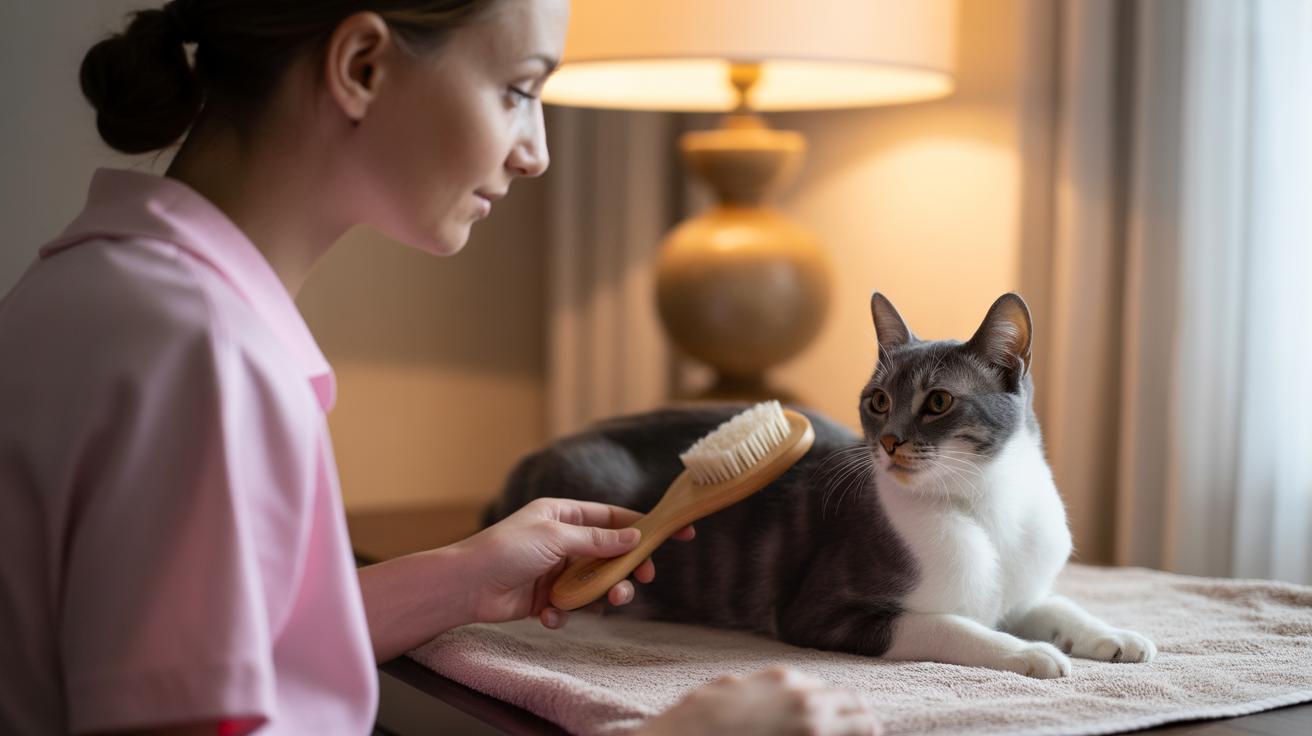
    Pick a quiet, comfy spot with a soft surface so your cat feels safe, after play or a meal when they’re already mellow is ideal. Use a blanket or cushion so paws sink in a bit; that little comfort matters. Ever notice how your cat gets sleepy after dinner? That’s your chance.

    Turn off noisy devices, shut the door, and warm the room a touch. Less startle means less struggle. Keep sessions short. Five to ten minutes is perfect, or split a session into two quick passes if your cat tires. Calm beats force, always.

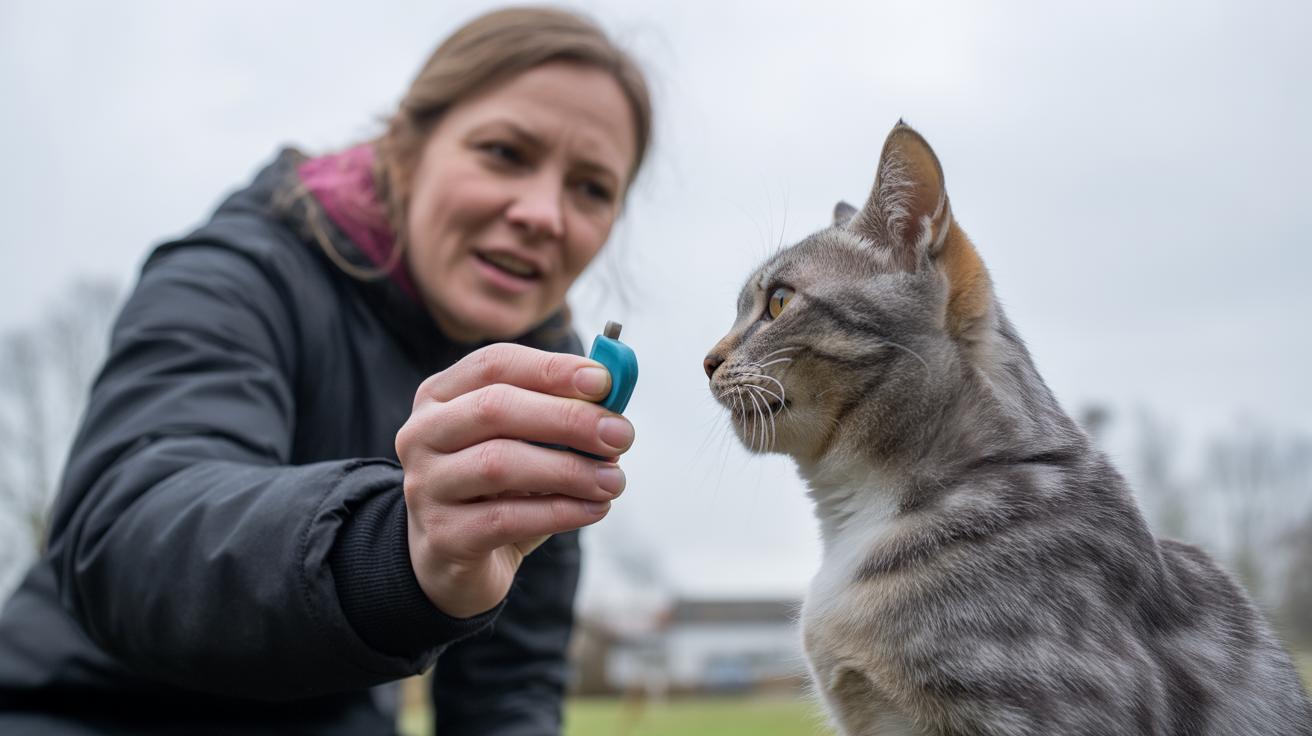
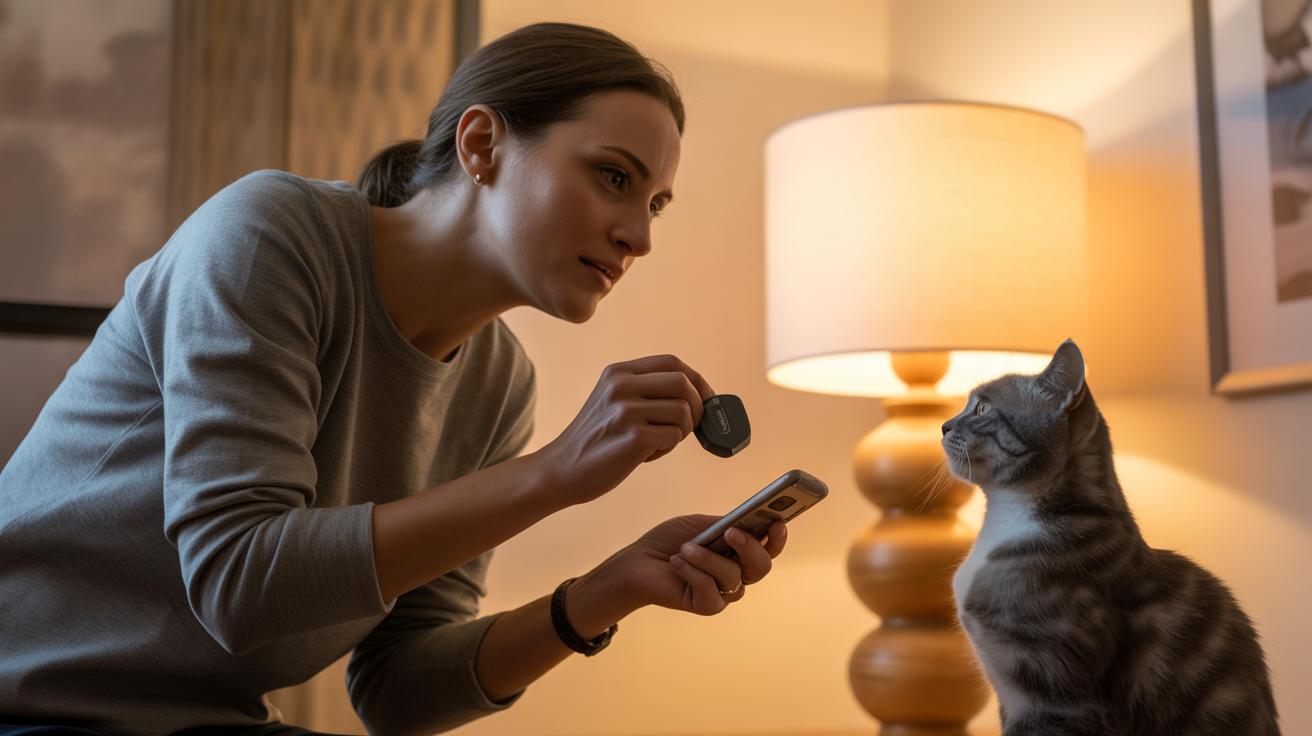
    training Desensitize with tiny, frequent steps. Let your cat sniff brushes, clippers (electric trimmer), or the grinder (rotary nail file) first, then give a tiny treat for calm behavior. Play the clipper sound softly from across the room so it becomes familiar instead of scary. Try a towel swaddle (light towel wrap to gently limit movement) for nervous cats, or a grooming glove (rubber mitt with soft nubs) for shy or touch-sensitive kitties. Those gloves feel like petting, so they’re often a win.

    Pheromone diffusers or sprays (plug-in or spray that mimics a cat calming scent) can help some cats. Put them out about 30 minutes before grooming so the room smells like home. Offer puzzle treats (treats hidden in a toy) or a small catnip toy after sessions to build good vibes. Break big jobs into short chunks, keep your voice soft, and reward calm. Worth every paw-print.

    Desensitization Exercises

    Days What to do
    Day 1-3 Gentle handling and paw touching for a few seconds, then a tiny treat after each touch. Keep it brief and cheerful.
    Day 4-5 Introduce the brush for 30-60 seconds while rewarding calm behavior. Let them explore the brush first with sniffing and soft pats.
    Day 6-7 Do mock trims or run the grinder nearby for a few seconds, then praise and treat. Make the sounds normal, not scary.

    Small notes: use soft praise, one treat at a time, and stop if your cat gets overwhelmed. Try again later. And hey, maybe toss a little catnip toy afterward and watch the pounce party. Claw-tastic progress.

    Safety, signs that require a vet or professional groomer, and maintenance of grooming tools

    - Safety, signs that require a vet or professional groomer, and maintenance of grooming tools.jpg

    We moved the full list of urgent red flags into Quick-start under "Watch for urgent red flags." If you see any of those signs, stop grooming right away and call your vet. Seriously, don’t keep going.

    Tool care is now part of the Brushing "Tool care" paragraph, and we cleaned up the routine so it’s easy to follow. After each session pull fur off brushes so they don’t get gummy. Wash bristle heads (the part with the brush hairs) weekly with mild soap and warm water, then let them air-dry. Sanitize tools once a month. Wipe clippers and scissors after every use so nothing sticky builds up.

    Nail tool care moved into the Nail-trimming section. The rotary-grinder (battery-powered nail file) needs regular attention: keep it charged, swap dull bits, and store it somewhere dust-free. Replace worn parts as needed so it runs smooth and quiet. These quick steps save you headaches, and avoid sad, crunchy sounds when your cat nudges the grinder.

    At-home first aid for nicks is folded into the Nail-trimming two-person technique subsection. If you nick a quick, apply firm pressure first. Use styptic powder (a clotting agent) or plain cornstarch to help stop bleeding. Call your vet if the bleeding won’t stop or the spot looks infected.

    When to book a professional groomer? Look for big warning signs: dense mats close to the skin, mats covering large areas, a trim that needs sedation, complicated lion trims, or handling that feels unsafe for you or your cat. Those situations are best left to pros who have the right tools and experience.

    Worth every paw-print.

    Final Words

    Jump right in: brush 5–10 minutes (3–4×/week), check ears weekly, trim nails every 2–3 weeks, spot-clean as needed, and watch the big red flags like infected mats (tangled fur), sudden hair loss, or new lumps.

    Run the eight-step session checklist, keep treats ready, and split longer sessions if your cat tires.

    See the Brushing, Bathing, Nails, Dematting, and Shedding sections for technique and product notes. Finish with a small treat and calm petting so grooming becomes a cozy habit. These indoor cat grooming tips help busy, multi-cat homes cut hairballs, lower stress, protect furniture, and bring more playful purrs into the day.

    FAQ

    Cat grooming FAQs

    What are the best indoor cat grooming tips and how often should I groom my indoor cat?

    The best indoor cat grooming tips are short, regular sessions: brush 5–10 minutes, 3–4×/week (daily during heavy shedding); check ears weekly; trim nails every 2–3 weeks; spot-bathe as needed.

    How do I groom a cat that hates it and can I sedate my cat at home for grooming?

    To groom a cat that hates it, use short desensitization sessions, treats, towel swaddles, pheromone spray, and a grooming glove (soft rubber glove). Never sedate at home – only a veterinarian should sedate safely.

    What cat grooming tools should be in a basic grooming kit and how do I use clippers at home?

    A basic cat grooming kit includes a slicker brush (fine wire pins), rubber curry or glove (massage), undercoat rake (removes loose underfur), metal comb, nail clippers or grinder (rotary file), clippers for trims, and waterless wipes.

    What are the benefits of grooming and does my cat groom itself enough?

    The benefits of grooming are healthier skin, fewer hairballs, fewer mats, and a stronger bond. Cats groom themselves, but indoor cats still need owner brushing, nail care, and help with stubborn mats.

    What is the 3-3-3 rule for cats?

    The 3-3-3 rule for cats means 3 days to adjust to new smells, 3 weeks to feel more settled and explore, and 3 months to be comfortable with your home and routine.

    What are common cat grooming mistakes to avoid?

    Common cat grooming mistakes are skipping regular brushing, cutting into the quick, forcing long sessions, using human or dog shampoos, pulling mats, and neglecting ear, eye, and dental checks.

    What are the main types of cat grooming I should do?

    The main types of cat grooming are brushing and de-shedding, dematting, bathing or waterless cleaning, nail trims, ear and eye care, and quick dental wipes or checks.

  • How-to-Get-My-Cat-to-Drink-More-Water

    How-to-Get-My-Cat-to-Drink-More-Water

    Does your cat stroll past a full water bowl like it’s invisible, while you worry that hydration (drinking enough water) matters more than most of us realize? You’re not alone. Ever watched your kitty sniff and walk away? It’s a small panic for us and a mystery for them.

    \n

    I once watched Luna totally ignore a shiny new bowl until one tiny drip from the tap made her pounce, ears up, tail like a question mark. That little moment taught me cats often prefer motion, sound, or scent over a perfectly full dish.

    \n

    Tiny tweaks can make a big difference. Try a different bowl shape, set up moving water, or add a splash of tuna water (liquid from canned tuna) to spark interest. Think of it like giving their thirst a little nudge.

    \n

    This post lays out vet-approved, easy tips: quick emergency steps if you’re worried, the best bowls and fountains to try, simple diet tweaks, and easy tracking so you can see progress. You’ll get practical fixes that help your cat drink more and let you breathe easier, purrfect, right?

    \n

    Worth every paw-print.

    \n

    Quick, vet‑approved emergency checklist for immediate cat hydration

    \n

    \"-

    \n

    Short, vet-approved steps you can do right now to get water into a thirsty cat. These are for immediate home care , if anything feels off, call your vet.

    \n

      \n

    1. Offer fresh, clean water now. Change the water and rinse the bowl so it looks and smells inviting.
    2. \n

    3. Add a second wide, shallow bowl near food (cats like shallow bowls; they feel safer). Put it in a quiet spot so your cat isn’t spooked.
    4. \n

    5. Offer wet food (canned food with high moisture) or moisten kibble by adding a little warm water. It’s an easy way to boost hydration without forcing anything.
    6. \n

    7. Turn on a pet fountain (recirculating water bowl) or leave a very gentle tap drip , many cats prefer moving water. Ever watched your kitty nose at a drippy sink? Magic.
    8. \n

    9. Flavor water very sparingly with tuna water (liquid from canned tuna) or low-sodium broth (low salt chicken or beef broth) to tempt picky drinkers. A little goes a long way.
    10. \n

    11. Monitor intake , note how much and when your cat drinks so you can tell the vet if things change (tracking helps detect problems sooner).
    12. \n

    13. Keep calm and try different options for short sessions. Rotate bowls, fountain, and wet food; some cats need a few tries before they take to a new thing.
    14. \n

    \n

    See 'Bowls, fountains, location and cleaning,' 'Monitor and measure cat water intake,' 'Use diet to increase hydration,' 'Troubleshooting plan,' and 'Medical causes' for more detail.

    \n

    Immediate vet flags:

    \n

      \n

    • Refusal to drink for more than 24 hours.
    • \n

    • Persistent vomiting.
    • \n

    • Collapse or unresponsiveness.
    • \n

    • Sudden large change in drinking or urination , polyuria/polydipsia (peeing a lot or drinking a lot).
    • \n

    \n

    health signs-and-when-to-call-the-vet-for-water-changes”>Recognize cat dehydration signs and when to call the vet for water changes

    \n

    \"-

    \n

    Catching dehydration early can make a big difference. Cats evolved to get most of their water from prey, so they drink less than dogs and mild dehydration can sneak up on you. Watch their eating, litter box trips, and energy , sudden changes are usually the clearest clue something’s wrong. Ever watched your kitty chase shadows? That same twitchy energy disappearing is worth noticing.

    \n

    Here are common signs of dehydration to watch for. If you think your cat might be low on fluids, try the quick skin‑tent test (instructions after the list).

    \n

      \n

    • Tacky or dry gums (lift the lip gently to check).
    • \n

    • Skin tenting – skin that stays lifted for a second or more.
    • \n

    • Lethargy or less interest in play or food.
    • \n

    • Sunken eyes or a dull-looking gaze.
    • \n

    • Dark, concentrated urine or fewer trips to the litter box.
    • \n

    • Sudden changes in appetite or eating habits.
    • \n

    • Very rapid breathing, weakness, or wobbliness.
    • \n

    • Collapse, pale gums, or unresponsiveness , this is an emergency.
    • \n

    \n

    \n

    \n

    \n

    \n

    \n

    \n

    \n

    \n

    \n

    \n

    \n

    \n

    \n

    \n

    \n

    \n

    \n

    \n

    \n

    \n

    \n

    \n

    \n

    \n

    \n

    \n

    \n

    \n

    \n

    \n

    \n

    \n

    \n

    \n

    \n

    \n

    Sign What to look for Urgency
    Mild skin tent Pinch loose skin over the shoulder blades (scruff) and watch how fast it returns – 1 to 2 seconds Watch closely. Try offering water or wet food
    Dry gums Gums feel sticky or less moist when you touch them Moderate concern. Monitor drinking and eating
    Reduced urine Fewer litter box visits; urine looks darker and stronger-smelling Moderate. Call your vet if it continues
    Lethargy Sleeping more, not interested in toys or food Moderate-high. Call the vet if it’s sudden
    Rapid breathing Breaths are fast and shallow, even at rest High. Seek immediate care
    Collapse / pale gums Can’t stand, gums look pale or white Emergency. Get urgent vet attention

    \n

    Quick skin‑tent test: gently lift a small patch of loose skin over the shoulder blades and let go. If the skin snaps back right away, hydration is probably OK. If it stays up or returns slowly, that suggests dehydration. The test isn’t perfect for very overweight cats or very old cats, or when a thick coat hides the result. In those cases you’ll want a vet exam and simple tests like bloodwork (a basic blood test to check hydration and organ function) or urinalysis (a urine test that checks concentration and infection).

    \n

    If you’re wondering how much water a cat should drink, or whether a stressed, older, or suddenly thirsty cat needs a medical workup, check the monitoring and medical sections and call your veterinarian for guidance. Worth every paw-print to be safe.

    \n

    Medical causes that affect how much water a cat drinks

    \n

    \"-

    \n

    Medical problems are a common reason a cat’s drinking habits change, so if your cat suddenly gulps more or avoids the water bowl, don’t shrug it off. Older cats, say 11 years or older, are at higher risk. About one in three cats will face kidney problems in their life, and that often shows up as odd thirst or more frequent peeing. Let’s look at the main medical culprits and what vets check for.

    \n

    Kidney disease

    \n

    Chronic kidney disease makes the kidneys worse at concentrating urine, so your cat pees more and then drinks more to keep up. Tests like BUN (blood urea nitrogen, a blood marker that rises when kidneys struggle), creatinine (another kidney blood marker), and SDMA (a sensitive blood marker for early kidney stress) help vets spot trouble. Extra water can help flush the system and ease symptoms while your vet makes a treatment plan. Worth every paw-print.

    \n

    Diabetes mellitus

    \n

    Diabetes pulls water out of the body because extra glucose in the blood drags fluid along, so you get polydipsia (drinking a lot) and polyuria (peeing a lot). A simple blood glucose test confirms it, and treating the diabetes usually brings drinking back toward normal. Ever watched your kitty suddenly zoom after a nap? Diabetes can take the fun out of that, but it’s treatable.

    \n

    Urinary and dental problems

    \n

    Urinary tract infections, bladder stones, or crystals can change drinking habits; often cats drink more because extra water helps flush irritants. Dental pain does the opposite , a cat with sore teeth or gums may avoid cold or hard liquids and drink less. Stress or competition at the water bowl from other pets can also make a timid cat cut back.

    \n

    Recommended vet tests and what they reveal:

    \n

      \n

    • Blood chemistry panel (BUN/creatinine) , shows kidney function and whether filtering is reduced.
    • \n

    • SDMA (blood test) , flags early kidney stress before other markers change.
    • \n

    • Urinalysis (exam of urine) , checks how concentrated urine is and looks for infection or crystals.
    • \n

    • Urine culture , grows and identifies bacteria so the vet can pick the right antibiotic.
    • \n

    • Blood glucose , screens for diabetes by measuring sugar in the blood.
    • \n

    • Dental exam and radiographs (dental x-rays) , finds tooth or jaw pain that might make a cat drink less.
    • \n

    \n

    How-to-Get-My-Cat-to-Drink-More-Water

    \n

    \"-

    \n

    Wet food is the easiest way to up your cat’s daily water. Most wet food is about 70 to 80 percent water, so canned or pouch meals with gravy give shy drinkers a steady trickle of fluids without asking them to lap from a bowl. Think of food as hydration, not just calories. Ever watched your cat’s whiskers twitch as a gravy-slick chunk slides across the plate? Cute and useful.

    \n

    Switch slowly over 7 to 14 days so their tummy doesn’t protest. Mix a little wet food into the old food and increase it each meal. Try different textures , pate (smooth, blended wet food), chunks in gravy, or loaf (firmer, sliceable wet food) , because cats can be picky. If a straight swap fails, try mixing wet into kibble (kibble = dry, crunchy cat food) or moistening kibble with warm water until it softens.

    \n

    A splash of low-sodium broth (low-salt cooking stock) can help if they need extra flavor. Check the ingredients and never use anything with garlic or onion because those are toxic to cats. Don’t force changes. Pushing food can make your cat refuse meals for a bit. Be patient and keep portions small and tempting.

    \n

      \n

    1. Transition over 7 to 14 days: mix more wet food into each meal until the swap is complete.
    2. \n

    3. Rotate flavors and textures so your cat can find a favorite.
    4. \n

    5. Gradually add warm water to dry food until the kibble softens and holds moisture.
    6. \n

    7. Add a little low-sodium broth for flavor, but avoid any broth with garlic or onion.
    8. \n

    9. Put a water bowl next to feeding spots or use a timed feeder (automatic food dispenser) with a bowl beside it.
    10. \n

    11. Offer a small wet meal after a short play session or first thing in the morning to boost drinking around activity.
    12. \n

    \n

    Try a simple routine: tiny wet meals after play bursts, a wet mid-day snack, and a wet evening meal. If you’ve tried these steps for two weeks and you’re still wondering how to get my cat to drink more water, check the troubleshooting and monitoring tips or call your vet. Worth every paw-print.

    \n

    Bowls, fountains, location and cleaning to encourage drinking

    \n

    \"-

    \n

    Lots of cats prefer moving water, so a quiet recirculating fountain can be a real winner. Look for a fountain with a quiet motor and replaceable filter (tiny cartridges that trap debris and odors). The steady little flow and cleaner smell often lure a picky cat in. A ceramic water fountain can look nice and keep the water tasting neutral, but match the style to how your cat likes to drink.

    \n

    Pick bowl shapes and materials that keep whiskers comfy and water tasting fresh. Wide, shallow ceramic bowls (baked clay) or glass are good because whiskers won’t brush the sides and they don’t hold odors. A stainless steel bowl (rust-resistant metal alloy) is tough and hygienic and won’t leach smells like some plastics (polymer: common hard plastic that can trap odors). Some cats want a bowl filled to the brim. Others prefer a slow trickle. Try both and see which one makes your cat’s whiskers twitch.

    \n

    Ever watched your kitty nose a new bowl like it’s a treasure? Try these simple tips and you’ll get more sips:

    \n

      \n

    • Use wide, shallow bowls so whiskers don’t touch the rim.
    • \n

    • Fill one bowl to the top if your cat seems to like a full dish.
    • \n

    • Place multiple water stations in quiet spots – think low-traffic corners or near favorite napping areas.
    • \n

    • Wash and rinse daily when you’re cleaning a cat water bowl to keep the taste fresh.
    • \n

    • Replace fountain filters on the maker’s schedule and follow the manual’s maintenance tips.
    • \n

    • Choose a model with a quiet motor so the pump won’t scare a skittish cat.
    • \n

    • Keep water bowls well away from litter boxes and busy doorways.
    • \n

    \n

    Keep a short maintenance routine. Empty and scrub bowls weekly with mild soap. Top up fountains every day. Swap filters on the timeline the manufacturer recommends. These little habits cut down on slime and odors that make cats walk away. Worth every paw-print.

    \n

    \n

    \n

    \n

    \n

    \n

    \n

    \n

    \n

    \n

    \n

    \n

    \n

    \n

    \n

    \n

    \n

    \n

    \n

    \n

    \n

    \n

    \n

    \n

    \n

    \n

    \n

    Option Pros Cons
    Ceramic bowl Neutral taste, easy to clean Can chip if dropped
    Stainless bowl Durable, hygienic Can be noisy on hard floors
    Filtered fountain Attracts drinkers with moving water; filters odors Needs power and regular filter changes
    Non-electric shallow dish Works without power, simple No moving water appeal

    \n

    Safe flavoring and additive options to entice drinking

    \n

    \"-

    \n

    Want your cat to drink more? Tiny, safe tweaks can turn plain water into something kitty can’t resist. A little scent goes a long way , your cat’s whiskers will twitch at the fishy or savory smell. Ever watched a cat paw at an ice cube like it’s a toy? Cute, right.

    \n

    Try adding a teaspoon of tuna juice (liquid from tuna packed in water) or just a few drops of low-sodium chicken broth (low salt cooking stock) to the bowl. Keep portions tiny and only offer these treats now and then. Freeze broth or tuna juice into ice cubes for a cool splash and a fun batting toy that doubles as hydration. Check the ingredient list, and run new flavors by your vet, especially if your cat has kidney disease (reduced kidney function) or heart disease (conditions that affect the heart).

    \n

    Avoid these things , they can hurt more than help. High-salt liquids, anything with garlic or onion, tuna packed in oil, and regular cow’s milk can make cats sick or drive thirst the wrong way. Many cats are lactose intolerant, so milk often causes tummy trouble, not better hydration. When in doubt, ask your veterinarian before adding anything other than plain water.

    \n

      \n

    • Tuna juice (from tuna packed in water) – use sparingly; strong scent, tiny amount per bowl
    • \n

    • Low-sodium chicken broth (low salt cooking stock) – no garlic or onion; use only a few drops
    • \n

    • Broth or tuna-juice ice cubes – fun, cooling, and interesting to bat at
    • \n

    • Garlic- or onion-flavored broths – toxic to cats, avoid entirely
    • \n

    • Salty commercial broths – can worsen kidney or heart conditions, so skip them
    • \n

    • Cow’s milk or cream – many cats are lactose intolerant and will get an upset stomach
    • \n

    \n

    Worth every paw-print.

    \n

    Monitor and measure cat water intake: ml/kg rule and tracking methods

    \n

    \"-

    \n

    Keep an eye on daily drinking so you catch slow drops or sudden spikes early. A simple guideline to use is the ml-per-kg hydration rule (ml = milliliters, kg = kilogram, about 2.2 pounds). Most adult cats need roughly 50-60 ml per kg per day from food and water combined. If your cat eats a lot of wet food, they’ll get more fluid from meals, so expect less bowl drinking.

    \n

    You can use digital bowls or smart water monitors (bowls that log each sip to an app) to make tracking easy. No fancy gear? No problem. A notebook or a spreadsheet works just fine. Ever watched your cat lap water, all delicate nibbles and tiny splashes? Those tiny sips add up.

    \n

    Also watch the litter box. Big changes in peeing often match changes in drinking, so numbers and litter-scoop clues together tell a better story.

    \n

    Steps to track daily intake

    \n

      \n

    1. Weigh your cat so you know their body mass in kg (kilogram = kg, about 2.2 pounds).
    2. \n

    3. Measure the bowl’s usable volume by filling it to the level you normally use and noting that amount (ml = milliliters).
    4. \n

    5. Record start-of-day and end-of-day volumes to calculate how much your cat drank that day.
    6. \n

    7. Compare the daily total to the ml-per-kg rule and track values for a week to find your cat’s baseline. Actually, make that two weeks if your schedule is weird, more data helps.
    8. \n

    \n

    \n

    \n

    \n

    \n

    \n

    \n

    \n

    \n

    \n

    \n

    \n

    \n

    \n

    \n

    \n

    \n

    \n

    \n

    \n

    \n

    \n

    cat weight (kg) Approx. total water (ml/day)
    2 kg 100-120 ml
    3 kg 150-180 ml
    4 kg 200-240 ml
    5 kg 250-300 ml

    \n

    If you notice a sustained increase or decrease in drinking, or the water numbers don’t match litter box changes, call your veterinarian so they can check for medical causes while you keep monitoring. Worth every paw-print.

    \n

    Troubleshooting plan: stepwise actions if your cat still won’t drink

    \n

    \"-

    \n

    If the usual tricks aren’t working and you’re thinking, “How do I get my cat to drink more?” here’s a friendly, two-week plan you can follow. It moves from easy swaps to small temptations, then finishes with simple measurements so you’ll know what to tell your vet. Think of it as a gentle escalation, one paw at a time.

    \n

      \n

    1. Day 1-3 – Swap bowl types. Try glass, ceramic, and stainless. Some cats prefer a wide, shallow bowl because it doesn’t tickle their whiskers; a second bowl can help too.
    2. \n

    3. Day 1-3 – Move bowls to quiet, low-traffic spots and keep them far from the litter box. Cats like space between eating, drinking, and bathroom areas. Ever watched your kitty side-eye a noisy hallway? Yeah, that matters.
    4. \n

    5. Day 4-7 – Introduce a quiet filtered fountain (a recirculating water fountain) or run the tap for a short time when your cat is awake. The sound and motion can be irresistible. Try short sessions so it stays novel.
    6. \n

    7. Day 4-7 – Offer a few broth or tuna-juice ice cubes for play and cooling novelty. Use tuna in water (the liquid from the can) or low-sodium chicken broth (broth is a savory, watered-down stock). The ice cubes add scent and fun, especially on warm days.
    8. \n

    9. Day 8-11 – Add tiny amounts of tuna water or low-sodium broth to one bowl to make it more tempting. Tiny amounts, not soaking everything, just a hint of aroma to pique interest.
    10. \n

    11. Day 8-11 – Gradually moisten dry kibble or give a small wet-food meal after a play session to encourage licking and drinking. Think of wet food as a nudge toward extra hydration.
    12. \n

    13. Day 12-14 – Start measuring. Track daily water intake and litter-box output (how often and how much your cat urinates) and compare to a baseline you recorded before you started. Note any patterns, like more drinking after play or first thing in the morning.
    14. \n

    15. Day 12-14 – If there’s no steady improvement, book a vet visit for bloodwork (blood tests) and urinalysis (a urine test). Bring your notes so the vet can see what you tried and when.
    16. \n

    \n

    Red flags: if your cat refuses to drink for 24 hours, vomits a lot, becomes weak, or collapses, seek urgent veterinary care right away. Those signs can mean something serious.

    \n

    Kittens and post-op cats: sometimes syringe or dropper feeding is used short term, but only with your vet’s ok. Warm the fluid to about body temperature, draw a small amount (5-10 ml) into the syringe, and place it at the side of the mouth so tiny amounts can drip in and your kitten can swallow. Never force big gulps or tilt the head back. Go slow and watch for coughing or breathing trouble (aspiration, breathing fluid into the lungs).

    \n

    You’ve got this. Small changes often make a big difference, and if they don’t, your vet will appreciate the clear notes you bring in. Worth every paw-print.

    \n

    Special populations: getting kittens and senior cats to drink more water

    \n

    \"-

    \n

    We folded this separate section into other headings so the same tips don’t appear twice. It keeps things clean and easier to follow, you know, less scrolling.

    \n

    Kitten tips moved to How-to-Get-My-Cat-to-Drink-More-Water. Suggested text: Offer shallow dishes kittens can reach easily. Leave water out between short feeds so they can lap when they want. Playful snack sessions often trigger a quick lap after play, and you might catch that adorable, tiny splash.

    \n

    Syringe basics are now part of the Troubleshooting syringe paragraph. Quick how-to: only use a syringe (a small plastic tube with a plunger) with your vet’s okay. Give tiny 5 to 10 ml (milliliters) doses of warm, body-temp fluid (about the warmth of your cat), and place the tip at the side of the mouth so the kitten can swallow without coughing. Be gentle, slow, and stop if the kitten gags.

    \n

    Senior-cat tips were split between Medical causes and Bowls, fountains, location and cleaning. For medical causes, note that older cats often need more water because of kidney or metabolic changes (how their body handles fluids). Watch for changes in thirst and offer wet meals when it makes sense.

    \n

    For bowls, fountains and placement: add extra water stations near favorite nap spots. Use elevated bowls (raised dishes that reduce neck strain) for arthritic necks, and pick a quiet fountain for timid elders who avoid busy areas. Clean fountains and bowls often so shy cats aren’t put off by scum or funky smells.

    \n

    Monitoring stays under Monitor and measure cat water intake. Weigh pets regularly and log daily water and litter-box habits so trends stand out. Call your veterinarian if drinking steadily drops or you notice weight loss.

    \n

    We also removed duplicate bullet lists and the extra syringe paragraph so there’s one concise set of instructions in the right spots. Cleaner. Easier. Worth every paw-print.

    \n

    Seasonal, travel and boarding tips to maintain hydration

    \n

    \"-

    \n

    Hot days make dehydration more likely, so put out extra water where your cat likes to nap. Use chilled bowls and even a few ice-cube treats made from low-sodium broth (broth with very little salt) or tuna water (the liquid from tuna packed in water). Those clinking cubes get curious noses moving and cool the tongue.

    \n

    Play for a few minutes, then offer a small wet snack or a full bowl, your cat will often lap up water after a fun session. Shady, low-traffic spots invite slow, peaceful sipping. In short: more bowls, cooler water, and short, tasty snacks help keep them hydrated.

    \n

      \n

    • Familiar bowl from home so the cat smells something safe
    • \n

    • Measured water in a sealed container (pre-measured for travel days; sealed to avoid spills)
    • \n

    • A can or two of wet food (canned food with gravy) for emergency meals
    • \n

    • Broth or tuna-juice ice cubes for novelty and cooling (low-sodium, no garlic or onion)
    • \n

    • Small syringe (without a needle) for kittens or frail cats, only use if your vet says it’s okay
    • \n

    • Contact vet details and local emergency clinic info
    • \n

    • A simple emergency plan: who cares, where they go, and how much to give
    • \n

    \n

    When you’re traveling, bring a small travel fountain or a pet water bottle for travel (a collapsible bottle with an attached drinking tray). Toss in the bowl your cat uses at home so things smell familiar.

    \n

    If you board your cat, ask the staff about their hydration routine, how often they give fresh water, where they place bowls, and if they offer cool treats or wet food. Ask who checks on each cat and how they handle heat. That little conversation can save a lot of worry.

    \n

    Quick tip: freeze a few extra broth cubes in a zip bag and pop one in during the hottest part of the day. My cat once batted an ice cube under the sofa for later, uh, so you might want a shallow dish too.

    \n

    Worth every paw-print.

    \n

    Final Words

    \n

    In the action, you’ve got a vet‑approved emergency checklist for fast hydration steps, clear signs to watch, medical causes, diet and bowl fixes, safe flavor ideas, ways to measure intake, a 2-week troubleshooting plan, plus kitten, senior and travel tips.

    \n

    Quick tip: start with extra fresh stations, wet food, and a quiet fountain, then measure intake and move through the escalation steps if things don’t improve.

    \n

    You’ll find helpful, practical answers for how to get my cat to drink more water, and a calmer, healthier multi‑cat home is within reach.

    \n

    FAQ

    \n

    \n

    \n

    How do I hydrate a cat that won’t drink or make a sick cat drink water?

    \n

    Offer wet food (high water content), try flavored water or a pet fountain, and — only under veterinary guidance — give small amounts of fluids with a feeding syringe. Contact your veterinarian if the cat refuses all fluids for more than 24 hours or shows signs of illness.

    \n

    \n

    \n

    \n

    How can I get my cat to drink more water?

    \n

    Provide fresh water in several wide, shallow bowls placed in quiet spots, serve wet food regularly, run a quiet pet fountain, and rotate safe flavors sparingly while monitoring intake.

    \n

    \n

    \n

    \n

    How can I trick or entice my cat to drink water?

    \n

    Try adding safe flavors like tuna water or low‑sodium chicken broth, offering broth ice cubes, and avoid milk and broths with garlic, onion, or high salt.

    \n

    \n

    \n

    \n

    How do I get my cat to drink water from a fountain?

    \n

    Choose a quiet fountain with a gentle flow, place it in a calm location, keep the flow shallow, and introduce the fountain gradually during play or mealtime so the cat becomes comfortable.

    \n

    \n

    \n

    \n

    My cat won’t drink water but eats wet food or drinks milk — is that okay?

    \n

    If your cat eats wet food (about 70–80% water), total fluid intake may be adequate. Milk is not a safe substitute. Monitor urine output and behavior, and contact your vet if you notice changes.

    \n

    \n

    \n

    \n

    What is the 3-3-3 rule for cats?

    \n

    The 3-3-3 rule for new cats: three days of hiding, three weeks of cautious exploration, and about three months for a cat to feel fully at home.

    \n

    \n

    \n

    \n

    \n”

  • healthy weight guidelines for cats: target weights

    healthy weight guidelines for cats: target weights

    Think your chunky kitty is just fluffy? Not quite. A little extra weight can slow their pounces and steal years of playful life. Check out our guide on Cat Training Treats.

    Too much weight raises the chance of diabetes (a blood-sugar disease), makes joints ache, and can lead to other health problems. Your cat might nap more, sneeze less in play, or struggle to jump up on a favorite perch, little signs that matter.

    This post gives clear target weights for common breeds, shows an easy wellness Body Condition Score check (BCS: a quick look and gentle feel to compare fat and muscle against your cat’s bones and overall shape), and points out the signs that mean a vet visit is urgent. Ever watched a cat try to squeeze into a box and fail? That’s a hint.

    Read on for simple, practical steps to keep whiskers twitching and paws springy. Worth every paw-print.

    Healthy Cat Weight: Immediate Benchmarks, Core Risks, and When to See a Veterinarian

    - Healthy Cat Weight Immediate Benchmarks, Core Risks, and When to See a Veterinarian.jpg

    There’s no single perfect weight for every cat. Most house cats sit around 8 to 12 lb (3.6–5.4 kg). Big-boned breeds like the Maine Coon often run 12 to 18+ lb, and Ragdolls can reach about 20 lb. Sleek breeds, like the Siamese, tend to be lighter. Age, sex, spay/neuter status, and diet all affect healthy weight ranges—, and medical history all help decide a healthy target.

    Body Condition Score (BCS) is the quick clinical way vets judge whether a cat’s body fat and muscle fit its frame. (BCS = compares fat and muscle to the cat’s bones and overall shape.) You can think of it like trying on clothes , does the coat look fitted, or is it snug and bulging? Vets will feel for ribs and check the waistline. Ever watched your kitty’s whiskers twitch as they chase a toy? That kind of play helps tell the story, too.

    Extra weight raises real health problems:

    • Diabetes and insulin resistance (when the body doesn’t respond well to insulin, so blood sugar stays high).
    • Arthritis and joint pain (extra pounds speed up wear and make movement sore).
    • Shortened lifespan (overweight cats often pick up more chronic illnesses).
    • Higher anesthesia and surgical risk (fat changes drug dosing, recovery, and wound healing).

    Top reasons to call your vet now: sudden, unplanned weight loss; a fast gain of more than 10% of body weight; not eating for 48 to 72 hours; or big changes in activity, appetite, or litter-box habits. A quick weigh-in is helpful, but BCS plus a medical check gives a clearer picture than the scale alone. See Monitoring for urgent-care details and step-by-step red-flag guidance.

    If you want a simple next step, try this: feel your cat’s ribs gently , you should feel them under a light layer of fat, not see them sticking out. Small changes now can make a big difference later. Worth every paw-print.

    How to Assess Cat Weight at Home: Body Condition Score, Home Weighing, and Practical Checks

    - How to Assess Cat Weight at Home Body Condition Score, Home Weighing, and Practical Checks.jpg

    Scales give you a number, but how your cat looks and feels tells the full story. The Body Condition Score helps you see whether weight is muscle or extra padding. Ever watched your kitty chase a sunbeam and wondered if they look a little heavy or just fluffy? This is the quick way to know.

    The nine-point Body Condition Score

    Body Condition Score (BCS) is a 1 to 9 scale vets use to judge fat and muscle on a cat’s frame, not just pounds. Two cats can weigh the same and look very different under the fur, so BCS shows the real picture.

    Scores 1 to 3 mean underweight. Bones stick out, there’s almost no fat, and muscle wasting (when muscles shrink and feel hollow) is common. Your cat may look bony and frail.

    Scores 4 and 5 are the sweet spot. You should feel ribs with light pressure under a thin fat layer, see a waist from above, and notice a tummy tuck from the side. Muscles look filled out, not sunken. Think of it like a softly padded sweater over a lean frame.

    Score 9 means obesity. There’s a heavy fat pad, no waist, a big belly bulge, and fat over the ribs so you can’t feel them. This can make moving and jumping harder.

    When you palpate (feel with your hands), ribs should be felt without pressing hard , they shouldn’t be sharp ridges. The lumbar spine and pelvic bones should not stick out. The belly should tuck up behind the ribs. To tell fat from muscle loss, notice texture: fat feels soft and squishy. Muscle wasting makes the spine and shoulders feel thin and hollow.

    Weighing at home and a simple trick

    A reliable home method is to weigh yourself, then weigh yourself holding the cat and subtract. Example: you weigh 150 lb, you plus cat weigh 158 lb, so the cat is 8 lb. Use the same scale, similar clothing, and the same time of day for each check so results are consistent.

    Vet scales are often more precise, but trends matter more than a single reading, so pick one method and stick with it. If you use a bathroom scale, take two or three readings and average them to cut down on wiggle-room error.

    Three quick daily checks

    • Run your hands lightly over the ribcage. Ribs should be felt under a thin layer of fat, not sharp or buried.
    • Look down from above. You should see a narrowing behind the ribs , a little waist.
    • Watch appetite and activity. A sudden drop in eating or play can be a sign something’s wrong.

    Worth every paw-print.

    Cat Weight Ranges and Breed-Specific Healthy Weights

    - Cat Weight Ranges and Breed-Specific Healthy Weights.jpg

    Breed, frame, age, and sex all help set what a healthy weight looks like for your cat. Big-boned or long-framed cats can carry more pounds without being overweight, so don’t just trust the scale. Pair numbers with a Body Condition Score (BCS, a simple way to check fat versus muscle; see How to Assess) to tell whether those pounds are muscle, fat, or both.

    Breed Typical healthy weight (lbs) Notes
    Domestic shorthair 6–12 Most land 8–12 lbs; size varies by frame and activity.
    Maine Coon 12–18+ Very large frame; males often heavier. Usually muscular.
    Ragdoll Up to ~20 Big and sturdy; 12–20 lbs can be healthy depending on frame.
    Persian 7–14 Compact body with dense coat; fur can hide extra weight.
    Sphynx 6–12 Lean, feels muscular since there’s little to no fur.
    British Shorthair 9–18 Rounder, stocky build with heavier bone and muscle.
    Exotic Shorthair 8–13 Like Persians but a bit chunkier; coat masks contours.
    American Shorthair 7–12 Medium, balanced frame; males usually larger than females.
    Devon Rex 6–9 Small, lithe body with fine muscle tone.
    Siamese 6–10 Sleek and long-bodied; tends toward the lighter end.

    Numbers are a starting point, not the whole story. Use BCS (see How to Assess) to read fat versus muscle, and watch trends over weeks instead of fixating on one weigh-in. Your cat should have a visible waist and a slight tummy tuck, and you should be able to feel ribs with a thin layer of fat over them.

    Males and neutered cats often run heavier, and many breeds hit their peak weight around 6–10 years. If your cat is above the listed range but feels solid and athletic with a clear waist, that weight can still be healthy for that frame. If a thick coat hides the shape, gently run your hands over the ribs and spine to check, think of it as a quick, respectful hug.

    When in doubt, weigh, score, and check with your vet so any plan to lose or gain weight fits your cat’s age, activity level, and medical history. Worth every paw-print.

    Calorie Needs and Safe Weight-Change Targets for Cats

    - Calorie Needs and Safe Weight-Change Targets for Cats.jpg

    A good rule of thumb is about 20 kcal per pound of body weight per day for most adult cats. Kcal (calories) is what we mean here. It’s just a starting point, not a strict law. Use it to get close, then tweak based on your cat’s age, activity level, and health history.

    For example, a 10-lb adult needs roughly 10 × 20 = 200 kcal/day for maintenance (the calories to keep current weight). If your target weight is 8 lb, that’s 8 × 20 = 160 kcal/day. Clinicians often reduce current intake by about 20-25% while moving toward the goal. So a 20% cut from 200 kcal lands at 160 kcal , neat, right? As your cat loses weight, recalc monthly using new weight × 20 kcal and adjust portions so calories follow the new target, not the old one.

    Go slow. Cutting calories too fast or letting a cat stop eating can cause hepatic lipidosis (a serious liver condition that happens when a cat suddenly stops eating and their body breaks down fat too quickly). Don’t crash-diet your cat. Work in small steps, watch appetite and behavior, and keep your vet involved. If appetite drops or weight changes unexpectedly, see Monitoring for hepatic lipidosis signs and refeeding guidance for next steps.

    Measure food accurately. Use a gram food scale (a small kitchen scale that reads grams) or the manufacturer’s calibrated scoop, and always check the label for kcal per cup or per can. Don’t forget treats , they add up fast , so include them in the daily kcal total. Try to measure with the same tool at the same time of day for consistent tracking.

    Think of this like tuning a radio – small knob turns, then listen and adjust. Your cat’s whiskers twitch, they pounce a bit more, and you tweak again. Worth every paw-print.

    Feeding Strategies, Diet Types, and Treat Control for Healthy Cat Weight

    - Feeding Strategies, Diet Types, and Treat Control for Healthy Cat Weight.jpg

    Measured meals at set times help keep cats full and protect their muscle. Aim for higher protein (protein helps build and keep muscle) and skip free feeding. Think of each meal like a short hunting session, structured feeding trims the waistline, cuts down on begging, and makes portions predictable.

    Wet food often wins for weight work. It usually has more protein and fewer carbohydrates (carbohydrates are sugars and starches), plus extra water so your cat feels full on fewer calories. Dry kibble packs more kcal (kcal means food calories) per cup and can be handy for timed dispensers. Prescription weight-loss diets (vet-prescribed medical formulas) are made to reduce calories while keeping protein and nutrients balanced; use them only with your veterinarian, especially if your cat has diabetes or other metabolic issues. Wet diets can help slow, steady weight loss and protect muscle during the process. Ask your vet about the right plan.

    Portion control tools make success repeatable. Use a gram kitchen scale, manufacturer-calibrated scoop, or an automatic feeder that sends out set portions. In homes with multiple cats, feed in separate rooms or use microchip feeders (they read a cat’s implanted microchip and open only for that cat). Swap high-fat treats for low-calorie options, or use regular kibble as rewards during play so you’re not adding extra calories.

    Slow eating helps, too. Try a slow-feeder bowl or turn mealtime into a hunt with puzzle toys. Scatter tiny piles of food across a flat surface so fast eaters have to move between bites, or put small portions in each cup of a muffin pan. Ever watched your cat’s whiskers twitch as she stalks a scattered crumb? Cute, and calorie-smart. I once watched Luna leap six feet for a muffin-pan piece, worth every paw-print.

    For step-by-step how-tos on feeder toys, slow-feeder bowls, and the muffin-pan trick, check how to use feeder toys for slow feeding and start implementing these today.

    Exercise and Enrichment to Support a Healthy Weight for Cats

    - Exercise and Enrichment to Support a Healthy Weight for Cats.jpg

    Short daily play sessions of about 5 to 10 minutes can make a big difference. They burn calories, keep muscle tone, and satisfy your cat’s hunting instincts, think whiskers twitching, a quick pounce, the little victorious thud when they catch the toy. Quick bursts of chase or pounce several times a day are easier to fit into a busy schedule than one long workout, and they help stop boredom that leads to extra snacking.

    Turn play into routine so it feels natural, not a chore. Try a morning wiggle, a midafternoon tease, and a brief evening chase. Ever watched your cat suddenly focus like a tiny tiger? It’s delightful. Small, regular sessions win over marathon play once in a blue moon.

    Sample 4-week activity plan for an indoor cat

    Week 1: Two 5-minute wand sessions daily. A wand toy (a stick with feathers or a lure) lets your cat stalk and leap. End each session with a “capture” , a stuffed toy or a couple pieces of kibble (dry cat food) so they feel successful.

    Week 2: Keep the wand routines and add one meal in a food puzzle (a toy that makes your cat work for kibble) or a slow feeder (a dish that spaces out bites). It makes eating part of play, so calories are earned.

    Week 3: Add a short supervised harness walk or two focused climbs on the cat tree (two climbs of 3 to 5 minutes). Rotate toys to keep things novel, new smells and textures make play irresistible.

    Week 4: Combine a morning wand session, an afternoon puzzle meal, and an evening short walk or climb. Track active minutes each day and tweak what your cat likes best. Small, steady increases beat huge one-off workouts.

    Older cats need gentler moves. Swap full-speed chases for short wand taps, slow target games, or gentle climbs on low platforms. If your cat has arthritis or mobility limits, check with your vet about safe options and see importance of play for senior cats for low-impact ideas. See Monitoring for how to track progress and when to adjust activity.

    Monitoring Progress: Weekly Weighing, BCS Tracking, Red Flags and Veterinary Partnership

    - Monitoring Progress Weekly Weighing, BCS Tracking, Red Flags and Veterinary Partnership.jpg

    Weigh your cat once a week and do a full Body Condition Score (BCS) check about once a month. BCS (Body Condition Score – a quick visual and hands-on way to tell fat versus muscle) shows whether the pounds you see slipping away are fat or muscle. Weekly weights help you spot trends. Keep the same routine so numbers stay comparable.

    Keep a simple log you’ll actually use: date, weight, a short BCS note, grams of food offered, treats (grams), and minutes of daily play. Try weighing Sunday morning after your cat uses the litter and before breakfast. Jot the full BCS once a month and glance at the trend at month’s end. Ever watched your kitty’s whiskers twitch as the scale moves? Little details matter.

    Change food portions slowly and only after you see a consistent trend for 2 to 4 weeks. Small adjustments. Then watch the weight and the BCS. It’s safer, and less stressful for your cat.

    Red flags that need quick veterinary contact:

    • Not eating for more than 48 to 72 hours (prolonged anorexia – not eating).
    • Rapid, unexplained weight loss of about 5% or more in a short time.
    • Sudden, severe lethargy, repeated vomiting, or big changes in litter-box habits.
    • Fast weight gain of 10 to 20% (this can mean fluid buildup or other issues).

    One serious risk to know is hepatic lipidosis (fatty liver disease – when fat floods the liver faster than it can process). It can happen when a cat stops eating. You might notice yellowing of the gums or skin (jaundice), high liver values on bloodwork (liver enzymes), vomiting, and severe weakness. Vets use blood tests and sometimes imaging to diagnose, and they treat quickly because a cat can tip into liver failure fast.

    Safe refeeding and early vet care are methodical. If a cat is at risk, vets usually start a controlled calorie plan with small, frequent meals or assisted feeding (syringe or feeding tube – a small tube that delivers food directly to the stomach). They’ll monitor daily weights and appetite and run serial bloodwork to follow liver enzymes and electrolytes. Hospital care often includes IV fluids (intravenous fluids), anti-nausea meds, and assisted feeding when anorexia is prolonged or liver values rise. If a feeding tube is placed, calories are increased in measured steps until your cat is reliably eating by mouth.

    Work with your veterinarian to set a target weight, agree on a monitoring cadence (weekly weights, monthly BCS, labs as needed), and pick clear escalation thresholds so you both know when to act. Worth every paw-print.

    Underweight and Growing Cats: Causes, Safe Gain Plans, and Warning Signs

    - Underweight and Growing Cats Causes, Safe Gain Plans, and Warning Signs.jpg

    Sometimes a cat is thin because eating hurts. Dental disease can make chewing painful. Or the stomach and intestines (gastrointestinal problems) or parasites (tiny critters like worms) stop food from being used. An overactive thyroid gland (hyperthyroidism) can burn calories too fast. Kidney disease (when the kidneys can’t clean the blood well), cancer, stress, or meal-time competition at home can all steal weight. And yes, sometimes it’s just not enough calories for growth or recovery.

    For steady, safe weight gain, vets recommend slow changes to food and feeding style. Offer canned, nutrient-dense food (more protein and calories per bite). Try vet-approved high-calorie toppers and give smaller, more frequent meals so the stomach never gets empty and bored. Warm a small scoop briefly to boost aroma and interest. Hand-feeding short sessions or spoon-feeding can re-teach eating. If a cat won’t or can’t eat reliably, vets may use assisted feeding like syringe feeding (pushing food gently with a syringe) or a feeding tube (a small tube that delivers food straight to the stomach) under professional care. Rotate textures, pâté, chunks in gravy, soft morsels, to find what makes your cat lick its lips, and measure portions so you know the daily calories delivered.

    Watch for these red flags. If your cat stops eating for more than 48 to 72 hours, call the vet, don’t wait. Prolonged anorexia can lead to hepatic lipidosis (fatty liver disease) and becomes an emergency. Rapid weight loss, getting more tired, or trouble swallowing also needs quick attention.

    Your vet will usually make a stepwise refeeding plan with target calories, regular weigh-ins, and repeat exams and labs. Common tests include bloodwork (CBC, a complete blood count, and a chemistry panel to check organs), thyroid testing, a stool test for parasites (fecal parasite check), a dental exam, and imaging like X-rays (radiation images) or ultrasound (sound waves that make pictures of the organs) to look for hidden problems. Gains are staged over weeks to months, not days, so muscle and appetite come back safely. Worth every paw-print.

    Final Words

    In the action, we ran through immediate weight benchmarks, how to check body condition at home, breed-specific ranges, calorie math, feeding tactics, play plans, and the monitoring steps that flag urgent vet care.

    We gave practical tools: the weigh-yourself trick, BCS (body condition score) palpation cues, the 20 kcal-per-pound starting rule, slow feeders, short daily play sessions, and treat control for multi-cat homes.

    Keep a simple log and work with your veterinarian, because healthy weight guidelines for cats make steady progress doable. Small steps, big purrs.

    FAQ

    Frequently Asked Questions

    What is the normal weight for a cat in kg?

    The normal weight for a cat in kg varies by breed and build. Many domestic cats fall about 3.6–5.4 kg (8–12 lb), with large breeds commonly heavier.

    What is a cat weight chart by age and how does normal cat weight vary by age?

    A cat weight chart by age shows typical weights for kittens, adults, and seniors. Domestic adults often sit 3.6–5.4 kg; kittens grow fast. Use BCS (body condition score, a fat vs muscle check) for accuracy.

    What are the average male and female cat weights in kg?

    Average male and female cat weights differ. Males often range about 4–5.5 kg (9–12 lb), females about 3.6–4.5 kg (8–10 lb). Breed, age, and neuter status shift those numbers.

    How do I use healthy weight guidelines or a calculator, and how much should I feed a cat by weight?

    Using healthy weight guidelines, estimate maintenance at roughly 20 kcal per pound (kcal = food‑energy unit). Then reduce intake about 20–25% for slow weight loss, adjust monthly, and check with BCS and your veterinarian.

    What is the 3-3-3 rule for cats?

    The 3-3-3 rule for cats describes adjustment phases: three days hiding and settling, three weeks learning home routines, and three months to feel secure and show true personality.

    Is 12 pounds or 20 pounds too heavy for a cat?

    Whether 12 or 20 lb is too heavy depends on breed and frame. Twelve pounds may be overweight; twenty pounds often means obesity unless the cat is very large. Use BCS (body condition score, a fat vs muscle check) to judge.

  • Toyger Cat Energy Level and Toy Suggestions

    Toyger Cat Energy Level and Toy Suggestions

    Think your house is quiet? Meet the Toyger, a little striped dynamo that treats your living room like a jungle gym. They look like tiny tigers, and they move like athletes, slinking, sprinting, and pouncing with big curiosity.

    Toygers are medium-sized and very active. Their whiskers twitch the moment a ball rolls across the floor. Expect about 30 to 60 minutes of play a day, split into short sessions. Ever watched your kitty chase shadows? That kind of quick, focused training energy is Toyger territory.

    For toys, match what they love: chase, puzzle, and climb. Teaser wands work like fishing rods for cats, wave it and let them hunt. Puzzle feeders slow them down and give their brains a workout. Tall cat trees with sisal (coarse natural rope) wrapped posts are perfect for climbing and scratching. Toss in a few soft, noisy balls for sprint practice.

    Rotate toys every few days so things stay exciting, and always check for loose parts or strings before you leave them alone. For busy days, throw an unbreakable ball into the hallway before you head out, ten minutes of safe play and peace of mind.

    Worth every paw-print.

    Toyger Cat Energy Level and Toy Suggestions

    - Toyger energy level and toy suggestions  Quick, actionable answer.jpg

    If you share your home with a Toyger, get ready for a lively roommate. Toygers are high-energy indoor cats with unique play behavior patterns that need daily interactive play and mental work to stay happy and out of trouble. They usually weigh about 7 to 15 pounds (a medium-sized cat) and run roughly 18 inches long, so pick durable toys that match that size, so pick toys and platforms that fit that build.

    They pick up tricks fast and love working for rewards. Many Toygers learn to fetch or walk on a leash, and they thrive with a mix of chase, puzzle, and climbing play to keep both body and brain busy. Ever watched one stalk a rolling ball? Their whiskers twitch and they’re all focus.

    Best toy types for a Toyger:

    • Interactive wand toy (a stick with feathers or a tassel) , short tug-and-swoosh sessions mimic prey and strengthen your bond.
    • Puzzle feeder (a food-dispensing toy that makes your cat work for kibble) , slows eating and gives mental exercise for a quick mind.
    • Running wheel (like a treadmill for cats) , lets them sprint indoors; choose a quiet, roomy model.
    • Motorized mouse or spinning toy (battery-powered moving toy) , unpredictable motion simulates live prey and sparks a serious chase.
    • Chase balls (lightweight balls that roll easily) , great for fetch or solo rolling play.
    • Tall cat tree with wide shelves (vertical play structure with platforms) , perfect for jumping, climbing, and surveying the room.

    Rotate toys every few days so things stay fresh. Supervise any string play and watch motorized toys while they run. Small detachable parts are a no-go for safety.

    Aim for 30 to 60 minutes of play a day, broken into short 5–15 minute bursts. Example: 10–15 minute wand session in the morning, a 10-minute puzzle challenge midday, and 15–20 minutes of evening chase or fetch. Toss in brief training sessions for fetch or leash work, and give them running wheel time to burn energy when you’re out.

    Check toys weekly for frays, loose pieces, or hot motors (overheated moving parts). Remove damaged items right away. If your cat has heart, kidney, joint, or infectious-disease concerns, check with your vet about safe play types first.

    Worth every paw-print.

    Toyger energy level by life stage, health, and temperament

    - Toyger energy level by life stage, health, and temperament.jpg

    Kittens and adolescents are turbo-charged. They do short, intense zoomies and practice hunting with lots of pounces and play. Ever watched a kitten vanish under the couch and pop out like a furry spring? It’s cute and exhausting.

    Adult Toygers stay busy. They need steady daily exercise and mental work so they don’t get bored. Think puzzle feeders (treat-dispensing toys) and wand games that mimic prey, your cat’s whiskers will twitch with every twitch of the toy.

    Seniors slow down. They still like to play, but expect gentler motion and shorter sessions, soft batting at a plush mouse or a slow-rolling ball is perfect. Keep sessions calm and easy on their joints.

    Health changes how you play. Heart murmurs (abnormal heart sounds), kidney disease (kidneys not filtering well), patellar luxation (kneecap slipping), or FIP (feline infectious peritonitis, a viral illness) mean you should trade high-speed chases for low-impact wand games, slow-rolling balls, or puzzle feeders that reward light movement. Add ramps or lower platforms so a 7–15 lb cat (about 3–7 kg) can climb without strain. Ask your vet about checkup timing. Most cats get an annual exam, but if a condition shows up you may need more frequent visits. And pair activity with a vet-guided feeding plan to help prevent obesity.

    Personality matters a lot. Bold, playful Toygers love unpredictable prey motion and tall climbing spots. Shy or cautious cats prefer slow introductions, toys with familiar scents, and short supervised sessions. Rotate toys and match the intensity to your cat’s vibe so play stays fun, not scary.

    Worth every paw-print.

    Age/Stage Typical energy level Daily play target Suggested toy types
    Kitten Very high; bursts of zoomies and hunting practice 60–90 minutes (multiple short sessions) Wand toys, chase balls, small soft mice (supervised)
    Adult High; steady need for physical and mental outlets 30–60 minutes (3–4 sessions) Running wheel, motorized mouse, puzzle feeders (treat-dispensing toys), tall cat tree
    Senior Lower; prefers gentle, low-impact play 10–30 minutes (short, calm sessions) Soft plush, low-roll balls, puzzle feeders (easy level), ramps for access

    Best toy categories for Toyger cats: wands, puzzle feeders, chase toys, and climbing

    - Best toy categories for Toyger cats wands, puzzle feeders, chase toys, and climbing.jpg

    Toygers are clever and busy, so give them toys that match their hunting brain and boundless energy. Look for play that lets them stalk, sprint, solve puzzles, and climb. Your Toyger will thank you with full-body zoomies and razor focus.

    Chase toys hit the sweet spot for that pursuit instinct. A running wheel lets them sprint safely indoors. Pick one with a wide running surface and quiet bearings (small parts that help the wheel spin smoothly), and a lane big enough for a 7-15 lb cat to run without slipping. A 15-inch lane keeps paws safe. Solid chase balls should roll easily but be too big to swallow.

    Motorized mice and spinning toys mimic erratic prey and can keep a Toyger busy. Choose units with a sturdy casing, replaceable batteries, and an auto-shutoff to prevent overheating. Washable or wipeable surfaces are ideal. Fun, but skip toys with tiny detachable parts for medium-sized cats.

    Wands and teasers are low-tech winners. The sudden darts and fluttering make stalking and pouncing click. Go for a durable shaft and a head you can swap out (feathers or fabric). Supervise any string-like bits so your cat doesn’t swallow them. Think of a teaser wand like a fishing rod for cats, just add feathers. Example: "Swap the feather when it frays; keep the shaft for years."

    Puzzle feeders, treat-dispensers, and climbing furniture feed a Toyger’s mind and need to go up. Pick adjustable puzzles so the challenge stays rewarding. Climbing pieces should have wide, stable platforms and tough coverings like sisal (rough natural fiber for scratching) or heavy-duty carpet; washable pads are a big plus. Your cat’s whiskers will twitch as they hunt treats. Worth every paw-print.

    Item Key specs Note
    Running wheel Wide running lane 14-16 in; quiet bearings (smooth spin); supports 7-15 lb “A 15-inch lane keeps paws safe.”
    Motorized toys Sturdy casing; replaceable batteries; auto-shutoff “Stops after 10 minutes if left alone.”
    Climbing furniture Sisal (rough natural fiber for scratching) or heavy-duty carpet; wide stable platforms; washable pads Big perch, no wobble.

    Match toys to your cat’s personality and rotate them so nothing gets boring. Retire anything with frays, chew marks, or a motor that runs hot. Keep an eye on play, you’ll spot the favorite right away. Ever watched your kitty chase shadows and then act like nothing happened? I guess that’s peak cat.

    Play routines and exercise schedule tailored to a high-energy Toyger

    - Play routines and exercise schedule tailored to a high-energy Toyger.jpg

    Most Toygers do best with about 30 to 60 minutes of active play each day, split into 3–4 short sessions. Short bursts of 5 to 15 minutes match their natural hunting rhythm and keep them engaged without wearing them out. Picture whiskers twitching and that satisfying pounce, yeah, that.

    Try a simple daily plan that fits a busy life. Morning: a 10–15 minute high-energy wand session (wand = a pole with a toy on the end) to burn off early zoomies. Midday: a 10 minute puzzle-feeder or treat-dispensing challenge (puzzle-feeder = toy that releases food when your cat solves it) to give the brain a workout. Afternoon: a short 5–10 minute chase or fetch mini-session. Evening: a 15–20 minute play block combining running and recall practice (recall practice = training your cat to come when called) with a wand plus tossed chase balls. Swap in a slow puzzle or gentle batting session for older or sore cats, or move the main session later if evenings are when your house is liveliest.

    If you’re out for work, add a running wheel (running wheel = an exercise wheel made for cats) or an automated toy (automated toy = a battery- or motor-driven toy that moves on its own) so your Toyger has solo outlets. Let wheel runs be 10–20 minutes at a stretch. Limit automated-play blocks to 20–30 minutes total and choose toys with built-in shutoffs so motors don’t overheat.

    In multi-cat homes, stagger sessions so every cat gets attention. Give each cat separate puzzle-feeders or set up multiple play stations, and watch for resource guarding so everyone gets a fair turn. Ever seen two cats stare down a single toy? Yeah, that.

    Keep training short and fun: 5–10 minute clicker or fetch drills a few times a week build skills and focus. Clicker (clicker = a small training device that makes a sharp sound) sessions work wonders. For leash work, start inside with a harness (harness = a secure vest-style leash system) and keep walks to 2–3 minutes at first, praising lots. Slowly extend sessions, stop if your cat shows stress, and check with your vet about activity limits if there are health concerns.

    Worth every paw-print.

    Toyger climbing and indoor enrichment: cat trees, shelves, tunnels, and vertical space

    - Toyger climbing and indoor enrichment cat trees, shelves, tunnels, and vertical space.jpg

    Toygers love being up high. It gives them a safe perch to scout, a runway for big leaps, and a front-row seat to whatever birds are doing outside. Pick climbing gear that feels solid under your hands: a heavy base, no wobble, and platforms wide enough for a 7-15 pound cat to land and turn. Aim for platforms at least 12 inches deep so your cat can sprint, sprawl, and flop down with that satisfying thud.

    Tall cat trees give lots of vertical real estate and cozy nap spots between chases. Wall-mounted shelves make climbing routes without stealing floor space, and window perches turn bird-watching into a daily show. Look for sisal-wrapped posts (sisal is a rough natural fiber good for scratching) and platforms made from dense plywood (layers of wood glued together) or MDF (medium-density fiberboard, an engineered wood). Add non-slip coverings so paws don’t slide. Mount shelves near a window or connect them to a tree so your Toyger can travel across levels. Place higher shelves about 12-18 inches apart to match their jumping stride.

    Tunnels add low-level chase options and hide-and-pounce fun. Choose tunnels about 10-12 inches in diameter so they’re roomy for a medium cat. Put exercise wheels on a flat, clear surface against a wall for stability (think of an exercise wheel like a big hamster wheel for cats). Keep tunnels, wheels, and perches clear of cords or blind pulls so play stays safe. Rotate perch locations now and then to keep views fresh and curiosity high.

    Ever watched your cat’s whiskers twitch as a ball rolls across the carpet? Small changes make a big difference. Move a perch closer to a sunny window. Swap a toy at the top of the tree. Those tiny surprises keep your Toyger engaged, even when you’re busy.

    Choosing the right cat tree or wall-mounted shelves

    For a 7-15 pound Toyger, platform size matters. A 14 by 16 inch platform is comfy for lounging; 12 by 12 inches is the bare minimum for perching. Space shelves 12-18 inches vertically so jumps feel safe and progressive, not scary.

    Stability tips: pick a tree with a base that is 18 inches or more, or use wall anchors for tall units. Tighten bolts monthly and check mounting screws after busy play sessions to stop wobble. Sisal posts stand up to heavy scratching; carpeted posts are softer but wear faster. Choose washable pads or removable covers, wipe surfaces routinely, and retire pieces with torn fabric or loose staples so play stays safe.

    A quick note: if your cat loves to leap, add a wider landing surface or an extra mid-level shelf. Worth every paw-print.

    Toy safety, durability, cleaning, and replacement guidance for Toyger play

    - Toy safety, durability, cleaning, and replacement guidance for Toyger play.jpg

    Start with a weekly toy check. Give every toy a quick once-over every 7 days and pull anything with loose threads, split seams, wobble, or exposed parts out of play right away. If a toy has sharp edges, crumbling plastic, or a motor that feels warm, take it away at once. Don’t wait.

    Pick materials that survive rough play. Thick rubber (durable, bouncy rubber) and silicone (flexible, heat-resistant, rubber-like material) are great for chewers. Puncture-resistant fabric like Cordura (heavy-duty nylon) or ballistic-style fabric (very tough nylon) works well too. Look for machine-safe labels (gentle cycle) or wipeable surfaces, and choose toys with non-toxic fillings and dyes. For aggressive chewers, go for rubber puzzle dispensers or tightly woven ballistic-style fabric instead of thin plush. Your fingers will thank you when the stuffing stays put.

    Gear rules matter. Running wheels should have a wide lane of about 14 to 16 inches and a low-wobble base so a 7 to 15 lb cat can run without slipping. Quiet bearings (small parts that help wheels spin smoothly) or a silent motor keep noise down. Motorized toys should have an auto-shutoff (turns off after a set time), replaceable batteries, and a solid casing. Toss any toy with cracked plastic or a loud grinding motor. Never leave string or ribbon-style wand toys unsupervised; store them out of reach between sessions so they’re not a chewing or tangling hazard. Ever watched your kitty chase a string and get totally focused? Yeah, don’t sleep on supervision.

    Clean and retire on clear signs of wear. If fabric is frayed, stuffing is loose, eyes or beads are missing, wires are exposed, or a motor hums or buzzes, it’s time to retire the toy. Do a few quick checks each week:

    • Check seams for splits.
    • Squeeze soft toys to feel for loose stuffing.
    • Spin motorized toys to listen for grinding.
    • Wipe or wash machine-safe toys on a gentle cycle and air dry when possible.

    Put frayed or chewed items in the trash. Worth every paw-print.

    Toyger Cat Energy Level and Toy Suggestions

    - Toy rotation strategy, introducing new toys, and adaptations for shy or senior Toyger.jpg

    Rotate 3–6 toys each week and keep 2–3 favorites out where your Toyger can reach them. Swap textures and motion types each rotation – feather wand (stick with feathers at the end), crinkle ball (ball that makes a crinkly noise), and a slow-rolling ball (lightweight, slow-rolling ball) are great examples so your smart Toyger stays curious. Try one week with a feather wand, a crinkle ball, and a slow-rolling ball; the next week swap in a plush (soft fabric toy), a squeaky toy (toy that makes a squeak), and a wand that moves differently. You’ll notice whiskers twitching and that satisfying little pounce, feline fine, right?

    For shy or older Toygers, choose low-energy, softer targets and introduce them slowly. Scent new toys by letting them sit in the house 1–3 days so they pick up familiar smells. Start with short, supervised 2–3 minute sessions using plush for gentle batting, low-roll balls for easy chases, and ramps (gentle inclines or steps) so a 7–15 lb cat can reach higher spots without a big jump. Use calm praise and tiny treats to make play feel safe; for example, leave a plush by a favorite perch for two days, then offer a two-minute supervised bat and reward with a tiny treat.

    Swap where toys live and how they move to keep play fresh – hide one in a box, toss another down a hallway, or dangle a feather once in a while. Check toys for loose parts and retire anything shredded or unsafe, and keep small, swallowable bits out of play for safety. Ever watched your kitty chase a slow-rolling ball across the carpet? It’s a little moment of joy you can give every day, even if you’re short on time.

    Worth every paw-print.

    Final Words

    Your Toyger pounces and zips, high-energy and quick to learn. They need daily interactive play, mental puzzles, and indoor climbing; typical size is about 7–15 pounds.

    Top matches: wand toys, puzzle feeders (treat-dispensing toys), running wheels (cat treadmills), motorized mice, chase balls, and tall cat trees. Aim for 30–60 minutes a day in short sessions, add fetch or leash walks, and rotate toys to keep interest.

    Watch for health cues, get regular vet checks, and supervise string or motorized play. Keep play safe and joyful, Toyger cat energy level and toy suggestions are here to help every pounce feel paw-some.

    FAQ

    What is the Toyger’s energy level and which toys are best?

    The Toyger’s energy level is high and is best met with daily interactive play and mental challenges: wands, puzzle feeders, running wheels, motorized mice, chase balls, and tall cat trees. Purrfect for a domestic tiger.

    How much daily play does a Toyger need and how should I schedule it?

    A Toyger needs about 30–60 minutes of play daily, split into short 5–15 minute sessions: morning wand bursts, midday puzzle feeder time, evening chase/fetch, plus running wheel or automated toy sessions.

    How does Toyger energy change by life stage and health?

    Toyger kittens are extremely playful, adults remain active, and seniors slow down; health issues like heart murmurs or kidney disease can lower activity, so ask your vet for adapted routines.

    Are Toyger cats friendly, cuddly, and good with kids?

    Toygers are social, curious, and often affectionate; many enjoy cuddles and play with children when socialized early and given plenty of interactive attention and enrichment.

    How much do Toygers cost and where can I find Toyger kittens for sale?

    Toygers typically cost $2,000–$3,500, with under 30 breeders worldwide; expect limited availability and waitlists, and verify breeder health testing and registration before buying.

    What colors do Toyger cats come in?

    Toygers usually show tiger-like stripes on orange to golden-brown coats; white Toygers exist but are rarer and may command higher prices or specific breeder focus.

    What is the Toyger’s lifespan and common health concerns?

    Toygers live about 12–16 years; watch for heart murmurs (abnormal heart sounds), kidney disease, patellar luxation (kneecap slipping), and FIP (feline infectious peritonitis). Keep up with vet checks and screenings.

    How do Toygers compare to Bengals, Savannahs, Chausies, Ocicats, and Maine Coons?

    Toygers share wild striping like Bengals and Ocicats but are bred for a calmer, domestic temperament; Savannahs and Chausies are more wild, while Maine Coons are bigger and often more laid-back.

    What should I check when buying a Toyger kitten?

    When buying a Toyger kitten, check health clearances, view parents, confirm vaccinations, ask about socialization, get a written health guarantee, and prefer breeders who test for cardiac and genetic issues.

  • How to Choose Unbreakable Balls for Multi-Cat Households

    How to Choose Unbreakable Balls for Multi-Cat Households

    Think every cat ball can survive a house with three determined stalkers? Nope.

    My two turned playtime into a tiny obstacle course: feathers pulled off, seams split, and the little sparkly eyes swallowed by the couch. Ever watched a furry missile launch across the living room? It’s loud, messy, and kind of hilarious.

    Picking a really tough ball is easier than it sounds. Read the material label , look for polymer (a kind of hard plastic), rubber, or fiberglass (like a strong fishing-rod core) , and check for reinforced seams (extra stitching or tape) and chew-resistant fabric (tight weave that won’t rip). Also trust chew-resistant claims, but match the ball size to each cat so nobody can choke or hog the toy.

    Do that and toys last longer, scuffles calm down, and everybody gets a fair chase. For busy days, toss an unbreakable ball before you head out – ten minutes of safe play and a much quieter home. Worth every paw-print.

    How to Choose Unbreakable Balls for Multi-Cat Households

    - Quick checklist to choose unbreakable balls that work in multi-cat homes.jpg

    Top three things to check: clear material labels, chew and puncture resistance, and the right size for each cat. Think of it like picking shoes for a busy household , comfort, toughness, and fit matter.

    1. Look for non-toxic and BPA-free labels on the box or product page. BPA-free means the plastic won’t leach nasty chemicals into your home.

    2. Buy one to two balls per cat. Multi-packs save money and stop fights over the same toy, especially when your house turns into a feline traffic jam.

    3. Verify a seam-strength or reinforced-seam claim before you buy. A seam (where two parts join) is often the first place to split, so scan product photos for visible stitching or molded joins.

    4. Favor chew-resistant or puncture-proof claims and double-check what real users say about breakage. Chew-resistant usually means tougher materials, like polymer (a tough plastic) or reinforced rubber.

    5. Match ball diameters to your cat: kittens about 1.0–1.5 in (25–38 mm); adult cats about 1.5–2.5 in (38–64 mm); large breeds about 2.5–3.5 in (64–89 mm). Big enough to avoid swallowing, small enough to be batted across the floor.

    6. Pick low-noise or foam-core balls for hardwood floors or shared spaces. Foam-core (a soft foam center) or felt balls keep noise down; use high-bounce rubber for carpeted chase sessions.

    7. Choose washable or dishwasher-safe toys for easy cleaning and check the label for care instructions. Nobody wants a smelly toy after a week.

    8. For battery-powered balls, confirm the enclosure is sealed and tamper-proof so batteries aren’t easy to access. Sealed means you or your cat can’t pop the battery door open mid-play.

    9. Reject toys with glued-on decorations or any bits that look like they could peel off. Tiny bells, beads, or glued eyes are choking hazards, so avoid them.

    10. For treat-dispensing balls, check hole size so kibble comes out but paws don’t get stuck. You want playful snacking, not a vet visit.

    11. Read the warranty and return policy closely. See whether the company covers chew damage or just factory defects, and prefer sellers who handle photo claims quickly.

    12. Do a quick durability check when you buy: inspect seams, squeeze to feel wall thickness, and fail any ball with gaps or thin spots. If it feels flimsy in-store, it’ll feel worse after a week of pouncing.

    Use this checklist when you’re comparing specs, reviews, and ratings in-store or online. Happy hunting , and may your floors be full of well-behaved, unbreakable joy.

    Materials and safety: narrow material guide and labeling to check before purchase

    - Materials and safety narrow material guide and labeling to check before purchase.jpg

    Before you buy a toy, give it a quick safety check. Think like a picky cat parent: you want something that survives a few zoomies and chews, not a shredded mess. Ever watched your kitty win a tug-of-war with a flimsy toy? Yeah, don’t buy that again.

    Look for these materials , they hold up best:

    • Food-grade silicone (soft, food-safe rubbery polymer used in kitchen tools). It’s squishy, easy to clean, and gentle on teeth.
    • Solid rubber (dense natural or synthetic rubber). Feels firm under a paw and resists punctures.
    • Polyurethane (tough, plastic-like polymer). Durable and often used in long-lasting pet gear.
    • Foam-core rubberized (soft foam center with a durable rubber skin). Gives a nice bounce without falling apart.

    Avoid brittle plastics, ceramics, or glass. Those can crack and make sharp bits. Also skip toys with glued-on decorations, scented coatings, toxic dyes, or paint that can flake off during play. If your cat can pull it off, they will.

    Battery-powered toys need extra attention. Look for sealed compartments with tamper-resistant screws or access that requires a tool. If the battery door is loose or wiring shows, put it back on the shelf. The ASPCA has a useful guide on toy-safety labeling and red flags: https://www.aspca.org/pet-care/general-pet-care/choosing-safe-toys-pets.

    Label examples to look for:

    • "Sealed compartment; tamper-resistant screws; tool required."

    Read material claims like a detective. "Non-toxic" should point to tests. "BPA-free" should be specific. "Food-grade silicone" means it meets food-contact standards. Check for dishwasher-safe max-temperature markings and any seam-strength or reinforced-seam claims. Prefer toys that publish manufacturer or third-party durability testing instead of fuzzy marketing words like "super tough" with no proof.

    Claim examples that make you nod and relax:

    • "Non-toxic: third-party tested"
    • "BPA-free" on the spec sheet

    I once bought a cute plush that looked indestructible and my cat turned it into confetti in ten minutes. Oops, lesson learned. Now I pick toys that list real tests or clear material specs.

    Worth every paw-print.

    Size, weight and bounce: concrete ranges to match each cat and room

    - Size, weight and bounce concrete ranges to match each cat and room.jpg

    Size really matters. For kittens, aim for about 1.0-1.5 in (25-38 mm); adult cats do best around 1.5-2.5 in (38-64 mm); and large breeds or extra-big options work at 2.5-3.5 in (64-89 mm). Do a quick jaw-width check: if your cat can almost close its mouth around the ball, pick the next size up to avoid any swallowing risk. Ever watched a kitten try to gulp a toy? Yeah, not great.

    Think about weight and bounce based on how your cat plays. For quick flicks and batting, choose balls under 15 g; for balanced rolling and fetch, go with 15-40 g; and for push toys that resist flying under the couch, pick over 40 g. High-bounce rubber (bouncy elastic material) cranks up the chase, while foam-core (soft foam center) or low-bounce silicone (soft, rubbery polymer) gives gentler, slower play that’s kinder to kittens and seniors.

    Match the ball’s bounce to your floors and noise tolerance. Hardwood and shared living spaces do best with quiet, low-bounce or rubberized balls that roll without clatter. Carpeted chase zones love springy, high-bounce rubber for thrilling sprints. Want peace during nap time? Keep low-bounce options out for everyday play and save the high-energy bouncers for supervised sessions. My cat once launched a high-bounce ball across the living room. Oops, chaos and giggles.

    Worth every paw-print.

    Cat category Recommended diameter (in / mm) Best weight & bounce
    Kittens 1.0-1.5 in / 25-38 mm Light, under 15 g; low- to mid-bounce (gentle)
    Adult cats 1.5-2.5 in / 38-64 mm Midweight, 15-40 g; mid- to high-bounce for chase
    Large breeds / seniors 2.5-3.5 in / 64-89 mm Heavier, over 40 g or sturdy midweight; low-bounce for low-impact play

    Durability, care, and inspection: home stress tests, cleaning routines, inspection cadence, and replacement cues

    - Durability, care, and inspection home stress tests, cleaning routines, inspection cadence, and replacement cues.jpg

    Toys last longer and stay safer when we give them a little love and a quick once-over. Think of these checks as a pre-play warmup , fast, hands-on, and a bit picky. Multi-cat households wear toys out faster, because personalities collide and toys get tossed around. So let’s keep things simple and practical.

    Quick home stress checks
    Ever watched your kitty launch at a toy like it’s the moon? Do these before playtime.

    1. Bite test – Press with a fingernail or mimic a tooth nip. Fail if the surface flakes, tears, or shows loose fibers.
    2. Crush / hand-squeeze – Squeeze firmly around seams and joins. Fail if seams gape, split, or the toy stays deformed.
    3. Puncture probe – Use a blunt probe shallowly (a pencil eraser works fine) to test the skin thickness. Fail if the skin tears or the inner core (the toy’s inner material, like foam or plastic) becomes exposed.
    4. Drop / roll – Drop from chair height (about 18 inches) onto a hard floor and roll it several times. Fail if seams split or panels separate on impact.
    Test How to do it Fail signs
    Bite test Press with a fingernail or simulate a nip Flaking, tears, exposed fibers
    Crush / squeeze Squeeze seams firmly Gapping seams, splits, permanent dents
    Puncture probe Probe shallowly with a blunt point (pencil eraser) Skin tears, exposed core
    Drop / roll Drop from chair height and roll Seams split, panels separate

    Cleaning made easy
    Keep it simple and follow the label.

    • Wash washable balls and soft toys with mild soap and warm water, rinse well, and make sure they’re fully dry before giving them back. Damp toys invite bacteria and mold.
    • Only use the dishwasher if the toy explicitly says dishwasher-safe on the label. Don’t guess.
    • Ignore vague “self-cleaning” or antibacterial claims unless the maker provides lab tests. If they list specific temperatures for dishwasher use, follow them.
    • Clean daily if toys get slobbery or gross; otherwise weekly for light use.

    Inspection cadence and replacement cues
    Find problems early and toss what’s unsafe. Your cat will thank you with a happier, less germy zoom.

    • Inspect all active toys at least once a week. Heavy chewers need checks every 2-3 days.
    • Replace immediately if you see: cracking, exposed core, loose seams, flaking paint, soft spots that don’t spring back, or any missing fragments. Those are classic choking or ingestion risks.
    • Store toys away from heat and direct sun to avoid warping and material breakdown.
    • Keep dirty or wet toys out of rotation until they’re bone-dry.

    A quick checklist before play

    • Bite, squeeze, puncture probe, drop test – done.
    • Fully dry and clean – check.
    • No exposed core, loose seams, or missing pieces – check.
    • Happy, safe cats – yes.

    For supervision tips and inspection best practices, see Toy safety for cats (VCA Hospitals): https://vcahospitals.com/know-your-pet/toy-safety-for-cats

    Worth every paw-print.

    Best unbreakable ball types and matching them to play-styles (with one-line durability caveats)

    - Best unbreakable ball types and matching them to play-styles (with one-line durability caveats).jpg

    Match a ball’s play mechanics to your cats’ favorite moves so everyone gets a turn and guarding is less likely. Think fast-rolling balls for zoomies, quiet foam for older kitties, and puzzle balls for snack-driven hunters. Ever watched your cat chase a lone dot of light? That same idea helps when you pick the right ball.

    Battery-powered or LED models can grab attention, but pick ones with sealed, tamper-proof enclosures (no loose panels or exposed batteries) and supervise the first few sessions so batteries don’t become a chew risk.

    • Solid silicone (flexible, durable rubber-like plastic). Best for rough chewers and fetch. Caveat: May show bite marks after months of heavy chewing.
    • Heavy-duty rubber chase ball (tough, elastic material). Best for high-speed group chases and crazy zoomies. Caveat: Can abrade under extreme, repeated bites.
    • Foam-core silent ball (soft, compressible foam around a core). Best for quiet rolling and seniors who prefer gentle play. Caveat: Foam can compress and eventually reveal the inner core with heavy use.
    • Treat-dispensing puzzle ball (hides kibble or small treats inside). Best for food-motivated cats who love a problem to solve. Caveat: Small treat openings can clog or wear, so check them often.
    • Multi-texture ball (felt, ridges, and rubber patches for varied feel). Best for tactile seekers and shy players who like a range of surfaces. Caveat: Stitched textures may fuzz or pull if a cat persistently chews.
    • Modular ball with replaceable skins (outer covers you can swap). Best for long-term multi-cat rotation and variety without replacing the whole toy. Caveat: Replacement skins vary in fit and quality and may loosen over time.
    Ball type Best-for (play-style) Durability caveat
    Solid silicone (flexible, durable rubber-like plastic) Rough chewers and fetch May show bite marks after months of heavy chewing
    Heavy-duty rubber chase ball (tough, elastic material) High-speed group chases Can abrade under extreme, repeated bites
    Foam-core silent ball (soft, compressible foam around a core) Quiet rolling and seniors Foam can compress and reveal the core after heavy use
    Treat-dispensing puzzle ball (hides kibble or small treats) Food-motivated cats Small treat holes can clog or wear, check often
    Multi-texture ball (felt, ridges, rubber patches) Tactile seekers and shy players Stitched textures may fuzz or pull with persistent chewing
    Modular ball with replaceable skins (swap-able outer covers) Long-term multi-cat rotation Replacement skins vary in quality and may fit loosely over time

    Introducing, rotating, and preventing conflict in multi-cat households

    - Introducing, rotating, and preventing conflict in multi-cat households.jpg

    Multi-cat homes are full of personality, so toy management is not optional. It’s how you keep the peace, spread playtime, and stop one bold cat from hogging every ball. Picture whiskers twitching as a ball skitters across the rug. Cute chaos, but manageable.

    When you bring a new ball home, let each cat inspect it alone in a favorite lounge spot. Give solo sniffing or solo play for about 5 to 15 minutes, then try a short supervised group session of 3 to 10 minutes so you can step in if things get tense. Keep identical spare balls handy to cut down on hoarding and guarding. Short, regular group sessions beat long free-for-alls because they focus attention and lower competition.

    Swap toy sets every 3 to 7 days to keep novelty high and rivalry low. Keep one to two identical balls per cat in the active rotation (see Checklist pack-count) so nobody feels shortchanged. Watch body language during joint play and pause or remove toys if one cat starts to dominate. Retire any toy at the first sign of damage to avoid fights over a prized, unsafe item.

    1. Place new balls in separate zones so each cat can find one without crowding.
    2. Allow solo sniffing and short solo play for 5 to 15 minutes before group exposure.
    3. Run a short supervised joint session (3 to 10 minutes) and step in if things escalate.
    4. Rotate sets every 3 to 7 days to preserve novelty and reduce guarding.
    5. Maintain 1 to 2 identical balls per cat in rotation (refer back to Checklist pack-count).
    6. Retire or remove any toy showing damage or causing repeated conflict.

    Signs of guarding and quick fixes:

    • Stiff posture. Remove the toy briefly and give space.
    • Blocking access. Offer a duplicate ball in another zone so everyone can play.
    • Growling or hissing. End the session and separate for a minute, then try calm reintroduction.
    • Swatting or redirected aggression. Distract with a wand toy away from the ball and reset the mood.
    • Persistent resource fixation. Split toys between rooms and supervise until tensions ease.

    Worth every paw-print. Keep it simple, watch the whiskers, and enjoy the pounces.

    Where to buy, pack sizes, pricing and warranty advice

    - Where to buy, pack sizes, pricing and warranty advice.jpg

    Want to hold the toy first? Head to a local pet store and give it a squeeze. Feel the wall thickness (how thick the toy's outer shell is), press the seam (where two pieces are joined), and roll it on your floor to hear the rattle or bounce, your cat’s whiskers will thank you. Online shops win on variety and real-world durability reports from other owners, plus sellers that accept photo-based return claims make refunds faster, so I usually mix both options.

    Read warranty language like it’s a short contract. Look for whether chew or durability claims are covered, or if the warranty only handles factory defects (flaws made during production). Favor sellers with clear return windows and a simple photo-claim process so you’re not waiting for weeks to get a replacement.

    Pack sizes matter. Common sets are 3, 6, and 12; bigger packs usually lower the cost-per-toy but think about storage and how many balls you need for rotation and multi-cat harmony. For busy days, toss an unbreakable ball before you head out, ten minutes of safe solo play.

    Quick checklist:

    • Check the seller’s return policy and the manufacturer warranty for chew/durability coverage versus manufacturing defects.
    • Read user breakage reports and timelines to see how toys hold up in real homes.
    • Inspect seams and wall thickness in person when you can; it’s worth touching the toy.
    • Start with a small multi-pack to test durability and rotation needs before committing to bulk.

    Worth every paw-print.

    Pack size Typical retail price (USD) Estimated cost per toy (USD)
    3-pack $9–$15 $3.00–$5.00
    6-pack $16–$30 $2.50–$5.00
    12-pack $28–$50 $2.30–$4.20

    Quick answers: top buyer questions

    - FAQ concise answers and pointers to detailed sections.jpg

    Short, one-line answers you can skim, scroll down the page for full guidance.

    • Best size for kittens: 1.0-1.5 in (25-38 mm) diameter. That’s small enough for tiny paws to bat and carry. See Size, Weight & Bounce for numeric ranges.
    • Are LED or battery balls safe: Only when the battery compartment is fully sealed (a closed casing that keeps the batteries inside) and you watch play time. If the case can pop open, skip it. See Materials and safety.
    • How many balls per cat: Aim for 1-2 balls per cat, plus at least one identical spare so there’s no “mine” meltdown. See Introducing, rotating, and preventing conflict.
    • Do treat-dispensing balls cause fights: They can spark guarding, yep. Supervise and give duplicates so everyone gets a fair turn. See Introducing, rotating, and preventing conflict.
    • Cleaning frequency: Wash slobbery toys every day, light-use toys about once a week. A quick rinse and air-dry keeps germs down. See Durability, Care & Inspection for cleaning routines.
    • Key failure signs: Look for cracks, exposed cores, or soft gummy spots where the surface has broken down. If a ball splits or feels squishy in a new way, toss it. See Durability, Care & Inspection for testing and replacement cues.
    • Materials for heavy chewers: Pick tough options like polymer (a hard plastic), silicone (soft rubber-like material), or metal where appropriate, check labels for chew resistance. See Materials and safety for chewer-friendly guidance.
    • What to do about a bully cat: Give duplicates in separate zones, rotate sets every 3-7 days, and offer play sessions one-on-one so everyone gets attention. See Introducing, rotating, and preventing conflict.

    Final Words

    In the action, you covered the quick checklist, material and safety labels, size/weight and bounce ranges, durability tests and care, ball types matched to play styles, and intro/rotation plus buying and warranty tips.

    Keep the 12-point checklist handy when you compare specs and reviews in-store or online.

    Follow size guidance, look for non-toxic and seam-strength claims, rotate toys every 3–7 days, and buy 1–2 balls per cat to reduce guarding and wear. How to choose unbreakable balls for multi-cat households becomes simple with those steps, and your crew will be happier and more active, happy pouncing!

    FAQ

    Frequently Asked Questions

    What is the 3-3-3 rule for cats?

    The 3-3-3 rule for cats describes typical adjustment stages after bringing a cat home: about 3 days of hiding, around 3 weeks of exploring and loosening up, and roughly 3 months to fully settle into routines and trust.

    What is the 3-3-3 rule for cats on Reddit?

    On Reddit the 3-3-3 rule echoes the same guidance: expect initial hiding for about 3 days, gradual comfort in roughly 3 weeks, and fuller settling by about 3 months.

    Are actual cat fights likely in multi-cat households?

    Actual cat fights can occur in multi-cat homes, especially with stress, scarce resources, or poor introductions. Reduce conflict by providing multiple separate resources (beds, litter boxes, food/water), supervising and slow introductions, offering identical toys, and rotating sets of toys or resources to prevent guarding.

    What is the N+1 rule for cats?

    The N+1 rule (N 1) is a playful meme meaning owners often add one more cat than they have. It’s not a care guide—consider your space, time, budget, and veterinary needs before adopting another cat.

    Related Articles

  • How Are Unbreakable Cat Balls Made: Materials & Safety

    How Are Unbreakable Cat Balls Made: Materials & Safety

    Think "unbreakable" cat ball is just clever marketing? Ever watched your kitty pounce on a toy and destroy it in seconds. Let’s dig into what those claims really mean, and have a little fun along the way.

    First, the materials and what they actually do. Silicone (soft, nonporous rubber-like material that resists grime) feels gentle on paws and is easy to clean. TPE (thermoplastic elastomer, a bendy plastic that springs back) gives a nice bounce and a slightly squishy texture. Vulcanized rubber (rubber made stronger with heat treatment) stands up to heavy chewers and takes a beating. Polycarbonate (very strong, impact-resistant plastic used in safety gear) adds durability and structural strength.

    Now, combos matter. A polycarbonate core with a silicone outer layer gives a paw-friendly feel and keeps the ball from cracking. All-rubber or vulcanized-rubber toys survive hardcore chewers, but they can be heavier and less bouncy. TPE layers make lightweight balls that zoom across carpet with a satisfying thud. Ever watched your cat chase a ball and stop to bat it with the perfect little nibble sound? That’s the texture you’re after.

    Safety checks you should look for. Sharp-edge testing (makes sure broken bits don't leave cutting edges) prevents accidental cuts. Toxicology screening (checks for harmful chemicals like BPA or heavy metals) keeps mouths and bodies safe. Also check seam strength, small-part/choking hazard tests, and whether the toy is truly washable or dishwasher-safe for easy cleanup. Oops, make that three must-check labels: tested materials, clear safety reports, and an easy-clean tag.

    Quick tips for busy people and kitten parents. For daily play pick a ball that’s easy to toss and clean, ten minutes of supervised play before you leave is gold. For heavy chewers choose vulcanized rubber or polycarbonate cores. For shy or older cats choose softer silicone or TPE textures that don’t hurt their paws.

    Pick a toy that’s been safety tested, feels right to your cat, and survives a few royal pounces. Worth every paw-print.

    How Are Unbreakable Cat Balls Made: Materials & Safety

    - What unbreakable cat balls are made of.jpg

    Think of an unbreakable cat ball like a tiny fortress of fun. Makers pick a few core materials to balance chew-resistance, how the ball feels under paw, and how easy it is to clean. The usual lineup: silicone (a soft, nonporous rubber-like material), TPE (thermoplastic elastomer, a bendy plastic that bounces back), vulcanized rubber (rubber treated to be tougher), polycarbonate (a very strong, impact-resistant plastic), polyurethane foam or PU foam (light, squishy core material), and nylon/fiber blends (strong synthetic threads for reinforcement). Each one plays a role in keeping the toy safe and fun.

    Material Key properties relevant to cat toys Common use in “unbreakable” balls
    Silicone (soft, nonporous rubber-like) Easy to wash, stretchy, gentle on teeth Outer shells and washable covers for chew-friendly designs
    TPE (thermoplastic elastomer) Resists chewing and rubbing, bonds well when molded Flexible shells, overmolded grips, soft-touch layers
    Vulcanized rubber (crosslinked, toughened rubber) High tear and abrasion resistance under repeated bites Solid chew cores and durable outer layers for heavy chewers
    Polycarbonate (impact-resistant plastic) Very strong, rigid without shattering Hard-core inserts or solid play-balls where stiffness is wanted
    Polyurethane (PU) foam (lightweight cushioning foam) Light, cushions impacts, adjusts weight and bounce Weighted or soft inner cores that change feel and bounce
    Nylon/fiber blends (synthetic reinforcement) Adds tear resistance and structure without metal Internal layers or embedded scrim to help stop punctures

    Design choices matter a lot. Some balls are hollow so they wobble and bounce, others are solid to survive the toughest chewers. Makers often use multi-layer shells by overmolding (pouring one material over another in the mold) to get a soft outside and a tough inside. Thicker walls usually last longer, but they feel heavier and bounce differently, so it’s a tradeoff. Shore A hardness (a simple scale that measures how soft or firm rubber is) helps pick a surface that resists claws but won’t hurt teeth.

    Cleaning and chemical resistance steer material picks, too. Nonporous silicone and stable TPEs stand up to repeated washing and drool better than soft foams, which can soak up gunk. That means easier cleanup and fewer stinky surprises.

    One more thing: metal inserts are usually avoided. Metal can rust, form sharp edges, or be dangerous if bitten free, so designers use nylon or fiber reinforcement instead (strong threads that don’t corrode). Safer, lighter, and still tough enough to handle most cat antics.

    So yeah, makers mix materials like a chef mixes ingredients to get the right taste and texture for play. The result: a ball that bounces, survives a pounce-fest, and cleans up when you need it, worth every paw-print.

    How Are Unbreakable Cat Balls Made: Materials & Safety

    - Production processes used to make unbreakable cat balls injection molding, rotational molding, compression and transfer molding.jpg

    Toy makers pick the manufacturing route that fits the design and how the toy will be used. Injection molding, rotational molding, and compression or transfer molding with vulcanization (heat and chemical cure that toughens rubber) are the big three. Those choices change how durable the ball is, whether seams show up, if a bell can be fully sealed inside, and how much mold-release residue (a lubricant that helps parts pop out of molds) needs cleaning so curious kitties do not lick anything yucky. Fun fact: the right process can mean the difference between a toy that survives a week of pouncing and one that still looks new after months.

    1. Clamp mold and ready the machine.
    2. Load resin or elastomer into the hopper (resin is a plastic material; elastomer is a rubber-like material).
    3. Inject or transfer material into the mold cavities under pressure.
    4. Hold so the material flows and fills the gates.
    5. Cool or cure the part, timing depends on the material.
    6. Open the mold and eject the parts.
    7. Trim flash and inspect visually.
    8. Post-process with overmold (adding a second material over a part), ultrasonic weld, or assemble inserts.

    Injection molding: basics and pitfalls

    Injection molding forces melted plastic into a machined mold. The molds are CNC-machined (cut by computer-controlled tools) from steel or aluminum, which helps hit repeatable cycle times for big runs. Where you put the gate and vents guides the melt so seams stay strong; a poor gate location makes a weak spot where a cat might chew. Mold-release agents are kept in tight control to avoid residues that pets could lick. And tooling cost is driven by how many cavities you need and the steel grade you pick. Watch out for defects like short shots (incomplete fills) and sink marks (dents that form as thick areas cool); they’re common but fixable with tweaks.

    Rotational molding and elastomer molding

    Rotational molding heats resin inside a rotating hollow mold to make seamless, hollow balls. It’s slower, but you get a wobble-and-roll toy with no seam for claws to catch. For chew-resistant, rubbery shells, compression or transfer molding followed by vulcanization makes a crosslinked material (chemical bonds that make rubber tougher) that stands up to biting. Small-batch makers often try 3D-printed molds or soft tooling for prototypes before investing in full steel molds, because testing is cheaper than learning the hard way. Ultrasonic welding, careful heat-sealing, or minimal-use hot-melt adhesives (quick-setting glue) join multi-part items without leaving loose bits that could be swallowed.

    Safety is a running priority. Encapsulating a bell or insert is great, but only if the seam and bonding method are solid. Clean mold-release residue off every surface. And test for common failure modes so the ball doesn’t come apart mid-pounce. Ever watched your cat launch at a toy and land with that proud, satisfied look? That’s the goal. Worth every paw-print.

    How Are Unbreakable Cat Balls Made: Design Features That Make Them Resist Chewing and Impact

    - Design features that make unbreakable cat balls resist chewing and impact.jpg

    Think of the inside of an unbreakable cat ball like a tiny fortress. Internal ribbing, lattices, or honeycomb supports (honeycomb core: a web-like pattern that spreads loads) act like little shock absorbers. When your cat gives one big chomp, that single hard bite is turned into lots of smaller impacts so the outer shell stays whole. Rounded gate locations (the mold entry point that’s trimmed after molding) smooth out the seam so you don’t get a weak spot where the plastic could crack. It’s not about adding bulk. It’s about clever structure that handles force.

    A honeycomb core really does the job – it breaks one fierce chomp into many small hits, so the shell keeps its shape.

    Surface texture matters too. Tiny ribs, dimples, or a cross-hatch pattern spread bite forces across many points instead of one sharp spot. That works together with the toy’s Shore A rating (Shore A: the common hardness scale for soft plastics) to balance grip and puncture resistance. A softer Shore A with a pronounced texture gives your cat something to sink teeth into without focusing pressure on one tiny point. A harder Shore A with subtle texture rolls better and lasts longer. You can almost hear the satisfying thud of a ball that rolls true.

    Before you buy, ask yourself:

    • Does the design include internal ribbing, a lattice, or a honeycomb core?
    • Is the surface texture described, and what Shore A hardness is listed – so the toy matches your cat’s chewing style?
    • Is there an internal foam core (foam core: a soft cushion layer inside the shell) – great for cushioning but tricky for recycling and deep cleaning?

    Internal foam cores lower peak bite stress by absorbing energy, so they help a lot with under-the-tooth durability. The trade-off is real: foam glued or molded to a different plastic makes recycling and thorough washing harder because the layers are tough to separate. If recyclability or easy cleaning matters to you, look for mono-material shells (all one material) or designs where the core can be removed and recycled separately.

    Worth every paw-print.

    Safety standards, testing protocols and compliance for unbreakable cat balls

    - Safety standards, testing protocols and compliance for unbreakable cat balls.jpg

    Safety standards help tell you what serious makers test for, and what labels actually mean for shoppers. Think of them as useful checkpoints. They don’t always apply to pet toys exactly, but many brands follow them to show they’re checking small parts, chemicals, and mechanical strength.

    Relevant standards and what they test

    ASTM F963 (a consumer toy safety standard) covers mechanical hazards, small-part tests, and chemical limits that toy makers often use as a guide when designing cat toys. CPSIA (the Consumer Product Safety Improvement Act) adds tracking labels and strict limits for lead and some phthalates (plastic softeners), so CPSIA testing or tracking info is a good sign the maker checks for heavy metals and regulated chemicals. EN71 (European toy safety rules) looks at mechanical safety and flammability and overlaps with pet-toy concerns like choking or sharp edges.

    These standards aren’t magic, but they’re a strong hint a product was built with safety in mind. Look for labels or test reports that reference them. They make it easier to trust a toy when you watch your cat pounce.

    Practical test protocols manufacturers use

    Bite tests use calibrated jaws or pendulum rigs that mimic a cat’s bite force, watching for punctures, tears, or layers coming apart. Small-part and choke tests mimic how cats mouth and chew things. Tensile and elongation testing measure strength and stretch (how much a material pulls before it rips), and Shore A checks measure surface hardness (a simple scale for how soft or firm a material feels).

    Drop tests, repeated impact cycles, and accelerated aging – heat and UV exposure to simulate months of sun and play – check long-term toughness and whether colors fade. Dishwasher-safe claims get checked with repeated wash cycles. Saliva resistance tests look for chemical leaching when a cat slobbers on a toy.

    Advanced quality control uses X-ray imaging (to spot hidden gaps) and ultrasonic inspection (to find poor bonds between layers). Automated visual systems scan seams and flash for cosmetic and safety flaws so nothing obvious gets missed.

    Want a quick way to shop safer? Look for third-party reports, CPSIA tracking details, or a phthalate-free label. Those are the short cuts to buying something that’s fun and less likely to fall apart mid-pounce. Worth every paw-print.

    Durability testing, quality control and common manufacturing defects in unbreakable cat balls

    - Durability testing, quality control and common manufacturing defects in unbreakable cat balls.jpg

    Start with the front-line QC steps, like you’re checking a new toy before letting your kitty loose. Incoming raw-material checks should include batch certificates and phthalate/BPA screening (phthalates and BPA are plastic-related chemicals often checked for safety). These papers and tests tell you if the plastic mix is what it should be, and if it’s safe for chewing and play.

    Next, do in-process checks while parts are being made. Use simple dimensional gauges and a wall-thickness gauge (a tool that measures how thick the toy walls are). Do quick visual checks for flash or seam problems while pieces are still on the line. Then follow a lot-sample testing plan so only some pieces go to functional rigs like controlled bite-simulation jaws (repeatable clamp-and-release machines that mimic a cat’s chomp). For example, the rig clamps the ball, holds for one second, then opens, and repeats that cycle many times. In higher-volume runs, add machine-vision (automated camera inspection) to flag flash, seam gaps, or drifting dimensions so human inspectors can focus on the tricky failures.

    Keep a designer’s eye on injection molding. Common defects show up again and again as real-world failure modes, so watch for these:

    • Weld-line weakness, where two molten flows meet and don’t bond well. That spot can split when a curious cat bites it.
    • Flash or thin-wall short shots, meaning extra thin plastic at the mold parting lines or areas that didn’t fill completely. Those feel flimsy and get chewed through fast.
    • Sink marks in thick sections, which look like small dents from uneven cooling. They aren’t just ugly, they can hide weak spots.
    • Trapped mold-release residues, leftover slick film from release agents that make surfaces slippery or tacky.
    • Poor encapsulation of bells or weights, when internal parts aren’t fully covered and might poke through. Nobody wants a bell suddenly exposed.
    • Color migration from unstable dyes, where color bleeds or fades after heat or wear.

    Catching these issues at material receipt and during inline checks saves rework and keeps toys safer for playtime. Worth every paw-print.

    How Are Unbreakable Cat Balls Made: Materials & Safety

    - DIY options, safe home materials and prototyping tips for unbreakable-style cat balls.jpg

    DIY cat balls are cheap and fast to make, and they can be a hoot for your kitty. But small choices change whether a toy is safe or risky, so let’s keep playtime fun and worry-free.

    One popular crinkle-pom trick uses yarn, metallic candy wrappers, a small pom-pom maker, dental floss, and tiny scissors to make a roughly 35 mm pom-pom. You cut foil into strips about 1 inch (2.5–3 cm) tall (a 70 mm wrapper usually gives two strips), trap those strips in yarn layers on each half of the maker, then tie and trim. The creator said their ball lasted about 30 minutes of normal play before showing wear, which is handy to know, but it also flags some hazards.

    Metallic foil cores (aluminum foil, thin metal that can fold and tear) can fold into sharp edges that nick gums or shred into little pieces a cat might swallow, so skip foil for toys your cat will play with alone. Dental floss (strong thread that can tangle) is risky if swallowed because long strands can knot inside a pet. Regular household tape peels, and then it becomes a chew-and-swallow hazard. For the same crinkle appeal, consider Mylar (a thin, crinkly plastic film) only when it’s fully enclosed inside a solid shell, or better yet, leave crinkle layers out of toys meant for unsupervised play.

    If you want safer, longer-lasting DIY options, try thick silicone casting with food-grade RTV silicone (RTV means room-temperature vulcanizing silicone that cures to a rubbery, washable part) for small batches. Or make two-part molds and cast TPE (TPE is a thermoplastic elastomer, basically a bendy plastic) for a springy shell. Use simple 3D-printed prototypes in durable filaments like PETG or ASA (filaments: strong plastics used for test prints) to check size, grip, and texture before you commit to casting; those prints are for fit-testing, not long-term chewing. Aim for mono-material shells or fully potted cores so nothing can pop out mid-pounce.

    Seal and bond with products labeled for food contact or potable-water use after they’ve fully cured, such as FDA-compliant silicone sealants or manufacturer-rated pet-safe adhesives, and follow cure times exactly. Prefer mechanical encapsulation – fully molding over a core – or potting a core inside a single material, rather than gluing on small parts that can peel off. Keep metal bits and removable pieces out of unsupervised toys. A well-sealed silicone ball or a properly cast TPE shell gives you durability and peace of mind while your cat has a blast.

    Worth every paw-print.

    How Are Unbreakable Cat Balls Made: Materials & Safety

    - Buying guide, lifecycle and end-of-life choices for unbreakable cat balls.jpg

    First thing, check the product page. Look for a clear material statement – for example silicone (a soft, nonporous rubber-like material), TPE (thermoplastic elastomer, a bendy plastic), or vulcanized rubber (rubber treated to be tougher). You might also see a Shore A number (Shore A is the simple scale that tells you how soft or firm something feels). That number gives a quick sense of how the ball will feel under paw and how it will bounce.

    Next, scan construction notes. Good listings call out seamless molding, overmolded layers (two or more layers molded together for strength), or fully encapsulated sound elements (a rattle sealed inside so nothing pokes out). If the brand says dishwasher-safe or sanitizable, there should be a note about repeated-wash testing or lab cycles to back that up. Ask for proof, and see the Safety/Standards section for which reports and certifications to request.

    Think about the toy’s end-of-life before you buy. Mixed-material toys with foam cores (soft inner filler), glued layers, or metal bits are hard to take apart and usually not recyclable. Brands that offer take-back or recycling programs get extra credit. Price can also hint at build quality – tooling, multi-material overmolding, and small production runs raise costs, while a very low price can mean cheaper materials or less testing. Sustainable packaging, like minimal plastic and recyclable cardboard, is a nice bonus if you care about waste.

    Quick buyer checklist – scan product pages for:

    • Material declaration and Shore A example, e.g. "100% food-grade silicone (nonporous and easy to clean), Shore A 45."
    • Construction features example, e.g. "Seamless overmold with fully encapsulated rattle."
    • Dishwasher/sanitizable claim verification, look for "wash-cycle tested for X cycles" or a lab wash report.
    • Test and certification references, e.g. "ASTM F963 report available / CPSIA tracking / EN71 compliance / independent lab report."

    Worth every paw-print when you pick the right one.

    Final Words

    Silicone (easy to clean, elastic), TPE (soft, chew-resistant), vulcanized rubber (tear-proof), polycarbonate (impact-strong), polyurethane foam (light cushioning) and nylon/fiber blends (fiber reinforcement) are the key players, each chosen for a simple, practical reason.

    We covered molding methods, hollow vs solid choices, overmolding and wall-thickness tradeoffs, plus the safety testing and QC steps that separate flimsy toys from truly durable ones.

    You’re ready to pick paw-some, long-lasting toys that keep multi-cat homes active and calm. Curious about how are unbreakable cat balls made? This guide gives what you need to shop smart and keep cats playful.

    FAQ

    How are unbreakable cat balls made?

    Unbreakable cat balls are made from tough materials like silicone (cleanable, elastic), TPE (thermoplastic elastomer, chewy), vulcanized rubber (tear-resistant), polycarbonate (impact-strong), PU foam (cushioning), and nylon/fiber blends. Parts are typically formed by molding or overmolding to create durable shapes.

    How are catnip balls made and how do I make a cat toy ball?

    Catnip balls are made by enclosing dried catnip in a sewn pouch or sealing it inside a durable shell like silicone (elastic) or TPE (soft, chew-tolerant). DIY options include stitching plush covers, casting small silicone rounds, or sealing catnip inside small fabric or silicone pouches—then closing or sealing the edges securely.

    Why are cat balls so fluffy?

    Cat balls are fluffy because plush fabrics and yarn trap texture and scent, which entices play. Faux fur or fiberfill add tactile appeal. Note: loose fibers can pose an ingestion risk for some cats, so check toys regularly and replace if damaged.

    Cat hacks

    Quick safety tips: avoid toys with foil cores, dental floss, or peeling tape. Make crinkle poms by trapping foil inside yarn, prototype shapes with 3D-printed parts, or cast small pieces in food-grade silicone (soft castable rubber) for durable, quiet bits.

    Evan and Katelyn cat treats

    “Evan and Katelyn cat treats” refers to DIY videos showing homemade cat treats. Use vet-approved recipes, avoid toxic foods (chocolate, onions, etc.), store treats safely, and check with your veterinarian about allergies and portion sizes.

    Why do cats do the ekekek thing?

    Cats make the “ekekek” or chattering sound when excited or frustrated during hunting. It mixes predatory reflexes, mimicry of bird calls, and arousal—whiskers often twitch and the chattering sharpens focus. It’s usually a playful or hunting-related behavior rather than a sign of distress.

    Related Articles

  • Teaser Wand Safety Tips for Cats

    Teaser Wand Safety Tips for Cats

    Think your cat's teaser wand is harmless? Think again. Those fluttery feathers and skinny strings look like pure fun, but they can hide real risks like choking, tangled limbs, or injured eyes. Ever watched your kitty chase a feather until their whiskers twitch? It’s adorable and a little nerve-racking.

    I once watched Luna go from playful pounces to a wide-eyed fixation, her paws going in circles around a string. That’s why short, supervised play sessions and a clear capture at the end matter. Capture (end the game by giving a treat or letting your cat “catch” a safe toy, then put the wand away) gives your cat a win and keeps things safe.

    Before you play, do a quick check: make sure feathers and attachments are secure, clips and knots are tight, and strings are not frayed. Keep sessions short, about 5 to 10 minutes for most cats; kittens should have shorter bursts. Always watch while you play, and store the wand out of reach when you’re done.

    If your cat does get tangled, stay calm and call them with a soft voice or a treat to distract them. If they won’t let go or the string is wrapped tightly, gently cut the string close to the knot with scissors and get help; if there’s bleeding, a limp limb, or an eye injury, contact your vet right away. And, um, don’t feel bad, these things happen to the best of us.

    Worth every paw-print.

    Quick-action safety summary: what to do right now

    - Quick-action safety summary what to do right now.jpg

    Always watch every teaser wand play session. Give the wand and attachments a quick once-over before you start. End play with a satisfying capture or treat so your cat doesn’t keep chasing and get fixated.

    Common immediate risks: choking (airway blockage from small parts), entanglement (string wrapped around a paw or limb), eye trauma (eye injury from whipping motions), and overstimulation that can lead to biting or redirected aggression. Ever watched your kitty go from zoomies to full-on pounce mode? That’s when you step in.

    Keep sessions short and focused. Aim for 5 to 10 minutes per burst, up to three bursts a day for active adult cats; shorten those bursts for kittens and seniors. If something goes wrong, stop play, separate the cat calmly, and cut the line with scissors if they’re tangled (careful not to cut skin). Call an emergency vet right away for severe signs like persistent vomiting, trouble breathing, heavy bleeding, collapse, or not responding.

    • Do supervise every wand session.
    • Do use non-toxic, larger attachments (no tiny parts that could be swallowed).
    • Do end each session with a “capture” or treat so play feels finished.
    • Do check the play area for cords, sharp corners, and other hazards before you start.
    • Do rotate and inspect attachments for wear or loose bits before each use.
    • Do keep sessions short: 5–10 minutes per burst, up to three times a day for active adults; reduce for kittens and seniors.
    • Don’t use elastic bands or rubber bands as attachments.
    • Don’t leave a wand, string, or parts lying around unattended.
    • Don’t whip the rod toward your cat’s face or eyes.
    • Don’t use tiny detachable beads or parts smaller than 1/2 inch.

    Worth every paw-print.

    Materials, buying, and DIY

    - Materials, buying, and DIY.jpg

    Start with a solid rod. Wood handles (light and grippy) or aluminum (a lightweight metal that bends instead of snapping) make great bases. Avoid brittle plastics that can crack into sharp bits. The part that flies? Natural feathers (real feathers that shed) or short-pile faux fur (soft synthetic fur with short fibers) feel irresistible to cats. Thick synthetic fabrics stand up to chewing way better than thin ribbon, and they make a more satisfying swat. Use thicker monofilament (single-strand fishing line) instead of thin thread for the connection. It resists fraying and is less likely to snap into dangerous fuzzy bits.

    Dyes and glue need attention. Cheap dyes and unknown adhesives can leach or stain paws and mouths. Spot-test new colors by rubbing a damp white cloth over the piece. If color blooms, skip it. Prefer sewn seams and stitched backing over glued-only joins. Pet-safe adhesives (water-based and labeled non-toxic) are okay for quick fixes, but don’t rely on glue alone. Also watch for metal parts that might contain heavy metals and avoid anything unlabeled.

    Sizing and design keep play safe. Make the toy end at least 2 inches across so cats can bat without swallowing it. No beads smaller than 1/2 inch. Tiny detachable bits are choking hazards. Pick wands with clip-on or replaceable tips so you can swap worn pieces instead of tossing the whole rod. Avoid permanently glued-on tiny parts or loose threads that can pull free during play.

    Quick buying checklist

    • Replaceable ends clearly labeled.
    • Non-toxic materials called out.
    • Thick line connections visible.
    • Visible stitching and solid backup knots.

    DIY picks that work. For homemade teaser tips, use tightly woven cotton (sturdy quilting cotton), felt (dense wool or synthetic fabric), or short-pile faux fur (low-shed synthetic). Sew seams with double stitching and use a stitched backing cloth for repairs instead of just glue. Don’t use plastic bags, rubber bands, or small beads. Store spare tips separately so you can rotate them in when one shows chewing damage. Speaking of feathers, my cat once traded a feather for a nap, so rotating keeps things interesting.

    Safe knotting and attachment methods

    Keep knots simple and strong. A double-overhand knot (two wraps) with at least a 1/2 inch tail tucked under a stitched backing patch helps stop slippage. For loop attachments, thread the line through a small metal ferrule or a sturdy clip and crimp or stitch the ferrule to lock it in place. Use thicker monofilament (single-strand fishing line) rather than thin sewing thread.

    Want a breakaway connection? Use a small breakaway clip or a deliberately weaker short cord section that releases under moderate force. Test it by tugging so the connector comes apart before the line tightens around a paw. Quick reminder: toy-end should be at least 2 inches across, no beads smaller than 1/2 inch, and leave about a 1/2 inch tail beyond knots for safe stitching. Worth every paw-print.

    Teaser Wand Safety Tips for Cats

    - Supervising play and multi-cat management.jpg

    Active supervision keeps small things like swallowing or tangling from turning into big problems. Stay low or kneel so you control the wand (a stick with a string and toy on the end). Keep the handle (the grip you hold) out of paw reach between moves, or tuck it under your foot when the chase pauses. Hold the rod (the stick) so the line (the string) never drags behind furniture where a curious paw can snag it. Controlled, deliberate motions beat wild swinging every time , safer and more fun for your kitty.

    Run play sessions like a tiny story. Start slow to spark interest, build into a lively chase with quick, jerky moves that mimic prey, then end with a calm capture and a treat or gentle petting so the hunt feels finished. Your cat’s whiskers will twitch as the toy darts away and the final pounce feels so satisfying. Clear the room first, put away cords and breakables, and check the quick-action checklist for exact burst lengths and how often to repeat sessions.

    Multi-cat homes need a plan so no one hogs the spotlight. Offer multiple wands or stagger playtimes so the high-drive kitty doesn’t monopolize the toy. Use separate areas or close a door for back-to-back sessions and watch for resource guarding, blocking access, hissing, or one cat stealing the toy and refusing to share. Rotate toys so every cat gets a turn and play stays peaceful.

    Signs of overstimulation and when to stop

    Watch for tail lashing, flattened ears, sudden hard bites, or frenzied spinning. If you see any of those, pause play. Swap to a calmer on-floor toy, or calmly separate the cats and follow the quick-action checklist’s immediate stop actions. Worth every paw-print.

    String hazards and emergency response

    - String hazards and emergency response.jpg

    Scope: This section explains how string and other linear things can hurt cats, which signs mean you need urgent care, what to do right away at home, and exactly when to call an emergency vet.

    A linear foreign body (a length of thread or string that runs along the intestinal tract) can be sneaky. The string can catch in the mouth or stomach while the intestines try to pull the rest through. The outside bit acts like an anchor while the inside part bunches and slides, sawing into tissue. Thin sewing thread or long loose fibers are more dangerous than thicker monofilament (single-strand fishing line) because thin lines cut, fray, and can slip between gut folds.

    Watch closely for these red flags and call your vet if you see any of them:

    • Drooling or lots of saliva – call right away.
    • Repeated vomiting or gagging – urgent vet contact needed.
    • A hard, swollen, or very tender belly – get emergency help.
    • Not eating for more than one meal – call your clinic.
    • Lethargy, stumbling, or collapsing – go to emergency care.
    • Trouble breathing or noisy breathing – emergency attention required.

    If your cat gets tangled, stay calm. Stop play and separate gently so you don’t scare them. Cut any external line close to the toy to free the cat instead of pulling, because pulling can make internal damage worse. Don’t try to fish a swallowed thread out of the mouth or throat – that can slice tissues. Keep your cat quiet and warm, wrap them gently for transport, and head to your vet or the emergency clinic promptly. Ever watched a cat freeze mid-pounce? Yeah, stay calm like that.

    Call an emergency clinic immediately for persistent vomiting, severe belly pain, breathing trouble, collapse, heavy bleeding, or signs of shock. Bring the toy and any detached pieces, note the time your cat was exposed, and take photos if you can. The clinic will likely do diagnostics such as x-ray (radiograph to see inside), ultrasound (sound waves that image organs), endoscopy (a camera on a flexible tube to look down the throat and stomach), or surgery to find and remove a linear foreign body.

    Quick checklist

    • Cut the external line right away if your cat is tangled.
    • Do not pull on a thread that may have been swallowed.
    • Watch for drooling, repeated vomiting, a hard belly, lethargy, or breathing trouble.
    • Phone an emergency vet now for any severe sign listed above.
    • Bring the toy or parts, the exposure time, and photos to the clinic.
    • Expect x-ray, ultrasound, endoscopy, or surgical removal if ingestion is suspected.

    Act fast. It really can make the difference.

    Maintenance: inspection, cleaning, storage, rotation, and records

    - Maintenance inspection, cleaning, storage, rotation, and records.jpg

    Scope: Here we cover the quick checks to do before play, simple cleaning methods, when to replace toys, smart storage tips, a rotation schedule, and a tiny log you can use to track toy history. Think of this as a no-fuss routine that keeps play safe and fun.

    Do a quick pre-play scan every time. Look for frayed threads, loose knots, detached feathers, cracked handles (wood or plastic), sharp edges, chewing, exposed stuffing, or popped seams. If you see any of those, pull the toy out of rotation right away. Ten seconds now can save a vet visit later. Ever watched your kitty chase shadows? That’s the exact kind of play you want to keep worry-free.

    Washing basics: Toss soft fabric toys in a gentle, cold cycle inside a mesh laundry bag (a netting bag that keeps tiny bits from disappearing). Use a pet-safe detergent that’s fragrance-free and skip bleach or harsh solvents. For mixed-material toys, hand-wash with mild soap and warm water, rinse until the suds are gone, and lay flat to air dry so glue seams (the adhesive holding pieces together) don’t soften. Wipe rigid parts (plastic or wood) and handles with a pet-safe disinfectant wipe or a damp cloth and mild soap, then dry thoroughly. Wet bits can grow mold or loosen stitching and glue.

    Replace toys the moment damage appears. Visible chewing, jagged edges, or exposed stuffing are non-negotiable replace moments. Don’t rely on a fixed calendar date; note what failed and replace when wear shows up. Keep a short log entry with purchase or replacement date and the failure mode so you spot patterns , like a feather tip that always sheds after two weeks.

    Store wands and spare tips out of paw reach in labeled containers or a closed drawer so curious cats don’t “help” between sessions. Rotate toys weekly to cut focused wear and boredom – bring a different tip or wand into play each week and inspect it before the first use. Keep worn tips separated and marked for retirement so you don’t accidentally hand a partially chewed toy back to your cat. For busy days, toss an unbreakable ball before you head out , that’s ten minutes of safe play while you’re gone.

    A tiny log makes this easy. Jot date, item, what you saw, and what you did. Over time you’ll see patterns and know which bits last and which need upgrades.

    Date Item IssueObserved ActionTaken
    2026-01-10 Feather tip Loose quill, small feathers falling Removed, replaced with faux fur tip
    2026-01-15 Faux fur ball Seam split, stuffing exposed Discarded, logged replacement
    2026-01-22 Monofilament line Fraying near knot Retied with stitched backing, tested
    2026-01-29 Wooden handle Crack forming Replaced rod, stored old for craft scrap
    2026-02-05 Clip-on tip Clip loosened Replaced clip, marked for closer inspection

    Age- and condition-specific safety

    - Age- and condition-specific safety.jpg

    Scope: This section gives simple, targeted safety tips for kittens, seniors, and cats with medical needs. Session timing and emergency steps live in the quick-action checklist and the maintenance section, so check those for exact times and stop-actions.

    Kittens mouth everything when they’re teething, so pick chew-resistant ends like tightly stitched felt (soft fabric that won’t come apart) or short-pile faux fur (short, plush fake fur), and use thicker monofilament (a single, thin fishing-line style thread) connections. Supervise every play session , don’t leave a kitten alone with a wand , and swap to a sturdier chew-safe tip the moment mouthing turns to biting or shredding. Short bursts are best; your kitten will pounce, then flop, then ask for more. Cross-reference the quick-action checklist for exact session lengths and immediate stop actions.

    For senior or mobility-limited cats, slow things down. Lower the toy height, keep movements gentle and ground-level, and use soft, low-flying targets that invite stalking rather than big leaps. Watch breathing, long pauses, or limp responses as signs to stop; older bodies tire fast. Finish calm, maybe with a slow pet or a small treat to mark play as over, and shorten sessions compared to a young adult cat. Skip high jumps and fast, whip-like motions that can jar joints.

    If a cat is post-surgery, wearing a collar, or has stitches, get the vet’s okay before bringing back active wand play. Use low-risk designs with large, non-detachable tips and a longer handle so the toy stays away from incisions or the collar. After play, check the wound for rubbing, redness, or swelling and pause active sessions until your vet clears full activity. Safety first, fun next.

    Worth every paw-print.

    Final Words

    Supervise every wand session, check the tip before play, and always finish with a calm “capture” so the hunting urge is satisfied.

    This post ran through quick-action stops, safe materials and knot tricks (think thicker monofilament, like a strong fishing-line cord), multi-cat strategies, string hazards (thin thread that can tangle and snag), emergency signs, cleaning, storage, and age-specific tweaks.

    Practice these teaser wand safety tips for cats with short, joyful bursts. Your crew stays active, your toys last longer, and home life gets a lot cozier.

    FAQ

    What are the best teaser wand safety tips for cats and how do I use wand toys with my cat?

    Supervise every session, inspect attachments before and after play, finish play with a “capture” treat or tangible toy, use short 5–10 minute bursts, avoid thin threads, and never leave the wand unattended.

    Is the Da Bird cat toy safe to use?

    Yes when used correctly: supervise play, replace frayed feathers (natural or synthetic), remove any detached bits, keep sessions short, and store the wand out of reach between uses.

    What toys are safe for cats?

    Choose toys made from non-toxic materials with replaceable tips and attachments at least 2 inches wide. Avoid beads smaller than 1/2 inch, elastic bands, and thin thread; prefer thicker monofilament (single-strand fishing-style) lines.

    How do I play safely with my cat using lasers?

    Never shine the beam into your cat’s eyes, use short 5–10 minute bursts, finish with a tangible “capture” toy or treat, and stop if chasing becomes frantic or obsessive.

    What is the 3 3 3 rule for cats moving?

    The 3 3 3 rule: three days to hide and adjust, three weeks to explore the new space, and three months to fully settle and resume normal behavior and confidence.

    Related Articles