Author: Lucas Turner

  • Managing Play Aggression in Multi-Cat Households

    Managing Play Aggression in Multi-Cat Households

    Ever watched two cats play tag one second and turn into teeth-and-claws tumble the next?
    Whiskers twitch, fur flies, and it can be hard to tell if it’s friendly roughhousing or something that could hurt.

    So here’s the plan: clear signs to spot playful vs. real fights, quick and safe ways to break things up, and a simple daily routine to keep hunting drives healthy without anyone getting hurt. Think of it like refereeing a scrappy soccer game, with rules, short bursts of play, and a timeout when things get too rough.

    Play looks loose and bouncy. Bodies are wiggly, they take turns chasing, and one will pause or flop down to say “I’m done” now and then. There might be chattering or light batting, not full-on biting, and ears stay mostly forward. Real aggression is tense. Look for stiff bodies, ears flattened back, growling, claws out with no breaks, and one cat trying to hide or escape. Blood, repeated hard bites, or a cat screaming means stop and separate.

    If things get heated, try a calm distraction first. Toss a favorite toy or shake a bag of treats to redirect attention. You can also roll a blanket between them or gently block the view with a piece of cardboard, then carry one cat away, never grab by the scruff or chase them, that usually makes it worse. Put them in separate rooms with water and a litter box for 10 to 20 minutes, then reintroduce calmly.

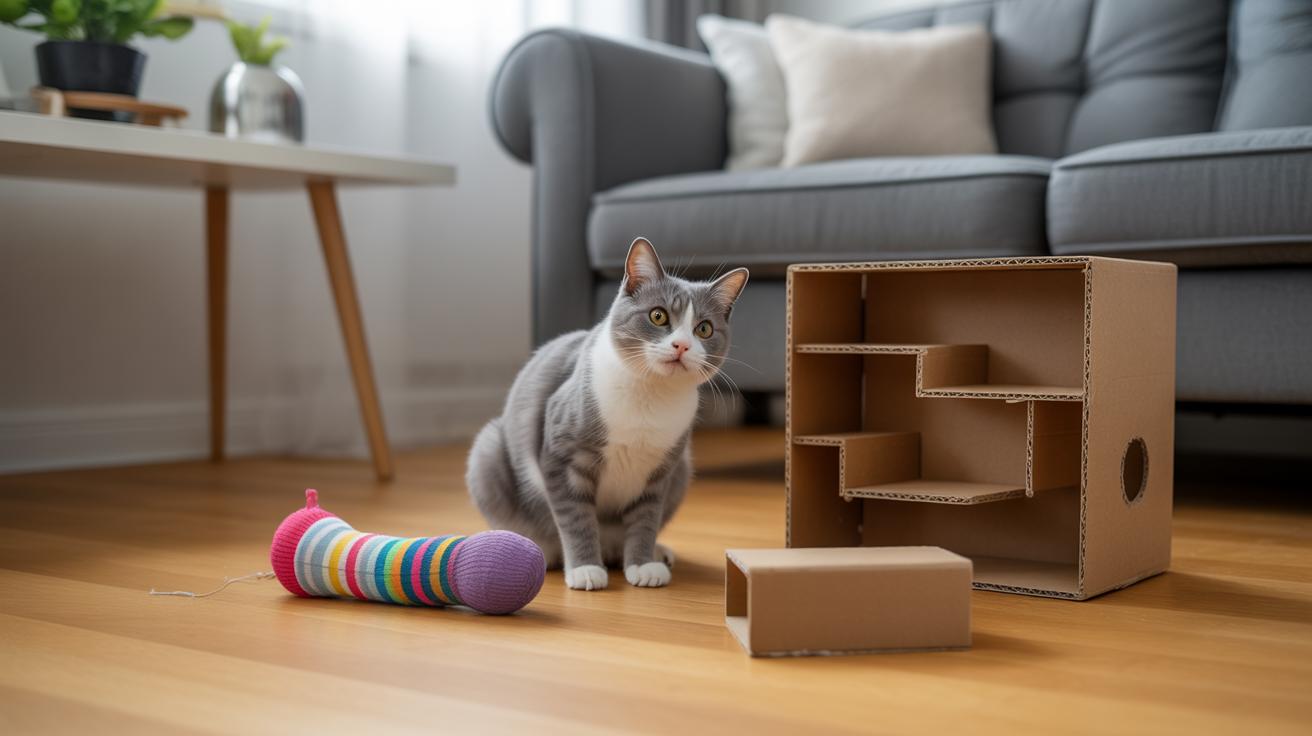
    Keep it peaceful every day with short, structured play. Do two or three 5 to 10 minute sessions with an interactive wand (like a fishing rod for cats) to burn off predatory energy, then let each cat “catch” a toy and get a small food reward. Puzzle feeders (toys that make them work for kibble) give mental exercise and slow eating. Rotate toys so things stay new and exciting.

    I once watched Luna launch six feet for a feather and then nap like nothing happened. Worth every paw-print.

    Managing Play Aggression in Multi-Cat Households

    - Immediate action hub quick triage, deescalation, oneparagraph protocol  next steps.jpg

    Quick check: if the rough play is mutual, with cats trading roles and no one gets hurt, it’s probably play aggression (rough play that looks like fighting but isn’t meant to hurt). But if one cat keeps delivering hard bites that cause punctures (deep skin breaks), or a cat looks truly scared and avoids the other, treat it as harmful and act fast. Ever watch two kitties swap places like tag? That’s usually fine. Repeated attacking is not.

    Stay calm. Stop the play right away and quietly step back, don’t chase or grab them, that only makes things worse. If you need to separate them, put a barrier between the cats, like a baby gate or a cardboard panel, or from a safe distance make a brief noise to break focus. Only do noise or intervention if it’s safe. If you must physically intervene, protect your hands and feet with gloves or a thick towel (a towel absorbs bites and scratches). Then walk away once things settle so the cat understands that rough hits end the fun.

    One simple routine: schedule short interactive play sessions every day. Do 10–15 minute bursts in the morning or evening when cats are naturally active, and always end play with the same reward or a calm cue so the session finishes cleanly. No hand play, ever, and use wand toys (a long stick with a toy on the end), feather teasers (feathers on a string), or kicker toys (soft, long toys cats can grab and kick) to keep teeth and claws off skin while letting hunting drives out. Rotate toys so things stay interesting. Give extra solo sessions to the instigator (the cat that starts the rough stuff) to burn energy, and offer separate, gentle enrichment for the shy cat until they regain confidence. That routine is the backbone of safer play in multi-cat homes. Worth every paw-print.

    For deeper help and tools see:

    • Distinguishing play fighting from real aggression: expanded cues and systematic monitoring
    • Safe play techniques: toy mechanics, recommended toys, and demonstration variations
    • Sample routines, shift templates, and troubleshooting for multi-cat households
    • Medical, physiological, and professional interventions

    Distinguishing play fighting from real aggression: expanded cues and systematic monitoring

    - Distinguishing play fighting from real aggression expanded cues and systematic monitoring.jpg

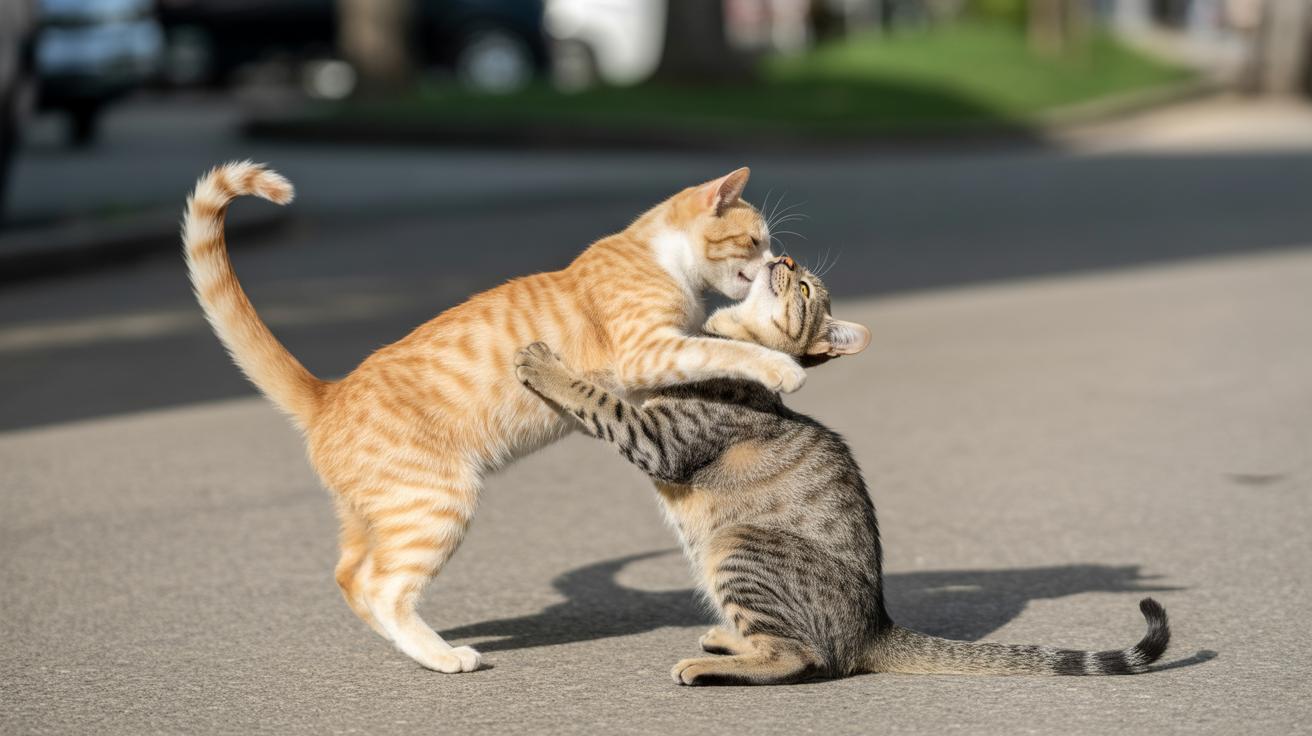
    Play often looks like a friendly back-and-forth: chasing, pouncing, quick breaks, and role swaps where the chaser becomes the chased. It’s usually short, reciprocal, and ends without injuries. Real aggression feels one-sided – hard bites that break skin, loud yowling, or a cat who hides and won’t get back to their normal routine. Quick rule of thumb: if both cats take turns and nobody gets hurt, it’s probably play. If one cat is repeatedly targeted, fearful, or has puncture wounds (small holes from teeth or claws), it’s not play.

    Cats give clues long before claws fly. Ears pinned or turned sharply back usually mean rising alarm. A twitching or fluffed tail signals growing arousal or irritation. Wide, dilated pupils (when the black part of the eye gets large) show high arousal. Whiskers (the long face hairs that help cats sense space) pushed forward or flattened suggest intense focus or stress. A stiff, crouched stance with no role-swapping usually means the fun has tipped into something riskier and you should step in.

    Body language cues to watch

    Watch who starts and who stops play. If one cat always initiates and the other freezes, flattens ears, or tries to run away, that’s a red flag. Short chases with pauses are normal; long, relentless chases that corner a cat at a doorway are not. Also, note posture changes: a sudden freeze, tucked tail, or hiding after an interaction means a cat felt threatened.

    Vocal signals and interaction context

    Hissing, growling, and frantic yowls are more likely signs of aggression or fear. Soft chirps, trills, and quick excited mews are usually play sounds. Check what’s around them: a narrow hallway, a bird at the window, or mealtime nearby can flip playful energy into stress. Always make sure there are clear escape routes so a cat can safely break contact.

    Monitoring guidance

    Keep a simple behavior journal and save short video clips so you can spot patterns, who starts fights, how often they happen, and how they end. Note time of day, which toys were out, and any nearby triggers. Try small interventions like tossing a toy to redirect energy or giving the targeted cat a quiet hideaway. See Step-by-step plan for the central protocol to interrupt and retrain risky patterns. Worth every paw-print.

    Root causes and household triggers of misdirected play in multi-cat homes

    - Root causes and household triggers of misdirected play in multi-cat homes.jpg

    Boredom and excess energy are the usual culprits. Cats need hunting-style activity (chasing, pouncing, stalking) to burn off that spark. When they do not get short, focused play sessions, they invent targets: your hands, your feet, or the sleepy person on the couch. Ever watched a whisker-twitching pounce turn into a surprise bite? It happens when the hunting muscle needs exercise.

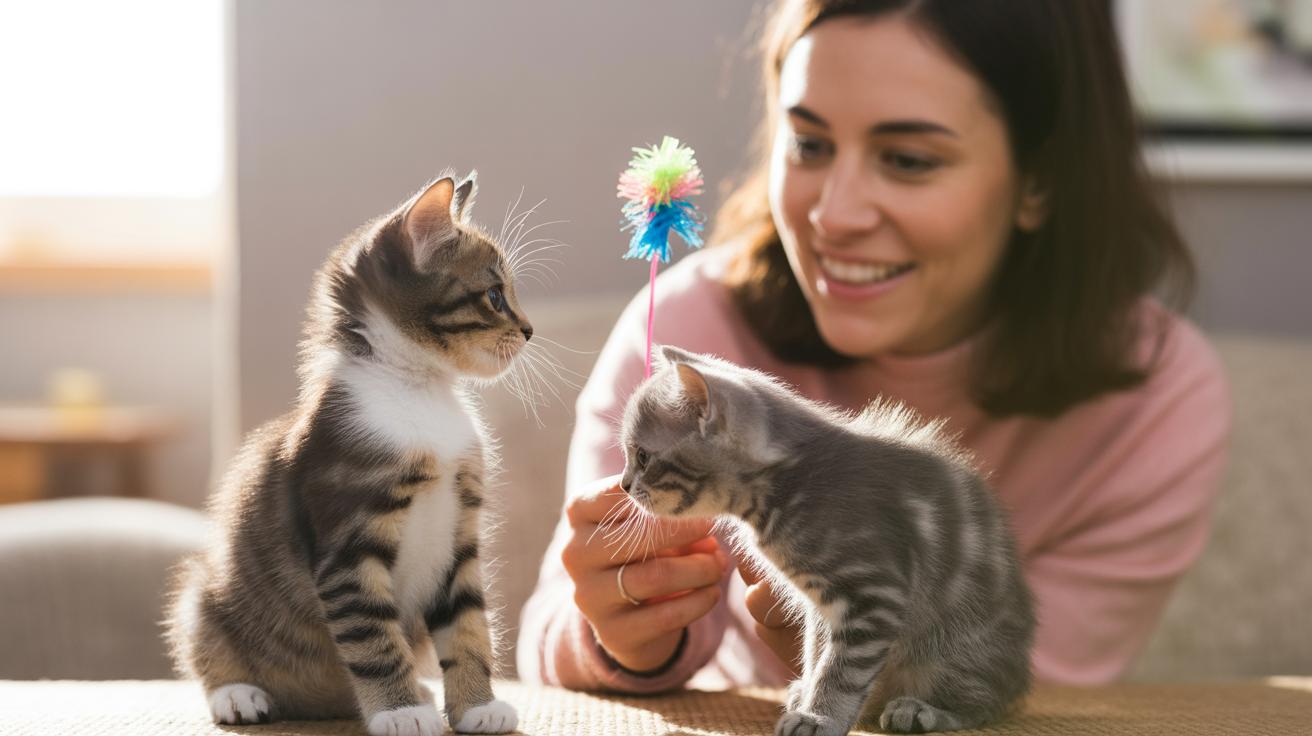
    Kittens pick up hunting moves very young. Rough play with humans teaches them that grabbing and nipping people is okay. Think of it like a sport practice. Without safe outlets, the practice gets rerouted into awkward or painful play. So use toys, not fingers, to teach what is and is not a target.

    Territory and social rank also steer whether play stays friendly. A confident cat may chase or corner a timid cat by a doorway or a food bowl, and that trapped feeling can turn play into real trouble. Spread out perches and bowls, create clear escape routes, and give shy cats high resting spots so they can opt out when they want.

    Redirected aggression (when a cat gets amped up by something it cannot reach and then attacks whatever is closest) is another trigger. A strange cat at the window, a sudden loud noise, or a stressful visitor can spike arousal and lead to misdirected attacks. Scent or identity mismatches also matter , if a cat smells different after being outside, housemates may not recognize them and tension can flare, since cats rely on smell to know who belongs.

    Fixes should match the causes. Add short chase-and-catch games several times a day, rotate toys so play feels new, and give high-energy cats solo outlets like puzzle feeders or an unbreakable ball. Use gentle separation when groups clash, then do slow reintroduction with supervised, calm meetings. And if you suspect pain or a sudden health change, see a vet for medical interventions.

    - Safe play techniques toy mechanics, recommended toys, and demonstration variations.jpg

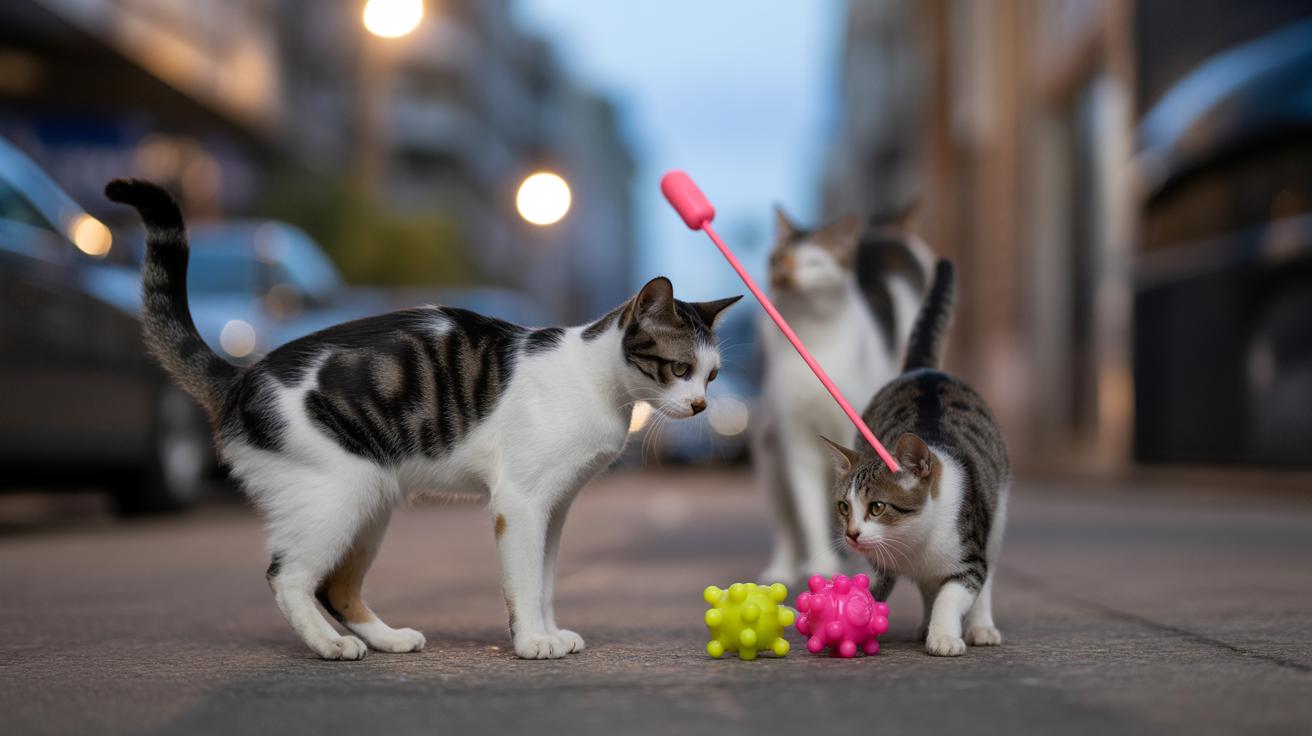
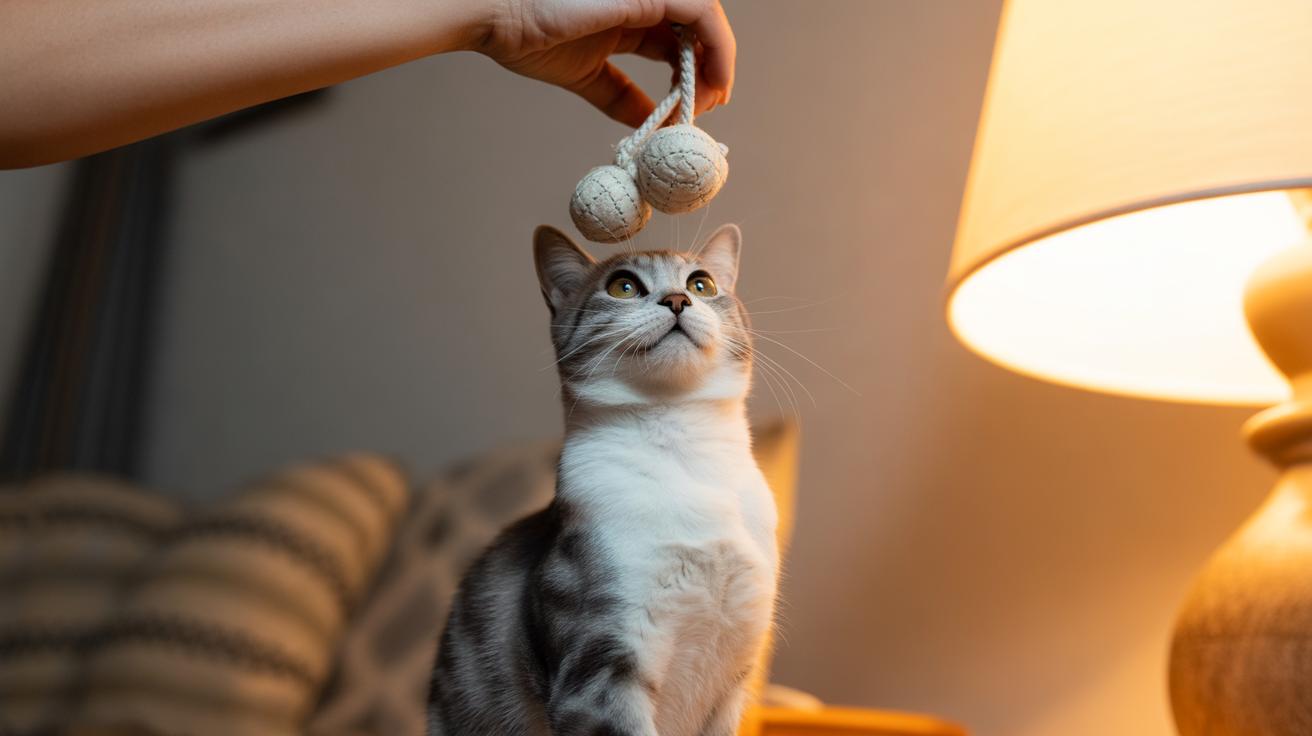
    Interactive toys work best when they copy the small, unpredictable moves of real prey , a feather that flutters, a small ball that skitters, a sudden dart across the floor. Use toys to channel hunting energy onto props, not people. Rotate toy types and give high-energy cats solo sessions so one kitty doesn’t become the house-instigator, and keep your hands out of reach by using long-handled tools.

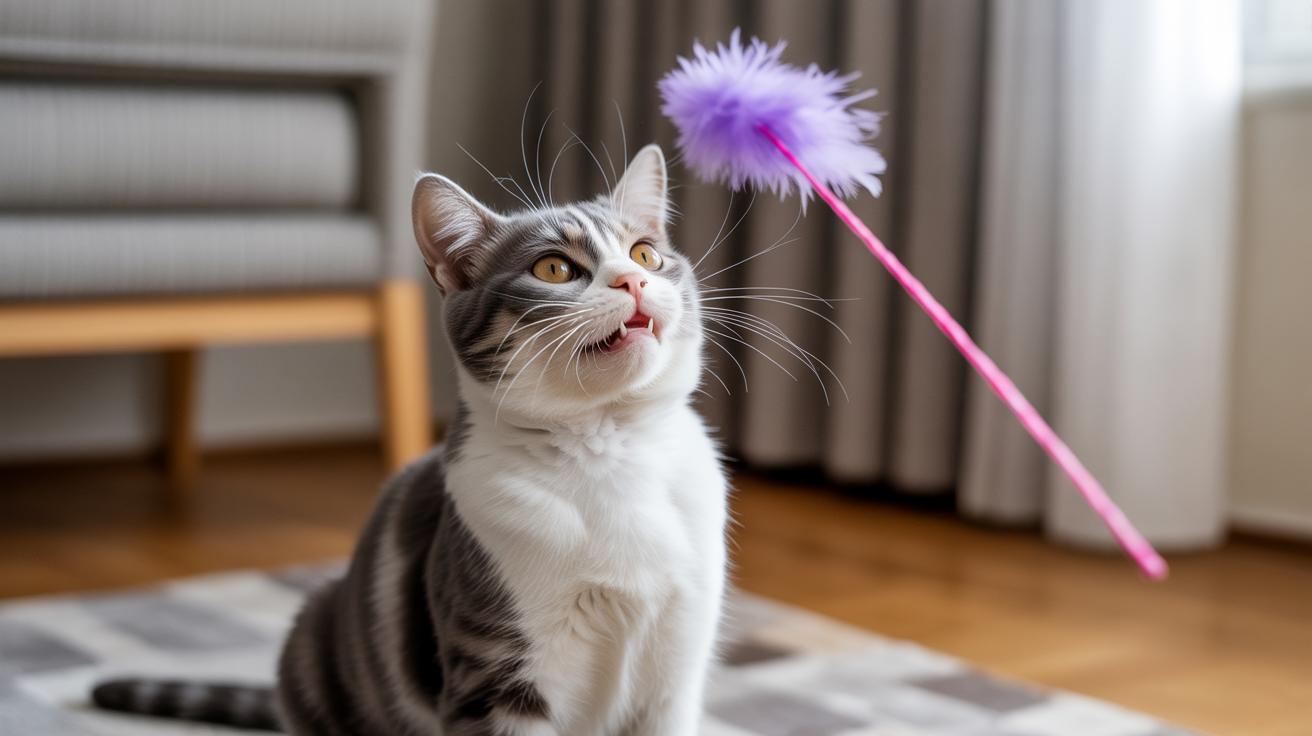
    Wand toys work because a flexible shaft sends quick wrist jerks into tiny, prey-like twitches. Pick a rod made from fiberglass (like a strong fishing-rod core) or polymer (a tough synthetic plastic) so it has good snap and lasts. The motion is what makes cats pounce, so feel free to vary speed and height.

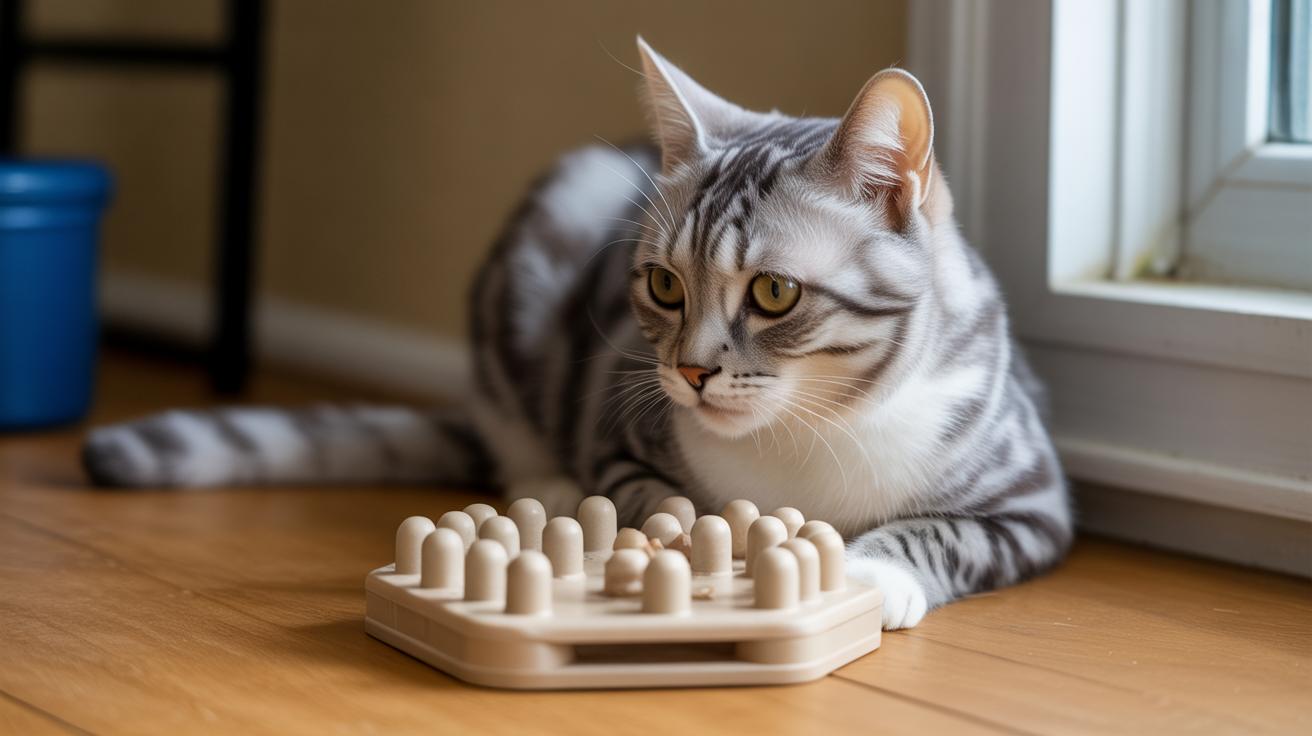
    Kicker toys are soft, long toys for biting and hanging onto while cats kick with their hind legs, which satisfies the grab-and-hold instinct. Puzzle feeders turn hunting into foraging by making food come out only after effort , puzzle feeder (a toy that hides food until the cat works for it). Motorized chase toys imitate erratic ground-level movement, but use them in short, supervised bursts so no guarding behavior develops. Hide-and-pounce tunnels create ambush spots that feel like real hunting practice. Nail trims and soft paw caps (tiny vinyl covers) help reduce injury during rough play, so play can stay fun and safe.

    • Wand/teaser – long reach, mimics live movement; keep hands well away.
    • Kicker toys – let cats bite and grapple a safe target.
    • Puzzle feeders – redirect hunting energy into food-finding work.
    • Motorized chase toys – use short, supervised bursts to burn energy.
    • Hide-and-pounce tunnels – encourage stalking and surprise pounces.
    • Soft paw caps (tiny vinyl covers) and nail trims – reduce the risk of injury.

    Try these demo variations to teach safe play patterns. Slow stalk + quick pounce – tease the wand low and slow so your cat crouches, then whip it into a fast twitch for the pounce, and end with a soft reward like a brief pet or a tiny treat. Two-step chase then kicker – lead a short chase with a motorized toy, then drop a kicker toy for your cat to grab and kick so they can finish the hunt. Group session bursts – run short, separate spurts for different cats (cat A gets the wand, cat B gets a kicker), so everyone gets a turn without crowding.

    Scatter interactive toys around rooms and avoid dropping one prized toy in a narrow hall where guarding can start. Watch group play and step in if one cat monopolizes action; give the target cat a quiet hideout and offer the instigator extra solo outlets, like a puzzle feeder or a timed motorized toy. For exact session timing and central toy rules see Step-by-step plan.

    Managing Play Aggression in Multi-Cat Households

    - Managing space and resources layout specifics and actionable resource table.jpg

    Make sure no single cat can block access to everything. Spread food, water, beds, and litter boxes into different rooms and on different floors so cats don’t have to pass each other to meet basic needs. Follow the N+1 rule for litter boxes (N = number of cats, so two cats get three boxes). That simple trick lowers tension and cuts down on resource guarding that can turn rough play into something meaner. Small fixes , like a second bowl or an extra bed , really calm the household.

    Give cats places to climb and easy escape routes so a cornered cat can opt out. Add vertical perches (cat trees or shelves) and window spots so shy cats can step up and away without a big face-off. Put a high perch near narrow doorways or choke points so a fleeing cat won’t feel trapped. Add hiding nooks like covered beds or boxes on quiet shelves so cats have private refuges. Try pheromone diffusers (plug-ins or sprays that release a calming cat scent) in tense rooms and set up time-sharing routines (scheduled access for different social groups) when certain cats need separate use of favorite rooms.

    Quick things you can do tonight: move one feeding station (bowl or tray) to another room, add a high shelf by the hallway, and tuck a covered bed into a quiet corner. Use short play sessions and watch body language so play doesn’t escalate. For central play rules and session logistics see Step-by-step plan. Worth every paw-print.

    Resource Minimum per cat or recommended count Placement tips
    Vertical perches (cat trees or shelves) 1–2 per cat Place near windows and doorways to serve as escape routes
    Litter boxes (tray with cat litter) N+1 (where N = number of cats) Spread across different levels and rooms
    Feeding stations (bowls or trays) One separate bowl per cat, multiple locations Avoid high-traffic corridors; give space to eat
    Hiding places / refuges (covered beds or boxes) One per cat plus communal spots Small boxes or covered beds on quiet shelves
    Interactive toys / puzzle feeders (toys that hide food) Several scattered around Place in different rooms to discourage monopolizing
    Resting spots (low cushions and high perches) Multiple per room Offer both low and high options so every cat can choose

    Handling incidents: safe separation, time-outs, and ordered reintroduction after fights

    - Handling incidents safe separation, time-outs, and ordered reintroduction after fights.jpg

    Stay calm. Yelling or chasing only raises their arousal and makes things worse. If two cats are fighting, try a quick, safe interruption: a loud clap, shake a can (a sealed can with coins to make a rattle), or hold up a cardboard panel between them to break focus. Keep your hands and feet well away. Don’t try to pry them apart with bare hands; use a towel or a barrier only when you can do it without getting bitten.

    Once things settle, close them into separate quiet rooms so everyone can cool off. From a safe distance, look for visible bites or scratches and get veterinary care for puncture wounds (deep bite holes that can trap bacteria). Give each cat their own food, water, litter box, and a low-stress hiding spot. Let them calm for several hours or even a day or more depending on how hurt or shaken they are; don’t force a fast reunion.

    When you’re ready to reintroduce them, go slow and steady. Start with scent swapping: rub a towel on one cat, then the other, and swap that towel for a few days so they get used to each other’s smell. Next try short visual-only sessions with a baby gate (a secure mesh or plastic barrier) or a cracked door. Keep those first looks to 5–10 minutes.

    After that, move to supervised brief interactions using wand toys or treats so they focus on play instead of each other. Increase the time little by little over days to weeks. Reintroduce shared resources slowly and spread them out across the house so no cat feels cornered. Watch for stress signs, flattened ears, puffed tails, hiding, and pause or step back if either cat looks overwhelmed. If things keep going sideways or wounds appear, call your vet or an animal behaviorist.

    Emergency separation protocol

    Use a loud noise or put a barrier between them when it’s safe to do so. Only toss a towel over a cat if you can do it without getting bitten. Keep an emergency kit ready: carriers (hard-sided or soft-sided pet carriers), a heavy towel, disposable gloves (thin plastic exam gloves are fine), and a basic first-aid kit for transport.

    Step-by-step reintroduction plan

    1. Isolate each cat so they can recover and do a safe wound check.
    2. Clean and treat minor scrapes; see a vet for puncture wounds (those can hide infection).
    3. Swap bedding or towels daily for 2–4 days so scents mingle.
    4. Offer scent-only exposure with doors closed for 48–72 hours.
    5. Start visual sessions behind a barrier for 5–10 minutes.
    6. Add supervised short interactions with wand toys and treats.
    7. Slowly increase interaction time over days to weeks.
    8. Reintroduce shared resources gradually, with duplicates spread across rooms.
    9. Watch for stress; if problems persist or injuries show up, contact your vet or a behavior specialist.

    Medical, physiological, and professional interventions: red flags and when to seek help

    - Medical, physiological, and professional interventions red flags and when to seek help.jpg

    Think of sudden aggression as a signal, not just bad behavior. Ever watched your calm cat suddenly snap? That sudden change can mean pain, infection, neurological problems (issues with brain or nerve function), or sensory changes like losing sight or hearing. A quick vet check can rule out medical causes and keep you from misreading a health problem as naughty play.

    Chronic pain (ongoing aches that last weeks to months) often makes cats irritable and less tolerant of handling or play. So what looks like misdirected play could be a hidden health issue. Other things that change how a cat plays include hormonal or metabolic problems (body chemistry imbalances), arthritis (joint inflammation), dental pain, and ear or vision changes. These all lower a cat’s frustration threshold and can make rough play more likely.

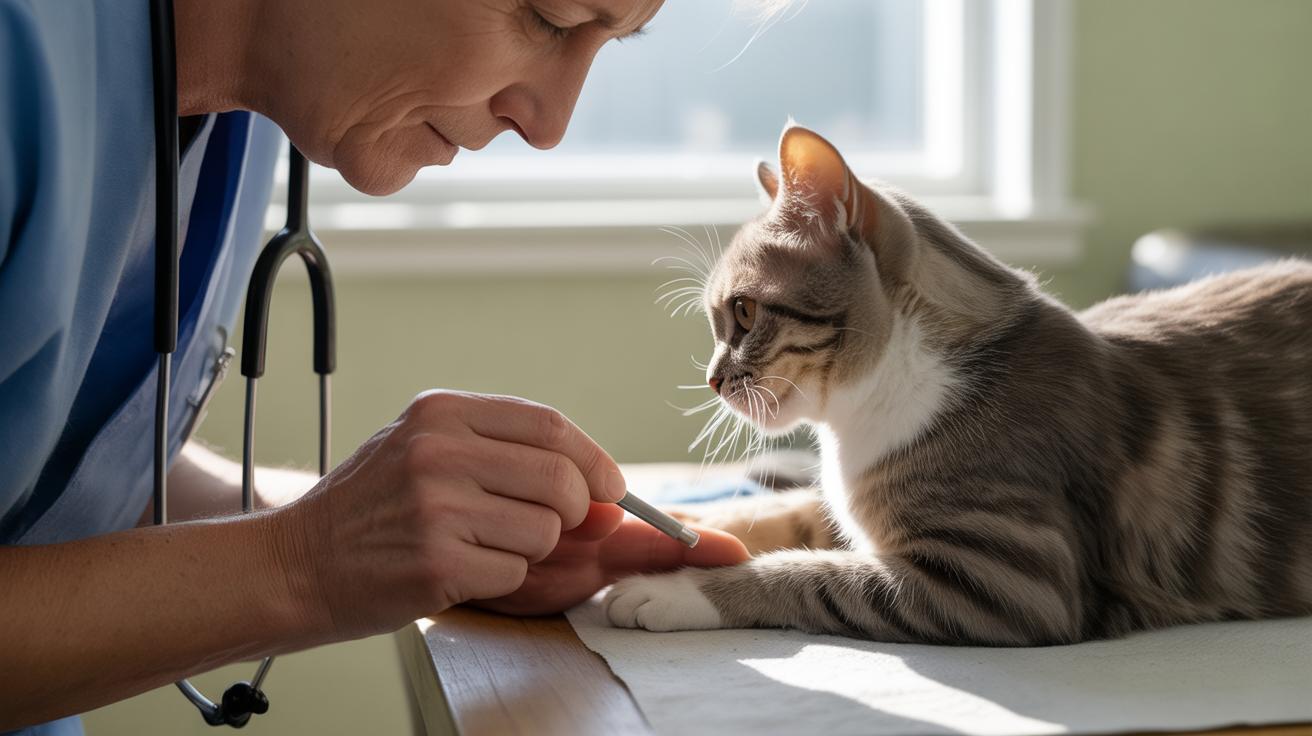
    Spay/neuter (surgical removal of reproductive organs to stop breeding hormones) is usually part of a bigger plan for intact animals, because hormones can amplify mating-related roughness and roaming. If aggression pops up suddenly or the pattern shifts, book a clinical check before you overhaul training. Better to rule out medical causes first.

    When you visit the vet or call a certified feline behaviorist (a specialist in cat behavior), expect a step-by-step assessment that mixes medical tests with behavior history. The vet will do a pain-focused exam, basic lab work (blood and urine tests), and targeted diagnostics if needed like imaging (X-rays or scans). The behaviorist will look at daily routines, how resources are arranged, and video of interactions, then suggest a stepwise plan with training tools and changes to the environment. For severe or persistent aggression they might recommend short-term medication as an adjunct (medicine to reduce reactivity while you retrain play and add outlets).

    Red flags for immediate veterinary attention

    • New, sudden aggression that you haven’t seen before.
    • Visible puncture wounds, bleeding, or signs of trauma.
    • Limping or reluctance to move or jump.
    • Big changes in grooming, eating, or litter box habits.
    • Abrupt personality shifts, like hiding or snarling where your cat used to be friendly.
    • A cat that won’t or can’t use escape routes after an incident.

    Get prompt care if you spot any of these. Don’t wait.

    Professional guidance notes
    A vet and behaviorist together will check for pain, run labs or imaging when needed, review your home setup, and build a gradual plan. Medication is sometimes used in a limited, monitored way to lower reactivity while behavior modification and environmental fixes take effect. It’s about helping your cat feel better and giving you tools to make play safe and fun again.

    Managing Play Aggression in Multi-Cat Households

    - Sample routines, shift templates, and troubleshooting for multi-cat households.jpg

    Here are three plug-and-play daily schedules you can drop into your calendar and try this week. They give clear times, short sessions, and a rhythm cats can learn. Ready? Let’s tame the midnight pounce.

    1. Single-shift household template
      Morning: 7:00–7:15 AM short interactive play (10–15 min), then breakfast at 7:20 AM.
      Afternoon: 2:30–3:00 PM calm enrichment like a puzzle feeder or window watching.
      Evening: 6:30–6:45 PM short play (10–15 min), then dinner at 6:50 PM. If the group is relaxed, add one supervised 5–10 minute social play session after dinner.

    2. Two-shift household (people alternate sessions)
      Shift A handles morning: 6:45–7:00 AM play plus breakfast handoff. Shift B handles evening: 6:15–6:30 PM play plus dinner handoff. Stagger feeding times by 10–20 minutes so bowls aren’t a battleground. Each person records which cat got solo time that day.

    3. High-energy cat template
      Give the zoomer short solo burn-offs spaced through the day: 8:00 AM 5–10 min, 11:30 AM 5–10 min, 4:00 PM 5–10 min, and 8:00 PM 5–10 min. Offer puzzle feeders between bursts to slow things down. Only do group play after the high-energy cat has had a solo session so others don’t get overwhelmed.

    Weekly rotation and shift logistics
    Pick two toy groups, like a wand/kicker set and a puzzle/motorized set, and swap them every 48 to 72 hours so things feel fresh without cluttering one room. For multi-shift homes, keep a shared log in a phone note or calendar that says who ran each session, which toys were used, and which cat got solo time. That stops accidental double-booking of a favorite toy and helps you spot patterns, like “that one instigator gets most play at night.”

    Use a play-before-meal habit to reduce post-play hyperactivity. A quick chase session followed by food helps cats wind down and teaches them play ends predictably. Ever watched your kitty slump into a food bowl after a good sprint? So satisfying.

    Troubleshooting checklist and monitoring tips

    • Video short interactions and jot details. Note time, who started it, toys in use, and the outcome so you can spot repeating triggers.
    • Give more safe solo play to the persistent instigator, like extra wand time or a timed motorized toy. It burns energy without turning other cats into targets.
    • Add vertical escape points, such as shelves or a tall perch near doorways, so cats can avoid each other on their terms.
    • Use temporary separation after any fights, then do staged reintroduction with scent swaps and short visual sessions. Take it slow.
    • Check with your vet about medical red flags like sudden aggression, limping, or puncture wounds. These can be health issues in disguise.
    • If patterns are stuck or progress stalls, consider a certified behaviorist for a tailored plan.

    Keep notes short and consistent. A two-line daily note plus a 30 to 60 second video clip is often enough to reveal who starts rough play and when. Small timing tweaks or swapping who leads sessions usually fixes most problems. If not, your clear notes make the next step with a vet or behaviorist way easier.

    Worth every paw-print.

    Final Words

    in the action: you get a quick triage to tell playful scrums from real fights, immediate calming steps, a one-paragraph protocol, and clear next steps to follow.

    We covered body-language cues, common household triggers like boredom or redirected frustration, safe toy mechanics and session rules, layout fixes, and ordered separation plus reintroduction, plus when to see a pro.

    Stick with the short sessions, toy rules, and resource spread. Little changes add up, and you’ll be closer to managing play aggression in multi-cat households with less stress and more happy pounces.

    FAQ

    How do I manage play aggression in a multi-cat household?

    Spot play versus harm, stop play calmly, offer 10–15 minute scheduled interactive sessions, use wand toys (stick with lure), and separate one-sided attackers.

    What are signs that play is normal versus dangerous?

    Play: reciprocal chasing, role-swapping, relaxed pauses, and no injuries. Dangerous: ears back, tail bristling or twitching, dilated pupils, hissing, and one-sided targeting indicating escalation.

    What is redirected aggression and how does it affect humans or other pets?

    Redirected aggression is when a cat vents frustration at a nearby person or pet after reacting to an unreachable trigger. Break focus with calm withdrawal, separate, use staged reintroduction, and get a vet review for sudden change.

    My cats suddenly became aggressive toward each other — what should I do now?

    Separate them safely, use calm withdrawal and barriers to break focus, check for injuries, avoid chasing, then follow scheduled 10–15 minute play sessions and staged reintroduction or seek vet help.

    How can I get my cats to stop growling at each other?

    Burn energy with short, predictable play sessions, spread food and litter to avoid competition, add vertical escape spots, use temporary separation, and perform slow supervised reintroductions with treats.

    When should I see a behavior specialist or veterinarian for cat aggression?

    See a behavior specialist or vet when aggression is sudden, causes puncture wounds or limping, involves big personality shifts, or persists despite home steps. Professionals offer exams and tailored plans.

    Why is my cat mean to everyone but me?

    A cat that is mean to others but not you likely shows social preference, fear, stress, pain, or learned rough play. Get a vet check for pain, offer predictable interactive sessions, and use slow introductions and scent swaps to broaden trust.

    Related Articles

  • Best Litter Boxes for Indoor Cats

    Best Litter Boxes for Indoor Cats

    Think any litter box will do? Your cat begs to differ. Whether you live in a tiny apartment, manage a busy multi-cat home, or care for an older kitty with stiff joints (look for a low step-in height that’s easy to enter), the right box really helps.

    A good box cuts down on tracking (little bits of litter dragged around the house), tames odors, and keeps claws happy while your cat digs and spins. You’ll hear the satisfying scrape and see less mess, which is pretty nice when you’re juggling work and life.

    We’ve rounded up budget, midrange, and premium picks, plus quick tips on size, litter capacity (how much litter it holds), and footprint (the floor space it uses), so you can pick one that actually fits your space and schedule. Ever watched a cat try to squeeze into a too-small box? Yeah, don’t.

    Worth every paw-print.

    Quick buying guide to the best litter boxes for indoor cats (fast answer)

    - Quick buying guide to the best litter boxes for indoor cats (fast answer).jpg

    For a tight budget, go with the Litter Genie Cat Litter Box. For multi-cat or high-traffic homes choose the Litter-Robot 4. And if your cat is older or has mobility issues pick the KittyGoHere Senior.

    Budget picks like the Litter Genie keep upfront cost low and are lightweight, so you can tuck them away or move them when needed. Midrange options such as the Frisco High Sided and ModKat Flip give you more durability and nicer features without the sticker shock. Premium models like the Litter-Robot 4 bring automation (self-cleaning) and bigger capacity for busy households who want to scoop less. Match the price tier to how much time you want to spend scooping versus how much tech or heavy-duty construction you want.

    Tradeoffs come down to floor space, how much litter (the granules cats dig in) the box holds, and the box footprint in your room. Bigger boxes give cats room to turn and dig, but they take up more floor and need more litter. See the detailed comparison table below for full specs and dimensions so you can measure before you buy.

    • Frisco High Sided Cat Litter Box: Best Overall
      A simple, roomy pan that most cats love because it lets them dig and spin. It’s sturdy and practical, great as a daily go-to for one or several cats. Your cat’s whiskers can twitch happily while they bury their business, uh, you know what I mean.

    • Litter Genie Cat Litter Box: Best Budget
      Super affordable and easy to move around, good for tight spaces or temporary setups. It’s not fancy, but it does the job and won’t make you wince at the price. Perfect if you want something practical and portable.

    • IRIS Premium Square Top Entry: Best Top Entry
      The top-entry design helps keep litter and odor contained, and it cuts down on tracking across your floor. It’s best for cats who don’t mind jumping in, some do, some don’t. Think of it like a little private booth for shy cats.

    • Litter-Robot 4: Best Automatic
      Great for busy people who hate daily scooping, this one cleans itself (automatic self-clean function). It’s tech-heavy and takes more floor space, but if you want low-effort cleanliness, it’s a game changer. Be ready for some setup and occasional maintenance, but worth it if you prefer hands-off care.

    • ModKat Flip: Best With Liner
      Works well with reusable liners (thin fabric or plastic covers you can reuse), so scooping feels cleaner and neater. It looks tidy and fits between basic pans and full automation. If you like a neat routine without electronics, this is a sweet spot.

    • KittyGoHere Senior: Best for Seniors
      Made for older or stiff-jointed cats that need a low entry and stable floor access. It’s easy to step into and gives extra room without a high lip that trips up arthritic paws. I once watched an older cat actually relax and nap right next to theirs, worth every paw-print.

    Worth every paw-print.

    Best litter boxes for indoor cats by category

    - Best litter boxes for indoor cats by category (detailed comparison table).jpg

    Here’s a friendly, side-by-side table of our tested winners so you can quickly match box style, footprint, and price to your room and your cats. Think of it as a quick map: find the shape and size that fits your floor plan, then see which model suits how many cats you care for.

    Read the Dimensions column as the box's basic footprint (floor space) and interior height. Bigger pans take more floor space and hold more litter; smaller boxes save room but limit digging and turning. If your cat loves to dig or spin, give them extra interior space.

    Price tiers show upfront cost and how many features you get for the money. Scan the materials and cleanability notes too: BPA-free plastic (sturdy molded plastic without the chemical BPA), stainless steel (corrosion-resistant metal), and painted engineered wood (pressed wood board with a finish). Smooth interiors, removable walls, and simple lids or liners usually mean faster cleaning and fewer grime traps. Less scooping. More snuggles.

    If you liked the short tips in the Quick Guide above, hop back there for the quick shopping pointers, then use this table to compare specs against your room and your cat.

    Model Category Dimensions (in) Best for Price tier Rationale
    Frisco High Sided Cat Litter Box Best Overall Medium: 18 x 8.5 x 15.2; X-Large: 24 x 10 x 18 Most cats; families Mid High sides keep litter in the box while a low entry stays easy to step into. Practical and tidy.
    Litter Genie Cat Litter Box Best Budget 22.3 x 17.6 x 16 Budget shoppers; tight spaces Budget Very affordable and lightweight, so it’s easy to move or use as a temporary solution.
    IRIS Premium Square Top Entry Best Top Entry 17.5 x 17.5 x 14.5 Homes wanting reduced tracking Mid Top entry helps keep litter off the floor and hides mess from view. Great for nosy guests.
    Litter-Robot 4 Best Automatic 29.5 x 27 x 22 Multi-cat homes; hands-off owners Premium Self-cleaning with app controls and built-in odor control. Less scooping, more free time.
    ModKat Flip Best With Liner 20 x 16.75 x 15 Liner users; tidy scooping routines Mid Made for reusable liners and includes scoop storage, which keeps the area neat and ready.
    Catit Jumbo Hooded Best Hooded 22.4 x 18.3 x 19.7 Large cats; multi-cat homes Mid Locking hood and replaceable carbon filter help cut down odors and hide messes from view.
    Less Litter Box L-5 Best Stainless / Buy-for-Life 19.75 in dia (interior) x 17 H (walls) Long-term durability; heavy-duty use Buy-for-life / High-end Stainless-steel build resists corrosion and is made to last for years. Worth it if you want durability.
    Creative Plastic Concepts Mixing Tub Best Budget XL Varies (very large open tub) Very large cats; DIY setups Budget Huge interior for space-loving cats at a low price, though low walls mean more spill risk.

    Use the Dimensions and Price tier to match a box to your room and wallet: measure the floor area you can spare, compare interior length to your cat's size and habits, and pick a price tier that fits how much time or extras you want to buy. If your cat digs or twirls, choose a bigger interior. Happy hunting, and may your floors stay litter-light.

    Entry style, size, and accessibility for large and senior indoor cats

    - Entry style, size, and accessibility for large and senior indoor cats.jpg

    Big or older cats with stiff joints need litter boxes they can actually get into and move around in. Think of this like a quick field guide: pick an entry your cat can use without fuss, then make sure the inside is roomy enough for turning, digging, and some privacy. Your cat’s whiskers and paws will thank you.

    Open pan: accessibility and sizing

    Open pans are the easiest to get in and out of, so they’re great for seniors, kittens, and multi-cat homes. Use the 1.5x rule: measure from your cat’s nose to the base of the tail and choose a box about one and a half times that length so your cat can turn and dig comfortably. For example, an 18-inch cat needs roughly a 27-inch interior. Open pans usually have low fronts, which is kinder to arthritic paws. The tradeoff? More visible litter and a bit more scatter. A textured mat or a pan with a higher back wall helps keep the mess contained. Worth every paw-print.

    Covered/hooded boxes: ventilation and fit for large cats

    Hooded boxes hide the mess and cut down on smells, which is handy in small apartments. But they must have enough clearance for larger breeds to stand up and spin without feeling stuck. Look for smooth curves inside so fur and litter don’t gather in corners. A carbon filter (a charcoal-based filter that helps trap smells) can help when ventilation is limited, but vents or a removable top are better for keeping air moving and stopping stale odors. If you have a chunky cat, have them try sitting in one before you buy so they don’t feel cramped or trapped. Ever watched a big cat hesitate at a tiny hole? Not cute.

    Top-entry: containment tradeoffs and accessibility solutions

    Top-entry boxes are champs at keeping litter off the floor because cats climb in and shake loose debris on the lid. But they can be tough for arthritic or timid cats, since climbing and balancing on a rim takes strength. Simple fixes work well: set the box inside a shallow cabinet to lower the rim, or add a sturdy step platform so your cat climbs less high. Little changes make a big difference for older paws. For more on how entry choices compare, see comparing top-entry vs open litter box designs.

    Measure fast checklist:

    • Measure nose-to-tail-base.
    • Multiply that length by 1.5 for the interior floor length.
    • Check front-entry height so seniors can step in easily.

    In truth, the right box is the one your cat actually uses. Try one change at a time and watch them pounce with confidence.

    Self-cleaning and automatic options among the best litter boxes for indoor cats: maintenance realities

    - Self-cleaning and automatic options among the best litter boxes for indoor cats maintenance realities.jpg

    Automatic and self-cleaning litter boxes use a few simple tricks to keep things tidy. A sensor (weight or motion detector) tells the unit when your cat leaves, and then a mechanism moves or sifts waste into a drawer so you don’t have to scoop every day. Designs vary from rotating globes to rakes and sifting trays, and each style changes how much floor space you need and how much noise you’ll tolerate.

    If you want a low-touch life, these systems really deliver consistent cleanliness that busy households love. Ever watched your cat sniff a fresh box and do that happy little tail flick? Yep, that’s the goal. And while they’re not magic, most models cut down daily chores a lot.

    High-tech picks like the Litter-Robot 4 offer app connectivity (phone controls and notifications) and a built-in carbon filter (charcoal-based odor absorber) but they take up more floor space. PETKIT PuraMax sits at the premium end with big capacity and quiet motors (small electric parts that move the waste) made for multi-cat homes. Remember: most automatic boxes need power and a dedicated spot, so measure the footprint before you buy.

    Mechanicals can fail, not dramatically, but enough to annoy you and your cat. Common problems are jams from giant clumps, sensor errors when a tray gets misaligned, and motor noise as parts wear. Signs something’s off include grinding sounds, blinking error lights, frequent resets, or your cat suddenly avoiding the unit.

    Quick fixes are often simple: power cycle the unit, clear a clog, or reseat the waste drawer. If the problem keeps coming back, reach out to support or consider swapping the unit. Oops, I guess that’s the less-glam side of convenience, but worth knowing.

    Manual sifting boxes look tempting and they’re cheaper, but testers found mesh trays can snag clumps and mean fiddly cleanups. They save some money, not always time. For full cleaning tips, see the "Odor control, litter choice, and a cleaning schedule" section.

    Worth every paw-print? If you want less scooping and more time cuddling, an automatic box is a great choice, just plan for power, space, and the occasional maintenance moment.

    Odor control, litter choice, and a cleaning schedule for the best litter boxes for indoor cats

    - Odor control, litter choice, and a cleaning schedule for the best litter boxes for indoor cats.jpg

    A simple cleaning routine makes life easier for you and your cat. Less stink, fewer avoidance problems, and a calmer home. Stick to a small schedule and the box will stay fresh and inviting.

    Scoop at least once a day, following Humane Society and ASPCA guidance, to remove solids and clumps. Do a full litter change and wash every week to two weeks depending on how many cats use the box and what kind of pan you have. Single-cat homes with an open pan can often wait two weeks. Busy multi-cat homes should aim for weekly. For automatic units, do a quick visual check every day and a mechanical check once a week – look for stuck clumps, blinking error lights, or a misaligned drawer so you catch problems before your cat avoids the unit. Ever watched a cat walk past a smelly box? Yeah, that.

    Filters, liners, and replacement parts add ongoing costs – factor them into the total price. Carbon filters (charcoal-based odor absorbers) usually need swapping every 1-3 months depending on use. Reusable tarp liners like ModKat’s come in three-packs for about $30 and each liner can last several months with normal use. Self-cleaning boxes vary a lot: drawer liners, motor parts, and cartridge filters differ by model and can be cheap or pricey over time, so set aside a small yearly parts fund if you pick an automatic box.

    Litter choice changes how you clean. Clay clumping litter (clay that forms firm clumps when wet) is quick to scoop and widely available, but big pans use more product. Pellet systems like Purina Tidy Cats Breeze use pellets (hard, absorbent granules that separate urine from solids) to cut odor and scoop time, though they need specific pans and pads. Silica or crystal litters (silica: tiny gel beads that trap moisture) hold odor well and can stretch the time between full changes. Match the litter to the pan: top-entry and high-sided pans usually work best with clumping clay or crystals, and Breeze-style systems need pellet-compatible trays. Think of a Breeze tray like a tiny urine-separating sandbox for your cat.

    Task Frequency Tools / notes
    Daily scoop Daily Scoop; check for clumps and odors
    Full change and wash Weekly to biweekly Empty litter; wash with mild dish soap and warm water
    Filter / liner check or replace Monthly (filters 1-3 months) Swap carbon filters; inspect reusable liners for wear
    Deep clean / disinfect As needed Use diluted pet-safe disinfectant (follow label) for stains or persistent odor
    • Sturdy scooper
    • Rubber gloves
    • Mild dish soap and warm water
    • Replacement filters / liners on hand
    • Pet-safe odor neutralizer

    Worth every paw-print.

    Placement, number, and layout for multiple indoor cats: where to put the best litter boxes for indoor cats

    - Placement, number, and layout for multiple indoor cats where to put the best litter boxes for indoor cats.jpg

    Start with one box per cat plus one extra. This gives shy cats an alternative spot and cuts down on fights over territory. It’s the single easiest move to reduce marking and avoidance. Short and sweet.

    Pick quiet, well-ventilated spots away from noisy appliances and favorite sleeping nooks. Ventilation (airflow that moves fresh air in and stale air out) keeps smells from building up and helps timid cats feel safe. Spread boxes across floors so a cat doesn’t have to walk through another cat’s area to get relief. Your cat’s whiskers will thank you when they can step in without side-eye from a roommate.

    For multi-cat homes, balance box count and capacity. Example: three cats need four boxes; that could be four medium pans (the low, open litter trays) or two large pans plus two small stations. Bigger pans or automatic systems (self-scooping boxes) mean you’ll scoop less often, but they take more floor space and more litter. Think footprint versus convenience, more digging room usually means happier, cleaner habits.

    Small homes call for clever compromises. Hidden enclosures, like bench-style cabinets or small furniture hides, tuck a box into living areas without making things obvious. Multi-pit systems (boxes with separate scooping areas) let you offer distinct spots even in tight spaces. Add a mat and a low-profile entry ramp to catch litter and keep hallways tidy. Speaking of hides, my cat once treated a bench box like a fort, um, he loved it.

    1. One-plus rule: one box per cat, plus one spare.
    2. Spread boxes across separate rooms or floors; avoid loud appliances.
    3. Include at least one large or high-capacity pan for multi-cat use.

    Hidden solutions, litter box furniture, and accessories that make the best litter boxes for indoor cats fit your home

    - Hidden solutions, litter box furniture, and accessories that make the best litter boxes for indoor cats fit your home.jpg

    Furniture hides can make a litter station vanish into your living room, but honestly, entry size and availability matter more than how pretty it looks. We loved the Baxton Studio Tamra 2-Door Litter Box Cover for its roomy access and magnetic doors (snap-close panels), but it’s out of stock right now. The Baxton Studio Elie 2-Door Cat Litter Box Cover is a close stand-in , painted engineered wood (pressed wood panels with a finish) and a shelf-style entry that suits bigger cats. The TRIXIE Wooden Litter Box Cover brings a farmhouse vibe without breaking the bank, and the Lark Manor Elborough Armoire worked well as a discreet piece in a staged room when we left the door slightly cracked for access.

    If you want something budget-friendly, aim for simple bench or cabinet-style covers with wide openings and light construction so you can move them easily. For a furniture-forward pick, painted wood hides and armoires blend right into a living room and can double as storage or a seat, but they’re heavier and need a cleaning plan. A bench-style box can pass as an entryway piece , your guests might never guess what’s inside.

    Assembly and cleaning access are the real deal-makers, removable panels, top-lift lids, or magnetic doors make scooping faster and less messy. Pick units with vents or the option to leave a door ajar for airflow so odors don’t stagnate, and choose surfaces that wipe clean without fuss. Also keep spare filters on hand if the unit uses them.

    • High-tack mat sized to the box footprint (traps tracked litter so it doesn’t spread)
    • Extra carbon filter cartridges (activated charcoal to help control smells) or replacement stock
    • Small scoop with storage hook (so you always know where it is)
    • Low step or ramp for seniors (gentle on older joints)

    Worth every paw-print.

    Troubleshooting behavior, health monitoring, and signs it's time to replace the best litter boxes for indoor cats

    - Troubleshooting behavior, health monitoring, and signs its time to replace the best litter boxes for indoor cats.jpg

    When your cat stops using the box, start with a quick checkup in your head. First rule out medical causes like a UTI (urinary tract infection) or pain, and think about mobility problems that make getting in and out hard. Notice if something in the house changed suddenly – new people, new pets, new furniture – stress can do this. And check the box: is it cleaned on your usual schedule? Are there visible cracks or deep grooves that trap waste and smell? Tiny clues, like a cat circling or hesitating at the entrance, mean you should do something sooner rather than later. Ever watched your kitty pace like they are picking a hiding spot? Yeah, that.

    Know the clear signs it is time to replace the pan. If you deep-clean it (empty, scrub, dry) and a strong odor still stays, the plastic may have absorbed smells and should be retired. Cracks, chewed edges, or persistent grooves that collect grime mean the box cannot be fully sanitized. If a covered or top-entry box is too tight for your cat to turn and dig, switch to a larger open pan – for example, a cat about 20 inches long will be way more comfortable in a pan with roughly a 30-inch interior. Automatic boxes that keep throwing sensor errors (sensors detect weight or position) or jam after a reboot are candidates for replacement or pro repair.

    There are some neat health-monitoring options that help catch issues early. Urine pad systems (a pad that separates urine from solids) like the Breeze line make collecting a clean sample easy. Some automatic units log weight and visit counts, which many vets find useful for spotting changes. For collecting a vet sample, use a clean container, try to catch midstream urine (that means after the cat starts peeing), keep it cool, and get it to the vet fast.

    Do these four things right away:

    1. Call the vet if your cat suddenly changes elimination habits.
    2. Record and time each incident; note the behavior and which box was used.
    3. Photograph any cracks, deep grooves, or damaged seals.
    4. Keep a sample-friendly pan or pad ready for urine collection.

    Act fast. Phone your vet, grab a fresh sample if you can, snap photos of damage, and retire any pan that meets those replacement triggers so your cat has a clean, safe spot now. Worth every paw-print.

    Final Words

    In the action, we gave a quick-buy guide with budget, multi-cat, and senior picks to help you choose fast.

    We compared top models, explained entry styles and sizing for large or older cats, covered automatics and real maintenance, and mapped placement, hides, and troubleshooting.

    Pick the right entry and size, follow the cleaning plan, and keep extra boxes for multi-cat homes so cats stay playful and furniture gets relief.

    Happy hunting for the best litter boxes for indoor cats; your busy home will be calmer and your cats will be feline fine.

    FAQ

    Frequently Asked Questions — Cat Litter Boxes

    What are the best litter boxes for indoor cats and where can I find top-rated picks?

    The best litter boxes for indoor cats include: Frisco High Sided (best overall), Litter Genie (budget), IRIS Top Entry (top-entry), Litter-Robot 4 (automatic), ModKat Flip (liner), and KittyGoHere Senior (low-entry).

    Which litter box controls odor best?

    The litter box that controls odor best pairs a hooded (covered) unit with a carbon filter (odor-absorbing charcoal) and low-tracking litter; high-sided or automatic models also reduce smell and scatter.

    What litter boxes work best for multiple cats?

    Large pans or multiple stations work best; follow the rule of one box per cat plus one extra, spread boxes across rooms, and use high-capacity models to reduce competition and stress.

    What are the pros and cons of automatic/self-cleaning litter boxes?

    Automatic boxes offer hands-off scooping, app features, and odor reduction but require power, more floor space, periodic mechanical checks, and occasional part replacements (for example, Litter-Robot 4).

    What type of litter is best for indoor cats?

    It depends on the box type and cat preference. Common options are clay clumping (fine clay that forms clumps), silica (crystal beads that absorb moisture), and pellets (compressed plant bits).

    Do cats prefer open or enclosed litter boxes, and do vets recommend enclosed ones?

    Cats’ preferences vary: many like open pans for visibility while timid cats enjoy hooded privacy. Vets often recommend open boxes for seniors or cats with medical needs because they offer easier access.

    What is the golden rule for litter boxes?

    The golden rule is one box per cat plus one extra. Boxes should be about 1.5 times your cat’s length (for example, an 18‑in cat needs roughly a 27‑in box) and placed in quiet spots.

    What litter boxes suit large and senior cats?

    Large and senior cats do best with low-entry wide pans sized to about 1.5 times body length. Low-front entries (≈3 in) or ramps help mobility; high-sided walls limit scatter but can block access.

    Related Articles

  • Best Toys for Indoor Cats: Top Picks

    Best Toys for Indoor Cats: Top Picks

    Think indoor cats are happy just sunning on a windowsill? Nope. Boredom shows up as extra napping, overgrooming, or that maddening habit of knocking things off shelves. The right toys can flip that energy into play, focus, and a healthier weight.

    This guide sorts our top 12 picks by how cats like to play , puzzle feeders (food-dispensing toys), feather wands (a stick with feathers that flutter like prey), laser pointers (a little red dot to chase), and plush catnip toys (soft toys filled with catnip, an herb cats love). Match a toy to your cat’s personality and your schedule; ten minutes with a wand or a puzzle feeder before you leave can make a big difference. Ever watched your kitty’s whiskers twitch as a feather skates across the floor? Cute, right.

    I tested a lot of these toys, and my tabby Luna still pounces at the very mention of a feather teaser. Worth every paw-print.

    Quick Picks , top 12 by play type

    - Quick Picks  top 12 by play type (compact buying summary).jpg

    1. Best for puzzle feeders – Cat Amazing Classic
      This one slows eating with an adjustable maze that vets like. It’s great for cats who inhale food, and it can be tricky for tiny or declawed kitties. Prices vary; sold on Cat Amazing and major online retailers.

    2. Best wand toy – Frisco Bird Feather Teaser
      A flexible wand with a soft bird that stands up to plenty of tugs. The feathers can thin if your cat is extra enthusiastic, but it’s light and perfect for short, high-energy play. About $10–15 at major online retailers. DIY replacement attachments for teaser wands

    3. Best long-wand – Pet Fit for Life Ultimate Feather Teaser
      Want big leaps? This one’s a 66-inch reach, so you’ll see some impressive air time. Not ideal for tiny rooms, but awesome for living-room acrobatics. Around $20–30 at major online retailers. DIY replacement attachments for teaser wands

    4. Best window teaser – KONG Window Teaser
      Sticks to glass with a suction cup (a little cup that grips the window) so your cat can chase solo while you’re busy. Comes with batteries, but some cats lose interest after a few weeks. Usually $15–25 at major online retailers.

    5. Best electronic motion – NOUNOU Tinkly + Nylon Knit
      USB rechargeable and offers seven movement modes to keep things surprising. The plush cover is nylon knit (stretchy synthetic fabric), so it feels soft but can be easy to misplace because it’s small. Pricier, about $25–40 from brand sites and online stores.

    6. Best laser toy – Randomized laser toy
      Motion-activated, USB recharge, and it keeps the dot moving in patterns for long chase sessions. Great cardio, but some cats get frustrated since they can’t actually catch the red dot. About $25 from online retailers.

    7. Best catnip plush – Yeowww! Catnip Banana
      Heavy-duty canvas (sturdy cotton fabric) stuffed with very potent catnip. Your cat will love the scent, though you’ll see teeth and claw wear over time. Roughly $7–12 at online retailers.

    8. Best silvervine – WoLover Silvervine sticks
      Packs of silvervine (a plant like catnip that many cats adore) that double as chew and dental treats. Some cats roll and nuzzle them more than actively pounce. Pack prices vary; find them online.

    9. Best treat dispenser – Treat-dispensing hollow mice set
      Five adjustable-difficulty mice with washable covers make snack time into a game. Filling them can get messy and trap moisture if you’re not careful. Expect $12–20 at online retailers.

    10. Best multi-meal puzzle – Nina Ottosson Buggin’ Out
      A wood (hard natural board) and plastic (durable synthetic) puzzle that’s dishwasher-safe for meal-sized treats. It’s great for smart, puzzle-savvy cats, if your cat doesn’t like puzzles, they won’t get the benefit. About $20–35 at online retailers.

    11. Best activity center – Trixie 5-in-1 Activity Center
      Five obstacle areas with spill-safe treat spots, good for multi-cat households and longer play sessions. Needs some bench or table space and can tip if not set on a stable surface. Around $15–30 at online retailers.

    12. Best classic teaser – Cat Dancer
      A spring-steel (thin, bendy metal) wire that makes wild, irresistible motion so cats can bat without you moving your hand constantly. Cardboard ends wear down with heavy use, but it’s cheap and super effective. $5–12 at online retailers. DIY replacement attachments for teaser wands

    How to choose the best toys for indoor cats: short buyer checklist

    - How to choose the best toys for indoor cats short buyer checklist (factors + one-line actions).jpg

    Use this quick checklist to pick toys that fit your cat’s age, play style, the space you have, how tough the toy is, whether it’s washable, and your budget. Think of it as a speed-check before you hit buy.

    • Age & size – For kittens, choose lightweight, soft toys and short lures (short teaser wands) so their tiny jaws and wobbly leaps stay safe. For senior cats, pick low-impact puzzles (gentle brain games) and toys that sit within easy reach so they don’t have to jump or strain. Kittens love batting; older cats like slow, steady play.

    • Play style & goals – Want exercise? Get chase toys like rolling balls that make that satisfying thud on the floor. Want to slow eating or boost brainpower? Try puzzle feeders (feeding toys that make cats work for food). Need something for naps and comfort? Plush toys work great. Match the toy to what you want your cat to get from play.

    • Space & mobility – Match the toy’s footprint to your room. Big wands and tunnels are perfect for open living rooms. Compact mats, small puzzles, and solo balls are better in tight apartments. For busy days, toss a small unbreakable ball before you head out , that’s ten minutes of safe play.

    • Materials & washability – Favor safe materials like thick canvas (durable woven fabric) or BPA-free plastic (plastic without the BPA chemical). Pick toys with removable covers or ones you can pop in the wash. Cleanable toys help keep fur and dust down, and they last longer.

    • Durability & chewers – Look for double-stitched seams, reinforced canvas, or solid cores (a hard center) if your cat chews a lot. Balance cost by buying a few tough toys and mixing in cheaper DIY or replaceable pieces. Your couch will thank you.

    • Safety & rotation – Avoid small loose parts, long dangling strings, or anything your cat could swallow. Supervise play with wand toys and retire torn items right away. Rotate a toy box weekly to keep things fresh , ever watch a cat rediscover a “new” toy? Magic.

    Find full specs and tested examples in the category tables and the Quick Picks summary above, and check the Cleaning & Safety section for inspection and replacement guidance.

    Interactive puzzle feeders and treat toys for indoor cats

    - Interactive puzzle feeders and treat toys for indoor cats.jpg

    We moved the short, practical tips out of this section and into the "How to choose" checklist under a new mini-heading: Puzzle feeders & treat toys.
    Example snippet you can copy: "Start easy – begin with a wide-hole tray or low-profile compartments so your cat learns the game; increase challenge after a few successful sessions." Ever watch your cat figure it out? Cute, right.

    Detailed specs like dimensions, materials, cleaning notes, trade-offs, and price ranges are now folded into the matching Quick Picks entries (items 1, 9, 10, 11). You’ll see them as extra bullets or a collapsible "Specs & trade-offs" note so every product’s info lives in one place. Example snippet for the Quick Picks format: "Specs & trade-offs – Cat Amazing Classic: model-dependent dimensions; recyclable cardboard (sturdy paper board); 1.5-2 in treat holes; not dishwasher-safe – cardboard must dry if wet; price: $25-45."

    We removed the repeated product comparison table and duplicate Quick Picks lines from this section. Instead, there’s one consolidated comparison table elsewhere, and Quick Picks links to it so you don’t have to hunt through multiple lists. Example link text used in Quick Picks: "See the consolidated comparison table for dimensions, materials, washability, and price ranges." Less duplication, less scrolling, and more time to watch your kitty pounce.

    Wand, teaser and electronic toys for indoor cats (hands-on play and solo motion)

    - Wand, teaser and electronic toys for indoor cats (hands-on play and solo motion).jpg

    Wands are your secret weapon for bonding and exercise. You wave, your cat explodes into little bursts of joy , jumps, pounces, short sprints, and zoomies. It’s hands-on, interactive, and you get to pick the pace.

    Electronic motion toys step in when life gets busy. They make unpredictable movement so your cat can chase and stalk without you standing there. Think of them as a short, exciting workout that runs itself. Quick Picks includes Frisco Bird, Pet Fit for Life Ultimate Feather Teaser, Cat Dancer, KONG Window Teaser, NOUNOU Tinkly + Nylon Knit, and randomized laser toy.

    Maintaining interest in electronic toys

    Most electronic toys stop feeling new after a few weeks to a few months if they move the same way every time. You might notice less pouncing, quick glances, half-hearted swats, or a sniff and then a walk-off. Basically: “Meh, next.”

    Here are quick, practical ways to keep things fun:

    • Rotate toys on a schedule. Put a toy away for 3 to 7 days, then bring it back so it feels like a surprise. Example: “Hide the motor mouse for five days, then bring it back for a sprint.”
    • Pair an electronic session with a physical reward. Run the toy, then toss a feather or give a tiny treat so the play ends on a win. Example: “Run the laser for three minutes, then toss a feather toy and give one kibble.”
    • Change modes and lures when you can. Switch speed, motion pattern, or clip on a different lure so your cat can’t predict the game.
    • Keep solo sessions short and predictable. Short bursts make the toy feel like a game, not background noise.

    Practical safety and session guidance:

    • Session length: kittens and mellow adults do best with 2 to 7 minute bursts. Very active cats can handle 5 to 10 minutes. Aim for two to three short sessions a day.
    • Supervised vs solo play: watch toys that have loose parts or strings; feathers and motors can fail and become chew hazards. Let a cat play alone only with sealed electronics (no exposed wires) and sturdy construction.
    • Check wand attachments before each play. Look at feathers, strings, and fastenings; trim loose threads, replace frayed lures, and stop using any wand with a cracked handle or loose parts.
    • Battery and charging care: follow the Cleaning, safety, maintenance and replacement section for tips on battery life, charging habits, and when to retire or repair a motion toy.

    Ever watched your kitty twitch its whiskers and zero in on a moving toy? That’s the good stuff. Keep play short, varied, and safe, and you’ll get more of those happy hunting moments.

    Durable and chew-resistant toys for aggressive players

    - Durable and chew-resistant toys for aggressive players.jpg

    Pick toys made from thick canvas (durable woven fabric), heavy-duty nylon (a tough synthetic fiber), double-stitched seams (two rows of stitching for extra strength), and solid-core designs (a hard inner center). Look for replaceable inserts and reinforced edges, and check specs for seam thickness or stitch density (stitches per inch). Those little numbers actually mean a toy will survive serious gnawing. Ever watched a cat go full puma on a toy? You want materials that fight back.

    There’s a trade-off between toughness and scent appeal. Very stiff or rubbery toys last the longest but might not tempt a scent-driven cat; soft plushes smell amazing and invite rolling, but they shred faster. Good examples: Yeowww! Catnip Banana , canvas-like cotton twill (sturdy cotton weave), about 7 x 1 x 3 inches, and it takes repeated chomping without falling apart. WoLover Silvervine sticks come in a 12-pack (each about 4.72 x 0.47 inches) and are great for chewing and light dental scraping, but the bark needs shaving to activate the scent. For serious chewers, heavy-duty replaceable-core toys and reinforced canvas options are worth the extra cost.

    When should you retire a toy? Pull it out if you see big holes, exposed stuffing, loose cores, or cracked hard pieces. Stop using anything that could be swallowed or snag a claw. See the Cleaning, safety, maintenance and replacement section for a quick inspection checklist and suggested retirement timelines so you don’t miss a worn-out hazard. Worth every paw-print.

    Best Toys for Indoor Cats: Top Picks

    - Life-stage and personality picks for indoor cats (kittens, adults, seniors, multi-cat).jpg

    Kittens need light, fast toys that match tiny paws and wobbly coordination. Pick small feathery lures and soft, tightly stitched plush (fleece (a soft synthetic fabric)) so seams don’t pop when they chew. Try a quick lure cue, like saying "Look, a feather!" to snap their attention. Ever watched a kitten chase a bouncing pom-pom across the rug? Cute chaos.

    Adult active cats want bigger challenges that spark jumping and sprinting. Reach for puzzle feeders (treat-dispensing toys that slow eating), rolling toys that beg to be chased, and wands that invite dramatic airborne pounces. Think of a teaser wand like a fishing rod for cats (just add feathers). Keep play focused and high-energy, then let them settle with a toy they can bat on their own.

    Seniors and low-mobility cats do best with low-impact options that reward small movements. Choose low-profile mats and shallow puzzles with adjustable difficulty (so you can make it easier or harder) so treats stay reachable. Gentle, easy-to-reach designs keep joints moving without wearing them out.

    For multi-cat homes, get multi-station activity centers (multi-station play units) and several identical small toys so nobody hoards the best lure. Placement and rotation tips are folded into the How to choose checklist and the Activity Center/Trixie Quick Pick entries. We moved the step-by-step routine for introducing new toys into the Maintaining interest subsection as a short numbered routine.

    Worth every paw-print.

    Cleaning, safety, maintenance and replacement for indoor cat toys

    - Cleaning, safety, maintenance and replacement for indoor cat toys.jpg

    Keep a simple rhythm. Spot-clean plush and fabric toys once a week. Wash removable covers once a month. Big play mats and tunnels (fold-out play mats and fabric tunnels) can get hosed down and left to air-dry completely before you put them back out. It’s easy. Your cat will notice the fresh smell.

    Hard plastic or wood puzzles get a quick wipe after messy sessions. Battery-powered gadgets should get a check after every busy play week so tiny problems don’t turn into chew hazards.

    Give toys a quick once-over before or after play. You’ll catch wear early and keep play safe and fun. Ever watched your kitty chase shadows? That quick check could save a lot of trouble.

    Quick inspection checklist

    • Stitching and seams, look for split threads or loose stitches. If you see them, repair (sew or glue) or retire the toy.
    • Exposed stuffing, any puff of cotton or polyester fiber (stuffing) poking out is a choke risk. Fix it or take the toy away.
    • Loose small parts, beads, bells, or glued eyes that wobble or come off, pull the toy from rotation.
    • Frayed ribbons or feathers, strings and feathers that shred need trimming or replacement; don’t leave long bits loose.
    • Cracked plastic or housings (the outer shell), hairline cracks can pinch or cut paws. Stop use and replace.
    • Battery or charging-port damage, bent pins, swollen battery packs, or exposed wires mean immediate retirement.

    Wands and teasers , the fun stuff
    Supervise every wand session. Store lures out of reach between plays. Retire split-feather or chewed lures so kitty can’t swallow scraps. Choose a wand length that fits your space – long wands for big rooms, short ones for small spaces – and swap lures now and then to keep the game fresh. If you’re into DIY, check the Quick Picks note for cheap, safe replacement attachments.

    Electronics and batteries need extra care
    Track runtime and charge cycles. Many USB-rechargeable toys (charge via a USB cable) run 30–150 minutes per charge, depending on the model. Lithium-ion batteries (rechargeable cells used in small gadgets) usually handle a few hundred full cycles before they hold less charge. Charge toys in a dry spot. If a toy gets hot while charging, don’t leave it charging overnight. Store gadgets in a cool, dry drawer when not in use. Replace disposable batteries (AA/AAA) before they leak. For built-in rechargeable packs, follow the maker’s replacement advice and recycle old batteries at an appropriate collection point.

    If you find damage, here’s a simple plan

    1. Remove from rotation, take the damaged toy away and keep it out of reach.
    2. Clean and quarantine, wash what you can or wipe it down and leave it apart for 24 hours.
    3. Decide repair vs. trash, small tears can be sewn; broken motors (tiny vibrating or moving parts), cracked housings, or chewed cores (inner structure) should be retired.
    4. Replace with a similar-spec toy, match size, material, and play style so the swap feels familiar to your cat.

    A tiny table to help you remember

    Toy Type Cleaning Frequency Quick Notes
    Plush & Fabric Spot-clean weekly, full wash monthly Check seams and stuffing (polyester fiber)
    Mats & Tunnels Hose down as needed, air-dry fully Let them dry completely to avoid mildew
    Plastic/Wood Puzzles Wipe after messy play Look for cracks or splinters
    Electronics & Battery Toys Check weekly; charge per maker’s guide Watch for swollen batteries or exposed wires

    Match care to the toy’s build. See the category tables for product-specific cleaning steps and material notes so you pick the right method. Worth every paw-print.

    DIY and budget-friendly toys for indoor cats (simple builds and safety notes)

    - DIY and budget-friendly toys for indoor cats (simple builds and safety notes).jpg

    Two quick sock projects anyone can make. Stuff a clean sock with dry catnip (dried herb that many cats go crazy for), add a bit of crinkly paper for that satisfying rustle, tie the end and sew a tight seam , about 5 to 10 minutes. Your cat will bat it, nuzzle it, and purr. Or try a double-sock pouch: tuck one sock inside another, add catnip and a little stuffing, then sew the opening closed (7 to 10 minutes). Use fleece (a soft synthetic fabric) or cotton (natural soft fiber) for the outer layer, and avoid glued seams so nothing flakes off.

    Cardboard maze and tunnel are simple and fun. Cut a few shoebox-sized openings and tape boxes together to make a short tunnel or a treat maze (10 to 20 minutes). Make the holes about 1.5 to 2 inches so treats peek through, and scale the challenge by adding more chambers or smaller openings so your cat has to paw around. Cardboard (sturdy paperboard) is cheap and recyclable; swap it out if it gets soggy or messy.

    Teaser-lure fixes and snack hacks for lazy afternoons. Replace worn lures with braided yarn (yarn twisted into a braid) or taped fabric strips, or clip on a small plush you already own , quick refresh, 5 to 15 minutes. For a budget treat dispenser, fold a toilet-paper roll into a puzzle cup or hide kibbles (dry cat food) in folded paper cones for a snack hunt. Quick caution: supervise stringed toys and throw away any DIY with loose small parts like beads, bells, or long threads that could come off. See the Cleaning & Safety section for washing guidance.

    Worth every paw-print.

    FAQ: troubleshooting and common questions about indoor cat toys

    - FAQ troubleshooting and common questions about indoor cat toys.jpg

    Q: Why does my cat ignore toys?
    A: Cats notice texture, motion, and scent more than we think. Try swapping a soft plush for rough canvas (tight woven cotton) so the feel changes under their paws. Move the toy differently too , quick, twitchy flicks for kittens; slow, teasing pulls for older cats. Add a scent like catnip or a tiny bit of your worn T-shirt; sometimes your smell is the secret winner. Picture this: your cat's whiskers twitch as a fuzzy mouse skitters across the rug. Ever watched your kitty chase shadows? Small, light lures often excite kittens. Older cats may prefer puzzle-style play that makes them think and hunt at a gentler pace.

    Q: How often should I rotate toys?
    A: Rotate every 3 to 7 days so toys feel new again. A simple trick: stash half the box and swap mid-week. That small change sparks big curiosity. For busy days, toss an unbreakable ball before you head out , ten minutes of safe solo play.

    Q: Where are the safety, laser, catnip, treat-calorie, and vet tips now?

    • Laser safety: moved to the Electronics / Maintaining interest section. A laser pointer (small handheld light) can be great, but never shine it in your cat's eyes. Always end a laser game with a physical toy they can catch so they get a satisfying win.
    • Catnip and silvervine: merged into Durable & DIY. Silvervine bark (a plant resin) smells stronger if you shave it a bit. Supervise chewing, and watch for over-exuberant rolling or rough play.
    • Puzzle feeders and treat toys: guidance added there. Count treats and use tiny pieces or low-calorie options so play stays active without adding pounds.
    • Cleaning and safety + vet advice: moved to Cleaning & Safety. See a vet for a limp, persistent bleeding, or sudden behavior changes. You'll also find a simple inspection and retirement checklist in that section to help decide when a toy needs to go.

    Worth every paw-print.

    Final Words

    Jumping right into Quick Picks, we gave a fast, one-line shopping roundup that matches play style, age, durability, and price so you can scan and grab.

    Then a short buyer checklist and focused sections walked through puzzle feeders, wands and lasers, chew-proof options, life-stage fits, cleaning, DIY fixes, and FAQs.

    Use the maintenance checklist before rotations, swap toys every few days, and try simple DIY lure fixes to stretch value.

    Armed with this compact guide, you can pick the best toys for indoor cats that keep play fresh, protect furniture, and save you time. Happy paws!

    FAQ

    What are the best toys for indoor cats (Reddit, Amazon, interactive picks)?

    The best toys for indoor cats from Reddit and Amazon are wands, puzzle feeders, durable plush, spring toys (Cat Dancer), and motion/laser devices—pick by play style, age, and durability for top results.

    What stimulating cat toys work well for indoor cats?

    Stimulating cat toys for indoor cats are puzzle feeders, treat-dispensers, feather wands, and randomized motion toys; they spark hunting instincts, slow eating, and offer mental challenge for a happy, active kitty.

    Which interactive toys are top-rated for cats in 2025?

    Top-rated interactive toys in 2025 tend to be adjustable puzzle feeders, rechargeable randomized lasers (USB rechargeable, charges with a cable), multi-mode electronic wands, and sturdy spring toys that hold interest longer.

    Is the Cat Dancer interactive cat toy worth it?

    The Cat Dancer interactive toy is worth it for many cats; its spring-steel (thin flexible steel) design makes erratic motion that triggers pounces, and it’s lightweight, durable, and low-cost play.

    Are electronic interactive cat toys good for indoor cats?

    Electronic interactive toys for indoor cats can be great for independent play but may lose novelty; pick rechargeable models, vary play often, and pair electronics with fresh toys to keep interest alive.

    How do I keep an indoor cat entertained?

    To keep an indoor cat entertained, rotate toys every few days, mix chase and puzzle play, schedule short daily sessions, and offer treat puzzles for mental and physical stimulation.

    What toys will cats not get bored of?

    Toys cats rarely get bored of include varied-texture wands, adjustable puzzle feeders, and toys paired with human play; rotate types and swap scents or lures to maintain curiosity.

    What toys do cats love most?

    Cats most love toys that mimic prey: feather wands, small moving objects, crinkly plush, and puzzle feeders that reward effort—textures and unpredictable motion are key attractors.

    Do indoor cats need toys?

    Indoor cats need toys to provide exercise, mental work, and reduce stress; play prevents weight gain, boredom, and unwanted scratching, so regular, varied playtime helps feline well-being.

    Related Articles

  • FIP in cats (feline infectious peritonitis): Diagnosis, Care

    FIP in cats (feline infectious peritonitis): Diagnosis, Care

    Imagine a routine kitty cold turning serious. Sometimes the common feline coronavirus (a common cat virus) mutates and becomes feline infectious peritonitis (FIP), a dangerous illness that damages tissues and organs. You might see a puffy, fluid-filled belly, or more subtle signs like quiet weight loss, fever, and low energy. Ever watched your cat suddenly stop jumping? I once watched Luna go from six-foot leaps to flopping on the couch, and that sudden change was a red flag. FIP usually hits young cats, about 6 to 24 months old, and it can also cause eye or brain problems that change how we treat things.

    Diagnosing FIP can be tricky because its signs mimic other diseases. Your vet will use your cat’s history and a physical exam plus blood work (checks organ function and inflammation), ultrasound (sound-wave imaging) or X-rays, and sampling of any fluid for lab tests (cell counts, protein, virus checks). There are specific tests that look for the mutated virus or its effects, but often the diagnosis is a puzzle made from several clues. So expect follow-up visits and some detective work.

    Treatment focuses on antiviral drugs (medications that stop viruses from multiplying) together with supportive care (fluids, nutrition, fever control, and pain relief). New antivirals have helped many cats recover, but treatment can be long and costly, and close monitoring is essential. Vets will tailor therapy to your cat’s symptoms and adjust if side effects appear. It’s not always simple, but many owners and vets have seen real improvements.

    If FIP reaches the nervous system or the eyes you might notice stumbling, head tilts, seizures, circling, or vision changes, and those signs need urgent attention. Keep a close eye on behavior, appetite, and mobility, and call your vet if things change quickly. It’s scary, uh, but early diagnosis and treatment give the best chance for your kitty to feel feline fine again.

    FIP in cats (feline infectious peritonitis): Diagnosis, Care

    - Complete overview of FIP in cats a concise lede and quick facts.jpg

    Feline infectious peritonitis, or FIP, is a serious illness caused when feline coronavirus (FCoV, the common cat coronavirus) mutates and starts damaging tissues. It usually shows up in two main ways: the wet form with fluid buildup, and the dry form with lumps or organ inflammation. Early veterinary care really matters, so read on for Diagnosing FIP, Treatment options, Monitoring/Prognosis, Causes/Pathophysiology, and Neurologic and ocular manifestations.

    Key points:

    • Two forms: wet (effusive, with fluid in the belly or chest) and dry (noneffusive, with inflammatory lesions in organs).
    • Common signs: weight loss, fever, low energy; wet cases often have a swollen belly or trouble breathing.
    • Most cats affected are young, usually 6 to 24 months old.
    • Eye (ocular) and brain/nerve (neurologic) signs can happen and change how we diagnose and treat things.
    • Antivirals (drugs that stop virus replication) can lead to remission for many cats.
    • A definite diagnosis sometimes needs histopathology (microscopic exam of tissue samples).
    • Prevention focuses on reducing FCoV spread in multi-cat homes or shelters.
    • Relapse risk and best follow-up plans are still being studied.

    Noticeable signs are often subtle at first. Your cat might seem quieter, eat less, or lose weight. Then you might spot a soft, round belly or faster breathing if fluid is building up. Ever watched your kitty suddenly stop jumping? Neurologic signs can look like stumbling, circling, or strange eye movements.

    Treatment choices depend on the form and how sick the cat is. Antivirals, supportive care, and sometimes anti-inflammatory meds are the toolkit. Treatment options have improved a lot recently, but access and cost vary, so Practical Decisions matter , and, um, it’s okay to ask tough questions about affordability and goals of care.

    Prevention helps in group settings. Good hygiene, minimizing overcrowding, and prompt testing of ill cats reduce FCoV spread. For shelters and multi-cat homes, simple steps can make a big difference.

    Early vet checks are important. See your veterinarian right away if your cat has a swollen belly, breathing trouble, new neurologic signs, or unexplained weight loss. Check Diagnosing FIP for testing steps, Treatment options for therapies, and Practical Decisions for cost and access guidance.

    Early action can change the story.

    Causes and pathophysiology of FIP in cats

    - Causes and pathophysiology of FIP in cats.jpg

    FIP starts when the common feline coronavirus, or FCoV, changes inside a cat and gains the ability to infect macrophages (immune cells that eat germs and move around the body). Those infected macrophages carry the virus into organs and trigger an over-the-top immune reaction that damages blood vessels – vasculitis (inflammation of vessel walls) – and leads to pyogranulomatous lesions (pus-filled, firm nodules). The funny, sad part is the damage comes more from the cat’s own immune response than from the virus itself, so symptoms depend on where the inflamed vessels and nodules show up.

    FCoV spreads mostly by the fecal-oral route (cats pick up the virus from a contaminated litter box, food bowls, or hands), so the virus is very common in many cat groups. Studies find about 40% to 80% of cats have been exposed, and roughly one-third (around 33%) will shed the virus in feces at some point. Most cats either clear the intestinal infection or only shed briefly. A few shed for long periods, and only rarely does the virus mutate inside a cat and lead to FIP – that mutation can happen weeks, months, or even years after first exposure.

    Young cats are the highest risk group. FIP usually appears between about 6 and 24 months of age, and estimates suggest around 5% to 10% of cats infected with FCoV go on to develop FIP, though overall FIP rates are often closer to 2% in many places. Crowded environments like catteries, shelters, or busy multi-cat homes, stressful changes, and some pedigree lines raise the odds. Intact males may have a slightly higher risk in some studies, so both environment and individual factors seem to matter.

    Steps in how FIP develops

    1. FCoV infects the gut and replicates there.
    2. The cat may shed virus in feces for a short or long period.
    3. In a small number of cats the virus mutates and gains macrophage tropism (ability to infect macrophages).
    4. Infected macrophages spread systemically and cause immune-mediated vasculitis, which produces the clinical disease we call FIP.

    Ever watched a kitten nap in the sun and thought, I hope it stays healthy? This is why understanding how FIP starts and spreads matters.

    Clinical presentation of wet vs dry FIP in cats

    - Clinical presentation of wet vs dry FIP in cats.jpg

    FIP (feline infectious peritonitis) usually shows up in two main ways. One is the effusive or wet form, where fluid builds up in body cavities. The other is the non-effusive or dry form, which causes localized inflammation in organs. Lots of cats have signs of both. For CNS and eye-specific signs, see Neurologic and ocular manifestations.

    Wet FIP signs:

    • Abdominal swelling or ascites (ascites = fluid in the belly) that often feels squishy when you press the belly.
    • A pot-bellied look with a tense, rounded abdomen.
    • Trouble breathing from pleural effusion (pleural effusion = fluid around the lungs).
    • Muffled or dull chest sounds when listening with a stethoscope (auscultation = listening to the chest).
    • Fast clinical decline in severe cases , low energy and rapid breathing are common.
    • The fluid is usually high in protein and straw-colored, and can be sticky or thick when analyzed.

    Dry FIP signs:

    • A persistent fever that doesn’t get better with ordinary antibiotics.
    • Progressive weight loss and muscle wasting (loss of muscle mass) even if appetite hasn’t dropped much.
    • Signs tied to specific organs, like jaundice (yellowing of skin and eyes) from liver involvement or renal azotemia (a rise in blood nitrogen waste, seen on blood tests) from kidney problems.
    • Firm nodules or palpable masses in the abdomen caused by granulomatous inflammation (granulomatous inflammation = small, firm immune cell nodules).
    • Eye problems such as uveitis (uveitis = inflammation inside the eye); see Neurologic and ocular manifestations for exam details.
    • A course that can wax and wane, with signs that come and go over time.
    Feature Wet FIP (effusive) Dry FIP (non-effusive)
    Typical fluid Large-volume, high-protein ascites or pleural effusion Minimal or no free fluid; focal organ lesions instead
    Onset/progression Often rapid decline over days to weeks Slower, more variable progression over weeks to months
    Most common clinical clues Abdominal swelling, breathing trouble, muffled chest sounds Fever, weight loss, organ-specific signs such as jaundice
    Survival without treatment Typically days to weeks in severe effusive cases Often weeks to months, but variable by organ involvement

    Neurologic and ocular manifestations of FIP in cats

    - Neurologic and ocular manifestations of FIP in cats.jpg

    When feline infectious peritonitis hits the brain or the eyes, signs can come on fast and be pretty scary. These neurologic and eye changes often shift what vets choose to do and what the outlook looks like. If you think your kitty’s brain or eyes might be involved, check Clinical Presentation for overlapping systemic signs and follow the stepwise testing in Diagnosing FIP.

    Neurologic signs are often obvious: seizures, wobbliness or ataxia (loss of balance), circling, a head tilt, weakness or partial paralysis (paresis), and cranial nerve problems that change pupils or swallowing. Advanced imaging like MRI (magnetic resonance imaging; detailed brain pictures) or CT (computed tomography; X-ray slice images) helps when there’s a focal lesion or suspected raised pressure. Analyzing cerebrospinal fluid (CSF = the clear fluid that bathes the brain and spinal cord) can show inflammation , more white blood cells and higher protein , although CSF isn’t always definitive. Referral to a neurologist and quick imaging can guide urgent care and safe sampling.

    Eye problems usually show as anterior uveitis (inflammation inside the front of the eye), chorioretinitis (inflammation behind the retina), or sometimes retinal detachment (the retina pulling away, which can cause sudden blindness). An eye exam with fundoscopy (looking at the retina and back of the eye) often gives the key clues. Short-term treatment focuses on calming inflammation and protecting vision with topical eye medicines, systemic anti-inflammatory drugs when appropriate, and pain control. A timely referral to an ophthalmologist is a good idea. Antiviral choices should be discussed with your clinician in Treatment.

    Warning signs of brain or eye involvement

    • Seizures.
    • Head tilt or other vestibular signs (losing balance).
    • Sudden vision loss or bumping into things.
    • Unequal pupils or odd pupil reactions (anisocoria).
    • Light sensitivity or very small pupils suggesting anterior uveitis.
    • A “dark curtain” across vision or abrupt blindness suggesting retinal detachment.

    What vets often recommend

    • MRI or CT for detailed brain imaging.
    • CSF analysis to look for inflammatory cells and protein.
    • Full eye exam with fundoscopy to check the retina.
    • Acute treatments: anticonvulsants for seizures, anti-inflammatory therapy to calm the immune response, and topical ophthalmics for eye inflammation and comfort.
    • Discuss antiviral options with your clinician as part of the overall plan.

    If your cat suddenly seems off , like knocking into furniture or acting blind , don’t wait. These signs can be urgent. It’s tough to watch, I know, but quick diagnosis and the right referrals can make a real difference.

    Diagnosing FIP in cats: tests, interpretation and diagnostic algorithm

    - Diagnosing FIP in cats tests, interpretation and diagnostic algorithm.jpg

    FIP can feel like a mystery. No single noninvasive test proves it. So vets put together the history, physical exam, bloodwork, imaging, fluid or tissue analysis, PCR (polymerase chain reaction, a test that finds viral genetic material), and sometimes a biopsy to get a confident answer. This mix helps tell FIP apart from look-alike problems and lets you start the right treatment sooner.

    Below is a practical roadmap you can use when you’re working up a sick cat. Think of it as a checklist to walk through, not a strict rulebook , and yes, I know it’s a lot. But step through these ideas and you’ll be clearer about next moves.

    1. Stabilize first. Fix dehydration, breathing trouble, or seizures, and run quick screening labs to spot life-threatening issues. Calm the cat, treat immediate problems, then dig into diagnostics.
    2. Get baseline bloodwork and imaging. Do a CBC (complete blood count) and chemistry panel, including the albumin-to-globulin (A:G) ratio (blood protein balance that often drops in FIP). Add an abdominal ultrasound and chest X-rays (thoracic radiographs) to look for fluid or organ changes.
    3. Collect and test any fluid or affected tissue. Tap effusions (fluid buildup) for cytology (cell-level exam), protein measurement, and FCoV PCR (tests for feline coronavirus RNA). Run a Rivalta test (a simple bedside drop test that hints at inflammatory fluid) if you have an effusion. Remember: positive PCR or Rivalta fits the story, but neither alone proves FIP because coronavirus and some infections can show the same results.
    4. When noninvasive tests are unclear, refer. Tissue biopsy and histopathology (microscopic tissue exam) with immunohistochemistry (IHC, a stain that shows viral antigen in cells) can confirm FIP. Referrals to internal medicine, neurology, or ophthalmology may be needed for tricky CNS or eye signs.
    Test What it shows Key limitations
    CBC/chemistry & A:G ratio Often sees high globulins (hyperglobulinemia), low A:G ratio (albumin to globulin), fewer lymphocytes (lymphopenia), and raised acute-phase proteins (inflammation markers) Supportive but not specific. Other diseases can cause the same changes.
    Effusion analysis & Rivalta Effusive FIP usually gives thick, straw-colored, high-protein fluid. Rivalta (a quick drop test at the bedside) is often positive in inflammatory effusions. Helpful for effusive cases but not definitive. Bacterial peritonitis and some other causes can look the same.
    FCoV PCR (blood/effusion/tissue) Detects viral RNA and can show a high viral load in effusion or tissue. FCoV is common in cats. A positive PCR needs to be interpreted with the clinical picture to suggest FIP.
    FCoV antibody testing Shows prior exposure to feline coronavirus. Many cats are antibody-positive, so this test by itself is not very useful for diagnosing FIP.
    Imaging (X-ray/US, MRI for CNS) Finds effusions, organ lesions, or brain/spinal changes if CNS is involved (MRI = magnetic resonance imaging, detailed soft-tissue pictures). Suggestive findings but not proof. MRI is needed for focal CNS disease and may require referral.
    Tissue biopsy / histopathology (IHC) Gold standard: shows pyogranulomatous vasculitis (inflammatory blood vessel lesions) and viral antigen on IHC (a staining test that highlights virus in tissue). Requires anesthesia and sampling or necropsy. Often needs referral and specialty lab work, but it’s the most definitive test.

    When should you refer? If noninvasive tests leave you unsure, if the cat has CNS or eye signs that need advanced imaging, or when a biopsy will change treatment choices, send the case on. Histopathology (microscopic tissue exam) looks for the typical pyogranulomatous vasculitis, and IHC (staining to detect viral antigen) is the confirmatory test. It can be done before death when safe, or at necropsy for final confirmation. Worth every careful step when the diagnosis matters.

    Treatment options for FIP in cats: antiviral protocols and supportive care

    - Treatment options for FIP in cats antiviral protocols and supportive care.jpg

    Antiviral drugs that stop the virus from copying itself have changed the FIP story. GS-441524 (an antiviral you can sometimes give by mouth or by injection), remdesivir (an injectable antiviral related to the drug used in people), and GC376 (a protease inhibitor – a drug that blocks a viral enzyme) have all helped cats go into remission when used with proper veterinary protocols and follow-up. Many cats improve a lot under a vet’s care; some recover after about 84 days of treatment. It used to be a hopeless diagnosis. Now there are real options.

    Protocols depend on the drug and where you live. Remdesivir is usually given by injection. GS-441524 may be oral or injectable, depending on local availability. GC376 is still investigational in many places. Typical courses last at least 12 weeks, and vets adjust duration based on how the cat looks and what blood tests show. Stick with the full, published course rather than stopping early, okay? Oops, let me rephrase that – don’t stop just because things look better for a few days.

    Good supportive care is the backbone while antivirals do the viral work. Remove dangerous fluid with abdominocentesis or thoracocentesis (needle removal of belly or chest fluid), give IV or subcutaneous fluids for dehydration, and help nutrition with appetite stimulants or feeding tubes (a small tube to deliver food when the cat won’t eat). Treat seizures with anticonvulsants (meds to stop seizures), use targeted anti-inflammatory or pain meds for comfort, and handle infections and wound care as they come up. Keeping your cat comfortable really helps them tolerate therapy and recover faster.

    Watch for treatment-related problems and change care if needed. Vets commonly check for injection-site reactions, changes in liver enzymes or blood counts, and tummy upset. Some antiviral plans require blood tests and physical exams at set times, so follow the Monitoring/Prognosis guidance for exact timing and relapse tracking. And if sourcing or cost is an issue, see Practical Decisions for legal access and budgeting tips.

    Supportive care actions

    • Abdominocentesis or thoracocentesis as needed to relieve effusion (needle removal of belly or chest fluid).
    • IV or subcutaneous fluids to treat dehydration and keep circulation going.
    • Nutritional support with appetite stimulants or feeding-tube placement (small tube to give calories when eating is poor).
    • Pain control and targeted anti-inflammatory meds to keep the cat comfy.
    • Anticonvulsant therapy for seizures and neurologic stabilization (meds that reduce or stop seizures).
    • Wound and injection-site care to prevent local problems.
    • Treat concurrent infections with appropriate antibiotics or antifungals (meds to fight bacteria or fungi).
    • Palliative care planning when antivirals aren’t used or goals change.
    Oral antivirals Injectable antivirals
    Easy for at-home dosing when owners can reliably medicate their cat Helpful when oral absorption is uncertain or the cat refuses pills
    Can be affected by appetite or gut absorption, so watch for vomiting Bypasses gut variability and gives more predictable blood levels
    Less need for clinic visits if the owner can give meds safely at home May require clinic visits or owner training to give injections
    Preferred when approved oral versions are available locally Preferred for very sick cats, poor eaters, or when fast reliable dosing is needed

    Monitoring, prognosis and expected outcomes for cats with FIP

    - Monitoring, prognosis and expected outcomes for cats with FIP.jpg

    Without antiviral treatment, the outlook is grim. Effusive (wet) FIP, where fluid builds up in the chest or belly and makes breathing hard, often leads to death in days to weeks. Non-effusive (dry) FIP tends to sneak up more slowly, with organs failing over weeks to months. Cats can seem a little off at first and then get worse fast, so knowing that timeline helps you make realistic, urgent decisions. Ever watched a cat suddenly stop jumping? That’s a clue.

    The good news is modern antiviral drugs have changed the story for many cats. Lots of cats reach clinical remission and go back to normal play and naps. There are published recoveries after long courses of therapy, for example about 84 days of treatment in one report. Still, relapses do happen and long-term outcomes are not fully known, so think of a successful course as hopeful rather than guaranteed. Worth keeping your paws crossed, but not letting down your guard.

    Monitoring during treatment is basically careful check-ins plus lab tests to see if the cat is getting better and to catch side effects early. Start with a baseline CBC (complete blood count) and a chemistry panel (blood tests that check organ function and blood proteins). Between visits watch weight, appetite, breathing, and any return of fluid. Early on vets often check bloodwork more often to track liver enzymes (blood markers of liver health) and blood cell counts, then stretch out the gaps as your cat improves. Physical exams and imaging like ultrasound or chest X-rays show whether fluid is shrinking and organs are recovering.

    Follow-up checklist for owners and vets:

    • Daily weight and appetite checks.
    • Watch activity and behavior for changes.
    • Physical exams focused on belly size and breathing effort.
    • Baseline CBC and chemistry panel before starting therapy.
    • CBC and liver enzyme checks every 2 weeks for the first month of treatment.
    • Then CBC and chemistry every 4 weeks for the rest of treatment.
    • End-of-treatment labs and exam, then rechecks at 1, 3, 6, and 12 months after finishing.
    • Re-evaluate right away for any return of fever, wasting, fluid build-up (effusion), or neurologic signs like stumbling or odd behavior.

    Remission means your cat’s symptoms have gone and blood tests are normal or clearly moving that way, for example an improving A:G ratio (albumin:globulin ratio, a simple blood protein comparison) and stable liver enzymes. Because we don’t yet have complete long-term data and relapse risk is still a bit of a mystery, it’s smart to keep up surveillance after treatment so you catch any comeback early. And hey, seeing your cat purr and chase a toy again makes all that follow-up worth it.

    Preventing FIP in cats: reducing FCoV spread in multi-cat households and shelters

    - Preventing FIP in cats reducing FCoV spread in multi-cat households and shelters.jpg

    Focus your prevention where it matters: stop fecal-oral transmission (how the virus moves from poop to mouth) and lower crowding and stress that make a common feline coronavirus (FCoV; the cat coronavirus) more likely to mutate into FIP (feline infectious peritonitis). See Causes/Pathophysiology for prevalence and shedding details. Keeping virus exposure low in homes, catteries, and shelters makes FIP much less likely.

    Here are practical, easy-to-remember steps you can use right away:

    • Reduce group size and avoid putting too many cats together when you can; fewer cats means less chance the virus circulates.
    • Give at least one litter box per cat plus one extra. More boxes cut down on shared exposure and litter-box fights.
    • Scoop and remove feces daily from litter boxes and shared areas to limit infectious material.
    • Clean litter boxes, bedding, food bowls, and scoops on a regular schedule using disinfectants labeled for coronaviruses or a dilute bleach solution (follow product directions).
    • Quarantine new arrivals for 2 to 4 weeks (quarantine means separate space with minimal contact) while watching appetite, stool, and behavior; test or screen per your clinic’s protocol.
    • Minimize stress: keep routines steady, avoid overcrowding, and give hiding spots and vertical space so cats can get away from each other. Ever watched a cat tuck into a box and relax? That’s the goal.
    • Support immune health with good nutrition, parasite control, and routine veterinary care.
    • Work with your veterinarian on targeted screening and testing strategies for high-risk facilities, and write down a clear plan for isolating sick cats and cleaning after them.

    There is a licensed FIP vaccine, but its protective value is uncertain and most major guidelines do not recommend routine use. Shelters and breeders might consider vaccination as one extra layer of biosecurity, not a cure-all. Talk with your clinic about local virus levels, how vaccination fits your operation, testing implications, and costs before adding it to your protocols so the choice matches your facility’s overall control strategy.

    - Practical decisions treatment costs, legal access, selecting a veterinarian for FIP in cats.jpg

    Treating FIP can feel like a big leap, costs and access are the two things that trip people up the most. You’ll want to budget for drugs, clinic visits for injections or checks, and the chance of a hospital stay. Some past reports show black-market GS-441524 (an experimental antiviral) courses cost thousands of dollars, so plan carefully.

    Check the legal picture first. Rules about FIP antivirals and how GS-441524 can be sourced legally vary by region and change over time, so talk with your vet before making plans. Your vet can confirm what’s lawful where you live and point to approved or legal pathways.

    Think of your veterinarian as the central hub for safe, legal care. They can prescribe or obtain approved options like remdesivir (an injectable antiviral), help find compassionate access programs or clinical trials (special pathways for hard cases), and write a monitoring and treatment plan. They’ll also manage lab checks and side effects, document the case for pharmacies or regulators, and refer you to specialists if imaging (X-ray or ultrasound) or biopsy (small tissue sample) is needed.

    Practical steps to take right now: ask for a written treatment plan that includes estimated costs, a timeline for monitoring, and who will give injections or teach you to do home dosing. Get a clear consent form that spells out goals of care and fallback options, like palliative care. Sort payment methods, pick a backup clinic for emergencies, and set expectations for follow-up visits and how often labs will be run so you’re not surprised halfway through treatment.

    Questions and criteria for selecting a veterinarian

    • Experience treating FIP, with documented case outcomes you can review.
    • Familiarity with antiviral protocols and the regional legal status of FIP antivirals.
    • Ability to perform and interpret required monitoring tests like CBC/chemistry (blood cell counts and blood chemistry tests), and access to imaging tools.
    • Clear cost estimates, a written treatment plan, and transparent billing practices.
    • Willingness to discuss compassionate access programs or clinical trials (possible legal routes for treatment).
    • Capacity to provide palliative care and have honest goals-of-care conversations.

    Worth every paw-print if you find the right team. Ever watched your cat suddenly pounce like a little furry missile? That jump back to life is what we’re aiming for, practical plans make it possible.

    Differential diagnoses for FIP in cats and the single most useful distinguishing tests

    - Differential diagnoses for FIP in cats and the single most useful distinguishing tests.jpg

    Many other conditions can look a lot like FIP, so it’s important to rule them out so treatment actually fits the problem. See [Diagnosing FIP](Diagnosing FIP) for full test interpretation and the stepwise diagnostic algorithm. Use the targeted tests below to narrow the list quickly and avoid unnecessary therapy.

    Condition Overlapping signs with FIP Single most useful distinguishing test
    Bacterial peritonitis Abdominal fluid, fever, low energy Effusion cytology (exam of fluid cells to look for infection or inflammation) plus aerobic culture (grows bacteria that need oxygen)
    Lymphoma Weight loss, abdominal masses, possible fluid accumulation Tissue biopsy with histopathology (microscopic exam to spot cancer) or flow cytometry (cell-type testing) showing neoplastic cells
    Toxoplasmosis Fever, tiredness, eye or neurologic signs Toxoplasma PCR (detects parasite DNA) or paired serology (two blood tests showing rising antibodies) and clinical response to therapy
    Heart failure / CHF Fluid around the lungs, breathing difficulty, poor tolerance for activity Echocardiography (heart ultrasound) to document cardiac disease
    Primary hepatic or renal disease Jaundice (yellowing), abnormal blood chemistry, weight loss Targeted organ bloodwork (liver/kidney panels) and imaging-guided biopsy (needle sample taken with ultrasound or CT) when indicated

    If those single key tests and the overall clinical picture still leave you guessing, next step is tissue biopsy and histopathology (microscopic tissue exam). Add immunohistochemistry (staining to show viral antigen) when available. I know, more tests. But they’re the best way to be sure. For recommended steps and when to refer, consult [Diagnosing FIP](Diagnosing FIP).

    Final Words

    in the action, we ran through what FIP is and why rapid vet assessment matters, causes and how the virus mutates, wet versus dry signs, neurologic and eye problems, stepwise testing, antiviral and supportive care, monitoring, prevention in group settings and practical cost/access choices.

    It's a lot, I know – short reads and checklists were meant to help you find what matters fast.

    FIP in cats (feline infectious peritonitis) can feel scary, but timely care and clear plans give many kitties a fighting chance. Worth every paw-print.

    FAQ

    Fip in cats feline infectious peritonitis treatment

    FIP treatment in cats involves antiviral therapy such as GS-441524 (an antiviral that blocks viral replication) or remdesivir (an injectable antiviral), plus fluid removal, nutritional support, and symptom control under veterinary care.

    Fip in cats feline infectious peritonitis symptoms and how does dry FIP differ

    FIP symptoms in cats include persistent fever, lethargy, and weight loss; wet cases show abdominal or chest fluid, and dry cases cause organ-specific signs plus eye or neurologic changes, often beginning with vague illness.

    How do cats get FIP / How did my cat get FIP?

    Cats get FIP when common feline coronavirus (FCoV) in the gut mutates into a macrophage-tropic form (infects immune cells called macrophages) that spreads systemically; roughly 5–10% of infected cats progress, risk higher in young or crowded settings.

    Final stages of FIP in cats

    Final stages of FIP include severe fluid buildup, breathing trouble, profound weakness, neurologic collapse such as seizures, extreme weight loss and organ failure, often progressing to death over days to weeks in wet cases.

    Is FIP in cats curable

    FIP can be cured in many cats when treated early with antiviral drugs like GS-441524 (an antiviral that blocks viral replication) or remdesivir, though outcomes vary and monitoring is required.

    Is FIP contagious in cats

    FIP itself is not directly contagious between cats; the related feline coronavirus spreads by fecal-oral contact and may mutate within individual cats to cause FIP.

    How long can a cat live with feline infectious peritonitis?

    A cat with untreated effusive FIP often survives days to weeks; untreated non-effusive cases may last weeks to months; treated cats can live many months or achieve remission with appropriate antivirals.

    Is it my fault my cat got FIP?

    It is not your fault your cat got FIP; most cats encounter feline coronavirus and only a small, unpredictable minority develop FIP due to viral mutation and host factors beyond owner control.

    Related Articles

  • How to Wean Kittens to Solid Food

    How to Wean Kittens to Solid Food

    Think kittens will just switch to solid food like magic? Not always. This short, step-by-step plan tells you exactly when to start, how to mix and gently warm that first cozy gruel (a thin mash of wet food and kitten milk replacer), how many meals to offer each day, and which vet signs mean you should stop and call for help. When you warm it, test a drop on your wrist , warm, not hot.

    Grab a kitchen scale (a small digital scale for weighing tiny portions) and a shallow, low-lip dish (a flat bowl with a tiny rim), then follow the seven simple steps below so you can wean kittens onto solid food quickly and with confidence. Ever watched a kitten pounce on a crumb? You’ll get that same tiny thrill, only less messy.

    Worth every paw-print.

    Wean kittens: a step-by-step plan

    - Wean kittens a step-by-step plan.jpg

    Quick , grab a kitchen scale and a shallow, low-lip dish. This short 7-step checklist gives the exact ages, mixing ratios, warming temp, meal counts, and vet red-flags so you can move fast and confident.

    1. Start trials between 3 and 5 weeks of age. Check that the kitten can sit steady in your lap and lap from a dish, and that premolars and canines have erupted (premolars are the back chewing teeth, canines are the pointy front teeth). See the Signs section for more details.

    2. Make the first gruel by mixing equal parts canned kitten food and kitten formula (kitten milk replacer, a commercial milk substitute made for kittens). Warm it to about 100°F (38°C) and test a drop on your wrist so it feels cozy, not hot.

    3. Offer 3 to 4 wet meals a day in shallow dishes. Encourage lapping , try a soft spoon or gentle hand-feeding if the kitten needs help. Small wins add up; even a few confident licks matter.

    4. Cut back on supplemental bottle feeds (a small nursing bottle or syringe) slowly as the kitten eats more solids. Weigh the kitten every day and jot down the numbers so you can see trends and catch problems early.

    5. Over several days, make the mix thicker so the kitten practices chewing. Aim for about a 1:2 to 1:3 wet food to liquid ratio as tolerated, then introduce softened kibble (dry food soaked until soft). Patience here pays off , let them set the pace.

    6. Expect about a +10 g per day weight gain during the active transition phase (g means grams, about 0.035 ounces). Many kittens finish weaning around eight weeks, but keep fresh water available at all times.

    7. Watch for vet triggers: diarrhea lasting more than 24 to 48 hours, ongoing vomiting, signs of dehydration like sticky gums or sunken eyes, severe lethargy, or failure to gain weight. If any of these happen, resume supplemental bottle feeds right away, weigh daily, and contact your veterinarian.

    Keep this checklist as your single source of truth for ages, meal counts, mixing ratios, warming temp, and red-flag thresholds. Other sections should point back here instead of repeating the numbers. Worth every paw-print.

    Wean kittens: signs of readiness and quick health checks before you begin

    - Wean kittens signs of readiness and quick health checks before you begin.jpg

    Here’s a short, friendly checklist to help you spot when a kitten is ready for its first meat trials. Use these as go/no-go checks before you follow the lead plan. Think of it as a quick health and behavior scan so you and the kitten both feel confident.

    • Dental cue: gently peek inside the mouth. If you see deciduous premolars or canines (baby teeth), that’s a helpful confirmation. It’s a good sign, but don’t use this as the only test.

    • Lap ability: the kitten can sit steady and lap from a shallow dish. Or the kitten will accept gentle spoon or hand feeding without gagging. If they can lap, they’re coordinating mouth and tongue movements.

    • Behavioral cue: the kitten shows curiosity about food, reaches toward the dish, and mouths in a coordinated way instead of just pawing. Ever watched a little head-tilt before a bite? That’s the good kind of focus.

    • Baseline weight: weigh and record a starting weight before trials begin. Track daily gains toward the target of +10 g per day (about +0.35 oz per day) during transition, and use the same scale and time of day for consistency.

    If you’re unsure, refer to the lead checklist for the exact age window, feeding frequency, mixing ratios (how much formula to mix), warming temperature (in F and C), and veterinary triggers to watch for. Follow those details and you’ll be in a much better spot.

    Worth every paw-print.

    Wean kittens: feeding tools, supplies, and feeding area setup

    - Wean kittens feeding tools, supplies, and feeding area setup.jpg

    Set up a tidy, low-stress feeding corner so kittens can focus on learning to eat. Keep it warm, quiet, and easy to clean, and you’ll see them relax faster. Ever watched a tiny face concentrate on a bowl? It’s the best.

    • Shallow, low-lip dishes (about 2 inches deep) so little faces can lap without tipping or struggling. Think saucers, not deep bowls.
    • Soft baby spoons for guided tasting and gentle hand-feeding when you first introduce gruel (gruel, a softened mix of formula and canned food). These help teach licking and reduce mess.
    • Non-slip mats and washable surfaces to catch spills and keep bowls from sliding during enthusiastic lapping. Carpets are fine, but wipeable floors make your life easier.
    • Small, shallow water dish (about 2 inches high); change the water daily so it smells fresh and invites sips. Hydration matters.
    • Gram kitchen scale (small digital scale that measures grams) for daily weigh-ins so you can track that target gain of about +10 g/day (g means grams) during the transition. Quick weigh-ins catch problems early.
    • Cleaning supplies: mild dish soap, a separate bottle brush, and a small pot or steam sterilizer (steam sterilizer, like a baby bottle steam cleaner) for utensils used with orphaned kittens. Keep one set just for the kittens.
    • Bottles and kitten formula (kitten milk replacer, a commercial formula that substitutes for mom’s milk) on hand as backup until solids are reliably eaten. Check your lead checklist for when to scale back bottles.
    • Feed kittens individually when you need to measure intake or stop a stronger sibling from stealing food. One-on-one feeds help shy babies learn without pressure.

    For utensils used with bottle-fed kittens, wash in hot soapy water, rinse well, then boil or use a steam sterilizer every day. If food intake drops or weight stalls, follow the lead checklist for when to resume bottle feeds and contact your vet. Don’t wait, small kittens can turn downhill fast.

    Worth every paw-print.

    Wean kittens: simple gruel recipes, mixing ratios, warming and storage

    - Wean kittens simple gruel recipes, mixing ratios, warming and storage.jpg

    Lead checklist – key numbers and where to find staging:

    • Warm the gruel to about 38°C / 100°F. Test one drop on your wrist first. It should feel warm, not hot, like a baby’s bath water.
    • See the lead checklist for exact ages, how often to feed, and the vet red flags to watch for. Keep other sections linked to that checklist so the numbers stay the same.
    • Keep a kitchen thermometer handy for consistency. It makes life easier and helps nervous humans sleep better.

    Detailed recipes & storage

    Quick recipe examples:

    • Initial gruel – 1 part canned kitten food : 1 part kitten milk replacer (a store-bought milk substitute made for kittens) for a thin, lappable soup. Think gentle, drinkable texture so tiny tongues can learn to lap.
    • Progression – over several days, slowly thicken toward 1 part wet food : 2 parts liquid or 1:3 wet:liquid as chewing improves. Let them graduate at their own pace.
    • Kibble soak – when introducing solids, soften dry kibble with formula or warm water at about 1:3 (kibble:liquid). The pieces should be soft, not crunchy.

    Practical serving tips:

    • Use shallow dishes so tiny faces can easily lap. The satisfying little slurp helps them learn fast.
    • For shy eaters, dip a clean fingertip in the gruel and wiggle it near their mouth. Many kittens will lick and figure it out. Ever watched one suddenly discover food? Cute.
    • Keep mealtimes calm and short. A little praise and a tiny pat afterwards goes a long way.

    Storage and safety guidance:

    • Opened wet food: refrigerate and use within 24 to 48 hours.
    • Freeze small gruel portions in ice cube trays for up to 1 month. Thaw completely, then rewarm to about 38°C / 100°F before serving.
    • Keep formula and feeding bottles on hand as a backup until steady weight gain is recorded. If weight stalls, check the lead checklist and call a vet.
    • Toss any leftover gruel that sat out longer than two hours to avoid tummy trouble.

    Quick reference: see lead checklist for ages, meal frequency, and vet red flags. Worth every paw-print.

    Wean kittens: week-by-week schedule with sample daily feeding plans

    - Wean kittens week-by-week schedule with sample daily feeding plans.jpg

    Quick, printable weekly plan that links back to the lead checklist for the exact ages, mixing ratios, warming temperature, and vet red-flags. Read the lead for the numeric thresholds; use the steps below as the day-to-day flow you’ll follow. Ever watched a kitten try to lap? Cute chaos, but we’ll make it easy.

    1. Week 3-5: start meat trials with thin gruel (gruel = canned kitten food mixed with kitten formula, kitten formula = commercial milk replacer). Keep sessions short and calm so the kitten can practice lapping and learn tongue control. Offer small amounts and let them sniff and lick at their own pace.
    2. Week 5-6: increase the canned food portion and cut back on formula as the kitten shows more interest in solids. Keep meals frequent and patient; that builds confidence. If they’re hesitant, don’t rush it.
    3. Week 6-8: introduce softened kibble (kibble = dry kitten food soaked in warm water or a little formula) so chewing skills can develop. Reduce the liquid over several days so texture changes slowly.
    4. Move by texture, not a calendar – if a kitten struggles, pause the thickening and go back to thin gruel until they’re comfortable. It’s okay to repeat a week.
    5. Phase out supplemental bottle or syringe feeds (syringe = small feeding syringe) gradually as the kitten eats reliably. Weigh daily and track gains (see the lead checklist for the +10 g/day target).
    6. If any vet triggers appear, follow the lead checklist’s corrective actions right away – resume bottles if needed, weigh more often, and contact your veterinarian.

    Sample 5-week day schedule (practical):

    • Meal 1: thin gruel in a shallow dish, aim for 5-10 tiny licks; use a gentle spoon-feed if the kitten needs help.
    • Meal 2: short trial with the same thin gruel; offer the bottle afterward only if intake was very small.
    • Meal 3: warm, thin gruel; encourage with a fingertip dab so they learn to lap from the dish.
    • Meal 4: final thin gruel of the day; weigh before bedtime and record the number.

    Sample 8-week day schedule (practical):

    • Meal 1: wet kitten food warmed slightly, served in a shallow dish so it’s easy to access.
    • Meal 2: wet food again; leave dry kibble out to sniff and taste during the day.
    • Meal 3: wet food; always have fresh water in a small shallow dish.
    • Weigh daily and use the lead checklist to decide when to stop bottles or call the vet.

    A few quick tips: use warm, not hot, food – think cozy bathwater, not scalding. Keep feeding sessions calm and short, and praise the tiny wins. If you’re juggling life and kittens, a consistent routine gives huge benefits, ten minutes of guided feeding can buy you hours of nap time later. Worth every paw-print.

    Wean kittens: moving from wet food to kibble and safe texture progression

    - Wean kittens moving from wet food to kibble and safe texture progression.jpg

    Start offering dry food when your kitten is ready to move away from mostly wet food. Think slow and steady so the mouth learns to chew, not just swallow. Ever watched a tiny jaw figure out a crunchy bite? Cute and impressive.

    Keep these practical tips handy as you shift from canned to kibble textures:

    • Soften kibble with kitten formula (kitten milk replacer, a commercial milk substitute) or warm water at first; the pieces should be soft, not mushy.
    • Gradually reduce the liquid over 1-3 weeks so the kitten learns to chew; small steps, please.
    • Pick small, soft kibble (kibble = dry, crunchy pet food) or puppy-style kitten kibbles (tiny, softer pieces made for small mouths).
    • Chew-check procedure (a simple test to confirm safe chewing): offer one softened piece, watch three to five chews, make sure there’s no coughing or gagging, and verify the kitten can break the piece with jaw motion.
    • Avoid large adult kibble and watch for choking signs; keep feedings supervised until chewing is confident.
    • Always keep fresh water available, and let the kitten set the pace , proud little progress beats rushed crunches.

    Refer to the recipes table for the recommended mixes and exact ratios.

    Stage Mix Notes
    Starter (Days 1-3) 75% wet + 25% softened kibble Soften with kitten formula or warm water; pieces should be easily compressible.
    Transition 1 (Days 4-7) 50% wet + 50% softened kibble Reduce liquid a bit so the kibble keeps some texture but is still easy to chew.
    Transition 2 (Week 2) 25% wet + 75% softened kibble Make the kibble firmer each day; watch chewing and reduce wet food if comfortable.
    Final (Week 3-4) 100% dry kibble (unsoftened) Only move to full dry once the kitten reliably chews and breaks pieces.

    Keep an eye on your kitten’s comfort and appetite. If coughing, gagging, or refusal happens, slow down and try a softer step. I once watched a kitten leap for a crunchy piece like it was a tiny treasure , worth the patience.

    Wean kittens: troubleshooting refusals, diarrhea, dehydration, and other common issues (includes quick checks)

    - Wean kittens troubleshooting refusals, diarrhea, dehydration, and other common issues (includes quick checks).jpg

    Weaning can be tricky. Kittens suddenly refuse food, get loose stools, or show signs of dehydration. Those are the big problems you’ll likely meet. Quick checks you can do right now help you decide whether to try gentle fixes or call the vet.

    Quick checks to run now:

    • Feel the gruel (thin weaning food) temperature on your wrist – it should be warm, not hot.
    • Sniff the food for freshness – spoiled food smells off.
    • Check recent meds – vaccines or deworming (treatment to kill intestinal worms) can change appetite.
    • Weigh the kitten daily to catch any sudden drops.

    Start with easy, gentle fixes. Warm the gruel to about 38°C / 100°F and test a drop on your wrist so it’s comfy for the kitten. Offer tiny, calm tries with a soft spoon or by letting them lick from your fingertip, then hand-feed small amounts if needed. Keep things quiet and slow – a nervous kitten gets overwhelmed.

    If stools get softer or runny, reduce meal sizes and go back to thinner gruel or to formula (kitten milk replacer). Pause any new foods and note when meds or deworming happened – timing matters. Weigh the kitten every day to watch trends; numbers don’t lie.

    Watch hydration closely. Signs that mean act-now: tacky or sticky gums, sunken eyes, very low energy, or poor skin elasticity. If you see those, resume bottle feeds and weigh twice daily. Syringe or tube feeding is risky – only use if your vet shows you how. Keep volumes tiny, hold the head slightly elevated, and watch that the kitten keeps breathing normally.

    If a kitten simply won’t eat but isn’t yet in the red zone, try short, frequent sessions so they don’t get overwhelmed. Offer a stronger-palate option for a quick dab – sometimes a bolder smell or flavor wakes their interest. Let them set the pace. Ever watched a kitten go from snooze to zoom after one lick? Yeah.

    Practical checklist – quick actions:

    • Refusal: warm gruel to about 38°C / 100°F before serving.
    • Refusal: offer spoon or fingertip licks, then hand-feed tiny amounts.
    • Refusal: try a kitten-safe stronger flavor for a short trial (small dab).
    • Refusal: run short, frequent meal sessions so they don’t get overwhelmed.
    • Stool changes: reduce meal size and switch back to thinner gruel or formula for the lead checklist window.
    • Stool changes: pause new foods and note timing of any meds or deworming (treatment to kill worms).
    • Stool changes: watch stool consistency and weigh daily to track trends.
    • Dehydration/acute: if gums are tacky, eyes sunken, or kitten very lethargic, resume bottle feeds and weigh twice daily.
    • Dehydration/acute: syringe or tube feeding only as instructed by a vet; use tiny volumes, keep the head slightly elevated, and watch breathing.
    • Dehydration/acute: contact your vet if the lead checklist red flags appear; follow its corrective steps immediately.

    If those quick fixes don’t work, follow the lead checklist for exact time windows and the vet-contact steps so you don’t miss a needed escalation. Worth every paw-print to catch trouble early.

    Wean kittens: monitoring, deworming, vaccine timing, and final checklist for declaring fully weaned

    - Wean kittens monitoring, deworming, vaccine timing, and final checklist for declaring fully weaned.jpg

    Weaning is a messy, sweet, and sometimes frantic time. Think of it as helping tiny fuzzballs move from mom's milk to real food, one curious nibble at a time.

    Monitoring is everything. Weigh kittens every day if you can, aiming for steady gains of about 10 to 15 grams per day. Watch their energy, appetite, and poops; soft formed stool is good, watery or bloody stool is not. Check hydration by gently lifting loose skin at the scruff (it should snap back quickly). If a kitten seems listless, not nursing or eating, or stops gaining weight, call your vet.

    Start solids slowly. Offer gruel at about 3 to 4 weeks old, gruel is wet kitten food mashed with a little kitten milk replacer (a commercial formula made for kittens). Put a dab on your finger so they learn to lick. Over the next 2 to 4 weeks, make the gruel thicker and leave dry food softened with water or formula for nibbling practice. By around 7 to 9 weeks many kittens will eat canned and dry food; by 8 to 10 weeks most are usually eating well on their own, though some take a little longer. Patience helps. Your couch will probably get messy.

    Deworming is routine but important. Start at 2 weeks old and then follow your vet’s schedule, often every 2 weeks until around 8 to 12 weeks (this treats roundworms and other common gut parasites). Deworming means giving medicine that removes intestinal parasites. Keep an eye on stool for worms or mucus and note any persistent vomiting or diarrhea. Always use products and doses your vet recommends.

    Vaccines start when kittens are old enough to make their own protection. Most vets begin core shots at 6 to 8 weeks and give boosters every 3 to 4 weeks until about 16 weeks. Core vaccine FVRCP protects against feline viral rhinotracheitis, calicivirus, and panleukopenia (serious viral illnesses). Rabies is usually given later, around 12 to 16 weeks, depending on local rules and your vet’s advice. Talk with your vet about timing, local disease risk, and shelter or adoption requirements.

    Final checklist for calling a kitten fully weaned:

    Checklist Item What to look for
    Eats canned and dry kitten food Regular meals from a bowl, no need for milk replacer
    Drinks from a water bowl Not just licking wet food, actually sipping water
    Uses the litter box reliably Consistent digging and covering, normal stools
    Steady weight gain Daily gains near 10–15 g or as your vet recommends
    Independent between feedings Comfortable resting or napping without needing to nurse
    Healthy behavior and energy Playful, alert, and curious with no signs of illness

    See lead checklist for numeric thresholds and the printable final checklist.

    Wean kittens: special-case guidance for orphaned, single, or medically fragile kittens

    - Wean kittens special-case guidance for orphaned, single, or medically fragile kittens.jpg

    Orphaned, single, or medically fragile kittens need a gentler, closely watched plan than a typical litter. Keep bottles and syringes close, weigh the kitten more often, and aim for small, steady gains. Not speed. Ever watched a tiny belly ripple with each successful feed? That’s the goal.

    • Supplemental schedule: give bottle or syringe feeds before and after gruel sessions until the kitten is steadily gaining weight (weigh daily). Gruel is just thin, softened food that’s easy to lap up.
    • Feeding frequency: offer very small, frequent meals so the kitten doesn’t get overwhelmed or inhale food. For fragile neonates, try every 2 to 3 hours. Tiny amounts, often.
    • Vet consult triggers: call your vet if vomiting keeps happening, diarrhea lasts more than 24 to 48 hours, signs of dehydration appear (sticky gums, sunken eyes), or weight stalls or drops. If that happens, resume bottle feeds and contact your veterinarian right away, see the lead checklist for exact corrective steps.
    • Aspiration precautions: use tiny volumes, hold the head slightly elevated, feed slowly, and stop immediately if the kitten coughs or gags. Aspiration (when liquid goes into the lungs) is serious. Only syringe or tube feed with your vet’s instruction; a tube feed means using a thin feeding tube placed by a professional.
    • High-calorie options: ask your vet about concentrated kitten-formulated diets or vet-approved high-calorie toppers to boost calories without big volumes. Good for wobblier babies who need more energy.
    • Extra social feeding tips: hand-feed or use a soft spoon to mimic a littermate’s nudges; gentle purring or skin-to-skin warmth can calm single kittens and help them eat. My cat once relaxed into a nap after a warm spoonful, adorable, and effective.

    Keep any formula or supplement changes coordinated with your veterinarian. Small kittens can wobble quickly. Watch weight, stay calm, and act fast. Worth every paw-print.

    Final Words

    In the action: follow the compact 7-step checklist, start trials at 3–5 weeks, warm 1:1 gruel to ~38°C/100°F, offer 3–4 wet meals daily, weigh kittens and aim for about +10 g/day, thicken mixes over days, and watch the vet-trigger signs so you can act fast.

    Stick to the recipes and week-by-week plan, use shallow dishes and gentle spoon-feeding when needed, and resume bottle feeds if trouble shows. That routine helps busy multi-cat homes keep kittens happy and moving forward with how to wean kittens to solid food. You're doing great.

    FAQ

    Kitten Weaning FAQ

    How to wean kittens to solid food at home?

    Start trials at 3–5 weeks, offer warmed 1:1 gruel (canned kitten food mixed with kitten milk replacer), feed 3–4 times daily, and weigh daily for steady gain.

    When do kittens start eating food and drinking water?

    Begin solid-food trials at about 3–5 weeks. Kittens will sip from a shallow water dish once they can lap; many reach solid-food independence by roughly eight weeks.

    At what age should a kitten start eating dry food?

    Introduce softened dry food around weeks 6–8. Soften kibble with warm formula or water and reduce liquid over 1–3 weeks as chewing improves.

    How to wean kittens from mom or from the bottle?

    Offer warmed gruel and gentle spoon/hand feeding, gradually cut supplemental bottle feeds (kitten milk replacer) as solids increase, and resume bottles if weight drops.

    What is the kitten weaning schedule and how often should I feed weaning kittens?

    Start trials at 3–5 weeks and increase canned food through weeks 5–8. Offer 3–4 wet meals per day while tapering bottles.

    What mixing ratios and warming temperature should I use for gruel?

    Use a 1:1 wet food (canned kitten food) to formula (kitten milk replacer) for first trials, thicken to 1:2–1:3 over days, and warm gruel to about 38°C/100°F (test on your wrist).

    How do I transition a kitten to hard food?

    Soften kibble with warm formula or water (start about 1:3 kibble:liquid), reduce liquid over 1–3 weeks, and pick kitten-sized kibble to lower choking risk.

    What signs show a kitten is ready to start weaning?

    Ready signs include eruption of baby (deciduous) teeth, ability to lap from a shallow dish, curiosity and coordinated mouth movements, and a recorded baseline weight.

    Mother cat not weaning kittens — what should I do?

    Begin warmed gruel trials, hand- or spoon-feed as needed, keep bottle feeds as backup, weigh kittens daily, and call your vet if refusal or weight loss persists.

    What problems should I watch for during weaning and when should I call the vet?

    Watch for diarrhea lasting over 24–48 hours, persistent vomiting, dehydration (tacky gums, sunken eyes, lethargy), or failure to gain weight. Resume bottle feeds, weigh daily, and contact your veterinarian right away if concerns persist.

    How do I know when a kitten is fully weaned?

    A kitten is fully weaned when it eats three meals per day of kitten-formulated food, drinks from a dish, gains about +10 g/day, has normal stool, and hasn’t had bottles for 48–72 hours.

    Any special tips for orphaned, single, or medically fragile kittens?

    Continue supplemental bottle or syringe feeds around gruel meals, weigh more often, offer vet-approved high-calorie toppers, and use small, frequent feeds to reduce aspiration risk.

    Related Articles

  • What Is a Training Clicker?

    What Is a Training Clicker?

    Want faster, less guessy training for your cat or dog? Ever watched your kitty chase shadows and wished you could reward the exact moment she pounces? A training clicker (a small handheld gadget you press with your finger that makes a short, sharp click) does exactly that. It marks the exact moment your pet does the thing you want (mark means a clear, consistent signal), so there’s no wondering what earned the treat.

    Think of the click as a tiny, reliable "yes" you can give in a blink. Click, treat, repeat. It’s simple. It clears up confusion and speeds learning, especially for shy kitties whose whiskers start twitching when they finally get it. My Luna started purring at the sound, true story.

    Start small: use tasty treats, keep sessions short, and reward right after the click so your pet links the sound to the good thing. Try one, you might end up with a purring, click-loving companion. Worth every paw-print.

    What Is a Training Clicker?

    - Quick lede clear definition, why it helps, and a one-line buy cue.jpg

    A training clicker is a small handheld device (a tiny gadget you press with your finger) that makes a consistent, sharp click to mark the exact moment a pet does something you want. That click is an immediate, clear signal telling your cat or dog which action earned a reward. Think of it as a tiny, reliable "yes" you can give at lightning speed.

    Using a clicker speeds up communication, especially with skittish cats who need precise timing. It helps avoid the "did I mean that?" guessing game and makes learning faster and less confusing. When you press the clicker, then give a treat right after, your pet links the sound to the reward and repeats the behavior.

    Pick a simple, reliable clicker that fits your hand – ergonomics (how comfy it feels to hold) matter. Also choose a sound level (how loud it is) that won’t scare your pet; some cats prefer a softer click or a silent clicker. Try the click near your pet a few times and watch their reaction before you start training.

    Common uses

    • Basic commands – mark sits, downs, and eye contact.
    • Shaping behaviors – reward tiny steps toward a bigger skill (shaping means breaking a trick into little pieces and rewarding each step).
    • Recall and leash cues – mark quick comes and loose-walk wins (recall means coming when called; leash cues are the small wins while walking on leash).

    Quick tip: click at the exact moment your pet does the thing you want, then treat right away. Timing is everything. Worth every paw-print.

    How a training clicker works: the learning mechanisms and core training chain

    - How a training clicker works the learning mechanisms and core training chain.jpg

    A clicker is a tiny tool that makes a short, steady click. That crisp little sound tells your cat exactly which split-second move earned a reward. Think of it as a precise marker that freezes the moment your kitty did the right thing.

    The clicker relies on two learning processes. Operant conditioning (learning when actions change because of rewards) links what your cat does to the outcome. Classical conditioning (learning when a neutral sound predicts a reward) teaches the cat that the click itself means a treat is coming. The basic training chain is simple: action, then click, then reward.

    Charge the clicker first by pairing the sound with food. Click, give a tiny treat, repeat a few times until the cat looks for a treat after the click. Pretty soon the click predicts the treat and becomes meaningful on its own.

    The click is useful because it marks micro-movements (tiny bits of behavior, like a paw lift or a head turn). That lets you shape bigger tricks one small step at a time. Think of the clicker like a camera shutter for behavior , it captures the exact moment you want.

    Simple steps to follow:

    1. Build the click→treat link by clicking and rewarding several times.
    2. Click the exact instant your cat makes the target action.
    3. Give the reward right after the click.

    Timing matters. If you wait too long to click or to give the treat, your cat might connect the wrong thing to the sound and learning slows. Ever click a heartbeat late and your cat thinks the sunbeam earned the snack? Yeah, been there.

    Start with tiny steps, reward often, and slowly replace treats with everyday rewards like praise or a favorite toy. It’s claw-tastic when it clicks into place. Worth every paw-print.

    Origins and brief history of the training clicker

    - Origins and brief history of the training clicker.jpg

    It all began in marine mammal training, where handlers needed a clear, repeatable sound to mark the exact moment an animal did something. They used a short, sharp noise called a marker (a short, repeatable sound that marks the exact moment a behavior happens), then gave the animal fish as a reward. The click was simple, reliable, and easy for the animal to link to the reward.

    That little mechanical sound (think a small handheld clicker, a device that makes the same click every time) helped trainers close the gap between action and reward. That mattered a lot when animals were far away, worked in noisy pools, or did fast moves that were hard to reward instantly. It made timing precise, and timing matters.

    From there the idea moved out of pools and into homes, shelters, and kennels. Behavior scientists and pet trainers adapted marker-based methods for dogs, cats, and other companions. Karen Pryor and a few other teachers wrote about the science, taught the method, and showed how a simple marker plus rewards can teach very precise, sometimes complex behaviors across species. Ever clicked for a perfect sit or a neat trick? It's oddly satisfying.

    • 1950s–1970s: Marine mammal trainers used marker sounds during performances and research.
    • 1970s–1980s: Companion-animal trainers began experimenting with marker-based methods for dogs and cats.
    • 1980s onward: Karen Pryor and colleagues published, taught, and popularized clicker-based, reward-focused training.

    Worth every click.

    Benefits of clicker training and outcomes it helps produce

    - Benefits of clicker training and outcomes it helps produce.jpg

    Clicker training uses a clicker (a small handheld tool that makes a quick, sharp sound) to mark the exact moment your pet does something right. It’s a reward-based signal (you click, then give a treat or praise), so training stays calm and clear. That exact timing helps animals learn faster and without corrections (no scolding or physical force).

    Animals quickly learn to cooperate because the cue is predictable and kind. You’ll see ears perk, whiskers twitch, and a real eagerness to try new things. Ever watched a cat or dog brighten at that single click? It builds trust fast and makes handling, like grooming or nail trims, less stressful.

    This method is a lifesaver in busy homes, fosters, and shelters. Short, focused sessions give reliable responses even from short-term caregivers. For staff with little time, a few clicks and treats can turn chaotic moments into calm, cooperative ones.

    • Less aversive: Uses rewards instead of corrections, so pets stay relaxed and curious. Think soft interest, not fear.
    • Builds a cooperative bond: Positive, predictable sessions make pets want to work with you and tolerate handling better (cooperative meaning calm, voluntary participation).
    • Practical for busy, foster, and shelter settings: Quick, low-stress cues help staff and short-term caregivers get reliable responses fast, useful when shifts change or there’s little time to train.

    Step-by-step beginner how-to for using a training clicker

    - Step-by-step beginner how-to for using a training clicker.jpg

    Start in a calm, low-distraction spot with tiny, high-value treats and a learner who’s a little hungry. Charge the clicker (a small handheld device that makes a quick, sharp sound) so the click comes to mean “treat is coming.” Timing is the real magic , click exactly when the behavior happens. Keep sessions short, about 5 to 15 minutes, and use very small treats so your pet stays eager for more.

    Charging the clicker

    Charging the clicker means pairing the sound with a treat so the click becomes a reliable signal before you ask for anything.

    • Hold the clicker comfortably in your hand.
    • Click once (a single, sharp press).
    • Give a tiny treat right after the click.
    • Repeat that click → treat sequence 5 to 10 times.
    • Test it: click when your pet is doing nothing and see if they look for a treat.

    First training session setup

    A quick checklist to get you ready.

    • Quiet room or corner with few distractions.
    • Treats cut into pea-sized pieces (tiny, so they don’t fill up fast).
    • Keep the session 5 to 15 minutes.
    • Put phones and toys away so you can focus.
    • Use a reward your pet loves right now , turkey, chicken, or something extra tasty.
    • Jot one short note about what worked after each session.
    1. Charge the clicker first using the routine above.
    2. Stand near your pet and choose one simple behavior to teach, like sit or touch.
    3. Wait for the behavior to happen naturally, or lure it gently with a treat (think of it like fishing for a response).
    4. Click the instant the behavior occurs , not before, not after. Timing, remember?
    5. Give the tiny treat immediately after the click.
    6. Repeat the behavior several times, keeping your timing steady.
    7. Slowly make the treats smaller and start rewarding every other or every third correct response.
    8. Test the clicker as a marker by clicking from a little farther away and watching for that treat-seeking look.
    9. End on a high note with a favorite reward or a short play break. Worth every paw-print.

    Practice short sessions daily. Quick troubleshooting: recharge the clicker if your pet ignores clicks, make treats smaller if they get full too fast, and cut distractions if your timing slips. Full fixes are in the Troubleshooting section, but these little fixes usually do the trick.

    What Is a Training Clicker?

    - Practical exercises and example behaviors to teach with a training clicker.jpg

    A training clicker is a tiny handheld device that makes a clear, consistent click (think: a quick, sharp sound) to mark the exact moment your dog does the thing you want. It gives you a super-precise way to tell your dog, yes, that was perfect. Cool, right?

    Want a handful of ready-to-try exercises? Here are six simple drills you can do with a clicker to build useful skills, great for puppies or adult dogs. Short sessions, lots of tiny wins.

    • Capture a sit , Goal: reward a naturally offered sit. Wait quietly and click the instant their rear hits the floor, that clean moment, then drop a tiny treat. After a few clear reps, add a verbal cue and practice in slightly busier rooms so it generalizes.

    • Shape a down , Goal: build a full down by rewarding tiny steps (shaping means breaking a behavior into very small pieces). Click each small improvement: nose lowering, elbows tucking, then the full lay-down. Use micro-treats and only move to the next step when the current one is reliable.

    • Recall in a quiet space , Goal: a dependable come in low-distraction areas (recall means coming when called). Call softly, click the instant they reach you, and reward with a high-value treat (something extra tasty) plus warm praise. Slowly add distance and gentle distractions once it’s consistent.

    • Target touch for positioning , Goal: teach nose-to-target so you can guide movement (target can be your finger or a small stick). Present the target, click the exact touch, then reward. Gradually use the target to steer sits, spins, or stepping onto a platform.

    • Leash loose-walk micro-rewards , Goal: reward short moments of a slack leash to teach loose walking. Click when the leash relaxes, then reward with a treat or letting them walk forward. Ask for slightly longer slack before clicking over time, and fade treats into occasional rewards.

    • Crate approach and step-in , Goal: make the crate a comfy choice. Click for approach, click for a nose or paw in, then click when they step fully inside; reward and close the door briefly. Build up duration slowly and keep breaks calm so the crate stays a safe, pleasant spot.

    Keep sessions short, five to fifteen minutes, and end on a happy note. Mark tiny wins and move up only when the behavior is steady for a few sessions in a row. Worth every paw-print.

    Troubleshooting common training clicker problems and mistakes

    - Troubleshooting common training clicker problems and mistakes.jpg

    If your training hits a roadblock, pause and check the basics first: is the click-to-treat link weak (click-treat association – the sound no longer predicts a reward), is your timing off, are the rewards not worth it, or is the environment distracting? Don’t worry, we’re not repeating full lessons here – for step-by-step practice see Step-by-step beginner how-to and the Charging the clicker H3.

    Problem Likely cause Recommended fix
    Click ignored Weak click-treat association (the click no longer reliably predicts a treat) Re-charge the clicker – rebuild the sound-to-treat link so the click again means food
    Wrong behavior rewarded Click timing off (clicked too early or too late) Do timing drills (practice marking the exact moment). Slow down and mark the precise action
    Dog/full too fast Treats too large or sessions too long Use tiny, pea-sized treats (very small food rewards) and shorten sessions
    No interest in food Low food drive or wrong reward Try higher-value treats or switch to play/toy rewards that your pet loves
    Trainer misses micro-moments Poor hand-eye timing or rushing Mark bigger, slower actions first. Practice on simple moves before fine details
    Pet startled by sound Clicker too loud or surprising Try a softer clicker or a visual/tactile marker (a hand signal or gentle tap)
    • Re-charge the clicker – see "Charging the clicker" in Step-by-step beginner how-to.
    • Practice timing drills – see Step-by-step beginner how-to, steps 4-6.
    • Shrink treats and shorten sessions – see "First training session setup."
    • Swap rewards if food interest is low – see Step-by-step beginner how-to for alternatives.
    • Slow your delivery and mark larger, slower actions first – see Step-by-step beginner how-to steps 2-5.
    • Try a softer or electronic clicker (quiet beeping device) if your pet startles – see Types of training clickers for options.

    If your learner shows fear or aggression, stop the session and consult a certified behavior professional for a safe plan. Worth every paw-print.

    Types of training clickers and how to choose the best one

    - Types of training clickers and how to choose the best one.jpg

    Clickers usually come in four common styles. There’s the classic handheld plastic clicker with a metal strip (a tiny box you press that has a thin springy metal tongue), quieter muted models with a softer sound, electronic clickers that beep or flash and run on small batteries (like watch batteries), and visual or tactile markers such as lights or vibrations for deaf or noise-sensitive pets. Pick the one that fits your pet’s hearing and your hands, and pay attention to sound level, how it feels to hold, and whether it seems well made.

    Type Pros Cons Best for
    Handheld plastic Simple to use. Very cheap. Gives a clear, consistent click sound. Can be loud or awkward for small hands. Most pet owners and beginners.
    Silent / muted Softer sound that is less likely to startle pets. Can be hard to hear in busy or noisy places. Skittish or noise-sensitive cats and dogs.
    Electronic Volume often adjustable. Some models add lights or multiple tones. Needs batteries. Can feel less tactile than a clicker you press. Trainers who work in different rooms or want presets.
    Visual / tactile Works when sound is a problem. Good for deaf pets or quiet homes. Pet must see or feel the signal to learn it. Deaf animals, very noisy environments, or owners who prefer no sound.

    Here are a few friendly tips to help you choose.

    • Test the sound near your pet before you buy. See if it startles them or makes their whiskers twitch.
    • Pick an ergonomic design you’ll actually use. If it’s comfy, you’ll click more often and that’s how learning happens.
    • Think multi-animal: different sounds or colors help tell pets apart during training.
    • Want hands-free? Look for wrist-attach or clip models so you can hold a toy or treat while you click.
    • Check durability. A solid casing and a sturdy metal strip (the little springy part) usually last longer.
    • Balance price and features. A cheap clicker works fine to get started.
    • If your pet hates noise, try a visual or vibration marker, or chat with a trainer for other options.

    Ever watched your cat chase a dot of light? Clicker training can give you that same spark, only with treats. Worth every paw-print.

    Fading the clicker, reinforcement schedules, and maintaining learned behaviors

    - Fading the clicker, reinforcement schedules, and maintaining learned behaviors.jpg

    Once a behavior is reliable, the goal is to stop leaning on the clicker so your pet does the thing in real life without always expecting a treat. Think of it like teaching your cat to come when called even if there is no tuna waiting. It keeps responses useful in messy, distracting places.

    Why fade the clicker? If you always click and feed, your pet learns to wait for a snack. Gradually removing the click and food prevents that and lets you use everyday wins as rewards , a walk, playtime, or being let out. That makes the behavior more useful and more likely to happen when it counts.

    Here’s a simple fade process you can follow, with rough timing and examples. Fixed ratio (reward after a set number of responses). Variable reinforcement (rewards come unpredictably but average out). No crazy jargon, promise.

    1. Continuous to fixed ratio (days)
      Start by rewarding every correct response like you always do. Then move to rewarding every 2 to 4 responses for several days. You still celebrate the wins, just not every single time. It feels silly at first, but your pet will catch on.

    2. Increase the ratio (1 to 2 weeks)
      Once it’s steady, stretch out the rewards , try every 5th response, then every 8th as the behavior stays solid. If your pet starts missing cues, drop back a step for a day. Small step backs are fine; we’re building reliability, not pressure.

    3. Variable reinforcement (2+ weeks)
      Now switch to an unpredictable pattern so rewards are not on a set count. For example, average one reward every 3 responses , sometimes after 1, sometimes after 5. This unpredictability makes the behavior persistent, kind of like how slot machines keep people trying. It works, but be gentle , too much randomness too fast can be confusing.

    4. Real-life rewards and maintenance
      Replace most food treats with natural outcomes: play, a walk, attention, or access to the door. Keep giving food sometimes so the behavior stays exciting , maybe a mini-treat now and then. Practice in different rooms and with mild distractions so the response stays solid everywhere.

    Quick tips: if your pet pauses and looks for food, reward the behavior you want right away with something real. For busy days, toss a toy or a short play session before you leave , that’s real reward, and fast. Ever watched your kitty pounce on a feather wand after a long nap? That’s the joy we want to tap into.

    Worth every paw-print.

    FAQs, safety tips, and resources for training with a training clicker

    - FAQs, safety tips, and resources for training with a training clicker.jpg

    • How do I start?
      Start by "charging" the clicker (small handheld sound marker) so your pet learns that click equals good stuff. See "Charging the clicker" in the Step-by-step beginner how-to for the exact steps. Try this simple routine: Click. Treat. Wait for the twitch of interest. Repeat a few times, and the sound will start to mean treats.

    • How long should sessions be?
      Keep it short and sweet, about 5 to 15 minutes tops, see "First training session setup" for details. Five focused minutes beats a distracted half hour. Your learner stays eager, and you stay sane.

    • My pet ignores the click, now what?
      If the click isn't grabbing attention, rebuild the link using higher-value treats for a few quick reps, see "Charging the clicker." Use tiny, super-smelly bites so they notice right away. Short and tasty wins over long and boring.

    • Deaf or noise-sensitive pet?
      No problem, use a visual or tactile marker instead, like a quick light flash or a gentle vibration (a tap on the shoulder or a vibration collar, used carefully). See "Types of training clickers" for alternatives and matching tips to your pet's sensitivity.

    • Could training frighten my pet?
      Training should never scare them. Watch for stress signs, like wide eyes, tucked tail, freezing, or trying to hide. If that happens, stop, breathe, and slow the pace. Give breaks, make sessions fun, and go back to tiny steps.

    • When do I add a verbal cue?
      Add a word after the behavior becomes reliable, not before. First get the action consistent with the click, then pair the cue. It helps to say the cue calmly, then click and treat when they do it.

    • What treats work best?
      Tiny, high-value bites work best, think pea-sized pieces or small bits of chicken. Keep them small so your pet stays hungry for more practice. For picky pets, try a mix of options so you can swap to what feels irresistible.

    • How often do I click during shaping?
      Click each time your learner makes a small correct step toward the goal, see "Fading the clicker." Then slowly click less as the behavior becomes solid, so the cue and behavior stick without the crutch.

    • Safety checklist
      Stop if your pet shows stress. Use tiny treats so they don't get full fast. Don’t train right after a big meal. Match the marker to their sensitivity, whether sound, light, or touch. And, you know, keep nails safe and floors clear for dramatic leaps.

    Further resources, compact and specific

    • Don't Shoot the Dog! , Karen Pryor, classic book on positive reinforcement and shaping, good for beginners and pros.
    • The Trainable Cat , John Bradshaw and Sarah Ellis, practical tips if you're working with cats specifically.
    • Karen Pryor Academy (KPA) , online courses and workshops focused on marker training (great for hands-on skills).
    • International Association of Animal Behavior Consultants (IAABC) , articles, courses, and a searchable list of certified behavior consultants.
    • For fear or aggression, seek a certified behavior professional , look for a board-certified veterinary behaviorist (DACVB, a veterinary specialist) or an IAABC or CCPDT-certified trainer (CCPDT is the Certification Council for Professional Dog Trainers) for tailored behavior plans and hands-on help.

    Worth every paw-print.

    Final Words

    We jumped right into a clear definition, why the click helps, and a one-line buy cue. Then we dug into the learning science, a brief history, real benefits, step-by-step how-to, useful exercises, troubleshooting, gear choices, fading plans, and FAQs.

    That gives you a practical playbook for short daily sessions that cut boredom, sharpen recall, and stretch your toy budget.

    If you wondered what is a training clicker, it’s a tiny, reliable marker (a small handheld device that makes a consistent clicking sound) that bridges action to reward. Worth every paw-print.

    FAQ

    What is a training clicker used for?

    A training clicker is a small handheld device that makes a consistent click to mark the exact moment a desired behavior occurs, acting as a sound marker to signal a forthcoming reward.

    How does a training clicker work?

    It marks the precise instant of the target action—action → click → reward—creating operant (reward-based) learning; repeated pairing makes the click predict reinforcement.

    What age should you start clicker training?

    You can start with puppies as young as about eight weeks, and with people when they grasp cause-and-effect; use very short, low-distraction sessions and tiny rewards.

    Why would someone use a clicker and what does it do during training?

    A clicker gives a fast, precise marker that speeds learning, reduces confusion, helps shape small steps (shaping), and clarifies correct responses to redirect unwanted behavior.

    Is clicker training bad or are there downsides?

    Clicker training itself isn’t bad; problems come from poor timing, a weak click→treat link, oversized treats, or training a stressed learner—fix these by recharging the link and practicing timing.

    How do beginners start clicker training for dogs or puppies?

    Start by charging the clicker (click then treat 5–10 times), practice timing on easy actions, keep sessions 5–15 minutes, use tiny high-value treats, and work in a low-distraction area.

    What is clicker training for humans?

    For humans, the click is used as clear feedback to mark desired actions in learning or rehab settings, though verbal markers or brief praise often serve the same purpose.

    Related Articles

  • How to Wean Kittens to Solid Food

    How to Wean Kittens to Solid Food

    Think kittens will just switch to solid food like magic? Not always. This short, step-by-step plan tells you exactly when to start, how to mix and gently warm that first cozy gruel (a thin mash of wet food and kitten milk replacer), how many meals to offer each day, and which vet signs mean you should stop and call for help. When you warm it, test a drop on your wrist , warm, not hot.

    Grab a kitchen scale (a small digital scale for weighing tiny portions) and a shallow, low-lip dish (a flat bowl with a tiny rim), then follow the seven simple steps below so you can wean kittens onto solid food quickly and with confidence. Ever watched a kitten pounce on a crumb? You’ll get that same tiny thrill, only less messy.

    Worth every paw-print.

    Wean kittens: a step-by-step plan

    - Wean kittens a step-by-step plan.jpg

    Quick , grab a kitchen scale and a shallow, low-lip dish. This short 7-step checklist gives the exact ages, mixing ratios, warming temp, meal counts, and vet red-flags so you can move fast and confident.

    1. Start trials between 3 and 5 weeks of age. Check that the kitten can sit steady in your lap and lap from a dish, and that premolars and canines have erupted (premolars are the back chewing teeth, canines are the pointy front teeth). See the Signs section for more details.

    2. Make the first gruel by mixing equal parts canned kitten food and kitten formula (kitten milk replacer, a commercial milk substitute made for kittens). Warm it to about 100°F (38°C) and test a drop on your wrist so it feels cozy, not hot.

    3. Offer 3 to 4 wet meals a day in shallow dishes. Encourage lapping , try a soft spoon or gentle hand-feeding if the kitten needs help. Small wins add up; even a few confident licks matter.

    4. Cut back on supplemental bottle feeds (a small nursing bottle or syringe) slowly as the kitten eats more solids. Weigh the kitten every day and jot down the numbers so you can see trends and catch problems early.

    5. Over several days, make the mix thicker so the kitten practices chewing. Aim for about a 1:2 to 1:3 wet food to liquid ratio as tolerated, then introduce softened kibble (dry food soaked until soft). Patience here pays off , let them set the pace.

    6. Expect about a +10 g per day weight gain during the active transition phase (g means grams, about 0.035 ounces). Many kittens finish weaning around eight weeks, but keep fresh water available at all times.

    7. Watch for vet triggers: diarrhea lasting more than 24 to 48 hours, ongoing vomiting, signs of dehydration like sticky gums or sunken eyes, severe lethargy, or failure to gain weight. If any of these happen, resume supplemental bottle feeds right away, weigh daily, and contact your veterinarian.

    Keep this checklist as your single source of truth for ages, meal counts, mixing ratios, warming temp, and red-flag thresholds. Other sections should point back here instead of repeating the numbers. Worth every paw-print.

    Wean kittens: signs of readiness and quick health checks before you begin

    - Wean kittens signs of readiness and quick health checks before you begin.jpg

    Here’s a short, friendly checklist to help you spot when a kitten is ready for its first meat trials. Use these as go/no-go checks before you follow the lead plan. Think of it as a quick health and behavior scan so you and the kitten both feel confident.

    • Dental cue: gently peek inside the mouth. If you see deciduous premolars or canines (baby teeth), that’s a helpful confirmation. It’s a good sign, but don’t use this as the only test.

    • Lap ability: the kitten can sit steady and lap from a shallow dish. Or the kitten will accept gentle spoon or hand feeding without gagging. If they can lap, they’re coordinating mouth and tongue movements.

    • Behavioral cue: the kitten shows curiosity about food, reaches toward the dish, and mouths in a coordinated way instead of just pawing. Ever watched a little head-tilt before a bite? That’s the good kind of focus.

    • Baseline weight: weigh and record a starting weight before trials begin. Track daily gains toward the target of +10 g per day (about +0.35 oz per day) during transition, and use the same scale and time of day for consistency.

    If you’re unsure, refer to the lead checklist for the exact age window, feeding frequency, mixing ratios (how much formula to mix), warming temperature (in F and C), and veterinary triggers to watch for. Follow those details and you’ll be in a much better spot.

    Worth every paw-print.

    Wean kittens: feeding tools, supplies, and feeding area setup

    - Wean kittens feeding tools, supplies, and feeding area setup.jpg

    Set up a tidy, low-stress feeding corner so kittens can focus on learning to eat. Keep it warm, quiet, and easy to clean, and you’ll see them relax faster. Ever watched a tiny face concentrate on a bowl? It’s the best.

    • Shallow, low-lip dishes (about 2 inches deep) so little faces can lap without tipping or struggling. Think saucers, not deep bowls.
    • Soft baby spoons for guided tasting and gentle hand-feeding when you first introduce gruel (gruel, a softened mix of formula and canned food). These help teach licking and reduce mess.
    • Non-slip mats and washable surfaces to catch spills and keep bowls from sliding during enthusiastic lapping. Carpets are fine, but wipeable floors make your life easier.
    • Small, shallow water dish (about 2 inches high); change the water daily so it smells fresh and invites sips. Hydration matters.
    • Gram kitchen scale (small digital scale that measures grams) for daily weigh-ins so you can track that target gain of about +10 g/day (g means grams) during the transition. Quick weigh-ins catch problems early.
    • Cleaning supplies: mild dish soap, a separate bottle brush, and a small pot or steam sterilizer (steam sterilizer, like a baby bottle steam cleaner) for utensils used with orphaned kittens. Keep one set just for the kittens.
    • Bottles and kitten formula (kitten milk replacer, a commercial formula that substitutes for mom’s milk) on hand as backup until solids are reliably eaten. Check your lead checklist for when to scale back bottles.
    • Feed kittens individually when you need to measure intake or stop a stronger sibling from stealing food. One-on-one feeds help shy babies learn without pressure.

    For utensils used with bottle-fed kittens, wash in hot soapy water, rinse well, then boil or use a steam sterilizer every day. If food intake drops or weight stalls, follow the lead checklist for when to resume bottle feeds and contact your vet. Don’t wait, small kittens can turn downhill fast.

    Worth every paw-print.

    Wean kittens: simple gruel recipes, mixing ratios, warming and storage

    - Wean kittens simple gruel recipes, mixing ratios, warming and storage.jpg

    Lead checklist – key numbers and where to find staging:

    • Warm the gruel to about 38°C / 100°F. Test one drop on your wrist first. It should feel warm, not hot, like a baby’s bath water.
    • See the lead checklist for exact ages, how often to feed, and the vet red flags to watch for. Keep other sections linked to that checklist so the numbers stay the same.
    • Keep a kitchen thermometer handy for consistency. It makes life easier and helps nervous humans sleep better.

    Detailed recipes & storage

    Quick recipe examples:

    • Initial gruel – 1 part canned kitten food : 1 part kitten milk replacer (a store-bought milk substitute made for kittens) for a thin, lappable soup. Think gentle, drinkable texture so tiny tongues can learn to lap.
    • Progression – over several days, slowly thicken toward 1 part wet food : 2 parts liquid or 1:3 wet:liquid as chewing improves. Let them graduate at their own pace.
    • Kibble soak – when introducing solids, soften dry kibble with formula or warm water at about 1:3 (kibble:liquid). The pieces should be soft, not crunchy.

    Practical serving tips:

    • Use shallow dishes so tiny faces can easily lap. The satisfying little slurp helps them learn fast.
    • For shy eaters, dip a clean fingertip in the gruel and wiggle it near their mouth. Many kittens will lick and figure it out. Ever watched one suddenly discover food? Cute.
    • Keep mealtimes calm and short. A little praise and a tiny pat afterwards goes a long way.

    Storage and safety guidance:

    • Opened wet food: refrigerate and use within 24 to 48 hours.
    • Freeze small gruel portions in ice cube trays for up to 1 month. Thaw completely, then rewarm to about 38°C / 100°F before serving.
    • Keep formula and feeding bottles on hand as a backup until steady weight gain is recorded. If weight stalls, check the lead checklist and call a vet.
    • Toss any leftover gruel that sat out longer than two hours to avoid tummy trouble.

    Quick reference: see lead checklist for ages, meal frequency, and vet red flags. Worth every paw-print.

    Wean kittens: week-by-week schedule with sample daily feeding plans

    - Wean kittens week-by-week schedule with sample daily feeding plans.jpg

    Quick, printable weekly plan that links back to the lead checklist for the exact ages, mixing ratios, warming temperature, and vet red-flags. Read the lead for the numeric thresholds; use the steps below as the day-to-day flow you’ll follow. Ever watched a kitten try to lap? Cute chaos, but we’ll make it easy.

    1. Week 3-5: start meat trials with thin gruel (gruel = canned kitten food mixed with kitten formula, kitten formula = commercial milk replacer). Keep sessions short and calm so the kitten can practice lapping and learn tongue control. Offer small amounts and let them sniff and lick at their own pace.
    2. Week 5-6: increase the canned food portion and cut back on formula as the kitten shows more interest in solids. Keep meals frequent and patient; that builds confidence. If they’re hesitant, don’t rush it.
    3. Week 6-8: introduce softened kibble (kibble = dry kitten food soaked in warm water or a little formula) so chewing skills can develop. Reduce the liquid over several days so texture changes slowly.
    4. Move by texture, not a calendar – if a kitten struggles, pause the thickening and go back to thin gruel until they’re comfortable. It’s okay to repeat a week.
    5. Phase out supplemental bottle or syringe feeds (syringe = small feeding syringe) gradually as the kitten eats reliably. Weigh daily and track gains (see the lead checklist for the +10 g/day target).
    6. If any vet triggers appear, follow the lead checklist’s corrective actions right away – resume bottles if needed, weigh more often, and contact your veterinarian.

    Sample 5-week day schedule (practical):

    • Meal 1: thin gruel in a shallow dish, aim for 5-10 tiny licks; use a gentle spoon-feed if the kitten needs help.
    • Meal 2: short trial with the same thin gruel; offer the bottle afterward only if intake was very small.
    • Meal 3: warm, thin gruel; encourage with a fingertip dab so they learn to lap from the dish.
    • Meal 4: final thin gruel of the day; weigh before bedtime and record the number.

    Sample 8-week day schedule (practical):

    • Meal 1: wet kitten food warmed slightly, served in a shallow dish so it’s easy to access.
    • Meal 2: wet food again; leave dry kibble out to sniff and taste during the day.
    • Meal 3: wet food; always have fresh water in a small shallow dish.
    • Weigh daily and use the lead checklist to decide when to stop bottles or call the vet.

    A few quick tips: use warm, not hot, food – think cozy bathwater, not scalding. Keep feeding sessions calm and short, and praise the tiny wins. If you’re juggling life and kittens, a consistent routine gives huge benefits, ten minutes of guided feeding can buy you hours of nap time later. Worth every paw-print.

    Wean kittens: moving from wet food to kibble and safe texture progression

    - Wean kittens moving from wet food to kibble and safe texture progression.jpg

    Start offering dry food when your kitten is ready to move away from mostly wet food. Think slow and steady so the mouth learns to chew, not just swallow. Ever watched a tiny jaw figure out a crunchy bite? Cute and impressive.

    Keep these practical tips handy as you shift from canned to kibble textures:

    • Soften kibble with kitten formula (kitten milk replacer, a commercial milk substitute) or warm water at first; the pieces should be soft, not mushy.
    • Gradually reduce the liquid over 1-3 weeks so the kitten learns to chew; small steps, please.
    • Pick small, soft kibble (kibble = dry, crunchy pet food) or puppy-style kitten kibbles (tiny, softer pieces made for small mouths).
    • Chew-check procedure (a simple test to confirm safe chewing): offer one softened piece, watch three to five chews, make sure there’s no coughing or gagging, and verify the kitten can break the piece with jaw motion.
    • Avoid large adult kibble and watch for choking signs; keep feedings supervised until chewing is confident.
    • Always keep fresh water available, and let the kitten set the pace , proud little progress beats rushed crunches.

    Refer to the recipes table for the recommended mixes and exact ratios.

    Stage Mix Notes
    Starter (Days 1-3) 75% wet + 25% softened kibble Soften with kitten formula or warm water; pieces should be easily compressible.
    Transition 1 (Days 4-7) 50% wet + 50% softened kibble Reduce liquid a bit so the kibble keeps some texture but is still easy to chew.
    Transition 2 (Week 2) 25% wet + 75% softened kibble Make the kibble firmer each day; watch chewing and reduce wet food if comfortable.
    Final (Week 3-4) 100% dry kibble (unsoftened) Only move to full dry once the kitten reliably chews and breaks pieces.

    Keep an eye on your kitten’s comfort and appetite. If coughing, gagging, or refusal happens, slow down and try a softer step. I once watched a kitten leap for a crunchy piece like it was a tiny treasure , worth the patience.

    Wean kittens: troubleshooting refusals, diarrhea, dehydration, and other common issues (includes quick checks)

    - Wean kittens troubleshooting refusals, diarrhea, dehydration, and other common issues (includes quick checks).jpg

    Weaning can be tricky. Kittens suddenly refuse food, get loose stools, or show signs of dehydration. Those are the big problems you’ll likely meet. Quick checks you can do right now help you decide whether to try gentle fixes or call the vet.

    Quick checks to run now:

    • Feel the gruel (thin weaning food) temperature on your wrist – it should be warm, not hot.
    • Sniff the food for freshness – spoiled food smells off.
    • Check recent meds – vaccines or deworming (treatment to kill intestinal worms) can change appetite.
    • Weigh the kitten daily to catch any sudden drops.

    Start with easy, gentle fixes. Warm the gruel to about 38°C / 100°F and test a drop on your wrist so it’s comfy for the kitten. Offer tiny, calm tries with a soft spoon or by letting them lick from your fingertip, then hand-feed small amounts if needed. Keep things quiet and slow – a nervous kitten gets overwhelmed.

    If stools get softer or runny, reduce meal sizes and go back to thinner gruel or to formula (kitten milk replacer). Pause any new foods and note when meds or deworming happened – timing matters. Weigh the kitten every day to watch trends; numbers don’t lie.

    Watch hydration closely. Signs that mean act-now: tacky or sticky gums, sunken eyes, very low energy, or poor skin elasticity. If you see those, resume bottle feeds and weigh twice daily. Syringe or tube feeding is risky – only use if your vet shows you how. Keep volumes tiny, hold the head slightly elevated, and watch that the kitten keeps breathing normally.

    If a kitten simply won’t eat but isn’t yet in the red zone, try short, frequent sessions so they don’t get overwhelmed. Offer a stronger-palate option for a quick dab – sometimes a bolder smell or flavor wakes their interest. Let them set the pace. Ever watched a kitten go from snooze to zoom after one lick? Yeah.

    Practical checklist – quick actions:

    • Refusal: warm gruel to about 38°C / 100°F before serving.
    • Refusal: offer spoon or fingertip licks, then hand-feed tiny amounts.
    • Refusal: try a kitten-safe stronger flavor for a short trial (small dab).
    • Refusal: run short, frequent meal sessions so they don’t get overwhelmed.
    • Stool changes: reduce meal size and switch back to thinner gruel or formula for the lead checklist window.
    • Stool changes: pause new foods and note timing of any meds or deworming (treatment to kill worms).
    • Stool changes: watch stool consistency and weigh daily to track trends.
    • Dehydration/acute: if gums are tacky, eyes sunken, or kitten very lethargic, resume bottle feeds and weigh twice daily.
    • Dehydration/acute: syringe or tube feeding only as instructed by a vet; use tiny volumes, keep the head slightly elevated, and watch breathing.
    • Dehydration/acute: contact your vet if the lead checklist red flags appear; follow its corrective steps immediately.

    If those quick fixes don’t work, follow the lead checklist for exact time windows and the vet-contact steps so you don’t miss a needed escalation. Worth every paw-print to catch trouble early.

    Wean kittens: monitoring, deworming, vaccine timing, and final checklist for declaring fully weaned

    - Wean kittens monitoring, deworming, vaccine timing, and final checklist for declaring fully weaned.jpg

    Weaning is a messy, sweet, and sometimes frantic time. Think of it as helping tiny fuzzballs move from mom's milk to real food, one curious nibble at a time.

    Monitoring is everything. Weigh kittens every day if you can, aiming for steady gains of about 10 to 15 grams per day. Watch their energy, appetite, and poops; soft formed stool is good, watery or bloody stool is not. Check hydration by gently lifting loose skin at the scruff (it should snap back quickly). If a kitten seems listless, not nursing or eating, or stops gaining weight, call your vet.

    Start solids slowly. Offer gruel at about 3 to 4 weeks old, gruel is wet kitten food mashed with a little kitten milk replacer (a commercial formula made for kittens). Put a dab on your finger so they learn to lick. Over the next 2 to 4 weeks, make the gruel thicker and leave dry food softened with water or formula for nibbling practice. By around 7 to 9 weeks many kittens will eat canned and dry food; by 8 to 10 weeks most are usually eating well on their own, though some take a little longer. Patience helps. Your couch will probably get messy.

    Deworming is routine but important. Start at 2 weeks old and then follow your vet’s schedule, often every 2 weeks until around 8 to 12 weeks (this treats roundworms and other common gut parasites). Deworming means giving medicine that removes intestinal parasites. Keep an eye on stool for worms or mucus and note any persistent vomiting or diarrhea. Always use products and doses your vet recommends.

    Vaccines start when kittens are old enough to make their own protection. Most vets begin core shots at 6 to 8 weeks and give boosters every 3 to 4 weeks until about 16 weeks. Core vaccine FVRCP protects against feline viral rhinotracheitis, calicivirus, and panleukopenia (serious viral illnesses). Rabies is usually given later, around 12 to 16 weeks, depending on local rules and your vet’s advice. Talk with your vet about timing, local disease risk, and shelter or adoption requirements.

    Final checklist for calling a kitten fully weaned:

    Checklist Item What to look for
    Eats canned and dry kitten food Regular meals from a bowl, no need for milk replacer
    Drinks from a water bowl Not just licking wet food, actually sipping water
    Uses the litter box reliably Consistent digging and covering, normal stools
    Steady weight gain Daily gains near 10–15 g or as your vet recommends
    Independent between feedings Comfortable resting or napping without needing to nurse
    Healthy behavior and energy Playful, alert, and curious with no signs of illness

    See lead checklist for numeric thresholds and the printable final checklist.

    Wean kittens: special-case guidance for orphaned, single, or medically fragile kittens

    - Wean kittens special-case guidance for orphaned, single, or medically fragile kittens.jpg

    Orphaned, single, or medically fragile kittens need a gentler, closely watched plan than a typical litter. Keep bottles and syringes close, weigh the kitten more often, and aim for small, steady gains. Not speed. Ever watched a tiny belly ripple with each successful feed? That’s the goal.

    • Supplemental schedule: give bottle or syringe feeds before and after gruel sessions until the kitten is steadily gaining weight (weigh daily). Gruel is just thin, softened food that’s easy to lap up.
    • Feeding frequency: offer very small, frequent meals so the kitten doesn’t get overwhelmed or inhale food. For fragile neonates, try every 2 to 3 hours. Tiny amounts, often.
    • Vet consult triggers: call your vet if vomiting keeps happening, diarrhea lasts more than 24 to 48 hours, signs of dehydration appear (sticky gums, sunken eyes), or weight stalls or drops. If that happens, resume bottle feeds and contact your veterinarian right away, see the lead checklist for exact corrective steps.
    • Aspiration precautions: use tiny volumes, hold the head slightly elevated, feed slowly, and stop immediately if the kitten coughs or gags. Aspiration (when liquid goes into the lungs) is serious. Only syringe or tube feed with your vet’s instruction; a tube feed means using a thin feeding tube placed by a professional.
    • High-calorie options: ask your vet about concentrated kitten-formulated diets or vet-approved high-calorie toppers to boost calories without big volumes. Good for wobblier babies who need more energy.
    • Extra social feeding tips: hand-feed or use a soft spoon to mimic a littermate’s nudges; gentle purring or skin-to-skin warmth can calm single kittens and help them eat. My cat once relaxed into a nap after a warm spoonful, adorable, and effective.

    Keep any formula or supplement changes coordinated with your veterinarian. Small kittens can wobble quickly. Watch weight, stay calm, and act fast. Worth every paw-print.

    Final Words

    In the action: follow the compact 7-step checklist, start trials at 3–5 weeks, warm 1:1 gruel to ~38°C/100°F, offer 3–4 wet meals daily, weigh kittens and aim for about +10 g/day, thicken mixes over days, and watch the vet-trigger signs so you can act fast.

    Stick to the recipes and week-by-week plan, use shallow dishes and gentle spoon-feeding when needed, and resume bottle feeds if trouble shows. That routine helps busy multi-cat homes keep kittens happy and moving forward with how to wean kittens to solid food. You're doing great.

    FAQ

    Kitten Weaning FAQ

    How to wean kittens to solid food at home?

    Start trials at 3–5 weeks, offer warmed 1:1 gruel (canned kitten food mixed with kitten milk replacer), feed 3–4 times daily, and weigh daily for steady gain.

    When do kittens start eating food and drinking water?

    Begin solid-food trials at about 3–5 weeks. Kittens will sip from a shallow water dish once they can lap; many reach solid-food independence by roughly eight weeks.

    At what age should a kitten start eating dry food?

    Introduce softened dry food around weeks 6–8. Soften kibble with warm formula or water and reduce liquid over 1–3 weeks as chewing improves.

    How to wean kittens from mom or from the bottle?

    Offer warmed gruel and gentle spoon/hand feeding, gradually cut supplemental bottle feeds (kitten milk replacer) as solids increase, and resume bottles if weight drops.

    What is the kitten weaning schedule and how often should I feed weaning kittens?

    Start trials at 3–5 weeks and increase canned food through weeks 5–8. Offer 3–4 wet meals per day while tapering bottles.

    What mixing ratios and warming temperature should I use for gruel?

    Use a 1:1 wet food (canned kitten food) to formula (kitten milk replacer) for first trials, thicken to 1:2–1:3 over days, and warm gruel to about 38°C/100°F (test on your wrist).

    How do I transition a kitten to hard food?

    Soften kibble with warm formula or water (start about 1:3 kibble:liquid), reduce liquid over 1–3 weeks, and pick kitten-sized kibble to lower choking risk.

    What signs show a kitten is ready to start weaning?

    Ready signs include eruption of baby (deciduous) teeth, ability to lap from a shallow dish, curiosity and coordinated mouth movements, and a recorded baseline weight.

    Mother cat not weaning kittens — what should I do?

    Begin warmed gruel trials, hand- or spoon-feed as needed, keep bottle feeds as backup, weigh kittens daily, and call your vet if refusal or weight loss persists.

    What problems should I watch for during weaning and when should I call the vet?

    Watch for diarrhea lasting over 24–48 hours, persistent vomiting, dehydration (tacky gums, sunken eyes, lethargy), or failure to gain weight. Resume bottle feeds, weigh daily, and contact your veterinarian right away if concerns persist.

    How do I know when a kitten is fully weaned?

    A kitten is fully weaned when it eats three meals per day of kitten-formulated food, drinks from a dish, gains about +10 g/day, has normal stool, and hasn’t had bottles for 48–72 hours.

    Any special tips for orphaned, single, or medically fragile kittens?

    Continue supplemental bottle or syringe feeds around gruel meals, weigh more often, offer vet-approved high-calorie toppers, and use small, frequent feeds to reduce aspiration risk.

    Related Articles

  • Ragamuffin cat temperament: Affection and Play

    Ragamuffin cat temperament: Affection and Play

    Think Ragamuffins are just lazy lap cats? Think again. They’re like Velcro – following you from room to room, offering soft chirps, then suddenly exploding into short, joyful zooms before plopping onto your lap. You can feel the big, rumbling purr and the warm thud when they collapse into a nap.

    They’re calm and super affectionate, but also delightfully goofy. Food is a huge motivator, so short training sessions stick easily, sit, come, even a little fetch if you try. Great for families, kids, or other mellow pets, though they do really want company. Ever watched one chase a shadow and then act like it was a personal triumph? So cute.

    This post will walk you through their cuddle habits, play styles, grooming needs, and the health screens to ask breeders for. Ask about HCM (hypertrophic cardiomyopathy, thickening of the heart muscle) and PKD (polycystic kidney disease, fluid-filled cysts in the kidneys). You can request an echocardiogram (a heart ultrasound) for HCM and a renal ultrasound or genetic screening for PKD, um, actually genetic tests are common for some lines.

    Worth every paw-print.

    Ragamuffin cat temperament: Affection and Play

    - Quick verdict affectionate, calm, playful  family fit in one sentence.jpg

    TL;DR: Ragamuffins are total love bugs. They’re calm, friendly, and not super hyper. Great with families and other pets, but they really want company. Before adopting, ask for screening for HCM (hypertrophic cardiomyopathy – a heart muscle disease) and PKD (polycystic kidney disease – cysts that can form in the kidneys).

    Think of a Ragamuffin like a Velcro cat. They follow you from room to room, curl up on laps for long naps, make soft little chirps when they want attention, and knead like they’re massaging a pillow. They play in short, lively bursts – zoom, pounce, then flop back down. They’re food-motivated and pick up short training sessions easily, especially with treats and positive reinforcement.

    They’re mellow company. Perfect if someone’s home a lot, or if you already have calm pets. For busy days, toss a durable toy before you leave and that’s ten minutes of safe fun. Ever watched a Ragamuffin stretch and gently bat a feather? Their moves are oddly graceful and totally charming.

    Safety and health matter. Always ask breeders or rescues for documented HCM and PKD test results. If they can’t show proof, keep looking. HCM affects the heart and can be screened with an echo; PKD is usually checked with an ultrasound or genetic test. It’s quick to ask, and worth it.

    Keep an eye on weight. Ragamuffins love food and can get chunky if you’re not watching portions. Portion control, measured meals, and a bit of daily play help a lot. My friend’s Ragamuffin once climbed a bookshelf for a treat – worth every paw-print.

    Grooming and handling are easy. Their coat feels like a soft pillow but still needs regular brushing to cut down on loose fur. Learn basic body language so you know when they want pets or some alone time. Training? Short, tasty sessions are your best bet. Positive reinforcement works wonders.

    If you’re ready for a cuddly, gentle companion, read the sections on body language, training, grooming, and the adoption checklist next. You’ll find practical tips for daily care, safety checks, and what to ask a breeder or shelter. Honestly, a Ragamuffin is one of those cats that makes a house feel like home.

    Core Ragamuffin personality traits: observational examples, body language, and short anecdotes

    - Core Ragamuffin personality traits observational examples, body language, and short anecdotes.jpg

    Ragamuffins meet you with tiny chirps, slow head-butts, and soft kneading. Imagine warm little paws pushing into your lap, so soothing. They’re mostly calm, with short bursts of curiosity and play. Often they’ll drop a toy at your feet to ask for attention instead of demanding it. Cute, right?

    Body language & calm vs. stressed signals Quick action plan
    Calm / content cues:

    • Slow blinks
    • Belly exposure (showing their belly – a sign of trust)
    • Loose tail or tail curled around a wrist

    Stress cues:

    • Tucked tail
    • Flattened ears
    • Wide pupils
    • Freezing or sudden avoidance
    Give space, lower your voice, and offer a high perch or a quiet room with familiar smells. Try a towel or blanket that smells like home. Keep movements slow until they relax.

    Affectionate behaviors (observational cues)

    • Look for soft kneading, low-volume vocal requests, carrying a small toy to get your attention, and gentle head-butts.
    • One cat I knew would drop a plush bunny beside the couch and stare until someone noticed. That was a tidy, unmistakable invite to cuddle. Ever seen that? Melt city.

    Play and energy examples

    • Play comes in short bursts: a minute or two of pouncing and batting at a feather wand or soft ball, then a long, relaxed nap.
    • I once watched a kitten sprint for ten seconds, fling itself into a sunpatch, then snooze for an hour. Perfect little energy sprints.
    • For busy days, toss a soft ball before you head out – that’s ten minutes of safe play and a happy cat.

    Many Ragamuffins learn well with short, food-driven practice sessions and can pick up simple cues like sit or fetch. Oops, make that fetch in small steps, treat, praise, repeat.

    For compatibility guidance, see the "Ragamuffin temperament with children, dogs, and other cats" section.

    Ragamuffin temperament with children, dogs, and other cats

    - Ragamuffin temperament with children, dogs, and other cats.jpg

    Ragamuffins are basically gentle giants. They are patient, cuddly, and usually happy to hang out with kids who chatter and snuggle. They take gentle roughhousing better than many breeds and will often stick close instead of dashing away. But because they trust easily, pushy kids or bossy animals can overwhelm them, so a little supervision goes a long way.

    Start introductions slowly. Keep the new cat in a quiet room and swap bedding and toys so each animal can learn the other’s scent. Put the dog on a leash (a short lead to keep the dog close) or behind a baby gate (a simple barrier that blocks access) for short, supervised visits. Let the Ragamuffin come forward when it wants to, not the other way around.

    Watch the body language like a hawk. Look for a tucked tail, flattened ears, hard staring, sudden hiding, or whiskers pulled back. If you see hissing, growling, or the cat stops eating, hit pause and give everyone space. If the resident cat starts swatting or chasing in an aggressive way, separate them and let things calm down before trying again.

    Give your Ragamuffin easy escape routes and high perches (a cat tree or shelf works great) so it can back off without drama. Set up separate feeding spots if meals cause stress. Do short, supervised sessions every day for the first week, then increase the time they can see each other over 7 to 14 days. If all goes well, slowly expand supervised access the following week.

    Keep an eye on eating, litter box use, and friendly behavior. If the new cat avoids others or eats less for more than a couple of days, slow the pace and offer quiet, private time. Worth every paw-print.

    How Ragamuffin temperament changes across life stages

    - How Ragamuffin temperament changes across life stages.jpg

    Ragamuffin kittens are tiny explorers with sudden bursts of zoomies. They sprint, pounce, stalk a tossed soft ball, and then flop into a deep, purring nap that seems to come out of nowhere. Their play is practice for hunting skills, lots of stalking, batting, and quick jumps, so you’ll notice their style shift week to week as coordination sharpens and curiosity runs the show. Ever watch your kitten’s whiskers twitch as a toy rolls across the floor? Cute, right.

    By about three to four years, most Ragamuffins ease into a calmer, more predictable rhythm. They love long, cozy rest times broken up by short play sessions and one-on-one attention; energy usually reads low to moderate. Typical adult weights land around males up to roughly 20 pounds and females up to about 15 pounds. Their days tend to center on routine, cuddles, and a little food-motivated training (simple tricks for treats).

    Senior Ragamuffins slow down even more and benefit from gentler activity and a watchful eye on weight. Swap high jumps for low climbs and soft, rolling toys, shorten play sessions, and trim portions if their activity drops. Keep movement easy on joints (joint-friendly = gentle on hips and knees) so they stay comfortable and mentally bright. I once watched a senior Ragamuffin happily bat a soft ball with slow, satisfied taps for a good ten minutes, small joys.

    Worth every paw-print.

    Care and grooming: routines that support a calm, comfortable Ragamuffin

    - Care and grooming routines that support a calm, comfortable Ragamuffin.jpg

    Ragamuffins have a medium-to-long ultra-plush coat (thick, soft fur) that resists matting (tangled clumps) more than you might expect. A little weekly maintenance keeps that fur soft and tangle-free. Use a long-toothed comb (comb with widely spaced teeth) to gently pull out loose hair, then follow with a soft-bristle brush (bristles that smooth and add shine). In heavy-shed seasons, add an extra short session or two.

    To start a calm grooming routine, sit somewhere quiet, offer a tiny treat, comb for 1–2 minutes, then stop. Add a minute or two each week until your cat accepts 5–10 minute sessions. Ever watched your kitty blink contentedly as you brush them? That’s the good stuff.

    Check ears and eyes once a week and keep a soft wipe (a damp, lint-free cloth) handy for mild cleaning. If an ear looks very red, smells bad, or your cat tilts its head, call the vet. Dental care is best daily, but aim for at least once a week using a cat toothbrush or approved dental wipes (products made for cat teeth). Watch for bad breath or a drop in appetite as signals to get checked.

    Trim nails every 2–4 weeks. If your cat hates the clipper, try short, calm sessions, wrap them gently in a towel if needed, and reward them right after. Tiny rewards help. Really.

    Food and weight make a huge difference in comfort and energy. Feed measured meals twice a day instead of free-feeding. Most adult Ragamuffins do well on two portioned feeds that match the food label and your cat’s activity level. Check body condition by feeling ribs and looking for a waist every 2–4 weeks; if the waist disappears or ribs are buried under fat, cut portions and add short play sessions. Include a high-protein diet and omega-3/omega-6 fatty acids (good fats that support coat and joint health). Keep treats to a very small fraction of daily calories.

    Weekly micro-checklist:

    1. Comb coat (5–10 minutes).
    2. Quick ear check and gentle wipe.
    3. Dental routine (tooth brushing or dental chew/wipe).
    4. Nail check and trims as needed.

    Grooming is bonding. Start at 1–2 minutes and build up over days or weeks, use tiny treats, speak in a calm voice, and pause if you see stress signs like tail swishing, flattened ears, or sudden flinches. If your Ragamuffin shuts down, stop, give quiet time, then try again later , slow wins trust and more cuddle time.

    Enrichment and training: consolidated strategies and stepwise plans

    - Enrichment and training consolidated strategies and stepwise plans.jpg

    Start tiny and tasty. Do 3-5 minute, food-driven sessions two to four times a day using pea-sized high-value treats like freeze-dried meat (intense smell, super tempting) or soft treats (moist, easy to chew). Keep each reward under about 5 calories so you can repeat often without overfeeding. Click, say a happy word, or give a gentle pet right after the behavior so your Ragamuffin links the action to the reward. Short bursts keep attention sharp and make training feel like play, not a chore.

    Teach a clear "sit" cue in five simple steps:

    1. Hold a tasty treat just above the cat’s nose so they look up.
    2. Move the treat backward over the head; many cats will lower their rear to follow the treat.
    3. The instant the rear touches the floor, mark it with a soft “yes” or a click, then give the treat.
    4. Repeat in 3-5 minute bursts, slowly fading the lure so the hand becomes the signal.
    5. Once it’s reliable, add the verbal cue “sit,” then switch to intermittent rewards to build consistency.

    Make a daily enrichment routine so boredom stays away. Morning: 5-10 minute interactive wand session to mimic a hunt and wake them up. Midday: a food puzzle (puzzle feeder – a toy that dispenses food) or scatter kibble in a snuffle mat (fabric mat that hides kibble) at mealtime. Late afternoon: a calm grooming session or soft play plus a 3-5 minute training slot. Evening: 10-15 minute interactive play before family chill time, then a quiet puzzle or plush toy for independent play. Breaks between sessions let your cat rest and mentally process wins.

    Introduce leash and harness slowly and gently. Days 1 to 3: leave the harness near their bed so it smells like home. Days 4 to 7: drape it over them for a minute while rewarding calm behavior, then take it off. Week 2: fasten it briefly indoors and try short walks around familiar rooms, lots of praise. Weeks 3 to 4: try a lightweight leash (a soft, short leash) in a quiet yard or catio while you supervise; aim for 2-5 minute outdoor steps and build up if your cat stays relaxed and the tail is loose.

    Prep for travel and vet visits over weeks, not days. Leave the carrier out with a comfy blanket and treats so it becomes a safe spot; feed inside the carrier too. Do short carrier-door-closed sessions with a treat and calm voice to make it normal. Practice gentle handling of paws, ears, and mouth for a minute or two daily so vet exams feel routine. Before appointments, make a calm routine: quiet room, a favorite toy, and slow, soothing talk.

    Clicker and positive reinforcement basics

    Pair the clicker (small plastic click device) with food by clicking, then immediately giving a treat for 20-30 quick repeats so the click comes to mean “good.” Time the click the instant the desired motion finishes. For linking two-step behaviors, reward the first full action, then click and reward the second once they flow together smoothly.

    Aim for two 10-15 minute interactive play sessions each day, plus puzzle time and safe vertical space for climbing and watching the world.

    • Interactive wand play – mimics prey, perfect for pouncing and big jumps.
    • Small soft ball for fetch – easy to pick up and toss.
    • Puzzle feeder (toy that dispenses food) – slows eating and boosts foraging fun.
    • Plush toy for carrying – satisfies that little-carry instinct and soft nibbles.
    • Low-intensity laser (short bursts) – use briefly and finish with a catch toy so they don’t get frustrated.
    • Vertical perch with dangling toys – gives a lookout and gentle batting practice.

    Five quick steps to teach fetch or simple recall:

    1. Use a tiny, tossable soft ball and a high-value treat.
    2. Toss the ball a short distance, say “get it” in an excited tone, and encourage play.
    3. When the cat picks it up or even looks at it, call them back with a treat and cheerful voice.
    4. Reward heavily the moment they return with the ball or come close.
    5. Gradually add distance and reduce treats, keeping every session short and fun.

    I once watched Luna leap six feet for a tiny ball, worth every paw-print.

    Common behavior issues: troubleshooting steps and escalation plan

    - Common behavior issues troubleshooting steps and escalation plan.jpg

    First 24 to 72 hours, do a quick health check and jot down what you see. Take the temperature if you can (fever is over 103°F, about 39.4°C), note appetite, water intake, litter box use (where your cat pees and poops), walking and whether they limp or flinch when touched. Watch for more hiding, different meows, or sudden litter changes. Also pull out or separate any new food, toys, or furniture you recently added so you can see if something new triggered the fuss.

    Next, try a short, focused two-week plan. Up the number of short play sessions, 3 to 5 minutes, several times a day, so your cat gets bursts of fun and hunting practice. Give them vertical space like shelves or a cat tree (a climbing and scratching structure) so they can escape and look around. Use puzzle feeders (food-dispensing toys) when you leave to keep them busy. Think about a feline pheromone diffuser (a synthetic calming scent) placed in the problem area. Keep routines steady, meals, play, and quiet time at roughly the same times each day. If other pets are involved, split resources: extra litter boxes and separate feeding spots can cut down on stress.

    Track everything for 7 to 14 days. Log date, time, what happened, how long it lasted, who was there, and what was different just before the incident. Short video clips are gold for later review. Also track weight and appetite every 2 to 4 weeks and note any medication or diet changes. A clear timeline makes patterns jump out and helps a vet or behaviorist help faster.

    If you don’t see improvement, gather your evidence and escalate. Call your vet right away for sudden severe aggression, not eating for 24 to 48 hours, or signs of pain or trouble urinating (straining or frequent attempts). If ongoing aggression or inappropriate elimination continues after 4 to 6 weeks of structured fixes, consult a certified behaviorist (a cat behavior specialist) and bring videos, your 2-week log, recent vet records, medications, and a list of interventions you tried. That focused info speeds things up.

    1. Sudden severe aggression or a deep bite.
    2. Not eating or drinking for 24 to 48 hours.
    3. Signs of pain, labored breathing, or straining to urinate.

    Choosing and introducing a Ragamuffin: breeder/rescue vetting, socialization timeline, and acclimation checklist

    - Choosing and introducing a Ragamuffin breederrescue vetting, socialization timeline, and acclimation checklist.jpg

    Ragamuffins are pretty rare, so where you get one really matters. A good breeder or rescue will show dated test results and vet reports for things like HCM (hypertrophic cardiomyopathy – a heart muscle condition) and PKD (polycystic kidney disease – fluid-filled kidney cysts). Ask for echocardiogram or ultrasound (types of imaging that show the heart or kidneys), or genetic test results, plus clear vaccination and deworming records. Also ask about the parents' health and temperament notes. Expect to pay around $1,500 for a well-documented kitten – that usually reflects testing and careful breeding, not fluff.

    Socialization shapes how brave and friendly your kitten becomes. The first 0 to 12 weeks are especially important; lots of gentle handling and calm new experiences helps build trust. Keep exposures short and positive: quick cuddles, soft strokes of paws and ears, and brief introductions to new sounds or surfaces. Then keep that up through about 12 to 20 weeks so the kitten grows used to carriers, vet visits, and everyday household activity. Think of it like teaching them the world is not scary – one tiny step at a time.

    Question/Topic Ideal Answer from Responsible Breeder/Rescue Why it matters
    Health testing for HCM/PKD Copies of tests and dates – echo (heart ultrasound), kidney ultrasound, or genetic reports Reduces hereditary risk and helps you plan vet care
    Socialization Daily handling routines and gentle, varied exposures Builds confidence and makes vet care and grooming easier
    Vaccination and deworming Up-to-date records with dates and vet clinic name Protects early health and prevents disease spread
    Return policy/contract Clear rehoming terms and basic health guarantees Gives you a safety net if problems come up
    Temperament notes In-person or video examples of kitten behavior Shows likely social style and how they cope with handling
    Parent health/history Genetic and cardiac background on the parents Helps estimate hereditary risks
    1. Set up a quiet room with litter, food, water, a hiding spot, and a vertical perch. Make it cozy, not cluttered.
    2. Give the kitten 24 to 72 hours to retreat and settle. Offer food and calm contact on their terms. Let them peek out when they’re ready.
    3. Start daily short play and handling sessions to build positive associations. Keep them fun and bite-sized.
    4. Do scent exchanges and staged visual meetings with resident pets over several days. Slow wins here.
    5. Gradually expand supervised access to the rest of the home over 1 to 2 weeks, watching body language as you go.
    6. Schedule a vet visit within 1 to 2 weeks for a baseline check and any needed tests. Bring the records you got from the breeder or rescue.
    7. Note temperament observations and any worrying signs. Report patterns to the breeder or rescue so you can get help early.

    Signs your Ragamuffin is settling in: eating normally, using the litter box, holding steady weight, and offering voluntary contact like head butts or lap naps. If eating, elimination, or social behavior changes for more than a few days, try basic troubleshooting and call your vet if you suspect a health problem. Worth every paw-print.

    Final Words

    Ragamuffins are affectionate, calm, and gently playful , lap-friendly, low-to-moderate energy cats that suit family and multi-pet homes when given steady company and health screening for HCM (heart muscle disease) and PKD (polycystic kidney disease).

    They form Velcro-like bonds, settle for long lap naps, enjoy short play bursts, and pick up food-motivated cues in quick training sessions; energy stays mellow, sociability is high, and weight should be watched.

    For adopters: best where someone is home often or other pets live nearby, expect social needs and obesity risk, and insist on HCM/PKD checks. Read the body language, training, grooming, and adoption checklist sections for a smooth start , your home will feel warmer with that Ragamuffin cat temperament.

    FAQ

    Frequently Asked Questions about Ragamuffin Cats

    Ragamuffin cat temperament with other cats

    The Ragamuffin’s temperament with other cats is usually friendly and tolerant after slow, supervised introductions; they like calm company and may retreat if faced with very dominant roommates.

    Ragamuffin cat temperament affectionate / Do Ragamuffin cats like to be held?

    The Ragamuffin’s affectionate temperament means they usually enjoy being held, are velcro-like, love laps and gentle cuddles, though individual comfort and short breaks matter.

    Ragamuffin cat temperament intelligent

    The Ragamuffin’s temperament shows clear intelligence; they are food-motivated learners, pick up simple cues, enjoy puzzle toys, and respond well to short reward-based sessions.

    Ragamuffin cat lifespan

    A Ragamuffin’s lifespan is about 12–16 years with good care, routine vet checks, and attention to weight and dental health.

    Ragamuffin cat size

    Ragamuffin size: adult males often reach up to about 20 pounds, females up to around 15 pounds, with a large, sturdy, plush build.

    Ragamuffin vs Ragdoll personality

    Comparing Ragamuffin vs Ragdoll personality: both are gentle and lap-friendly, but Ragamuffins tend to be a touch more social, food-motivated, and clingy.

    What is a Ragamuffin cat mixed with / What two breeds make a Ragamuffin cat?

    A Ragamuffin typically descends from Ragdoll and domestic longhaired stock, with influence from breeds like Birman, Persian, Himalayan, Maine Coon, or Turkish Angora.

    Ragamuffin cat for sale

    Ragamuffin cats for sale are uncommon; expect responsible breeders to screen parents for HCM (heart muscle disease) and PKD (polycystic kidney disease), with prices often near $1,000–$2,000.

    What are the cons of a Ragamuffin cat?

    The cons of a Ragamuffin cat include high social needs, obesity risk from low activity, weekly grooming time, and possible hereditary issues like HCM (heart disease) or PKD (kidney cysts).

    What is the calmest type of cat?

    The calmest type of cat often includes breeds like Ragamuffin, Ragdoll, Birman, and Persian—lap-loving, low-to-moderate energy, patient companions for families.

    Related Articles

  • ringworm in cats: symptoms and treatment

    ringworm in cats: symptoms and treatment

    Think that round bald patch on your cat is just a grooming quirk? Uh, it might be ringworm, dermatophytosis (a contagious skin fungus that lives on hair and nails), and it spreads easily between pets and people.

    You may spot a neat circle of missing fur, a pink or red scaly edge, flaky skin, or even brittle claws. Sometimes cats look perfectly fine but still shed spores (tiny fungal cells that spread the infection), so a glossy coat isn’t always proof everything’s safe.

    Vets usually treat it with topical meds (creams or medicated shampoos applied to the skin) and sometimes oral antifungal pills. I’ll walk you through the common options vets use and what each one does, so you’ll know what to expect.

    You’ll also get simple home steps to protect your family and other pets: isolate the affected cat, wash bedding and soft toys in hot water, vacuum often, and use a vet-approved disinfectant on hard surfaces. Wear gloves when you handle infected areas and wash your hands well , ringworm can pass to people, so don’t skip that.

    Read on for the signs, the usual vet treatments, and easy, practical steps to treat your cat and keep your home safe.

    ringworm in cats: symptoms and treatment

    - Quick overview and urgent actions for feline ringworm.jpg

    Ringworm (dermatophytosis) in cats is a contagious fungal infection of the skin, hair, and nails, most often caused by Microsporum canis (a fungus that lives on hair and skin). It spreads easily from cat to cat and can pass to people through direct contact or shared items like bedding, brushes, or towels. Kids and people with weaker immune systems are at higher risk. Ever watched a kitty groom a bald patch? That might be your first clue.

    Treatment at a glance: small, local spots often respond to topical antifungals (creams, ointments, or medicated shampoos). Bigger or stubborn infections usually need systemic antifungals (oral medicine your vet prescribes). Courses are commonly 4 to 6 weeks or longer, and vets often keep treatment going until a negative fungal culture (a lab test that grows any remaining fungus) confirms the infection is gone.

    Common signs to watch for

    • Circular or patchy hair loss , sometimes with the full circle visible.
    • Scaly, crusty patches with red edges.
    • Broken, stubby, or brittle hair.
    • Dandruff or flaky skin.
    • Lesions often show up on the head, ears, and face.
    • Changes at the nail bed , brittle, deformed, or crusty claws.
    • Note: some cats carry and shed fungal spores without looking sick (asymptomatic carriers), so a clean-looking cat can still spread it.

    Urgent action checklist (do these now)

    1. Isolate the affected cat in one room to limit spread. Keep the door closed and minimize who goes in.
    2. Use PPE – wear disposable gloves and long sleeves when handling the cat, bedding, or grooming tools (PPE means personal protective equipment).
    3. Call your veterinarian promptly and, if you can, take photos of the lesions to show them.
    4. Limit contact from children and immunocompromised household members until your vet says it’s safe.
    5. Start focused laundry and surface cleaning now , wash bedding, towels, and soft toys on hot, and clean hard surfaces (see Environmental cleaning below).
    6. Follow your vet’s treatment plan and schedule follow-up testing as recommended, including fungal cultures to confirm cure.

    See the sections below for Diagnosis, Environmental cleaning, Multi-cat management, and Monitoring.

    Ringworm in cats: common signs and what ringworm looks like on a cat

    - Ringworm in cats common signs and what ringworm looks like on a cat.jpg

    Ringworm usually shows up on your cat’s skin and coat. Spotting it early helps your vet treat it faster. Kittens and cats who are immunocompromised (weakened immune system) often get larger, harder-to-treat patches. And a lot of infected cats barely scratch, so not itching does not mean no infection.

    Look for subtle changes first , hair that feels different or skin that looks off before your cat seems uncomfortable. The classic sign is a round, spreading spot with a clearer middle and a raised, red, scaly edge that slowly gets bigger.

    • Outwardly spreading ring lesions: clear center with a raised, red, scaly rim that grows outward.
    • Patchy hair loss around the head, face, and ears, or odd bald spots with visible scaling.
    • Areas where the fur looks a different shade where hair is thinning.
    • Broken, stubby, or brittle hairs, especially on longhaired cats.
    • Thick crusts or dandruff-like flakes over the area.
    • Small raised nodules or granulomas (small lumps of inflamed tissue) in more severe cases.
    • Lesions that look bright red on the head, ears, or face.
    • Many infected cats show little or no itching; a tidy-looking cat can still spread spores.

    Photographing lesions for your vet

    Take 3 to 6 clear photos from different angles: one close-up with a small ruler or coin for scale, one showing the whole affected patch, and one wider shot that shows where the lesion sits on the body. Date each image and try to use the same lighting and background so you can compare over time. Repeat photos every 7 to 10 days to track change and share them with your veterinarian.

    Example shot , Close-up with ruler: lesion about 2 cm across.

    Ringworm in cats: diagnosis , Wood’s lamp, microscopic exam, and fungal culture

    - Ringworm in cats diagnosis  Woods lamp, microscopic exam, and fungal culture.jpg

    Start with a vet visit and a quick history. Tell the vet where the spots are, how long they’ve been there, and whether other pets or people have similar rashes. No single test finds every case, so vets usually combine fast screens with slower lab tests to get a clear answer.

    Wood’s lamp exam

    A Wood’s lamp is an ultraviolet light (a handheld black light) that can make some Microsporum canis infections glow pale green. It’s fast and cheap. But only some strains glow, and other things can fluoresce too, so a glow helps, but no glow does not rule out ringworm.

    Microscopic examination (KOH)

    A KOH prep (potassium hydroxide slide test that dissolves skin debris) means the vet plucks a few hairs and checks them under a microscope for fungal spores or arthroconidia (fungal reproductive bits). Results are quick , often same-day , and can show active shedding. Still, very low-level carriers can be missed.

    Fungal culture

    A fungal culture on dermatophyte test medium (a nutrient gel that lets fungus grow) is the clinic standard for diagnosis and for confirming cure. Cultures can take up to 14 days to grow. Vets commonly want two negative cultures spaced 2 to 4 weeks apart before stopping treatment, because cultures catch low-level infections that quick tests might miss.

    PCR and biopsy

    PCR (a DNA test that looks for fungal genetic material) and skin biopsy (a tiny piece of skin sent to the lab) are options when cases are confusing or don’t follow the usual pattern. They’re used if other tests disagree or if the vet needs more detail.

    What to bring to the clinic

    1. 3 to 6 dated photos of the lesions and a note on when they first showed up.
    2. A list of recent medications, supplements, and any topical products you’ve used.
    3. Notes about recent contact with other animals or people, and any new pets or fosters (see do cat scratches scar for how to tell scars or trauma from infection).

    Worth every paw-print.

    Ringworm in cats: topical and oral treatment options, durations, and medication notes

    - Ringworm in cats topical and oral treatment options, durations, and medication notes.jpg

    Treatment usually goes down two paths: surface care for a few spots, or medicine that works through the whole body for bigger problems. Surface treatments lower spores on the coat and help small lesions. Systemic, or oral, drugs (medicine given by mouth that reaches the whole body) are for widespread, stubborn, or carrier cats (cats that carry the fungus without looking sick). Your vet will pick based on how many spots there are, where they are, your cat’s age and health, and whether other pets or people are at risk.

    Topical treatments and dips

    Creams like miconazole (topical antifungal cream) or clotrimazole (topical antifungal cream) are great for one or two small patches. Medicated shampoos with antifungals help wash spores away from the coat , follow your vet’s schedule so you don’t dry out the skin. When you put creams on, go about 1–2 cm past the visible edge of the lesion so you catch tiny spread you can’t see.

    For bigger problems vets use whole-body dips like lime sulfur dip (sulfur-based topical that kills spores; it can stain fur and smells strong) or enilconazole dip (veterinary antifungal dip). Dips lower environmental spores well, but they can stain, smell, and bother sensitive skin. Clip matted fur first. Wear gloves and long sleeves. Ask your vet to show you how to mix, apply, and rinse safely , it’s worth watching once.

    Oral antifungal therapy

    When lesions are all over, your cat has long hair, or the cat is a carrier, vets often use oral drugs: itraconazole (oral antifungal pill), terbinafine (oral antifungal pill), or fluconazole (oral antifungal pill). Doses and schedules change by drug and by cat , some vets use daily dosing, some use pulse dosing (short treatment bursts). Griseofulvin (old-school antifungal) has more risks in cats , possible bone marrow and liver problems , so it’s rarely first choice.

    Oral meds can affect the liver, so your vet will want baseline bloodwork and periodic liver enzyme checks (blood tests that show how the liver is doing). Watch your cat for less appetite, vomiting, or being extra sleepy , call your vet if you see those signs.

    Medication Route Typical use Key precautions
    Itraconazole (oral antifungal) Oral Widespread or persistent infections; pulse or continuous dosing Monitor liver enzymes (blood tests); use vet-prescribed dose
    Terbinafine (oral antifungal) Oral Alternative systemic option for many cases Watch for stomach upset; periodic bloodwork
    Fluconazole (oral antifungal) Oral Used in selected cases or when others don’t work Follow vet dosing; watch for side effects
    Miconazole / Clotrimazole (topical antifungals) Topical Small, localized lesions; creams and shampoos Apply 1–2 cm beyond lesion edge; wear gloves
    Lime sulfur dip (sulfur-based topical) Topical dip Whole-body treatment for heavy contamination Stains fur and has strong odor; use PPE and vet guidance

    Most owners see visible improvement in 2–4 weeks, and many cats are close to recovered by 5–6 weeks. Don’t stop early , even if the spots look gone. Keep treatment until your vet confirms cure with negative fungal cultures (lab tests that check for fungus), usually two negatives a few weeks apart.

    Worth every paw-print.

    Ringworm in cats: environmental cleaning, disinfectants, and how long spores survive

    - Ringworm in cats environmental cleaning, disinfectants, and how long spores survive.jpg

    Cleaning your home is as important as giving your cat medicine. Dermatophyte spores (fungal reproductive units) love hiding in carpet fibers, fabric, and tiny cracks, ready to cause a comeback. Think of cleaning like hunting for tiny fungal hitchhikers: tidy, targeted, and done more than once.

    1. Isolate the room. Keep the sick cat in one easy-to-clean room and take out extra rugs, throw pillows, and stuffed toys that trap fur and spores. Less clutter means fewer places for spores to hide.
    2. Laundry first. Wash bedding, towels, and soft toys in the hottest water the fabric can handle with regular detergent and a disinfectant. Dry on the hottest dryer setting or toss anything you can’t clean well.
    3. Vacuum thoroughly. Go over carpets, rugs, and upholstered furniture with the vacuum. Then remove and toss vacuum bags or empty canisters into an outdoor trash bin so spores don’t blow back into the house.
    4. Disinfect hard surfaces. Use a diluted household bleach solution (about 1 part bleach to 10–16 parts water) or a registered fungicidal product (fungicidal means it kills fungi). Follow the label and leave the surface wet for at least 10 minutes before rinsing.
    5. Steam or pro cleaning. Steam-clean carpets and upholstery when you can; steam helps lift and kill spores. For heavy contamination, hire professional cleaners who know what to do.
    6. Grooming tools and toys. Soak brushes and combs in disinfectant or replace them. Wash soft toys on hot or toss them if they’re too worn. Your cat will thank you for clean toys.
    7. Litter box care. Keep a dedicated litter box in the isolation room, scoop daily, and disinfect the box between uses. Clean litter boxes more often while treatment is happening.
    8. PPE for handlers. Wear disposable gloves and long sleeves when handling the cat, bedding, or while cleaning. Wash your hands and change clothes afterward to avoid carrying spores around.
    9. Timing and repetition. Repeat cleaning weekly while your cat is on treatment and keep at it for several weeks after the vet says the cat is clear. Consistency matters.

    Dermatophyte spores can survive up to 18 months on surfaces, so regular, focused cleaning lowers the risk of relapse and protects people and other pets. Worth every paw-print.

    Ringworm in cats: managing multi-cat homes, shelters, and quarantine procedures

    - Ringworm in cats managing multi-cat homes, shelters, and quarantine procedures.jpg

    Ringworm is a fungal skin infection that can spread fast in places with lots of cats. So the idea is simple: contain the infected cat, cut down contact, and clean like a pro. Keep the sick cat in one single, well-ventilated room with bare floors and just a few items you can wash or toss. Bare floors make mopping easier, and fewer hiding spots mean fewer surprises.

    In shelters, grouping infected animals together – cohorting – plus strict PPE (personal protective equipment) and frequent cleaning really slows transmission. Screen other animals quickly; many programs test or treat all animals that were exposed instead of waiting for obvious signs. Ever watched a cat shiver and then pounce? We want to stop the jump to another host before it happens.

    • Isolate the affected cat in one dedicated room. Limit who goes in and out.
    • Give that room its own supplies – litter box, food and water bowls, bedding, grooming tools – and don’t move them between animals. Think of each item as single-use for that room.
    • Test exposed animals as your veterinarian advises. A fungal culture (lab test that grows and checks for the fungus) is common. Test early, and test again as recommended.
    • Treat positives right away or move them to separate isolation. Follow your vet’s medication and retesting schedule closely. It helps everyone if you stick to the plan.
    • Clean the isolation area often while treatment is happening. See Environmental cleaning for full steps and routines. Regular scrubbing and appropriate disinfectants make a big difference.
    • Use PPE for handlers: disposable gloves, long sleeves, and wash hands and clothes after any contact. Shoe covers or washable booties can help in high-risk settings.
    • Tell adopters, fosters, and staff about any exposure and hold adoptable animals until your clearance rules are met. Clear communication avoids surprises and keeps people and pets safe.
    • Retesting schedule: expect quarantine to continue until you have two negative fungal cultures collected 2 to 4 weeks apart and those results are documented.

    Cost and logistics note: plan for exams, cultures, medications, extra cleaning supplies, and possibly temporary housing or added staff time. Shelters and owners should budget for these things. Talk with your vet or shelter manager about low-cost testing or treatment options, bundled services, or practical ways to cohort or foster during recovery. Small tweaks, like scheduled shifts for isolation care, can make a big difference.

    Worth every paw-print.

    Ringworm in cats: zoonotic risk and protecting children and immunocompromised household members

    - Ringworm in cats zoonotic risk, protecting children and immunocompromised household members.jpg

    Ringworm (a fungal skin infection) can pass from a cat to a person – that's what "zoonotic" means (can spread from animals to people). You or your kids can catch it by touching the cat or things the cat uses, like bedding or brushes. Young children, older adults, and people with immunocompromised systems (weakened immune systems) are more likely to get sick. Routine testing of people isn’t needed unless someone shows symptoms, like a red, itchy, round patch or scaly spot.

    • Limit who handles the infected cat to one caregiver when you can. It helps keep the spread small, kind of like keeping cookie crumbs to one counter.
    • Wear disposable gloves and long sleeves for handling, grooming, and cleaning (disposable gloves are single-use latex or nitrile gloves). Add a simple apron if you have one.
    • Wash hands with soap and water right after any contact with the cat or its things – no shortcuts. Hand sanitizer is OK in a pinch, but soap and water is best.
    • Wash clothing, towels, and bedding on the hottest safe cycle and dry on high heat (hot wash and hot dryer help kill the fungus). Put contaminated laundry straight into a bag or hamper so it doesn’t touch the rest of your stuff.
    • Cover any human skin lesions and get medical care for new rashes or anything that looks like a ring-shaped sore. If you have immune problems, see your doctor sooner rather than later.
    • Tell both your veterinarian and your doctor if someone in the house gets a suspicious rash. A quick line like, "My cat tested positive for ringworm and I have a new rash on my hand," helps everyone know what to look for.

    Routine testing of people isn’t required unless symptoms appear. For details on PPE (personal protective equipment) and laundry steps, check the Urgent Action Checklist and Environmental Cleaning sections so we’re not repeating the same things here.

    Ringworm in cats: monitoring response to treatment, complications, and when to return to the vet

    - Ringworm in cats monitoring response to treatment, complications, and when to return to the vet.jpg

    You’ll usually see the first signs of improvement in 2–4 weeks. By weeks 5–6 many cats look a lot better. Keep treatment going until your veterinarian confirms a cure with fungal culture(s) (fungal culture = a lab test that grows the fungus to check if the infection is gone). Lots of clinics want two negative cultures spaced 2–4 weeks apart. If your cat is on oral antifungals (pills that fight fungus), expect baseline bloodwork (blood tests done before starting medicine) and periodic liver enzyme checks (liver enzymes = blood tests that show how the liver is doing).

    Signs of improvement vs treatment failure

    Watch clear, simple signs so you know if therapy is working. If improvement stalls or new lesions pop up, call the vet.

    • Lesion size – the red or scabby patch gets smaller over time.
    • Hair regrowth – short, fuzzy new hair appears in the bald spots.
    • Culture results – negative fungal culture(s) at the scheduled check.
    • Crusting and flakes – less scaling and fewer crusty areas on the skin.
    • Behavior and appetite – your cat is back to normal play and eating.
    • Fever or marked lethargy – any temperature rise or serious tiredness needs attention.

    Ever watched your kitty chase dust motes? That return to play is a great sign.

    When to contact the vet

    Call your clinic right away for any worsening lesions, new lesions on other pets, or signs of a secondary bacterial infection (secondary bacterial infection = bacteria making the area more sore, with pus, extra warmth, or swelling). Reach out if bloodwork shows abnormal liver values while your cat is on oral meds, or if anyone in the home develops a suspicious rash.

    Monitoring steps to follow:

    • Take dated photos every 7–10 days. Write notes like "Day 0: 2-cm red patch" and "Day 10: border smaller, tiny hair sprouts" so you can see real progress.
    • Plan for a fungal culture at about 4–6 weeks and repeat until you have two negatives 2–4 weeks apart.
    • Keep routine bloodwork on the schedule your vet recommends, especially with oral antifungals.

    You’re doing the right thing by watching closely. Worth every paw-print.

    Final Words

    In the action, we gave the quick lede: what ringworm is (Microsporum canis , a common skin fungus), how it spreads, and the six-step urgent checklist so you know what to do first.

    Then we ran through the usual signs , patchy hair loss, scaly red rings, broken hairs, crusting, nail bed changes , plus diagnosis tools (Wood’s lamp , UV lamp; KOH , microscopic hair exam; culture , fungal growth test), treatment choices, cleaning, and multi-cat steps.

    Follow your vet’s plan and keep photo notes. You can handle ringworm in cats: symptoms and treatment with steady care and calm steps. Better days ahead.

    FAQ

    Frequently Asked Questions — Ringworm in Cats

    How do you know if a cat has ringworm?

    You may spot circular hairless patches, scaly red borders, broken stubby hairs, crusting or dandruff, lesions on the head or ears, or nail changes; some cats carry ringworm with no visible signs.

    How can ringworm in cats be treated at home, and what kills it fastest?

    Home treatment can include topical antifungal creams and medicated dips (dips and shampoos reduce spores quickly). Widespread or severe cases usually require oral antifungal pills prescribed by a veterinarian.

    Can I touch my cat if it has ringworm?

    You can touch the cat, but doing so risks transmission. Wear gloves and long sleeves, wash hands after handling, and limit contact by children or immunocompromised people until treatment is underway.

    Can humans get ringworm from cats and how is it treated?

    Yes—humans can contract ringworm from cats via direct contact or contaminated items. Human treatment is usually topical antifungal creams; doctors may prescribe oral antifungals for widespread or persistent infections.

    How long should I quarantine a cat with ringworm?

    Quarantine typically continues until two consecutive negative fungal cultures taken 2–4 weeks apart, commonly totaling 4–6+ weeks. Follow your veterinarian’s testing and isolation plan.

    What happens if ringworm in a cat goes untreated?

    If untreated, ringworm can spread on the cat, infect other pets and people, cause secondary bacterial infections, and become harder and longer to clear—especially in kittens or immunocompromised cats.

    What do ringworm lesions look like in photos and what should I photograph for the vet?

    Photos typically show circular bald patches with scaly, red borders and broken hairs. Take 3–6 clear, dated photos from multiple angles with a ruler for scale every 7–10 days to help your vet monitor progress.

    Related Articles

  • unbreakable cat toys: what makes them durable

    unbreakable cat toys: what makes them durable

    Most so-called "unbreakable" cat toys are marketing hype. Ever watched your cat shred one in five minutes, stuffing and fuzz flying everywhere?

    Real toughness comes down to three things. First, the core material, like TPR (thermoplastic rubber, a grippy, bouncy plastic) that gives the toy shape, bounce, and that satisfying thud when your kitty pounces. Second, a tough outer skin such as ballistic nylon (heavy, puncture-resistant fabric) to stand up to teeth and claws. Third, strong seams and joints, like welded seams or double-stitching, so the stuffing and squeakers stay inside instead of becoming snack time.

    Match those bits to how your cat plays and you get a toy that actually lasts. If your cat chews, go for a solid TPR core and welded seams. If your cat bats and pounces, pick a bouncy core wrapped in ballistic nylon. For mixed players, double-stitching is your friend, honestly, it keeps the toy from turning into confetti. Ever seen your cat launch a toy across the room and it survive? That’s the goal.

    Worth every paw-print.

    unbreakable cat toys: what makes them durable

    - How unbreakable cat toys resist chewing and scratching.jpg

    When shoppers say a toy is "unbreakable," they mean it survives chewing, scratching, and wrestling long enough to cut down replacements and avoid exposing small parts that could hurt your cat. Think less fragile plaything, more long-lasting sidekick. Ever watched your kitty rip a toy in two five minutes after you bought it? Yeah, not fun.

    Durability really comes down to three things. The right material. Strong construction. And a design that matches how your cat plays. Match those and you’re golden.

    • Core material: Look for TPR (thermoplastic rubber, a grippy, bouncey plastic), natural rubber (stretchy and chew-friendly), or hard nylon cores (very tough, like a plastic bone). Check the Materials section for hardness and chew-resistance trade-offs.
    • Fabric or skin strength: Prefer ballistic nylon (a heavy, puncture-resistant fabric), reinforced canvas, or tightly woven synthetic skins. These handle claws and rough rolls better. See Construction and Materials for abrasion data.
    • Seam and joint integrity: Seek welded seams, double-stitching, or bar-tacks (extra-strong stitches at stress points). Those details stop a toy from unraveling mid-wrestle. Refer to Construction for seam tests and examples.
    • One-piece vs replaceable parts: For heavy chewers, sealed one-piece shells keep guts and small parts away from teeth. For multi-cat or high-use homes, modular toys with official replacement parts make sense. The Buying Guide explains when each approach wins.
    • Match-to-playstyle and safety: Pick materials and shapes that fit chewers, wrestlers, or chasers and avoid small detachable bits that could come off. See Testing and Maintenance/Repair to learn how to evaluate and keep toys safe.

    Pick TPR or natural rubber for aggressive chewers. They take bites and bounce back, so you get longer play sessions and fewer shredded surprises. For wrestlers, go with ballistic nylon plus reinforced stitching, those toys survive the tumble and the satisfying thud of a kitty body hitting the floor. Kittens need softer silicone (a gentle, rubbery material) or soft rubber so their teeth don’t get hurt. Chasers want light, catchable lures that flutter and dart. Multi-cat homes do best with rugged toys that let you swap in replacement parts.

    Want side-by-side comparisons, test methods, and repair tips? Check the Materials, Construction, Buying Guide, How durability is tested, and Maintenance/Repair sections below to match puncture-resistant toys and chew-resistant materials to your cat. Worth every paw-print.

    Materials comparison for durable unbreakable cat toys

    - Materials comparison for durable unbreakable cat toys.jpg

    Material choice is the biggest factor in how long a toy survives teeth and claws. When you compare materials for durable cat toys, you’re really weighing puncture resistance, flex-fatigue (how a material bends and bounces back), and how easy it is to clean. Those three things decide if a toy lasts a few months or a few years. Picture your cat’s whiskers twitching as a toy keeps on going after yet another pounce.

    Material Typical Use Durability Traits (puncture/abrasion) Cleaning & Care Typical Lifespan Notes
    Thermoplastic Rubber (TPR) (a bouncy, rubber-like polymer) Chew toys, balls Tough against bites. Bouncy and returns shape. Handles repeated bending well. Soap and water. Air dry. Months to years, depending on how hard your chewer is.
    Silicone (soft, flexible medical-grade polymer) Kitten-safe toys, teething rings Soft and stretchy; low puncture risk for kittens. Sharp chewers can slice it. Usually dishwasher-safe (top rack). Months to years. Great for teething and gentle play.
    Natural Rubber (sap-based stretchy material) Durable chewables, treat dispensers Stretchy and tough. Resists puncture better than cheap plastics. Soap and water. Avoid prolonged sun exposure. Months to years; holds up well to biting.
    Ballistic Nylon / Reinforced Canvas (tightly woven tough fabric) Wrestle toys, tug toys High abrasion resistance. Stands up to wrestling and claws. Spot clean or hand wash. Hang dry. Years for most wrestlers.
    Reinforced Plush / Cotton Twill (soft fabric with extra stitching) Cuddly wrestle toys Soft and snuggly. Reinforced seams reduce tearing and unraveling. Warm water, mild detergent. Air dry. Months to years if seams hold.
    Sisal (natural plant fiber for scratching) Scratch posts, textured toys Fantastic for claws. Fibers will fray with heavy use. Brush or vacuum. Replace when frayed. Months to years based on how much scratching happens.
    Nylon Rope (man-made nylon fibers twisted into rope) Tug lines, reinforced tails Sturdy and resists fraying. Can be heavy for small kittens. Hand wash. Air dry. Months to years; strong chewers shorten life.
    Hard Plastic (ABS / Polycarbonate) (strong rigid plastics) Track toys, rigid cores Very tough and rigid. Can last years but watch for chips that make sharp edges. Wipe with damp cloth. Keep dry if electronics are involved. Years, but inspect regularly for cracks or sharp bits.

    Match materials to your cat’s habits. Aggressive chewers usually do best with TPR or hard nylon cores because they resist bite forces and stay intact. Wrestlers need ballistic nylon or reinforced canvas with solid stitching so seams don’t give out mid-tumble. Kittens love silicone, soft on their teeth and easy to clean in the dishwasher. Multi-cat homes benefit from nylon-reinforced construction and abrasion-resistant fabrics so toys survive lots of play and frequent washing.

    Keep an eye on cleaning needs and on safety. Replace anything with sharp chips or torn seams. Ever watched your kitty shred a plush in seconds? Oops, yes, that happens. Pick materials that balance puncture resistance with tooth safety for your cat’s profile, and you’ll get more playtime and fewer tossed toys, claw-tastic.

    unbreakable cat toys: what makes them durable

    - Construction features that extend lifespan of unbreakable cat toys.jpg

    Durability starts at the seams. The best toys use reinforced stitching , double rows, bar-tacks (tiny blocks of dense stitches) at stress points, and folded hems (fabric folded over so threads don’t catch a claw). Those simple fixes keep seams from splitting when a paw or tooth tugs.

    For rubber and plastic bits, pick welded seams (edges heat-joined or molded together) not glued lines that peel. Welded or molded joins mean fewer gaps for teeth to pry. So when your cat launches a three-am leap, the toy is more likely to survive the satisfying thunk of impact.

    What’s inside matters as much as the outside. Solid-core designs (one single molded core) remove weak join points chewers love, while modular toys (parts you can swap) let you replace lures or batteries without tossing the whole thing. Brands also add weighted or low-slip bases (rubbery bottoms that stop sliding) and multi-track layouts so impact spreads across parts instead of beating up one corner.

    Seamless chew toys (one-piece shells) are great for serious biters. But modular systems win for long-term value , keep the tough outer shell and just swap the worn bits. Oops, I mean, that’s saved me a few toys when Luna decided a mouse needed remodeling.

    Know the usual failure spots and how smart design fixes them. Embedded squeakers and battery packs die fast if exposed, so look for sealed cavities (sealed pockets keeping innards dry) or user-replaceable modules. Tails and feathers shred quickly; reinforced tails and appendages with extra stitching or nylon-reinforced cores (nylon is a tough synthetic fiber) slow the damage. And choose no-small-parts safety designs , lobster-style clasps (spring-loaded metal hooks) or sewn-on lures instead of pins , so there’s nothing easy for a mouth to pry off.

    Worth every paw-print.

    How durability is tested for unbreakable cat toys

    - How durability is tested for unbreakable cat toys.jpg

    Labs like hard numbers. They run a bunch of standard tests to tell you how tough a toy really is. Puncture tests (measuring the force to pierce a material) check whether claws or teeth will poke through. Flex-fatigue testing (repeated bending cycles to see when cracks form) looks for parts that get brittle after lots of play. Abrasion tests for fabrics (simulating claws rubbing) show how the surface holds up. Cyclic loading or pull tests for seams and attachments test repeated tugs on the same spot. Rubber pieces get a Shore A rating (a scale that tells how soft or hard a rubber is), which helps predict chew and puncture resistance. Impact and tensile tests (drops and how much pulling force before something breaks) check plastics and welded joins.

    Real-world protocols try to copy actual cat chaos. Reviewers do timed play sessions , think 50 to 200 hours, or hundreds to thousands of repeated strikes and pulls. They run multi-cat stress tests and aggressive-chewer simulations that bite and tug the same spot over and over. Shelters or dedicated testers may log cycles (how many tugs until a seam fails) or hours of continuous motion for electronic toys. Ever watched your kitty chase a wand until its whiskers twitch? The Pet Fit for Life wand, for example, was put through many hours of play to see if the wand joint would wear out or separate under stress. It’s very hands-on.

    When you read product claims, look for specifics, not fluff. Good signs: named test types, numeric results (cycles, pounds of force, Shore A value), and independent lab or third-party durability certifications. Vague phrases like built to last without numbers mean little. If a page lists test methods, compare those methods to real-world metrics , hours, pulls, or the kinds of tugs your cat actually does , and check whether the company describes likely failure modes and replaceable parts so you know what fails and how easy it is to repair or swap out.

    Worth every paw-print.

    Safety standards and non-toxic choices in durable cat toys

    - Safety standards and non-toxic choices in durable cat toys.jpg

    Start by choosing toys labeled non-toxic, BPA-free, and phthalate-free. Look for food-grade silicone (soft, flexible polymer that’s safe for teething) or natural rubber (sap-based stretchy material). If the spec sheet says "polymer," that just means a plastic-like chain material, ask what kind. Third-party test marks or references to standards like CPSIA (US safety rules for kids' products) or ASTM (an independent testing group) are a good sign. Vague claims like "built to last" without test details should make you ask questions.

    Good safety design means no small parts that can come off and a secure attachment for anything your cat can chew. For electronic toys, pick ones with screw-closed battery doors or tamper-resistant panels and an automatic shutoff timer to prevent overheating. (Some products, like PetSafe Bolt, use a 15-minute auto-off as an example.) Squeakers should be fully encased or left out, and one-piece or sealed shells keep guts away from teeth.

    Replaceable lures and strong metal clasps win over glued-on bits every time. Look for lobster-style clasps (heavy metal spring clips) or welded rings instead of glued loops. Avoid toys with exposed staples, loose glued-on eyes, unsealed seams, visible stuffing, frayed strings, or thin telescoping joints that can collapse. Small parts and weak joins are the usual culprits when toys fail.

    When you shop, zoom in on photos and read the description like a detective. If pictures don't show the battery compartment or close-up seams, ask the seller for more shots. For kittens, pick soft silicone chew toys and skip anything with heavy hardware. Your cat will thank you with purrs and fewer vet visits.

    Quick durability recap

    - Types of unbreakable cat toys and durability trade-offs.jpg

    Durability boils down to three things: material, construction, and how you care for the toy. Materials (like fabric, polymer (a plastic-like material), or fiberglass (like a strong fishing-rod core)) decide how a toy stands up to bites and rubbing. Construction , seams, bonds, and attachment points , is what keeps parts from coming apart. See the Materials, Construction, Testing, and Maintenance sections for the full details.

    Different toy types trade one strength for another. Chew toys aim for puncture resistance (how well a surface resists pokes and teeth) and toughness. Plush toys rely on smart seam design and stuffing-access control so fluff doesn’t explode across the living room. Wand toys balance wand rigidity with line strength so motion feels natural. Interactive toys add moving parts or electronics that need their own tests and care.

    Testing looks at bite, tug, abrasion, seam, and moving-part cycles so you know what fails first. We simulate real play with repeated-use cycles; moving parts and electronics get extra focus to show wear patterns. Read the Testing section for methods and pass/fail thresholds and details on how we recreate real play.

    Match the toy to your cat’s play style and pick toys with replaceable parts or simple mechanics for longer life in multi-cat homes. For busy days, favor something you can swap a part on instead of tossing the whole toy. Small tip: Swap a worn lure before the whole toy quits.

    Worth every paw-print.

    Maintenance, repair, and prolonging life of unbreakable cat toys

    - Maintenance, repair, and prolonging life of unbreakable cat toys.jpg

    Start with a simple habit: a quick weekly check for loose threads, exposed stuffing, frayed lines, or parts that look like they might fall off. Once a month do a deeper look at seams (where two pieces of fabric are sewn together) and clasps (the little fasteners). Catching problems early means fewer shredded toys later. Ever watched your cat pounce on a toy and think, uh-oh, that won’t last? Yep, that.

    Cleaning is easier than it sounds. Fabric toys: wash in warm water with mild detergent and air dry. Rubber toys? Soap and water do the trick. Silicone (flexible, heat-resistant, rubber-like plastic) usually survives the top-rack dishwasher on a gentle cycle. Electronic toys should be wiped with a damp cloth, have batteries removed, and be kept dry. Toss or repair anything that shows stuffing or sharp edges, safety first.

    When a toy rips, you’ve got options. Reinforce seams with a double stitch or a bar-tack (a short, tight stitch used to strengthen a spot). Patch holes with fabric glue (quick-setting adhesive safe for cloth) or swap in replacement lures and tails. For teaser wands, replace the line or lure instead of chucking the whole wand, see DIY replacement attachments for teaser wands for step-by-step tips on making safe connectors and clasps. And a quick safety note: skip glued-on buttons or tiny bits, and use non-toxic materials for any repair.

    Little habits make toys last way longer. Rotate toys weekly so no single item gets chewed to dust. Store favorites out of reach between play sessions so they dry and reset their scent, your cat will love the novelty. Buy spare packs when a toy uses replaceable parts, and keep a backup lure or ball ready; swapping parts saves money and keeps your kitty guessing, which means more play and fewer shredded casualties.

    Bonus tip: for busy days, toss an unbreakable ball before you head out, ten minutes of safe play buys you a breather. Worth every paw-print.

    Buying guide: selecting truly durable unbreakable cat toys

    - Buying guide selecting truly durable unbreakable cat toys.jpg

    Start by checking the materials listed. Look for TPR (thermoplastic rubber, a flexible durable polymer), natural rubber (rubber from trees that stays stretchy), or ballistic nylon (heavy woven fabric used for tough gear). If the spec sheet says "TPR" or "ballistic nylon," that’s a good sign. Ever watched a ball bounce and your cat go nuts? That’s the feeling we want.

    Zoom in on product photos for the seams. Good toys show welded seams or bar-tacks (short reinforced stitches). A close-up that reads "welded seam" or shows neat bar-tacks tells you it was made to last. Soft, floppy stitching? Pass.

    Prefer sealed one-piece cores or toys that offer official replacement parts. A "sealed core" means fewer bits for teeth to work on. Modular toys can be great too, as long as the maker sells replacement lures or parts ("maker-sold lure"). Keeps things simple when your tiger gets extra playful.

    Ask for numbers when a seller claims "durable." Demand test data or a Shore A rating (Shore A is a hardness scale for rubber). Example: "Shore A 60." If they won’t show a number, be skeptical.

    Check warranty and replaceable-lure policy before you buy. Look for clear notes like "30-day warranty; replaceable lures." That tells you the company stands behind the toy.

    Do a quick review scan. Search buyer photos and reviews for failure phrases like "rope frayed," "battery not replaceable," or "lure tore." Give extra weight to reports from multi-cat homes or heavy-chewers. Those situations expose weak points fast.

    Who should use what? Here’s a simple guide:

    • Aggressive chewers: one-piece TPR or natural rubber cores. Tough and hard to shred.
    • Wrestlers: ballistic nylon (heavy woven fabric) with bar-tacks (reinforced stitches). Built for rough play.
    • Kittens: soft silicone or gentle rubber. Teething-friendly and kind to gums.
    • Interactive chasers: rigid wands with woven lines and secure clasps. Think fishing rod for cats.
    • Multi-cat homes: commercial-grade materials and modular parts you can swap during a play session.

    Maintenance and repairs matter. Brand examples and cost-of-ownership notes live in the Maintenance/Repair callout. See Materials, Construction, Testing, and Maintenance for deeper explanations. Oops, let me rephrase that, check those sections if you want brand names and repair tips.

    Worth every paw-print.

    Final Words

    We defined "unbreakable" as a toy that stands up to chewing, scratching, and wrestling long enough to cut replacement and keep small parts out of reach.

    Main takeaway: durability comes from the right material, robust construction, and a match between design and your cat’s play style.

    Use the checklist to choose cores like TPR (thermoplastic rubber), soft silicone (kitten-safe flexible material), or ballistic nylon (heavy-duty woven fabric). Read the Testing and Maintenance sections and you’ll know why unbreakable cat toys: what makes them durable matters for busy multi-cat homes. Your cats will repay you with zooms and purrs.

    FAQ

    Frequently Asked Questions

    What makes unbreakable cat toys durable?

    The durability comes from tough core materials, strong outer skins, reinforced seams, one-piece or replaceable designs, and matching the toy’s form to your cat’s play style.

    What material is best for cat toys?

    It depends on play style: TPR (thermoplastic rubber) is tough and bouncy; natural rubber is flexible and chew-resistant; ballistic nylon suits wrestlers; silicone is soft and good for kittens.

    What cat wand toy won’t break?

    A durable wand has a rigid polycarbonate shaft, a woven nylon line, reinforced joints, and replaceable lures so you swap the lure instead of the whole wand.

    Why does my cat break every toy?

    Your cat may break toys when their bite force or rough play outmatches the toy’s material or construction; choose chew-rated cores, double-stitched seams, or rotate toys to reduce continuous wear.

    What toys are good for cats who play rough?

    Good options are one-piece TPR or hard nylon chews, ballistic nylon wrestle toys, weighted track balls, and sealed treat dispensers.

    What are the best toys for destructive cats or aggressive chewers?

    Best picks include sealed rubber or hard nylon chew toys, commercial-grade ballistic nylon plush with reinforced seams, modular toys with official replacement parts, and heavy-duty puzzle feeders.

    Are KONG, Yeowww, and Jackson Galaxy toys durable?

    KONG often uses durable rubber chews; Yeowww makes dense catnip-filled plush (strong scent but may not suit heavy chewers); Jackson Galaxy products vary by model—check materials and user durability reports.

    How do I pick unbreakable cat toys on Amazon?

    On Amazon, look for clear material callouts, reinforced seams or welded joints, one-piece or replaceable parts, specific test claims, and user reviews that mention hours of play and failure modes.

    Related Articles