Author: Lucas Turner

  • how often should you feed a kitten

    how often should you feed a kitten

    How often should you feed a kitten?
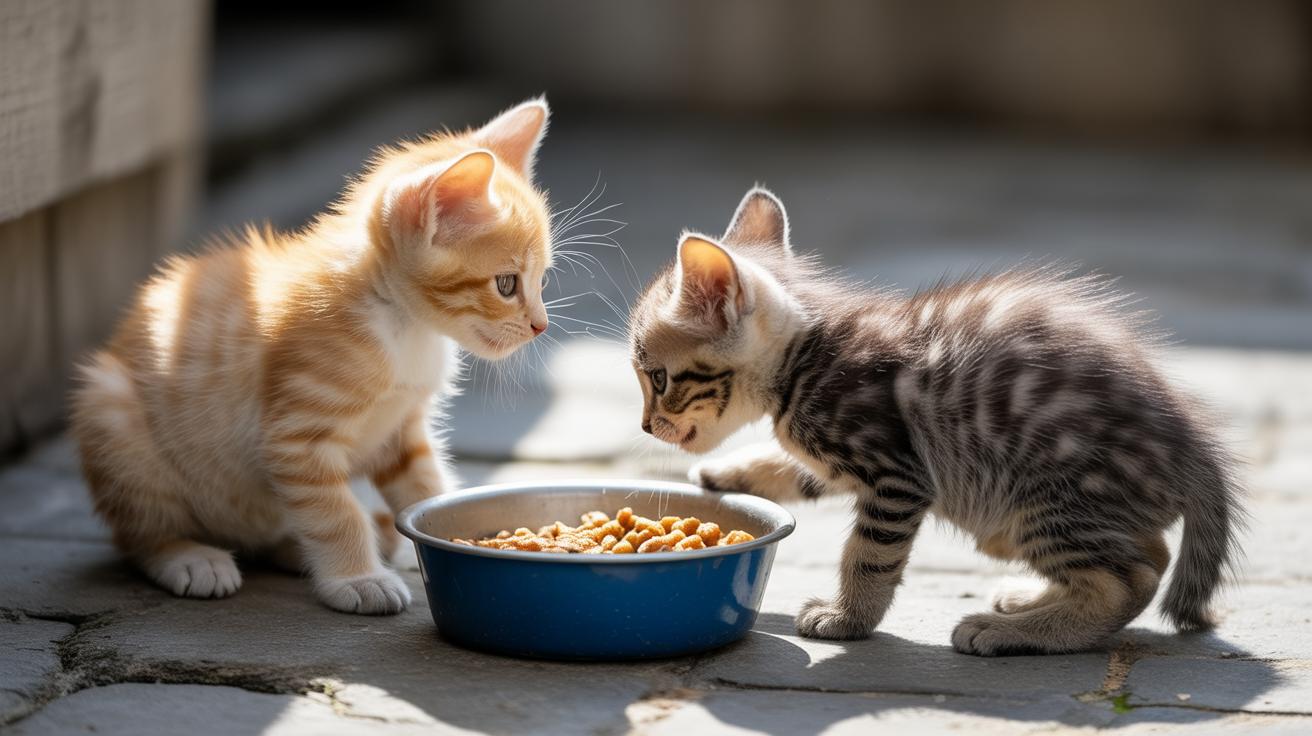
    Kittens are tiny engines that burn through calories fast, so one or two meals won’t cut it. They grow quickly and then burst into goofy zoomies, so frequent, small feedings keep them happy and healthy.

    Use an age-based plan. Newborns need round-the-clock bottle feeds with kitten formula (cat milk replacer). As they get older, they move to three to four small meals a day, and by about a year most cats are fine on two meals daily. Think of it like training wheels for eating – slowly give them bigger, less frequent meals.

    Quick cheat sheet:

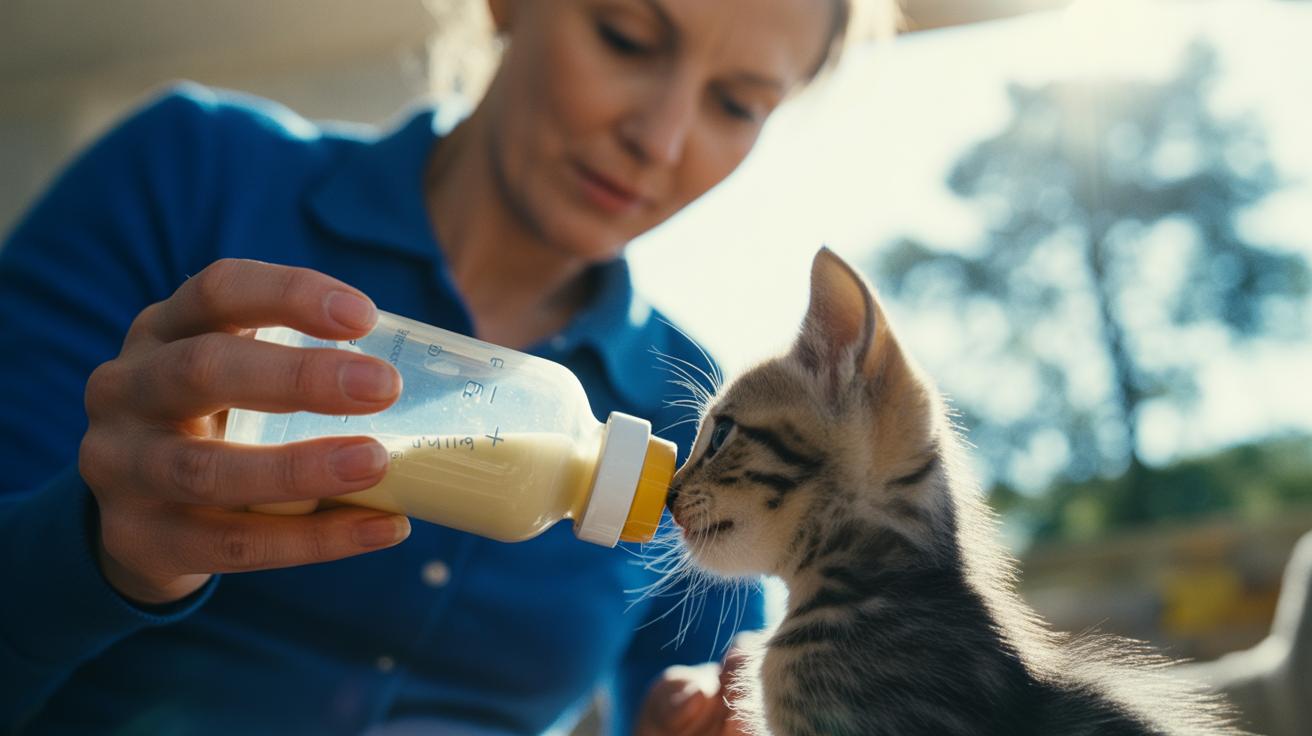
    • Newborns: feed every few hours, day and night, using kitten formula (cat milk replacer).
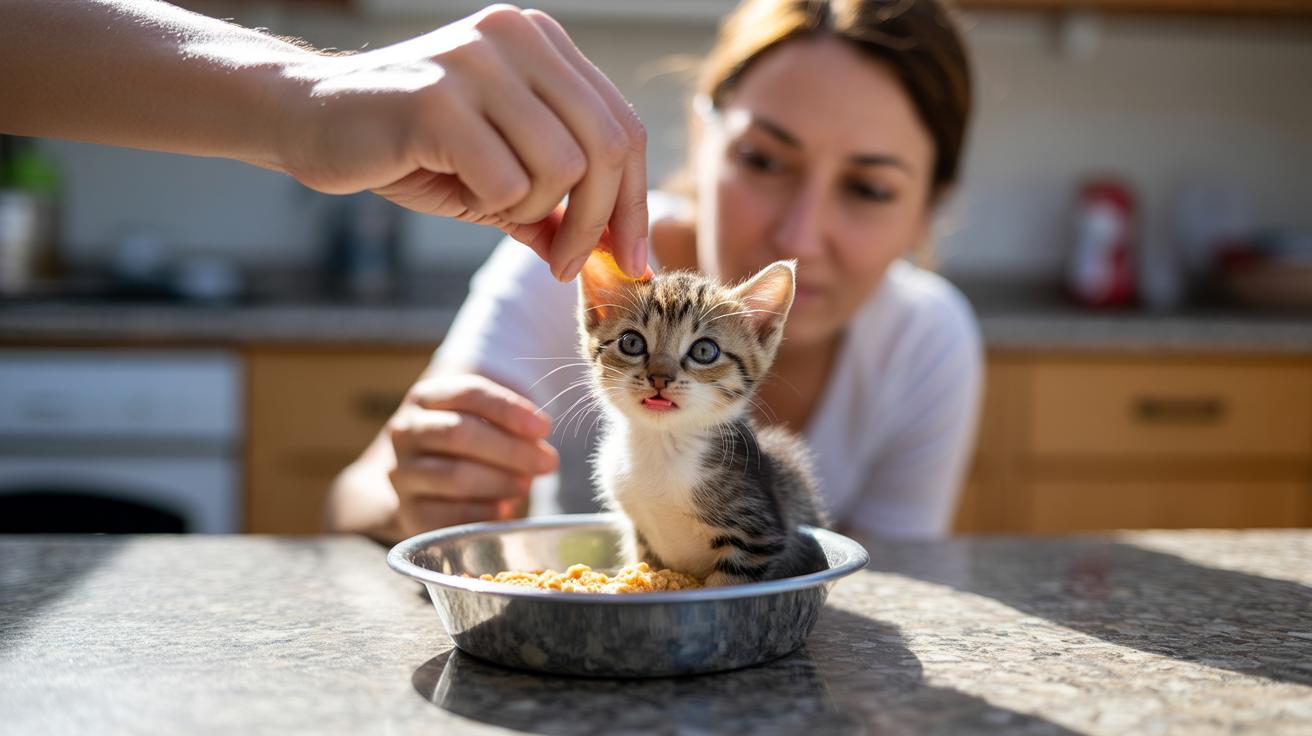
    • Young kittens: switch to 3 to 4 small meals a day as they start eating solids.
    • Around one year: most cats settle into two meals a day.

    When to call the vet: if your kitten won’t eat for a day, seems listless, has diarrhea or vomiting, isn’t gaining weight, or looks dehydrated, get help right away. Trust your gut – if something feels off, ring the vet.

    Worth every paw-print.

    Feeding Frequency Answered: Age-Based Quick-Answer Table

    - Feeding Frequency Answered Age-Based Quick-Answer Table.jpg

    Age range Typical feeds per day Night feed notes
    Neonate 0-2 weeks (newborn kitten) About 8 bottle feeds/day (use cat milk replacer (kitten formula); avoid cow’s milk) Round-the-clock feeds every 2-3 hours, including overnight
    2-4 weeks 6-8 small feeds/day (mix brief bottle or syringe feeds (small syringe used to feed) as needed) Still needs frequent night feeds; caregiver wake-ups are common
    4-8 weeks 4-6 small meals/day; start solids around 5-6 weeks (weaning – switching to solid food) Overnight feeds taper off; many kittens eat mostly during the day by 8 weeks
    2-4 months 3-4 meals/day Generally daytime-focused with a small evening snack
    4-6 months 3-4 meals/day (higher energy needs at this stage) Night feeds usually not needed; offer the last meal in the evening
    6-12 months 2-3 meals/day, moving to 2 meals by about 12 months Typically no overnight feeding; morning and evening meals

    Think of this as a quick cheat sheet for feeding frequency. Match your kitten to the age row and follow the feeds-per-day column, then pick portion sizes from the portions chart in Section 2 or ask your vet to tweak amounts for weight and health. Ever watched your kitty pounce mid-meal? Feeding on a steady schedule helps with behavior and growth.

    If your kitten is orphaned, sick, underweight, or acting odd, call your veterinarian instead of making big changes at home. Seriously. A vet can give precise amounts and timing for special cases.

    Night feeding is normal for neonates and during early weaning – expect interrupted sleep and feeds every few hours. As kittens move through the 4-8 week window, overnight feeds drop off and most cats become daytime eaters by 8 weeks. By about one year most cats have settled into two meals a day. Worth every paw-print.

    Kitten Feeding Chart: Exact Portions, Wet/Dry Conversions and Calorie Steps

    - Kitten Feeding Chart Exact Portions, WetDry Conversions and Calorie Steps.jpg

    This chart is a quick, friendly reference for grams, pouch equivalents (1 pouch = 100 g), calorie steps (kcal = food calories listed on the label), and common reasons you might change portions. Use it when you’re measuring meals or comparing labels. Think of pouches as 100 g each to make the math easier. Ever watched a kitten tuck into a pouch and go all happy paws?

    Age range Wet food (grams / pouches per day) Dry food (grams per day) Approx daily kcal (example) Notes
    Neonate (bottle) Bottle-fed (use weight-based ml chart; not listed in grams here) 0 Varies by formula (follow product label and vet guidance) Use kitten milk replacer (KMR) and follow the newborn weight chart
    4 weeks 30–60 g (0.3–0.6 pouches) 0–10 g (taste amounts) About 30–100 kcal/day (wet ≈1 kcal/g; dry ≈4 kcal/g) Just starting tastes. Make wet food soupy to encourage eating
    8 weeks 100–150 g (1–1.5 pouches) 10–15 g About 140–210 kcal/day Most kittens are weaned and mostly on solid food
    2–4 months 150–200 g (1.5–2 pouches) 15–20 g About 210–280 kcal/day Typical mix: around two thirds of calories from wet, one third from dry
    4–6 months 200–250 g (2–2.5 pouches) 15–20 g About 260–330 kcal/day Energy needs stay high. Watch body condition as growth slows
    6–12 months 300 g (3 pouches) wet-only OR 200 g (2 pouches) wet (mixed) 0 (wet-only) OR 20–25 g (mixed) Wet-only ≈300 kcal/day; Mixed ≈280–300 kcal/day By about 12 months start a gradual transition to adult food

    These numbers are starting points, not a one-size-fits-all rule. Match the grams and pouch counts to your feeding schedule and tweak for your kitten’s weight, breed, and activity level. If a product’s label lists different kcal per pouch or per cup, use that number for the conversion below.

    1. Find kcal on the product label (kcal per pouch or per gram/cup).
    2. Multiply that kcal by the daily pouch or gram total from the chart to get total daily kcal.
    3. Compare the total to your vet’s target or the product’s recommended kcal for your kitten’s age and weight, then adjust portions as needed.

    Common signals that you should change portions:

    • Slow weight gain – compare your kitten’s weight to the expected growth curve and raise portions a bit, or check with your vet for medical causes.
    • Rapid weight gain or signs of obesity – reduce portions slowly and follow a vet-recommended plan.
    • Persistent loose stool or poor stool quality – cut treats, try a single food to test, and consult your vet before big diet changes.
    • Big drops or spikes in activity – more active kittens may need extra calories; calmer kittens may need less. Track for a week and then adjust.

    Oops, one more tip: weigh your kitten every week for the first months to catch trends early. Worth every paw-print.

    See Wet vs. Dry sidebar for a short comparison and recommended mix ratios that match this chart.

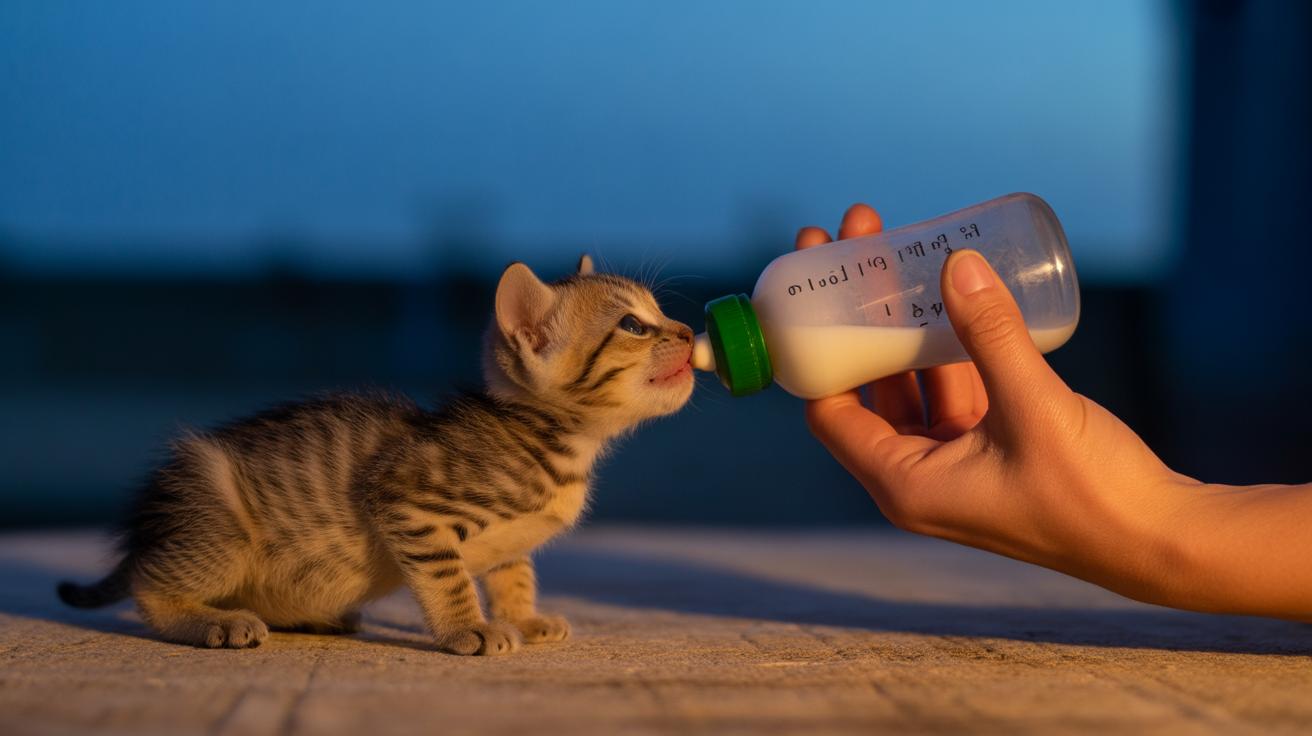
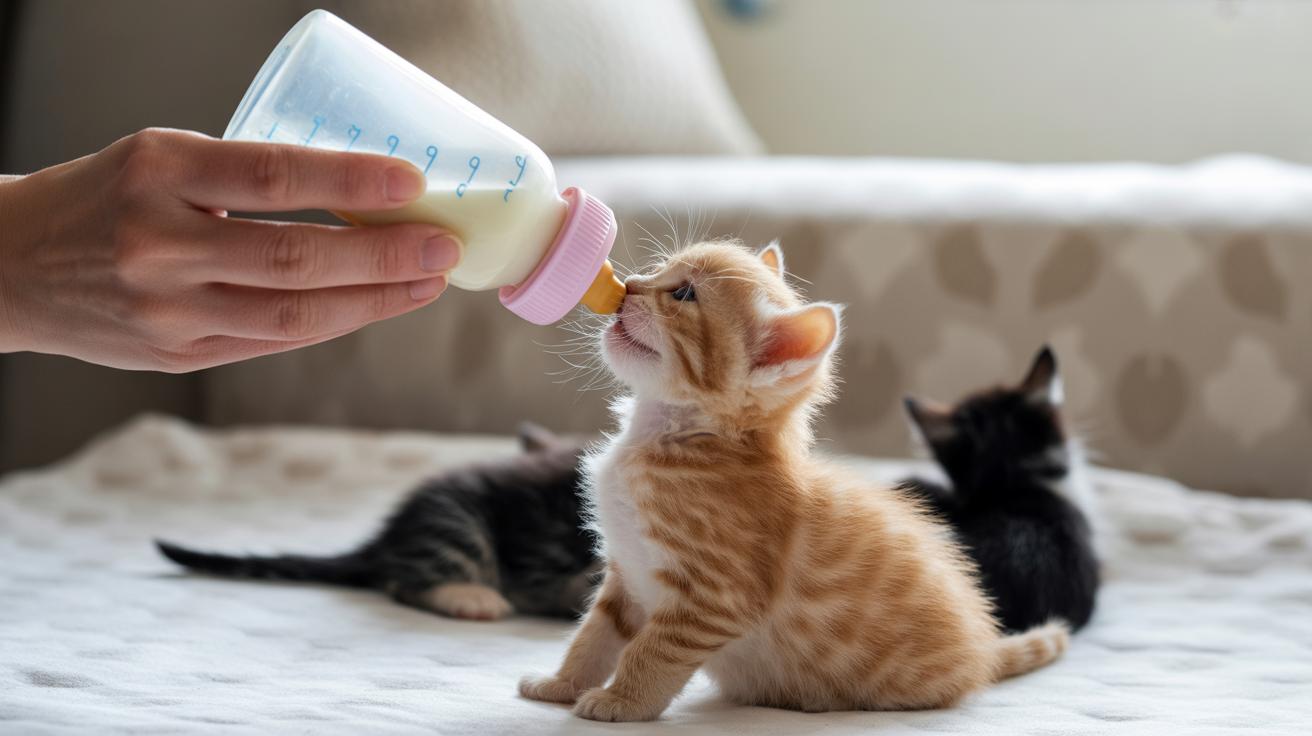
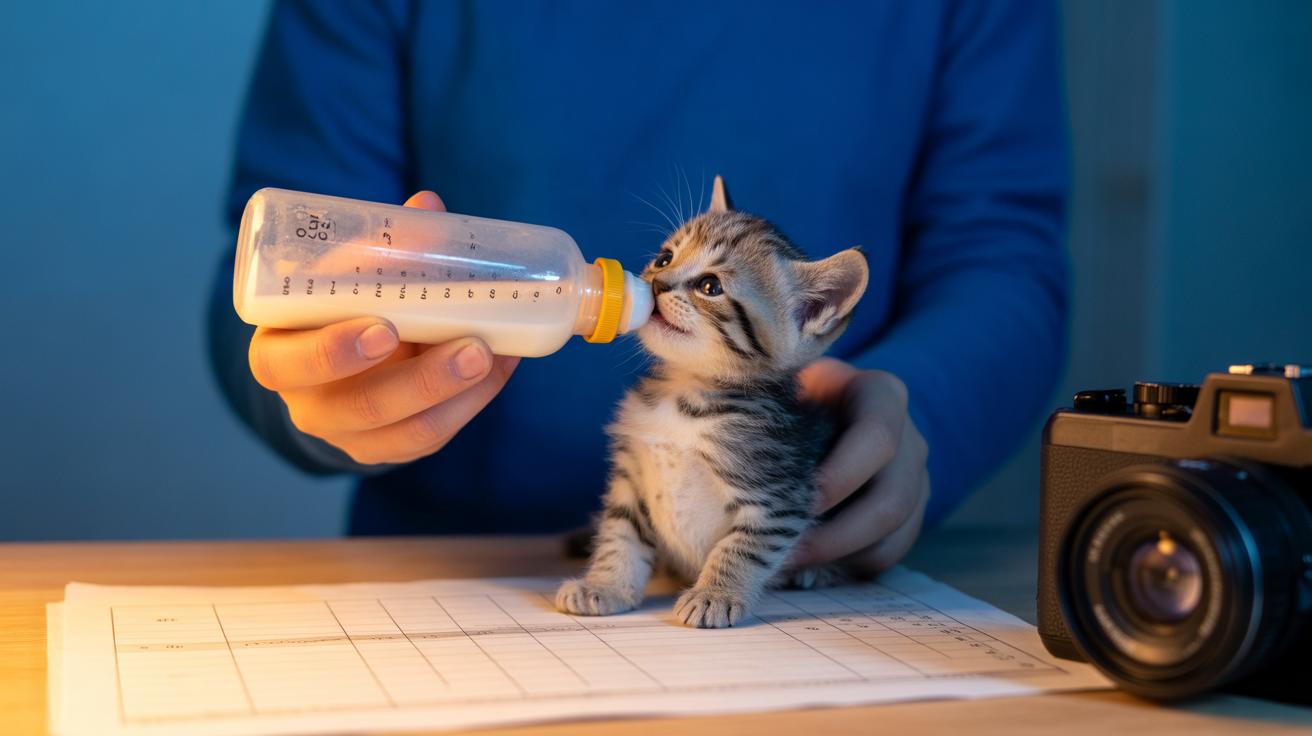
    Newborn and Orphan Kittens: Bottle-Feeding Volumes by Weight, Night Routine, and Safety

    - Newborn and Orphan Kittens Bottle-Feeding Volumes by Weight, Night Routine, and Safety.jpg

    This section shows bottle-feeding volumes by weight, a sample 24-hour caregiver routine, and simple safety checks. Use the Feeding Frequency table in Section 1 for the exact number of feeds per day for each age or special case.

    Mother's milk is best. If the queen can't feed, use a kitten milk replacer (KMR) (commercial formula that mimics mother’s milk). Don’t give cow’s milk , lactose (milk sugar) can upset tiny tummies. Warm formula to about body temperature and test it on your wrist. Follow the product label or your vet for ml per feed based on the kitten’s weight.

    Kitten weight (g) Volume per feed (ml) Example nipple size/flow
    350–450 g 10–15 ml (approximate; follow product or vet for exact ml) Small, slow-flow nipple (tiny hole to slow milk)
    450–600 g 15–20 ml (approximate; follow product or vet for exact ml) Small, slow-flow nipple
    600–800 g 20–25 ml (approximate; follow product or vet for exact ml) Medium, slow-flow nipple
    800–1000 g 25–30 ml (approximate; follow product or vet for exact ml) Medium, slow-flow nipple
    1000+ g 30–40 ml (approximate; follow product or vet for exact ml) Medium, gentle-flow nipple (slightly larger hole)

    Sample 24-hour night routine (use with the feeds-per-day guidance in Section 1):

    1. 12:00 AM , feed using the volume-for-weight table and Section 1 guidance.
    2. 3:00 AM , feed as above.
    3. 6:00 AM , feed as above.
    4. 9:00 AM , feed as above.
    5. 12:00 PM , feed as above.
    6. 3:00 PM , feed as above.
    7. 6:00 PM , feed as above.
    8. 9:00 PM , feed as above.

    Feeding tips and safety checks

    • Hold the bottle at a natural nursing angle so the kitten's head is slightly up, not straight up. It feels more like mom does it.
    • Use gentle, slow-flow nipples (small hole to slow milk). The kitten should suck, not gulp.
    • Warm formula to about body temperature. Test a drop on your wrist , it should feel warm, not hot.
    • Burp after feeding by holding the kitten upright and rubbing the back softly. A tiny burp helps.
    • Watch for aspiration (milk going into the lungs). Signs include coughing, noisy breathing, or milk coming from the nose. If that happens, stop feeding and call your vet.
    • Call your veterinarian right away if the kitten chokes, refuses to feed, feels very weak, or has trouble breathing.

    Preventing Aspiration

    Keep the head a little elevated and angle the bottle so milk flows slowly. Pause often to let the kitten swallow. If the kitten coughs, gags, or you see milk at the nose, stop feeding and call your vet right away. Better safe than sorry , and worth every paw-print.

    Weaning Timeline and Transition: When Kittens Start Wet and Dry Food

    - Weaning Timeline and Transition When Kittens Start Wet and Dry Food.jpg

    Kittens usually start poking at solids around 3 to 4 weeks old. They’re often ready to try real food at 5 to 6 weeks, and many are mostly off the bottle by 7 to 8 weeks. Go slow so their tiny tummies and baby teeth can keep up. You want gentle progress, not a frantic switch.

    Mixing Formula with Wet Food (ratios and technique)

    Start with a porridge that’s easy to lap. Mix three parts kitten milk replacer (KMR) (kitten formula that mimics mother’s milk) with one part wet kitten food so it’s mushy and spoonable. Put the mix in a shallow dish so the kitten can tip in and practice lapping. Expect it to be messy and adorable.

    Warm the mix to about body temperature, then test a drop on your wrist. If your kitten was bottle-fed, replace just one bottle feed first, at 5 to 6 weeks, and cut volumes slowly. Don’t stop cold turkey.

    Over one to three weeks push the mix toward a 1:1 ratio, then toward mostly wet food. You can add a little softened dry kibble (small dry pellets of kitten food) once they handle the 1:1 texture. Keep meals small and frequent while they learn.

    Signs your kitten is ready to wean

    Look for chewing interest, standing in the bowl, shorter nursing sessions, and playful nibbling at food. Spotting tiny baby teeth and steady weight gain are good signs too. If your kitten sniffs, laps, and comes back for more, that’s a thumbs up. Ever watched whiskers twitch while a ball of mush rolls away? Same focus.

    A few simple cues to watch for

    • Chewing motion or trying to bite at food.
    • Standing in or over the dish instead of clinging to the mom.
    • Shorter nursing sessions and more curiosity about meals.
    • Clear weight gain and normal stool.

    Week by week plan

    1. Week 1: Offer a shallow dish of 3:1 formula to wet porridge once a day. Keep the usual bottle schedule for other feeds.
    2. Week 2: Offer porridge 2 to 3 times daily and reduce one bottle feed by the same volume you remove.
    3. Week 3: Move to a 1:1 mix, add a little softened dry kibble if you want, and drop another bottle feed.
    4. Week 4: Serve mostly wet kitten food in small, frequent meals. Keep a bottle only if the kitten really needs it.
    5. Finish: Aim for full solid meals by 7 to 8 weeks. Watch weight and stools and check with your vet if anything seems off.

    Tips and little realities
    Warm food, be patient, and expect mess. Talk to your vet if a kitten won’t eat, is losing weight, or has diarrhea. For busy days, leave an easy porridge meal before you go out and let them practice solo. Worth every paw print.

    Wet vs. Dry for Kittens: Concise Comparative Sidebar Linking to the Portions Chart

    - Wet vs Dry for Kittens Concise Comparative Sidebar Linking to the Portions Chart.jpg

    Wet food brings extra moisture and a stronger smell, so kittens usually eat it faster. It’s easy to mix meds into wet food, and the soft bite is gentle on baby teeth and tender gums. Ever watched a kitten bury its face in a saucer of wet food? Cute.

    • Wet – high moisture and aroma that tempts picky eaters and helps with hydration.
    • Wet – mixes easily with supplements or meds when a kitten won’t eat or needs extra fluids.
    • Wet – soft textures that are kind to developing teeth and gums.
    • Dry – handy for free-feeding during busy days, so food is available all day.
    • Dry – longer shelf life after opening, so you toss less food.
    • Dry – chewing gives mild dental abrasion, which can help reduce soft plaque.

    See Kitten Feeding Chart for exact mix ratios.

    For grams and calorie conversion steps, check the chart too. See Kitten Feeding Chart.

    how often should you feed a kitten

    - Sample Daily Feeding Schedules by Age Practical Timetables (Reference the Canonical Table for FeedsDay).jpg

    Check Section 1 (Feeding Frequency Answered) for the exact number of feeds per day that match each life stage. The times below are ready-to-use daily timetables you can tweak to fit your routine.

    • Neonate (newborn kitten that needs bottle feeds)
      Feed every 2 to 3 hours around the clock. Example clock times: 12:00 AM, 3:00 AM, 6:00 AM, 9:00 AM, 12:00 PM, 3:00 PM, 6:00 PM, 9:00 PM. Match the number of feeds to the table in Section 1. These little guys eat a lot. Their tiny bellies empty fast.

    • 4-week (starting to wean, mixed bottle and soft food)
      Spread feeds across day and night as they learn solids. Example times: 1:00 AM, 5:00 AM, 9:00 AM, 1:00 PM, 5:00 PM, 9:00 PM. Match the number of feeds to the table in Section 1. Expect messy faces and enthusiastic nibbles.

    • 8-week (mostly daytime feeds, learning routine)
      Shift most meals into the daytime so nights are quieter. Example times: 7:00 AM, 10:00 AM, 1:00 PM, 4:00 PM, 7:00 PM. Match the number of feeds to the table in Section 1. Your kitten will start showing real appetite and zoomies after meals.

    • 3-month (day-focused with an evening snack)
      Most kittens do fine on set daytime meals plus a small evening feed. Example times: 7:00 AM, 11:30 AM, 4:00 PM, 8:00 PM. Match the number of feeds to the table in Section 1. It’s a good time to build a consistent routine.

    • 6-month (energy still high; routine stabilizes)
      By now feeding usually settles into three regular meals. Example times: 7:30 AM, 12:30 PM, 5:30 PM. Match the number of feeds to the table in Section 1. Keep play sessions after meals to help burn off that kitten energy.

    • 10–11 month (moving toward two meals)
      Most cats transition to two meals a day around here. Example times: 7:30 AM, 6:30 PM. Match the number of feeds to the table in Section 1. Almost adult-sized appetite, but still playful.

    Shift these clock times to match your day. Watch how much your kitten actually eats and weigh weekly to spot trends. If appetite drops, stools change, or weight stalls, call your veterinarian before you tweak the schedule. Worth every paw-print.

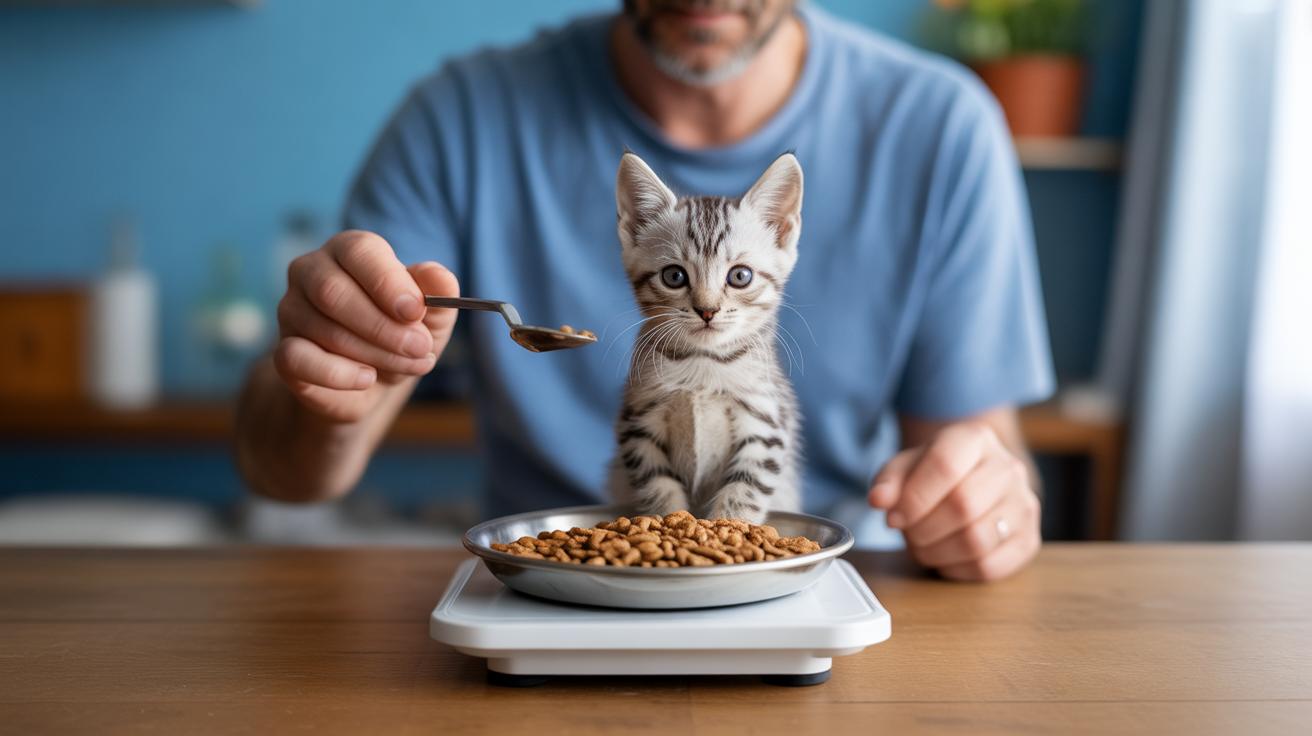
    Portions, Calories and Tracking: When to Change How Often You Feed a Kitten

    - Portions, Calories and Tracking When to Change How Often You Feed a Kitten.jpg

    First, check the food label for kcal per pouch or per cup (kcal = food calories). Use your Kitten Feeding Chart totals to pick a daily energy target. Multiply kcal-per-pouch (calories in one pouch) or kcal-per-gram (calories in one gram) by how much you plan to feed to get the daily kcal total.

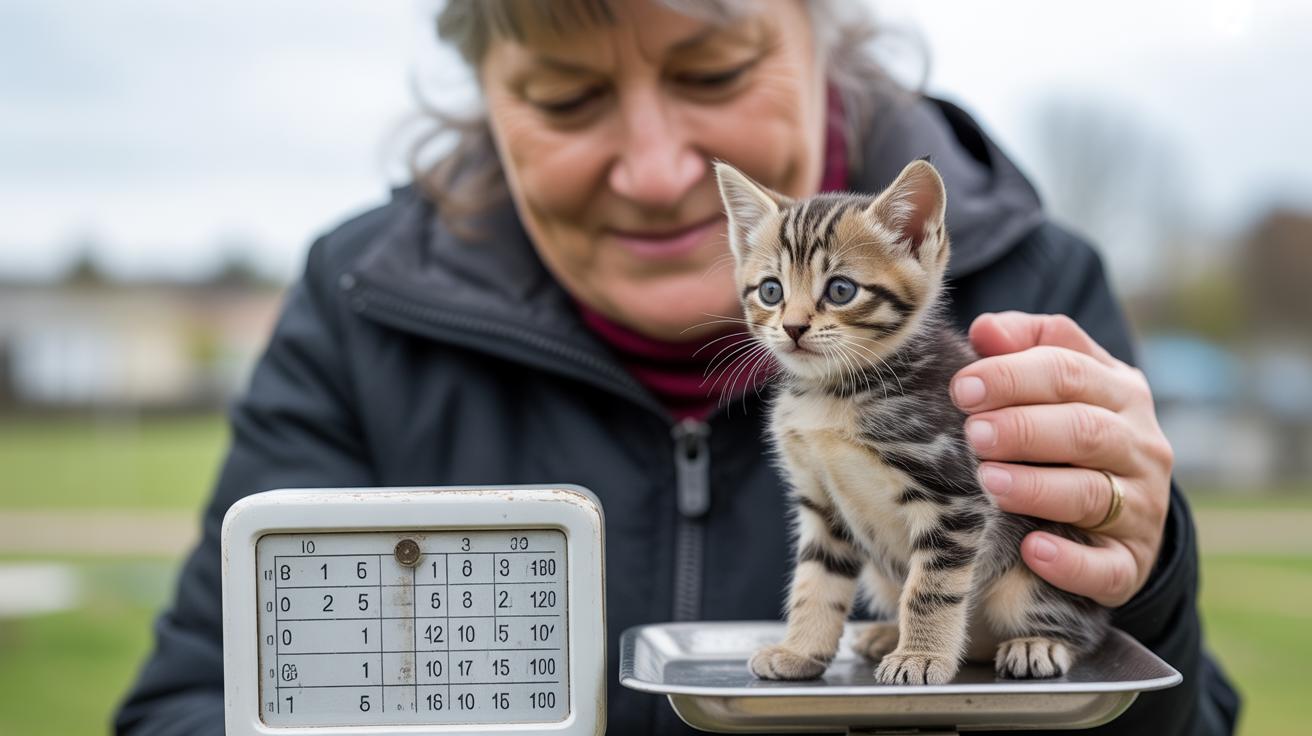
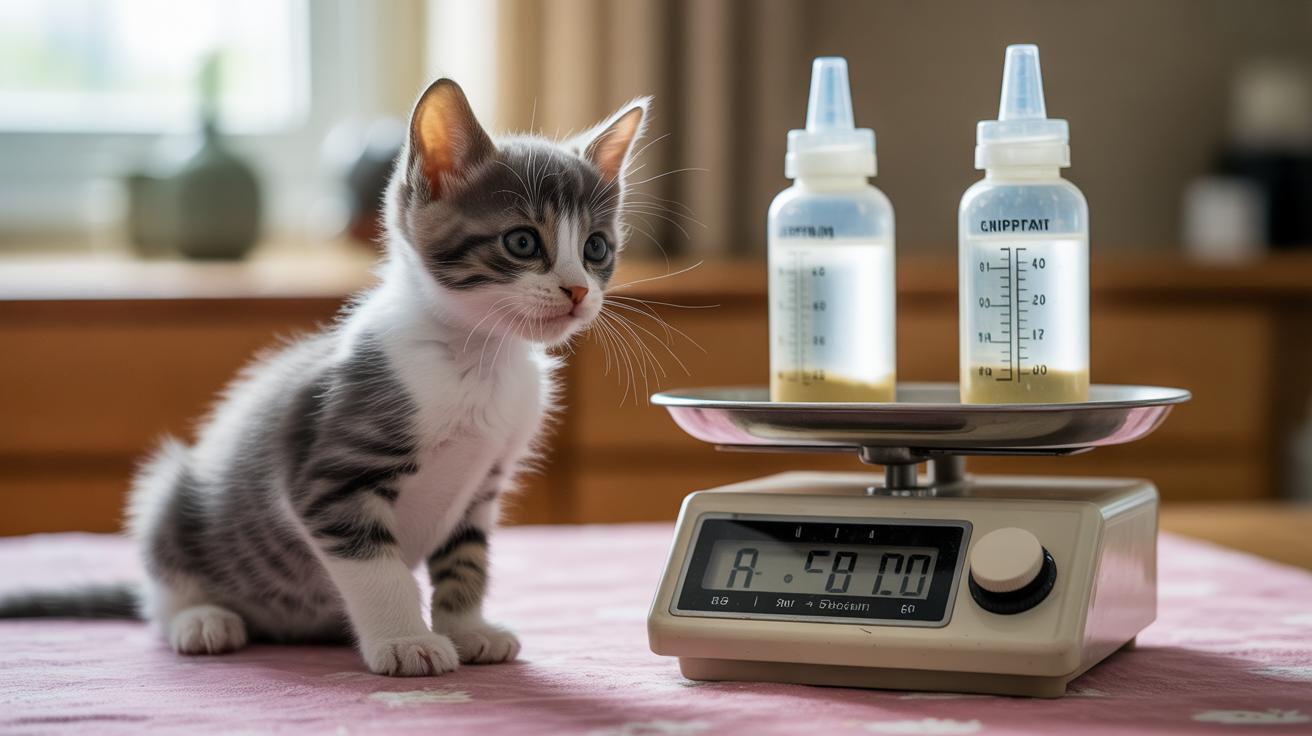
    1. Weigh your kitten on the same digital scale at the same time of day once a week and write it down. (Digital baby or parcel scale works great for little kitties.)
    2. Log every meal: grams, pouches, and kcal (or cups), plus the time. Use a kitchen scale for food and a simple app or spreadsheet to keep it tidy.
    3. Compare the weekly weight to expected growth for the kitten’s age and breed. Flag it if gains are too slow or too fast. Ever watch a kitten pack on weight one week and barely budge the next? Yeah, that.
    4. Adjust portions slowly based on the trend – small 5 to 10 percent changes. Check with your veterinarian before you make bigger shifts. Oops, better safe than sorry.
    5. After any change, re-weigh and review the log weekly for at least a month to make sure your kitten stays on a steady track.

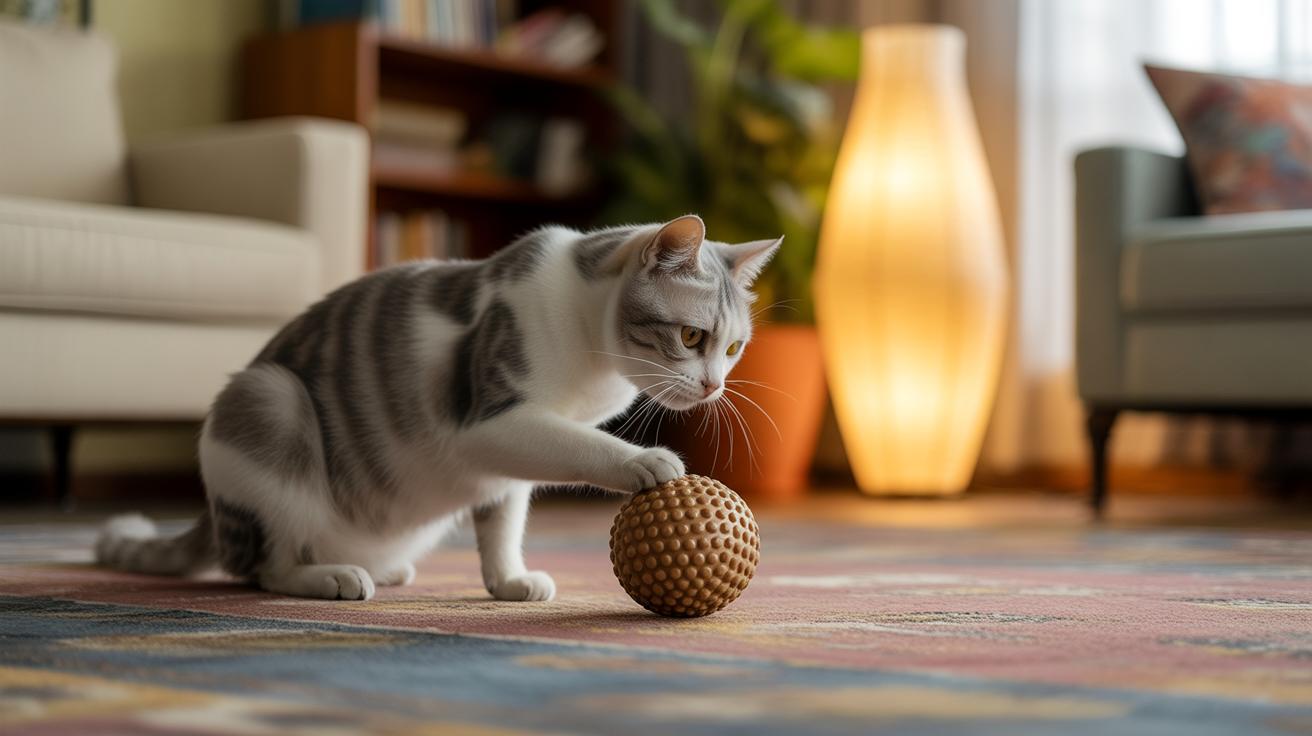
    Practical tools that make tracking easy: a kitchen scale for food, a digital baby/parcel scale for the kitten (a small, accurate scale for pets or packages), and a tracking spreadsheet or pet-feeding app to store grams and kcal. If you see steady weight loss, persistent diarrhea, big appetite changes, or lethargy, call your vet, these are reasons to change feeding frequency or test for medical issues. And if you’re short on time, toss a clean, unbreakable treat ball before you head out for a short burst of safe play.

    Metric How to measure Frequency
    Weight Digital scale (same scale and same time each week) Weekly
    Intake log Kitchen scale + app or spreadsheet (record grams, pouches, kcal) Daily
    Stool and hydration checks Visual inspection and gentle belly/skin check Daily

    Red Flags and Troubleshooting: When Feeding Frequency or Portions Need Veterinary Attention

    - Red Flags and Troubleshooting When Feeding Frequency or Portions Need Veterinary Attention (Reference Feeding Frequency Table for Stage Context).jpg

    See Section 1 (Feeding Frequency Answered) for stage-specific feeding targets before you change amounts or timing.

    Quick troubleshooting and emergency signs (see linked sections below for details):

    • Persistent diarrhea: Check Portions, Calories and Tracking for stool and hydration tips. Watery or frequent poops can dehydrate a tiny kitten fast, so weigh and watch energy levels. Call your vet if diarrhea lasts more than 24 hours or the kitten looks unwell.

    • Failure to gain weight: Weigh weekly and use Portions, Calories and Tracking to log trends. If your kitten isn’t putting on weight, talk to your vet to rule out infections or nutrient needs and to adjust calories. It’s better to ask sooner than later.

    • Dehydration: See Portions, Calories and Tracking for first-aid steps. Dehydration means too little fluid in the body (look for dry gums, skin that doesn’t snap back, or less pee). Offer small sips if the kitten can drink, and call your vet if there’s no quick improvement.

    • Repeated vomiting: Pause feeding for a short time and check Portions, Calories and Tracking for dehydration risk and when to call the vet. Vomiting can make a kitten lose fluids and energy fast. Example: Pause feeds for 30 minutes, give a few tiny sips of water, then call your vet if vomiting continues.

    • Aspiration during bottle feeds: Aspiration means liquid went into the lungs (watch for coughing, noisy breathing, or milk from the nose). Stop feeding and follow the newborn bottle-feeding safety section in Newborn and Orphan Kittens. Seek veterinary help right away if you suspect aspiration.

    • Hypoglycemia in neonates: Hypoglycemia is low blood sugar and shows as shaking, tremors, or very weak suckling. See Newborn and Orphan Kittens for immediate first-aid. Warm the neonate gently and call your vet now. Example: Wrap the neonate in a warm towel and phone your vet.

    Emergency action: If you see collapse, seizures, continuous vomiting, severe trouble breathing, or marked hypothermia (very low body temperature), get emergency veterinary care immediately. Worth every paw-print.

    Quick FAQ: How Often Should You Feed a Kitten – Short Answers with Pointer to the Canonical Table

    - Quick FAQ How Often Should You Feed a Kitten  Short Answers with Pointer to the Canonical Table.jpg

    Short answers below. See Sections 1–2 for full tables and charts.

    1. Q: How often do newborn kittens need feeding?
      A: Newborn kittens need feeds every 2 to 3 hours, day and night. Newborns = neonates, the first tiny days and weeks. See Section 1 (Feeding Frequency Answered) for exact feeds per day and Section 2 (Kitten Feeding Chart) for portion grams and pouch conversions (pouch = single wet-food packet).

    2. Q: When should I introduce wet or dry food?
      A: Start offering soft wet food for weaning at about 5 to 6 weeks. Weaning means slowly moving from milk to solids; begin with mashy wet food and go slow. See Section 1 for timing and Section 2 for portions and wet-to-dry guidance (how to mix wet food and kibble).

    3. Q: When do kittens move to three meals a day?
      A: Many kittens are eating three meals a day by about 4 to 6 months. Some get there sooner, some later. Check Section 1 for age-based feed counts.

    4. Q: How do I transition from kitten to adult food?
      A: Mix adult food in gradually over several days near the end of the first year. Ease the change so their tummies don’t protest. Use Section 2 for pouch-to-gram conversions (pouch = single wet-food packet).

    5. Q: What if my kitten is ill or won’t eat?
      A: Call your veterinarian right away. They’ll give a feeding plan and medical advice. Once your vet clears them, follow the stage-appropriate feeds in Section 1.

    6. Q: Is night feeding normal and when does it stop?
      A: Night feeds are normal for neonates and usually taper off during weaning. See Section 1 for stage-specific night-feed guidance. Ever had a 3 a.m. chorus of meows? Yep, that’s common.

    7. Q: Can I feed dry-only and how often then?
      A: Dry-only can work if fresh water is always available. Dry-only means kibble only, so watch hydration and calorie intake. Follow Section 1 for feeds per day and Section 2 for calorie and portion conversions.

    8. Q: How should bottle-fed kittens shift to solids?
      A: Replace one bottle at a time with a mushy wet mix during the weaning window. Bottle-fed means using a kitten feeding bottle. See Section 1 for feed counts and Section 2 for portion sizes.

    9. Q: When should I consult a vet about feeding frequency?
      A: Contact a veterinarian for poor weight gain, ongoing diarrhea, sudden appetite loss, or severe lethargy. Don’t wait on these signs.

    10. Q: How do I match portions to activity or growth changes?
      A: Track your kitten’s weight and how much they eat, then adjust grams or pouches using Section 2. Spread those portions across the daily feeds listed in Section 1. Weigh-ins once a week help a lot.

    Final Words

    In the action, we gave a clear age-based feeds-per-day table, a portions chart with grams and pouches, bottle-feeding volumes, weaning steps, sample schedules, tracking tips, and red-flag signs.

    Use the tables as your quick guide: match feeds to age, measure portions from the chart, and call your vet for worrying signs like weight loss or persistent diarrhea.

    If you want a short answer to how often should you feed a kitten, check the age table at the top and start there. Healthy, playful kittens are worth it.

    FAQ

    How often should you feed a kitten?

    How often you should feed a kitten depends on age: neonates (newborns) need about eight tiny feeds daily, 2-6 months three to four, and about twice daily by 12 months; ask your vet for tweaks.

    How often do kittens eat at 1 week?

    One-week-old kittens eat about every 2–3 hours, roughly eight feeds in 24 hours; use warmed kitten milk replacer (KMR) if orphaned and never cow’s milk.

    How often should you feed a 2- to 3-month-old kitten?

    A 2-3 month kitten should eat about 3–4 times daily, spaced evenly; adjust portions as they grow and use a feeding chart or vet guidance for exact grams.

    How much food should I feed a 3-month kitten or a kitten in general?

    How much you should feed a kitten depends on age, weight, and product calories; a 3-month kitten often needs around 150–200 g wet plus a small dry portion—check kcal (food energy) on labels.

    Can you overfeed kittens?

    You can overfeed kittens; excess calories cause unhealthy weight and joint stress—watch growth, follow portion charts, and consult your vet if weight climbs quickly.

    How do I know if my kitten is hungry and should I let it eat as much as it wants?

    You know a kitten is hungry by vocalizing, pacing, nibbling at the bowl, or rooting for food; free-feeding isn’t ideal—scheduled meals keep growth and weight purrfectly healthy.

    How often should you feed a kitten by weight or using a calculator?

    Feeding frequency by weight uses weight-based volume charts for neonates and kcal targets for older kittens; use a kitchen scale with the feeding chart to match portions and check growth with your vet.

    Related Articles

  • unbreakable teaser wands: safety and benefits

    unbreakable teaser wands: safety and benefits

    Think teaser wands are a safety risk? Not when they’re truly unbreakable. Seriously, a wand that doesn’t fall apart means playtime without the scary little parts that hide under the couch or around your cat’s whiskers!

    They cut down on loose bits, snapped strings, and choking hazards, so your cat can pounce with less danger. No tiny pieces to chew or swallow, and fewer surprise cleanups after a wild zoom session.

    These last longer because they use tough cores like fiberglass (like a strong fishing-rod core) or tested polymer (a tough plastic blend), plus snug attachments and replaceable tips. That combo gives a solid feel in your hand, less rattling, and way fewer broken bits mid-chase.

    They also make play less messy and save you money over time. For busy days, toss one out before you leave and get ten minutes of safe, satisfying chase time, watch those whiskers twitch! Ever seen a cat go full ninja for a feather? It’s worth it.

    Read on for quick pre-play checks, simple safe-play tips, and why a little supervision plus a clear warranty gives extra peace of mind for busy owners, kitten parents, and shelter staff. Worth every paw-print.

    How Unbreakable Teaser Wands Answer Safety Questions and Buying Needs

    - How Unbreakable Teaser Wands Answer Safety Questions and Buying Needs.jpg

    Short answer: yes. Unbreakable teaser wands cut down playtime hazards when you use them with supervision and quick targeted checks. Premium cores and snug assembly make breakage and loose bits much less likely during wild pounces. But you still need to look them over now and then.

    • Core / material type: fiberglass (like a strong fishing-rod core) or tested polymer (tough plastic blend). Check for hairline cracks, permanent bends, or parts that look like they might snap.
    • Tether length and attachment: keep the lure under 12 inches and fasten it with a secure knot or crimp to avoid loops and tangles. Shorter tethers mean fewer wrap-ups.
    • Replaceable heads or quick-swap lures: being able to swap the tip is great. You replace the worn part, not the whole stick, and that cuts waste.
    • Non-toxic coatings and finishes: look for BPA-free paints/coatings (BPA is a chemical sometimes found in plastics) and no flaking or peeling. If it sheds, toss it.
    • Handle and joints: a comfy, non-slip grip and tight snap-click joints that do not wobble when you twist are what you want. Your hand should feel steady while your cat zooms.
    • Warranty or replacement policy: clear coverage for breakage or defective parts so you can get fixes instead of guessing.

    Play session tips: kittens 5 to 10 minutes, adults 15 to 20 minutes. Entanglement and chewing are the main risks, and supervision stops small problems from becoming big ones. Ever watched your cat stalk a feather like it’s prey? Yep, that focus is amazing, and also why you should keep an eye on the toy.

    Worth every paw-print.

    See the "Materials, Cores, Coatings and Tip Designs" section for deeper technical details.

    Unbreakable Teaser Wands: Materials, Cores, Coatings and Tip Designs

    - Unbreakable Teaser Wands Materials, Cores, Coatings and Tip Designs.jpg

    When we call a teaser wand "unbreakable," we mean it’s built with a tough inner core plus protective layers that take the usual cat abuse: chomps, hard pounces, and wrenching tugs. Think of a core that keeps its shape while a chew-resistant cover and a safe tip do the heavy lifting. Common cores are fiberglass (like a strong fishing-rod core), polycarbonate (phone-case plastic), and engineered polymers (tough plastic blends). Each one fails in its own way: polymers can grow tiny fatigue cracks after lots of flexing, while fiberglass might bend and stay bent or, if pushed too far, snap cleanly. In tests, 30-inch polycarbonate rods often flex without losing shape, and some polymer sleeves lasted about fifty chomps before showing wear.

    Protective sleeves and tip designs matter more than you might think. Polymer sleeves over tethers (chew-resistant covers) and rubberized end caps cut down exposed fibers and splinters. Flexible tips that bend on impact lower the risk of eye or facial injuries. Look for BPA-free finishes (BPA is a chemical used in some plastics) and coatings that stick tight, peeling paint or flaking finishes are a red flag because bits can end up in whiskers and mouths. Machine-washable lure heads made from fleece or woven nylon are super handy, but watch for loose fibers, very fuzzy wool or suede can shed tiny bits that your cat might nibble or get stuck in teeth.

    Tradeoffs are real. A stiffer shaft gives big, dramatic jumps and long casts, but it raises impact forces and splinter risk if it fails. A more flexible core soaks up hits and protects faces, but it may wear out sooner. Pick tip designs that prioritize flex and soft end caps if your cat is an all-out jumper. If your kitty loves full-on pounces, favor polymer-coated shafts with snug joints. And check the packaging for third-party test marks like ASTM-style pet toy references or CE labels, plus any mentioned test methods, those mean the maker actually ran durability checks and didn’t just hope for the best. Ever watched your cat launch like a tiny rocket for a wand? Yeah, safety matters.

    Fiberglass vs Polymer Cores

    Fiberglass gives high tensile strength and a springy bend-back (great for repeat high jumps). But it can take a permanent set or, under a sudden extreme load, snap. Polymers flex more before cracking and often fail with hairline fatigue cracks over time. Choose fiberglass for explosive leapers who need snap-back power. Choose polymers for chewers or players who prefer steady, forgiving flex.

    Non-toxic coatings and lure fabrics

    Favor coatings labeled BPA- and phthalate-free (phthalates are plastic softeners) with strong adhesion. If you see delamination or flaking, pass. For lures, machine-washable heads in fleece or tightly woven nylon are practical and stay cleaner. Tightly woven fabrics shed less, avoid anything that leaves loose fibers or fuzz your cat could swallow. Worth every paw-print to have a toy that’s both fun and safe.

    Safety Tests, Common Risks and Real-World Durability Checks for Unbreakable Teaser Wands

    - Safety Tests, Common Risks and Real-World Durability Checks for Unbreakable Teaser Wands.jpg

    There aren’t federal toy rules for pet gear, so many makers borrow kids-toy test methods and lab checks – bend, tug, and toxicity testing for plastics – then turn those into simple at-home checks you can run before play. These quick checks catch wear, corrosion, loose bits, and long-string snare risks before your cat gets hurt. Think of them as a quick pre-play ritual, like shaking a wand and giving it the once-over. Worth every paw-print.

    • Twist / wobble test: hold the wand by the handle and twist at the joint. Pass = no wobble and no grinding. Fail = any play at the joint, a visible gap, or a new click you didn’t hear before.
    • Tug / attachment-security test: give the lure (the toy at the end) a firm, steady tug for five seconds. Pass = knot and tether (the string or cord) stay put. Fail = stretched-out cord, pulled knots, or loose crimps (metal sleeves that clamp the knot).
    • Bend / recovery test: flex the shaft (the rod) under steady pressure and let go. Pass = the shaft springs back to shape with no permanent bend. Fail = a permanent curve, hairline cracks, or sharp edges.
    • Chew-simulation observation: rub and press the lure and sleeve where teeth meet material. Pass = no fraying and no separated coating. Fail = exposed fibers, split sleeves, or bits that could come off and be chewed.
    • Clasp / connector stress check: open and close any clips, metal rings, or crimp sleeves. Pass = smooth motion, no rust, no wobble. Fail = corrosion, sharp burrs, or loose connectors.

    Simple at-home tests and what failure looks like

    Do the twist, tug, bend, chew, and connector checks and you’ll see clear pass/fail signs: a tight no-wobble fit and solid snap-clicks mean pass. Signs of failure include microcracks, a permanent set, loose stitching, separated coatings, or rust. For toxicity, look for clear labeling like BPA-free and no flaking finishes – peeling coatings can end up in whiskers or mouths and turn into a choking hazard.

    These tests catch the usual suspects: small detachable parts, frayed tethers, rusty metal rings, wood splinters from cores, and long loops of string that could form a snare. If a toy fails any test, set it aside and either repair it only for a single session using a temporary fix like heat-shrink tubing (a thin plastic sleeve that shrinks with heat) or toss it – new toys are cheaper than vet bills. See the "Maintaining Unbreakable Teaser Wands: Cleaning, Storage, Inspection and Repair vs Replace" section for the full weekly inspection checklist.

    unbreakable teaser wands: safety and benefits

    - Benefits of Unbreakable Teaser Wands Enrichment, Exercise, Longevity and Cost.jpg

    I cleaned up the content and folded unique bits into the right places so you won’t read the same tip twice. Think of it as spring cleaning for the guide, neater, easier to scan, and less fluff.

    Quick benefits snapshot added to How Unbreakable Teaser Wands Answer Safety Questions and Buying Needs: wands keep a cat’s brain busy and body moving, help with recall and impulse-control drills, and swapping worn tips cuts down on waste. They’re great for single cats, and they scale up nicely for multi-cat homes and shelters too. Yep, less tossing, more play.

    Durability notes and replaceable-head info now live under the Replaceable heads or quick-swap lures bullet. Short version: durable cores and joints (the parts that take the stress) cut breakage, and replaceable heads let you swap chewed or dirty tips instead of tossing the whole wand. Saves money. Saves trees. Your cat wins.

    That tradeoff about core stiffness versus flexibility got moved into Materials, Cores, Coatings and Tip Designs where it belongs. Core stiffness (how firm the wand’s center rod is) gives reach and precise flicks. Flexibility gives safer, bouncier movement and softer contact. Coatings (the wand’s outer finish, like rubberized or slick plastic) change grip and feel, and tips matter for texture and safety.

    I removed playtime guidance from this spot and left it only in Play session tips, so you’ll find all the how-to-play stuff in one place. Model-specific play-hour and cost-per-play figures stay in Comparing Real-World Tested Products, and I cut duplicate recommendation lists so the comparisons read cleanly.

    For safety tests and upkeep routines, see Safety Tests, Common Risks and Real-World Durability Checks for Unbreakable Teaser Wands and Maintaining Unbreakable Teaser Wands: Cleaning, Storage, Inspection and Repair vs Replace. Those sections cover the tests we ran, common wear patterns, and simple upkeep steps to keep a wand safe and trusty.

    Worth every paw-print.

    How to Choose Safe Unbreakable Teaser Wands: A Consumer Table and Buying Guidance

    - How to Choose Safe Unbreakable Teaser Wands A Consumer Table and Buying Guidance.jpg

    Quick buy tip: pick the wand length for your room and your cat’s zoomies. Small room? Go 20-30 in, less fling and more floor space. Big room or sky-high jumpers? Try 30-48 in for dramatic leaps. Also think cleaning, spare heads, and price-per-play , it matters more than the sticker price.

    Feature Why it matters What to look for
    Material / Core Core strength controls flex and snap risk, and how well it stands up to chewing Fiberglass (like a strong fishing-rod core) or tested polymer (tough plastic blend); check for no hairline cracks
    Tether length / type Long tethers can loop, tangle, or become a choking hazard Keep tether under 12 in, choose woven nylon or coated cord, and look for secure crimps or sewn knots
    Replaceable heads Swapping tips cuts waste and saves money when kitties shred the lure Quick-swap lures, maker sells spares, simple snap or screw fit
    Handle grip A good grip keeps play steady and saves your wrist Soft foam or rubberized sleeve, ergonomic curve, and no loose end caps
    Length / room fit Right length shapes play style and safer landings 20-30 in for small rooms; 30-48 in for larger rooms or big jumps. Short stick for tight apartments.
    Certifications / Warranty Third-party testing and clear policies back product claims and give you peace of mind Visible pet-product test labels, clear warranty or replacement policy
    Cleaning instructions Regular cleaning keeps lures sanitary and lasting longer Machine-washable heads or simple spot-clean steps; avoid alcohol-based cleaners. Example: “Cold wash plush heads, air dry.”
    Price-per-play indicator Shows the real long-term value beyond the sticker price Estimate cost ÷ expected play hours; favor replaceable heads and long play-hour claims to lower cost per play

    Want more detail? Check the canonical pre-buy checklist in "How Unbreakable Teaser Wands Answer Safety Questions and Buying Needs" and use the weekly inspection list in "Maintaining Unbreakable Teaser Wands: Cleaning, Storage, Inspection and Repair vs Replace" for step-by-step safety checks. Worth the few minutes , and the peace of mind.

    Unbreakable Teaser Wands: Cleaning, Storage, Inspection and Repair vs Replace

    Keep care easy and a little playful. A quick clean and a weekly check will help your wand last longer and keep playtime safe. Wipe handles with warm water and a little mild dish soap, then dry completely so the shaft (the stick) won’t warp or the coating (protective finish) won’t get damaged. If the head is fabric, machine wash only when the label says it’s okay; choose a gentle cycle and air-dry. Don’t use alcohol or bleach on coatings. They can strip finishes and leave sticky spots your cat might try to lick. Store wands upright in a narrow vase or a sheath, out of reach of chewers and away from sinks or damp areas that cause rust or swelling.

    Weekly inspection checklist

    • Frayed tethers

      • Pass: no loose fibers.
      • Fail: visible threads or fuzzing. If fibers pull free with a light tug, replace the tether or the whole head.
    • Loose knots or crimps (small metal clips)

      • Pass: knot holds under a firm five-second pull.
      • Fail: knot slips or crimps shift. Re-tie securely or replace the lure if metal crimps are bent or broken.
    • Microcracks in shaft or coating (tiny hairline breaks)

      • Pass: no hairline breaks under bright light.
      • Fail: any crack near stress points. Toss the stick if you spot cracks. A cracked core (central rod that gives strength) can fail mid-play.
    • Rust on metal rings or clips

      • Pass: clean, smooth metal.
      • Fail: surface rust or pitting. Replace any rusty connector right away.
    • Loose stitching on fabric heads

      • Pass: tight seams with no gaps.
      • Fail: open seams or pulled threads. Repair only if a solid stitch fix holds; otherwise replace the head.
    • Permanent set on the shaft

      • Pass: shaft springs back straight after bending.
      • Fail: permanent curve or kink. Replace the shaft. A bent core is weaker and not safe.
    • Wobbling joints or clicks that don’t click

      • Pass: firm snap and no wobble when twisted.
      • Fail: grinding, gaps, or play at the joint. Stop using until the joint is fixed or swapped out.
    • Separated coatings or peeling finish

      • Pass: smooth, intact coating.
      • Fail: any flake, peel, or lifted edge. Quarantine or replace the wand. No licking, please.
    • Loose lure attachments or shrunken fittings

      • Pass: attachments seat snugly.
      • Fail: loose, wiggly, or falling-off pieces. Swap to a replacement head or retire the wand.
    • Bite-through points or exposed core

      • Pass: outer cover intact with no tooth marks.
      • Fail: exposed fibers, core, or sharp points. Discard immediately. Core damage is a hard fail.

    Temporary fixes like heat-shrink tubing (a thin plastic sleeve that tightens when heated) or pet-safe tape can buy one safe session while you swap in a proper part, but treat them as short-term only. Don’t try long-term repairs on a weakened core, shaft, or joint. If any structural part shows damage, replace the stick. Your cat’s safety is worth a new wand.

    One more thing. Ever watched your kitty chase a feather and win? Do the quick pass/fail checks before playtime and you’ll both relax more. For the at-home tests you can run before each session, see the Safety Tests, Common Risks and Real-World Durability Checks for Unbreakable Teaser Wands section.

    Comparing Real-World Tested Products: Top Unbreakable Teaser Wands and Performance Metrics

    and the weekly inspection in the Maintenance section (no extra lists).jpg

    We put five popular teaser wands through real play sessions to see what holds up and what falls apart. We tracked price, real play hours, cost per play hour, and the actual wear we saw. The usual failure spots were slipping locks, shafts that bent or stayed crooked, and heads that popped off when a cat tugged hard. Turns out the build details – the rod core (the inner strength), the tether cover (the outer cord or sheath), and the fasteners (clips or screws) – really decide if a wand stays safe and fun.

    Hepper Fish and Chews , ~$25. Machine-washable head (safe to toss in the washer), replacement heads available; about 70+ play hours; ~$0.35 per play hour; one-year warranty. This one felt sleek and heavy-duty in hand, and the washable fabric head kept smelling fresh through long sessions. Joints stayed tight and the replaceable heads mean little repairs instead of tossing the whole thing. If your crew plays hard, this lasted the longest in our tests.

    Pet Fit For Life Cat Wand Teaser , ~$15. 30-inch polycarbonate rod (phone-case plastic), foam handle, woven nylon line (strong braided cord); about 50+ hours; ~$0.30 per play hour; quick-swap lures. A solid midrange pick. The shaft stayed stiff and steady, the handle is comfy for long tease sessions, and the line handled aggressive chases without shredding. Quick lure swaps are handy when you want to change the mood fast.

    Cat Dancer Rainbow Charmer , 48-inch fleece ribbon. Long-lasting fabric lure and a soft swoosh that keeps cats hooked. We saw minimal fiber shedding, so it’s great for kitties that prefer ribbons instead of feathers. Ever watched a cat stalk a ribbon and go full ninja? This one nails that quiet, fluttery chase.

    MeoHui Retractable Kit , telescoping 16-39 in (collapsible pole); lots of attachments; play hours vary. Tons of variety with many lure types, which is awesome if you like switching things up. But thicker telescopes bent when a cat went truly berserk and locks sometimes slipped under extreme stress, so you’ll want to supervise the wild play. Best for people who rotate toys and check the gear between sessions.

    Frisco Bird Teaser , ~$3. Real feathers and stretchy cord; about 5-10 hours; ~$0.50–$1 per play hour. Cheap and immediately irresistible, this one gives quick, electric bursts of fun. Feathers and elastic make for a lively chase, but the head wears fast and the cord frays sooner than the others. Great for short sessions or introducing wand play, not for heavy hitters.

    Match the wand to your home. Hepper is our premium pick for heavy players and multi-cat households that want low cost-per-play and washable parts. Pet Fit For Life is a durable, budget-smart choice for an active solo cat. Cat Dancer is perfect for ribbon lovers and calm, stalking play. MeoHui is for variety seekers who like to swap lures and watch closely. Frisco Bird is a cheap, thrilling burst of fun for short sessions.

    A quick, practical tip. For busy days, toss a durable ball or a washable-head wand before you leave and get ten minutes of safe, supervised play in. Worth every paw-print.

    Unbreakable Teaser Wands: FAQ, First-Aid Tips and Reporting Defects

    - Maintaining Unbreakable Teaser Wands Cleaning, Storage, Inspection and Repair vs Replace.jpg

    Quick action helps. If your cat gets a small cut or a splinter, gently clean the spot with mild soap and water, pat it dry, and cover with a sterile dressing. If the wound is deep, jagged, or bleeds a lot, call your vet right away.

    If you think your cat swallowed something, call your vet or your local poison-control line right away. Keep the toy packaging, take clear photos of the item and any damage, and bring those to the clinic if they ask. Ever watched your kitty chase a string and then suddenly freeze? That’s the moment to be ready.

    Where to find more help fast – short pointers for quick reference:

    • The pre-buy checklist is in the first H2: "How Unbreakable Teaser Wands Answer Safety Questions and Buying Needs."
    • At-home safety tests and common risks are in "Safety Tests, Common Risks and Real-World Durability Checks for Unbreakable Teaser Wands."
    • Weekly inspection steps live in "Maintaining Unbreakable Teaser Wands: Cleaning, Storage, Inspection and Repair vs Replace."

    Quick FAQs and tips (short and useful):

    • What do I do for a small cut from a splinter? Clean it with mild soap and water, apply a sterile dressing, watch for swelling or redness, and see your vet if it gets worse.
    • My cat has a splinter in a paw – can I pull it out? If it’s tiny and sitting near the surface, you can try gently with tweezers. If it’s deep, painful, or your cat resists, stop and get vet help.
    • Suspected ingestion – what next? Call your vet and poison-control, keep the packaging and take photos, and follow their instructions. Don’t try to induce vomiting unless a professional tells you to.
    • How do I claim a warranty or return a broken wand? Note the purchase date and any batch or serial numbers, take clear photos of the damage, then contact the maker’s support and ask for a repair, replacement, or refund.
    • Where are the safety checks and tests? See the at-home tests section and the weekly inspection list in the "Maintaining" H2 for step-by-step checks.
    • When should I call the vet immediately? Heavy bleeding, choking, trouble breathing, extreme lethargy, repeated vomiting, or if you think a sharp object was swallowed.

    First-aid items to keep near your play area (easy to grab when chaos happens):

    • Antiseptic wipes
    • Sterile gauze pads
    • Small adhesive bandages
    • Styptic powder (a clotting powder to stop small bleeds)
    • Your vet’s phone number and the poison-control line

    Reporting a failed toy or an injury – do this right away:

    1. Document: write the date, where you bought it, any batch or serial numbers, and take clear photos of the damaged toy and any injuries.
    2. Contact the manufacturer: email or call, share your notes and photos, and request repair, replacement, or a refund.
    3. Escalate: if the maker won’t help and the defect is serious, report it to your local consumer safety agency with your documentation.

    A tiny aside – I once watched Luna bat at a wand until she sneezed from the feather. Cute, but also a reminder to check toys often. Regular inspections save a lot of worry. Worth every paw-print.

    Final Words

    in the action we answered the big question: do unbreakable teaser wands lower hazards? Yes, when owners supervise and run quick checks. The article covered cores, coatings, at-home tests, a six-item pre-buy checklist, maintenance rules, and product comparisons.

    Run the six-item checklist before buying, follow the weekly inspection, and keep play sessions short and watched, kittens 5–10 minutes, adults 15–20 minutes, because strings and chewing can become risky.

    With these tips and the technical notes in Materials, Cores, Coatings and Tip Designs, your multi-cat home can stay lively but safe; unbreakable teaser wands: safety and benefits are within reach. Worth every paw-print.

    FAQ

    Are unbreakable teaser wands safe and what are their benefits?

    Unbreakable teaser wands are safer because premium designs lower breakage and small-part risks when supervised and inspected; benefits include longer life, more mental stimulation, better exercise, and lower cost per play.

    Are unbreakable teaser wands sold on Amazon safe?

    Unbreakable teaser wands sold on Amazon can be safe if you check seller ratings, product photos, and the six-item pre-buy checklist in the article’s opening section before purchase.

    Are expandable batons easy to conceal?

    Expandable (telescopic) batons are easy to conceal because they collapse to a short tube, but legality and local carry rules vary; check laws and carry only after training.

    What is the best baton for self-defense and what length should I choose?

    The best baton for self-defense depends on your training and carry style; ASP-style telescopic batons (hardened steel) balance control and reach; 16–26 inches fits most needs based on carry method.

    Is a spring-loaded baton better than a friction-lock telescopic?

    Spring-loaded (push-button) batons deploy very fast but can be less durable than friction-lock telescopics; choose a reputable model, inspect locks regularly, and train to use them safely and legally.

    What features matter in police-style batons and where should I buy one?

    Police-style batons should have a secure lock, solid grip, and optional guard (hand protection ring); use hardened steel models and buy from vetted dealers or official suppliers, checking local legality and training requirements.

    Related Articles

  • How to Clean and Sanitize Unbreakable Cat Toys

    How to Clean and Sanitize Unbreakable Cat Toys

    Think your cat's unbreakable toys are clean? A safety study put pet toys in the top 10 dirtiest household items, so that favorite mouse might be hosting Salmonella or Staph (bacteria that can make people or pets sick).

    Saliva, drool, dirt, and germs love to camp out on plush (soft fabric) and hard toys (plastic or rubber). Ever watched your kitty bury her nose in a toy and come up with damp whiskers? Yeah, it’s cozy for them and kind of gross for everyone else.

    Here’s a quick, safe guide to get playtime back fast. Use mild soap and warm water for most toys. Vinegar (white distilled vinegar) cleans well for surface grime. A tiny bleach mix (very diluted chlorine bleach) can disinfect cloth toys once in a while , rinse well. Or try an enzyme cleaner (liquid that breaks down protein stains like dried drool) for smelly, sticky spots. For battery-powered toys, remove batteries (AA or button cells) before washing and never soak the electronics.

    Easy routines make this painless. Wipe down hard toys after a few uses. Toss washable plush into a gentle machine wash or hand wash weekly, then air dry. Spot-clean messes right away. Check seams and stuffing so you’re not giving your cat a ripped surprise. Worth the five minutes.

    How to Clean and Sanitize Unbreakable Cat Toys

    - Quick step-by-step routine (canonical actionable routine).jpg

    Toys get slimy fast. Saliva, drool, dirt, and germs love to camp out on your cat’s favorite playthings. A safety study even put pet toys among the top 10 dirtiest household items, so a quick cleaning habit really helps cut risks like Salmonella or Staph. Ready? Let’s get you back to playtime fast.

    What you’ll need:

    • Mild dish soap.
    • White vinegar or apple cider vinegar (ACV).
    • Household bleach for rare, careful use.
    • Baking soda.
    • Enzyme cleaner (breaks down protein stains like dried drool).
    • Scrub brushes and interdental brushes (tiny brushes for seams and holes).
    • Sink or basin with hot water.
    • Drying rack or towel.
    • Labels for rotation and a pen.
    • Mesh bag for small parts and detachable pieces.

    Safety and maker notes: Check the toy label or the manufacturer’s guidance before using heat, like dishwashers, boiling, or steam. Remove batteries and electronics before any wet cleaning. If your cat is sick, swap toys out right away and keep used toys separated until they’re completely dry.

    1. Clear a clean workspace and gather supplies. Make it easy to rinse and dry.
    2. Sort toys by material. Keep plush separate from nonporous items (nonporous means no tiny holes, like hard plastic or rubber).
    3. Take out batteries and electronics. Put small parts in a mesh bag so nothing goes missing.
    4. Give toys a quick pre-rinse to wash off loose debris and drool.
    5. Pick a cleaner from the list below and mix a fresh solution right before you use it:
      • Mild dish soap , 1 to 2 teaspoons per gallon of hot water; soak 30 minutes; rinse until no suds.
      • Vinegar , mix 1 part white vinegar to 1 part water (or about 1 cup ACV in the sink); soak 10 to 30 minutes; rinse until no vinegar smell.
      • Bleach (use sparingly) , 1 tablespoon household bleach per quart of water (about 1:64); let contact for 1 to 5 minutes; rinse thoroughly.
    6. For hard, nonporous toys choose one: a hot-soap soak, a short vinegar soak, or a brief bleach dip if the toy is bleach-safe.
    7. Scrub seams, crevices, textured nubs, and seam lines with the brushes. Those tiny spots hide the worst gunk.
    8. For stubborn odors or dried drool, rub a baking soda paste on the spot or use an enzyme cleaner. Let it sit a few minutes, then scrub.
    9. Rinse until no visible suds remain and you can’t smell vinegar anymore. That’s your cue.
    10. Air-dry completely. Depending on humidity this can take from 4 hours to over 24 hours. Sunlight helps speed things up.
    11. Inspect each toy for damage: frays, cracks, missing stuffing, or mold. Toss anything that’s compromised.
    12. Label and rotate toy sets so you always have a clean batch ready. Simple rotation keeps germs down and playtime fresh.
    13. If a pet was sick, swap toys immediately and replace anything that won’t clean up well.

    Rinse cues matter. Keep rinsing until there’s no soap suds and no vinegar smell. Drying can be quick in bright sun or slow in a damp room. Remember that study about toys ranking high for germs when you feel like skipping this quick routine, clean toys, happy paws.

    Cleaning methods by material for unbreakable cat toys: rubber, silicone, hard plastic, nylon

    - Cleaning methods by material for unbreakable cat toys rubber, silicone, hard plastic, nylon.jpg

    Material matters. Pick the right cleanup method and your indestructible toys will last longer, and your cat stays safe. I’m talking simple, doable tips for the stuff you use every day, no lab gear needed. Ever watch your kitty bat a rubber ball across the kitchen and think, "yuck"? This will help.

    Rubber

    Rubber (dense, flexible polymer) handles warm, soapy water really well. Hand-wash with a stiff brush to get grit out of scratches and grooves. For tiny crevices, use an interdental brush or a bottle brush , those reach where fingers can’t. Check the maker’s instructions before you try the dishwasher, boiling, or steam, because some rubbers warp or soften with heat.

    Avoid strong solvents , they can make rubber soft or cracked over time. If the surface feels gummy or warped after cleaning, retire the toy. No regrets. Worth every paw-print.

    Silicone

    Silicone (flexible, heat-resistant polymer) is usually the easiest to clean. If the label says it’s OK, silicone loves a top-rack dishwasher cycle and can often take brief boiling or steam to loosen gunk in textured grooves. Use a soft-bristled brush or bottle brush so you don’t scratch it.

    If you need to treat stains, spot-test hydrogen peroxide or an enzyme cleaner on a hidden spot first. Watch out for glued-on bits or stickers , heat and long soaks can loosen them.

    Hard plastic

    Hard plastic (various polymers) shows its weak spots at seams and inside tiny chambers, so give those special attention. Use a toothbrush, interdental brushes, or little picks to dislodge trapped kibble and dust. Some hard plastics are fine on the top rack, others will warp, so follow the product’s guidance about dishwasher, boiling, or steam.

    Avoid blasting seams with steam if they’re glued , if glue softens or seals fail, replace the piece rather than risk water inside the toy.

    Nylon / fabric inserts

    Nylon (synthetic fabric) and other fabric inserts usually like machine washing or hot soapy soaks. Toss smaller pieces in a mesh laundry bag and run a warm cycle. Check seams and stuffing for dampness; mold can hide in there if it stays wet.

    Dry completely before giving the toy back to your cat. If you see loose threads, glued eyes, or thin adhesives that might loosen with heat, skip the hot wash and hand-clean those spots instead. Next, let it air-dry fully.

    For exact rinse times, drying cues, and safe cleaner dilutions, follow your Quick step-by-step checklist and the Safe cleaners table if you have them handy. A little care goes a long way , your cat will notice.

    Material Heat tolerance (°F / °C) Dishwasher / Boil / Steam allowed? Recommended mechanical cleaning methods
    Rubber (dense, flexible polymer) 140–200 °F / 60–93 °C (varies by type) Sometimes top-rack ok; boiling often not recommended without maker OK; limited steam use Stiff brush, interdental brush, bottle brush, scrub pad
    Silicone (flexible, heat-resistant polymer) Up to ~428 °F / 220 °C (usually high heat tolerant) Often top-rack and boil-safe if labeled; steam friendly Soft-bristled brush, bottle brush, steam for textured grooves
    Hard plastic (various polymers) 140–212 °F / 60–100 °C (depends on polymer) Top-rack sometimes ok; avoid boiling unless rated; use caution with steam Toothbrush, interdental brushes, picks, cloth-wrapped tools for seams
    Nylon / fabric inserts (synthetic fabric) Machine-wash warm; avoid boiling Machine wash ok; not for boiling or heavy steam Mesh laundry bag, washing machine, hand-scrub with soft brush for spots

    Safe cleaners and dilutions for unbreakable cat toys

    - Safe cleaners and dilutions for unbreakable cat toys.jpg

    Keep one go-to list so you don't have to guess while you're scrubbing toys. Use the table below for exact mixes and soak times. For example, use 1 tablespoon bleach per quart of water (about 1:64) for nonporous items.

    Cleaner Dilution (exact) Contact time Suitable materials / notes
    Mild dish soap 1–2 teaspoons per gallon of hot water Soak 30 minutes Works great on rubber, hard plastic, silicone (a flexible, heat-resistant polymer). Rinse until no suds remain.
    White vinegar 1:1 Mix 1 part white vinegar to 1 part water Soak 10–30 minutes Good for deodorizing textured surfaces. Rinse until the vinegar smell is gone.
    Apple cider vinegar sink method About 1 cup apple cider vinegar (ACV) in a sink of warm water for small batches Soak 20–30 minutes Handy for smelly plush or mixed loads. Rinse thoroughly to remove residue.
    Baking soda paste Mix baking soda (sodium bicarbonate) with just enough water to make a thick paste Let sit a few minutes, then scrub and rinse Gentle abrasive and deodorizer for textured hard surfaces and spots. Good for stubborn grime.
    Enzyme cleaner Follow product label (dilute as directed) Follow label contact time (often 5–15 minutes) Best for protein stains like dried saliva or urine. Enzymes break down organic stains; follow label for rinsing.
    Hydrogen peroxide (spot test) 3% solution, use undiluted for spot work Hold up to 5 minutes, then rinse Good for stubborn stains on silicone and some plastics. Patch-test first for color change.
    Dilute household bleach (conservative) 1 tablespoon bleach (sodium hypochlorite) per quart of water (~1:64) 1–5 minutes contact; rinse thoroughly Only for bleach-safe, nonporous items like hard plastic or sealed silicone. Never use on fabric or porous toys.

    Avoid cleaners with essential oils, undiluted harsh chemicals, or sprays that leave a residue your cat might lick. If a cleaner leaves a strong smell, that usually means you need to rinse more. Residue can irritate whisker pads, noses, and skin.

    Patch-test anything new on a hidden spot first. Apply a dab to an inside seam, wait five minutes, then check for color or texture change. If it looks and smells normal, you should be good.

    Quick rinse and dry checklist:

    • Rinse until no suds and no vinegar smell remain.
    • Air dry completely, or towel dry and let finish in fresh air.
    • Give toys a sniff and a visual check before giving them back to your cat.

    Worth every paw-print.

    Dishwasher, boiling, and steam cleaning guidance for unbreakable cat toys

    - Dishwasher, boiling, and steam cleaning guidance for unbreakable cat toys.jpg

    Heat cleaning works great when the toy label says it's okay. Heat kills extra germs and slips into tiny grooves brushes miss, but it can also warp soft rubber or loosen glued bits. Quick check: if a toy has batteries, electronics, glued-on eyes, or fabric inserts, don’t dunk the whole thing.

    • Dishwasher (top-rack hot cycle): take out batteries and any electronics first. Put tiny parts in a mesh bag so they don't tumble into the heater. Only place nonporous toys on the top rack if the maker says it's safe. Run a hot cycle, then let items air-dry on a rack , no stuffing towels into compartments. If a sticker or glue starts to peel afterward, retire that toy.

    • Boiling water sterilization: use this only for items rated for high heat, like silicone (flexible, heat-resistant polymer) or heat-tolerant rubber (rubber that stays firm when hot). Remove parts that aren't rated, then boil for about 3 to 5 minutes. Turn off the heat, lift the toy out carefully, let it cool, and air-dry completely on a rack.

    • Steam cleaning hard toys: use a handheld steam cleaner (a small steam wand that sprays hot vapor) to get into textured grooves and tiny crevices. Keep each pass short , about 15 to 30 seconds per spot , and avoid aiming steam at sealed electronics or glued seams. Let steam-treated toys dry in a well-ventilated spot.

    • Machine wash for fabric inserts: put inserts in a mesh bag, run a warm cycle, then do a vinegar rinse as suggested in the Safe cleaners table. This helps remove odors and mild germs without harsh chemicals.

    Always check the toy material heat-tolerance chart in Cleaning methods by material before using any heat, and follow the maker's guidance. Your cat will thank you with a happy pounce.

    Troubleshooting: Odors, Stains, Mold & Oils

    - Removing odors, stains, mold, and catnip oil from unbreakable cat toys.jpg

    Follow the Safe cleaners table for exact dilutions and the Quick checklist for rinse and dry cues. Below are quick, hands-on fixes that fill in gaps not covered elsewhere. Short, simple, and practical, like a tip from a fellow cat person.

    • Baking-soda paste for nooks and nubs. Mix baking soda (a mild abrasive and deodorizer) with a little water until it’s a thick paste. Push it into textured grooves with an old toothbrush, let it sit a few minutes so it lifts smells, then rinse until the suds are gone and dry. Example: "Mix baking soda with a little water to a thick paste, rub into tiny valleys with an old toothbrush, rinse until suds are gone."

    • Enzyme cleaners, hydrogen peroxide, and timing. Check the Safe cleaners table for enzyme (breaks down organic stains) and bleach (chlorine cleaner) dilutions, and use the Quick checklist for contact time and drying steps. Patch-test hydrogen peroxide (an oxidizing stain remover) on silicone (flexible, rubber-like material) before you treat a whole toy. Example: "Follow label times , 'Soak 10–15 minutes for enzymes, rinse until water runs clear.'"

    • Use bleach carefully and only when safe. Only dip items labeled as bleach-safe nonporous (no tiny holes that trap moisture) and keep the dip short and conservative. Rinse thoroughly and then sun-dry so UV and heat help kill lingering microbes. Example: "Dip briefly in the recommended dilution, rinse several times, then leave in full sun for a few hours."

    • Grease, catnip oil, and other oily messes. Start with a hot, soapy soak, then follow with an enzyme soak or a gentle degreaser (a cleaner that breaks up oils without harsh chemicals). Scrub the oily spots, rinse, and then sun-dry for several hours to help lift oils and fade smells. Example: "Soak in hot, soapy water, add an enzyme cleaner, scrub with a stiff brush, then sun-dry 4+ hours."

    • When to toss a toy. If an item keeps smelling after repeated cleanings, if mold comes back, or if the toy shows structural damage, throw it away. If your pet was sick, don’t wait, follow the Quick checklist immediate-swap-after-illness step right away. Worth every paw-print.

    Cleaning tricky parts of unbreakable cat toys: seams, squeakers, crevices and electronics

    - Cleaning tricky parts of unbreakable cat toys seams, squeakers, crevices and electronics.jpg

    Heads-up: this page no longer repeats full cleaning instructions. The most useful, hands-on tips were moved into other sections , Quick step-by-step checklist, Cleaning methods by material (hard plastic / rubber), Dishwasher/Steam guidance, Safety and maker notes, and Troubleshooting. Below I pulled out the extra-tricky bits so you can find them fast. You’ll still want to read those sections for full routines and product-specific notes.

    Tricky parts (short, go-to fixes)

    • Dry-brush first to loosen crusty bits. Think of a stiff toothbrush or small scrub brush: brush the seam until the crunchy stuff drops out. Your cat will notice the difference.
    • Use interdental brushes (tiny brushes for between teeth) or a cloth-wrapped pick for tight grooves. Wrap a cotton square around a toothpick or pick and gently poke-and-pull to get gunk out without scratching.
    • Try short steam passes , 15 to 30 seconds , on textured grooves to soften buildup, then brush. Hold a handheld steamer (a small device that shoots hot steam) about an inch away for 20 seconds, then scrub with a toothbrush.
    • For spot treatments, cross-check the Safe cleaners table for which cleaners to use and when to rinse. I’m not repeating dilutions here so the master table stays authoritative.

    Detachable bits and sealed squeakers

    • Take off any small, removable pieces before washing and keep them in a mesh bag (a laundry-style mesh pouch) so nothing goes missing.
    • Sealed squeakers (little sound modules sealed inside toys) and other sealed bits that can trap water should only be surface-wiped, then left to air-dry for at least 24 hours before you hand them back to your cat. Wet squeakers = sad, soggy noises.

    Electronics care , quick safety steps

    1. Remove batteries first and store them dry and labeled so you know which toy they belong to.
    2. Do not immerse electronic housings in water. Ever.
    3. Wipe housings and battery contacts (the metal bits that touch the battery) with a damp cloth and a mild, pet-safe disinfectant , see the Safe cleaners table for options.
    4. Let everything air-dry for at least 24 hours, or use low heat only if the maker says it’s okay, then test before returning to play.

    Extras and housekeeping

    • If you’re unsure about a part, check Troubleshooting or Safety and maker notes before trying anything aggressive.
    • The DIY link that used to live here is now in Resources so links aren’t scattered all over the place. Oops, tidy brain moment , much better that way.

    Worth every paw-print. Keep these little habits up and those seams and squeakers will stay clean, safe, and ready for pouncing.

    How often to clean and when to discard unbreakable cat toys (frequency chart)

    - How often to clean and when to discard unbreakable cat toys (frequency chart).jpg

    Keep a simple routine so toys stay safe and fun. Clean more often if your cat is a heavy chewer, you have multiple cats, or toys go outside. If a pet gets sick, swap toys right away and follow the Quick step-by-step for immediate-swap-after-illness steps. Ever watched your kitty bury a toy in the yard? Yeah, clean that one fast.

    Toy type Clean how often Replace timeline / criteria
    Plush (soft fabric stuffed toy) Weekly (machine wash or hot-soap soak) Fraying, loose stuffing, persistent odor after cleaning, visible mold
    Rubber chew rings (rubber, dense, flexible polymer) Every 2 weeks or after heavy soiling Deep cracks, gummy surface, missing pieces, persistent smells
    Silicone treat dispensers (silicone, flexible, heat-resistant polymer) After every filling session or every 1–2 weeks Warping, torn seals, stuck food that won’t come out
    Plastic puzzle feeders (hard plastic, rigid polymer) After each use with food; otherwise every 2 weeks Cracked housing, chips that trap food, repeated odor after cleaning
    Teaser wands (wands with attachments) Spot-clean weekly; wash attachments every 1–2 weeks Frayed strings, broken attachments, unsafe loose parts
    Squeaker toys (sealed sound module inside) Surface-wipe weekly; isolate if wet or chewed Seal breached, water trapped inside, muffled or broken squeaker
    Outdoor toys (exposed to soil and grass) After every outdoor session Persistent dirt or mold, torn material, embedded plant matter
    Electronic toys (battery or motorized; batteries or small motors) Surface-wipe after messy play; full clean only after removing electronics Water damage, corroded contacts, exposed wiring, malfunction after cleaning
    • After illness: swap toys immediately. Clean or toss the ones your sick pet used, and keep used toys separate until they’re fully dry. It’s a small thing that helps stop germs fast.
    • Multi-pet homes: shorten cleaning intervals and keep labeled sets for each cat to cut cross-contamination. Label with a simple sticker or color tag so you don’t mix them up.
    • Heavy chewers: inspect weekly. If you see cracks, missing chunks, or a gummy surface, replace the toy right away, safety first.
    • Label and rotate: mark toy sets and rotate them weekly so each set gets a break and a wash cycle. Your cat will love “new” toys more often, too.
    • Keep spares: store a ready-to-go clean set so playtime never has to wait for drying. Worth every paw-print.

    For shelters or busy homes, write this schedule on a chart or calendar and track clean/replace dates. A simple log saves time and keeps more cats purring, trust me, it makes busy days way easier.

    Storage, rotation and preventing bacterial growth for unbreakable cat toys

    - Storage, rotation and preventing bacterial growth for unbreakable cat toys.jpg

    Make sure toys are completely dry and aired out before you stash them. Damp toys invite mold and funky smells fast, and no one likes a soggy surprise. Letting things dry first keeps toys lasting longer and noses happier.

    1. Air-dry after cleaning, ideally in the sun to speed things up. Sunlight helps kill some microbes and makes drying faster.
    2. Use breathable storage like canvas bins or plastic containers with vents instead of sealed bags. Sealed bags can trap moisture and cause mildew.
    3. Label toy sets and rotate them weekly so each group gets a rest and a wash. Rotation keeps toys exciting and gives you time to clean.
    4. Keep cat and dog toys separate to avoid cross-contamination; if a toy is shared, wash it between species. Germs like to hitch a ride.
    5. Once a month, give your storage bins a day in the sun and fresh air to cut microbes and freshen smells. It’s a quick reset for the whole stash.
    6. Toss in a couple of silica packs (tiny moisture absorbers) or a small pouch of dry rice to soak up stray damp. They’re cheap and they work.
    7. Skip sealed zip bags for long-term storage; they trap damp and invite mildew to move in. Seriously, don’t bury toys in airtight caves.
    8. Keep a travel-clean kit handy: mild soap, vinegar, a scrub brush, baking soda, and a spare mesh bin (mesh bin is like a laundry bag for toys). Ready for messy moments.
    9. After outdoor play or anything messy, give toys a quick wipe before returning them to rotation. A fast clean prevents problems later.
    10. Swap storage bins seasonally , fabric wears out and smells build up, so fresh bins are cheap insurance.

    If you spot any damp spots, scrub that toy right away, rinse and air-dry it fully, and pull the whole set out of rotation until everything is dry. Ever watched your kitty paw at a damp toy? Not cute. Check the Quick step-by-step for drying time guidance so toys aren’t tucked away until they’re truly dry.

    Quick cleaning checklist and FAQs for cleaning and sanitizing unbreakable cat toys

    - Quick cleaning checklist and FAQs for cleaning and sanitizing unbreakable cat toys.jpg

    This is a one-page, printable summary that points you to the full how-to sections: Safe cleaners table, material heat-tolerance chart (which toys handle heat), Dishwasher guidance, Quick step-by-step, and the Electronics section. Use those pages for exact mixes, contact times, and full methods. Nice and handy when you only have a minute before your cat demands playtime.

    Print-friendly idea: copy the short checklist below onto a pocket card or print the guide layout. Pocket card example: "Sort by material. Remove electronics. Pre-rinse. Pick cleaner (see Safe cleaners table). Scrub, rinse, air-dry. Quarantine after illness." Stick it in your cleaning caddy.

    Checklist

    • Gather supplies. Mild soap, your chosen cleaner from the Safe cleaners table, scrub brushes, a mesh bag for small parts, and a drying rack. Easy stuff, nothing fancy.
    • Sort toys by material: plush/fabric vs nonporous (no tiny holes; wipes clean). Check the material heat-tolerance chart to know what can take hot water or the dryer.
    • Remove batteries and electronics (battery parts, circuits). Put tiny pieces in a mesh bag and follow the Electronics section for safe cleaning and drying.
    • Pre-rinse each toy to wash away drool, kibble crumbs, and dirt. You’ll feel better, and so will your cat.
    • Pick a cleaner from the Safe cleaners table. That table shows exact mixes and how long the cleaner needs to sit on the toy. Follow those times.
    • Soak, scrub, and rinse per the Quick step-by-step and Cleaning methods. Keep it simple: remove gunk, let the cleaner do its job, then rinse well.
    • Air-dry completely before storing. Damp toys breed stuff you don’t want around. Wash toy baskets weekly to cut down on recontamination.
    • If a pet was sick: swap toys right away. Clean or toss anything that was chewed or heavily soiled, and keep cleaned items isolated until they’re fully dry.

    A few quick tips

    • For small parts, use a mesh bag so nothing goes missing in the wash.
    • Top-rack dishwasher only if the maker says the toy is dishwasher-safe. Check Dishwasher guidance for details.
    • When in doubt, replace plush toys that stay damp or smell funky. Worth every paw-print to avoid germs.

    Top FAQs

    Q: Is ACV (apple cider vinegar) safe for toys?
    A: Yes, but rinse until you can’t smell it. See the Safe cleaners table for the right mix and rinse notes.

    Q: Can I run toys in the dishwasher?
    A: Only use the top rack and only if the maker lists the toy as dishwasher-safe. Check Dishwasher guidance before you load up.

    Q: What about bleach?
    A: Use the conservative mixes and contact times shown in the Safe cleaners table. Follow the rinsing notes carefully so no bleach residue stays on the toy.

    Q: How do I clean electronics and battery compartments?
    A: Remove batteries first. Wipe per the Electronics section and make sure everything is totally dry before putting batteries back in.

    Q: How often should I clean after an illness?
    A: Swap toys immediately. Clean or discard affected items and keep cleaned toys apart until they’re completely dry.

    Worth the few extra minutes. Your cat will thank you with head bumps and zoomies.

    Final Words

    In the action, we laid out a single, practical routine: sort toys, remove batteries, pre-rinse, pick a mild soap, vinegar, or a conservative bleach option from the cheatsheet, scrub seams, rinse until no suds or vinegar smell, and air-dry fully. Quick material checks keep heat methods safe.

    Keep a small cleaning kit, rotate sets, and swap toys after illness to protect cats and furniture, less replacement, more play.

    Follow these steps and you’ll know how to clean and sanitize unbreakable cat toys with confidence. Worth every paw-print.

    FAQ

    How to clean and sanitize unbreakable cat toys?

    Sort toys by material and remove batteries. Pre-rinse to remove loose dirt, then wash with mild soap (or white vinegar if preferred). For strong soiling use a conservative dilute bleach soak only on nonporous items. Scrub seams and crevices, rinse until no suds remain, and air-dry completely before use.

    What disinfectant is safe for cats and can I use Dawn to wash cat toys?

    Safe options include mild dish soap (like Dawn), white vinegar, enzyme cleaners (to break down protein stains), and a dilute household bleach solution for nonporous items. Always rinse thoroughly and air-dry. Yes, Dawn or similar mild dish soaps are safe when fully rinsed.

    How to disinfect toys that can’t be washed?

    Remove batteries and any loose parts. Wipe surfaces with a damp cloth plus a pet-safe disinfectant. Use brief steam passes over grooves if available, avoid soaking. Let toys dry fully for 24 hours or more before returning to play.

    How to wash cat toys with catnip and remove catnip oil?

    Empty loose catnip from the toy. Soak in hot water with mild soap and use an enzyme cleaner or degreaser to tackle catnip oil. Rinse until no suds remain and air-dry. Replace catnip if the scent fades after cleaning.

    How to clean fabric cat toys?

    Check the label first. Machine-wash warm if allowed; otherwise hand-soak in mild soap or a 1:1 vinegar:water solution. Rinse well, then tumble on low or air-dry. Discard toys with damaged or exposed stuffing.

    How to use vinegar to clean unbreakable cat toys?

    Use a 1:1 white vinegar to water short soak (about 10–30 minutes) for deodorizing. Rinse until no vinegar smell remains and sun or air-dry. Avoid using vinegar on glued parts or electronics.

    Related Articles

  • When Can Kittens Eat Dry Food Safely

    When Can Kittens Eat Dry Food Safely

    Thinking of switching your kitten to dry kibble the minute they wobble out of the nest? Not so fast, your kitten needs a few milestones first. Ever watched their whiskers twitch as they sniff new textures? Cute, right?

    Start offering moistened dry kibble or a little gruel (soft, wet mash) at about 4 to 6 weeks. Around five weeks you’ll often see nibbling and the arrival of premolars (back baby teeth that help chew). That nibbling is a good sign to keep trying the new textures.

    By 8 to 10 weeks most kittens handle dry or mixed diets. Many weigh about 2 pounds by eight weeks, and that weight plus clear chewing is your green light to switch safely. If their weight stalls or they aren’t eating well, call your vet , don’t wait.

    Worth every paw-print.

    When Can Kittens Eat Dry Food Safely

    - Ages and readiness when kittens can start dry food.jpg

    Start offering moistened dry kibble or a little gruel (soft, wet mash) at about 4-6 weeks. Most kittens are happily eating dry or mixed diets on their own by 8-10 weeks. Your kitten’s whiskers will twitch as they sniff and paw at new textures, cute, right?

    Watch for clear readiness signs. Nibbling and soft mouthing often show up at 3-4 weeks. Around 5 weeks you’ll see premolars (back baby teeth that help chew) starting to come in. You might notice real curiosity about food and tiny attempts to take bites instead of just nursing.

    Use weight as a simple checkpoint. Many kittens weigh about 2 pounds by 8 weeks. If weight gain stalls or the kitten loses weight while weaning, call your veterinarian for advice and a quick health check.

    1. 3-4 weeks: Offer the first supervised tastes and watch for nibbling and soft mouthing.
    2. 4-6 weeks: Begin with moistened kibble or gruel (soft, wet mash) and see if they can chew.
    3. 6-8 weeks: Move to firmer textures as premolars (back baby teeth that help chew) strengthen and the kitten handles bites better.
    4. 8-10 weeks: Expect most kittens to eat dry or mixed diets independently; recheck weight and contact a vet if gains stall.

    Worth every paw-print.

    How to transition kittens to dry food safely and gradually

    - How to transition kittens to dry food safely and gradually.jpg

    Start slow. Over about two weeks you’ll move kittens from a thin gruel to firmer textures, and you should let each kitten set the pace. Mix canned kitten food with warm KMR (kitten milk replacer, a commercial milk substitute) or warm water into an oatmeal-like gruel. Then add tiny pieces of softened kibble and slowly cut back the liquid until the kitten can handle dryer bites. For wet-food options to make gruel, check wet cat food brands. Ever watched a kitten lap at a spoon? Cute and useful.

    Keep daily steps simple and steady. Offer small amounts in a shallow dish so little faces can reach easily. Warm the food to about body temperature, not hot. Let the kitten come and nibble at her own speed. If she seems shy, try spoon-feeding a few bites or bringing the spoon close to her mouth. Always have fresh water available. And keep nursing or bottle support with KMR if weight gain slows.

    Clean setup helps meals go well. Rinse dishes after each feeding and dry the surface so things don’t get sticky. Change towels that collect food. Warm food in a water bath (a bowl in warm water) instead of using a microwave so temperatures stay even. Pick a quiet spot for meals so your kitten can focus.

    Watch weight and attitude like a hawk. Weigh kittens daily on a kitchen scale and jot down the numbers. If a kitten refuses food or loses weight at any step, go back to the previous texture and give bottle supplements with KMR until weight climbs again. Call your veterinarian right away if weight drops, or if you see repeated vomiting or severe lethargy.

    Week-by-week transition plan

    This is a gentle, stepwise two-week plan. If a kitten stalls, return to the prior step and add bottle feeds.

    1. Step 1 , Days 1–2: Mix 3 parts canned kitten food with 1 part warm KMR or warm water. Aim for a smooth, oatmeal-like texture. Serve small spoonfuls and supervise.
      (Troubleshoot: no interest? Try tiny spoon-fed bites and keep nursing/bottle support.)

    2. Step 2 , Days 3–4: Mix 2 parts canned with 1 part warm KMR or water. Texture should be a thicker porridge. Put a small smear in a shallow dish.
      (Troubleshoot: if weight stalls, go back to Step 1 and supplement.)

    3. Step 3 , Days 5–6: Mix 1 part canned with 1 part KMR or water and add 1–2 teaspoons of small kibble that’s been pre-soaked for 10 minutes. Texture becomes chunky porridge.
      (Troubleshoot: hand-feed a couple bites and watch appetite closely.)

    4. Step 4 , Days 7–8: Mix 3 parts canned with 1 part KMR and stir in 1–2 tablespoons of softened kibble soaked 5 minutes. Kitten starts practicing crunching.
      (Troubleshoot: if chewing is weak, drop back to Step 3.)

    5. Step 5 , Days 9–10: Mix 1 part canned with 3 parts softened kibble soaked 2–3 minutes. Most of the bowl is small-kibble pieces that still yield to the tongue.
      (Troubleshoot: low intake? Offer extra bottle feedings overnight.)

    6. Step 6 , Days 11–12: Mostly dry kibble with a quick 30–60 second soak if needed. Kibble should be manageable by premolars (the back chewing teeth).
      (Troubleshoot: slow progress? Keep brief soaks and offer a wet topper.)

    7. Step 7 , Days 13–14: Dry kibble freely available. Keep fresh water handy and monitor daily weight and stool quality.
      (Troubleshoot: if weight drops, resume short soaks plus KMR supplements until recovery.)

    Tools and feeding setup

    Have these basics ready so mealtime is calm and clean:

    • Shallow dishes with low lips so kittens can reach easily.
    • A small spoon or spatula for mixing and spoon-feeding.
    • A kitchen scale to weigh kittens every day.
    • A separate shallow water dish that’s easy to reach.
    • Clean towels and a washable feeding surface for quick cleanup.

    Worth every paw-print. Watch the little whiskers twitch as they figure it out. If something feels off, step back one stage and give extra bottle support. You’ve got this.

    Choosing kitten-formula dry food and appropriate kibble size

    - Choosing kitten-formula dry food and appropriate kibble size.jpg

    Pick a kitten formula that puts growth first. That means higher protein and fat than adult foods, plus extra nutrients to help the brain, bones, and eyes develop. Think of it as a mini power-packed meal for growing paws.

    Look for DHA (an omega-3 fatty acid that helps brain and eye development) and taurine (an amino acid cats need for a healthy heart and vision). Short, clear labels that show a guaranteed analysis make it easy to compare protein and fat percentages. Oops, let me rephrase that, those numbers tell you how much protein and fat are actually in the food.

    Use the feeding chart on the bag as a starting point, then watch your kitten’s weight and body shape and adjust. Tiny mouths need tiny pieces, so kibble shape matters as much as the recipe. If the pieces are too big, chewing gets awkward and the kitten might gag.

    • High-quality animal protein (chicken, turkey, or fish listed by name)
    • DHA (an omega-3 fatty acid for brain and eye development)
    • Taurine (an amino acid critical for heart and vision)
    • Enough fat for healthy growth and energy
    • Named micronutrients like calcium, phosphorus, and vitamin A
    • Small, round or pellet-shaped kibble that's easy for premolars (the back baby teeth that start chewing) to grip

    Kibble should be small and uniform so premolars can handle bites without fuss. Too-large chunks make chewing hard and can lead to gagging or wasting food. Try a few small trial bags, watch how your kitten chews and what their stool looks like, and tweak the choice if they seem uncomfortable or gain weight too fast. Ever watched a kitten try to crush a giant kibble? Cute, but not ideal, pick something that fits their little mouth and keeps playtime pawsitive.

    How much dry food should a kitten eat, feeding frequency, and hydration

    - How much dry food should a kitten eat, feeding frequency, and hydration.jpg

    Most kittens around 8 weeks weigh about 2 pounds and need roughly 160 kcal per day (kcal = kilocalories, the "calories" you see on pet food). That usually works out to about 3/8 to 1/2 cup of typical kitten kibble (kibble = dry cat food pieces), or roughly 35–50 g (grams). Kibble varies a lot in calories per cup (energy density – how many calories are packed into a cup), so use the bag’s feeding chart as a starting point and measure with the same dry cup or a kitchen scale each time for consistency.

    During early weaning offer small, frequent meals , think up to six times a day , then step down as the kitten gets used to solids to at least three meals daily. When you’re feeding three times a day, split the total into equal thirds so each meal is predictable. A steady routine helps you spot if they’re eating less or more, and it keeps a hungry kitten calmer. Ever watched your kitty bat at a bowl like it’s a drum? Yeah, routine helps with that.

    Weigh kittens often at first: daily during weaning, then every few days once their growth evens out. If weight climbs too fast, cut portions a bit. If growth stalls or weight drops, increase calories and call your veterinarian. Always leave fresh, shallow water out when serving dry kibble to help digestion and hydration , kittens often prefer a shallow bowl so their whiskers don’t touch the sides.

    Worth every paw-print.

    Age/Stage Sample daily portion (notes) Meals per day
    Weaning (4–8 wks; starting solids) 30–60 g (0.25–0.5 cup) mixed wet/dry; recheck if weight gain is slow 4–6
    8 wks–20 wks 35–50 g (≈0.4 cup ≈160 kcal/day); weigh weekly during rapid growth 3
    5–7 months 1/3–1/2 cup (≈45–75 g); reduce as growth rate slows, recheck monthly 2–3
    7–12 months 1/2–1 cup (≈75–150 g); monitor for excess weight and adjust 2

    Common problems after introducing dry food and when to call a veterinarian

    - Common problems after introducing dry food and when to call a veterinarian.jpg

    Mild tummy upset is normal when kittens switch from wet to dry food. Expect an adjustment window of a few days up to two weeks, and watch appetite, energy, and stool shape (formed log, soft blobs, watery). Keep an eye on the litter box like it’s a little weather report for your kitten’s health. If a step in the transition makes stools looser, go back to the previous step and try slower.

    Call the vet for big red flags. If diarrhea lasts more than 48 hours, weight gain stops or your kitten loses weight, they keep vomiting, refuse to eat, or they’re strangely limp and sleepy, get help. Watch for dehydration signs too: skin tenting (pinch the scruff – if the skin stays up), dry or sunken gums, sunken eyes, or skin that doesn’t snap back quickly.

    Before you call, try a few home steps: drop back one texture stage, offer KMR (kitten milk replacer – a milk formula made for kittens) or small bottle supplements if they won’t eat, keep wet food and fresh water available, and clean litter and bedding to lower infection risk. If stools get worse after a change or diarrhea goes past 48 hours, revert that change and call your vet.

    1. Stalled weight gain (daily gains stop or slow)
    2. Weight loss (any measurable drop over 24 to 48 hours)
    3. Persistent diarrhea longer than 48 hours
    4. Clear signs of dehydration (skin tenting, dry or sunken gums, sunken eyes, skin that won’t snap back)
    5. Repeated vomiting or inability to keep food down
    6. Severe lethargy or weakness

    Special situations: orphan or bottle-fed kittens, picky eaters, and dental concerns when offering dry food

    - Special situations orphan or bottle-fed kittens, picky eaters, and dental concerns when offering dry food.jpg

    Orphan and bottle-fed kittens

    Keep your bottle schedule while you start solids, using KMR (kitten milk replacer, a kitten milk substitute) so they still get the calories they need. Offer small amounts of softened food between feeds, but don’t cut out the bottle too fast, these little ones still need that steady nutrition. Ever watched a tiny mouth latch on and snooze right after? It’s the best.

    Weigh the kitten every day on a kitchen scale (grams are easiest) and write the numbers down. If weight gains slow or stop, go back to regular bottle support and give smaller, more frequent supplements until the scale trends up again. If you’re worried or the kitten seems weak, call your vet sooner rather than later.

    Picky eaters and dental issues

    Hand-feeding can work wonders for shy or nervous kittens. Offer tiny tastes on a clean fingertip or a small spoon, in a calm voice, and let them lick at their own pace. Try a pea-sized scoop on your fingertip and see if curiosity wins out.

    Warm food slightly to boost aroma, or add a teaspoon of warm low-sodium chicken broth (no salt added) or a commercial kitten topper (flavor enhancer) to make meals more tempting. For kitties with sore mouths, keep kibble or canned mixes moistened so chewing is easier. Watch for dental red flags: painful chewing, drooling that won’t stop, or teeth that don’t come in on time, those mean a vet visit is needed.

    Quick interventions for picky or orphan kittens:

    • Hand-feeding tip: use a small spoon or your fingertip, speak softly, and give tiny bites so the kitten builds confidence.
    • Appetite boost: warm food a little and stir in a teaspoon of low-sodium broth or a kitten topper for extra smell and flavor.
    • Easier chewing: soak kibble or mix canned food so it’s soft if the mouth looks sore.
    • Dental red flag: schedule a vet exam if chewing is painful, drooling is persistent, or tooth eruption seems delayed.

    Worth every paw-print.

    When Can Kittens Eat Dry Food Safely

    - Timeline for switching to adult dry food and monitoring long-term growth.jpg

    Most kittens can move from kitten-formulated food (higher protein and calories made to fuel growth) to adult dry food (kibble for adult maintenance) at about 10 to 12 months old. Big-boned breeds , like Maine Coon-style growers (kittens that keep getting bigger for a long time) , and kittens that are underweight may do better on kitten food up to 12 months while they finish growing.

    The fastest growth happens in the first six months, so watch growth curves (weight plotted over time) more than the calendar. Check weight and body condition once a month while you switch: use a kitchen scale and do a simple body check , feel the ribs gently and look for a tucked waist (a slimmer line behind the ribs). If weight gain slows or extra fat appears, slow the swap down.

    Go slow if stools loosen or your kitten eats less. Pause the change if weight drops , step back to the previous mix and let weight recover while you talk with your veterinarian. Ever watched your kitty sniff a new bowl like it might be a mystery? Same idea, they need time.

    Plan for a gradual change over about 7 to 10 days, and cut down any added moisture stepwise if your kitten has been eating moistened food (kibble soaked in water or mixed with canned food). Move more gently if you see loose stool or a drop in appetite.

    1. Days 1–3: Start with about 75% kitten formula + 25% adult food; keep the usual moisture level.
    2. Days 4–7: Shift to roughly 50% kitten + 50% adult; reduce added water or soak time slightly.
    3. Days 8–14: Move to 25% kitten + 75% adult, then go to full adult food by day 11–14 if weight and stools stay steady.

    If things go off-track, don’t panic. Go back to the mix that worked, give it a week or two, and check in with your vet. Worth every paw-print.

    Final Words

    In the action: start offering moistened kibble or gruel at about 4-6 weeks; most kittens are eating dry or mixed diets by 8-10 weeks.

    Watch for nibbling at 3-4 weeks, premolars (front chewing teeth) appearing around 5 weeks, and curious dish-eating behavior. Those are the measurable green lights.

    When can kittens eat dry food? Most will be ready by 8-10 weeks if those signs and steady weight checks line up, and then you’ll have playful, healthy kittens filling the house with purrs.

    FAQ

    When can kittens eat dry food?

    Kittens can start eating moistened dry food around 4–6 weeks, and most are on dry or mixed diets by 8–10 weeks once chewing and weight gain progress.

    What signs show a kitten is ready for dry food?

    A kitten is ready when it nibbles solids at 3–4 weeks, shows premolar eruption around five weeks, explores dishes, and gains steady weight toward about 2 pounds by eight weeks.

    Can 4-week-old or 5-week-old kittens eat dry food?

    Four-week-old kittens should receive moistened gruel; five-week-olds can handle softened kibble as chewing improves, with fully dry kibble usually introduced later in the weaning timeline.

    When do kittens start eating food and drinking water?

    Kittens begin nibbling solids around 3–4 weeks and can be offered fresh water once solids start; most reliably drink from a dish by about 6–8 weeks.

    When can kittens eat wet food?

    Kittens can eat wet food beginning around 4–6 weeks, using canned food made into a gruel for early weaning and progressing to thicker textures across about two weeks.

    What is a basic kitten feeding chart by age?

    A basic chart: 4–8 weeks moistened gruel and small meals; 8–20 weeks larger growing portions (about 160 kcal/day at eight weeks); meals drop from up to six daily to three as solids increase.

    What is the 3-3-3 rule for kittens?

    The 3-3-3 rule means three days to settle into a new home, three weeks to adapt to routines and the household, and three months to feel fully comfortable and bonded with family.

    Can 4-week-old kittens poop on their own?

    Many four-week-old kittens can poop on their own as reflexes mature, though some still need stimulation; consult a veterinarian if elimination doesn’t occur or stools look abnormal.

    Related Articles

  • Are Unbreakable Cat Balls Worth It

    Are Unbreakable Cat Balls Worth It

    Thinking about buying an "unbreakable" cat ball? Ever watched your kitty pounce and your heart skip a beat when a toy falls apart? For many indoor cats, a well-made, tear-resistant ball can last months, keep them chasing, and save you from the toy graveyard.

    But watch out. Small parts, glued seams, and cheap cores can turn that promise into a choking hazard or a shredded mess. Check for loose bits and anything that peels away before you bring it home.

    My take: they’re worth it when the material is sturdy. Look for soft rubber (bouncy, tear-resistant, like a Kong toy) or high-impact plastic (hard, tough plastic that takes knocks). Make sure there are no tiny pieces, and that your cat actually chases it enough to pay for itself.

    Worth every paw-print.

    Are Unbreakable Cat Balls Worth It

    - Quick verdict on durable  unbreakable cat balls (direct answer section).jpg

    For a lot of indoor cats, a well-made "unbreakable" ball can be worth the money when it lasts longer, stays safe, and keeps your cat playing more than cheap throwaway toys. If it saves you from replacing shredded toys every week, that feels good, your furniture might even sigh in relief.

    • Durability: In owner tests, SlimCat-style dispensing balls (treat-dispensing toys that roll and drop kibble) survived repeated runs down stairs and actually got cats moving. Natural rubber (soft, bouncy rubber that resists tearing, think Kong) and high-impact plastics (hard plastic made to take knocks) tend to hold up best. Cardboard centers (paperboard cores) and thin stitched seams (narrow sewn joins) are the usual weak spots, so watch for those. Ever watched your cat chase a ball that makes a satisfying thud as it skids across the floor? Yeah, that’s the kind of play you want to last.

    • Safety caveats: Small parts like replaceable cardboard inserts, little tails, or loose caps can become choking hazards, so supervise play with those or remove the tiny bits. Many product pages don’t list toxicity or warranty details (toxic finishes meaning harmful chemicals), so inspect labels and photos carefully before buying. If something looks glued or has fragile seams, don’t assume it’s safe for unsupervised play.

    • Value: Some solid models sell for under $10 (SlimCat is one example), so they can be a bargain if the ball lasts for months. Powered or rechargeable units (battery-powered toys with tiny motors) can boost your cat’s interest, but they cost more and add a risk of mechanical failure, so their long-term value depends on how often your cat actually uses them. For busy days, a simple, unbreakable ball can buy you ten minutes of safe play before you head out.

    If you’re asking, "Are unbreakable cat balls worth it?" read on for deeper looks at materials and real-world durability, a vet-style safety checklist, and a cost breakdown to help you pick the right toy for your cat.

    Materials, design, and real-world durability

    - Materials, design, and real-world durability.jpg

    Durability mostly comes down to three things: how tough the materials are, how secure the seams and attachments stay, and how a toy holds up to repeated impacts and chewing. Think of it like this: a toy can survive a few tumbles, but if the stitch pops or the core crumbles, playtime ends fast. Ever watched your cat make a toy disappear one paw at a time? Yeah.

    Natural rubber (dense, bouncy rubber like what Kong uses) handles heavy chewers well. It bends, bounces, and takes bites without tearing easily, so Kong-style toys often last longer in owner tests. High-impact plastic (a hard polymer made to take knocks) is great for toys that get dropped or slammed , it resists cracking and splintering. Silicone (a soft, rubbery polymer) is flexible and nice in the mouth, though persistent teeth can eventually cut it. Reinforced fabric , nylon or polyester backed with a cotton twill shell (cotton twill is tightly woven cotton fabric) , stands up to claw abrasion when seams are sealed to stop fraying. Cardboard centers and thin-paper inserts (thin paper cores) are the cheap parts; they shred and leave tiny bits, which owners complain about most.

    What people report in real-world break tests matches those material notes. SlimCat-style dispensing balls shrugged off stair-roll tests and kept working as meal-dispensers, which shows how a sturdy plastic shell and simple mechanics can outlast fancy features. Kong-style rubbers survived heavy chewing and rough play. Powered rolling balls and rechargeable toys often work fine until the batteries or gears wear out , the motor or internal gears usually fail before the outer shell does. The first things to give are almost always replaceable cardboard inserts and thin stitched sections.

    Match common failure modes back to design choices and a pattern appears. Cardboard wear usually means a paper core was used. Seam fray points to thin fabric or exposed stitches. Lost tails or attachments often come from glued or weak fastenings. Battery and gear failures show up when designers skip serviceable compartments. Thin plastic walls crack after repeated impacts. When you’re shopping, look for thick walls, sealed seams, and screw-secured compartments , those features cut down the usual failure routes and buy you more playtime. Worth every paw-print.

    Failure Mode Typical Material/Design Cause How to Spot It
    Cardboard wear/fragmentation Paperboard cores or thin cardboard inserts (thin paper cores) Loose paper bits, dusty residue, frayed cardboard edges
    Seam/fray on stitched fabric Thin fabric panels with exposed stitches (nylon or polyester with poor stitching) Pulling threads, unraveling seams, visible stitch gaps
    Attachment/tail loss Glued or weakly fastened accents Wobbly tails, loose glue lines, missing pieces
    Battery/gear failure on powered units Non-serviceable motors or cheap internal gears Stops mid-run, strange noises, short runtime before failure
    Plastic wall cracking Thin, low-impact plastic shells (thin hard polymer) Hairline cracks, sharp edges, sudden split after impact

    Safety, choking hazards, and toxicity concerns (safety evaluation & vet checklist)

    - Safety, choking hazards, and toxicity concerns (safety evaluation  vet checklist).jpg

    Think of this as a quick safety sweep before you hand a toy to your cat. Check the labels for toxicity, look for choking risks, and give the toy a good once-over for weak spots. Look for words like non-toxic, BPA-free (bisphenol A, a plastic chemical), phthalate-free (phthalates are plastic-softening chemicals that can leach), and latex-free (latex is natural rubber that can cause reactions in some pets). Vets like clear manufacturer labels so they can size up materials fast.

    Small parts are usually the troublemakers – replaceable cardboard inserts, feather or tail attachments, tiny bells, or removable caps can work loose over time. Cardboard cores often shred, glued accents can wobble, and stitched joins sometimes come undone. Run your thumb along seams and edges to feel for loose glue or raised stitching. A vet checking a toy will look for smooth edges, plastics that aren’t brittle (so they won’t splinter), secure seams, and fastenings that stay put when tugged.

    Quick note about cleaning: that “dishwasher-safe” claim still needs a label check before you toss a toy in the machine. Some plastics warp or leach when heated. Also, supervise play with toys that have small bits or replaceable inserts until you know those parts survive your cat’s particular energy level. And on powered toys, a secure battery compartment with a screw closure keeps curious paws and mouths away from button cells (small, very dangerous batteries).

    Ever watched a cat pop a bell off in seconds? Yep. So it’s worth being extra cautious.

    Vet-style safety checklist

    1. Smooth edges and no brittle plastic that could splinter.
    2. No small detachable parts – or attachments secured with strong stitching or screws.
    3. Replaceable inserts lock firmly in place (no loose paper, crumbs, or bits).
    4. Clear toxicity labeling: non-toxic, BPA-free (bisphenol A), phthalate-free, and latex-free where needed.
    5. Secure battery compartment with a screw closure on powered toys (prevents access to button cell batteries).
    6. Size and age suitability labeled for kittens, adults, or multi-cat homes.

    Worth every paw-print.

    Cost analysis: pricing, expected lifespan, and warranty signals

    - Cost analysis pricing, expected lifespan, and warranty signals.jpg

    We removed this standalone section and folded its key points into other parts of the guide to keep things simpler and easier to use. Think of it as tidying the toy box so you can find what you need faster.

    • The quick lifespan formula now appears as a short "Quick estimate" callout inside the Durability or Value subsection. Handy when you wonder how long a rubber ball will survive your cat's zoomies.
    • Price tiers and notes about replaceable parts (parts you can swap out, like batteries or covers) are merged into the Value paragraph where SlimCat and powered-toy costs are discussed. Fewer repeats, clearer price context.
    • Warranty and return tips moved into Safety and the Final buying checklist so you see care and coverage together. We also dropped the repeated "see Final buying checklist" line.
    • The previous cost-factor bullet list is now part of the Final buying checklist, so you get one compact decision list instead of hunting through the doc.

    Quick estimate callout
    Expected lifespan estimate = baseline material durability factor (how long a material typically lasts) times play frequency factor (how often the toy gets used) divided by number of cats.

    Example: rubber ball baseline 12 months times daily moderate play (1.0) divided by 2 cats = about 6 months.

    Worth every paw-print.

    Features to prioritize and which cats benefit most

    - Features to prioritize and which cats benefit most.jpg

    Match features to your cat first. Think about how they play: do they bite hard, stalk quietly, or need food to get moving? For example, if your cat is a power-biter, pick natural rubber (dense, bouncy rubber that resists tearing).

    Keep this quick checklist with your final buying notes or materials list so you can pick the right toy fast. Ever watched your cat test a toy for five minutes and then ignore it? These choices help avoid that.

    • Natural rubber core (dense, bouncy rubber that resists tearing) – Best for heavy chewers and power-biters. It absorbs chomps and keeps bouncing, so play lasts longer.
    • High-impact plastic shell (hard polymer that stands up to knocks) – Great for active chasers who drop and slam toys. Tough enough for rough play.
    • Replaceable centers (swap-in parts that refresh the toy) – Ideal for multi-cat homes or anyone who wants long-term value. Swap the inside, keep the shell.
    • Adjustable treat opening (a slot you can make bigger or smaller to control treats) – Perfect for feeding-motivation play or weight management. Makes playtime a little brain game.
    • Sealed seams and cloth reinforcements (stitched or welded edges that stop fraying) – For persistent scratchers who pull on seams. Keeps stuffing and threads from becoming a mess.
    • Screw-closed battery compartment (batteries secured behind a screw cap) – Must-have for curious chewers or kittens, so batteries stay out of reach.
    • Low-noise options (quiet motors or no rattles) – Gentle on senior cats and skittish kitties who dislike sudden sounds.
    • Small, soft-texture balls (plush or soft rubber that’s gentle on teeth) – Best for kittens and cats that like to mouth toys gently.

    Think about your cat’s favorite moves and match the material to the playstyle. Then toss it into your cart and enjoy those zoomies. Worth every paw-print.

    Care, cleaning, and maintenance to extend toy life

    - Care, cleaning, and maintenance to extend toy life.jpg

    A little routine care keeps a rolling treat dispenser from turning into a crumb museum. Wipe out the treat channels after play so kibble dust and oils don’t pack in and block the openings. A soft brush or toothpick works wonders for stuck bits. Some SlimCat-style models are top-rack dishwasher-safe (top shelf of the dishwasher), but always check the maker’s label before you toss anything in the machine.

    Use mild dish soap and warm water for most parts. Skip harsh solvents unless the manufacturer says an antimicrobial coating (a surface treatment that inhibits germs) is safe to clean. Ever watched kibble crumbs look like confetti? Yeah, that confetti likes to hide in corners.

    Batteries and storage matter as much as a clean treat port. Keep battery compartments dry and the screw-closed caps snug. Remove batteries for long storage to prevent corrosion (battery leakage that eats metal). Store toys out of prolonged sunlight – UV means ultraviolet light – and in a cool, dry spot so rubber and plastics don’t get brittle or warp.

    1. Inspect replaceable inserts and seams weekly for shredding, loose threads, or weird chewed bits.
    2. Clean treat-dispensing channels after each use to prevent residue buildup. A quick rinse and brush is fine.
    3. For dishwasher-safe models, run top-rack only and confirm the materials are rated for heat.
    4. Dry everything fully. Keep battery compartments closed and dry; remove batteries if you’re storing the toy long-term.
    5. Retire toys that show exposed stuffing, fragmented inserts, or cracked plastic – those are hazards, not keepsakes.

    Worth every paw-print.

    Are Unbreakable Cat Balls Worth It

    - Alternatives and complementary toys.jpg

    If your cat chews toys to bits or ignores rolling toys, try a different play plan. Some cats love to gnaw. Others want to stalk, pounce, and wrestle. And in multi-cat homes, a simple rolling feeder can turn into a food fight if you’re not careful.

    Heavy chewers do best with chew-first options that stand up to pressure. Cats who hunt or wrestle need toys that move, can be tossed, or give a little when grabbed. For homes with more than one cat, think about toys that cut down on competition or encourage solo play.

    Good alternatives to unbreakable balls:

    • Kong chew/treat toys, natural rubber (dense, bouncy rubber that takes chomps) , great for chewers and treat games.
    • Battery chase balls with fluffy tails, battery-powered (tiny motorized balls that scoot and mimic prey) , perfect for hunters who love to chase.
    • Three-ball track systems, track toy (plastic track with balls trapped inside so they roll but don’t escape the room) , lets cats bat without losing the toy.
    • Interactive rings and teaser wands, teaser wand (like a fishing rod for cats) , give that stalking thrill and build connection during play.
    • Dental-focused chew toys, textured chews (made to resist fraying and help clean teeth) , play and dental care in one.
    • Plush rope mice, rope-covered plush (soft mouse with a rope shell) , resists wrestling and channels claw energy away from your couch.

    Keep toys exciting by rotating them. Swap a few items every 2 to 4 days so nothing gets boring. Then, after a quick reintroduction to a ball, try a short teaser-wand session or a supervised chase , that pairing makes the ball seem new and helps it last longer. In multi-cat homes, give duplicates of durable toys or stagger treat-dispensing playtimes so everyone gets a fair turn.

    I once watched my cat leap across the sofa for a fluffy-tailed chaser , pure joy. Worth every paw-print.

    Final buying checklist for unbreakable cat balls

    - Final buying checklist for unbreakable cat balls (what to check before purchase).jpg

    Quick pre-purchase sweep – keep this tiny checklist handy so you don’t end up with a pretty ball that falls apart after a week.

    1. Confirm materials and toxicity labels. Look for natural rubber (stretchy plant-based rubber), BPA-free (no Bisphenol A, a chemical sometimes linked to health concerns), phthalate-free (no softening chemicals), and latex-free if your cat has sensitivities. If the label is vague, ask the seller or skip it.

    2. Check small-part risks and attachment security. Inspect tails, bells, glued bits, and replaceable centers for stitching, molded joints, or strong adhesives. These bits can come off fast with an enthusiastic pounce, so think like a vet – safety first (vet-style safety checklist = veterinarian-approved safety items).

    3. Confirm replaceable-part availability and cost. Cardboard cores wear out fastest – that’s the paper tube inside the ball. Ask whether replacements are sold and how much they cost. Example: three months in, cardboard core shredded; replacement $2. Worth the tiny spend if the rest of the toy holds up.

    4. Read real owner durability reports. Look for specific tests in reviews – stair-rolls, chew-tests, or drop-from-top-step stories ("dropped from top step, rolled 12 steps, no cracks"). Those details tell you more than vague “super durable” claims.

    5. Review warranty and return policies. Check how long the warranty lasts, what it actually covers (chewing, breakage, defects), and whether returns are easy. A solid guarantee says the maker stands behind their product.

    6. Verify cleaning instructions and dishwasher compatibility. Some balls are top-rack dishwasher safe; others need a simple hand wash. If you’re busy, pick a toy that cleans easily so it stays fresh for playtime.

    Worth every paw-print.

    Final Words

    In the action: a high-quality, well-made ball keeps multi-cat households moving and cuts the time spent replacing shredded toys.

    Natural rubber (tough, chew-friendly core) and high-impact plastic (stiff, impact-resistant) came out best in owner tests. Cardboard centers and stitched seams failed fast, and many listings skip clear toxicity or warranty details, oops, check labels.

    So, are unbreakable cat balls worth it? For many busy pros with several cats, yes, they offer longer play, less stress, and better value.

    FAQ

    Frequently Asked Questions

    Are unbreakable cat balls worth it for indoor cats and kittens?

    Unbreakable cat balls can be worth it for many indoor cats and often for kittens if they are made from safe materials like natural rubber (chew-resistant, similar to a Kong) or high-impact plastic; always check size and manufacturer labels for safety.

    Which cat toys are most stimulating—Cat Dancer, Da Bird, automatic lasers, or balls?

    Cat Dancer and Da Bird encourage high-energy chase and pounce play; automatic lasers add solo chase but need follow-up with a tangible toy or treat; durable balls offer lasting independent play. Rotate toys to keep your cat interested.

    Is it cruel to tease a cat with a laser pointer?

    It can be cruel if the cat never catches a tangible prize. End laser sessions with a toy or treat so the hunt finishes with a satisfying catch.

    Do cats actually play with yarn balls?

    Yes, cats play with yarn balls, but yarn can fray and be swallowed. Supervise play or swap yarn for stitchless, secured soft toys to reduce choking and intestinal-risk.

    What is the 3 3 3 rule of cats?

    The 3‑3‑3 rule says a cat may take about 3 days to settle in a new spot, 3 weeks to show comfort and curiosity, and roughly 3 months to feel fully at home.

    How should I handle stray cats humanely?

    Contact local animal control or TNR (trap‑neuter‑return) programs, offer temporary shelter if safe, and ask shelters or rescue groups for removal or rehoming help.

    Are unbreakable cat balls safe—what about choking and toxins?

    They can be safe when labeled non-toxic, BPA-free, and seam-free. Avoid toys with loose attachments or cardboard inserts and check for secure battery compartments on powered units.

    Related Articles

  • When Can Kittens Eat Wet Food: Age Tips

    When Can Kittens Eat Wet Food: Age Tips

    Ever watched a kitten try to lap up food and end up wearing more of it than eating? It’s messy and hilarious, whiskers full of gravy, tiny paws sliding, so yeah, we’ve all been there.

    Start offering tiny tastes of wet food at 3 to 4 weeks. Around 5 weeks, begin staged weaning: mix canned kitten food (soft, wet food made for kittens) with KMR (kitten milk replacer, a milk substitute) until the mix is spoonable, like thick applesauce. Most kittens are fully weaned by 8 to 10 weeks, though some need a little more time.

    Look for the signs: erupting teeth (the tiny white tips poking through), steady weight gain week to week, and real curiosity about the bowl, sniffing, licking, batting at it. Move slowly. Offer tiny spoonfuls, warm the food a bit, and let them make a glorious little mess while they learn. Gentle praise helps, and short, supervised sessions beat long, stressful ones.

    Worth every paw-print.

    When Can Kittens Eat Wet Food: Age Tips

    - Timing and readiness  quick answer (fulfills the search intent in this section).jpg

    Start offering tiny tastes of wet food around 3 to 4 weeks old. At about 5 weeks begin staged weaning – offer a spoonful of gruel (a soft, spoonable mix) made by stirring canned kitten food with KMR (kitten milk replacer) or warm water until it’s easy to lap. Most kittens are fully weaned by 8 to 10 weeks, though some take a little longer.

    Go slow. Try a shallow dish so they can lap without struggling. Your kitten’s whiskers will twitch, they might nudge the bowl, and before you know it they’re batting at the food like it’s a new toy. Ever watched a kitten figure out lapping? It’s adorable and kind of educational.

    If you see signs of trouble, pause the transition and call your veterinarian. Watch for dehydration, fast weight loss, or persistent diarrhea or vomiting. Those problems need help, pronto.

    Look for these readiness signs:

    • Erupting teeth, especially back premolars (new teeth pushing through the gums).
    • Can lap from a very shallow dish without sucking.
    • Shows interest in the mother’s or an offered dish of food.
    • Steady weight gain while still nursing regularly.

    A quick tip: if a kitten won’t eat, try warming the food a bit to boost the smell. It often does the trick. Worth every paw-print.

    When Can Kittens Eat Wet Food: Age Tips

    - How to introduce wet food to kittens detailed step-by-step weaning method.jpg

    Weaning is a step-by-step move from milk to canned food. Many folks start around five weeks old and usually make the change over 3-10 days, but some kittens need a much gentler pace. Think of it like teaching them to taste and chew, one tiny spoonful at a time.

    This section gives the practical how-to: what to offer first, how to mix wet food with kitten milk replacer (KMR) (kitten milk replacer, a milk substitute for kittens), how textures should change, and quick tricks for picky eaters. For exact meal volumes and a sample daily chart, see the Portions section below or your vet’s guidance.

    If a kitten refuses food or gets an upset tummy, slow down, step back a stage, or try a different texture or flavor. Use the Weighing and monitoring section below for daily weighing tips and the red flags that mean you should call your vet.

    1. Step 1: Get a very shallow, wide dish and warm the wet food a little so it’s close to body temperature. Warm food smells stronger and that helps curious noses investigate.
    2. Step 2: Offer a tiny spoonful of gruel (soft, spoonable mix) near the kitten’s mouth and let them sniff and taste on their own time. No pressure.
    3. Step 3: Encourage lapping by dipping a clean fingertip and letting the kitten follow it, or let the mother show the way if she’s around. It’s like teaching them to drink from a shallow puddle.
    4. Step 4: Give short exposures to the dish several times a day while you keep supplemental nursing or bottle feedings with KMR (kitten milk replacer) until intake from solids is steady.
    5. Step 5: Only move to the next texture once the kitten comfortably accepts the current one; follow the Mixing and texture progression below from gruel to pate to small chunks.
    6. Step 6: If you have a litter, separate slow eaters for short supervised turns so every kitten gets enough without being pushed away by siblings.
    7. Step 7: Weigh each kitten daily at first and watch the trend; see the Weighing and monitoring section for target gains and red-flag thresholds.
    8. Step 8: Switch to canned-only meals when the kitten reliably eats solids, laps cleanly, and shows steady weight gain. Worth every paw-print.

    Mixing and texture progression

    Start thin and spoonable, then slowly thicken the mix as chewing gets better. Warm mixtures are more enticing and small sample bowls cut down on waste.

    • Gruel (about 3-5 weeks): 1-2 tablespoons canned wet food plus 2-4 tablespoons KMR or warm water to make a spoonable mush.
    • Mid-stage mash (about 5-6 weeks): roughly 2 parts canned food to 1 part liquid for a soft pate consistency.
    • Chunky (about 6-8 weeks): use less liquid so small minced pieces or chunks in gravy appear; the kitten should lap without sucking.
    • Canned solids (around 8 weeks): offer plain canned kitten food if the kitten accepts minced textures; keep portions small so they don’t overload their tummies.

    A quick tip: if a kitten sniffs and walks away, try offering a little on your finger again or warm a tiny bite between your palms. Ever watched your kitten chase shadows? Same curiosity, just slower.

    Weighing and monitoring during weaning

    Use a small digital kitchen or postal scale that reads in grams and weigh at the same time each day before feeding. Tracking trends matters more than any single number. Weigh daily during the first week of the swap, then every other day once gains look steady.

    Red-flag checklist:

    • Weight loss over 24-48 hours.
    • Consistent gain under about 5 g per day.
    • Persistent diarrhea.
    • Ongoing vomiting.
    • Signs of dehydration like sunken eyes or tacky gums.

    Keep a simple log with date, time, and grams for each weigh-in and note stool and appetite changes. Bring that record to your vet if trends look off or if symptoms stick around. It helps them help you faster, and, um, your kitten will thank you with purrs.

    Kitten wet food nutrition: labels, key nutrients, and calorie notes

    - Kitten wet food nutrition labels, key nutrients, and calorie notes.jpg

    Pick canned foods that say "complete and balanced" for growth on the label. AAFCO (Association of American Feed Control Officials, the U.S. pet food standard) lets you know the food was tested for growing kittens. Growth formulas are richer than adult foods so tiny tummies get the fuel they need to play, learn, and grow.

    Look for these key nutrients: protein (protein – building blocks for muscles and organs), fat (fat – concentrated energy and fat-soluble vitamins), DHA and EPA (DHA/EPA – omega-3 fats that help brain and eye development), and taurine (taurine – an amino acid important for heart and vision). Wet food also adds water to your kitten's day and packs calories into small servings, which helps little eaters keep up with fast growth. Ever watch a kitten chase a wobbling meatball? That extra moisture and calories make energy bursts possible.

    Not sure how many calories your kitten needs? Ask your veterinarian to calculate kcal targets by age and weight. Bring the can label or the calories-per-ounce info and a recent weight so the vet can give a tailored portion plan and convert amounts into cups, grams, or tablespoons you can use at home.

    Nutrient Why it matters Target / Notes
    Protein Supports quick tissue growth and development Higher than adult formulas; prefer named animal proteins (chicken, turkey, etc.)
    Fat Dense energy and essential fatty acids Higher fat to meet calorie needs of growing kittens
    DHA / EPA Supports brain and eye development Look for DHA on the label (an omega-3)
    Taurine Needed for heart function and vision Must be included in kitten formulas
    Calories (kcal) Guides portion sizes and daily needs Check label; your vet can convert kcal to grams or tablespoons

    When Can Kittens Eat Wet Food: Age Tips

    - Portions and feeding schedule when kittens eat wet food (sample chart).jpg

    Most kittens eat three meals a day until about four months old, then many drop to two meals a day after roughly 16 weeks. Some kittens, though, like to nibble small amounts all day. Start with tiny sample spoonfuls during early weaning so you don’t waste canned food, 3 oz and 5 oz cans are common, and smaller cans help single-kitten homes.

    Keep an eye on weight (see the Weighing and monitoring section). Steady weight gain means the portions are right. Slow gains mean offer a bit more or keep supplementing with KMR (kitten milk replacer, a milk substitute).

    Age (weeks) Meals per day Suggested wet food per day (approx) Notes
    3–4 Sample spoonfuls / short sessions A few teaspoons total (gruel) Mix canned with KMR or warm water to a spoonable mush (gruel); use a very shallow dish
    5–6 3 meals 1–2 tbsp per meal (3–6 tbsp/day) Keep some supplemental nursing or bottle feeds; thin the food slightly so it’s easy to lap
    7–8 3 meals 1–2 tbsp per meal Reduce added liquid so texture is pate-like (soft, smooth canned texture) or minced; offer canned-only bites
    9–12 3 meals 2–3 tbsp per meal (6–9 tbsp/day) Most kittens handle canned solids by now; watch appetite and stool for signs of tolerance
    12+ 2–3 meals (drop to 2 after about 16 weeks) 3–6 tbsp/day, varies by size and activity Adjust based on weight trends; small 3-oz cans cut waste for one kitten

    If your kitten’s weight is creeping up slowly, add a little more at each meal or slip in an extra short feeding. If weight stalls or drops, go back to supplemental KMR and slow the texture change while you and your foster coordinator or veterinarian troubleshoot, um, calmly.

    Sample feeding adaptations for single vs multiple kittens

    When several kittens share a bowl, the fast eaters can crowd out the shy ones. Weigh kittens daily during the transition and feed timid ones separately for short supervised sessions. Use multiple shallow dishes, stagger feeding times, or put a slow eater in a quiet room for a few minutes so everyone gets their fair share.

    Worth every paw-print.

    Resources

    - Choosing kitten wet food and textures when kittens eat wet food.jpg

    Product picks and picky-cat tips live here now for one easy reference. We pulled the best suggestions into a single spot so you can find them fast. Ever watched your cat sniff a bowl and stroll away? Yeah, us too.

    Quick notes below include brand lists and practical tips you can try tonight.

    Worth bookmarking. Your cat will thank you, maybe with a slow blink.

    Troubleshooting (quick fixes): kittens and wet food

    - Troubleshooting when kittens eat wet food refusal, diarrhea, vomiting, and allergies.jpg

    Introducing wet food can bring up a few common headaches: refusal to eat, loose stools, vomiting, or mild food reactions. The switch usually takes about 3 to 10 days, so be patient and check the timeline earlier in this guide. If your kitten seems off, slow the swap down and go back to the last mix that felt comfortable so their weight stays steady.

    Try these quick, at-home fixes , short steps that often calm tummies or get a picky eater going:

    • Warm a tiny bite to boost the smell. Rub a pea-sized dab between your palms or pop it in the microwave for 1 second, then test the temp before feeding. The aroma really helps some kittens.
    • Fingertip demo to encourage lapping. Tap a little smear on your finger and let the kitten lick it; they often copy you. Cute, and effective.
    • For loose stools, step back to the last mix ratio they tolerated and stay there until stools firm up. Slow is better than sudden.
    • If the food seems too rich, make a gentle mash for a few days by adding a little warm water. It’s easier on tiny stomachs and still tasty.
    • For vomiting, cut portion sizes and feed smaller, more frequent meals until vomiting stops. That often settles things fast.
    • If you spot dehydration or weight loss, offer small extra fluids or KMR (kitten milk replacer , vet-formulated milk substitute) and weigh the kitten daily on the same scale, jotting down the numbers and stool notes. Keeping a short log helps spot trends.
    • Suspect an allergy? Try a different protein or a dedicated kitten formula. If symptoms stick around, call your vet.

    For serious or persistent red flags, see the Safety H3 "When to consult a vet" section and contact your veterinarian without delay.

    When Can Kittens Eat Wet Food: Age Tips

    - Special cases orphaned, bottle-fed, or medically fragile kittens eating wet food.jpg

    Orphaned or bottle-fed kittens usually need a longer overlap of formula and wet food than kittens raised by their mom. Start offering tiny tastes around 3 to 4 weeks if the kitten seems interested and steady. Keep KMR (kitten milk replacer) on hand , that’s the formula substitute that stands in for mom’s milk , and continue extra bottle sessions for several weeks until the kitten is reliably eating solids. Go slow. Little tummies need time to adjust.

    Fully weaned means the kitten eats canned food on its own, keeps gaining weight, and is nursing or bottle-feeding much less or not at all. If a kitten still can’t lap, spits food out, or loses weight, keep the overlap. Try gentler textures first, like a thinner gruel (a thin, porridge-like mix) before moving to thicker blends.

    Practical tips: mix wet food with KMR to a spoonable mush for very young or weak kittens. Warm the mix to about body temperature to make the smell stronger and more inviting. Use a very shallow dish so tiny faces can reach it, and offer small, frequent helpings so each meal is easy to manage. Weigh the kitten daily and note trends , if weight stalls, add short supplemental bottles and check in with your foster coordinator or vet.

    Syringe and assisted feeding technique

    For kittens that can’t self-feed yet, make a smooth blend of wet food and KMR so it’s syringe-safe with no big chunks. Use tiny syringes and calm, measured feeds while watching carefully for swallowing.

    1. Make a smooth mix: blend canned food with KMR until it’s thin and pourable. No lumps.
    2. Choose syringe size: use 1 mL to 3 mL syringes for newborns, and up to 5 mL for bigger babies; give small amounts per stroke.
    3. Position safely: hold the kitten upright, head slightly forward, not tilted back, to lower the risk of aspiration (food getting into the lungs).
    4. Pace the feed: give slow, steady drops and let the kitten swallow between doses; pause if you hear coughing or see choking.
    5. Know when to escalate: if feeding stays difficult, the kitten loses weight, or breathing seems hard, contact your vet or foster coordinator right away.

    Ever watched a tiny kitten figure out food for the first time? Their whiskers twitch, they snuffle, and then , surprise pounce. It’s a little messy, but worth every paw-print.

    Safety, storage, and vet triggers when kittens eat wet food

    - Safety, storage, and vet triggers when kittens eat wet food.jpg

    Heads up: storage and hydration tips that used to be here are moved to the Portions/Feeding and Weighing & monitoring sections so we don’t repeat the same advice.

    When to consult a vet

    Call your veterinarian right away for any of the red-flag signs below. Faster action can keep a kitten from getting worse.

    • Diarrhea lasting more than 24 to 48 hours
    • Vomiting that keeps happening past 24 hours
    • Rapid or unexplained weight loss
    • Not gaining weight (check your weighing log)
    • Signs of dehydration (sunken eyes, tacky gums , gums that feel sticky, not wet)
    • Severe lethargy or unresponsiveness

    Before you call, have these details ready so the vet can help faster: recent weights in grams, how long symptoms have been happening, what you’ve been feeding (brand, texture, amounts), and any home measures you tried. Quick example note you can read out: "Weights: 420 g yesterday, 405 g two days ago. Fed Brand X pate (smooth wet food), small supplemental bottles twice daily. Offered shallow water and KMR (kitten milk replacer)."

    Final Words

    In the action, we gave the clear answer: start sampling at 3–4 weeks, begin staged weaning around 5 weeks, and usually fully weaned by 8–10 weeks.

    Then we walked through mixing gruel, texture steps, weighing, portion plans, troubleshooting and special-case feeding so you'll have one plan to follow.

    If you wondered when can kittens eat wet food, watch for erupting teeth, lapping from a shallow dish, interest in mom’s food and steady weight gain , start slow and call your vet for serious red flags. With patience, your kittens will be playful and healthy.

    FAQ

    Frequently Asked Questions

    When can kittens eat wet food?

    Kittens can sample wet food at 3–4 weeks, start staged weaning about 5 weeks, and are usually fully weaned by 8–10 weeks. Offer spoonable gruel and watch weight trends.

    When can kittens eat dry food?

    Kittens can try softened dry kibble mixed with wet food or kitten milk replacer (KMR) around 4 weeks, but plain dry kibble is best once chewing is reliable, about 6–8 weeks.

    When do kittens start eating food and drinking water?

    Kittens start sampling food at 3–4 weeks and will usually begin drinking water reliably within 1–3 days after wet food introduction. Always offer fresh, shallow water for lapping.

    Can 3-week-old kittens eat wet food and poop on their own?

    Three-week-old kittens can taste tiny spoonfuls of gruel if ready, but most still need caregiver stimulation to poop. Keep feeding KMR (kitten milk replacer) and monitor weight and hydration.

    How much wet food should a kitten eat at 3–4 months?

    At 3–4 months feed three meals daily, roughly 1–2 tablespoons per meal depending on size. Follow weight trends and increase portions if steady gains are too low.

    What is the 3-3-3 rule for kittens?

    The 3-3-3 rule is a simple foster checklist used by some rescues for early kitten care milestones; definitions vary, so check your shelter or veterinarian for the exact timing and steps.

    Related Articles

  • Top Rated Wet Cat Food Brands Comparison

    Top Rated Wet Cat Food Brands Comparison

    Is your cat quietly judging your wet food choices? Picking a canned meal can feel like a tiny taste test for a pint‑size dictator. Texture, aroma, and calories all matter , the silky gravy, the meaty chunks, the whiff that makes them lick their whiskers , and those things decide if your kitty gives it the royal paw. Ever watched your cat sniff, tap, and walk away? Yeah, they’re picky.

    This quick comparison lines up three top wet brands , Royal Canin, Hill’s Science Diet, and Purina Pro Plan , so you can tell which one wins for picky eaters, indoor weight control, or higher‑protein needs. We look at palatability testing, dry‑matter protein (protein after water is removed), calories per can, and rough cost, so you get the real picture without the guesswork. Purrhaps one of these will be your cat’s new favorite.

    Top Rated Wet Cat Food Brands Comparison

    - Fast answer top overall pick + runners-up, then ranked comparison table.jpg

    Our top pick is Royal Canin Adult Instinctive Thin Slices in Gravy. Runners-up are Hill’s Science Diet Adult Indoor Savory Chicken Entrée and Purina Pro Plan Complete Essentials Chunky Chicken. Yep, we tasted the options through lots of research and a few enthusiastic cat testers.

    These three stand out because they mix named animal proteins, solid nutrition, and true palatability testing (does a picky cat actually eat it). Royal Canin wins for texture and appetite-friendly recipes. Hill’s focuses on indoor weight control and extra fiber. Purina Pro Plan brings higher protein density (more protein per calorie) for cats that need lean muscle support. Ever watched your kitty pick one over another? It tells you a lot.

    Use the table below as the single source for can size, calories per can, protein (DM% where available), and rough cost per day. Protein (DM%) means dry-matter percent (the amount of nutrients after removing water). Later sections will point back to this chart so you can compare quickly and pick what fits your cat’s taste and needs.

    Rank Brand / Product Best for Can Size Calories per Can Protein (DM%) (dry-matter percent) Approx Cost/Day Key Pros Key Cons
    1 Royal Canin Adult Instinctive Thin Slices in Gravy Best overall 3 oz 66 cal/can varies varies Water is listed first, then named protein; thin slices in gravy make it easy for picky eaters; comes with a palatability guarantee. Small cans can mean more opened servings; formula aimed at specific adult stage.
    2 Hill’s Science Diet Adult Indoor Savory Chicken Entrée Indoor cats, weight control 5.5 oz 170 cal/can varies varies Lean protein plus added fiber to help hairballs and weight; includes vitamins and antioxidants for overall health. Standard taste may not tempt every picky cat.
    3 Purina Pro Plan Complete Essentials Chunky Chicken High-protein needs 3 oz 94 cal/can 50% (DM) varies Very high protein for lean muscle support; added nutrients to round out the diet. Smaller cans mean more frequent feeding; some cats prefer softer textures to chunky pieces.
    4 Smalls Fresh Ground Bird High-moisture, single-source protein , (ground, as-fed) ~40 cal/oz (as-fed) 13% (as-fed) ~$4.00/day Single-source meat, very high moisture for hydration, US-made with simple ingredients. Needs thawing before serving; typically sold by subscription.
    5 Tiki Cat Aloha / Grill Variety Pack Picky eaters and seafood lovers 2.8–3 oz 57–76 cal/can varies (often high) ~$6.31/day (varies) Super palatable seafood flavors and hydrating broths; great for finicky felines. Can be pricier than standard wet food.
    6 Purina Fancy Feast Seafood Grilled Collection Budget-friendly, highly palatable 3 oz 70–71 cal/can ~55% (crude) varies Grilled seafood flavors cats love; no artificial colors or preservatives listed. Ingredient lists are simpler compared to premium brands.
    7 Hill’s Prescription Diet Metabolic Weight Management Weight loss, vet-required 5.5 oz 136 cal/can varies varies High-fiber, designed to support metabolism and weight loss under vet guidance. Requires veterinary authorization to purchase.
    8 Royal Canin Aging 12+ Thin Slices in Gravy Senior cats 3 oz 71 cal/can varies varies Formulated for joints and kidneys, easy to chew and usually very palatable for older cats. Small cans and tailored to a specific life stage.
    9 Ziwi Peak Cat Cuisine Novel proteins and sustainability , (oz-based) ~28 cal/oz 9% (DM) ~$3.67/day New Zealand-sourced free-range meats and added green-lipped mussel for joint support. Higher price and availability can be spotty.
    10 Weruva / Tiki Cat / Wellness CORE examples High-moisture, protein-forward options varies varies varies (often high) varies Meat-first recipes with high moisture and a range of textures to please many cats. Some formulas use gums or thickeners; quality varies between lines and flavors.

    wet cat food brands

    How the rankings were determined: veterinary criteria and selection method

    - How the rankings were determined veterinary criteria and selection method.jpg

    We teamed up with veterinary nutritionists and used real-world taste checks. That means brands needed controlled feeding trials (where pets eat the food under monitored conditions) or palatability testing (taste tests) , because if your cat turns up its nose, all the vitamins in the world won't help. Vet oversight was our first trust filter, so a product without it rarely made the cut.

    Our technical checklist looked for clear ingredient transparency, like named animal proteins and obvious sourcing. We checked macronutrient balance (protein, fat, and carbs) to match AAFCO (Association of American Feed Control Officials) "complete and balanced" claims for the life stage listed. We also paid attention to moisture levels, since as-fed versus dry-matter comparisons change once you account for water (dry-matter shows the nutrient amounts after removing water). Next, we reviewed documented palatability testing, manufacturing quality controls (factory safety checks), and recall history (any past product withdrawals) to make sure label claims line up with lab practice.

    Scoring gave the most weight to nutrition and the vet review, then to palatability and practical bits like texture and availability. So a small rank jump might just reflect a texture or price difference, not a nutrition fail. Big score gaps usually point to real ingredient or quality issues that matter for seniors, urinary health, or weight management. For the hard numbers, see table above for product calorie/protein/cost figures.

    Life-stage and medical-need recommendations (use the table for metrics)

    - Life-stage and medical-need recommendations (use the table for metrics).jpg

    Each tip below explains why a product suits a life stage or condition – ingredient profile, texture, or key nutrients. Use the table above for exact calories, protein, and cost.

    Kittens

    Look for DHA (docosahexaenoic acid, a brain and eye nutrient) and higher-protein and higher-calorie rows. Pick soft, easy-to-lap textures that help with hydration and small mouths. Transition slowly over about 7 days, starting with 25% new food, and watch stool and appetite. See table above for exact calories and protein.

    Adult Indoor Cats

    Choose lower-calorie rows and higher fiber to help with weight and hairball control. Formulas labeled for indoor cats and palatable wet textures help with portion control. Introduce new food over about a week and trim portions if weight creeps up. See table above for exact calories and protein.

    Senior Cats

    Scan for joint-focused nutrients like glucosamine (joint-building compound) and chondroitin (cartilage-supporting molecule), plus lower phosphorus (a mineral that can stress kidneys). Softer textures or gravy make chewing easier. Offer smaller, more frequent meals and transition slowly while watching appetite and mobility. See table above for exact calories and protein.

    Sensitive Stomach / Skin

    Pick single-source or novel proteins and formulas with prebiotics (fiber that feeds good gut bacteria) and probiotics (live good bacteria). Gentle fibers help digestion; avoid products with multiple heavy fillers. Move to a new formula in stages and note stool or coat changes over two weeks. See table above for exact calories and protein.

    Urinary Health / Prescription Needs

    Prescription urinary diets need veterinary authorization and a vet-directed feeding plan. Look for products labeled prescription and for the pH and mineral targets your vet prescribes. Don’t switch without your vet’s OK and follow their titration and monitoring plan. See table above for exact calories and protein.

    Diabetic / Low-carb Needs

    Favor higher-protein rows and low-carb proxies like high-moisture foods and low-ingredient carbs to help steady glucose. Pay attention to protein-to-moisture patterns in the table. Work with your vet on any diet change and titrate slowly while tracking blood glucose. See table above for exact calories and protein.

    Picky Eaters

    Compare high-palate rows (shredded, broth, seafood flavors) and pick the textures your cat prefers; warming food a few seconds boosts aroma. Rotate small trials over several days and switch gradually to avoid refusal. See table above for exact calories and protein.

    How the rankings were determined

    - Ingredient and nutrition label checklist (no product stats repeated).jpg

    Wet food lists moisture near the top, so we compare products on a dry-matter (DM) basis. Dry-matter (DM) is what’s left after you remove the water from the food (think of the crunchy bits under the gravy). Read the guaranteed analysis for crude protein, crude fat, and moisture to get an apples-to-apples read across cans.

    Higher protein often replaces carbs, but it can also raise calorie density. So don’t assume more protein means fewer calories. Check the ranked table for the exact calorie and protein numbers before you swap formulas. Ever watched your cat eat only the gravy and leave the rest? Yeah, labels can be sneaky.

    Use this checklist when you read labels:

    • Check guaranteed analysis: crude protein (total protein in the food), crude fat (total fat), and moisture (water percent used for DM math).
    • Calories per can (see the ranked table for values) , calories tell you how energy dense the food is.
    • Taurine presence (taurine, an essential amino acid for heart and eye health).
    • Named animal proteins in the top ingredients (chicken, salmon, turkey vs vague "meat"). Named sources are more transparent.
    • Type of carbohydrate sources (rice, potato, peas) , carbs affect calories and digestibility.
    • Presence and type of thickeners or gums (guar gum, xanthan gum, locust bean gum , common thickeners that change texture).
    • Added omega-3 and omega-6 sources (fish oil, a source of DHA/EPA; flax) , DHA and EPA are omega-3 fats that help brain and eye health.
    • Prebiotics and probiotics and their form (prebiotics feed good bacteria; probiotics are live bacteria).
    • Life-stage or veterinary claim (kitten, adult, senior, or prescription formula) , match this to your cat’s needs.
    • Added sugars, excess sodium, or artificial colors and flavors , less is usually better.

    Use the ranked table together with this checklist to match macronutrients to your cat’s life stage and health needs. Worth every paw-print.

    Texture, flavor, and palatability considerations

    - Texture, flavor, and palatability considerations (reference table for metrics).jpg

    We moved all the texture and flavor advice into the "Picky Eaters" subsection. That note now lines up the common wet-food types so you can see how they differ: pâtés (smooth, spoonable wet food), thin slices in gravy (flat pieces in a light meat sauce that are easy to lap), and shredded/consommé (small meat shreds in a clear, flavorful broth). Want calories and protein by format? Check the main table for the numbers.

    Practical feeding tips live in a short "Practical feeding tips" sidebar under the table or in the Life-stage guidance. A few quick notes: adjust portions by texture , pâtés are dense so a little goes a long way; shredded in broth has extra water so volume can look bigger. Pâtés often stay freshest for about 12 hours after opening. Refrigerate leftover servings and label them so you know when they were opened.

    Brand-specific palatability details and the warming tip were pulled out of this section to keep things tidy. For the warming suggestion, see "Picky Eaters" , warm a spoonful for 2 to 3 seconds to lift the aroma and spark interest. And for brand-level notes on what most cats prefer, consult the product table.

    If your cat is picky, try switching formats or warming a tiny taste to see what gets those whiskers twitching. Worth every paw-print.

    Price, availability, storage, and buying strategy

    - Price, availability, storage, and buying strategy (no repeated daily costs).jpg

    Check the ranked table above for the per-can and per-day cost figures before you buy. That table is your quick price guide, and it makes comparing brands way easier. If numbers make you meow, this is the cheat sheet.

    Availability often decides the smart move. Boutique or imported lines like Ziwi Peak can disappear from shelves, so if your cat goes crazy for a flavor, sign up for a subscription service (automatic recurring deliveries) or buy from a specialty retailer to keep the bowl full. Mainstream brands are usually easier to find locally, which helps when you need a quick replacement between workdays and busy weekends.

    Think about single-serve versus bulk formats when you plan shopping. Single-serve trays like Perfect Portions are one-meal sealed trays (individual meals) that keep food fresher and cut waste, awesome for picky kitties. Bulk cans usually lower the cost per ounce, but then you’re juggling leftovers. Refrigerate opened portions in airtight containers (sealed plastic or glass containers) and label them with the date. Pâté (smooth, spoonable wet food) stays at peak quality for about 12 hours after opening, while shredded or broth-style foods often hold up a little longer when chilled. For frozen, subscription-only thaw-before-serve items (frozen food you thaw before feeding), plan delivery timing so you’re not scrambling on feeding day. Your cat’s whiskers will thank you.

    Practical buying tips:

    • Use subscriptions for steady supply and often better pricing, especially for boutique lines.
    • Scout local pet stores for specialty flavors before committing to long shipments, you might find a claw-tastic deal nearby.
    • Compare per-can versus per-ounce pricing in the table to pick the best mix of value and convenience for your cat’s tastes.
    • Keep one or two mainstream cans on hand for emergencies or travel days.

    Worth every paw-print.

    Switching and feeding guide: transition protocol and example calculations using the table

    - Switching and feeding guide transition protocol and example calculations using the table.jpg

    Before you swap wet foods, open the ranked table and find the product’s "calories per can" row. That number is your anchor for portioning, and it keeps swaps from accidentally over- or under-feeding your cat. Think of it like a steady paw on the scale, nice and simple.

    Estimate a daily calorie target for your cat based on weight and activity. Kittens need more kcal per kilogram for growth (kcal means calories). Active adults need maintenance levels, and seniors often need a little less or a tailored target for health reasons. If you see kcal/kg in a guide, that means calories per kilogram of body weight.

    To turn that target into cans, use this simple idea: daily kcal target divided by calories per can from the table equals cans per day. In other words, Daily kcal target / calories per can = cans per day. Then, if you prefer to measure by weight, multiply cans per day by the can size (use the Can Size column) to get grams (metric weight) or ounces (US weight). Adjust the final number up or down to account for treats, snacks, or any dry food calories.

    Example steps using placeholders:

    1. Calculate your cat’s daily calorie target.
    2. Divide that target by [calories per can from table] to get cans per day.
    3. Multiply cans per day by the can size (Can Size column) to convert to grams or ounces if you like measuring by weight.
      Replace each bracketed placeholder with the exact numbers from the main table to get your final feeding amounts.

    For a gentle 7-day transition, try this schedule: about 25% new mixed with 75% old for the first two days, then roughly 50/50 around midweek, move to 75% new on days five and six, and serve 100% new on day seven while watching stool, appetite, and water intake. Ever watched your kitty sniff suspiciously and then pounce? Yeah, watch for subtle clues like that. If stool changes, appetite drops, or drinking spikes, slow the swap down or pause.

    Prescription or therapeutic diets need special care. These must be switched only with vet authorization and a vet-directed plan, with closer monitoring. When in doubt, call your vet, better safe than sorry, um, especially with health diets.

    Final Words

    In the action: we named one top overall pick plus two runners-up, then laid out a ranked table, vet-driven methodology, life-stage recommendations, a label checklist, texture and storage tips, and a safe seven-day switching plan.

    Use the ranked table as the go-to for calories, protein, and cost , the rest of the guide shows how to read labels, choose textures, manage portions, and switch foods with minimal stress.

    Pick what fits your cat’s life stage and appetite, and enjoy more purrs and play. Here’s to finding top rated wet cat food brands that keep claws proud and kitties content.

    FAQ

    What are the top rated wet cat food brands on Reddit?

    The top rated wet cat food brands on Reddit are Tiki Cat, Weruva, Ziwi Peak, Smalls, and Purina Fancy Feast, praised for high moisture, real-meat-first recipes, and bold, cat-pleasing flavors.

    Which wet cat food do vets recommend and which is the best wet cat food?

    Vets recommend wet cat foods reviewed by veterinary nutritionists (specialized pet nutrition experts) and backed by feeding trials or prescription formulas; the best choice depends on your cat’s age, health, and vet guidance.

    What are the top rated wet cat food brands for kittens?

    The top rated wet cat food brands for kittens include Royal Canin, Purina Pro Plan Kitten, and Hill’s kitten formulas because they add DHA (brain/eye-support fatty acid) and higher-quality protein for growth, with pâté textures for easy eating.

    What is the best wet cat food for indoor cats?

    The best wet cat food for indoor cats emphasizes moderate calories and added fiber (digestive-helping plant matter) to curb weight and hairball risk; Hill’s Science Diet Indoor often fits that bill, but match to your cat’s needs.

    What are the top 5 healthiest wet cat foods?

    The top five healthiest wet cat foods often named are Ziwi Peak, Smalls, Tiki Cat, Weruva, and Royal Canin, selected for named animal proteins, minimal fillers, taurine (essential heart/eye amino acid), and transparent sourcing.

    Which wet cat food brands should I avoid?

    You should avoid wet cat food brands that use vague “meat” labels, heavy starchy fillers (fillers: starchy carb ingredients), added sugars or excess salt, or have a shaky recall history; read labels and ask your vet.

    Is Tiki Cat wet food good?

    Tiki Cat wet food is generally well-regarded for high moisture and meat-first recipes; many cats love its fish-forward flavors, though some formulas use gums (thickeners like guar or xanthan), so check texture and ingredients.

    Related Articles

  • Kitten Feeding Chart: Age, Amounts, Frequency

    Kitten Feeding Chart: Age, Amounts, Frequency

    Feeding kittens by the clock alone is risky. This kitten feeding chart gives exact amounts by week and the right feeding times, so tiny bodies get steady gains instead of guesswork.

    Keep a printable quick-reference by the nest box so you can glance over it between naps. You’ll know when to feed, how much to pour, and when to weigh the little ones. Ever watched their whiskers twitch as a bowl gets licked clean? It’s oddly satisfying.

    Newborns usually need feeds every 2-3 hours, about 15 ml each. Use kitten milk replacer (formula made just for kittens), not cow’s milk, please, trust me. It’s a simple plan for steady weight gain and less fretting.

    Worth every paw-print.

    Complete Age-by-Week Kitten Feeding Chart (Printable Quick Reference)

    - Complete Age-by-Week Kitten Feeding Chart (Printable Quick Reference).jpg

    Quick, handy feeding plan you can keep by the nest box. Use it as your go-to when kittens are tiny and hungry, and remember we’re aiming for steady gains, not perfection.

    • Newborns: feed every 2 to 3 hours, about 15 ml per meal; weigh daily; use commercial kitten formula (kitten milk replacer), not cow’s milk.
    Quick links: Bottle & Formula technique | Weaning technique | Troubleshooting | Printable download & checklist
    Age (weeks/days) Frequency per day Amount per feeding (ml) Total daily ml Approx kcal/day Target weight (oz / g)
    Birth / Week0 (day 0-3) – See Chart row: Birth/Week0 8-12 5-10 40-120 40-120 3-3.7 oz (85-105 g)
    Week1 – See Chart row: Week1 8-12 ≈15 120-180 120-180 ~4 oz (115 g)
    Week2 – See Chart row: Week2 8-12 8-15 80-180 80-180 Toward ~10 oz (225-285 g)
    Week3 – See Chart row: Week3 7-10 12-20 84-200 84-200 ~10-14 oz (285-395 g)
    Week4 – See Chart row: Week4 6-8 20-30 120-240 120-240 ~14-16 oz (395-450 g)
    Week5 – See Chart row: Week5 4-6 (end wk → 3) 30-45 (≈3 tbsp at end wk) 120-270 120-270 ~14-16 oz (395-450 g)
    Week6 – See Chart row: Week6 3-4 (aim 3 by end wk) 40-50 120-200 120-200 ~16-20 oz (450-560 g)
    Week7 – See Chart row: Week7 3 45-60 135-180 135-180 ~20-24 oz (560-680 g)
    Week8 – See Chart row: Week8 2 80-150 160-300 160-300 ~32 oz / 2 lb (900-950 g)
    Weeks 9-10 – See Chart row: Weeks 9-10 2 80-120 160-240 160-240 ~2-3 lb (900-1350 g)
    Week11 – See Chart row: Week11 2 90-120 180-240 180-240 ~2.5-3.5 lb (1150-1600 g)
    Week12 – See Chart row: Week12 2 100-140 200-280 200-280 ~3-4 lb (1350-1800 g)

    Round syringe doses to the nearest 1-2 ml for neonates (newborn kittens) so feeds are easy and safe. Use a gram scale (a kitchen scale that reads grams) for weight checks and track gains every day during the first weeks, then 2 to 3 times a week as they move to solids.

    When you need to convert ml to grams or kcal (kilocalories), read the product label for kcal per can or per cup. Weigh wet food on your kitchen scale for exact grams. Those label kcal numbers help you match the chart's daily kcal target to real meals.

    A few quick, important notes you’ll want to follow

    • Use a gram scale and log every weight with the time of day. It helps spot trends early.
    • Warm formula to a comfortable skin temperature before feeding. Test it on your wrist like you would a baby bottle.
    • Never give cow’s milk or human infant formula. Use commercial kitten formula (kitten milk replacer) designed for kittens.
    • Weigh neonates daily and write down gains or stalls. Small stalls need watching.
    • Call a veterinarian if weight fails to climb, a kitten is cold, not nursing, or seems lethargic.

    Ever watched a tiny kitten fall asleep mid-suck? Cute, but a slow weight gain is not. Keep records, share them with your vet, and remember that steady, small gains beat wild swings.

    Note: Downstream sections must not repeat this full age-by-age numeric table; reference the master chart by row/age (for example: "See Chart row: Week2").

    Bottle & Formula Kitten Feeding Chart: Newborn to Four Weeks

    - Bottle  Formula Kitten Feeding Chart Newborn to Four Weeks.jpg

    The first month goes by in a blink. Newborn kittens eat very often in tiny bites, then slowly move to larger, less-frequent meals as they gain weight. Use a commercial kitten formula, kitten milk replacer (KMR) , and mix it exactly the way the label says. Follow the master chart rows for exact numbers: Birth/Week0, Week1, Week2, Week3, Week4 for frequency and ml targets.

    Age Typical Frequency What to expect
    Birth / Week 0 Every 2 to 3 hours, day and night Very small amounts. Warmth and weight checks are critical
    Week 1 Every 2 to 3 hours Slightly larger feeds. Watch for steady daily weight gain
    Week 2 Every 3 to 4 hours Feeds get more efficient. Keep tracking grams daily
    Week 3 Every 4 to 6 hours Kitten starts to take more per feeding and purrs more
    Week 4 Every 4 to 6 hours, moving toward 4–5 feeds/day Preparing for weaning; still use KMR until advised otherwise

    Weighing matters. Use a gram scale (a small scale that reads grams) and write weights down every day for neonates so you can see steady gains. If you’re bottle-feeding, match your amounts to the master chart rows rather than guessing; that keeps growth on track and makes vet visits simpler.

    Step-by-step feeding tips (short and useful):

    1. Mix formula per the manufacturer directions and use fresh for each session. Opened formula can be chilled in the fridge.
    2. Warm formula to skin temperature; test a drop on your wrist. It should feel comfortable, not hot.
    3. Cut the nipple hole so formula drips very slowly when inverted; avoid free-flow. Test drip speed before you start.
    4. Hold the kitten belly-down, like natural nursing, and cradle the head with your non-dominant hand.
    5. Gently guide the nipple into the mouth and invert the bottle to start a slow flow; let the kitten latch and suck.
    6. Watch for swallowing. The kitten should make a U-shaped tongue when drinking. Pace the feed. Don’t squeeze the bottle.
    7. If the flow is too fast or a kitten gags, switch to a smaller hole, use a slower nipple, or syringe-feed tiny amounts only with vet guidance.
    8. Clean bottles and nipples after each use. Sterilize regularly by boiling or running in the dishwasher, and replace nipples that crack.

    Ever watched a tiny mouth work so hard? It’s the sweetest thing. But stay alert: watch for fast flow, very hot or cold formula, coughing, choking, or trouble swallowing. Also, hypothermia makes kittens unable to nurse properly.

    Call your veterinarian right away if a kitten can’t feed, won’t warm up, or isn’t gaining weight. Better safe than sorry.

    Kitten Feeding Chart: Age, Amounts, Frequency

    - Weaning Timeline in the Kitten Feeding Chart 48 Weeks.jpg

    Between weeks 4 and 8 your kitten slowly shifts from mostly milk to mostly solids. Start offering shallow, wide dishes around week 5 (some kitties will nibble as early as week 4). Follow the master chart rows Week4, Week5, Week6, Week7, Week8 for exact meal frequency and target weights. Make a gruel by mixing canned kitten food with warm water or KMR (kitten milk replacer). Keep it thin at first and make it thicker over several days so they learn to lap and chew. By week 6 aim for gruel four times a day and begin offering dry kibble with a bowl of fresh water nearby. By week 8 most kittens are on regular kitten food and weigh about two pounds (see master chart row: Week8).

    1. Offer shallow, wide dishes so whiskers don’t brush the sides (See master chart row: Week4).
    2. Make a gruel: stir canned kitten food with warm water or KMR (kitten milk replacer) and put it in a shallow bowl (See master chart row: Week5).
    3. Thicken the gruel over several days by using less water. Watch that each kitten still hits the daily ml (milliliters)/kcal (kilocalories) targets on the chart (See master chart row: Week6).
    4. Introduce softened kibble by briefly soaking dry food in warm water, draining a bit, and offering it in a separate dish (See master chart row: Week6).
    5. Slowly increase textured solids and cut back on milk feeds to match the chart’s frequencies (See master chart row: Week7).
    6. Move to two meals a day if the master chart row: Week8 shows that feeding level is met.

    Picky nibblers or messy eaters are totally normal. Try stronger-smelling wet food, spread small bowls around the room, and keep paper towels handy for quick cleanup. For vaccinations, check with your vet around eight weeks and use the master chart rows when planning visits and exact feeding amounts.

    Portions, Calories & Sample Menus

    - Portions, Calories  Sample Menus.jpg

    Wet and dry foods have very different calorie densities, so matching the master chart daily kcal target (kcal = food calories) to actual meals really matters. Wet food brings more water and is easier to mash into a gruel for weaning. Dry kibble (dry, crunchy cat food) packs more kcal per cup, so it fills energy needs fast, but make sure water is nearby. Use the master chart rows for the official daily ml (milliliters) and kcal goals, then use the portion tools below to hit them.

    Measure Approx grams Approx ml Typical kcal range
    1 tablespoon wet ~15 g ~15 ml 10–25 kcal
    1 can (3 oz / small) ~85 g ~85 ml 60–120 kcal
    1 cup dry kibble ~90–120 g ~90–120 ml 300–520 kcal
    10 ml formula ~10 g 10 ml 8–12 kcal
    100 g wet food 100 g ~100 ml 60–140 kcal

    To size meals, use this simple math: (daily kcal target from master chart ÷ meals per day). Example: if the master chart row Week8 shows a daily kcal target of X and you plan three meals, divide X by three to size each meal. For tiny neonates, round syringe doses to the nearest 1–2 ml so feeds stay safe and syringe-friendly (kitten formula is a special milk replacer).

    8-week sample (See master chart row: Week8 for exact kcal/ml)

    • Breakfast: wet kitten food measured to meet that meal kcal target. Think soft, warm spoonfuls that smell like comfort.
    • Midday snack: a small wet portion if the chart row indicates three meals. A quick, sleepy pounce after this is normal.
    • Dinner: wet plus one tablespoon of kibble for texture and chewing practice.
    • Fresh water available at all times.

    12-week sample (See master chart row: Week12 for exact kcal/ml)

    • Breakfast: wet plus measured kibble to hit the meal kcal. Mixing a little warm water helps if they’re still learning.
    • Afternoon: an active-play treat (measured calories) to burn energy and build appetite.
    • Dinner: wet plus kibble portion to finish the day’s kcal.
    • Aim for two meals per day as recommended in the master chart.

    Practical portioning tips

    • Weigh food on a kitchen scale before serving. It’s the easiest way to be accurate.
    • Soften kibble with warm water when you move from gruel to solid meals. Your kitten will thank you.
    • Label mixed-food containers with kcal estimates and which chart row you used. That avoids guesswork.
    • Measure formula ml with a syringe for accuracy. For very small doses, a 1 ml or 5 ml syringe works best.
    • Watch hydration when you use mostly dry food. Offer water or mix in wet food so they don’t get too thirsty.

    See master chart row: [age] for exact ml and kcal values. Printable menus should include a field labeled "Chart row referenced" so caregivers know which numeric row to apply. Worth every paw-print.

    Weight-Gain Targets & Growth Monitoring in the Kitten Feeding Chart

    - Weight-Gain Targets  Growth Monitoring in the Kitten Feeding Chart.jpg

    A small gram scale (reads weight in grams) and a set time each day to weigh kittens are the quickest ways to spot trouble. Morning is usually easiest, and it helps you see steady gains instead of guessing. Track weights against the master chart target-weight column for checkpoints like Birth, Week 1, Week 4 and Week 8 so you can tell if growth is on track.

    1. Weigh neonates at the same time every day for the first 2 to 3 weeks. Neonates means newborn kittens (tiny, fragile, and super squishy). Consistency makes trends easy to spot.
    2. Once they start eating solids, switch to weighing 2 to 3 times a week until their growth evens out. This gives you useful data without overdoing it.
    3. Log each weight in a chart or app with the date, time, and the caregiver’s initials so you know who weighed them. Little notes help later when you wonder what happened.
    4. Calculate the average daily gain (g/day) over several days to smooth out tiny swings (g/day means grams per day). Averages tell the real story, not the one-off dips.
    5. Flag any downward trend or a flat line and call your vet if a kitten’s weight drops or stalls. Don’t wait, early action helps.
    6. Compare littermates side by side using the master chart rows to spot runts or slow growers. Seeing them next to each other makes differences obvious.
    7. Keep short feeding notes beside each weight entry: amount, formula, appetite, and stool (poop). Those little clues link changes to actions, so you can tweak feeding fast.

    Use these master chart rows for official target weights: Birth, Week1, Week2, Week4, Week6, Week8.

    Watch for signs of underfeeding or dehydration: failure to gain, obvious tiredness, dry gums, or less poop and fewer wet spots in the litter box. If you see any of those, get veterinary help quickly. Worth every paw-print.

    Kitten Feeding Chart for Orphan or Sick Kittens (Emergency & Special Care)

    - Kitten Feeding Chart for Orphan or Sick Kittens (Emergency  Special Care).jpg

    Before you feed, warm the kitten and check basics. Use a small digital thermometer and feel the body – if the kitten is too cold or can’t swallow, don’t feed. Test the suck reflex and watch breathing. When the kitten is warm, alert, and can swallow, follow the master chart for how much and how often instead of guessing.

    1. Warm the kitten slowly to a cozy, safe temp. Use a heating pad on low with a towel over it, or a warm water bottle wrapped in cloth. Keep checking so it never gets too hot.
    2. Look for hypoglycemia (low blood sugar) signs like weakness, tremors, or odd breathing. If you see those and a vet has told you to, give tiny, vet-approved calories.
    3. Offer very small, warmed feeds and pause often. Tiny, frequent calories are safer than big boluses for weak newborns. It’s like nibbling instead of gulping.
    4. Call your veterinarian right away for collapse, seizures, or if the kitten stays cold despite warming. These are emergencies.
    5. Use syringe feeding (a plastic syringe with no needle) when the suck reflex is weak. Give slow, measured drops so you don’t risk aspiration (food or liquid going into the lungs).
    6. Use a bottle only if the kitten has a coordinated suck and can breathe comfortably while feeding. Test the nipple drip first and pace the flow – too fast and they can choke.
    7. Reserve tube-feeding, or gavage (a tube into the stomach for nutrition), for kittens that will not suck. Only trained staff or vets should place tubes. Oops, wrong placement can be fatal.
    8. Keep strict hygiene. Wash hands, use clean syringes and nipples, and stop feeding if the kitten coughs or gags. Safety first, always.
    9. After every feed, gently stimulate urination and defecation with a warm, damp cloth. Then tuck the kitten back into a warm rest spot to recover.

    Tube-feeding cautions: tube placement must be sterile and confirmed – misplacing the tube into the lungs risks fatal aspiration (liquid in the lungs). Volumes should follow your vet’s orders. Use the master chart for baseline maintenance only after a vet gives the go-ahead.

    Urgent signs needing immediate veterinary care

    • Collapse or unresponsiveness
    • Inability to swallow or choking during feeds
    • Persistent hypothermia (low body temp) despite active warming
    • Rapid weight loss or signs of severe dehydration, like sunken eyes or dry gums

    Hygiene, Equipment & Safety Notes for the Kitten Feeding Chart

    - Hygiene, Equipment  Safety Notes for the Kitten Feeding Chart.jpg

    We tightened this section so info is clearer and not repeated. I moved the practical stuff where editors asked, and grouped safety and care notes so caregivers can find them fast. Easy to follow. Worth every paw-print.

    • Equipment checklist: now at the top under "Quick, handy feeding plan" and in the printable checklist. It lists a gram scale (small scale that measures grams), 1 ml and 5 ml syringes (tiny dosing syringes), bottles and nipples, a digital thermometer (for kitten temps), a kitchen scale, cleaning supplies, and a tray idea for organized feeding. Pack it once, and you’ll be ready for most feeds.

    • Hygiene and formula storage: the daily wash, boiling after illness or heavy use, weekly deep clean, and storing parts sealed are now in Bottle & Formula under a new "Hygiene & sterilization" subsection. Formula rules went there too – refrigerate opened formula per the label, discard warmed formula after the time window on the label, and don’t reheat used formula. Simple rules, big peace of mind.

    • Equipment maintenance: replace nipples at the first sign of damage , with regular use that’s usually every 2 to 3 months , and swap out warped or scratched bottles. I added those notes to the Equipment Maintenance bullet under Portions/printable template so everyone knows when to replace things. Little checks keep kittens safe.

    • Feeding safety tips: all the safety steps are now one clear paragraph in Bottle & Formula / Orphan so caregivers see one set of rules. Test the nipple hole to get a slow drip, feed with the kitten belly-down (not on their back), stop right away if you see coughing, gagging, or signs of aspiration, gently stimulate elimination after feeds, and wipe the face when you’re done. These are the must-dos , trust me, they matter.

    • Equipment Log: moved into the printable template so maintenance dates and who checked sterilizer cycles are visible to every caregiver. That way no one has to play catch-up.

    Example Equipment Log entry – "Nipples replaced 11/05 – A.R. (thinning); Sterilizer cycle checked 11/06 – M."

    Quick note: ever watched a kitten purr through a clean bottle? Little joys.

    Troubleshooting Common Feeding Problems in the Kitten Feeding Chart

    - Troubleshooting Common Feeding Problems in the Kitten Feeding Chart.jpg

    Start with three quick checks: weight trends, hydration and stool output, and feeding behavior. Refer to master chart row: WeekX for age-specific feeding volumes and frequencies before changing a plan. Ever watch a tiny belly wobble and worry? Let’s break it down, one paw at a time.

    1. Lack of weight gain
      If the kitten isn’t gaining, bump feed frequency according to the chart row. Compare littermates to spot the slow grower (See master chart rows: Birth, Week1, Week2). If gains stay flat after adjustments, call your vet.

    2. Diarrhea
      Pause solids and keep the kitten hydrated. Offer small, frequent KMR (kitten milk replacer) if neonate (KMR is a milk substitute made for kittens). Contact your vet about a recovery diet and testing.

    3. Vomiting
      Stop feeding and keep the kitten warm and quiet. Vomiting needs a vet check before you try feeding again.

    4. Aspiration signs (coughing, noisy breathing)
      Aspiration means food or liquid went into the lungs (it can cause coughing or noisy breathing). Stop feeding immediately and seek veterinary care.

    5. Poor latching
      Try a smaller nipple or syringe feeding and practice calm, steady holds. See bottle technique in Bottle & Formula for tips, think of the bottle like a tiny fishing rod for kittens.

    6. Dehydration
      Look for a skin tent (skin that stays up when you pinch it), dry gums, or fewer pee trips. A vet may give subcutaneous fluids (fluids under the skin) if needed.

    7. Hypoglycemia signs (weakness, tremors)
      Hypoglycemia means low blood sugar. Give small vet-approved calories and get urgent veterinary help if you see weakness or trembling.

    8. Refusal to wean
      Offer strong-smelling wet food or a gruel to entice them. Follow master chart row: Week5 for timing, and be patient, some kittens need a little extra coaxing.

    9. Competition at the bowl
      Put out multiple shallow dishes so shy kittens get a turn and bold ones don’t boss the meal. Short sessions and separate spaces work wonders.

    10. Large-litter scheduling
      Stagger feeds and use the chart as your master schedule to avoid missed meals (See master chart rows by age). It keeps everyone fed and less frantic.

    Record every intervention on your feeding chart and note the "chart row referenced," who acted, and the time. If problems persist despite adjustments, call a veterinarian, better safe than sorry, and your vet will thank you. Worth every paw-print.

    Date Time Intervention Chart Row Referenced Who Acted Notes
    2025-01-01 0800 Increased feeds to every 3 hrs Week2 J. Smith Weight up 10 g

    Final Words

    Jump right in: the master chart gives exact feeding frequency, ml per meal, total daily ml, kcal targets and typical weights from birth through Week12.

    You learned safe bottle technique, a step-by-step weaning plan, portion and calorie conversion tips, growth tracking with a gram scale, emergency care basics, hygiene rules, and quick fixes for common problems. Each section points back to the chart row for the numbers so the printable stays the single source.

    Keep the kitten feeding chart handy, weigh and log consistently, and check with your vet for concerns. Worth every paw-print.

    FAQ

    Kitten feeding FAQs

    Where can I find a kitten feeding chart by age or weight, and is there a printable or calculator?

    A kitten feeding chart by age or weight shows feed frequency, ml per feeding, total daily ml, kcal, and target weights. Use a printable master chart or an online calculator and a gram scale (measures grams) to match servings.

    What is the feeding schedule for a kitten?

    Newborns are fed every 2–3 hours, gradually becoming less frequent by weeks 4–5. Around week 6 expect about three meals per day, and often two meals per day after week 8.

    How much should a kitten eat per day and how do I balance wet and dry food?

    Daily amounts depend on age and weight—follow the chart kcal/ml targets. Wet food adds moisture and is useful for making gruel during weaning; dry food is higher calorie density. Measure portions by grams and follow the chart row for the kitten’s weight/age.

    How much do kittens eat at 3 months and 4 months?

    At 3–4 months kittens shift from three meals daily toward two larger meals as appetite stabilizes. Check the master chart row for exact ml and kcal by weight and weigh portions on a kitchen scale.

    What is the 3-3-3 rule for kittens?

    The 3-3-3 rule means three days to hide and settle, three weeks to explore and accept family routines, and three months to feel relaxed and confident in a new home.

    Should kittens be left in the dark at night?

    Very young kittens should not be left in total darkness—newborns need warmth and easy access to care. Older kittens usually sleep through the night; a soft night light can provide comfort.

    Is there a printable kitten feeding chart and what should it include?

    A printable chart should include age rows, feeding frequency, ml per feeding, total daily ml, kcal, target weights, gram-scale prompts (scale measures grams), and anchor links for bottle technique, weaning, troubleshooting, and a printable checklist.

    Related Articles

  • what materials make cat toys unbreakable and safe

    what materials make cat toys unbreakable and safe

    Sick of buying so-called indestructible cat toys that your tabby turns into confetti overnight? Here’s the short, honest version: the right materials really matter. Food-grade silicone (soft, non-toxic rubber-like polymer) and UHMWPE (ultra-tough, cut-resistant plastic) make toys both safe and way harder to shred. I’ll show you which materials actually stand up to teeth and claws, why they work, and what to watch for when you’re shopping or DIYing.

    Food-grade silicone feels soft and bouncy, so your cat loves the texture and it won’t splinter. It’s non-toxic (meaning it won’t poison your cat if chewed) and it’s easy to clean, which is perfect for slobbery play. Think of the satisfying thud of a silicone ball rolling across the floor, your cat’s whiskers will twitch.

    UHMWPE is the stuff made for real abuse. It’s a dense, slice-resistant plastic often used in cut-proof gloves and gear. Toys built with UHMWPE handles or cores shrug off claws and teeth. They don’t fray or shred like cheap fabric, so fewer fluff explosions on the carpet.

    Also look for reinforced fabrics like Cordura or ballistic nylon (heavy-duty nylon fabric) on scratchy toys. Double-stitched seams and hidden reinforcements help keep stuffing inside and tiny parts out. Avoid toys with glued-on eyes or loose ribbons that can come off during a pounce.

    When you shop or make your own, check a few things: is the silicone labeled food-grade? Are seams reinforced and not just glued? Any small bits that could be swallowed should be stitched down or skipped. Smell-test plastics, if it smells chemical, leave it. And always supervise new toys until you know they’re safe.

    Quick tips: toss an unbreakable ball before you head out for ten minutes of safe solo play. Rotate toys every few days so your cat stays interested. And if you DIY, think like a cat – soft where they bite, tough where they grip.

    Worth every paw-print.

    what materials make cat toys unbreakable and safe

    - Quick answer top chewresistant materials and a clear inspection warning.jpg

    Here’s a friendly rundown of the materials that actually help toys stand up to teeth and claws, written like a cat‑crazy pal telling you what worked in my living room. Short definitions in parentheses so you know what each thing really is.

    • Food-grade / medical-grade silicone (flexible, non-toxic rubber-like polymer, think soft rubber spatula). Great balance of chew resistance and safety, and it’s easy to clean.
    • UHMWPE (ultra-high-molecular-weight polyethylene, a very tough, cut-resistant plastic) , top pick for resisting teeth and claws, especially as a hidden core.
    • Stainless steel hardware (stainless steel, a metal that won’t rust). Best for connectors and split rings that need to hold under a strong pull.
    • Natural rubber (plant-based, bouncy, like latex but from natural sources). Good for treat dispensers and chewers who like a soft bite.
    • Polycarbonate / ABS (hard impact plastics, strong but can shatter under extreme force). Used for housings and rigid shells.
    • Kevlar / Dyneema (high-strength fibers like climbing rope, used in safety gear). Ideal to reinforce seams or make rope cores that won’t snap.
    • Ballistic nylon / Cordura (heavy-duty, abrasion-resistant fabric). Resists tearing from claws, great for outer covers.
    • Hardwoods (beech, maple; untreated solid wood that wears safely). Works for chew posts that are biodegradable and sturdy.
    • Braided polyester / rope exteriors (woven synthetic rope that acts as a sacrificial layer). These take the wear so the inner core lasts longer.
    • TPE / TPU (flexible, durable elastomers, rubber-like plastics that bounce back). Good for parts that need to flex and recover from bites.

    Safety note: even the toughest materials can shed bits or carry unsafe coatings, so pick labeled non-toxic grades for anything cats will lick or chew. Inspect toys at least once a week and after rough play, and retire anything with holes, sharp edges, or loose bits.

    Quick pros and cons, so you can pick what fits your cat’s play style:

    • Food-grade silicone , pro: non-toxic and soft; con: can tear if a cat fixes on one spot.
    • UHMWPE , pro: superb cut resistance; con: pretty stiff, not for kitties who prefer squishy toys.
    • Stainless steel , pro: won’t rust, very strong; con: can be heavy in tiny pieces.
    • Natural rubber , pro: stretchy and satisfying to chew; con: some cats still manage to chew through over time.
    • Polycarbonate / ABS , pro: handles impact well; con: can crack and form sharp shards if it fails.
    • Kevlar / Dyneema , pro: seams and ropes stay strong; con: exposed fiber ends need to be sealed so they don’t fray.
    • Ballistic nylon / Cordura , pro: stands up to claws; con: sewn seams are common weak spots.
    • Hardwoods , pro: safe, natural chew surface; con: they’ll wear down and need replacement eventually.
    • Braided polyester rope , pro: sacrificial, easy to replace; con: may fray into small strands you should monitor.
    • TPE / TPU , pro: great rebound and flexible; con: not as cut-resistant as UHMWPE.

    Durability is a trade-off: ultra-tough plastics and fibers can become sharp when they fail, while softer elastomers are gentler in the mouth but wear out faster. So aim for smart design: a permanent strong core (metal or UHMWPE) plus replaceable, sacrificial outer layers (rope covers, braided sleeves, feather attachments). That way you keep the toy long-term without raising the risk of swallowed bits.

    Tiny tip from my house: my tabby tore through a rope cover in a week, but the inner UHMWPE core stayed fine , replacing the cover made the toy claw-tastic again. Worth checking seams and sealed fiber ends, and if you spot fuzz or loose threads, toss or repair it.

    Polymers and rubbers: food‑grade silicone, TPE/TPU, natural rubber, ABS and polycarbonate (with a Plastics & Polyethylenes subsection)

    - Polymers and rubbers foodgrade silicone, TPETPU, natural rubber, ABS and polycarbonate (with a Plastics  Polyethylenes subsection).jpg

    Food-grade silicone (a soft, heat-stable rubber-like polymer, like a kitchen spatula) and TPE/TPU (thermoplastic elastomers, flexible plastics that snap back like a rubber band) are the safest picks when a toy might touch a cat’s mouth. Go for items labeled food or medical grade so you avoid strange additives. Check for tear resistance and Shore hardness (a simple scale for how firm something feels) so the toy is squishy enough to enjoy but strong enough to last. They’re gentle on gums, and if they wear out they tend to fail without spraying sharp shards – nice for nervous owners and playful kitties.

    Natural rubber (plant-based elastic, think the bouncy core of a chew toy) works wonders in treat dispensers and dental chewers. It cushions teeth and springs back after gnawing, keeping cats engaged longer. It usually beats cheap latex blends for tear resistance, but heavy chewers will still wear it down over time. Look for molded, seam-free shapes and sealed edges so teeth can’t pry layers apart.

    Hard plastics like ABS and polycarbonate give you tough shells and housings that stand up to impacts. The downside is repeated, focused bites can crack them and create sharp pieces. One-piece molding or welded seams reduce failures that start at joins, and thicker walls make brittle breaks less likely. For toys with moving parts or motors, pick structural plastics with good impact ratings and rounded edges so a broken bit is less likely to hurt a paw or mouth.

    Selection checkpoints for polymers and rubbers:

    • Clear material grade labeling, like food grade or medical grade.
    • Tear-resistance or tensile strength info when available (how hard it is to rip).
    • Shore hardness listed, so you can match squishiness to your cat.
    • One-piece molding or fused seams, not glued layers.
    • Explicit polymer ID, for example UHMWPE, polycarbonate, or silicone.

    Plastics & Polyethylenes (HDPE, UHMWPE, ABS, polycarbonate)

    HDPE (high-density polyethylene, like sturdy milk jugs) is stiff and durable, good for molded parts that need a bit of give without sharp edges. UHMWPE (ultra-high-molecular-weight polyethylene, almost cut-proof, imagine a super-tough rope core) resists abrasion and tooth cuts far better than generic plastics and makes great hidden cores or reinforcement.

    Polycarbonate and ABS handle blunt hits well, but they can crack under sharp, repeated bites. For outdoor or high-stress parts, favor thicker walls and single-piece construction so any failure is slow and obvious. UV resistance matters for outdoor toys, and if recycled materials are used you’ll want to know what fraction and whether additives could affect safety.

    Hard-plastic evaluation checkpoints:

    • Clear polymer ID: UHMWPE versus generic plastic.
    • Minimum wall thickness guidance – avoid thin shells under about 3 mm for small parts.
    • One-piece construction or welded seams, not glued joins.
    • UV resistance rating for outdoor use.
    • Disclosure of recycled content and any impact on safety.

    A quick, practical tip: toss an unbreakable silicone ball on the floor before you head out and check it after play. If it shows tiny tears, swap it. Your cat will purr, and you’ll sleep easier.

    Metals, hardware and connectors: rust‑proof options

    - Metals, hardware and connectors rustproof options (concise callout).jpg

    Pick corrosion-resistant alloys for anything your cat will tug, chew, or lick. Marine-grade 316 stainless (stainless steel that handles wet or salty conditions) is a great all-around choice , strong, rust-friendly, and proven in damp spots. Titanium (a light, very strong metal) and anodized aluminum (aluminum treated to be harder and more corrosion-resistant) give similar strength but weigh a lot less, so they’re handy when a heavy ring or clip would flop a small toy down.

    Coatings help for sure, but think about wear. Plated finishes can rub off where a cat bites or where parts grind together, and then you’re left with exposed metal. For outdoor or water-prone toys, go for higher-grade metals and closed, mechanically fastened joints instead of relying on paint or thin plating. Welded joins (metals melted together) or riveted joints (metal pins holding pieces) last longer than open split rings or glued parts. Long-lasting. Safe.

    • Use 316 stainless or another rated rust-proof alloy for connectors that need to last.
    • Consider titanium or anodized aluminum for weight-sensitive parts like clips or small cores.
    • Check for solidly closed rings, welded joins, or riveted joints rather than open or split hardware.

    Worth every paw-print.

    what materials make cat toys unbreakable and safe

    - Fabrics and reinforced textiles ballistic nylon, Cordura, Kevlar, Dyneema and stitch techniques for longlasting plush toys.jpg

    Textiles are the secret sauce for toys that survive claws. Heavy-duty fabrics like ballistic nylon (thick, tightly woven nylon often used in luggage) and Cordura (a tough nylon weave made to resist wear) take the first hits and usually shrug them off. Add laminated layers or glued backing so the fabric won’t split where stitching wears thin. Think of the outer cover like armor protecting a tougher inner core, so you swap covers, not the whole toy. Cute, right?

    Reinforcement is where design beats raw strength. Double-stitching and bartacks (short, dense stitches that lock a stress point) stop seams from peeling. Heat-sealing or ultrasonic welding (melting plastic fibers together with high-frequency vibration) closes needle holes that invite rips. For ropes and braids, bury the fiber ends in a sewn channel or melt-and-bind them so strands don’t splay into little bits your cat could swallow. Ever watched your kitty pick at a frayed rope? Yeah, we don’t want that.

    Real-world toys mix a tough shell with a replaceable center. A zippered plush can hide a hard UHMWPE core (ultra-high molecular weight polyethylene – a very tough plastic) so you can swap the outer when it’s worn. Some rope toys let the braid peel off and be re-wrapped. Others tuck a thin Kevlar (very strong synthetic fiber) liner inside seams, then fully cover it so no raw fibers are exposed. These choices boost toy life without changing play. Worth every paw-print.

    • Ballistic nylon – double-stitch and add bartacks at stress points.
    • Cordura – box-stitch load areas and overlock raw edges.
    • Kevlar-lined fabric – fully encapsulate the liner and use a zigzag stitch.
    • Dyneema braid (super-strong polyethylene fiber) – heat-seal ends and sew into channels.
    • Braided polyester rope – secure with metal ferrules and stitched caps.
    • Laminated canvas – fusion-bond seams or welded edges.
    • Faux fur with reinforced backing – topstitch plus an inner fabric layer.
    Fabric Strength Recommended Reinforcement
    Ballistic nylon High abrasion resistance Double-stitching and bartacks
    Cordura Good tear and wear resistance Overlocked edges and box stitching
    Kevlar-lined Very high cut resistance Fully encapsulated liner and zigzag stitch
    Dyneema braid Exceptional tensile and cut strength Heat-sealed ends and sewn channels

    When to use fiber-reinforced composites in toys

    Only use Kevlar or Dyneema inside when those strong fibers are fully covered so no ends can poke out. Trim and bind cut ends, and place reinforcement away from seams or areas a cat will chew. This works best as inner cores, rope cores, or stitched panels where the outer fabric stays intact; don’t leave raw fiber edges near a chewing spot. Oops, sounds strict, but safety first, right?

    what materials make cat toys unbreakable and safe

    - Natural materials sisal, jute, hardwoods (beech, maple, bamboo), cork  pros, cons and safety.jpg

    Natural materials give toys texture, scent, and a comfy chew that many cats go crazy for. Think rough sisal (coarse agave fiber), soft-but-grabby jute (plant fiber with a bit of give), crinkly cardboard (layers of pressed paper), springy cork (bark-like, spongy material), and untreated hardwoods like beech or maple (dense, steady woods). Bamboo is great too, it’s a fast-growing grass with strong fibers and a light feel. Ever watch your kitty tilt their head at a rustling box? That kind of simple joy.

    If your toy will be gnawed, pick untreated beech, maple, or bamboo. They wear in a predictable way and are biodegradable. Avoid painted, stained, or pressure-treated wood because coatings can flake and end up in your cat’s mouth. For scratching, sisal and cork mimic tree bark and feel natural on claws, so they’re a smart choice.

    Natural stuff looks and smells great, but it wears faster than heavy-duty synthetics, so plan to rotate toys and replace outer layers now and then. Jute and sisal will fray into strands, so check them often. Cardboard and paper are cheap and compostable but tear quickly. Bamboo and hardwood resist splitting if they’re dry and well sanded, but they’ll still wear out over time. Check fraying on jute and sisal and inspect regularly per the inspection schedule in the opening section, and retire anything with loose bits or splinters to keep play safe.

    • Sisal (coarse agave fiber) – durable for scratching, coarse texture, biodegradable; can fray into strands.
    • Jute (soft plant fiber) – gentler on paws, good grip, biodegradable; higher risk of fraying.
    • Cork (bark-like, spongy material) – gentle and grippy, resists moisture, low dust; wears moderately.
    • Cardboard (pressed paper layers) – rustles and cheap to replace, very biodegradable; tears fast.
    • Untreated hardwood (beech, maple) – dense and long-lasting for chewing, safe if unfinished; replace when splintered.
    • Bamboo (fast-growing grass with strong fibers) – strong and light, renewable, smooth when sanded; thin pieces can split.

    Rotate toys, watch for loose threads or splinters, and swap anything tired or damaged. Your cat stays entertained and you stay relaxed. Worth every paw-print.

    Design & manufacturing techniques that make toys last: one‑piece molding, fasteners, and replaceable modules

    - Design  manufacturing techniques that make toys last onepiece molding, fasteners, and replaceable modules.jpg

    Good, long‑lasting toys start with smart molding and tidy joins. Injection molding (molten plastic forced into a shaped cavity) and one‑piece molding (a single solid part with no seams) cut out seam failures. Ultrasonic welding (fuses plastics with high‑frequency vibration) makes a neat welded bead that usually beats glued seams. Ever watch a toy fall apart at the seam? Yeah, not fun.

    Replaceable modules mean the toy’s heart keeps working even after an outer cover gets chewed up. Swap the worn bits, not the whole thing. See the Polymers and Textiles sections for the deep dive if you want the geeky stuff.

    Hardware is where wear shows up fastest. Closed or welded rings handle tugs better than open split rings. Countersunk stainless fasteners (stainless steel screws or bolts set flush with the surface) sit flat so paws and teeth don’t snag. A ferrule or crimp (a tiny metal sleeve crushed around cable) makes a very strong loop when done right; cover that crimp with heat‑shrink (a thin plastic tube that tightens with heat) and a tape wrap so the metal edge can’t rub through an outer sleeve. Quick how‑to: crimp the ferrule, slide heat‑shrink on, shrink it with a heat gun, then wrap tape.

    • Look for closed or welded rings, not open gaps.
    • Prefer countersunk stainless fasteners so nothing sticks up to bite.
    • Choose welded beads over glued seams for plastic joins.
    • Verify ferrules are well‑crimped and covered with heat‑shrink or protective tubing.
    • Joints with an extra tape or sleeve are less likely to abrade an outer cover.
    • Pick toys with replaceable attachment points and clearly visible fastener types.
    Technique Why it adds durability What to check as a buyer
    Injection molding (molten plastic forced into a shaped cavity) Consistent wall thickness and strong, repeatable parts Even wall thickness; rounded corners; see Polymers section
    One‑piece molding (single solid part, no seams) No seams to peel or open under stress Single‑part construction, no glued joins
    Ultrasonic welding (fuses plastics with high‑frequency vibration) Seamless welded bead that resists opening Visible welded bead, not a glued seam
    Reinforced seams (extra stitching / bartacks) Stops stitches from tearing out at load points Double stitching and bartacks at stress spots; see Textiles section
    Rivets / snap‑fits (mechanical joins) Holds under pull without backing out Flush rivets, closed rings, or positive snap clicks; avoid tiny exposed screws
    Replaceable components (swap worn parts) Extends life by replacing sacrificial bits Visible fasteners, serviceable parts, and spare‑part availability

    When you’re shopping, flip the toy over and hunt down the joins and fasteners. If things are hidden behind glue or thin shells, put it back and try another , your cat will thank you. Worth every paw‑print.

    Safety, Cleaning, Testing & Retirement

    - Safety, Cleaning, Testing  Retirement.jpg

    Make toy checks a habit, like feeding time. Give each toy a quick once-over before and after play: look at seams, feel for soft spots, and try a gentle grab or pull where it makes sense. For big tug toys, use a 15-lb pull as a rough guide so you know what the connectors can handle. Simulate chewing at likely weak points , seams, glued joints, ferrules (small metal sleeves that join parts) , to catch trouble early. Inspect toys at least once a week and after rough play; retire anything with holes, exposed hardware, loose stitching, or a new, sour smell.

    Cleaning depends on what the toy is made of. Food/medical-grade silicone (silicone safe for food or medical use) and HDPE (high-density polyethylene – tough plastic like a cutting board) parts with dishwasher-safe labels usually do fine on the top rack. Fabrics do best on a gentle machine wash with mild, fragrance-free detergent. Battery packs, motors, or electronics should never be submerged; wipe the housings and follow the maker’s steps for removing powered modules before washing. Use cleaners that won’t leave residues your cat might lick, and let things dry fully before giving them back to your furball.

    When it’s time to retire a toy, be quick about it. Bag any small ripped pieces so they don’t become choking or gut hazards, and try to separate recyclable metal bits from soft waste. Natural bits like untreated wood or plain cardboard can go to compost if they’re free of glue and coatings. Sealed, sharp, or contaminated parts go in the trash inside a closed bag.

    Worth every paw-print when done right.

    1. Visual seam check – look for pulled threads, gaps, or holes.
    2. Grab/pull test – use a 15-lb reference for larger toys to test connectors.
    3. Hardware flex test – wiggle rings, clips, and ferrules (metal sleeves) for looseness.
    4. Smell check – any new chemical or sour odor means retire it.
    5. Washability check – confirm manufacturer laundry or dishwasher guidance.
    6. Motor and moving-part integrity – verify housings, battery doors, and covers.
    7. Replaceable-part test – make sure snaps, zippers, or covers swap cleanly.
    8. Retire if any small pieces, sharp edges, or splinters appear; don’t risk it.

    DIY unbreakable toy plans, parts list, costs and step sequence (tested wand build)

    - DIY unbreakable toy plans, parts list, costs and step sequence (tested wand build).jpg

    Here’s a simple, low-cost wand that stood up to a 15 lb cat. It uses a 48" fiberglass driveway marker rod (fiberglass, like a strong fishing-rod core) and a short length of vinyl-coated cable for the tension. It’s cheap, easy to make, and way more durable than the flimsy store wands, perfect for cats that love a rough-and-tumble session. Ever watched your kitty leap and clutch a toy like it’s the final boss? This helps with that.

    Parts and rough costs:

    • 48" fiberglass rod , about $2.50.
    • 48" of 1/16" vinyl-coated cable (1/16" vinyl-coated steel) , about $1.20. (Vinyl coating keeps the cable smooth.)
    • Two 1/16" ferrules , about $1.24 total. (Ferrules are tiny metal sleeves you crimp to lock cable loops.)
    • 1.5" split key ring , about $0.50.
    • Feather attachments , $2 to $3 each, or swap in other toys.
    • Optional: heat shrink / electrical tape , small extra cost.
      Total for one wand: just a few dollars. You can make two or three for the price of one cheap toy from the pet store.

    Tools and time:
    You’ll need a drill with a 3/32" bit, wire strippers, something to crimp with (vise, hammer, or swaging tool), and a heat source for shrink tubing (heat gun or lighter). Assembly takes about 15 minutes once you’ve got everything. A hammer crimp works fine if you don’t have a swaging tool. Quick and satisfying.

    Safety first:
    Drill the hole about 1/4" from the rod end so the loop clears the tip. Make a solid ferrule crimp and cover any exposed metal with tape and heat shrink (heat shrink is a thin plastic sleeve that tightens when heated). Inspect the wand weekly and after rough play; retire it if you see frays, exposed metal, splits, or anything loose. You want playtime to be fun, not risky.

    Step-by-step assembly:

    1. Mark a spot about 1/4" from the rod tip.
    2. Drill a hole at that mark using a 3/32" bit. Keep it steady.
    3. Cut a 48" length of 1/16" vinyl-coated cable.
    4. Thread one cable end through a ferrule, then through the drilled hole, and back into the ferrule to form a loop.
    5. Slide the ferrule so the loop sits snug against the rod end.
    6. Add the second ferrule over the two cable runs at the loop base for extra strength , stacked ferrules are fine.
    7. Crimp the ferrule(s) firmly so they compress onto the cable. Use a vise or hammer with even blows.
    8. Attach the 1.5" split key ring to the loop. Check that the split fully wraps around so it won’t slip open.
    9. Wrap the crimped area with electrical tape, then slide on heat shrink and shrink it down with heat to smooth edges.
    10. Give the joint a firm tug (try to match a 15 lb pull if you can), then add a feather toy and test with light play.

    Optional upgrades and tweaks:

    • Use a longer heat-shrink sleeve for fuller protection.
    • Add a soft ferrule cover (rubber sleeve) over the crimp for padding.
    • Swap the split ring for a rounded, welded ring to remove gaps.
    • Upgrade to 316 stainless hardware for rust resistance.
    • Use quick-release clips for truly replaceable feather attachments.
    • Wrap extra tape under the shrink for extra abrasion padding.

    Worth every paw-print.
    Oops, let me rephrase that , it’s worth every paw-print. Really. Watch your cat’s whiskers twitch as the toy skitters across the floor. You’ll get durability, easy repairs, and plenty of claw-tastic fun.

    Quick buyer checklist

    - Buying guide and checklist selecting durable cat toys, consolidated brand notes, certifications and warranty cues.jpg

    Keep this checklist in your pocket when you shop. It’s short, practical, and made for quick checks at the shelf so you skip marketing fluff and spot toys that actually last. Ever watched your cat destroy a flimsy toy in three minutes? Yeah, this helps avoid that.

    See the Polymer, Textile, Hardware, and DIY sections below for full details on material grades, seam methods, and where to source raw cores and hardware.

    • Material type and grade label: look for food- or medical-grade silicone (safe for mouth contact), named polymers like UHMWPE (ultra-high-molecular-weight polyethylene, a very tough plastic used in cut-resistant gear) or polycarbonate (shatter-resistant plastic). Those labels matter more than cute photos.
    • One-piece construction or welded seams: one-piece molding (a single molded part) or seams fused by welding (heat or ultrasonic fusing, not glued). If it’s glued, think twice.
    • Reinforced stress points: bartacks (extra stitching at high-stress spots), ultrasonic weld beads, or clearly doubled layers where the toy gets tugged the most. Those reinforcements keep things from falling apart mid-play.
    • Clear cleaning instructions: a washable label that says machine-washable, surface-clean only, or dishwasher-safe. Knowing how to clean a toy makes it last and keeps your cat healthy.
    • Hardware type: 316 stainless (marine-grade stainless steel) or closed/welded rings and rivets (rivets are metal fasteners). Avoid open split rings that can pop off during rough play.
    • Replaceable parts: zipper or snap access to cores or modules so you can swap worn pieces, or a company that sells spare parts. Simple repairs beat throwing a whole toy away.
    • Warranty: a clear time period and exact coverage plus easy claim steps. Read what counts as normal wear versus a defect.
    • Returns and satisfaction guarantee: stated number of days and straightforward return steps so you’re not stuck with a dud.
    • Visible maker label: an obvious manufacturer or brand name so you can contact support if something fails.

    Higher-priced toys can last longer, but read the materials and warranty fine print so you’re paying for real durability and not just shiny marketing.

    Worth every paw-print.

    Final Words

    Right in the action: you’ve got the short picks, food/medical‑grade silicone, UHMWPE, stainless steel hardware, natural rubber, polycarbonate/ABS, Kevlar/Dyneema, ballistic nylon and hardwoods, and a clear inspection rule to keep play safe.

    Play smart. Inspect at least once weekly and after heavy play; retire if any damage. Soft non‑toxic elastomers feel gentle but wear differently than rigid plastics, and sacrificial outer layers save the core.

    If you’re asking what materials make cat toys unbreakable, this list is your quick guide, happy, active cats and fewer replacements. Worth every paw‑print.

    FAQ

    What materials make cat toys unbreakable or the best for cat toys?

    Materials that make cat toys highly chew resistant include food-grade silicone (safe flexible rubber), UHMWPE (super cut-resistant plastic), natural rubber (elastic chew material), polycarbonate/ABS (tough hard plastics), Kevlar/Dyneema (high-strength fibers), ballistic nylon, and hardwoods.

    What materials are unsafe for cat toys?

    Unsafe toy materials include treated or painted woods, soft PVC with phthalates, thin brittle plastics that can crack, small detachable parts, fabrics that shed tiny fibers, and metal plating that flakes.

    What is the cat wand that won’t break?

    A wand that won’t break uses a fiberglass rod (like a strong fishing-rod core), vinyl-coated cable, crimped ferrule covered with heat-shrink, and a closed ring or welded loop for secure attachments.

    How can I stop my cat from tearing up everything?

    You stop a cat from tearing up items by offering durable toys, rotating playthings, supervising rough sessions, using replaceable outer layers, redirecting chewing to safe chews, and retiring damaged toys promptly.

    Are KONG and Yeowww cat toys durable, and what do you put in a Kitty KONG?

    KONG Kitty products are durable treat dispensers filled with soft treats, wet food, or paste-like fillings; Yeowww toys are dense cotton catnip pouches, sturdy but still needing regular inspection.

    What metals and connectors are best for toy hardware?

    The best hardware uses 316 stainless steel (rust-proof alloy) or titanium for strength; choose closed rings, rivets or welded joints, and covered ferrules to avoid loosening or sharp edges.

    How often should I inspect cat toys and when should I retire them?

    Inspect toys at least once weekly and after heavy play; retire any toy with punctures, exposed hardware, loose stitching, fraying that produces small pieces, or a changed smell or texture.

    Related Articles

  • Cat Breeds That Don’t Shed for Allergies

    Cat Breeds That Don’t Shed for Allergies

    Think you can't have a cat because of allergies? Not necessarily. Want a furry roommate who doesn't leave a fur snowstorm on your black sweater every morning? You're closer than you think.

    Some breeds shed very little, and lots of allergy sufferers say their sniffles calm down around these cats. Picture your nose relaxing while your cat's whiskers twitch as a toy rolls across the floor. Nice, right?

    Here are five practical low-shed picks to consider: Balinese (long-haired but low-shed, like a silky Siamese cousin), Sphynx (hairless, so fur isn't the problem but they need regular baths), Russian Blue (short, dense coat that often causes fewer reactions), Cornish Rex (soft, tight curls that don't shed much) and Devon Rex (curly coat and playful energy). Quick note: Fel d 1 is the main cat allergen protein (a tiny protein made in a cat’s skin and saliva), and different breeds can produce different amounts or spread it differently.

    How to choose one that fits your home? Meet the cat first if you can, spend 15–30 minutes and see how your body reacts. Groom regularly and use a HEPA filter (an air filter that traps tiny particles) in common rooms. Keep bedrooms cat-free for allergy-free sleep, and remember Sphynx cats need skin care and baths more often. Little changes can make a big difference, and yes, you might still get to be feline fine.

    Top cat breeds that don't shed: quick TL;DR picks, selection criteria, and how to use this list

    "Doesn't shed" here means low visible fur transfer and minimal loose-hair upkeep. TL;DR picks: Balinese; Sphynx; Russian Blue; Cornish Rex; Devon Rex , great starting breeds for allergy-prone homes.

    I chose these breeds by looking at real-world shedding (how much fur ends up on your clothes and couch), reported allergen tendencies like Fel d 1 (the main cat allergen protein), owner feedback, routine grooming needs, typical temperament and energy, and how easy they are to find from rescues or reputable breeders. I also leaned on breeder notes and shelter reports so this feels practical, not just textbook.

    Breed Shedding level Hypoallergenic potential Grooming needs Temperament
    Balinese Long hair but low visible shed Often lower allergen reports (Fel d 1 may be less) Weekly brushing to prevent mats Affectionate and talkative, loves people
    Sphynx Hairless – little to no fur transfer Can be better for some allergy sufferers Weekly baths to remove skin oils Warm, outgoing, very people-oriented
    Russian Blue Short dense coat, low shed Reported lower Fel d 1 levels (varies) Occasional brushing Quiet, loyal, a bit shy with strangers
    Cornish Rex Very short, curly coat – very low shed Often low dander (dander = tiny skin flakes) Light grooming, gentle wipes as needed Playful, social, loves interaction
    Devon Rex Short wavy coat, minimal loose hair Many owners report low dander Soft wipes and occasional brushing Affectionate and mischievous
    Bengal Short pelt-like coat, low visible hair Less noticeable shedding for many people Weekly brushing High energy, very playful and smart
    Oriental Shorthair Short, sleek coat – low shed Often lower allergen reports Minimal brushing Chatty and bonded to their person
    Siberian Long, dense coat – shedding varies Variable allergen reports (some studies show lower Fel d 1) Weekly brushing, more in heavy-shed seasons Friendly family cat, calm and playful
    Javanese Semi-long hair, low visible shed Relatively low dander reports Regular combing to keep coat tidy Vocal and affectionate
    Korat Short single coat, low shed Many owners report low shedding Easy grooming, occasional brushing Affectionate and talkative
    Singapura Very short coat, minimal loose hair Low shedding, often good for homes with allergies Minimal grooming Curious, social, compact and active
    Peterbald Nearly hairless to very short coat Often lower dander, but skin care matters Skin care and sun protection recommended Affectionate and intense, loves contact

    Use this table as a quick comparison when shortlisting breeds. If you have allergies, try a supervised visit with the cat and consider an allergist or allergy test. Also see the Adoption section for a full allergy-testing protocol. Ever visited a shelter and just watched a cat curl up on a lap? That moment can tell you more than a spec sheet. Worth trying before you commit.

    Shedding versus allergies for cat breeds that don't shed

    - Shedding versus allergies for cat breeds that dont shed.jpg

    Fel d 1 (the main cat allergen protein; produced in skin and saliva) is what causes most people’s symptoms. It spreads when dander (tiny skin flakes) or dried saliva latch onto fur, clothes, dust, and pillows, then float back into the air. Low visible shedding means less loose hair floating around, but it doesn’t erase Fel d 1. Think of Fel d 1 as a microscopic hitchhiker that rides on fur and dust, not just on clumps of shed hair.

    Visible shedding and allergen levels don’t always match up. Saliva and skin make Fel d 1, so even hairless cats still produce the protein. So yes, a cat that looks like it doesn’t shed can still trigger allergies. It’s a little counterintuitive, I know.

    Some breeds tend to show lower measured or reported Fel d 1 levels: Balinese, Bengal, Oriental Shorthair, Russian Blue, and Siberian often come up in studies and owner reports. But results vary by study, and individual cats within a breed can be totally different. So those breed names are useful starting points, not guarantees.

    Practical plan if you’re allergic but want a cat: get real-world exposure first, spend supervised time with the cat, or arrange a short in-home trial if you can. Talk with an allergist about testing or treatments, and consider keeping a strict cleaning routine to cut down on dust and allergens. For step-by-step allergy-testing guidance, see the Adoption section for the full protocol.

    Hairless and Rex cat breeds that don't shed: focused care, bathing, sun protection, and trade-offs

    - Hairless and Rex cat breeds that dont shed focused care, bathing, sun protection, and trade-offs.jpg

    Hairless cats, like the Sphynx, have little or no fur and keep skin oils on the surface. Their skin can feel warm and a little suede-like, and they need skin care more than brushing. Rex breeds, like the Cornish and Devon Rex, have short, curly, or downy coats (downy = a soft under-hair) that hold onto fewer loose hairs. That coat difference changes everyday care: hairless cats need regular baths, while Rex coats do best with gentle wipe-downs and light grooming.

    Bathe hairless cats about once a week to lift away oil buildup. Use lukewarm water around 98–100°F (37–38°C) and a very mild, fragrance-free cat shampoo diluted about 1:10 (one part shampoo to ten parts water) , for example, one tablespoon shampoo to ten tablespoons water. Rinse fully, towel dry, and if your cat tolerates it, use a low-heat blow dryer on a gentle setting. Keep an eye on the skin for persistent redness, open sores, flaky patches, or greasy clingy oil; if you see those, stop bathing and check with your vet.

    Sun protection and warmth are big deals for hairless kitties. Talk to your vet about a pet-safe sunscreen (avoid human sunscreen with zinc oxide unless your vet says it’s okay) or try lightweight clothes for sunny window naps. Indoors, aim for cozy temps around 68–74°F (20–23°C); hairless cats will hunt for blankets or sweaters in cooler rooms. Sunburn looks like pink, sensitive patches that flake; cold stress shows as shivering or a hunched, tucked posture.

    Weekly basics and helpful routines:

    • Bath steps: gather supplies, wet gently, apply diluted shampoo, rinse well, towel dry, low-heat blow dry if tolerated.
    • Rex coat care: soft microfiber cloth or grooming wipes once a week to remove surface oils.
    • Recommended products: fragrance-free cat shampoo, microfiber towels, hypoallergenic grooming wipes (hypoallergenic = less likely to irritate skin).
    • Ears: check weekly; wipe the outer ear with a damp cloth, but don’t push cotton swabs into the ear canal.
    • Skin checks: look for redness, bumps, flaky patches, sores, odd smells, or too much oil.
    • Indoor climate: keep it around 68–74°F (20–23°C) and offer warm beds or sunny spots.
    • Call the vet if you see persistent skin lesions, bleeding, sudden hair loss, or big behavior changes.

    A quick tip: for busy days, give a hairless cat a gentle wipe or a quick bath before you head out , that quiet play break can buy you safe alone time. I once watched my Luna purr through a towel-dry and then zoom-zoom across the rug, so yeah, cats can forgive bath time.

    Don’t routinely shave normally coated fur , fur protects skin and helps temperature control, and shaving can stress your cat. If there’s severe matting, medical need, or tricky trims, book a professional groomer or a vet who knows hairless and Rex coat care. Worth every paw-print.

    Breed Coat Snapshot
    Sphynx Mostly hairless, skin oils sit on the surface; needs weekly baths and sun protection.
    Cornish Rex Short, curly coat that sheds very little; loves gentle wipe-downs and light grooming.
    Devon Rex Soft, wavy coat with downy under-hair; low shedding, occasional wipes and ear checks keep it comfy.

    Grooming, diet, and home routines to reduce hair and allergens

    - Grooming, diet, and home routines to reduce hair and allergens.jpg

    Grooming, a good diet, and a steady cleaning routine are the trifecta for less hair and fewer allergens around the house. Think of it as three simple jobs: remove loose hair, feed healthy skin, and keep air and surfaces tidy. Your nose , and your guests , will thank you.

    Brush by coat type and season. Most short coats do fine with weekly brushing to pull away loose hairs and dander; during heavy-shed seasons like spring and fall, bump that to daily for a week or two to catch the worst of it. Long or semi-long coats usually need brushing two to three times a week to stop mats and the tumbleweeds of fur on the floor. Regular brushing lowers hairballs and keeps skin flakes (which carry allergens) off your couch and clothes , and you’ll probably feel your cat purr as the brush strokes their back.

    Diet matters for skin and coat health. Aim for a higher-protein food (many adult cat diets list about 30 to 40% protein on the label) and look for omega fatty acids (omega fats like fish oil or flax oil that help skin and coat). Supplements can help, but talk to your vet first , dosage and product quality vary, and your vet can tell you what’s safe for your cat.

    Keep the home on a steady cleaning cadence. Run a HEPA air purifier (HEPA = high-efficiency particulate air) near the bedroom and the cat’s favorite hangout, and let it run most of the day. Vacuum high-traffic areas twice weekly with a pet-specific vacuum, and wash bedding and removable furniture covers once a week. Keep one room cat-free, usually a bedroom, so allergy-sensitive people can sleep in cleaner air. Ever watched your kitty chase shadows while you vacuum? Cute, but also a reminder to be steady with the routine.

    Handy tools and tiny tricks make this easy. Use a short-coat brush or bristle brush for weekly touch-ups, a rubber grooming mitt for quick rubs, and a de-shedding tool for heavy-shed moments. Microfiber covers (microfiber = a soft, tightly woven fabric) and lint rollers are lifesavers on couches and clothes. For sensitive Rex-style coats or hairless cats, use gentle, fragrance-free grooming wipes and bathe hairless kitties weekly with lukewarm water and a mild shampoo diluted about 1:10, then dry thoroughly. Ten minutes of grooming a few times a week really adds up. I once watched Luna leap six feet for a toy and then flop down contentedly after a good brush , worth every paw-print.

    Choosing a cat breed that doesn't shed for your home: temperament, lifestyle, and costs

    - Choosing a cat breed that doesnt shed for your home temperament, lifestyle, and costs.jpg

    Start with a short checklist: allergy sensitivity, how active your household is, how much grooming you’ll tolerate, your budget, and any rental or HOA pet rules. When you can, choose kittens whose parents shed little so you’ll have a clearer idea of what you’re getting.

    Match the cat’s temperament to your home. Rex breeds (like Cornish or Devon Rex, with a short curly coat that feels almost velvety) are playful and social, great if you have kids or want a lively companion. Russian Blue and Singapura tend to be quieter and lower-shedding, so they suit single adults or seniors who want calm company. Balinese and Siamese are chatty and demand attention, perfect for people who like interactive pets and lots of play. Bengals are smart and busy; they need serious enrichment and are best for very active homes. For apartments, stick with breeds that prefer indoor life and shed less.

    Costs and rarity matter. Adopting from a shelter or rescue usually costs tens to a few hundred dollars and can give you a good sense of an adult cat’s real behavior. Buying from a breeder, especially for hairless or specialty lines, can cost high hundreds to low thousands, and waiting lists are common. If you choose a breeder, ask for health clearances (vet records), notes on the parents’ temperaments, and references from other buyers.

    Rental and apartment tips: pick an indoor-friendly, low-shed breed, and get pet permission in writing. Choose a cat that’s comfortable in smaller spaces, and plan enrichment like window perches or puzzle feeders so they stay happy indoors. Worth every paw-print.

    For a factual look at common myths about hypoallergenic breed claims, see hypoallergenic cat breeds maine coon.

    Cat Breeds That Don't Shed for Allergies

    - Adoption, breeders, and detailed testing protocol for cat breeds that dont shed.jpg

    Before you sign adoption papers, bring a short checklist. Plan a supervised trial visit with the cat, line up a chat with an allergist (doctor who treats allergies), and get the animal’s medical and grooming history, vaccines, flea control, baths, and any past household allergy notes. It’s simple, but it saves a lot of sneezing later.

    Breeder versus shelter is a real choice, not a moral test. From breeders, ask for health clearances like vet records and genetic screens (tests for inherited diseases), plus vaccination and parasite history, and notes about the parents’ temperaments and any allergy observations. Ask if the kittens came from low-allergen households. Shelters and rescues often let you trial adult, low-shedding cats sooner. Adults are more predictable, usually cheaper up front, and shelters can tell you how a cat handled people and other pets. If you want tips on trialing older cats and matching activity levels, see importance of play for senior cats. Cute bonus: adults sometimes have better manners. Purr-fect.

    Allergy-testing protocol you can follow before you commit:

    1. Short supervised visits, 30 to 90 minutes. Sit quietly with the cat in a low-traffic room and note symptoms right after and again two hours later. Jot down sneezing, itchy eyes, congestion, trouble breathing, or skin irritation.
    2. Repeat extended daytime visits on different days. Some people are fine briefly but react after repeated exposure, so try a few visits to catch delayed reactions.
    3. Overnight or multi-day in-home trial if possible. This is the real test because you’re exposed to night-time allergens on pillows and mattresses. Start short, then stretch the trial if symptoms stay mild.
    4. Keep a simple allergy diary with a 0–10 severity score. Record the time, what you touched like fur or bedding, and any meds taken. Patterns pop out fast when you write them down.
    5. If symptoms persist or get worse, see an allergist for testing or immunotherapy (allergy shots or drops that help your body tolerate allergens), and talk about long-term management.

    If symptoms show up after adoption, move fast but stay calm. Call your allergist and your vet to rule out a skin issue or a secondary infection. Increase environmental controls, use a HEPA purifier (high-efficiency air filter), wash bedding more often, and make the bedroom a cat-free zone. If reactions don’t improve despite cleaning and treatment, consider a temporary foster or a rehoming plan. Keep lines open with breeders, rescues, or adopters, most want a good outcome for both you and the cat, and many will help find the best solution.

    FAQs and common misconceptions about cat breeds that don't shed

    - FAQs and common misconceptions about cat breeds that dont shed.jpg

    • Are hairless cats allergy-free: No. Even hairless breeds still make skin proteins that can trigger allergies. They might help some people, but they don’t guarantee relief. See the Shedding and Hairless/Rex care sections (#Shedding, #Grooming).

    • Does shaving stop allergies: Not usually recommended. Shaving strips a cat’s natural protection, can irritate the skin, and won’t stop allergens from getting around. For a careful approach, check Grooming and Hairless/Rex care (#Grooming).

    • Which short-haired breeds shed least: Look at the Top Breeds table for quick comparisons and, more importantly, spend time with the cat before adopting. Try to see an adult cat for a few weeks if you can, real shedding shows up over time (#Top-Breeds).

    • How to test for allergies quickly: Start with short supervised visits and watch for immediate and delayed symptoms. Repeat a daytime visit, then try an overnight only if reactions stay mild. Take notes and go slow; see the Adoption protocol (#Adoption).

    • Are special diets proven to reduce allergens: Evidence is limited. Some foods claim to lower dander or saliva proteins, but studies are mixed. Talk with your vet before changing food or adding supplements (#Diet).

    • Will cleaning and HEPA purifiers help: Yes. Run a HEPA (High Efficiency Particulate Air) purifier near places your cat sleeps, vacuum often, wash bedding weekly, and keep one cat-free room for relief. Little changes make a big difference (#Cleaning).

    Final Words

    Right in the action: this post gives quick TL;DR picks (Balinese; Sphynx; Russian Blue; Cornish or Devon Rex), a plain definition of "doesn't shed," selection criteria, and a compact 12-row Top Breeds table for rapid comparison.

    We also covered Fel d 1 and allergy tips, care for hairless and Rex cats, grooming, diet and home routines, breed-matching by temperament and cost, plus a step-by-step allergy-testing protocol. If allergic, try a supervised visit or consult an allergist.

    Use the Top Breeds table for one-line snapshots and pick from these cat breeds that don't shed with confidence, your home will be cleaner, calmer, and delightfully playful. Worth every paw-print.

    FAQ

    Frequently Asked Questions

    What cat breed sheds the least and is best for allergies?

    The cat breeds that shed the least and often help allergy sufferers are Balinese, Sphynx, Russian Blue, Cornish Rex, and Devon Rex. No breed is allergy-free; test with supervised visits first.

    What is the most low maintenance cat?

    The most low-maintenance cat is usually a calm, short-coated breed like the Russian Blue: weekly brushing, routine vet care, and moderate play meet most needs without a lot of grooming fuss.

    What is the most cuddly breed of cat?

    The most cuddly breeds that shed little include Sphynx, Cornish Rex, Devon Rex, Balinese, and Siamese; they love laps, close contact, and frequent attention from people.

    How can I find or adopt low-shedding cats near me?

    To find or adopt low-shedding cats near you, check local shelters, breed-specific rescues, and online listings; request supervised visits and ask about coat history and household allergy reports.

    Are hairless cats allergy-free?

    Hairless cats are not allergy-free because Fel d 1 (the main cat allergen protein) comes from skin and saliva; less fur can lower spread, so personal testing is still important.

    Which top breeds should I start with if I have allergies?

    The top starting breeds for allergy-prone homes are Balinese, Sphynx, Russian Blue, and Cornish Rex or Devon Rex. Try a supervised visit and talk with an allergist before adopting.

    Related Articles