Author: Isabella Tiu

  • Kitten Clicker Training: Early Socialization and Play

    Kitten Clicker Training: Early Socialization and Play

    Think clicker training is just a party trick for show-off cats? Think again.

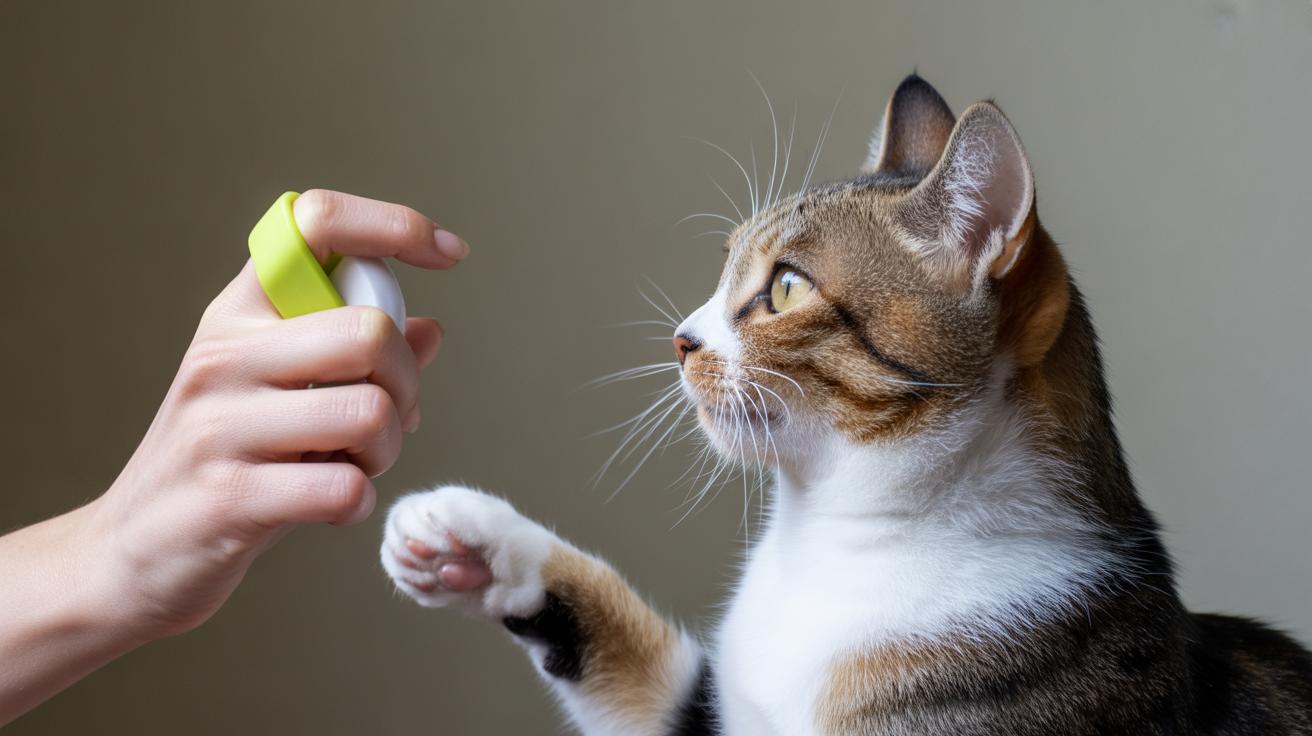
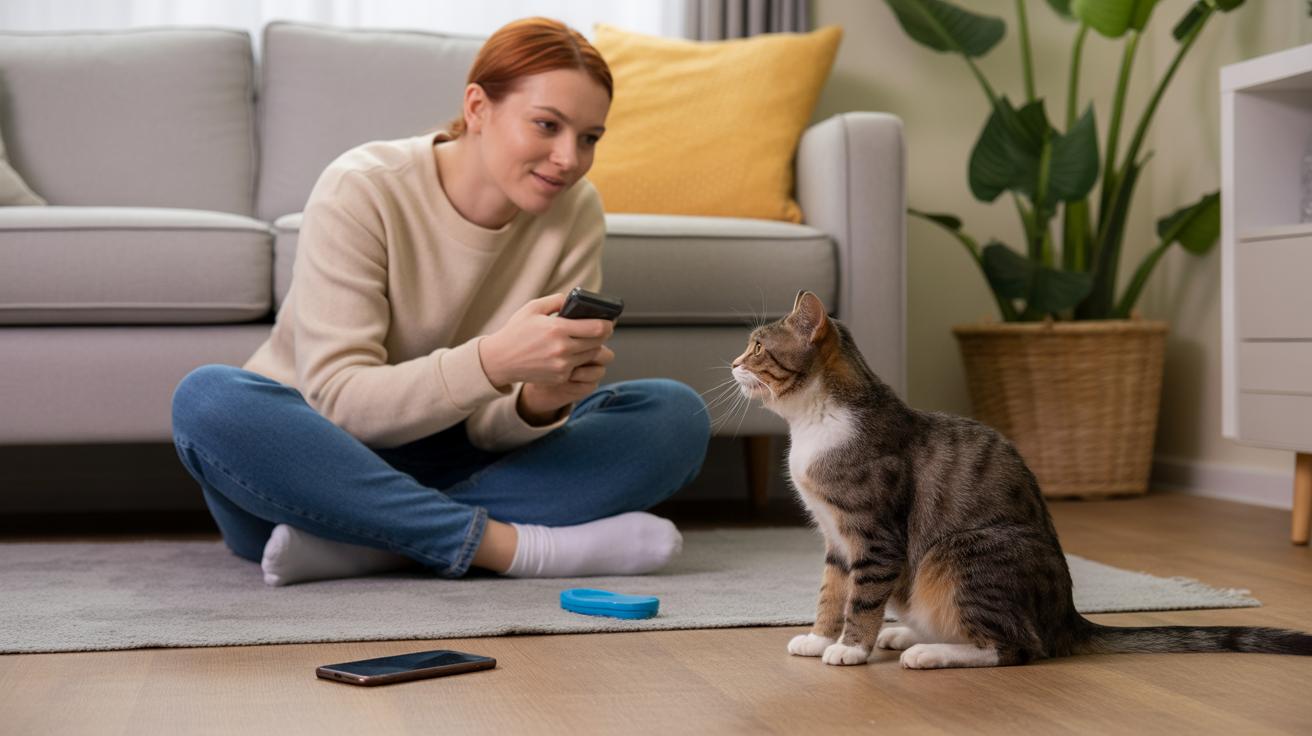
    Start during the 0 to 12-week social window (the early weeks when kittens learn to trust people). A clicker (small handheld device that makes a consistent click) acts like a tiny translator. That steady click marks the exact moment your kitten pounces, sits, or calms so you can reward them right away.

    Keep sessions short and quiet, two to five minutes a few times a day, and use tiny tasty treats. You’ll see more social confidence, gentler play, and vet visits that go much smoother in just a few weeks (vet handling means being picked up and examined).

    It’s fun, low-effort, and worth every paw-print. Claw-tastic results with almost no fuss.

    Kitten Clicker Training: Early Socialization and Play

    - How clicker training speeds socialization and playful behavior.jpg

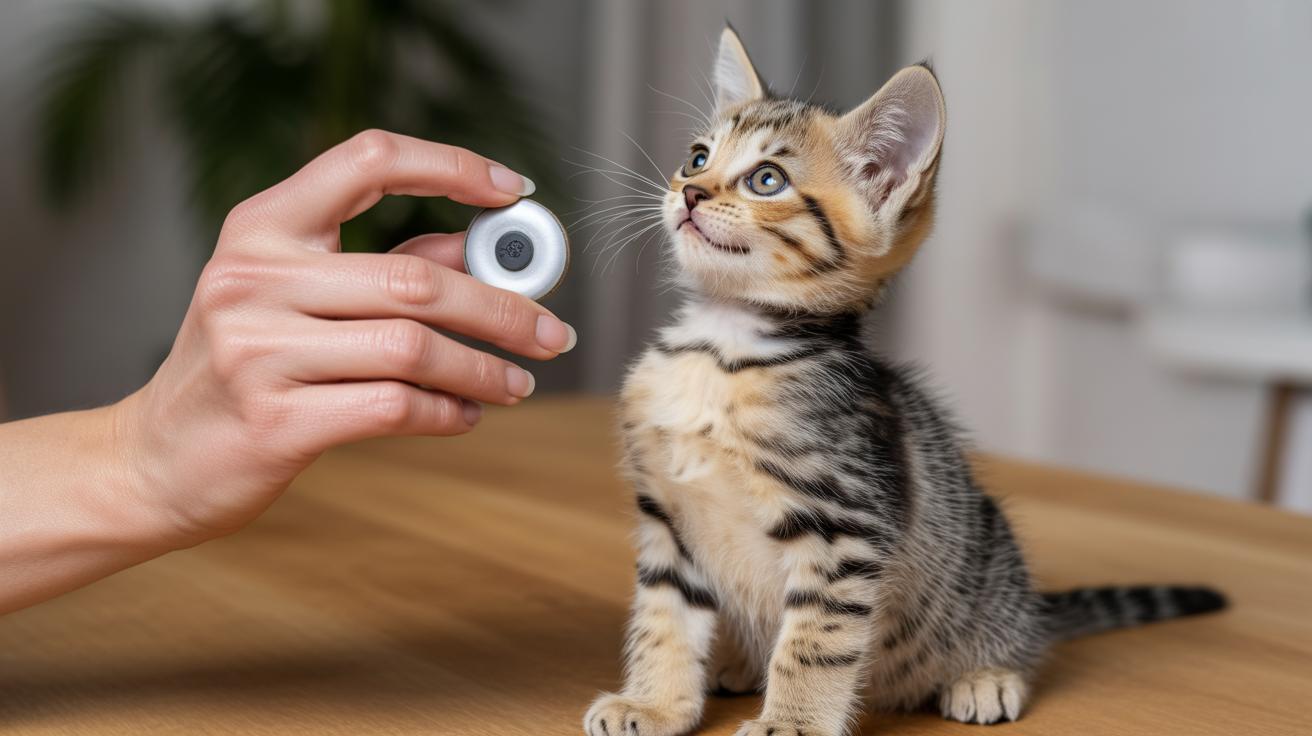
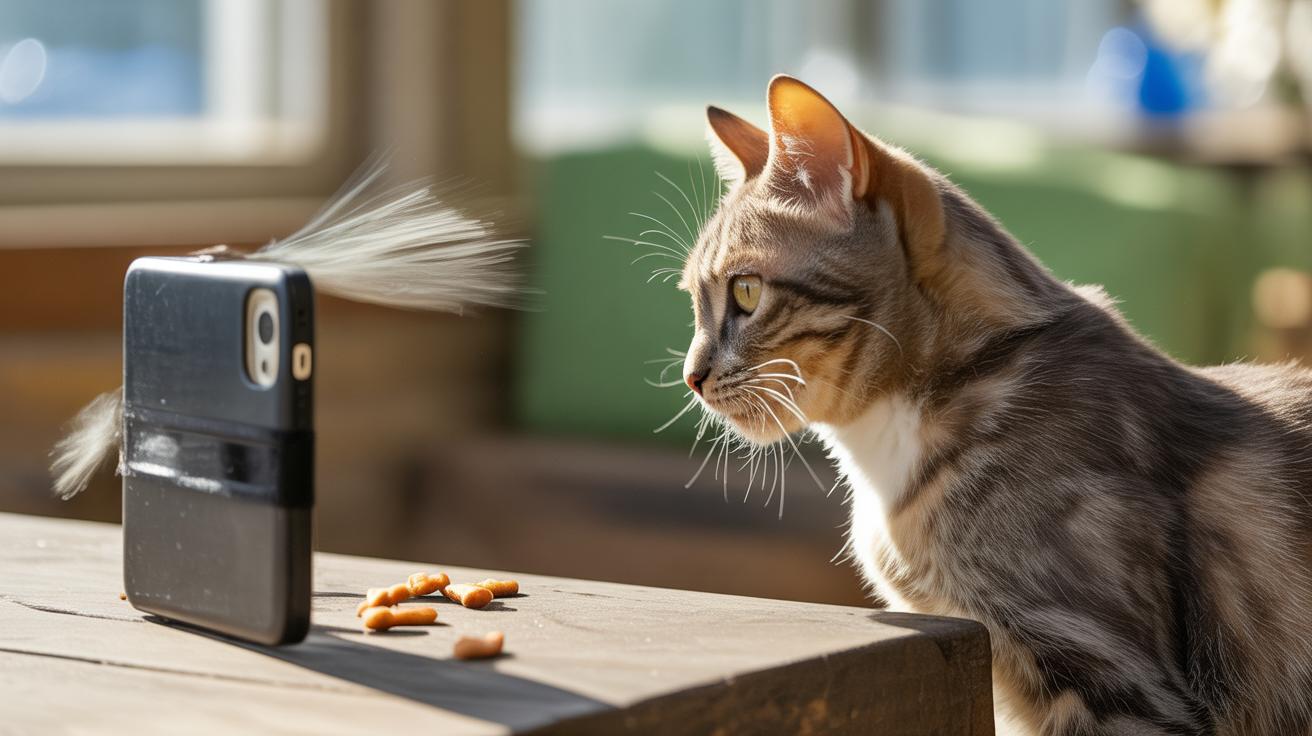
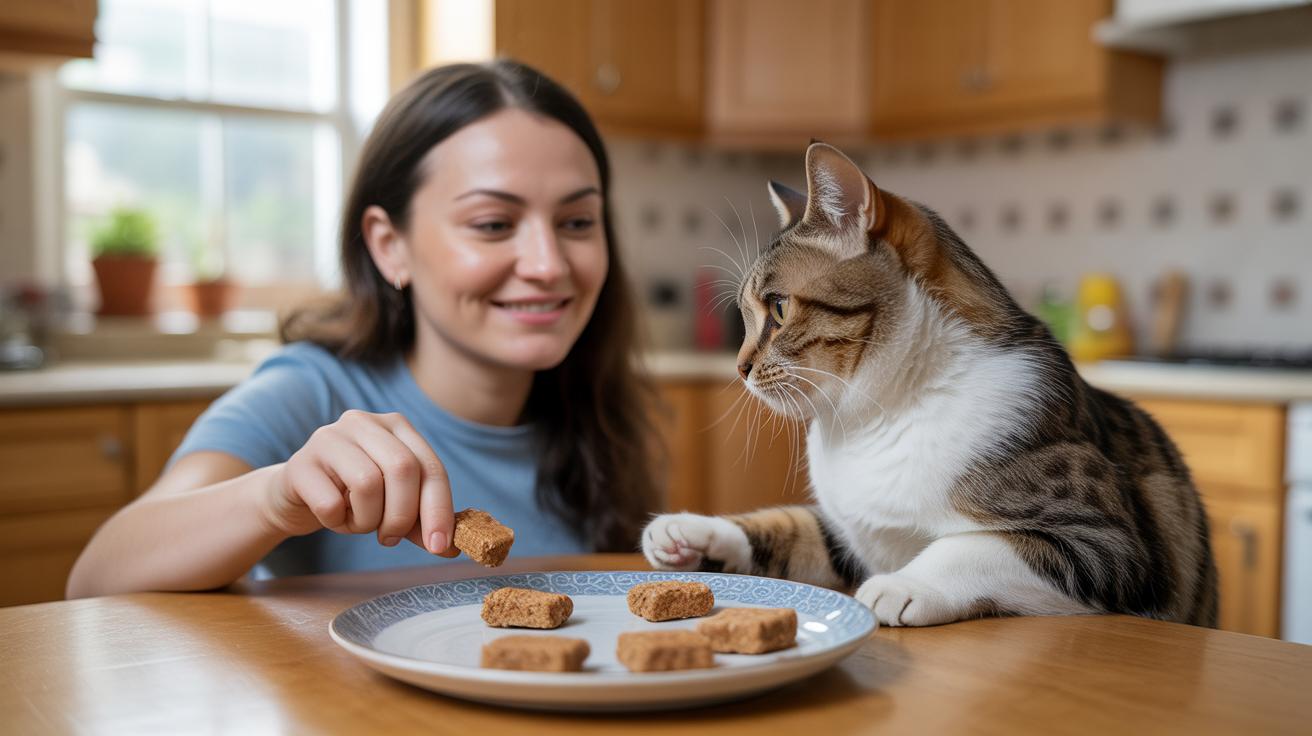
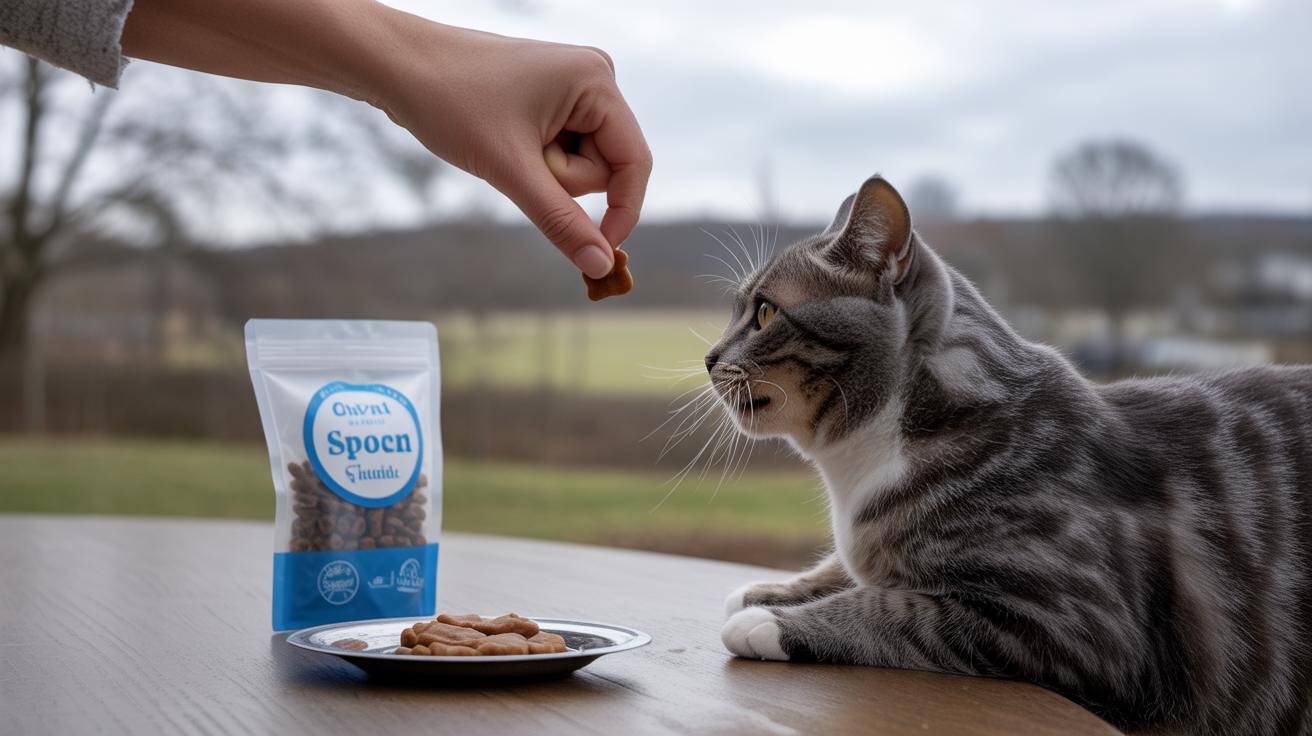
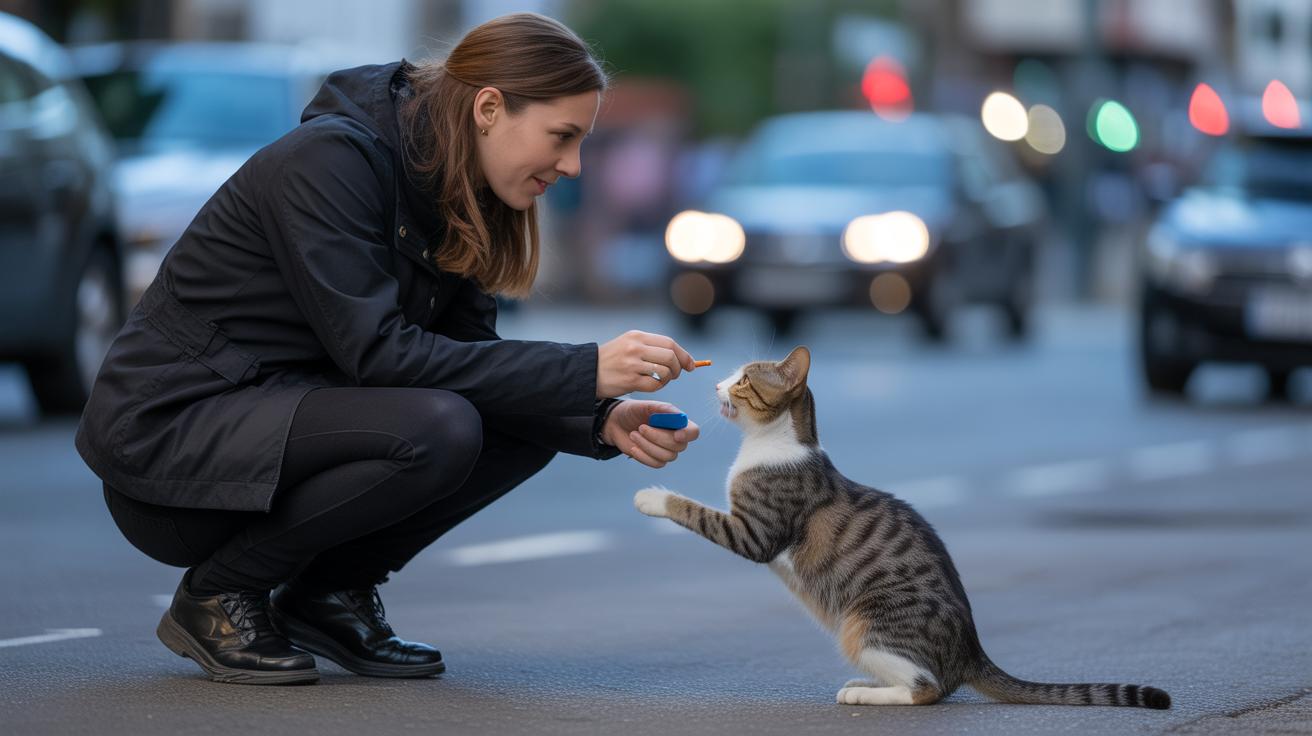
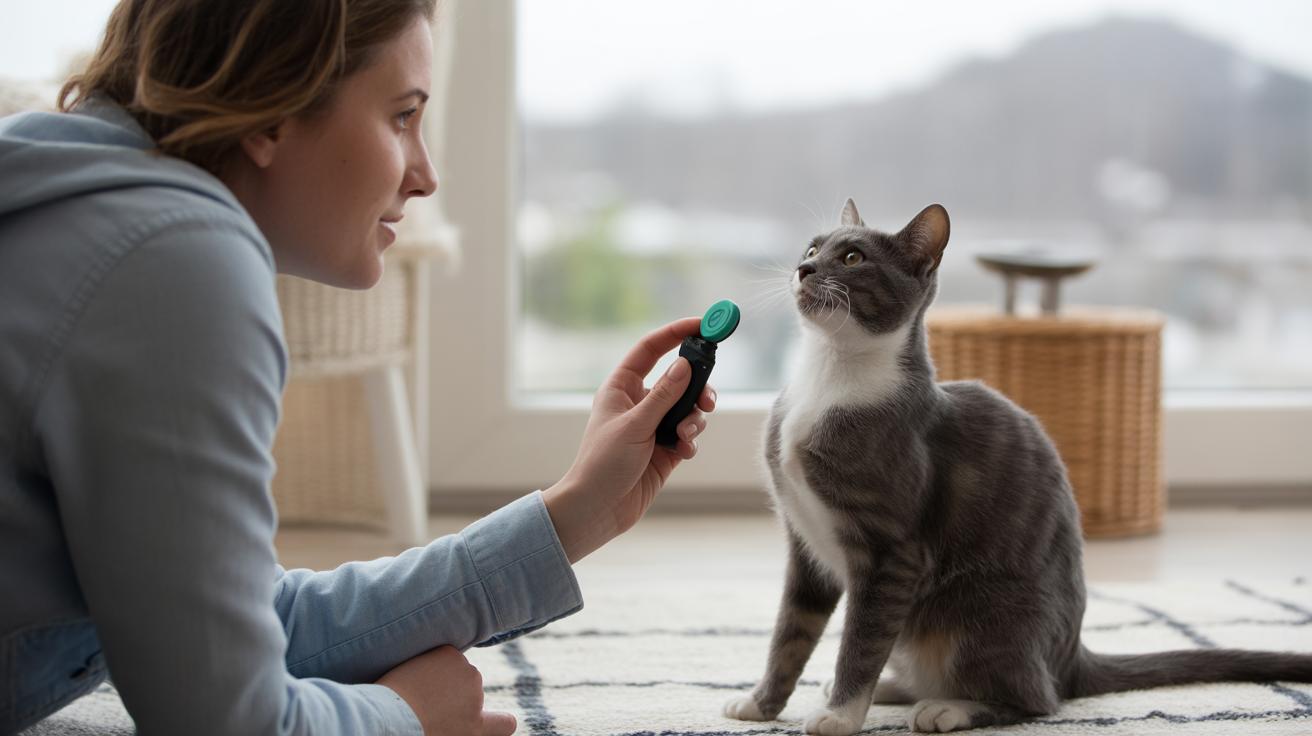
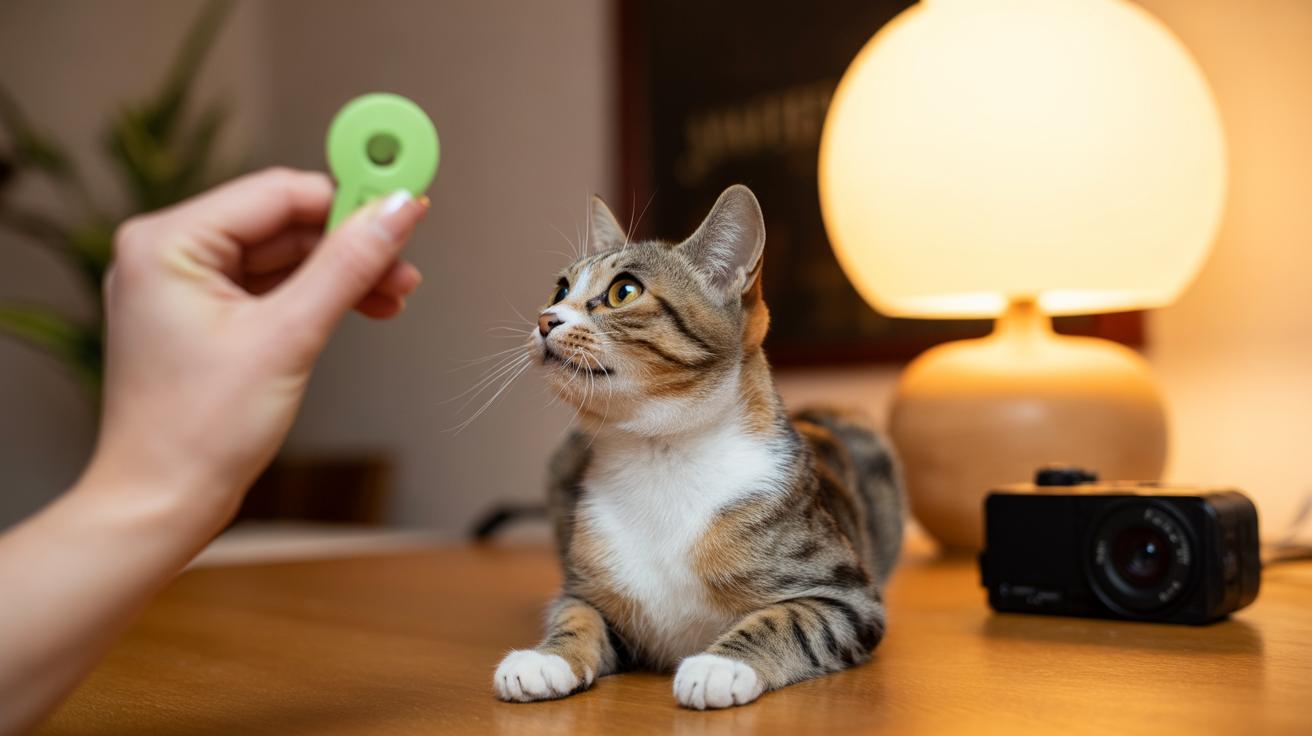
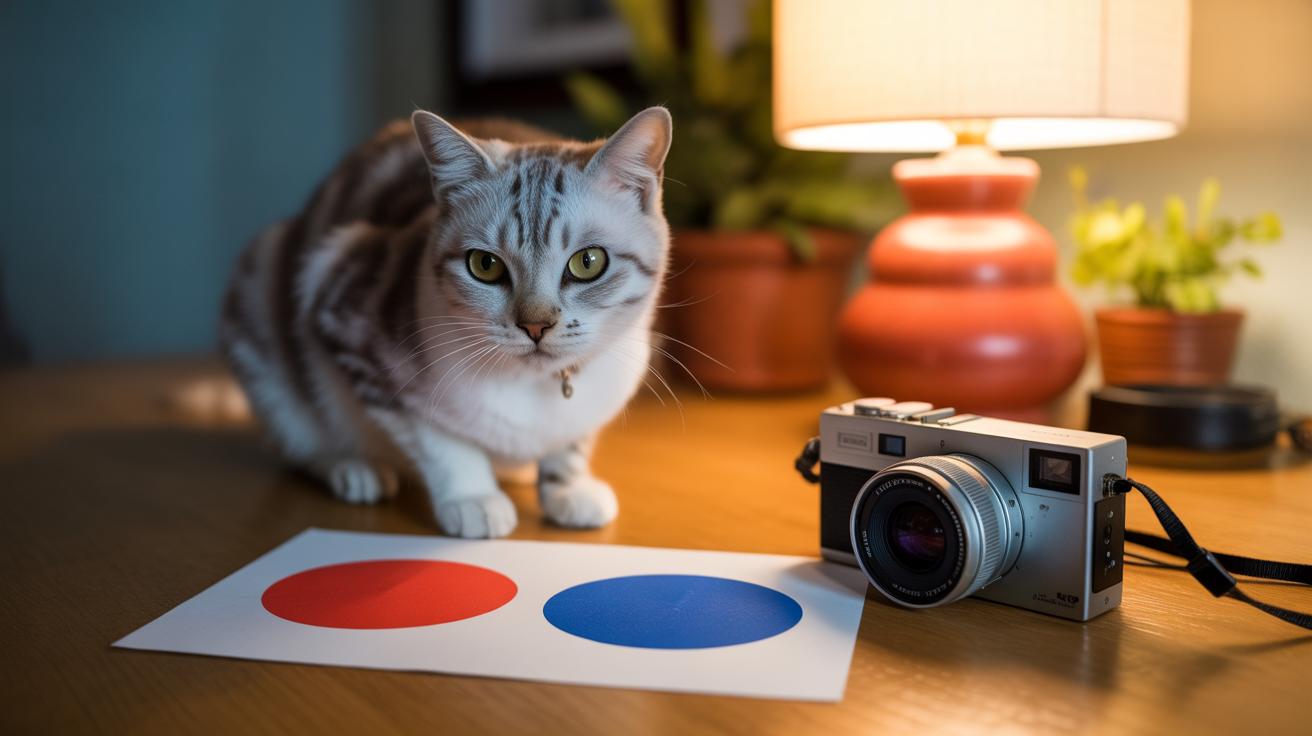
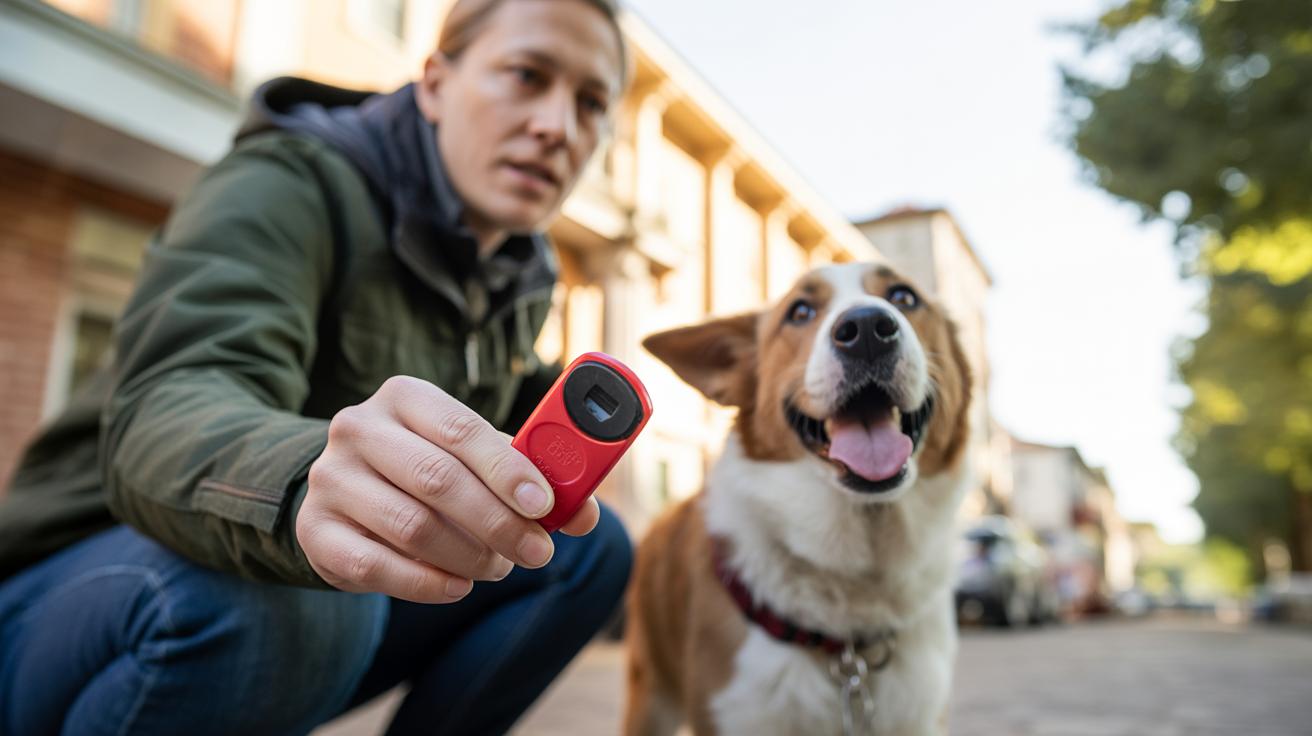
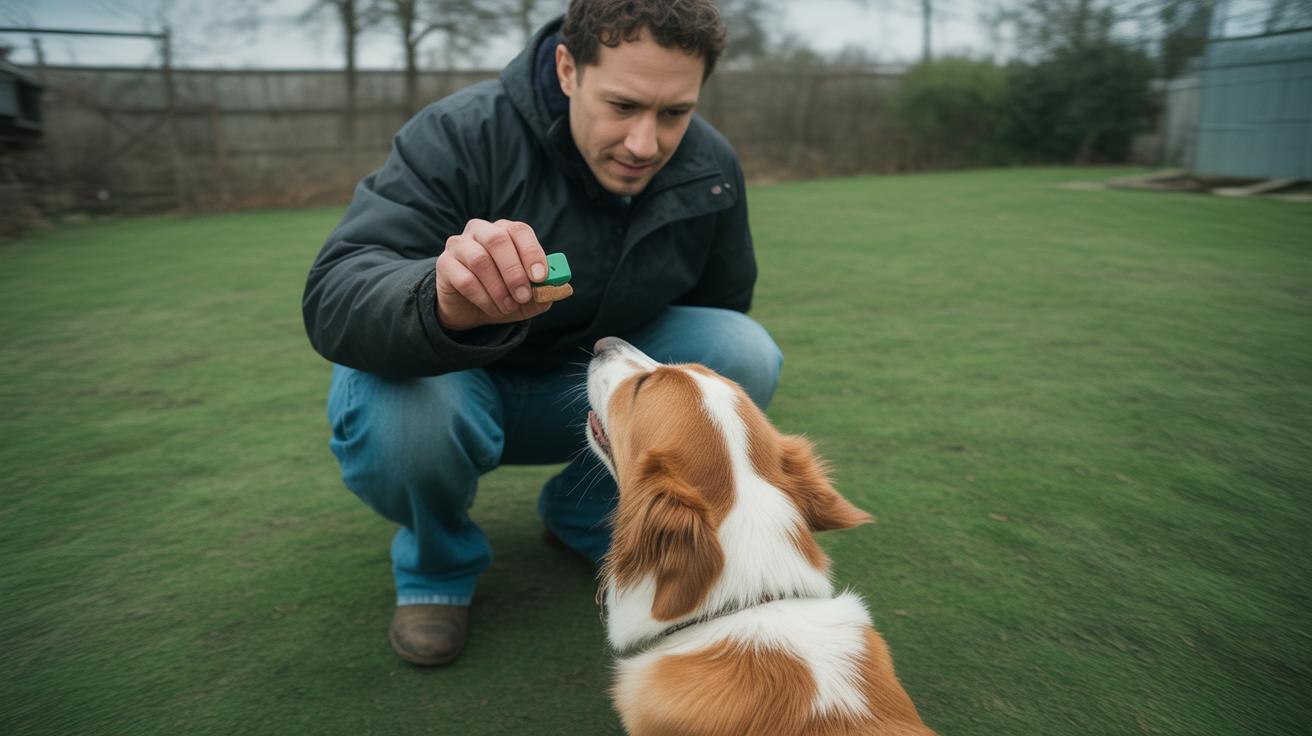
    Kitten clicker training captures the exact moment your kitten does something you want – a pounce, a gentle paw tap, or a calm sit – with a short click that says "yes" and then a tiny treat rewards that choice. The clicker is a small handheld device that makes a consistent click sound (think of it like a camera snap that freezes the good behavior). The click becomes a marker, meaning the sound tells the kitten exactly what earned the treat.

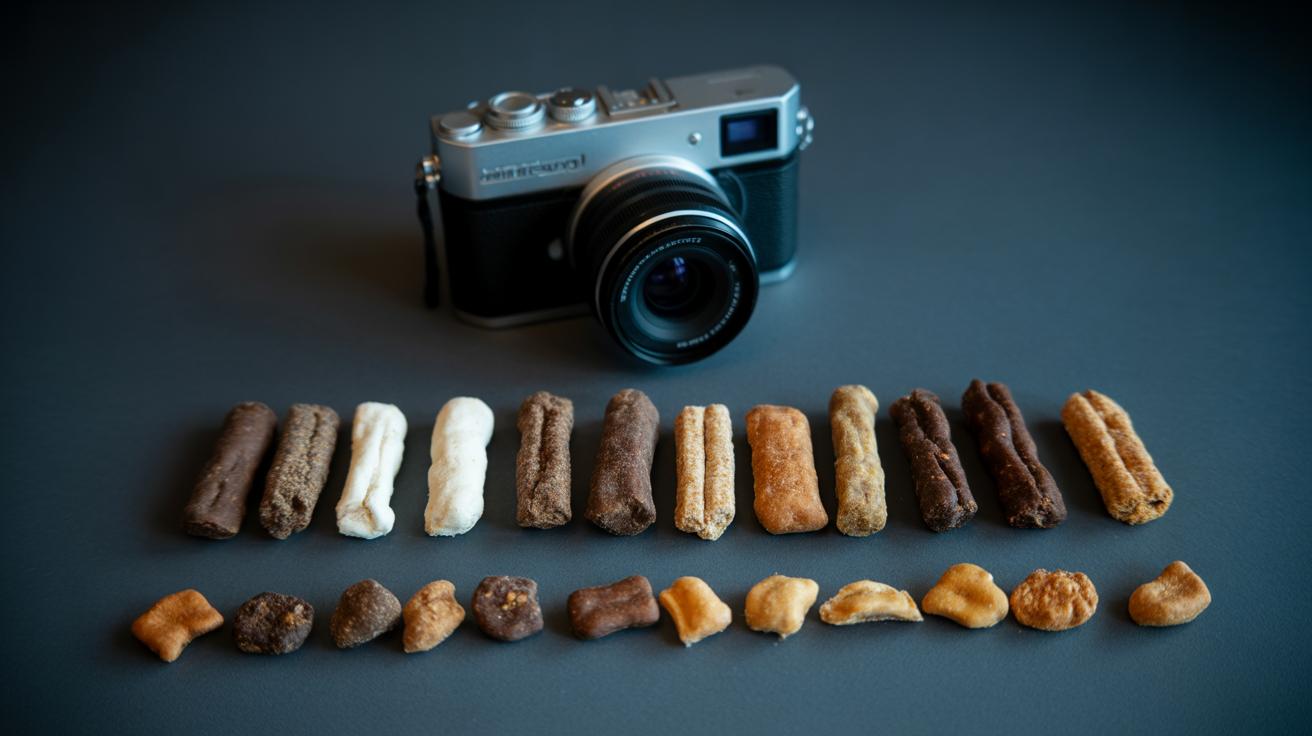
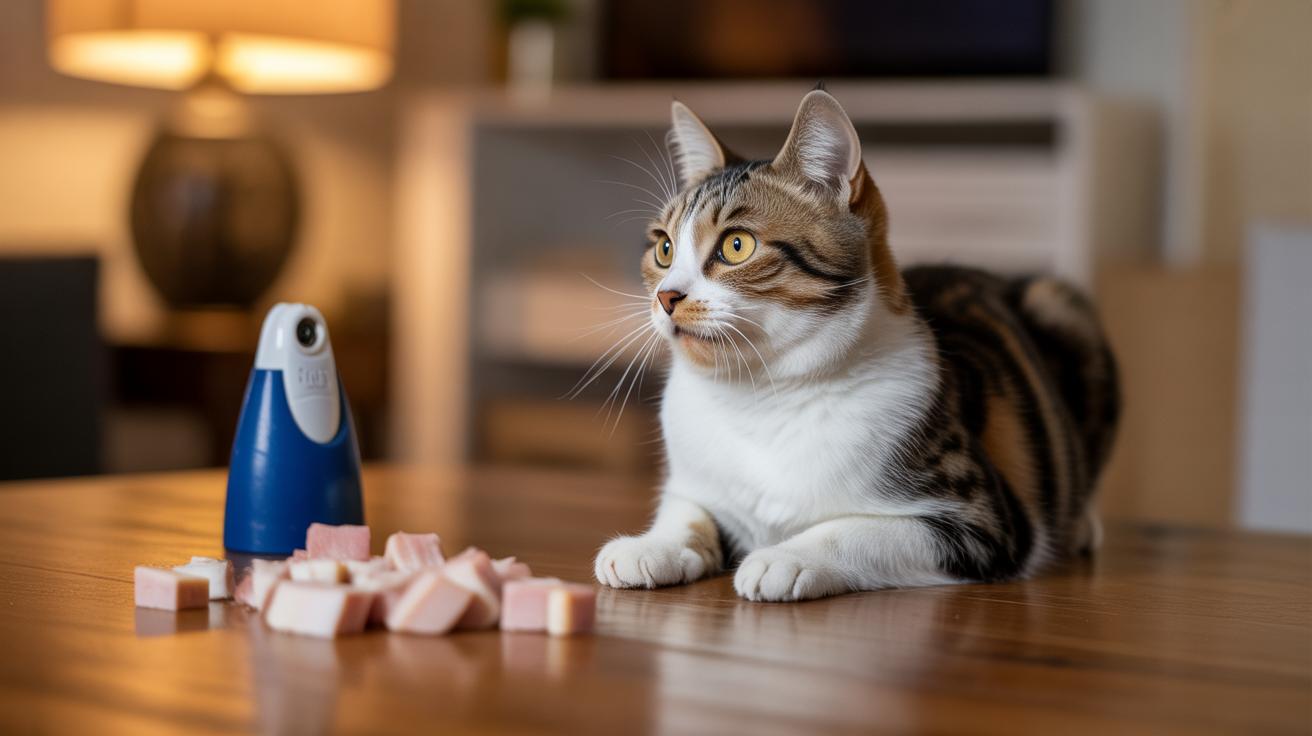
    Start around 8 weeks, which is inside the 0 to 12 week early socialization window. First, prime the clicker by doing 5 to 10 click to treat pairings so the kitten learns that click means reward. Use very small, tasty treats (chicken, tuna, or soft training bites) so you can reward lots without filling them up. Keep practice short and quiet so the kitten stays curious, not overwhelmed.

    • Start age: 8 weeks (inside the 0 to 12 week early kitten socialization window) – ideal time for clicker training.
    • Prime: 5 to 10 click to treat runs before teaching cues (small, high-value bites).
    • Sessions: 3 minutes, 3 to 4 times per week in a calm space (short, consistent practice).

    You’ll see wins quickly. Expect less play-biting, easier handling, better vet and groomer tolerance, sharper focus during play, and faster social confidence. Your kitten’s whiskers will twitch with excitement as they learn, and many owners notice real changes within a few weeks. Worth every paw-print.

    See Getting started, Play-based exercises (Sample games), Socialization handling, Troubleshooting for step-by-step how-tos.

    Getting started: equipment, priming protocol, and first preparations

    - Getting started equipment, priming protocol, and first preparations.jpg

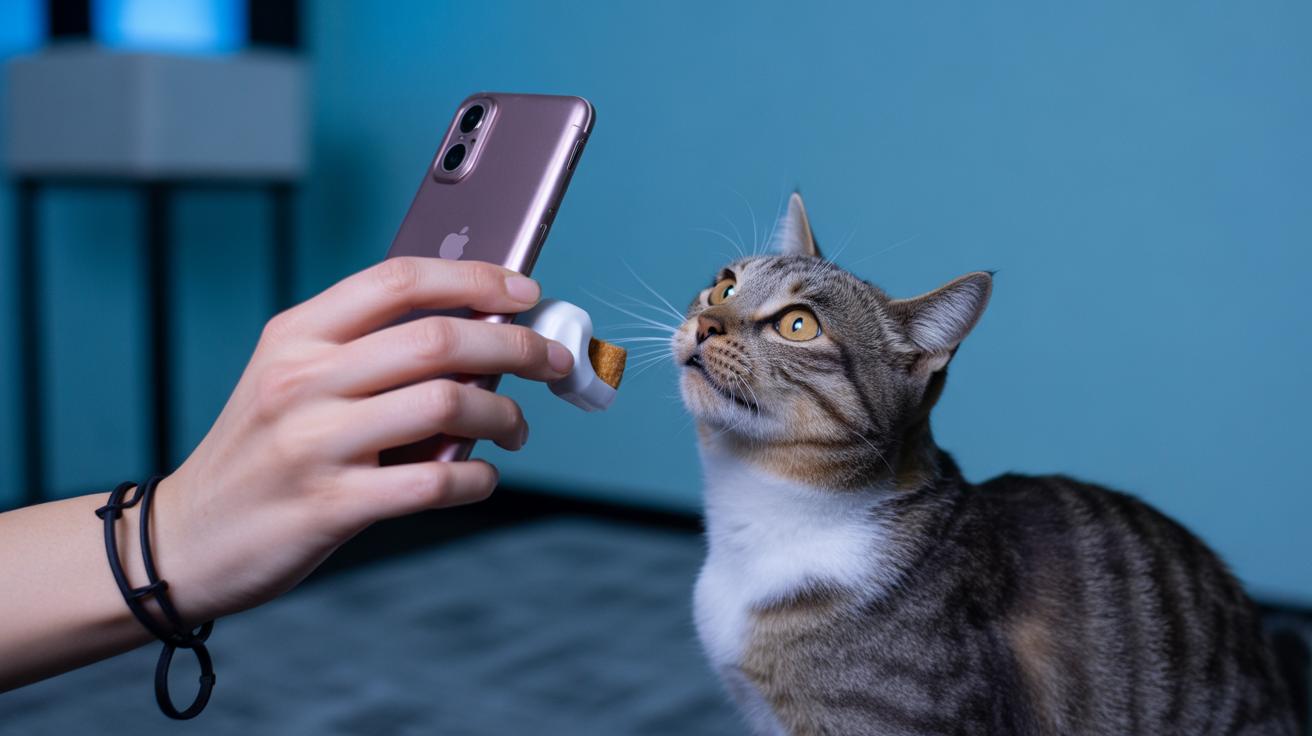
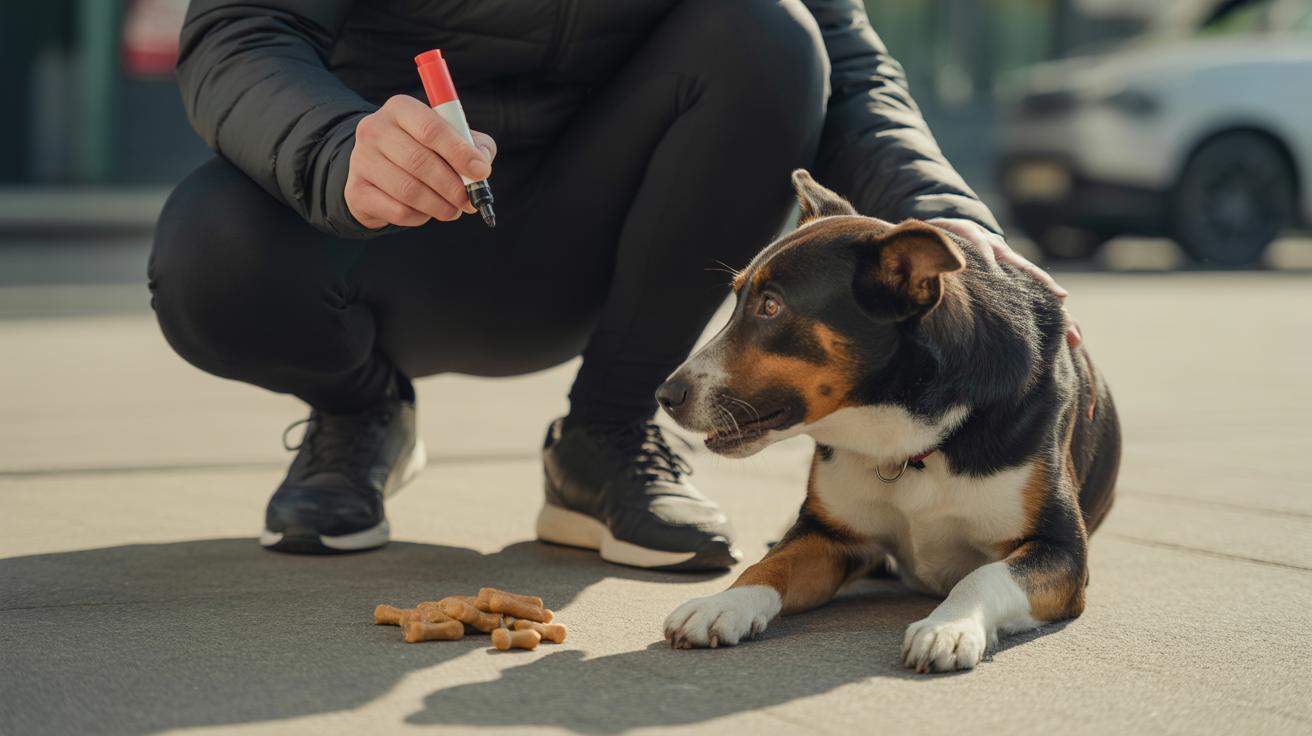
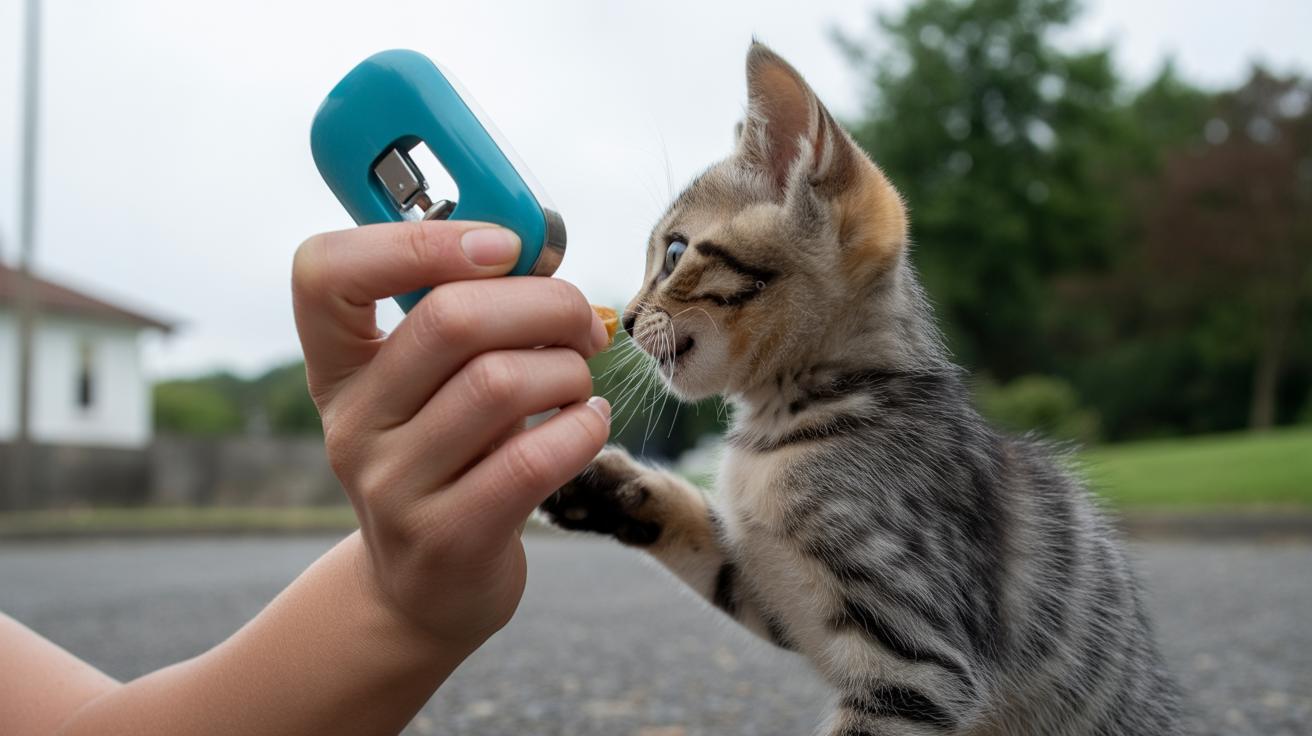
    Pick a compact clicker (small handheld device that makes a sharp, consistent sound) or a quiet verbal marker (a short, steady spoken cue like "good"). Try the sound a little distance from your kitten so you can see if it makes them jump; if it does, switch to a softer word. Ever watched a kitten flinch at a loud noise? Yeah, we do not want that.

    Priming means teaching your kitten that the click or word predicts a treat. Do 5 to 10 clear click → treat pairings: click, drop a pea-sized treat (tiny bite so they can eat it fast), wait one beat, then repeat. Your goal is for the kitten to look for the treat the moment they hear the marker.

    1. Choose a clicker or verbal marker and test the sound near the kitten to make sure it feels comfortable.
    2. Portion treats into bite-sized pieces so you can reward often without overfeeding. Pea-sized works great.
    3. Prime the marker with 5 to 10 clear click → treat runs so the association is obvious.
    4. Give the treat within about 2 seconds after the click so the connection stays tight.
    5. Once the behavior is reliable, swap some food rewards for a short burst of interactive play (see Shaping & rewards) to keep things fun and active.
    6. If the marker scares your kitten, switch to a softer verbal marker and check Troubleshooting for more tips.

    Keep it short and playful. A few minutes of priming now saves you time later, and your kitten will think you are the best treat machine ever.

    Age windows, session length, and a training schedule for kitten clicker training

    - Age windows, session length, and a training schedule for kitten clicker training.jpg

    Think early. The socialization window (the sensitive period when kittens learn about people, places, and handling) runs about 0-12 weeks, and starting around 8 weeks gives the biggest payoff. Beginning then helps your kitten learn calm handling, polite play, and faster tolerance for vet and grooming visits , nice wins for everyone.

    Keep sessions short and playful. For very young kittens aim for about 3 minutes. Older kittens and adult cats do well at 3-5 minutes. Short bursts keep their whiskers twitching with curiosity, not boredom.

    How often? Do 3-4 short sessions per week as a baseline, and sneak in extra tiny play-focused clicks on busier days if you want faster progress. Start every training block with marker priming (teaching the clicker to mean "yes") and one easy behavior, then repeat that behavior at least five times before you add a verbal cue (the spoken word you pair with the action). This repetition builds reliability.

    If your kitten loses focus, stop while they’re still interested and try again later. Short practice beats marathon drills. It keeps training feeling like play, not work , and that makes it stick.

    A couple quick tips: make each session fun, use tasty treats or favorite toys, and celebrate tiny wins. Ever watched a kitten pounce on a moving dot of light? That joy is the whole point. Worth every paw-print.

    Age range Session length Primary training goals
    0-6 weeks handling-only (short exposures) maternal/social exposure, basic touch tolerance
    6-12 weeks 2-3 minutes basic cues, people handling, first priming runs (marker priming = clicker means yes)
    8-16 weeks 3-5 minutes recall (come when called), sit, target (touch an object on cue), short leash/carrier exposure (brief, supervised introductions)
    16+ weeks 3-5 minutes shaping complex behaviors (building steps toward a bigger action), vet/grooming tolerance

    Kitten Clicker Training: Early Socialization and Play

    - Play-based exercises and sample clicker games for kitten socialization.jpg

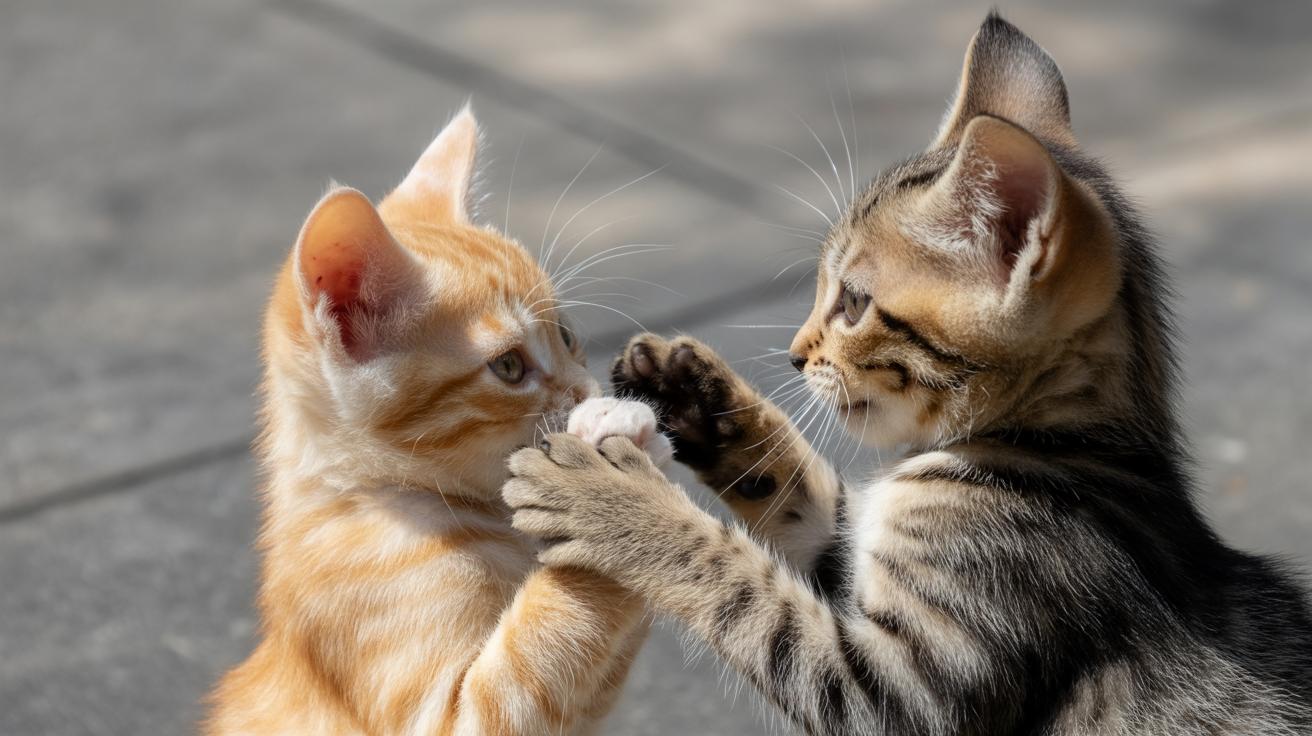
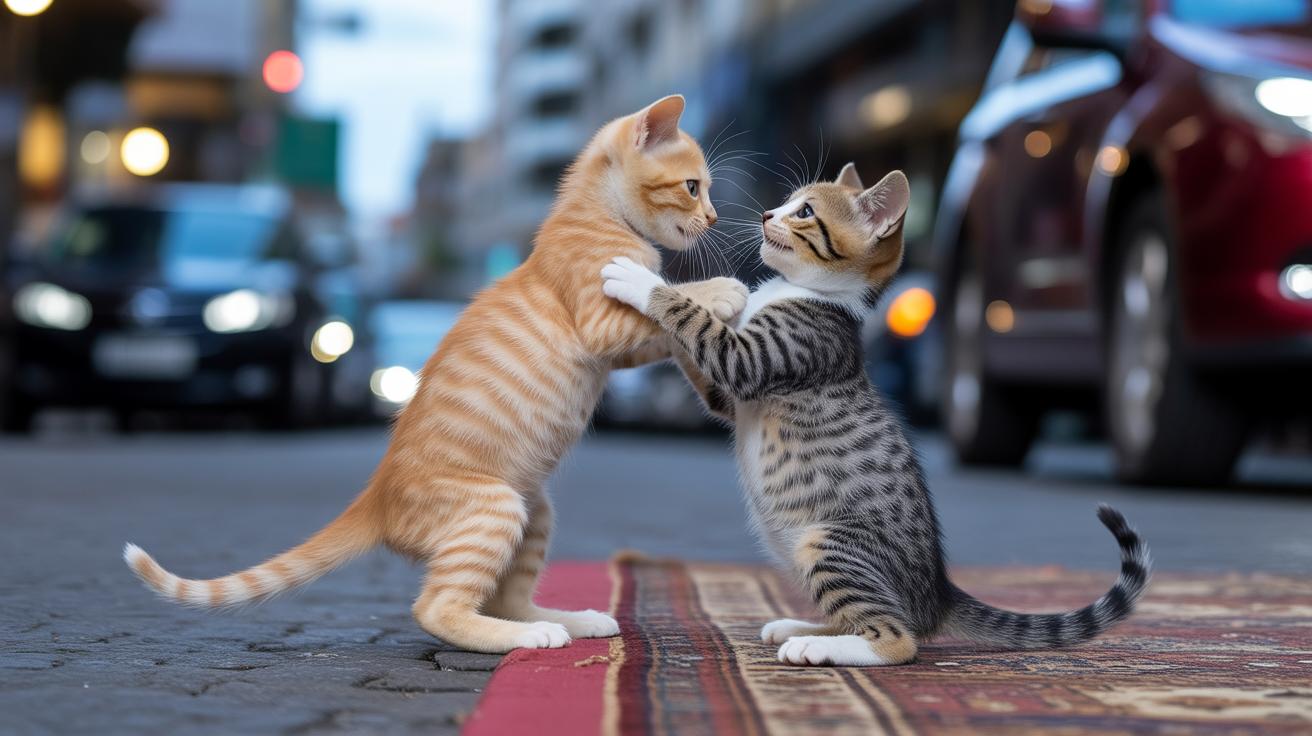
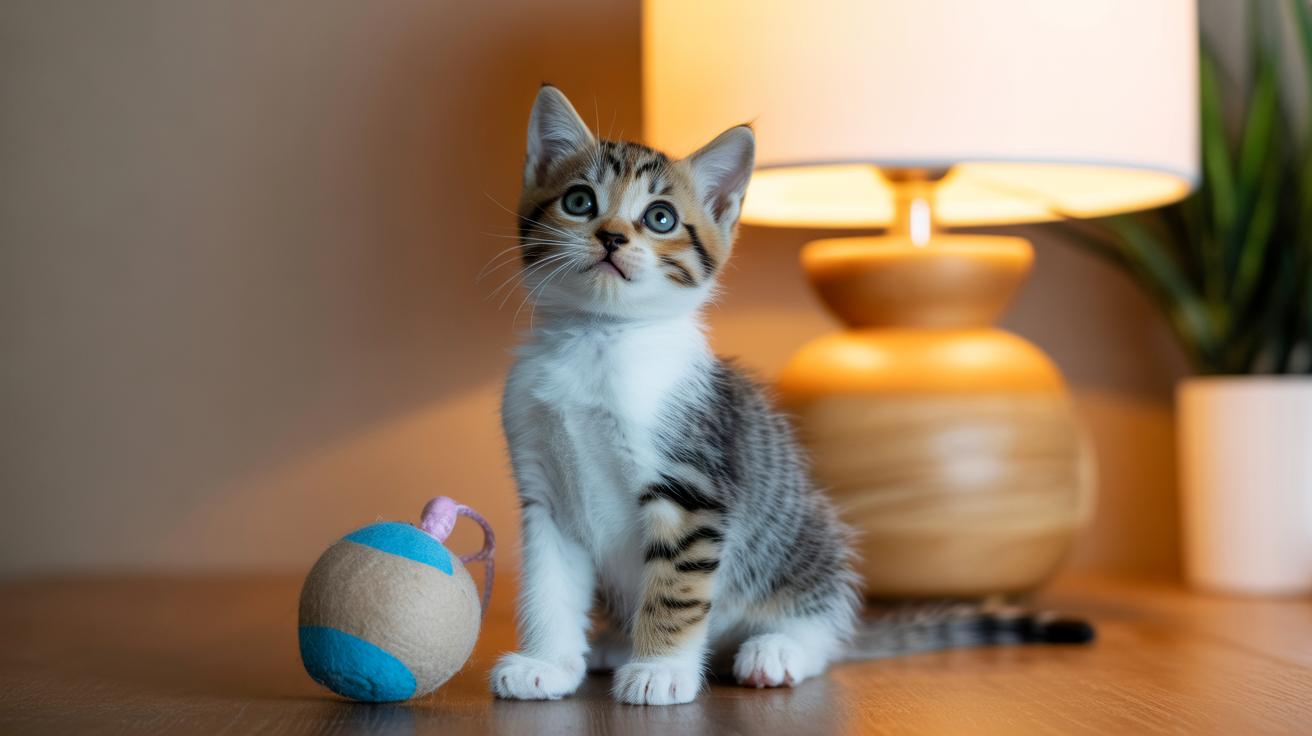
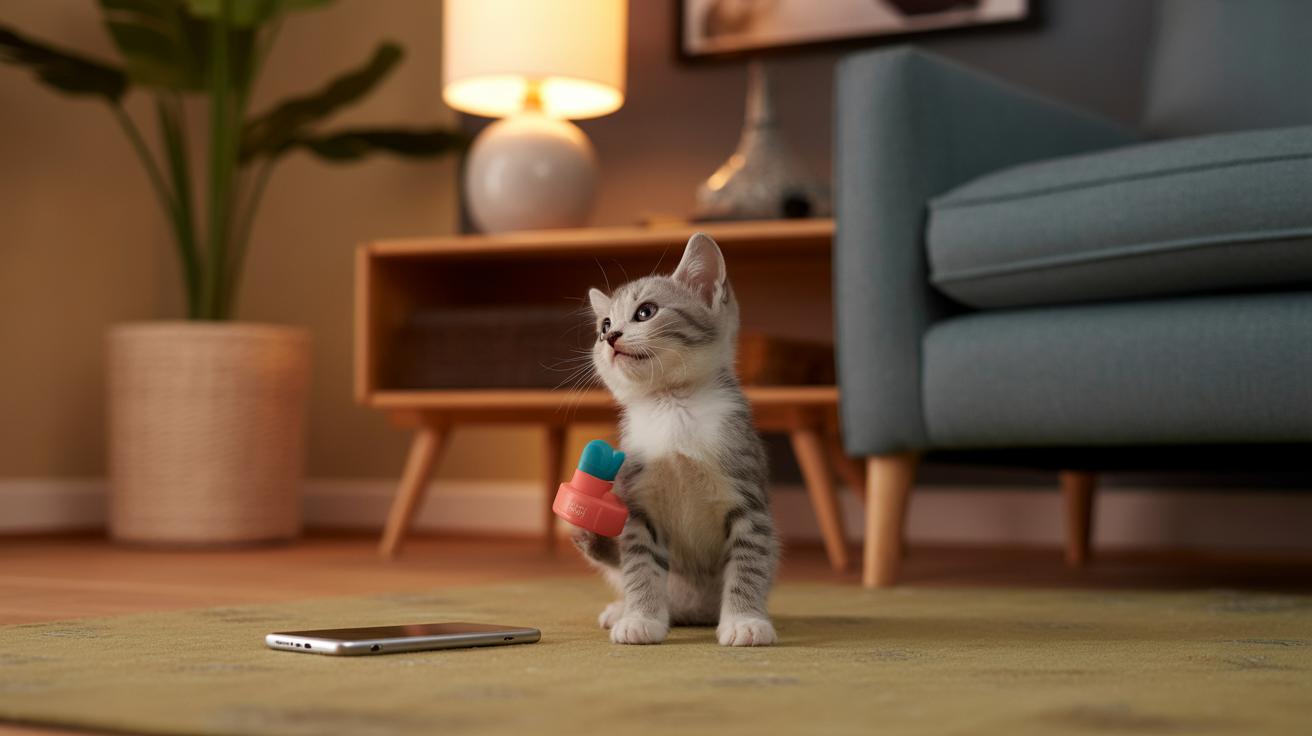
    Short, burst-style play fits a kitten's hunting rhythm. It teaches impulse control by rewarding the right choices, and it builds confidence fast. Pair those bursts with a click or a soft word and you get clear, repeatable feedback. (A clicker is a small handheld marker that makes a distinct sound.)

    Safety first: pay attention for stress signs and stop if your kitten yawns, licks lips, or walks away. See Troubleshooting for more cues and when to pause.

    For exact marker timing (the precise moment you mark a behavior) and which rewards to use, follow Shaping & rewards. For how long to practice each day, check Age windows.

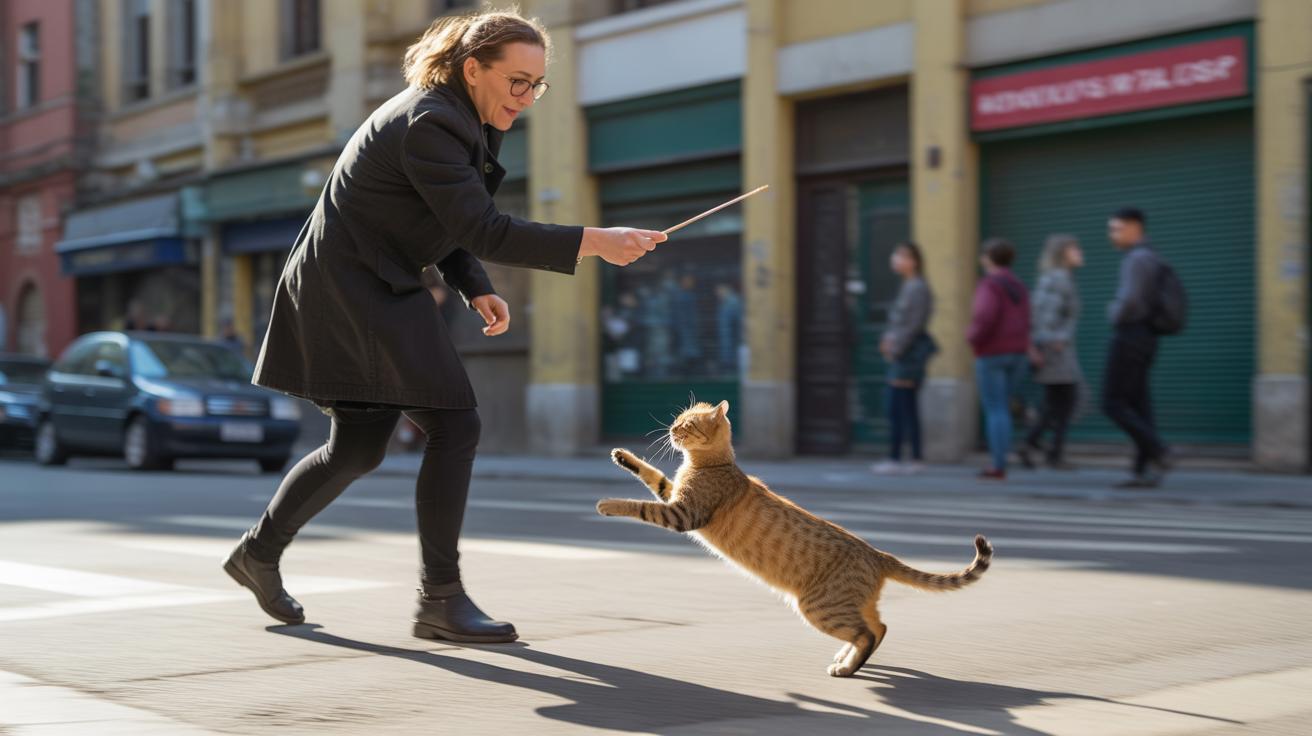
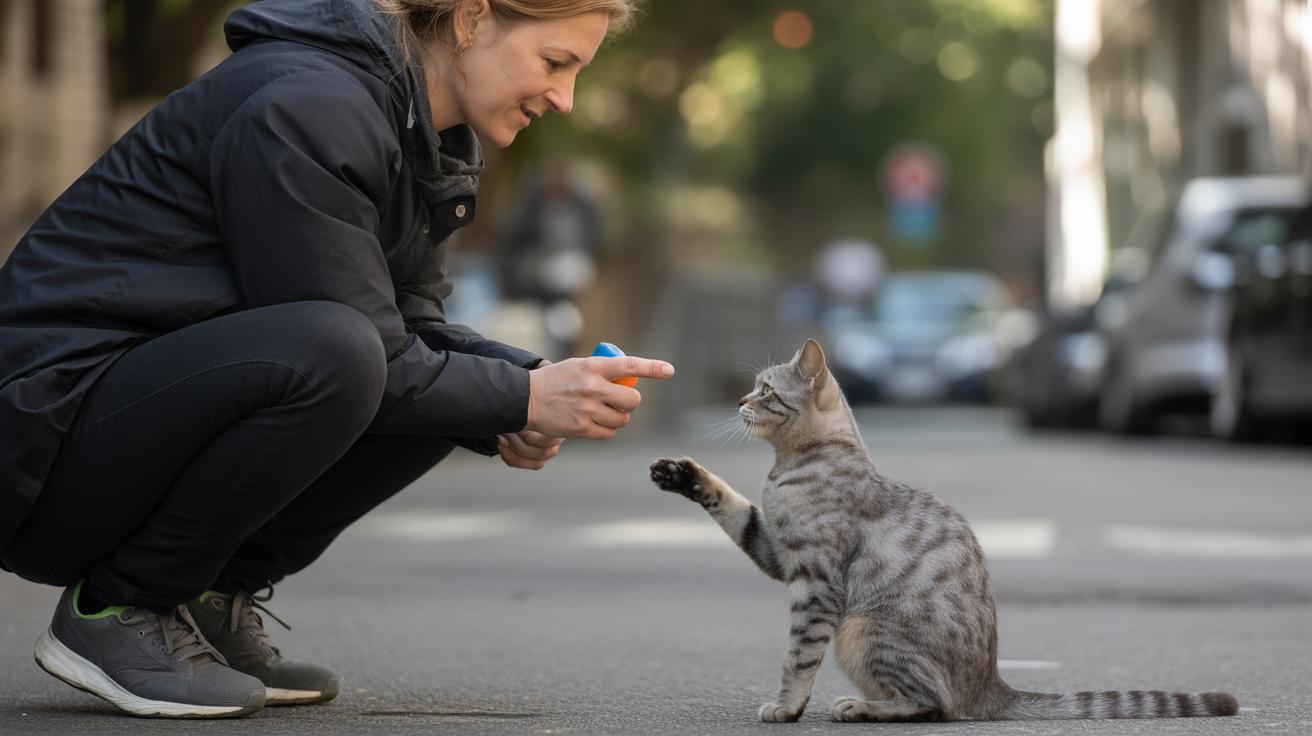
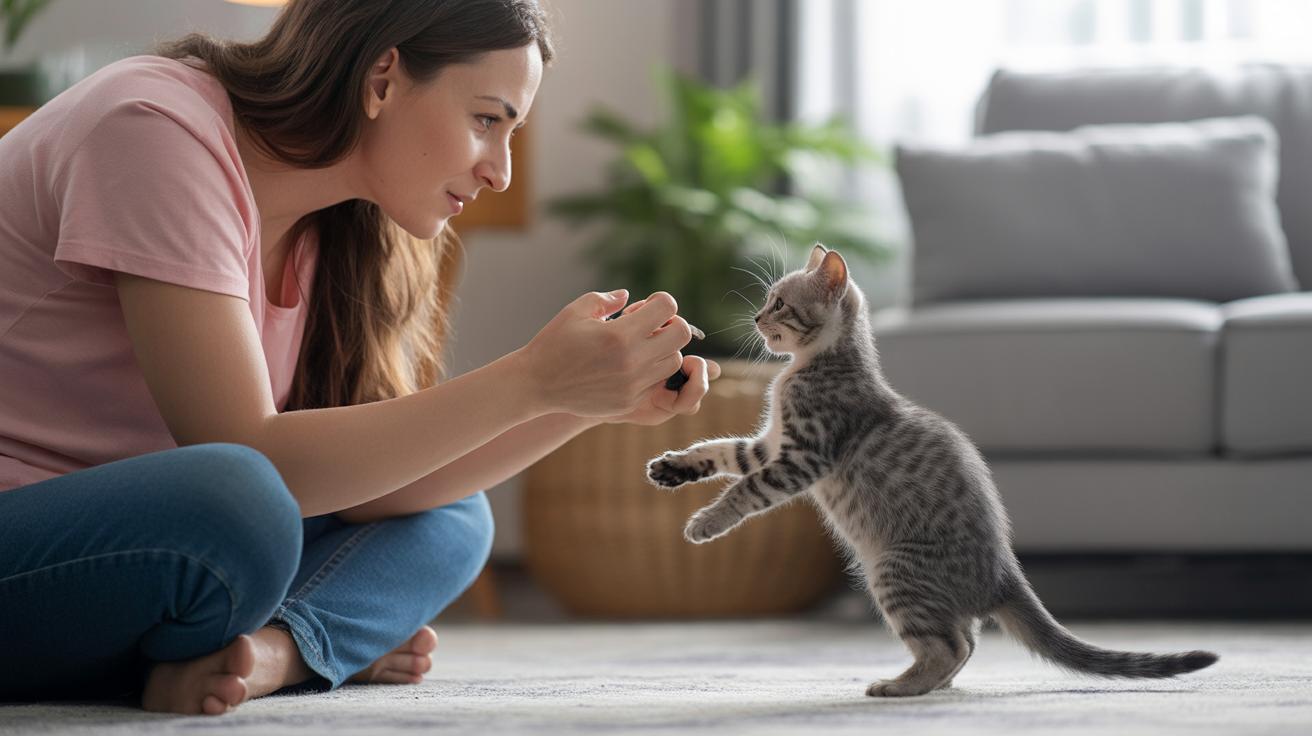
    Sample Game: Click-and-Recall

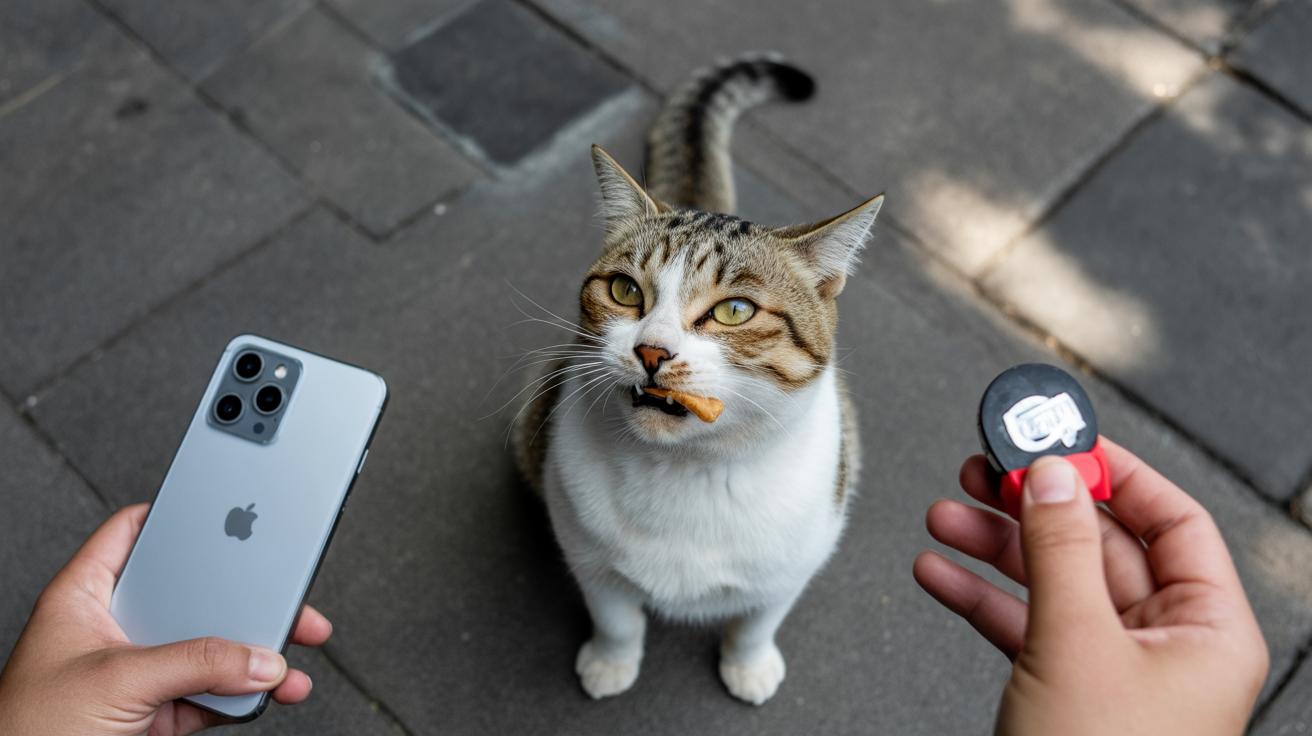
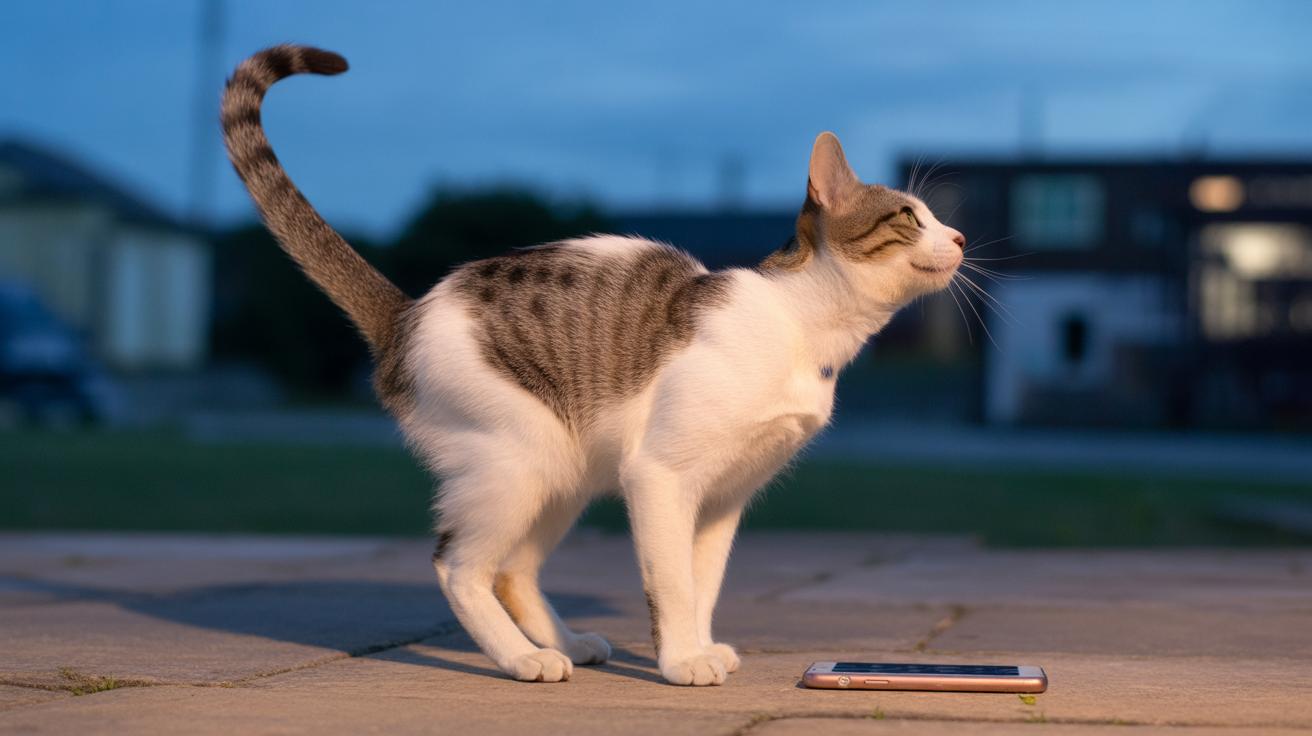
    Set up across the room with a tasty treat in hand. Call the kitten's name, and the instant they turn or start walking toward you, click and give the treat. Repeat, slowly increasing the distance until they come reliably. Success looks like an enthusiastic approach and a little sit or pause for the reward. Once it's steady, add a short verbal cue for recall. See Shaping & rewards for exact click-to-treat timing.

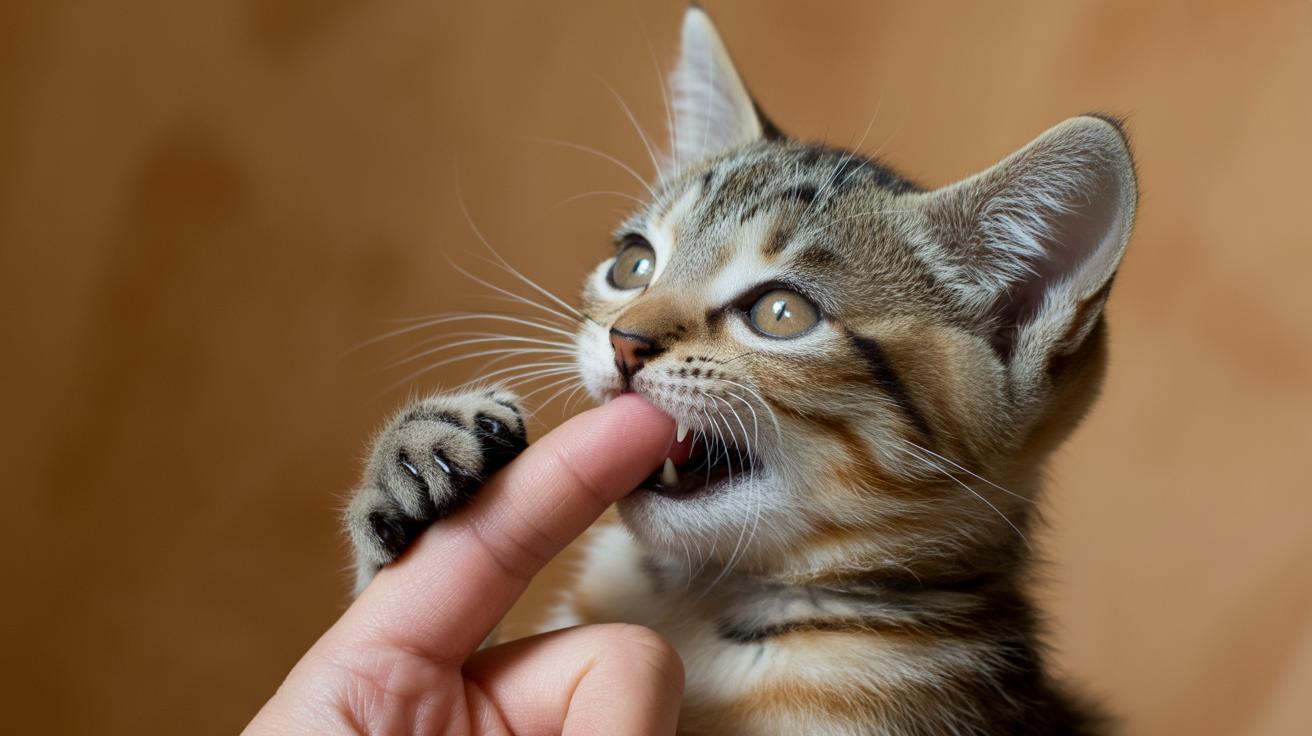
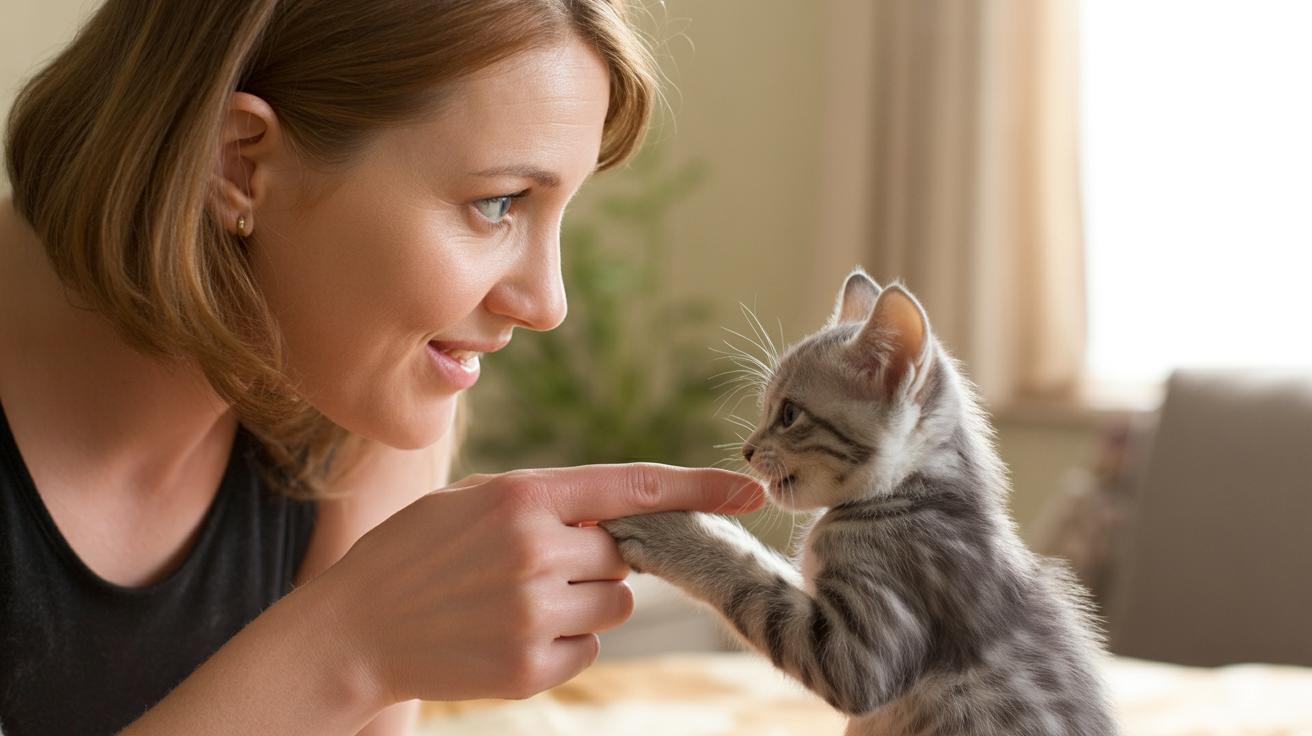
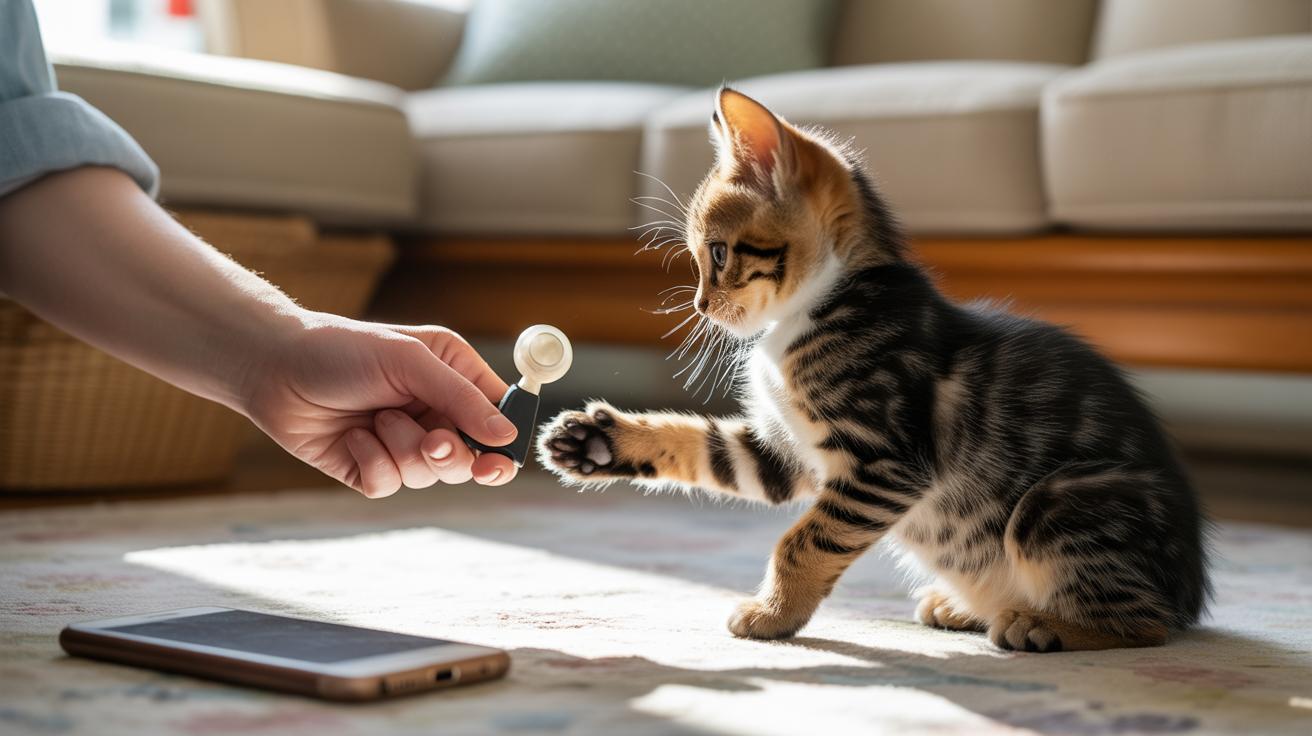
    Sample Game: Target-to-Hand and Bite Redirection

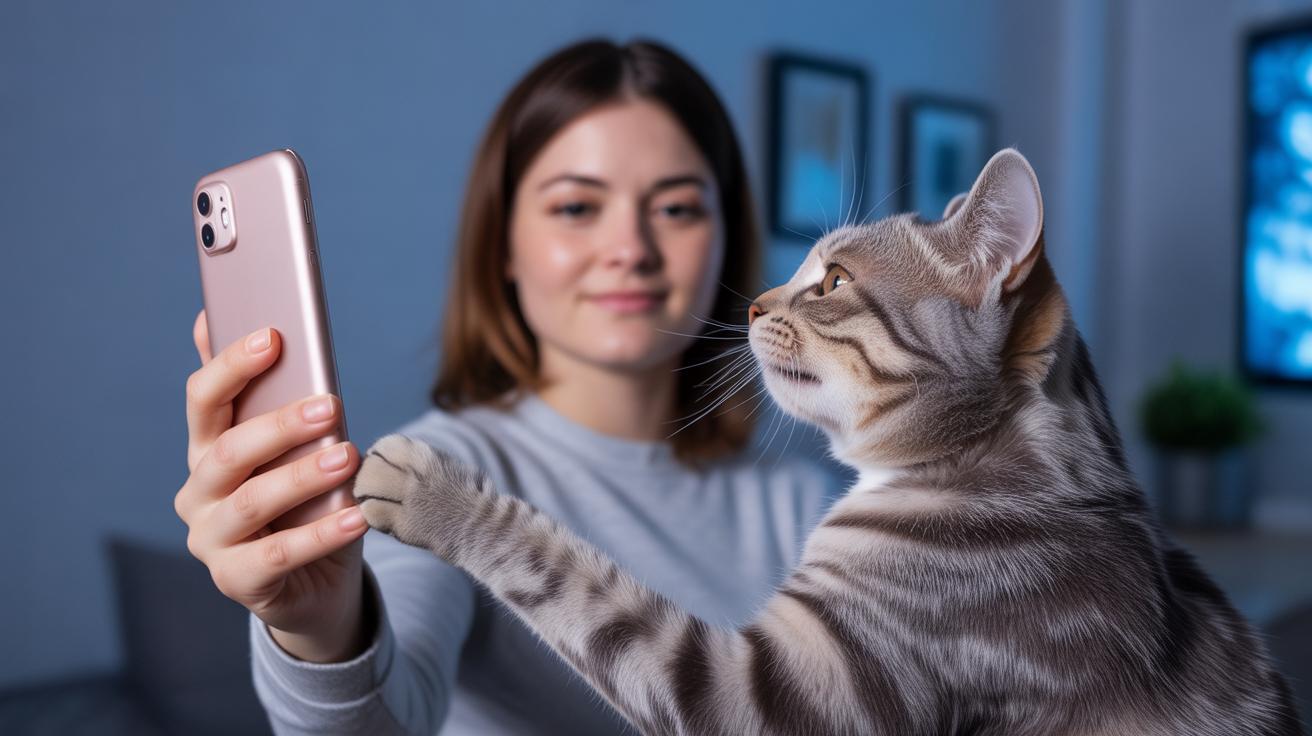
    Teach nose or paw targeting by offering a finger or a small target stick (a short rod used to guide touch). Click the moment they touch it, then reward. Move the target to guide them where you want them to go. If play-biting starts, swap the target for an approved toy so they bite that instead, click the toy-touch, and reward the calmer choice. After several consistent successes, add a short cue word. Consult Troubleshooting if biting creeps back.

    Quick games to rotate during short sessions – use tiny tasty treats or short play bursts as rewards:

    • Click-and-Recall: call the name, click as they approach, reward, and step back a few feet.
    • Target-to-Hand: present the target, click on touch, reward, and move the target toward the spot you want.
    • Sit via Lure: hold a treat above the nose then move it back toward the shoulders; click when the bottom hits the floor; reward.
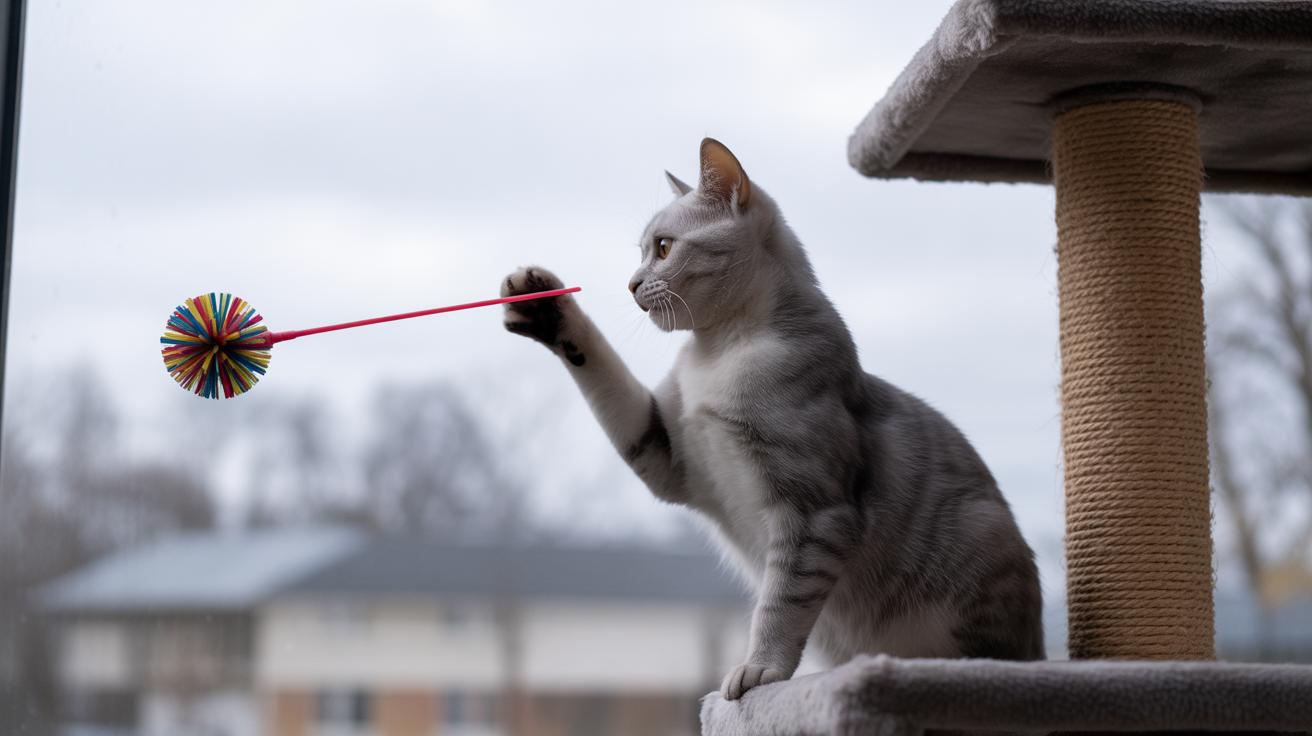
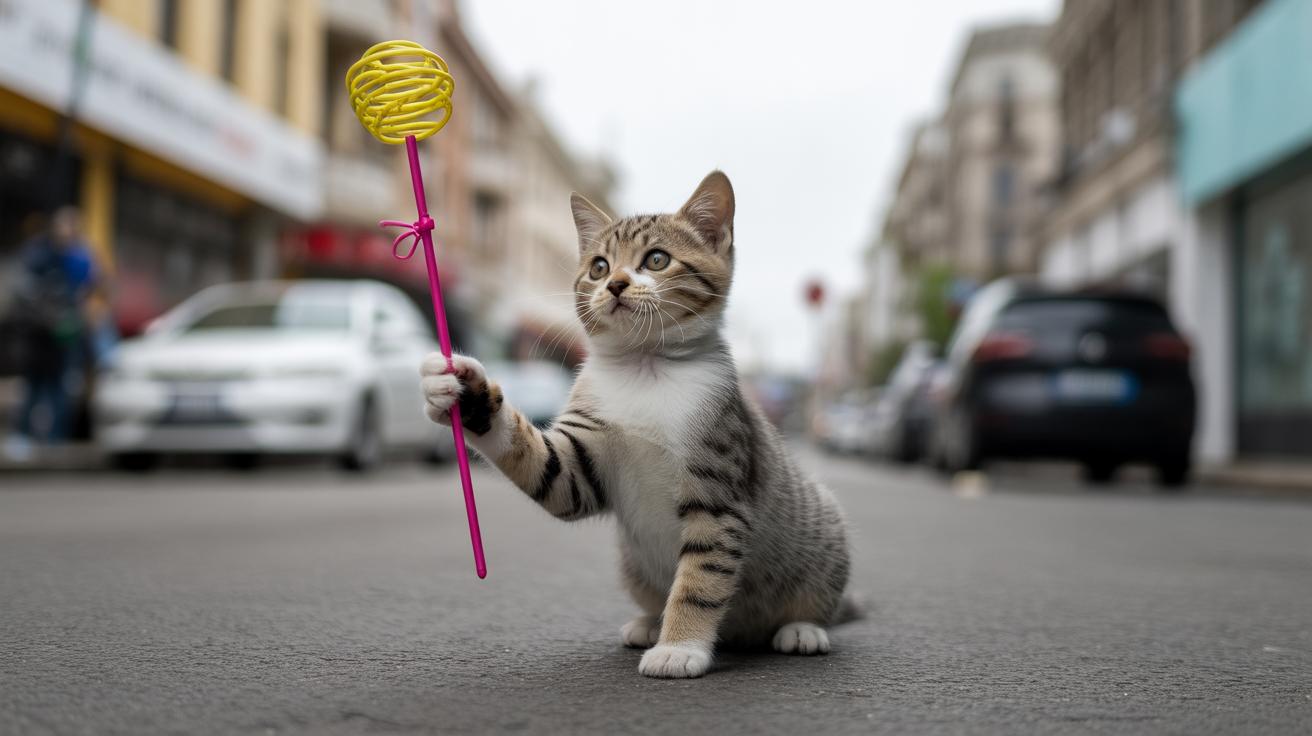
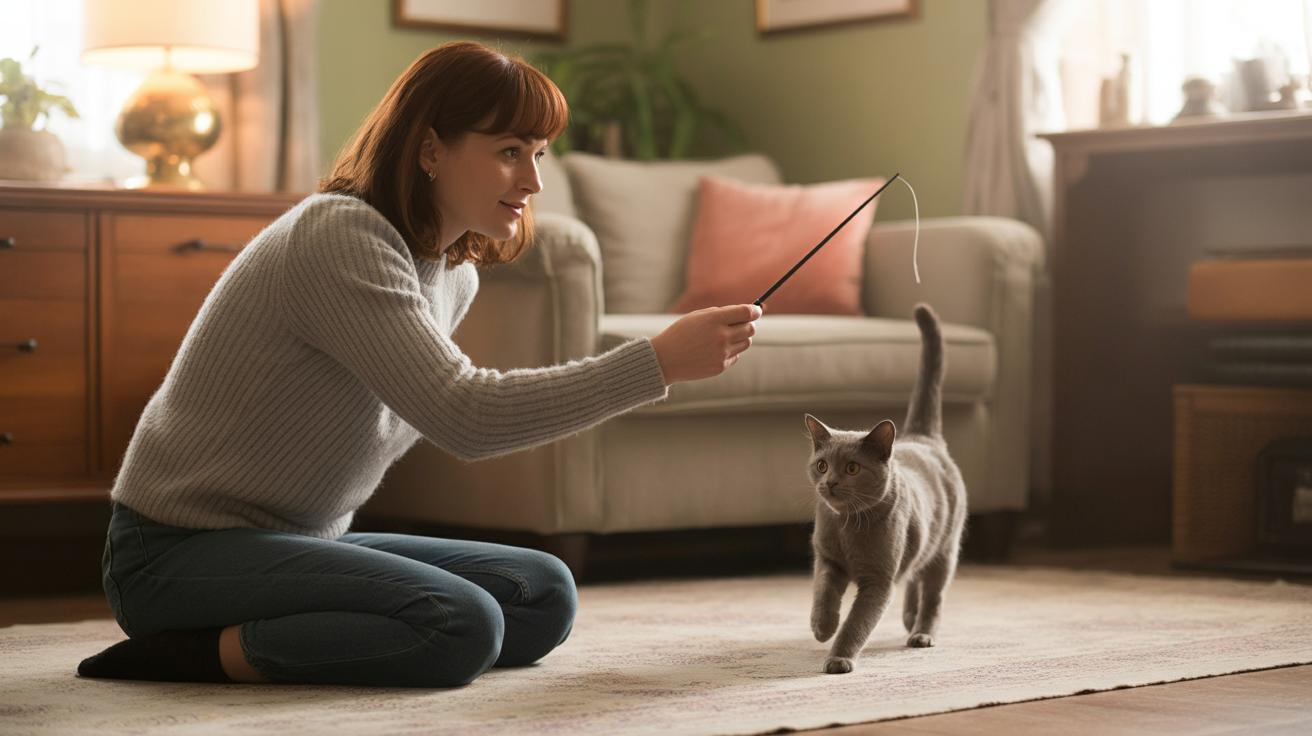
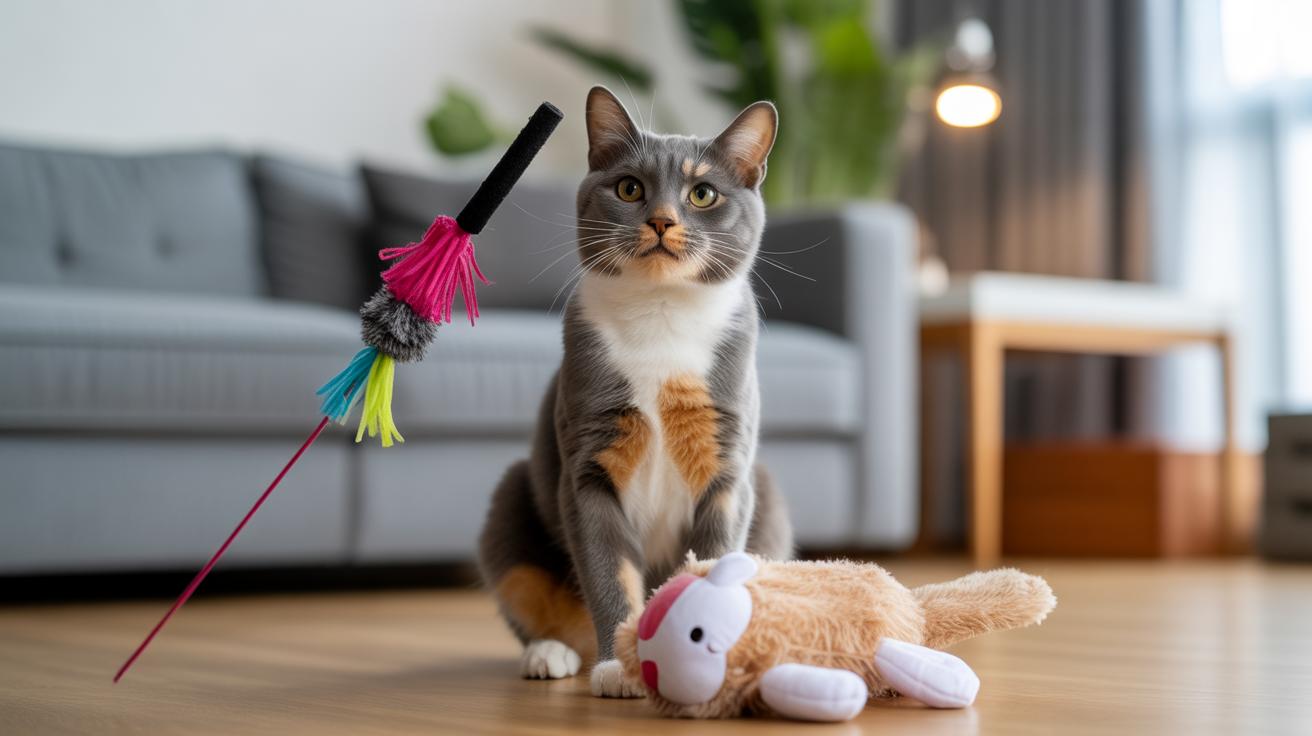
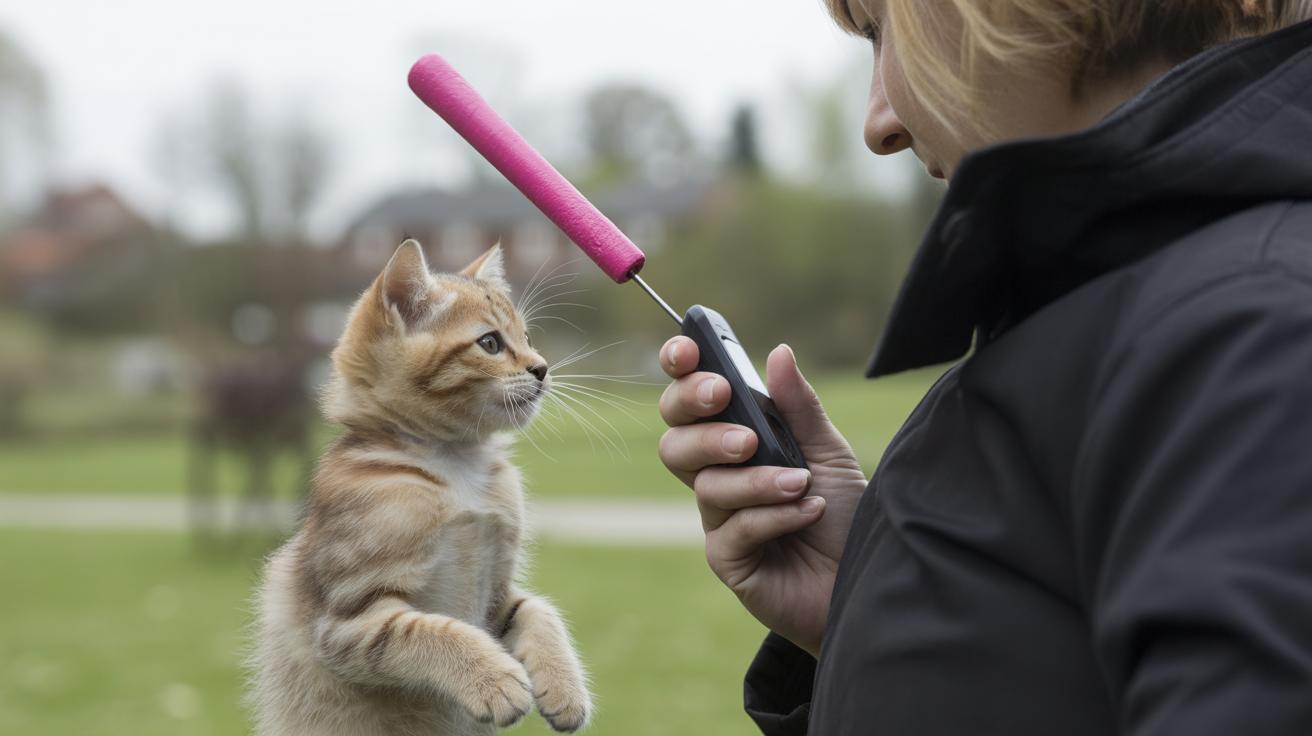
    • Wand Chase (supervised): wiggle a teaser wand (a stick with a toy on the end) at different speeds; click a clean pounce or a controlled bite on the toy; reward a calm play pause. Product note: for long-term play, use durable parts or DIY replacement attachments for teaser wands.
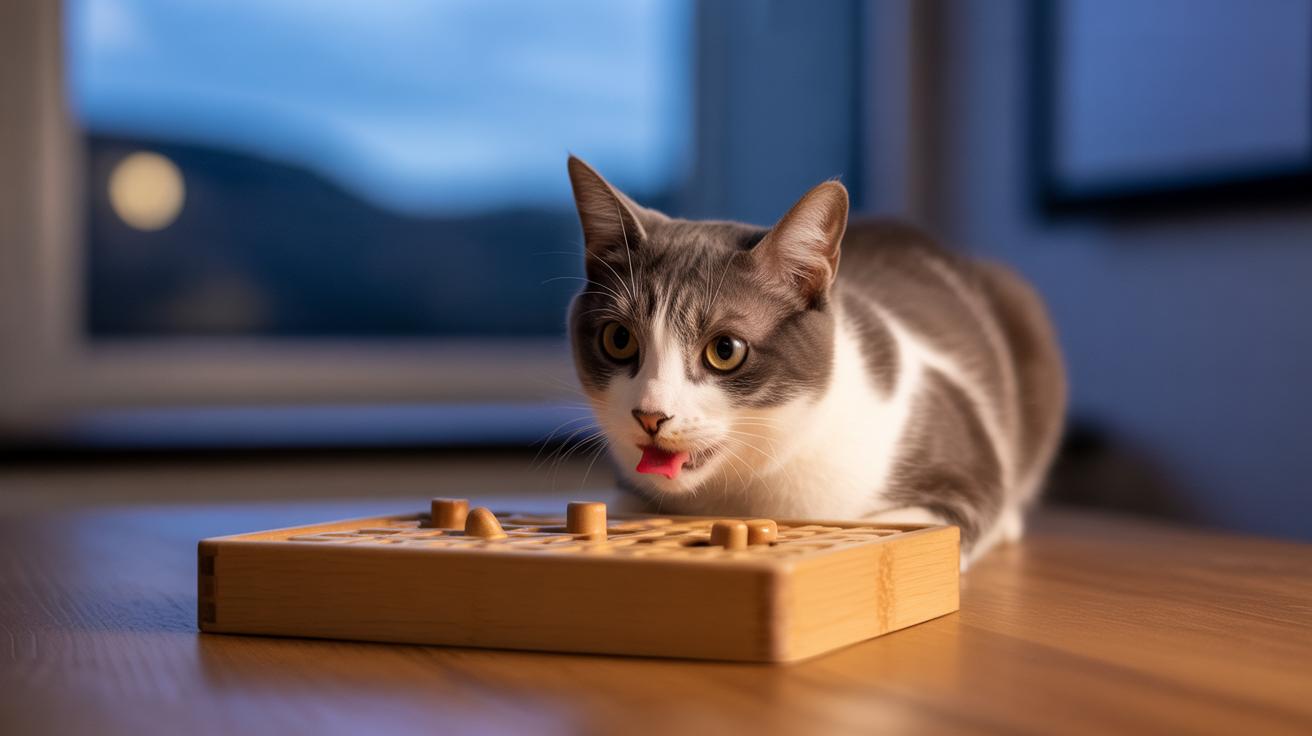
    • Forage Puzzle Steps: hide tiny treats in a forage puzzle (a toy that hides treats); click when they solve a compartment, then reward with a short play burst.
    • Bite Redirection Drill: invite gentle nuzzle-play with a soft toy, swap to the approved toy at the first nip, click toy contact, and reward calm play.

    Play success looks like steady approaches to targets, calm exits after play, and fewer mouthy grabs during handling. See Shaping & rewards for luring limits and how to rotate rewards. Worth every paw-print.

    Shaping & rewards: marker timing, luring limits, reward hierarchy, and fading

    - Shaping  rewards marker timing, luring limits, reward hierarchy, and fading.jpg

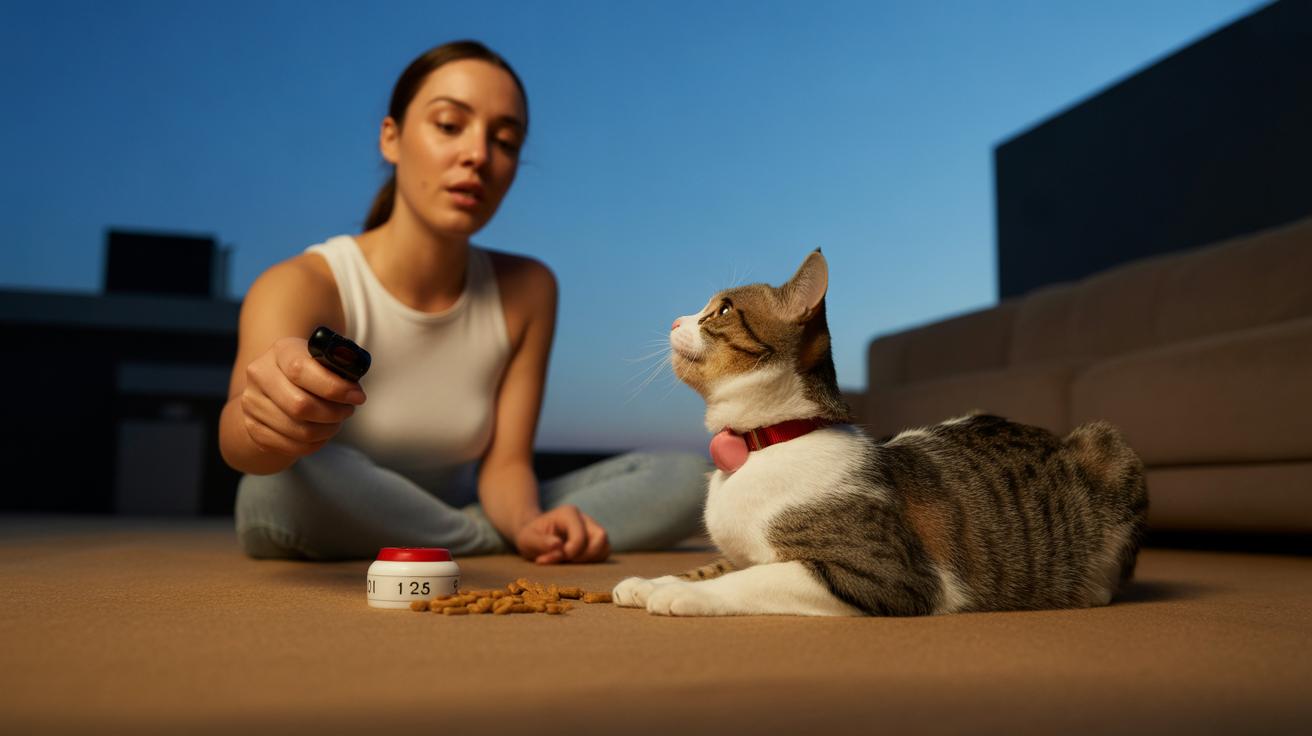
    Marker timing, plain and simple: click the exact moment the kitten does the tiny bit you want. Think of the click like a camera snapping when their paw taps a target. The marker window is basically instantaneous (that split second you press the clicker), and the treat or play reward needs to follow within about 2 to 3 seconds so the kitten links the click to the payoff. Wait too long and the connection blurs. Click too late and you end up praising the wrong move. Practice clicking in a quiet spot until it feels natural , trust me, your cat will notice.

    Shaping means rewarding little steps toward a bigger behavior instead of holding out for perfect performance (shaping = rewarding closer and closer approximations). Luring means using a visible treat to guide movement (luring = showing a treat to make the cat move). Lures are great to get started, but don’t let the treat’s motion become the cue. Do no more than three straight lure attempts, then switch to an empty-hand or empty-target cue so the kitten learns the action is the goal, not the treat’s movement. It’s like teaching them a trick, not how to follow food.

    Plan a clear reward hierarchy and a sensible fade. Use high-value treats to launch new cues; switch to medium-value treats for maintenance so the work stays interesting. Rotate food rewards and fold short play bursts into the routine to save calories and keep things fun. Start with continuous rewards while you’re learning, then move to variable reinforcement once you reach about 80% reliability so the behavior holds up around distractions. Tip: trade a quick toy chase for every third or fourth food reward during maintenance so your kitten starts loving the game as much as the kibble.

    Worth every paw-print.

    1. Click at the precise instant of the correct behavior (marker window = instantaneous).
    2. Deliver the reward within about 2–3 seconds of the click.
    3. Limit lures to a maximum of 3 consecutive attempts before removing the lure.
    4. Move from continuous rewards to variable reinforcement once reliability reaches about 80%.

    Kitten Clicker Training: Early Socialization and Play

    - Socialization handling grooming, nail trims, carriers, and vet prep using clicker play.jpg

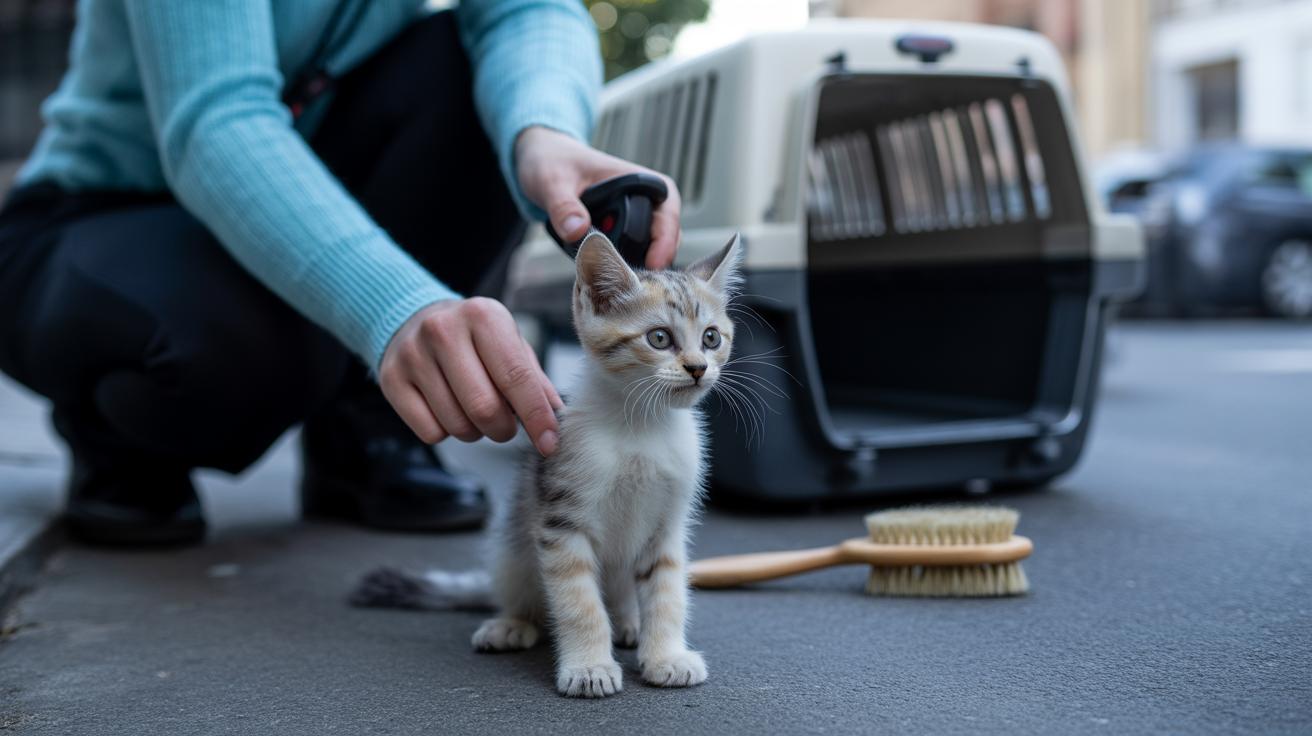
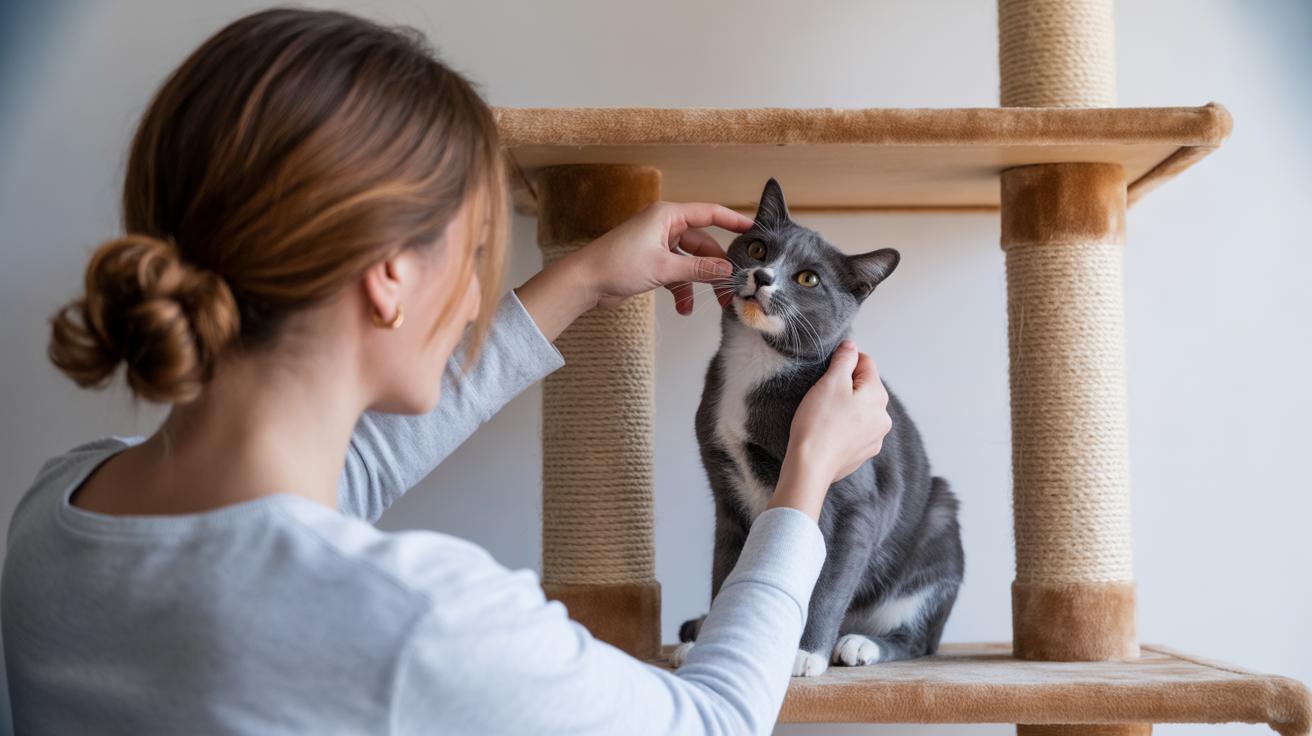
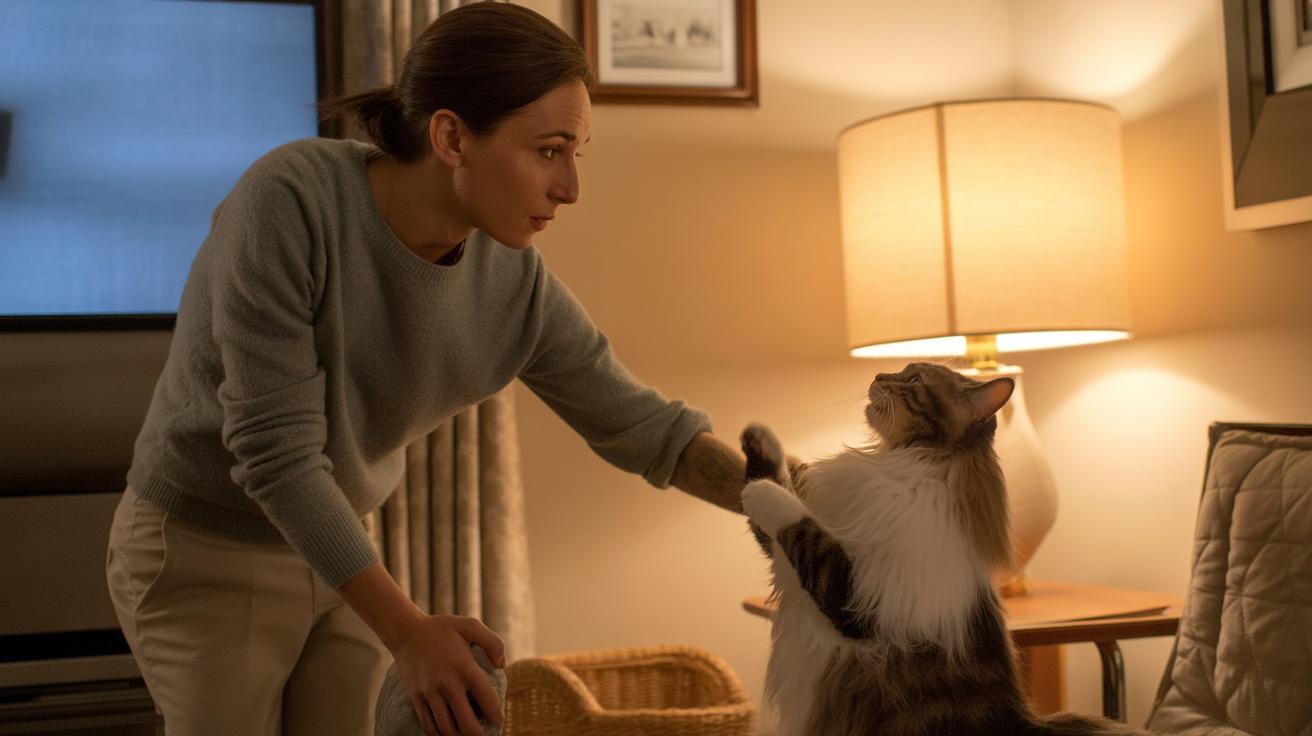
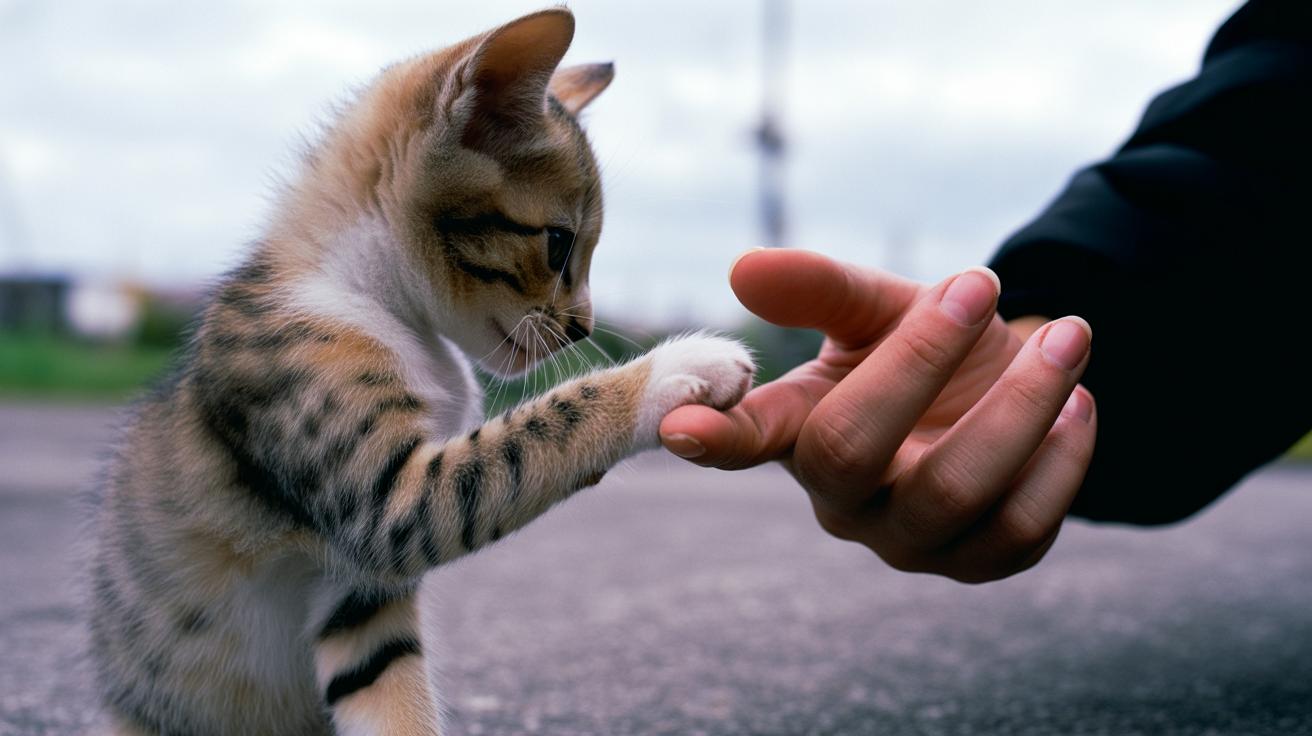
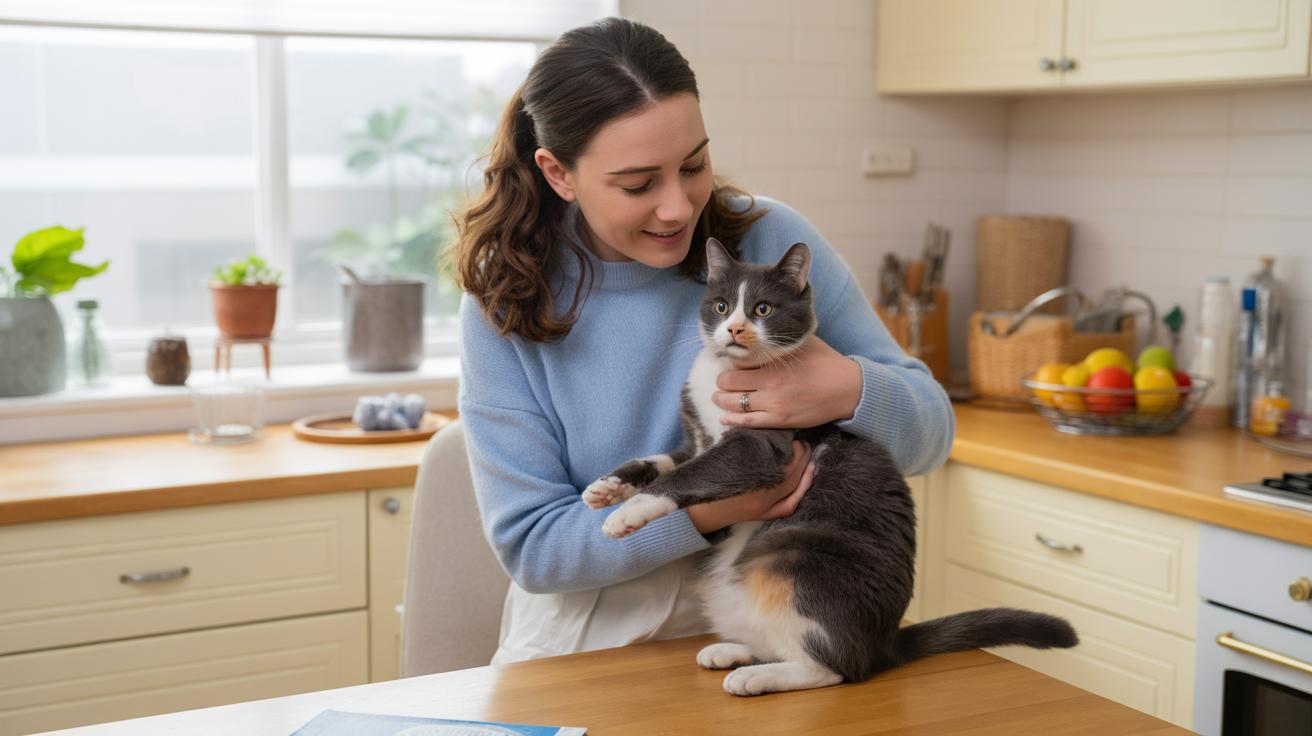
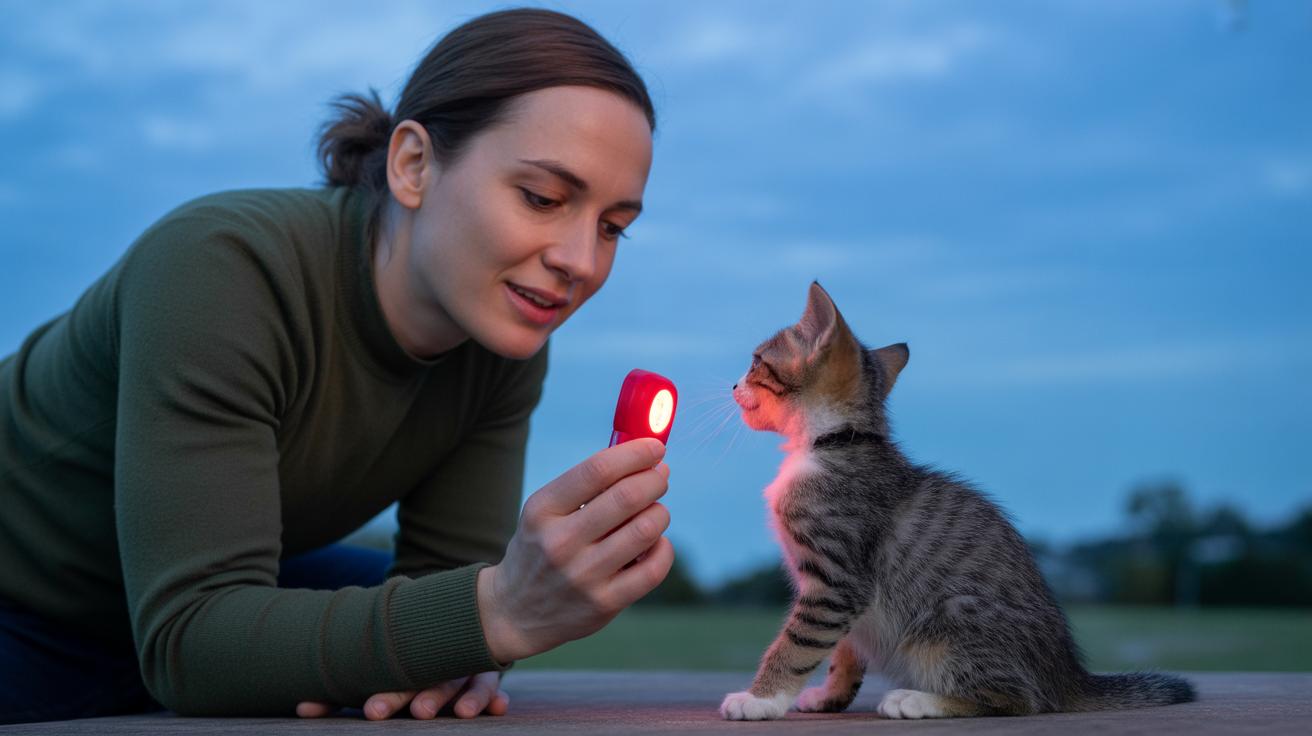
    Start with tiny, friendly touches to paws, ears, tail, and mouth. Keep sessions short and predictable every day so the kitten learns that handling means treats and calm hands. Use the marker you primed (see Getting started) , the quick sound that tells the kitten exactly when it did the right thing , and follow each click with a tasty bite or a tiny play burst so the moment stays joyful, not scary. Short, regular handling practice builds acceptance for grooming, nail trims, and basic vet handling , and you’ll get to see those whiskers twitch when something fun happens.

    Introduce grooming tools slowly. Let the kitten sniff a brush or a nail trimmer (clippers) at low intensity, click and reward calm inspection, then touch with the tool for one second and reward again. Add one extra second over several days so contact grows in tiny steps. Keep touches brief and cheerful , think pocket-sized rehearsals, not grooming marathons. For nail trims, lift one paw, click the calm hold, then reward; a few successful lifts per session beat forcing a full trim every time.

    Clicker work is great for vet prep and meeting other pets because it makes scary stuff predictable and rewarding. For a resident dog, use a gate or a leashed dog so the kitten can approach from a safe height, click and treat calm curiosity at a distance, then slowly shorten that gap over sessions. Happy visits to the clinic , treats, no procedures , teach the cat to link the vet with good things. Click and reward quiet behavior during handling so the clinic becomes less stressful and more like, well, a place that gives snacks.

    Carrier training protocol

    Leave the carrier out where the kitten can explore and make it part of the furniture. Bait it with food or a favorite toy and click/treat calm entries (see Shaping & rewards for marker timing). Next, close the door for a moment and reward calmness. Practice short driveway rides, click/treat after each step, then lengthen the trips as the kitten stays relaxed. Worth every paw-print.

    Troubleshooting common problems and stress signals in kitten clicker training

    - Troubleshooting common problems and stress signals in kitten clicker training.jpg

    When training stalls, a quick troubleshooting mindset saves time and keeps your kitten curious. Look first for tiny stress cues, then pick one simple fix , shorter sessions, a softer marker, or swapping rewards , so training stays fun, not scary. Think of it like tuning a radio: small tweaks make the music comfy again.

    If the kitten ignores the marker (the short sound or word that tells them they did something right), re-prime it by doing 5–10 clear click-to-treat runs with a higher-value bite (re-prime means re-establish the sound-food link). If loud noises frighten them, switch to a soft verbal marker and pair it with treats until the kitten perks up at the cue. Ever watched a kitty freeze mid-pounce? That freeze or avoiding you is a clear ask to slow down.

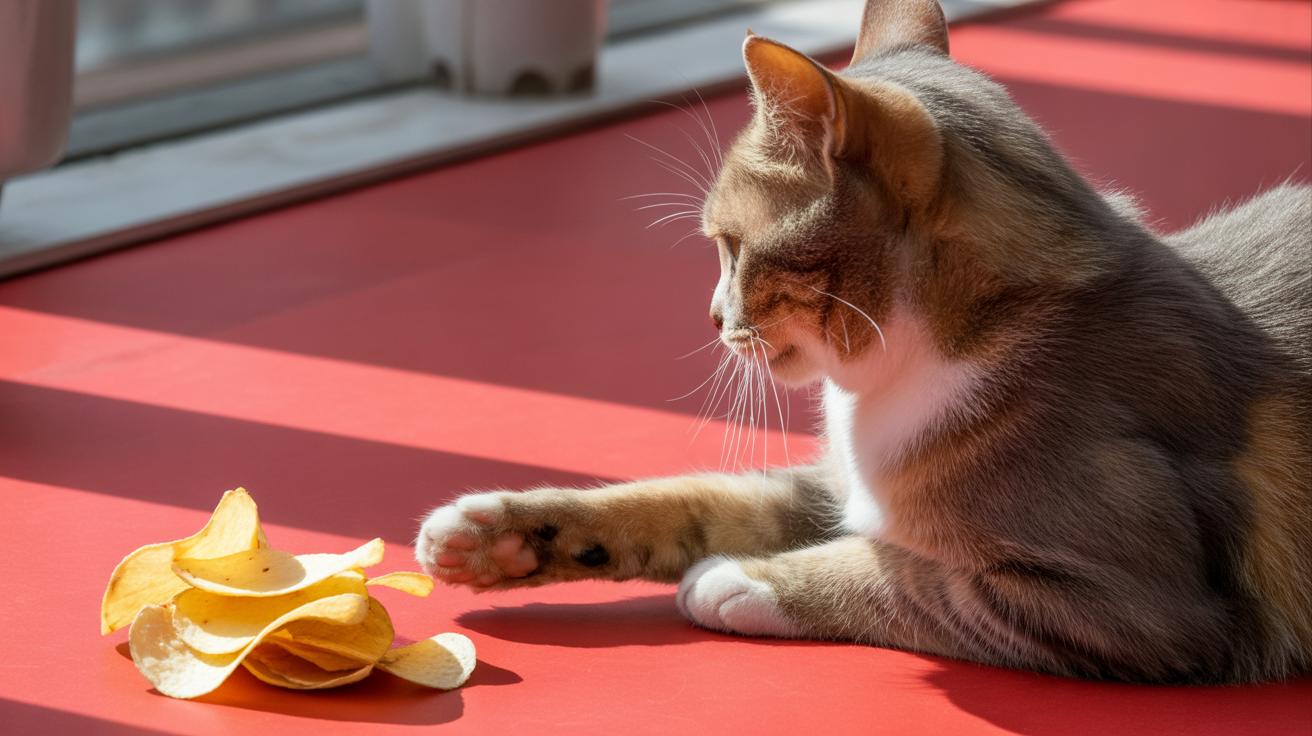
    Overstimulation often shows up as sudden nips, lunges, or frantic play. For play-biting, stop the drill and redirect to a toy right away, then click when the kitten bites the toy so they learn what’s okay to sink those teeth into. Keep stressful sessions under three minutes. Break bigger goals into tiny steps using shaping (rewarding really small, steady improvements). Limit luring (using food to guide movement) to three tries so the action, not the food, becomes the cue.

    Distraction and fear are fixable, promise. If the room is busy, move to a quieter spot and re-prime the marker with another 5–10 runs. If the click makes them wide-eyed or flinch, switch to a verbal marker and re-prime (see Getting started for priming details). For ideas on changing rewards and fading treats into play, check Shaping & rewards for step-by-step ways to keep progress steady.

    Recognizing stress signals helps you pick the right fix fast. Use this short list to spot stress and respond right away so training stays a positive game. Worth every paw-print.

    • Yawning – Pause. Shorten the session and try a gentler task.
    • Lip licking – Back off and reintroduce low-effort steps so confidence returns.
    • Scratching or walking away – Stop for now. Try again later in a calmer moment.
    • Flattened ears or tucked tail – Give space and end the session; let them calm down.
    • Wide eyes or flinching – Move to a quieter area and re-prime the marker with 5–10 runs.
    • Overstimulation or play-biting – Redirect to a toy and click the toy contact so biting gets re-routed.
    • Fear of the click sound – Switch to a verbal marker and re-prime with tasty treats (5–10 clear runs).

    Small, simple fixes work best. Short sessions, clearer signals, and the right treat can turn a stalled practice into a purr-worthy playtime.

    Tracking progress, milestones, and resources for ongoing kitten clicker training

    - Tracking progress, milestones, and resources for ongoing kitten clicker training.jpg

    Keep a tiny training log. Jot the date, the cue (like "sit"), how many reps you did, and the success rate. That one little habit makes progress pop out, no guessing. Example log line: "2026-01-04 | sit | 5 reps | 80% success."

    Aim for about 5 reps per cue each session. Short, focused rounds help kittens stay curious instead of bored. Wait until a cue is roughly 80% reliable across sessions before you start fading the marker (the clicker sound or a quick word that marks the correct behavior).

    When you fade the marker, do it slowly. Start mixing in variable rewards (treats given unpredictably so your cat keeps guessing) and keep a few high-value treats on hand for big wins. That surprise treat now and then keeps the game fun and the learning sticky.

    Don’t repeat milestone tables here. Use the Age windows table for week ranges and milestone details. And hey, if your kitty does a perfect sit and looks smug about it, snap a mental photo, those little victories matter.

    Final Words

    In the action, we showed how to prime a marker, set short 3-minute sessions, and use simple games to shape polite play and vet-friendly handling.
    We gave exact numbers: start around 8 weeks; 5–10 priming clicks; 3 minutes per session; 3–4x/week.

    You learned carrier steps, grooming progression, and stress signals with fixes like re-priming or switching to a verbal marker.
    Track progress, rotate rewards, and use durable toys to keep play fresh.

    Try the quick-start checklist and small daily wins. With patience, kitten clicker training: early socialization and play creates calmer, happier cats.

    FAQ

    How do I train a kitten with a clicker, what is clicker training for cats, and when should I start?

    Clicker training for kittens is a marker-and-reward method that marks the exact moment of a wanted action with a click, then rewards it. Start around 8 weeks (0–12 week social window); prime 5–10 click→treat runs.

    When should I start socializing kittens?

    Start socializing kittens during the 0–12 week window, aiming near 8 weeks for rich human and handling exposure; short, positive sessions and clicker priming help build friendly, calm responses.

    What are the negatives of clicker training?

    The negatives of clicker training include a scared kitten from the click sound, overreliance on treats, timing mistakes that confuse learners, and extra time needed for consistency; swapping to a verbal marker or re-priming fixes most issues.

    How can clicker training help stop bad behaviors like play-biting?

    Clicker training stops play-biting by rewarding alternative actions and redirecting to toys: shorten sessions to ~3 minutes, click toy contact, reward calm behavior, and gradually add a cue for polite play.

    Where can I find kitten clicker training resources on Reddit, YouTube, or free online?

    You can find free guides and demos on YouTube and Reddit training communities; pick videos that show 5–10 priming clicks, quick 3-minute sessions, clear marker timing, and hands-on examples.

    What is the 3-3-3 rule of cats?

    The 3-3-3 rule of cats says a cat often needs 3 days to adjust to a new space, 3 weeks to feel safer, and 3 months to fully settle comfortably.

    What is “Albert and Mia” clicker training?

    “Albert and Mia” clicker training appears to refer to a specific trainer or demo series; watch their clips for real examples, checking they use priming (5–10 clicks), short sessions, and clear rewards.

    Related Articles

  • cat training treats: choosing the right rewards

    cat training treats: choosing the right rewards

    What if the treats you give are actually making training harder, not easier? Ever watched your cat sniff a treat and walk away? Yeah, not fun.

    Most people assume any tasty nibble will do. But smell, size, calories, texture, ingredients, and how you give the treat all change whether your cat cares. You want treats that make them purr, not pause.

    Try six quick, action-first checks you can do right now. Check palatability (how tasty your cat finds it), pea-sized portions (about the size of a garden pea), kcal (food energy), texture, crunchy versus soft (how it feels and sounds), simple ingredient lists, and safe delivery (how you hand or hide the treat so it’s fun and safe).

    Short tests. Real results. No guesswork.

    How this section answers your cat training treats questions

    - How this section answers your cat training treats questions.jpg

    Here’s a quick, action-focused checklist to help you choose training treats that actually get your cat moving. Six clear criteria, each with one fast test you can try right now so you learn what truly motivates your cat.

    • Palatability / smell: Offer a tiny sample a few minutes before a meal and watch. If your cat’s whiskers twitch and they come sniffing, that’s a good sign. Ever watched your kitty chase a new scent? Cute, right.

    • Size / portioning: Break treats into single-reward morsels that are easy to grab and swallow. Think pea-sized pieces for rapid training. It’s easier to reinforce lots of reps when each treat is small.

    • Calories and daily accounting: Read the label for kcal (kcal = food energy, aka calories) and choose lower-calorie pieces for repeated practice. Track those calories against daily food so training doesn’t add extra weight.

    • Texture and mouthfeel: Try one crunchy option and one soft option to see which your cat prefers. Some cats love the satisfying crunch. Others want soft nibbles they can gobble.

    • Ingredients and allergies: Scan labels for onion or garlic (toxic) and favor single-protein (one meat source) or limited-ingredient treats if your cat has sensitivities. Simple ingredient lists make it easier to spot trouble.

    • Delivery / safety method: Pick a way to give treats that keeps your cat calm and prevents frantic grabs. Hand feeding, a small treat-dispensing toy (a ball that drops treats), or timed tosses after a clicker cue are all good options.

    See “How to run a treat trial”, “Portion control, caloric accounting…”, and “Safety, delivery methods…” below for full protocols, portion examples, and handling details on positive reinforcement treat strategies and clicker training with treats.

    Key criteria to evaluate cat training treats

    - Key criteria to evaluate cat training treats.jpg

    • Palatability and aroma
      Smell often wins over fancy packaging. Strong fish or liver scents grab a cat’s attention fast, and you’ll see them come running like they can smell dinner from two rooms away. Ever opened a pouch and had your cat sprint in? Yep, scent is that powerful.

    • Size and portioning
      Match the treat size to a cat’s tearing teeth and quick reps. Most adult cats do best with pea-sized bits; use even smaller crumbs for kittens. Freeze-dried (moisture removed by cold drying) and semi-moist (soft, slightly preserved) treats usually break apart easily, which makes tiny pieces perfect for rapid reinforcement.

    • Calories and label reading
      Look at kcal per piece or per gram on the bag so treats don’t quietly add weight; kcal means kilocalories, aka food calories. Pick low-calorie bits for lots of short reps, and save richer, higher-energy rewards for big wins. Tip: break a treat into smaller pieces to stretch a reward without adding extra calories.

    • Texture and life stage
      Crunchy treats feel like kibble and work well as low-value rewards. Soft, aromatic treats are best for kittens or seniors who have weak teeth or mouth pain. Freeze-dried options often sit between crunchy and soft, so they can please picky mouths. Choose softer textures for older cats or anyone with dental issues.

    • Ingredients, allergies and safety
      For sensitive cats, go limited-ingredient or single-protein treats and always scan labels for onion or garlic, which are toxic to cats. Start any new treat with tiny amounts and watch for vomiting, diarrhea, scratching, or behavior changes. I tried a new fish bite once , gave three crumbs, watched for 24 hours, and then used it in training when Milo was fine.

    • Delivery and handling safety
      Think about how you’ll hand out the treat: tiny dry crumbs can scatter into vents or under furniture; wet or sticky treats can gum up clicker devices or toys. If a treat is crumbly, use a shallow dish or your fingers to keep pieces controlled during fast sessions. A little planning means fewer messes and safer training.

    Comparing treat formats commonly used as cat training treats

    - Comparing treat formats commonly used as cat training treats.jpg

    Freeze-dried treats are your go-to when you need serious motivation. They’re often 100% meat, with the moisture removed by freeze-drying (a process that pulls out water but keeps flavor), so one tiny piece can smell like dinner. You can split a prawn into four or five rewards, which makes them stretch a long way. Raw freeze-dried treats can be insanely tempting, so buy from a trusted source and follow safe handling if the label says raw (raw means uncooked).

    Soft and semi-moist bites are gentle on mouths and loud on scent, which is perfect for kittens and seniors. Semi-moist (soft, slightly wet pieces) and wet treats let you give a quick reward without a chew battle. Squeezable tubes are great for cats that lick for rewards and they keep your fingers out of the crossfire. Plus, you can control the size by dispensing a tiny dab instead of handing over a whole morsel.

    Crunchy treats mimic kibble (dry cat food) and are ideal low-value rewards for lots of repetitions or casual praise. Use crunchy bits for quick clicks and short feedback, and save the super-stinky stuff for the big wins. Cats differ , some like tiny, tear-able bits, others prefer gnawing on longer, tendon-style chews (chewy strips). Try a few formats and match the treat to the training goal , your cat will tell you what she likes.

    How to run a treat trial to identify high-value cat training treats

    - How to run a treat trial to identify high-value cat training treats.jpg

    Ready to find your cat’s favorite reward? Do a short, simple treat trial when they’re hungry but not starving, about 30 minutes before their normal meal. Your cat’s whiskers will tell you what matters, watch for the twitch, the sniff, the quick pounce.

    Pick 4 or 5 different kinds of treats so you get a clear winner. Try commercial freeze-dried meat or fish (meat that had the water removed to lock in flavor), soft training treats (small, squishy rewards), crunchy treats, tiny bits of plain cooked chicken, fish, or egg, and a few pieces of regular kibble (dry cat food) or a spoonful of wet food (canned or pouched). My cat once ignored the fancy stuff and went crazy for plain cooked egg. Go figure.

    Portion them equally on a plate in a quiet spot. Use very small amounts, about 1/8 teaspoon each, just a nibble. Watch closely: the very first pick often shows what’s most tempting, but finishing a sample and coming back for seconds is a big clue too. Note what they choose first, what they finish, and what they walk away from.

    Keep quick notes and save your top 2 or 3 winners so you’re not stuck if one runs out or your cat gets bored. Common slip-ups: testing when your cat is too full or too ravenous, offering more than 5 or 6 options, or assuming the priciest treat wins. Retest every six months or whenever your cat’s tastes seem to shift.

    1. Choose time: about 30 minutes before a meal
    2. Select 4–5 varied options
    3. Portion equally: roughly 1/8 teaspoon each
    4. Present in a quiet area
    5. Observe and record first choice and finish behavior
    6. Repeat as needed and keep the top 2–3 winners

    Worth every paw-print.

    Portion control, caloric accounting, and session planning for cat training treats

    - Portion control, caloric accounting, and session planning for cat training treats.jpg

    Treats are food, and food has calories, so treat math matters. Check the package for kcal per piece or per gram (kcal = kilocalories, aka food calories), then multiply that number by how many pieces you plan to use in a session to get the training kcal. Use this simple formula: kcal per piece x pieces = training kcal, then add the training kcal to your cat’s daily food kcal to see the total.

    Many store-bought treats are bigger than we think, so break them into tiny bits to stretch the rewards and cut calories per reinforcement. Tiny pieces mean more repeats and more learning, and your cat still gets that satisfying nibble or crunch. Think of treat portioning like pocket change. Lots of small coins buy more reps than one big bill.

    Save the super tasty, smelly bits for the really hard stuff and use lower-value crunchy treats or kibble (kibble = dry cat food) for routine repeats. High-value treats (extra tasty wet bits) are your go-to when you need serious focus; kibble is great for keeping the session long without blowing the calorie budget. Your cat’s whiskers will twitch when you pull out the good stuff, ever watch them pounce on a tiny crumb? Fun, right.

    Plan sessions around your cat’s daily intake and activity so treat calories don’t push them over the line. If training adds 50 kcal, shave about 50 kcal off the main meal, or use fewer high-cal treats for big goals instead of lots of snacks. For quick math, a small kitchen scale (kitchen scale = small food scale) helps you measure bits instead of guessing.

    For cats with weight or medical issues, talk with your veterinarian about safe daily allowances and exact portion sizes. They can help you set a target kcal per day and show you how to measure treats for training so you don’t have to guess what’s right.

    Homemade and safe people-food rewards for cat training treats

    - Homemade and safe people-food rewards for cat training treats.jpg

    Plain cooked chicken (no seasoning) is a top pick for high-value training bites. Cut it into pea-sized pieces and watch your cat’s whiskers do a happy twitch as they get that savory smell. You can also try plain cooked fish or a tiny, well-drained dab of canned tuna in water (drained so it is less salty). Plain cooked egg is great for variety, and a very small piece of cheese is okay only if your cat tolerates dairy (milk products). Warm or mash these a bit to boost the aroma and get quick interest.

    Skip onions, garlic, raw dough, bones, and anything salty, spicy, or very fatty – those are people foods cats should never eat. Also avoid heavy sauces or seasonings. These can make cats sick or cause long-term problems.

    Introduce any new bite slowly. Start with one or two crumbs and watch your cat for 24 to 48 hours for vomiting, diarrhea, itchiness, or unusual tiredness. If you see any worrying signs, stop the new food and check with your vet.

    Homemade rewards are handy for portion control and usually don’t have preservatives, so you can cut pieces to the exact size and fat level you need. Use tiny pieces for lots of quick reps, and save richer treats for really tough behaviors. If your cat is on a medical diet or has a sensitive stomach, talk with your veterinarian before adding people-food rewards. Worth every paw-print.

    Choosing cat training treats for kittens, seniors, and cats with special dietary needs

    - Choosing cat training treats for kittens, seniors, and cats with special dietary needs.jpg

    Quick cheat-sheet: here’s a tiny, practical guide to pick training treats that actually work. Ever watched your kitten miss a leap because the treat was too big? Let’s fix that.

    • Kittens: pea-sized soft bites (about the size of a garden pea, roughly 5 to 7 mm). Small, soft pieces are easy to pop in during training and won’t overwhelm tiny mouths. Your kitten’s whiskers will twitch when they see something bite-sized and bouncy.

    • Seniors: soft, aromatic, easy-to-chew treats (aromatic meaning a stronger smell to tempt older noses). Go for plush textures that break apart without much chewing. It’s nicer when they can nibble gently and still get excited.

    • Overweight cats: low-calorie, highly portionable bits (low-calorie means fewer calories per piece; portionable means you can break them into many tiny rewards). Use these for frequent training without blowing their daily calories. Toss a few before you head out for ten minutes of distraction play.

    • Sensitive cats: limited-ingredient or single-protein options (single-protein means one meat source only, like turkey). Fewer ingredients make reactions easier to spot and manage. Think simple, gentle, and predictable.

    • Medical or post-surgery cases: always talk with your veterinarian about special diets or any weight-gain plan that uses higher-calorie morsels. They’ll tell you what’s safe and how to fit treats into a recovery plan.

    See "Texture and life stage," "Portion control, caloric accounting," and "Homemade and safe people-food" for full details.

    One-line life-stage summary – "Kittens: pea-sized soft bites; Seniors: soft, aromatic, easy-to-chew; Overweight: low-cal options; Sensitive: limited-ingredient/single-protein; Medical cases: consult vet"

    Safety, delivery methods, and behavior tips when using cat training treats

    - Safety, delivery methods, and behavior tips when using cat training treats.jpg

    Pick delivery methods that keep your fingers out of reach and your cat calm. Try a small metal or plastic spoon, or a wooden spatula (flat wooden stick like a kitchen stirrer) to drop tiny crumbs into a dish. Popsicle sticks (thin wooden ice-lolly sticks) are great for flicking little bits without risking nips. Wet treats from a squeezable tube (soft food in a tube with a nozzle) let your cat lick straight from the tip, which keeps hands clean and safe.

    For shy or skittish cats, use a long stick or wand (a long tool like a chopstick or wand) or a target stick (a stick with a small pad used to teach the cat to touch it) so you can keep distance while building trust. Move slowly. Let your cat come to the treat instead of shoving it near their face. Ever watched whiskers twitch as a treat rolls away? Yeah, that.

    Watch your cat’s body language and stop before things escalate. Signs of arousal include wide, dilated eyes, flattened ears, a tail that flicks or swishes, wrinkled skin, or jerky movements. If you see any of that, pause the session and give a breather. It’s better to quit early than to suffer a swipe.

    Combine short bursts of play with food rewards to tap the hunting instinct. Toss or wiggle a toy so your cat pounces, then reward with a tiny morsel right after the catch. That quick chase then snack pattern teaches speed and keeps stress low. If food motivation dips, swap in non-food rewards like a 30-second play bout, gentle brushing, or a favorite toy to keep training positive and productive.

    Keep sessions short and low-distraction, use tiny treat pieces so training lasts longer, and reward immediately so your cat connects the action with the treat. I once watched Luna leap six feet for a crumb, and I still laugh about it. Worth every paw-print.

    Quick buying guide and comparison for cat training treats

    - Quick buying guide and comparison for cat training treats.jpg

    Picking the right training treats is easier than it sounds. Think small, tasty, and fast to eat so your cat stays focused and you can reward lots of times. You’ll want treats that are easy to split, have simple ingredients, and two reliable options ready to go.

    Choose a portionable format , freeze-dried or soft. Freeze-dried (meat with the moisture removed to lock flavor) breaks into little crumbs that feel like cat crack. Soft or semi-moist (chewy, slightly moist pieces) are great when you need a quick, quiet reward. Split a freeze-dried nugget into pea-sized crumbs. Tiny pieces, big attention.

    Read the ingredient list like a detective. Aim for single-meat or just a few ingredients , for example, “chicken” means chicken, not a mystery mix. Avoid anything with onion or garlic, and skip treats with lots of fillers. Your cat will thank you, and so will your vet.

    Keep two go-to treats on hand. Use a high-value treat (think freeze-dried or wet bits) for hard tricks and first-time training. Use a lower-value crunchy treat (kibble-like, dry pieces) for lots of repetition and daily practice. Busy day? Toss a handful of the crunchy stuff before you go and get ten minutes of focused playtime.

    Worth every paw-print.

    Format Best training use Portioning tip
    Crunchy (dry, kibble-like) Everyday practice and high-repeat drills Break into pea-sized crumbs or give single kibbles
    Soft / Semi-moist (chewy, slightly moist pieces) Fast, frequent rewards; great for kittens Tear into tiny squares so each treat is a quick chew
    Freeze-dried (meat with moisture removed to lock flavor) High-value work and tough behaviors Split each piece into several pea-sized morsels
    Homemade (home-cooked or pureed-and-baked bites) Full ingredient control; good for picky or sensitive cats Cut into microcubes and keep chilled or frozen for freshness

    Final Words

    Jump right in, grab tiny samples, test in a quiet spot, and watch which scent or texture makes your cat pounce.

    We covered six quick criteria, palatability, size, calories, texture, ingredients, and safe delivery, plus how to run trials, portion treats, and keep picky cats motivated.

    Keep two to three winners on hand, swap formats now and then, and watch whiskers twitch with happy focus.

    Little habits like this turn short sessions into real gains , cat training treats: choosing the right rewards. Worth every paw-print.

    FAQ

    How do I choose the right treats for clicker training my cat?

    Pick tiny, high-aroma morsels that break into many pieces. Freeze-dried or soft treats work well. Use a small handheld clicker as an immediate sound marker to boost quick responses.

    What counts as low-calorie cat training treats?

    Low-calorie treats are small, low-fat bites or portioned kibble so you can reward often without extra calories. Use tiny crunchy pieces or split freeze-dried fragments.

    How do I train cats with treats?

    Use reward-based timing (positive reinforcement) with tiny tasty bits, mark the desired behavior immediately, keep sessions short, and use consistent cues to build repeatable behaviors.

    Can I train a house cat and a guard cat?

    Train a house cat for manners and routines. Training a cat to guard is limited—cats rarely reliably protect property. Set realistic goals, use food motivation, and prioritize safety and calm signals.

    What is a cat training stick and how do I use it?

    A cat training stick is a long wand used for distance rewards. Use it to present treats or targets, keep hands clear, and teach targeting with shy or reactive cats.

    Where can I find cat training resources?

    Look for online clicker guides, vet-behavior articles, short video courses, shelter classes, and local trainers. Choose resources with demos and printable protocols for hands-on practice.

    How should I pick treats for kittens, seniors, or sensitive cats?

    Choose tiny, soft, or limited-ingredient options. Introduce new foods in very small amounts and check labels to avoid onion, garlic, or other unsafe additives.

    Related Articles

  • environmental enrichment to reduce play aggression in cats

    environmental enrichment to reduce play aggression in cats

    Sick of getting tiny sharp nips when you try to cuddle or play with your cat? Your hand goes from warm to surprising little teeth, and ouch. Ever watched your kitty stalk a sock and think, huh, I wish that were my hand instead?

    Try environmental enrichment (small, easy changes to your cat’s world , perches [high spots they love], hiding spots [boxes or tunnels], wand toys [a stick with feathers or string], and puzzle feeders [toys that hide food so they have to figure it out]) to give them better ways to hunt, pounce, and burn off zoomies. Your cat’s whiskers will twitch as the toy rolls across the floor. It makes play feel safe and real.

    It’s not about buying every toy in the store. It’s about predictable play, short chase sessions, and letting them choose when to be wild so your hands stay off-limits. For busy days, toss an unbreakable ball before you leave , ten minutes of focused fun.

    This post gives a quick five-step start-now roadmap you can use today to cut biting and calm itchy paws. Ready to get your cat back to polite play? Worth every paw-print.

    Start-now roadmap: 5 immediate actions to reduce play aggression

    - Start-now roadmap 5 immediate actions to reduce play aggression.jpg

    Start with these five easy steps to calm itchy paws and build better play habits. Think of them as quick, practical moves you can do today to cut down biting and make playtime more fun for both of you.

    1. Get a vet exam, to rule out pain or medical causes. Sudden or new aggression can mean discomfort, and we want to be sure your kitty isn’t hurting.
    2. Run two 15-minute wand sessions each day, one in the morning and one before dinner. A wand (a stick with a string and toy on the end) is like a fishing rod for cats, perfect for safe pouncing and satisfying chases.
    3. Stop using hands-as-toys. Always redirect bites to a toy, especially the wand, so your hands stay off-limits. It’s tough at first, but your fingers will thank you.
    4. Add a perch and a hiding spot to the main room. A window perch (a cozy ledge) and a little hideaway let your cat watch, stalk, and decompress without needing to act out on you.
    5. Pair a short chase with a puzzle feeder before meals. A puzzle feeder (a toy that dispenses food) gives your cat the thrill of the hunt, then dinner, calming, mentally engaging, and yummy.

    Short-term goals to aim for in 2 to 4 weeks:

    Goal Target
    Weekly bite incidents Decrease by 50%
    Play sessions ending calmly At least 80% of sessions
    Human injuries requiring first aid Zero new incidents

    If the behavior starts suddenly, gets worse, seems linked to pain, or causes injury, book a vet appointment right away. If these steps don’t help after 4 to 6 weeks, or attacks escalate, contact a certified applied animal behaviorist (a credentialed specialist in animal behavior). Keep a daily log, time, what happened, what you were doing, and how severe the bite was. That record is gold for vets and behaviorists, and it helps you spot patterns fast.

    Worth every paw-print. Try this plan, tweak as you learn, and hey, watch those whiskers twitch when play finally clicks.

    Recognizing play aggression in cats: signs, causes, and differences from true aggression

    - Recognizing play aggression in cats signs, causes, and differences from true aggression.jpg

    Play aggression is your cat practicing hunting. Think pounce, quick bites that don’t stick, and fast chase-then-roll role play. Kittens and young cats do this a lot, and bored adults sometimes join the fun too. Ever watched whiskers twitch as a toy skitters away? That’s the vibe.

    Check the Start-now roadmap for the exact session timing and the hands-off wand rule so you can test whether enrichment fixes it. Enrichment (toys, play sessions, and puzzle feeders that satisfy hunting drive) usually calms this down.

    • Quick pounces with immediate breaks and little or no growling – usually playful stalking practice.
    • Soft-to-medium pressure bites that come and go, without a hard, fixed clamp (bite-inhibition gaps means they never learned to soften a bite).
    • Rapid chase-and-switch behavior, like rolling and role-play, often with relaxed whiskers and loose body language.
    • Prolonged hissing or growling, flattened ears, a rigid body, and a fixed, focused stare – these look more like real predatory or defensive aggression (serious attack or fear-based defense).
    • Sudden redirection – when a cat lashes out at whoever’s nearby after being startled; redirected arousal (excitement or fear gets shifted onto another target) is common if another pet or loud noise triggered it.
    • Tense tail twitching and wide-eyed hard stares that escalate instead of stopping when you interrupt – not playful.

    Common causes are pretty simple. Developmental bite-inhibition gaps (they didn’t learn to be gentle), under-stimulation, and inconsistent routines that leave hunting drive pent up. For busy people: a short, regular play session before you leave can buy you calm minutes at home.

    See your vet if aggression shows up suddenly, if wounds appear, or if your cat has other health changes like appetite loss or lethargy. And, uh, if you need help setting up safe play, ask a behavior pro or your vet – they can point you to good toys and timing tricks. Worth every paw-print.

    Toys, rotation, and redirection

    - Toys, rotation, and redirection.jpg

    Wand-style interactive toys are the cornerstone of play. Keep your fingers out of the action and let your cat practice stalking and pouncing from a safe distance. Think of the wand like a fishing pole for cats, just wiggle the lure and watch the whiskers twitch. Ever watched your kitty go full ninja? It’s the best.

    Mix supervised interactive sessions with toys your cat can use alone. That way they get to hunt, capture, and reset their focus without turning you into a moving toy. Keep about 5 to 8 active items out at a time and swap them every 3 to 7 days to keep things fresh. See the Start-now roadmap for the core session timing and the hands-off wand rule so those numbers stay consistent across the plan.

    • Wand teaser , great for kittens and adults. Check for frayed strings and split shafts (the stick part) and always supervise.
    • Plush mice , soft stuffed prey that help kittens learn bite inhibition; retire if seams open or stuffing shows.
    • Crinkle tunnels , noisy hide-and-seek fun; crinkle refers to a thin plastic layer that makes the sound, so watch for torn bits and exposed plastic.
    • Lightweight balls , perfect for solo chase; remove if paint chips or small pieces come loose.
    • Food-dispensing puzzle ball , a puzzle feeder (a toy that hides food so your cat works for treats) is great for slow feeding and brain work; clean often to prevent mold.
    • Lick mat , a rubbery mat with grooves (good for calming and enrichment); use with wet food or paste and wash after each use.
    • Catnip-stuffed toy , fun for playful adults and tolerant kittens; skip it if your cat gets overstimulated.
    • Safe chew/tug toy , helpful for bite-prone kittens learning limits; pick one with reinforced stitching (extra-strong thread) and non-toxic materials.
    Toy Type Primary Purpose Best Material/Size Session Recommendation
    Wand teaser Interactive stalking and ambush Light shaft (stick), soft lure, 12–18 in reach Use under supervision; replace frayed parts
    Plush prey Solo capture practice Small, machine-washable plush (soft stuffed), no small eyes Rotate often; retire if torn
    Puzzle feeder Extend hunt → reward sequence Durable plastic or rubber, food-safe Introduce slowly; watch first uses
    Ball/rolling toy Chase and pounce Lightweight, no small detachable bits Good for independent play; swap every few days
    Tunnel/box Hide, ambush, low-arousal play Sturdy fabric or cardboard, wide entry Keep clean; refresh to keep interest
    Chew/tug toy Mouthing outlet and gentle tug Reinforced fabric or rubber, no toxic fillers Supervise kittens; watch for wear

    Supervision guidance: watch new toys closely for the first few sessions, especially those with strings or small parts. Inspect toys weekly for loose pieces and weak stitching; repair or retire anything that looks unsafe. For low-cost wand repairs and replacement parts see DIY replacement attachments for teaser wands. Worth every paw-print.

    Play–feed sequencing and feeders

    - Playfeed sequencing and feeders.jpg

    Match play with mealtime so your cat gets the full hunt, catch, eat feeling. Start with a lively chase, wiggle a wand or roll a toy, and then give food right away from a puzzle feeder (a toy that drops kibble) or a regular bowl. It’s like a tiny hunting routine: wiggle, pounce, grab, snack. Your cat’s instincts get used, not frustrated.

    Safety first. Pick feeders made of food-safe materials (safe for mouths) and chew-resistant parts (won’t tear off easily). Wash them between uses. Watch new toys for small bits that could come loose. Supervise the first few sessions with any new feeder, and set up separate stations if you have more than one cat so meals don’t turn into contests. For exact play timing and capture counts, check the Start-now roadmap so your routine lines up with the rest of your plan.

    Session structure: hunt – chase – capture – reward

    Hunt: tease interest with a wand or rolling toy so your cat locks on.
    Chase: keep the motion varied and a little unpredictable so it feels like real prey.
    Capture: let your cat have a clear win, drop a plush mouse or slide a toy into a tunnel so they can grab it.
    Reward: give the food right after the catch, then finish with 1-2 minutes of calm petting so play ends gently and predictably.

    Feeder Type How It Reduces Arousal Average Session Duration Best For (kitten/adult/multi-cat)
    Slow-feed bowl Spaces out bites so the meal doesn’t spike excitement 5-15 minutes Kitten to adult
    Rolling treat ball (a ball that spills kibble when nudged) Encourages gentle chasing and active foraging 10-25 minutes Kitten and active adults
    Modular puzzle feeder (pieces you rearrange) Extends the hunt with problem-solving and paw work 15-40 minutes Adult and multi-cat (use multiple units)
    Snuffle mat (fabric mat with hidden pockets) Slows eating by making cats search by scent 10-30 minutes Shy cats and multi-cat homes
    Timed electronic feeder (battery-powered dispenser) Makes rewards predictable and spaces them out to lower anticipation Varies by setting Busy households, multi-cat with separate stations

    Introduce a new feeder over 7-14 days so your cat isn’t overwhelmed. Start with short, supervised bites at an easy level and slowly make it tougher. Watch the first few full meals for chasing, guarding, or frustration and move feeders apart if cats start to compete. Keep daily calories the same while spreading food across play sessions, and jot down which feeders calm your cat best so you can repeat what works. Ever watched your cat figure out a new toy and look so proud? Worth every paw-print.

    Resources & territory

    - Resources  territory.jpg

    Start by giving cats vertical real estate. Put in multi-tiered cat trees, wall shelves, and window perches so cats can climb and escape each other , heights around 20-60 inches work well. In shared rooms aim for 1-2 perches per cat so shy or low-ranking kitties can retreat without a face-off. Add 1-2 scratching posts per cat; sisal (a stiff natural fiber used for rope) and corrugated cardboard (layered paperboard like moving-box material) hit different scratch preferences, so mix and match.

    Ground-level hideaways matter just as much. Offer boxes, covered beds, and low tunnels as cozy retreats where a cat can tuck away and decompress; scatter these across rooms so hiding spots aren’t all in one corner. Litter box basics: one litter box per cat plus one extra, place boxes well away from feeding stations and noisy appliances, and scoop daily so they stay inviting and lower stress-driven redirected behavior.

    Multi-cat homes need deliberate resource spacing to curb guarding and rough play. Give each cat multiple feeding stations and separate perch clusters so mealtime and lookout duty aren’t centralized; spread hiding spots and toys across at least two rooms so competition drops. Quick checklist: one litter box per cat plus one extra, 1-2 scratching posts per cat, 1-2 perches per cat in shared rooms, and separate feeding zones. If fights or injuries keep happening after you try this, ask a pro for help.

    Staged introduction protocol

    Begin with a scent swap for about 3 days , swap bedding or rub each cat with a towel and leave it with the other so they learn each other’s scent. Next do visual-only separated interactions for roughly 4-10 days so they can watch and get used to signals without touching. Then move to short supervised meetings, slowly lengthening them; if hisses or growls keep showing up after 2 weeks, pause or go back a stage and try again. If aggression or injuries continue despite careful steps, contact your veterinarian or a certified behavior specialist (a pro trained in cat behavior) for the next steps.

    environmental enrichment to reduce play aggression in cats

    - Training gentle play and managing overstimulation.jpg

    Start with a tiny training loop: short targeting (teaching your cat to touch a spot on cue) or settling sessions that last about 3–5 minutes. Use a clear marker (a clicker, a small device that makes a sharp sound, or a short word like "yes") and give an immediate food reward, so your cat learns calm gets the good stuff. Time the marker to the exact moment your cat relaxes or touches the target, then reward with tiny treats (small, soft food bits). Think of it like teaching a polite finish: pounce, capture, then settle for a snack.

    Watch for early overheating signs: a stiff tail, flattened ears, a hard stare, or suddenly faster lunges. At the first sign, stop play, pull away attention briefly, and give the room a 10–20 minute cool-down. Then come back with a low-energy cue, like a gentle wand wiggle at chest level or a quiet target game. Don’t punish, okay? Physical corrections or scolding make your cat more fearful and can make reactive behavior (sudden aggressive responses) worse.

    If progress stalls, check common slip-ups: sessions that run too long, mixed or inconsistent cues, or sneaky hands-as-toys that erase your work. A simple 2–4 week plan usually gets things back on track. Week one: teach the marker and treat calm. Week two: practice ending play on a settle so calm becomes the routine. Week three: add short, predictable interruptions and reward fast recovery. Week four: stretch out calm periods and slowly switch to lower-value rewards. Oh, and no hands as toys, ever.

    If you’ve done this steadily and things still aren’t improving, get tailored help from your vet or a certified behavior specialist (a trainer with formal behavior certification). It’s worth it for your peace of mind and your cat’s safety. Worth every paw-print.

    Week Focus Simple Goal
    Week 1 Marker + treats Make calm predict treats
    Week 2 End-play settle Finish play with a calm cue
    Week 3 Brief interruptions Reward quick, calm recovery
    Week 4 Longer calm periods Phase in lower-value rewards

    Tracking progress, behavior logging, and referral criteria

    - Tracking progress, behavior logging, and referral criteria.jpg

    Keep this short, simple tracking plan in your Start-now roadmap. The goal is to have clear fields, follow a steady recording schedule, and watch for trends fast. Think of it like a habit tracker for your cat’s moods and mischief.

    What to log (keep it tidy)

    • Date/time (YYYY-MM-DD HH:MM).
    • Context (room, people, what was happening).
    • Pre-session activity (nap, meal, rough play).
    • Toys used (feather wand, laser, etc.).
    • Outcome (calm play, gentle pounce, nip, bite).
    • Wound presence (yes/no; photo if present – take a clear picture).
    • Vet notes (any medical advice).

    Example entry: "2025-01-02 19:15; living room; pre-session: nap; toy: feather wand; outcome: gentle pounce, no bite; wound: none; vet notes: n/a"

    What to measure (objective, quick)

    • Incidents per week.
    • Severity per incident on a 1-5 scale (1 = light nip, 5 = deep bite/attack).
    • Percent of sessions that end calmly.

    Example milestone: "50% drop in weekly bite incidents within 2-4 weeks; calm endings in at least 80% of sessions." Nice and clear.

    Recording item Schedule
    Daily entries Daily for first 2 weeks
    Weekly summaries Weekly after initial 2 weeks
    Milestone reviews At 2, 4, and 6 weeks

    If you see a sudden injury or signs of pain, contact your veterinarian right away. For ongoing behavior issues, reach out to a certified applied animal behaviorist (a pro trained in animal behavior) if your program shows no clear improvement after 4-6 weeks or if attacks are getting worse.

    Daily logging for the first 2 weeks. Then weekly summaries and milestone reviews at 2, 4, and 6 weeks. Worth every paw-print.

    Final Words

    In the action, we gave five immediate steps you can do today: rule out medical causes, run two short wand sessions, stop using hands-as-toys, add a perch and hiding spot, and follow play with a puzzle feeder. Easy to start between meetings.

    We also covered spotting play-aggression, smart toy rotation, play-feed sequencing, better territory setup, gentle training, and tracking progress with clear referral triggers.

    Stick with the plan, keep a brief log, and trust environmental enrichment to reduce play aggression in cats , calmer paws, happier home. Worth every paw-print.

    FAQ

    Frequently Asked Questions

    Why do my cats play so rough with each other?

    The reason your cats play so rough is usually normal social play or an unmet hunting drive. Common causes include bite-inhibition gaps, under-stimulation, redirected arousal, or adolescent energy. See a veterinarian if you notice sudden changes in behavior.

    How do I stop cats from playing rough with each other or reduce play aggression?

    Start with a veterinary check. Add structured play and environmental adjustments:

    • Run two short interactive wand sessions daily.
    • Never use your hands as toys; always use toys to redirect biting.
    • Provide perches and hiding places so cats can escape or observe.
    • End play sessions with a puzzle feeder or food-dispensing toy.

    What are some free, DIY, or indoor cat enrichment ideas?

    Free indoor enrichment ideas include:

    • DIY wand toys using string and a feather.
    • Cardboard-box forts and paper-bag hideouts.
    • Snuffle mats for foraging and window perches for watching outdoors.
    • Rotate a small stash of toys every 3–7 days and offer safe chew items.

    Do cats like to play rough with humans, and how can I stop a cat that plays too rough with me?

    Cats may play rough with humans because hands mimic prey. To stop it:

    • Use wand toys (teaser wands) so hands stay out of play.
    • Redirect bites and scratches to appropriate toys.
    • Pause or stop play immediately after a bite, then resume calmly later.
    • End sessions with a food reward to reinforce gentle play.

    How can I calm down an overly playful cat quickly?

    To calm an overly playful cat quickly: switch to low-intensity play, withdraw attention at the first sign of escalation, offer a food reward or puzzle feeder, and give a short quiet break so arousal subsides before resuming play.

    What is the 3-3-3 rule for cats?

    The 3-3-3 rule: three days of scent swapping or quiet room time, three weeks of gradual supervised interactions and exploration, and around three months for full settling. Extend this timeline if hisses or injuries continue.

    What is environmental enrichment for indoor cats and how does it help as prevention and therapy?

    Environmental enrichment provides daily interactive play, vertical perches, hiding spots, rotating toys, and puzzle feeders to reduce boredom and stress-driven rough play, and to improve cats’ overall quality of life.

    Related Articles

  • Simple clicker training for cats: getting started

    Simple clicker training for cats: getting started

    Think cats can't be trained? I figured that too, until I tried clicker training. A clicker (a small plastic tool that makes a sharp click) acts like a camera flash for behavior: you click the exact moment your cat does what you want, then give a tiny treat. That quick sound tells them "yes" faster than words ever could.

    It's simple and fast, great for busy people or shy kitties. Short, playful sessions and perfect timing turn wild, random pounces into tricks you can repeat. Ever watched your cat lock onto a sunbeam and pounce? That same laser focus is what starts the magic, so try a minute or two before you head out and watch them shine.

    Worth every paw-print. Claw-tastic.

    Simple clicker training for cats: getting started

    - Quick start immediate 6-step plan to start training.jpg

    Clicker training uses a sharp, consistent click to mark the exact moment your cat does something you want, then you follow that click with a reward. The clicker (a small plastic device that makes a crisp sound to mark behavior) tells your cat, "Yes, that!" It’s simple. And kinda magical when your kitty gets it.

    1. Get your cat’s attention. Ever watched your cat stare at a sunbeam and suddenly pounce? That focus is what you want.
    2. Offer a tiny treat (tiny chicken cubes, tuna flakes, or meat baby food). Make treats so small your cat can eat one in 1–2 bites.
    3. Click the instant the desired action happens. Click at the exact millisecond the behavior finishes. The click is the marker.
    4. Give the treat immediately after the click. Fast reward helps your cat link the click to the action.
    5. Repeat in short bursts. Do a few quick tries, then pause. Short and fun beats long and boring.
    6. End on a win and stop while your cat is still interested. Worth every paw-print.

    Keep sessions super short: 1–5 minutes each, a few times a day. Click only when the behavior finishes. That exact timing is the whole secret.

    See detailed sections below for equipment, charging/timing, and troubleshooting.

    Choosing clickers and reward tools for clicker training cats

    - Choosing clickers and reward tools for clicker training cats.jpg

    Pick a click sound your cat notices but doesn’t make them jump. Think of the click as your cat’s “yes” , a clear, consistent marker that says, good job. Standard plastic clickers (plastic – a small hard device that makes a crisp snap) give a bright, repeatable sound. Soft or silent clickers (dampened plastic or foam-covered models – soften the snap) are gentler for shy kitties. You can also use a pen-click, a tongue-click, or a clicker app (phone program that plays a click sound). Try a couple of options and pick the one your cat keeps coming back to , curious ears and steady returns beat drama every time.

    Treats and a few small tools make training way easier. Use tiny, soft bites that disappear in one or two chews: tiny dice of fresh chicken, flakes of tuna, a dab of meat-flavored baby food on a spoon (baby food – smooth, single-ingredient meat), or soft commercial treats (commercial treats – bite-sized, soft). A target stick (short stick with a nub for your cat to touch) is great if your cat snatches treats from your fingers. Carry treats in a pouch or small bowl (treat pouch – clips to your waist) and use a little scoop so pieces stay the same size. That way calories don’t sneak up on you or your cat.

    Worth every paw-print.

    • Standard plastic clicker (plastic – crisp snap)
    • Soft/silent clicker (foam-covered or dampened click)
    • Pen-click method
    • Tongue-click option
    • Clicker app (phone program that plays a click sound)
    • Treat pouch or small bowl (keeps treats handy)
    • Target stick (short stick with a nub for touching)
    Clicker Type Pros Cons
    Standard plastic clicker Clear, loud marker that your cat learns quickly; cheap and long-lasting Can startle very shy or noise-sensitive cats
    Soft/silent clicker Gentler sound for nervous cats while still consistent Harder to hear across a busy or noisy room
    App / phone clicker Free, adjustable volume, handy when you forget a device Phone alerts can interrupt; sound quality and timing vary by phone

    Calorie-control note: keep pieces tiny, count rewards, and try training before meals to boost motivation.

    For a quick refresher from the Quick Start, see section: Choosing clickers and reward tools for full equipment details.

    Charging the clicker and timing the click for clicker training cats

    - Charging the clicker and timing the click for clicker training cats.jpg

    Charging the clicker means teaching your cat that the click predicts a treat. Clicker (a small handheld device that makes a sharp click) charging is just pairing the sound with food so your cat thinks, “Oh good, treat time.” Do 10 to 20 click→treat pairings in a few short sets and your cat will learn that click equals reward.

    Timing is the whole trick. Click the instant the behavior finishes – for a sit, click the moment the rear hits the floor. Then give the treat right away. If you wait even a beat, the cat gets confused.

    Here’s a simple plan to practice. Start with three sets of 10 charge pairs to build the click-treat link. After a short 5–10 minute break, run 5 to 10 timing drills where you make the action slow and clear so you can click the exact finish. Think of the drills like warm-ups before the real game.

    Many beginners hit the same snags. Late clicks, clicking while the cat is still moving, and slow treat delivery are the usual culprits. The good news: small drills and tiny habit changes fix them fast.

    1. Find a quiet spot with few distractions.
    2. Use very small treats (tiny chicken cubes, tuna flakes, or meat baby food).
    3. Do 10–20 click→treat pairings across short sets (try 3 sets of 10).
    4. Wait 5–10 minutes, then do another short set.
    5. Test by waiting for a simple offered action and click the precise finish.

    Common mistakes and quick drills

    • Late click → Drill: Practice with slow behaviors, like having your cat sit very slowly, so you can click at the exact end. Do 10 slow reps.
    • Clicking during approach → Drill: Train clear end-points (rear on floor, paw touch) and only click when that point is reached.
    • Slow reward delivery → Drill: Pre-place treats in a bowl so you can hand one instantly after the click.
    • Startling sound → Drill: Try a softer clicker or a pen-click and recharge with gentle pairings so the sound feels friendly.
    • Treat-stealing interrupts timing → Drill: Use a target stick to separate the touch from the snack, so the timing stays clear.
    • Overclicking for partials → Drill: Raise your standards slowly; only click for closer approximations to the full behavior.

    Ever watched your kitty chase a shadow and think, “Yes, more of this”? Use short, fun sessions and you’ll get clean clicks and happy cats. Worth every paw-print.

    If a troubleshooting tip points to recharging or timing practice, come back to this section: Charging the clicker and timing the click for clicker training cats.

    Simple clicker training for cats: getting started

    - First lessons teach sit, recall (come), and target in clicker training for cats.jpg

    These first three lessons – sit, recall (come), and target touch – are perfect quick wins. They give you a clear path to more fun tricks and help your cat learn the clicker-to-treat connection (the idea that a click means a treat is coming). Keep sessions short and playful. Stop while your cat still wants more.

    Sit

    Use a treat to lure your cat into a sit with a smooth upward arc toward the head, then mark the exact moment the rear hits the floor with your clicker (a small handheld device that makes a sharp click).

    1. Get your cat’s attention by holding the treat near the nose.
    2. Move the treat slowly in an upward arc to just between the ears.
    3. Wait for the rear to lower. Don’t push the cat down.
    4. Click the instant the rear touches the floor. That millisecond is the marker.
    5. Give the treat right away and praise calmly.
    6. Repeat in short bursts, and finish on a clear success so the cat ends happy.

    Timing cues to watch for

    • Click the moment the rear hits the floor.
    • Click when the head lifts to follow the lure (if you’re teaching the movement).
    • Click when the cat holds the sit for a breath or two.

    Recall (Come)

    Start close, in a quiet room, and use very high-value treats. Click while your cat is moving toward you at first, then switch to clicking on arrival once they get the idea.

    1. Pick a quiet room and a super-tasty treat.
    2. Call your cat’s name or a short cue, and show the treat.
    3. Take one step back, pause, then call again.
    4. Click as your cat moves toward you in the early stage, or click on arrival later on.
    5. Reward immediately at your feet so coming equals payoff.
    6. Slowly increase distance and add gentle distractions over many short sessions.

    Tip: start 1-3 feet away, keep sessions tiny, and remove distractions until your cat is reliable.

    Target Touch

    A target stick (a small wand with a nub) or your fingertip becomes a precise tool to guide movement and stop treat-snatching.

    1. Present the target near the cat’s nose.
    2. Wait for a nose touch; don’t push the stick into their face.
    3. Click the instant the nose makes contact.
    4. Reward and then withdraw the target briefly.
    5. Use the target to lure positions or require a touch before giving a treat, which cuts down on grabby behavior.

    Short, easy session plan

    Behavior Typical reps per set Sets per session Session time per behavior
    Sit 6-10 2-4 1-2 minutes
    Recall (Come) 3-6 3-5 1-3 minutes
    Target Touch 8-12 2-3 1-2 minutes

    Keep things fun. Your cat’s whiskers will twitch, they’ll give you that slow-blink, and you’ll both feel proud. Worth every paw-print.

    Shaping, luring, and capturing natural behaviors in clicker training cats

    - Shaping, luring, and capturing natural behaviors in clicker training cats.jpg

    Luring means using a treat to guide movement, think of moving a tasty dot where you want your cat to go. Shaping is rewarding tiny, useful steps toward a bigger trick until the full behavior appears. Capturing is the easiest one for spontaneous stuff: you click and reward the instant your cat offers the action on its own. Clicker (a small handheld sound device) or a quick verbal marker works the same way.

    Pick the method based on how easy it is to guide the action. Use a lure for simple position cues like sit or down. Use shaping for layered or new tricks that don’t follow a single baited path, like a precise jump sequence or a paw target that needs several parts. Use capture when the cat already does the thing sometimes, then you just watch closely and click the moment it happens.

    Start fast. Clicks should come quickly at first, and give a treat every time so your cat connects the sound with the reward. As the behavior gets tighter, only click for closer versions and space out treats so the action stays reliable. Keep treats tiny and quick to eat so momentum doesn’t stop (tiny chicken cubes, tuna flakes, or meat baby food).

    Ever watched your cat’s whiskers twitch as a treat rolls across the carpet? That’s exactly the kind of attention you want. Break the final behavior into the smallest possible steps, praise the little wins, and tighten your criteria slowly.

    1. Decide the final behavior you want.
    2. Break it into the tiniest possible steps.
    3. Click the closest approximation the cat offers.
    4. Reward every click at first, fast and frequent.
    5. Raise the standard gradually; only click for closer versions.
    6. Fade treat frequency as accuracy improves (keep occasional surprises).

    Examples:

    • Luring: sit, lie down.
    • Shaping: jump through a hoop, fetch a small toy.
    • Shaping: spin or weave between legs.
    • Capturing: stretching, pawing a toy offered spontaneously.
    • Capturing: head-butt or slow-blink offered without prompt.
    • Luring/Target combo: stepping onto a mat or into a carrier.

    Worth every paw-print. See section: First lessons for target and lure steps you can copy.

    Simple clicker training for cats: getting started

    - Session length, frequency and avoiding overtraining in clicker training for cats.jpg

    Short, fun bursts work best. For kittens, aim for 1 to 3 minutes per session so they stay curious and not tired. Adult cats can handle 2 to 5 minute sessions that are a bit more focused. Stop before your cat loses interest. Most cats do best with no more than 10 to 12 minutes of formal training total each day.

    Spread those minutes into 2 to 4 short sessions instead of one long block. Quick repeats keep the click-to-treat link sharp , the clicker (a small handheld sound marker) tells your cat exactly what you liked, and the treat right after seals the deal. Proofing (adding distance or distractions) gets easier when you add a little challenge each day, not a heavy lesson all at once. Keep treats tiny, like pea-sized pieces, so momentum stays friendly and fast.

    Watch your cat’s body language and end on a win. Finish while they’re still interested and give a calm, tasty reward so tomorrow feels exciting again. Ever watched whiskers twitch right before a pounce? That’s the good stuff.

    Watch for these signs that your cat needs a break:

    1. Loss of focus or staring off instead of responding to cues.
    2. Tail thumping or a quick flick during practice.
    3. Ears flattened or pupils very wide, which can mean stress.
    4. Avoidance like walking away or hiding.
    5. Sudden frantic treat-chasing or grabbing instead of a calm response.
    6. Refusal to approach the training area.
    Age Sessions per day Total time
    Kittens Three Six minutes (three 2-minute sessions)
    Adults Four Twelve minutes (four 3-minute sessions)

    Keep it light. End while your cat still wants more. Worth every paw-print.

    Troubleshooting clicker training for cats: common beginner mistakes and fixes

    - Troubleshooting clicker training for cats common beginner mistakes and fixes.jpg

    If your clicker sessions feel clumsy, you’re not alone. Think of this as a friendly quick guide from someone who’s watched a thousand whiskers twitch while learning. These fixes are simple, cat-tested, and usually work fast.

    • Late or delayed click – If your click comes even a split second after the behavior, your cat gets confused. Fix it by practicing Charging the clicker and timing (charging the clicker means pairing the clicker – a small handheld device that makes a sharp click to mark a behavior – with a treat so your cat learns the sound means "good"). Do short timing drills (quick reps where you click the instant the action happens). You’ll often see improvement in days.

    • Low motivation – If your cat isn’t interested, try higher-value treats (extra tasty, smelly, or soft treats) or brief play rewards. Swap treats or toys across a few sessions to find what really lights them up. Most cats perk up in a few days.

    • Treat management issues – Inconsistent rewards, slow delivery, or snatching the treat can break the learning loop. Use a treat pouch or pre-place tiny treats so delivery is fast. Teach a target touch (ask your cat to touch a small stick or your fingertip on cue) so you don’t fumble with treats. Expect changes in days to about two weeks.

    • Noisy or distracting training space – A loud room or lots of movement steals focus. Shorten sessions and move somewhere quieter. Your cat’s attention usually comes back after a few calm sessions.

    • Multiple cats fighting over rewards – Don’t train them together at first. Train cats separately, use different cues, give treats in separate areas, or stagger sessions. Conflicts often calm in days, though very food-driven cats might need more time.

    • Stop punishment or scolding – Punishment makes learning slow and scary. Instead, manage the environment and reward clear alternatives you want to see. Behavior usually improves in days to weeks once you switch to positive steps.

    Quick troubleshooting flow: test the click – swap the treat – reduce distractions – timing drills (see Charging the clicker and timing for timing drills).

    Adapting clicker training for shy, food‑unmotivated, or multi‑cat households

    - Adapting clicker training for shy, foodunmotivated, or multicat households.jpg

    Shy, picky, or busy multi-cat homes just need a few small tweaks so training stays calm, clear, and actually fun. Move at your cat’s speed, follow their lead, and keep sessions tiny and stress-free. Think short, happy wins, not marathon coaching.

    Shy and fearful cats

    Work at kitty pace. Ever watched a cat freeze at a sudden sound? Yeah, we don’t want that. Use quieter click options and pair the sound with gentle, low-stress treats (soft, tiny pieces). Train near a hide spot so your cat can step away when it wants, safety first, always.

    1. Start in the cat’s safe zone, like next to a bed or hiding box.
    2. Use a soft clicker (a small device that makes a short click sound used to mark behavior; try one you can dampen) or a tongue-click if that’s less scary.
    3. Keep sessions 30 to 90 seconds, a few times a day. Short and sweet.
    4. Reward any calm approach or attention with a tiny treat and soft praise, quiet, soothing voice wins.

    Short sessions add confidence. Your cat learns that the click means something good, not a surprise. Worth every paw-print.

    Food-unmotivated strategies

    Some cats don’t care about kibble. No problem. Many of them love play, new smells, or novelty. Use toys, short chase games, or tiny, stinky tastes to make the reward feel real. Train right after a play burst when your cat is fired up.

    • Rotate high-value toys (wand toys, small balls) so sessions feel fresh.
    • Offer novel tastes at mealtime in tiny amounts, think a dab of tuna on a spoon (scent reward).
    • Use play as the click to reward: click, then toss the toy for a short chase, like a mini fishing trip for cats.
    • Try scent rewards like a tiny lick of chicken juice or canned tuna (very small amounts).
    • Train right after a short play burst when the cat is engaged and ready to focus.

    Play rewards can be as motivating as food for many kitties. Try different things and watch what makes whiskers twitch.

    Multi-cat rotation plan

    Training multiple cats means giving each one attention so nobody feels left out or jealous. Start separate, teach them your cue, then rotate quick one-on-one sessions. Short turns work best.

    1. Pick a quiet room and train one cat at a time.
    2. Use distinct cues per cat (different words or tones) so they learn their own signal.
    3. Keep treats in separate bowls in separate corners to avoid scuffles.
    4. Rotate who goes first each session so everyone gets a fair turn.
    5. Short sessions, one after another, work better than long group sessions.
    6. Stop and regroup if you see tail flicking, flattened ears, hissing, or avoidance.

    Keep reward areas apart and watch body language closely. If tension rises, give everyone space and try again later.

    Safety note: watch body language and separate reward zones to prevent fights. For silent click options and tool choices, see Choosing clickers and reward tools.

    Progress tracking, reinforcement schedules and fading the clicker in clicker training cats

    - Progress tracking, reinforcement schedules and fading the clicker in clicker training cats.jpg

    Keep a simple training log so you can actually see progress. Jot the date, the exact behavior you practiced, how many reps you did, and the success rate (percent of trials that met your criteria). Aim for measurable goals , for example, 80% success at 1 meter across three sessions , and watch the trend: steady gains, a plateau, or a dip when you add distractions. Use a paper chart, a spreadsheet, or a training app, and always note what changed (new treats, different room) so you can repeat what worked.

    Start with continuous reinforcement (reward every correct response) so your cat links the click to a treat fast. A clicker (small handheld device that makes a short click sound) helps mark the exact moment the behavior happened. Then move to a fixed ratio (reward every Nth correct response – set number of responses) to build longer or repeated behaviors, and later switch to a variable ratio (rewards after an unpredictable number of responses) to keep the behavior strong even with distractions. To fade the click, add a short verbal cue (one syllable like "yes") while you still click sometimes, then slowly reduce clicks and treats until the verbal cue alone predicts the behavior.

    Schedule When to use Example
    Continuous (reward every time) Teaching new behaviors; building a clear click-to-treat link Click + treat for every correct response for 1 to 2 weeks
    Fixed ratio (reward every Nth response) Increasing repetitions and duration Reward every 2nd or 3rd correct response for 2 to 4 weeks
    Variable ratio (reward after random responses) Making behavior durable under distraction Rewards after 1 to 5 responses unpredictably, ongoing

    Actionable 4-step fade plan

    1. Solidify. Stay on continuous reinforcement until you hit 80% success at the target distance (usually 1 to 2 weeks).
    2. Shift to fixed ratio. Reward every 2 or 3 responses to build persistence and lengthen the behavior (about 2 to 4 weeks).
    3. Introduce a verbal cue. Say the cue just before you click; click less often over several weeks so the cue starts to predict the reward.
    4. Randomize rewards. Move to variable ratio and toss in surprise treats while you test distance and distractions – complex skills can take weeks to months.

    Worth every paw-print. For suggested record-keeping templates and apps see the Quick FAQ and next steps section.

    Safety, age guidelines and realistic timelines for clicker training for cats

    - Safety, age guidelines and realistic timelines for clicker training for cats.jpg

    We removed a duplicate "Simple clicker training for cats: getting started" section and folded the useful specifics into the right places so everything’s easier to find. Think of this as tidying the toy box, same good stuff, just where you’d reach for it.

    • Session length / Kittens: Kittens can start clicker exposure at 8-10 weeks with very short, play-like bursts that pair the clicker (a small handheld device that makes a sharp click to mark a behavior) with a tiny taste. Keep it sweet and tiny so they don’t fill up. Example snippet: "Kittens: 8-10 weeks – five- to ten-second play-like bursts: click, tiny treat, calm praise." Ever watched a kitten’s whiskers twitch as a treat rolls away? It’s the best.

    • Adapting clicker training for shy, food‑unmotivated, or multi‑cat households: Advice for older or arthritic cats has been moved under a Mobility-limited / senior cats heading. Mobility-limited means cats with reduced movement or joint pain. Focus on low-mobility goals like mat work (touching or staying on a small flat surface) or target work (touching a small object), shorten sessions, and use soft treats (easy-to-chew, low-calorie pieces). Example snippet: "Mobility-limited / senior cats – focus on mat or target touches, shorten sessions, use soft treats that are easy to chew." Small wins are still wins.

    • First lessons / Progress Tracking: The one-page beginner timeline lives now as a Quick beginner timeline box in the First lessons area. It’s a condensed roadmap so you don’t have to guess what’s next. Example snippet: "Quick beginner timeline – Week 1: charge + touch; Weeks 2-3: sit & recall basics; Weeks 4+: proofing and distractions."

    • Troubleshooting and session length safety notes: Safety checklist bullets are integrated into the troubleshooting and session-length sections so you’ll see them when you need them. Highlights include treat counting, tiny low-calorie pieces, avoiding allergens, checking with your vet before diet changes, scheduling rest days, stopping if stress signals appear, and setting low-impact goals for mobility-limited cats. Example snippet: "Safety checklist highlights – count treats, use tiny low-calorie pieces, stop if stress signals appear."

    Cross-reference: for exact session-length guidance by age, see the Session length section.

    Clicker training for cats: quick FAQ and next steps after the basics

    Quick sidebar: this short FAQ points you to the full sections so we don’t repeat stuff. For step-by-step guides check Session length, Troubleshooting, Adapting training, Treats and calories, Choosing clickers, Progress tracking, Target training.

    • Can any cat be trained? Most can. Short, positive sessions work wonders. Move slower for shy or senior cats. See Adapting training.
    • My cat won’t take treats. Try training before meals or swap food for play rewards like a wand toy or a quick chase. Play can be as motivating as a treat. See Troubleshooting.
    • How long should sessions be? Keep them tiny. One to five minutes per session is perfect for keeping focus. See Session length.
    • How many sessions per day? Two to four short bursts spread through the day usually does the trick. See Session length.
    • Treat calories, what’s safe? Use pea-sized pieces and low-calorie, single-ingredient treats (single-ingredient, like freeze-dried chicken). Small bits let you reward a lot without extra calories. See Treats and calories.
    • Can I train multiple cats? Start one-on-one. Then rotate short, focused sessions so each cat gets your full attention and rewards. See Adapting training.
    • My cat grabs treats, how do I fix that? Teach a target touch so your cat learns to touch a stick or your hand instead of snatching food. It slows them down and looks cute. See Target training.
    • When should I call a pro? Call if your cat shows ongoing aggression, freezes in terror, keeps injuring itself, or shows persistent stress like hiding, heavy panting, or overgrooming. Contact your veterinarian and a certified applied animal behaviorist (CAAB or equivalent) , CAAB (a certified behavior expert who works with animals).

    Next skills and a short practice plan: add a little duration and mild distractions, chain small behaviors together, teach recall (come when called), and desensitize the carrier and vet handling (desensitize means slowly reduce fear). For demo videos, guided app timers, and quick self-review clips, head to Progress tracking so you can watch examples and pace sessions without repeating article text.

    Final Words

    Jump right in , you’ve got the one-sentence definition and a six-step quick-start checklist that lets you begin training today.

    We walked through choosing the right clicker and tiny treats, charging the marker and timing the click, plus step-by-step sit, recall, and target lessons.

    You learned shaping, luring, short session rules, troubleshooting tips, adaptations for shy or multi-cat homes, tracking progress, and basic safety and age guidance.

    Ready to make playtime purposeful? With this plan, clicker training for cats: getting started is simple, playful, and kind to busy schedules , worth every purr.

    FAQ

    Clicker Training for Cats — FAQ

    How do I get started with clicker training for cats using YouTube, PDFs, or free resources?

    Start with a simple 6-step quick start, watch short beginner YouTube demos, or download free PDFs titled like “clicker training for cats beginner” to follow practice drills.

    What is cat clicker training and how does it work?

    Clicker training uses a distinct click sound to mark the exact moment a cat performs a wanted action, then you give an immediate tasty reward to reinforce that behavior.

    Which clicker is best for training cats?

    The best clicker is one your cat notices without being startled: a standard plastic clicker, a soft/silent clicker, or a quiet app—choose the sound your cat accepts.

    Do I need a clicker training kit or can I DIY?

    You don’t need a kit. For beginner training you only need a clicker (or app), tiny soft treats, a treat pouch, and a target stick (a wand your cat noses).

    Can Jackson Galaxy’s methods be used for clicker training cats?

    Yes. Jackson Galaxy’s methods fit clicker training well: use calm timing, high-value treats, and short low-stress sessions, adapting his gentle approach to your cat’s pace and comfort.

    Are there silent clicker options for shy cats?

    Silent options include soft plastic clickers, pen-click or tongue-click sounds, and low-volume clicker apps—use the gentlest sound your cat tolerates.

    What treats work best for clicker training cats?

    The best treats are tiny soft pieces eaten in one to two bites—tiny chicken cubes, tuna flakes, or meat baby food—so you can reward often without many extra calories.

    How long should clicker training sessions be?

    Keep sessions to 1–5 minutes each, with several short sessions per day. Stop before your cat loses focus and end on a small success.

    What is a beginner clicker checklist I can follow right away?

    Checklist: get your cat’s attention; present a tiny treat; click the instant the behavior happens; give the treat immediately; repeat briefly; finish while interest stays high.

    Related Articles

  • Play Aggression in Kittens: What to Expect

    Play Aggression in Kittens: What to Expect

    Think your new kitten is being mean or just practicing ninja moves? Ever watch those tiny pounces and think, huh, aggressive or adorable?

    Play aggression is totally normal. Those pounces, the soft nibbles (gentle mouthing – soft nibbling with no real bite), and quick swats are your kitten practicing hunting. It usually peaks around 2-6 months when they’re teething (teething – gums can hurt as new teeth come in) and full of zoomies.

    Watch for signs that play is getting too intense: wide, dilated pupils (big, round eyes), a flicking or lashing tail, a stiff body, or sudden bites that come out of nowhere. Those moments are your cue to step in before fingers become target practice.

    What to expect: this phase tends to ease as they get older and you give them better outlets. Most kittens mellow over a few months, especially if they get regular play and something safe to chew on. I once saw a kitten leap six feet for a feather toy, pure joy.

    How to redirect that wild energy into safe play:

    • Use wand or teaser toys like a fishing rod for cats – you stay out of reach and they chase.
    • Swap your hand for a chew-safe toy when they try to bite. No hands as toys, ever.
    • Rotate toys so each one feels new and exciting.
    • Offer teething-friendly chew toys or rubber bits made for cats.
    • Do short play sessions before you leave or at night – ten minutes of vigorous play can calm a kitten for a while.
    • If play gets too rough, pause the fun and walk away for a minute so they learn that biting ends play.

    Keep it fun and consistent. Praise gentle play, give a quick correction when things get fierce, and reward redirection with a feather chase or a treat. Your fingers will survive, and your cat will learn to be delightfully playful instead of painfully personal.

    Worth every paw-print.

    Play Aggression in Kittens: What to Expect

    - Quick answer is kitten play aggression normal.jpg

    Play aggression is when normal hunting and play behaviors, like pouncing, mouthing (gentle nibbling), and swatting (quick paw hits), get aimed at people or housemates and turn rough instead of gentle. It’s a normal part of kitten life, but yeah, it can sting a bit, literally sometimes.

    You’ll see it most in kittens and younger cats under about 3 years, with a big spike around 2 to 6 months. That’s when they have loads of teenage energy and are often teething (when baby teeth are coming in), so they chew and bite more.

    Look for these signs before play gets out of hand:

    • Dilated pupils, like big round moons.
    • Flattened or pinned ears, which say “I’m tense.”
    • Rapid tail lashing, a quick swipe back and forth.
    • A sudden jump from soft play to hard biting.
    • Targeting moving hands, feet, or ankles.
    • Repeated unprovoked attacks that seem to come out of nowhere.

    Keep play sessions short and focused. Five to fifteen minutes is perfect. It’s enough to burn energy but not long enough for things to spiral. Never use your bare hands as toys. Ever. Think of a teaser wand like a fishing rod for cats, up close fun, with feathers or a toy on the end so your fingers stay safe.

    Redirect biting to proper toys, and give a firm “no” or stop the fun when they go too far. Timeout works. Give a chew-safe toy if they’re teething. For busy days, toss an unbreakable ball before you head out, that’s ten minutes of safe play and less shredded fingers.

    Get professional help if bites break skin, if attacks keep escalating, or if your cat suddenly changes behavior. A vet or certified behaviorist can check for pain, medical issues, or training plans that actually work.

    I once watched Luna leap six feet for a wand toy and then settle down to knead a blanket. Worth every paw-print.

    Quick Tips
    Session length: 5–15 minutes
    Never use hands as toys
    Get professional help if bites break skin or escalate

    Causes and common triggers of play aggression in kittens

    - Causes and common triggers of play aggression in kittens.jpg

    Play aggression usually starts when normal kitten instincts , stalking, pouncing, mouthing , get aimed at the wrong thing. Ever watched a whisker-twitch before a pounce? That hunting spark is natural. It’s instinct, not meanness.

    Common root causes are easy to spot. Overstimulation from too-intense play can overwhelm a kitten (sensory overload). An unmet predatory drive (the urge to hunt) makes them want to chase and grab. Boredom or not enough outlets leaves them restless. Early social gaps, like being separated from littermates or missing maternal correction, mean they never learned bite inhibition (how hard is okay when they bite). And when people rough-house and treat hands like toys, kittens learn that skin is fair game , soft nibbles turn into harder bites over time.

    Typical triggers around the home include fast-moving hands or feet, high-energy play without a real toy, nighttime zoomies, or feeding and play schedules that don’t match the kitten’s rhythm. Solo kittens with no playmate get extra wound-up. In multi-cat homes, scarce resources can raise tension and lead to rough play. Pain or illness also lowers a kitten’s tolerance for handling and can make them snap.

    Always rule out medical causes with a vet check if biting starts suddenly or your kitten seems touchy; pain changes behavior. Practical fixes help a lot. Keep play sessions short and toy-focused. Add solo enrichment like puzzle feeders or unbreakable balls (unbreakable means tough plastic or rubber). Use toys , think of a teaser wand like a fishing rod for cats , and keep hands out of the play. Slow, predictable routines calm them down. Extra play before bed can burn off zoomies and make nights calmer.

    See quick tips above.

    Worth every paw-print.

    Play aggression timeline: kitten development, teething, and peak weeks to expect

    - Play aggression timeline kitten development, teething, and peak weeks to expect.jpg

    This chart is a friendly week-by-week guide to what your kitten might do as they grow , when play-fighting starts, when teething makes mouthing worse, and when you’ll see big energy spikes. Think of it as a roadmap so you’ll know which behaviors are normal and when to step in with gentle guidance. Ever watched tiny teeth meet your finger? Yeah, that one’s common.

    Short version: play-fighting picks up after week 3. Bite inhibition (learning how hard is okay) is strongest around 7 to 12 weeks. Teething (when baby teeth are coming in) often increases nipping between 8 and 16 weeks. A big energy surge shows up around 3 to 6 months. Most cats calm down by a year, though some hunting habits can hang on until about 3 years.

    Age/Weeks Typical play behaviors Recommended interventions
    0–3 wks Newborns sleep and nurse most of the time. Very little play yet , mostly snuggles and tiny movements. Neonatal (newborn) reflexes rule the day. Handle very gently for short checks. Keep mom and litter calm and warm. Let nature do its thing while you offer soft, careful touch.
    3–7 wks Social play starts: soft swats, little pounces, basic stalking. The socialization window opens and curious kitten energy shows up. Their whiskers twitch and they explore. Supervised handling and lots of littermate play. Gentle exposure to people and everyday sounds. Use calm voices and short cuddle sessions to build confidence.
    7–12 wks Really intense littermate play teaches bite inhibition (how hard is okay). Expect full-on wrestling, tiny yelps, and role-play that shows them limits. Encourage group play and let kittens teach each other when possible. Use wand toys as targets so hands stay safe. Short, fun sessions work best.
    8–16 wks Teething (when baby teeth are coming in) makes mouthing and nipping more frequent. They may nibble for comfort, chew on soft things, or lightly bite while playing. Offer chew-safe toys and rotate them. Keep play sessions short and redirect nibbling to toys. Stay patient , it’s temporary and needs gentle guidance.
    3–12 months Adolescent energy spike: zoomies, vigorous play, and sometimes rougher bites. Control improves slowly as they grow into their adult moves. Do daily interactive play for 5 to 15 minutes to burn energy. Be consistent with rules and reward calm behavior. Consider puzzle feeders for extra brain work.

    Early, gentle handling and time with littermates usually helps kittens learn better bite control and can shorten the rough phase. If a kitten was raised alone or weaned too early, the rough period often lasts longer, so be extra patient and consistent.

    Worth every paw-print.

    Recognizing signs: normal play biting versus problematic play aggression in kittens

    - Recognizing signs normal play biting versus problematic play aggression in kittens.jpg

    Play bites are usually quick, soft, and followed by the kitten relaxing or going back to a toy. You might feel a tiny nibble during a pounce and then your kitten chills out. Problematic play aggression is different – harder grabs, repeated nips that escalate, or focused attacks on skin that make you flinch instead of smile.

    Watch clusters of body signals, not just one move. Big, round pupils that flick toward a toy then shrink again usually mean excitement. Pinned ears and tense shoulders often mean the kitten is wound up. Tail twitches, sudden yowls, or a cat that won’t calm down after a catch are signs play is tipping into rough territory. Ever watched your kitty stalk then go silent before striking? That quiet can be a clue.

    Play biting Problematic play aggression
    Quick mouthing, relaxed body Repetitive hard bites, tense posture
    Stops after a pause or distraction Keeps coming back to target flesh
    Playful chirps or silence Hissing, yelps, or loud growls

    Concrete scene: your kitten stalks your socked foot at dusk, pounces, and clamps down. Do this instead – toss a wand toy so the kitten gets a successful catch, stop moving your foot, and give a calm break of 30 to 60 seconds before you try playing again. Think of the wand like a fishing pole for cats – let them win sometimes.

    For deciding severity, keep track of frequency, whether skin is broken, the context (was it play or handling?), and if the cat shows calming signals afterward. If bites are frequent, draw blood, or happen while you’re just petting, get help from your vet or a behaviorist. In truth, small bites that stay playful usually fade with redirected toys and short time-outs.

    Quick tips:

    • Swap feet for toys during play.
    • Reward calm behavior with a quiet pet or treat.
    • Short, consistent breaks teach limits.
    • Seek professional advice if bites break skin or get worse.

    Worth every paw-print.

    Practical prevention and toys to reduce play aggression in kittens

    - Practical prevention and toys to reduce play aggression in kittens.jpg

    Keep it simple. Try a few 5 to 15 minute play sessions each day, especially at dawn and dusk (crepuscular peaks, the times cats are most active). Use wand toys so your fingers stay well away from tiny teeth. End every session with a clear win: let the kitten catch the toy so they feel successful, then follow with soft petting or a quiet treat to calm things down.

    Carry a small plush or ball in your pocket and toss it when a kitty goes for ankles. That quick redirect teaches what’s okay to bite. Ever watched your cat switch from human toes to a squeaky mouse in one leap? It works.

    Recommended toys and safety

    • Wand or feather toy, long reach keeps hands safe and mimics prey movement so your kitten practices stalking without you as the target.
    • Small bouncy balls, satisfy pouncing instincts with a fun roll or satisfying thud.
    • Crumpled paper or foil ball, cheap and irresistible for quick redirects.
    • Plush kick-stick, big enough for biting and kicking with hind legs so teething mouths get relief.
    • Puzzle feeder (a toy that dispenses food), turns meals into a hunt and gives mental work while slowing down eating.
    • Durable rubber chew toy (tough, flexible material), good for teething and safe chewing.
    • Tunnels and boxes, perfect for stalking and ambushing without human hands as targets.
    • Solo furry mice or soft prey toys, let them capture and finish the hunt on their own.

    Make a quick toy-safety habit. Check for loose parts, torn fabric, or exposed stuffing before each session and retire damaged toys. Rotate toys weekly so favorites feel fresh and exciting. Oops, make that a daily glance for rough play and a weekly swap for novelty.

    Worth every paw-print. See quick tips above.

    Training techniques: teaching bite inhibition, time-outs, and safe human responses to kitten nipping

    - Training techniques teaching bite inhibition, time-outs, and safe human responses to kitten nipping.jpg

    Start teaching bite inhibition (learning to control bite strength and not treat hands like prey) as soon as your kitten is in that socialization window. Tiny, calm lessons work best , think short play bursts where the rule is simple: hands are not toys. Teach now and you’ll have a calmer cat later, one that mouths less and pounces more politely.

    When play gets too rough, use age-appropriate interruptions. For very young kittens, a sharp yelp or an instant stop to play mimics a littermate’s complaint and often ends the escalation. For older kittens, calmly pulling your attention away teaches that nipping ends the fun; if a kitten hangs on, gently press toward the mouth to encourage release, then stop play.

    Choose time-outs that match the message. Very short breaks of 30 to 60 seconds are perfect – long isolation can scare or confuse a kitten. Make time-outs consistent and predictable so your kitten links the bite to the pause. Then reward good targeting with treats, praise, or the toy itself so they learn toys are the right thing to chomp.

    Don’t punish, grab, or wrestle. Those moves teach the wrong lesson and make your hands a target. Instead try clicker training (a small noise device that marks good behavior) or target training (teaching the cat to touch a spot or stick) to build focus and give clear cues without risky hand play.

    Immediate steps when you get bitten:

    1. Give a sharp yelp or say “ow” and stop play right away.
    2. If the kitten is latched, press gently toward the mouth to encourage release.
    3. Turn away and withdraw attention for 30 to 60 seconds – no eye contact, no petting.
    4. Redirect the kitten to a toy and let them catch it.
    5. Reward calm behavior with a treat or soft praise.

    Be steady and track progress over weeks. Jot down when nips happen, what sparked them, and which responses worked, then repeat the successful routines so habits form. I once watched a kitten go from frantic nipper to proud toy-chaser in just a few patient evenings – worth every paw-print.

    When play becomes serious: safety, first aid, and when to consult a veterinarian or behaviorist for kitten play aggression

    - When play becomes serious safety, first aid, and when to consult a veterinarian or behaviorist for kitten play aggression.jpg

    If your kitten’s bites or scratches are getting worse instead of improving, don’t wait. Get help when bites break the skin often, when play sessions turn into hissing or growling, or when the attacks keep getting stronger even after consistent training. If your kitten suddenly changes behavior or seems painful or sick, check with a veterinarian or a behaviorist (trained cat behavior specialist) so they can look for medical causes and build a plan that fits your cat.

    First aid for small bites and scratches is simple. Wash the area with soap and warm water, then put on an antiseptic (a germ-killing solution) and cover it if needed. Keep an eye on the wound for redness, swelling, warmth, or pus. If the cut is deep, getting worse, or won’t stop bleeding, see a doctor.

    If your kitten seems sore, limps, hides, or won’t eat, take them to the vet to rule out pain that could be driving the aggression. Left alone, rough play can fray your bond with your cat, and that’s no fun for anyone. Professionals can give behavior plans that actually work, and medication is usually a last step after medical issues are checked.

    Consult a professional if…

    • The bite breaks skin and causes bleeding.
    • Incidents become more frequent or more intense.
    • Aggression includes hissing, growling, or fear-driven attacks.
    • There’s a sudden, unexplained change in your kitten’s behavior.
    • Bites are aimed at children or people who are vulnerable.
    • Your kitten shows signs of pain, illness, or stops eating.

    Start keeping a short incident log right away. Note dates, times, what happened before the bite, and how the kitten reacted. Take brief videos if you can , even shaky phone clips help. Bring the notes and footage to your vet or behaviorist so they can see the pattern and give smart, fast advice.

    Final Words

    Mid-pounce, you got the quick answer: a tight definition, the peak age window, the six instant red flags, and fast first steps.

    We dug into causes and triggers, mapped a week-by-week timeline, showed how to tell playful mouthing from problem biting, and listed toys plus training moves to redirect that energy.

    Use short sessions, never play with bare hands, rotate durable toys, and get help if bites break skin. Stay pawsitive, be consistent, and remember play aggression in kittens: what to expect, most kittens mellow with time and playful practice.

    FAQ

    Kitten play aggression — FAQs

    Play aggression in kittens what to expect toward people or other cats?

    Play aggression in kittens toward people or other cats means normal hunting play, like pouncing, mouthing, and swatting, gets directed at humans or housemates and can escalate beyond gentle mouthing.

    Is play aggression normal in kittens?

    Play aggression in kittens is normal, especially under three years, peaking around two to six months during adolescent energy and teething, so expect extra mouthing and bursts of rough play.

    How long does a kitten play aggression last?

    A kitten’s play aggression often peaks between two and six months, stays lively through adolescence, and usually eases by about three years with consistent redirection and enrichment.

    How to deal with kitten play aggression?

    To deal with kitten play aggression, keep play sessions 5–15 minutes, never use bare hands as toys, redirect bites to appropriate toys, end play after a calm capture, and reward gentle behavior.

    How to stop play aggression between cats?

    To stop play aggression between cats, provide multiple resources, short structured play sessions, supervised interactions, and brief separation when play gets too intense to lower competition and stress.

    How do I tell if my kitten is being aggressive or playing?

    You can tell if your kitten is being aggressive or playing by watching posture, pupil size, ear and tail signals, whether bites are soft and followed by calm, and if behavior escalates or repeats.

    What is the 3-3-3 rule for kittens?

    The 3-3-3 rule for kittens means three days to settle, three weeks to adjust routines, and three months to feel at home, which sets realistic expectations for behavior and bonding.

    Related Articles

  • Cat Play Aggression: Causes and Solutions

    Cat Play Aggression: Causes and Solutions

    Think your kitten's nips are just bad behavior? Not usually. Play aggression (kitten hunting practice that teaches stalking, pouncing, and gentle biting) is how they learn to be hunters. Those ankle ambushes and surprise little bites are more practice than malice.

    Still, it can startle you, sometimes break skin, and get worse if we accidentally reward it by wrestling with our hands. Ever yelp and then play more with your hands? Yeah, that teaches them that biting = attention.

    Here’s a paw-ready plan you can try. Stop hand-play. Schedule two short hunt-style sessions a day (5–10 minutes each) , think quick chase games that mimic real hunting. Carry a redirect toy like a teaser wand (a wand with feathers or string, basically a fishing rod for cats) or a small plush/ball to swap in when teeth appear. End each play session with food , a few kibble or a treat so the hunt naturally finishes with a meal.

    If a bite breaks the skin, clean it and call your vet. And if the nipping gets fiercer or more frequent, check with your vet or a behaviorist for extra help , sometimes there’s pain or anxiety behind it. I once watched Luna leap six feet for a toy and then calm down when we changed the game, simple tweaks can make a big difference.

    Worth every paw-print.

    Quick action plan: immediate fixes for play biting

    - Quick action plan immediate fixes for play biting.jpg

    Play bites, ankle ambushes, and quick scratches aimed at people are usually play aggression. This is most common in kittens and young cats learning to stalk and control their bites. If the biting is sudden, much worse than usual, or comes with limping or a change in appetite, check When to consult a vet or behaviorist for medical red flags and how to document what’s happening.

    Do these now

    1. Stop hand-play right away , tuck your hands out of reach and don’t wiggle fingers like a toy.
    2. Start two 10–15 minute interactive sessions every day with a wand or fishing-pole toy (see Toys). Think of it like a mini hunt: you move, they chase, they pounce, they get tired.
    3. Carry a small plush or ball to redirect an ambush instantly; toss it away from you so their focus shifts.
    4. End each play session with a meal or a puzzle feeder so the “capture” leads to food. That helps your cat learn that catching things brings rewards, not hands.
    5. Add one food-foraging puzzle each day to slow feeding and burn off hunting drive. (Puzzle feeders are bowls or toys that make your cat work a bit to get kibble.)
    6. If bites break the skin or the aggression is sudden or getting worse, contact your vet and bring video and notes , see When to consult a vet or behaviorist.

    A few quick extras: don’t punish with hits or sprays , that just makes things scary and can make biting worse. If your cat gets overstimulated during petting, learn their telltale signs , tail flicks, skin ripples, hardening muscles , and stop before the bite. Ever watched your kitty stalk a feather? Mimic that pace in play sessions for better bite control.

    For full routines and background on training, Toys, managing overstimulation, special cases, and the vet/behaviorist checklist, read the linked sections below.

    Worth every paw-print.

    Cat Play Aggression: Causes and Solutions

    - Causes of cat play aggression developmental, predatory, medical, and environmental.jpg

    Developmental: Kittens learn how hard to bite by roughhousing with their mom and littermates. If a kitten grows up alone or was taken from the litter too soon, it might not learn that “too hard” rule. So you get those tiny, ferocious pounces that make you flinch. Ever watched a baby cat go full-on hunter and think, whoa, slow down?

    Predatory drive: Cats have a built-in hunting urge , predatory drive (their natural hunting instinct). Stalking, pouncing, and biting are practice moves meant for prey, not people. If they don’t get the right practice, they’ll use socks, ankles, or your fingers instead. Try wand toys (like a fishing rod for cats) and short, scheduled chase sessions so they get prey practice and your hands stay human.

    Medical and pain: If aggression shows up suddenly or gets worse fast, think medical. Pain, infection, neurologic issues (brain or nerve problems), or skin conditions like hyperesthesia (heightened skin sensitivity) can make a cat snap when they used to be gentle. If you see limping, hiding, or a drop in appetite, call your vet , better safe than sorry.

    Environmental and social: Boredom, not enough high spots, messy play schedules, or tension in multi-cat homes can crank up rough play. Overstimulation , when petting flips into a bite , is usually sensory overload, not spite. A predictable routine, more play and places to climb, and fewer surprises will calm that motor drive.

    Quick checklist

    • Check age and early social history: did they have littermates or were they separated early?
    • Inspect the body for injuries, sores, or swollen spots.
    • Note any recent household changes: new people, pets, furniture, or schedule shifts.
    • Log activity and incident times for a few days to see patterns.

    Watch for these red flags:

    Medical warning signs Behavioral clues
    Sudden start or escalation; limping, hiding, loss of appetite Predictable timing; clear play triggers; chase or pounce posture

    If you’re ever unsure, rule out medical causes first, then add structured play, safe toys, and routine. It helps. Your cat will thank you , probably with a purr, or a very focused stare.

    Cat Play Aggression: Causes and Solutions

    - Cat play aggression symptoms read the body language and distinguish types.jpg

    Reading your cat’s signals is the fastest way to tell harmless roughhousing from a real safety risk. Watch their body, not just the bite, then you’ll know whether to reach for a toy or call the vet (veterinarian, a medical doctor for pets). Ever watched your kitty stalk a sock and think, “Yep, that’s hunting”? Same idea.

    People often call quick pounces or nips “mean,” when really the cat is practicing hunting moves. But those same nips can come from pain or fear, and those feel and look different once you learn the cues. Misreading them can make you react the wrong way, and that can actually make biting worse. So watch first, act second.

    Here are easy signs to compare play versus other aggression:

    • Tail: short twitches or held up vs hard side-to-side lashing.
    • Ears: neutral or slightly back vs flattened against the head.
    • Pupils (the black center of the eye): normal or focused vs wide and dilated when stressed.
    • Vocal sounds: soft chirps or quiet chattering vs hissing or growling.
    • Skin along the back: small ripples during play vs big ripples with tension.
    • Paws: gentle batting vs claws-out swats.
    • Body tone: loose and stalking vs stiff and hunched.
    • Approach: playful stalk then disengage vs sudden, direct strikes.
    Sign or behavior Play aggression Other aggression or pain
    Tail Up or twitchy, short swishes Lashing side-to-side, stiff
    Ears Neutral or slightly back Flattened against head
    Vocalization Soft chirps or quiet chattering Hissing, growling, sustained yowls
    Duration Brief bursts, then resets Long, escalating attacks
    Intent Stalk, pounce, then disengage Defensive or targeted aggression
    Reaction to human withdrawal Often follows and resumes play later May continue, escalate, or avoid contact

    If you film incidents, aim for steady, well-lit clips that show the approach, the pounce or bite, and what happens right after. Include audio, note the date and time, and write down what led up to it. Try to collect a few examples, behaviorists and vets (veterinarians) can spot tiny body language cues on video that you might miss live.

    Next, if the bites are sudden, seem painful, or are new, get a vet check (veterinarian exam). Pain can make even the nicest cat snap. For regular play nips, swap in toys and short play sessions so hands stay out of the game. Simple changes, big relief.

    Worth every paw-print.

    Training and interactive play routines to reduce play biting

    - Training and interactive play routines to reduce play biting.jpg

    The goal is simple: stop your hands from feeling like prey and channel that hunting energy into toys. Think of training as teaching your cat a safe, repeatable routine that rewards calm behavior and real captures. Use the Toys section for specific picks, but here we focus on the how.

    Start with short, prey-like bursts of movement, quick, unpredictable dashes, a pause, then a slow "caught" moment so your cat practices the whole hunt-to-meal loop. Keep sessions short and regular. Two 10 to 15 minute blocks during peak activity (usually dawn and dusk) works well. Make sure each session includes several clear captures and ends with food or a puzzle feeder (a toy that hides food and slows eating). This helps your cat link catching with a calm reward. No punishment needed.

    Training technique matters. Don’t wrestle. Don’t use your fingers as toys. Stop the session the instant play gets too rough. Clicker training can help by marking calm choices, clicker (a small handheld device that makes a click sound) plus treats speeds learning, but steady cues and patience beat sudden corrections. If a session goes sideways, pause, let the cat settle, and try a calmer tempo next time.

    Structured session plan

    Warm up gently to get attention, then follow a clear rhythm of chase and pause so your cat practices stalking and pouncing. Aim for tidy captures and a calm finish.

    1. Start with 30 to 60 seconds of teasing movement to grab focus.
    2. Move the toy low and fast for 60 to 90 seconds to prompt chasing.
    3. Pause briefly and let the cat stalk, this builds anticipation.
    4. Resume with a short sprint to encourage the pounce.
    5. Slow the toy so the cat can bite and hold, let them "catch" it.
    6. Repeat steps 3 through 5 three to five times per session.
    7. After the last capture, slow the toy and wiggle it like trapped prey.
    8. Give a meal or place food in a puzzle feeder (a toy that hides food and slows eating) right after the final capture.
    9. End quietly. Sit nearby or step away so your cat finishes calm.

    Worth every paw-print.

    Clicker basics for reducing biting

    A click marks the exact moment your cat picks calm behavior, so they learn what gets rewarded.

    1. Click the moment the cat disengages from your hand or a toy.
    2. Reward within one second with a treat or a piece of kibble.
    3. Say a short cue like "calm" right after the click.
    4. Slowly increase the time before you click to shape longer calm stretches.
    5. Fade treats over time, keeping praise and a calm end-of-play routine.

    Troubleshooting quick tips

    • If over-arousal happens, stop the session and wait for a relaxed posture before trying again.
    • If your cat ignores cues, drop the bar and reward tiny improvements.
    • If signals feel messy, pick one clear start cue and use it every time.
    • If play escalates, end the session immediately and try a slower tempo later.
    • If your cat targets feet or ankles, keep a small plush toy on you to redirect instantly.
    • If biting returns, review session length and pace, shorter, slower cycles often work better.

    Ever watched your kitty chase shadows? Try this plan for a week and you might be surprised how quickly the teeth move from your hands to the toy.

    Toys, gear, and enrichment to prevent play aggression

    - Toys, gear, and enrichment to prevent play aggression.jpg

    The quickest fix is smart gear plus a plan. Use wand or fishing-pole toys, plush prey, lightweight balls, puzzle feeders (a toy that makes your cat work for food), and interactive electronic chase toys to give teeth and claws a safe target instead of your hands. Wand toys let your cat stalk, pounce, and bite a safe lure while you stay out of reach. Puzzle feeders turn mealtimes into a little hunt, which helps burn energy and calm that predatory buzz.

    Set up enrichment with vertical outlets like cat trees and window perches, short regular play sessions, and a rotating toy stash so things stay exciting. The best toys mimic prey movement and reward the capture: wand toys for shared hunts, plush mice for solo shaking, and lightweight balls for quick chases. Supervise electronic chase toys at first and replace worn parts. Small bits can become choking hazards, so keep an eye on them.

    Toy Type Best use Safety notes
    Wand toy Redirect predatory drive during interactive play Keep hands away from the lure; check attachments regularly; see DIY replacement attachments for teaser wands for fixes
    Plush prey Solo practice for biting and shaking Replace when seams tear; avoid tiny removable parts like beads or bells
    Ball (lightweight) High-speed chases and pouncing Watch for wear; pick a size that won’t be swallowed
    Puzzle feeder Food-foraging and slow-feeding Wash regularly; match difficulty to your cat’s skill
    Interactive electronic toy Active chase when you’re busy Supervise early; remove if it overstimulates or malfunctions
    • Rotate toys every 3 to 5 days to keep novelty fresh.
    • Keep a hidden stockpile and swap one or two items at a time.
    • Store small bits out of reach when not in use.
    • Put toys on vertical spots and near sunny windows for extra appeal.
    • Carry a small plush or ball for instant redirection when ambushed.

    Nail caps can be a short-term protective tool. They are tiny soft covers glued onto claws (they help blunt scratches). Read practical pros and cons at do cat nail caps work and check with your vet before fitting. Trimming claws during retraining also cuts damage. Have a pro show you where the quick is (the blood vessel inside the nail) and trim just a tiny bit at a time, pairing clips with treats so sessions stay calm and positive. Worth every paw-print.

    Managing overstimulation and petting intolerance tied to play aggression

    - Managing overstimulation and petting intolerance tied to play aggression.jpg

    Overstimulation is when a calm petting moment suddenly becomes a quick bite or a swat. It often happens after long strokes, rubbing sensitive spots like the belly, or touching the base of the tail. Your cat isn’t being spiteful. They’re practicing self-defense. Ever notice the skin ripple under your hand right before a nip? That’s a clue.

    Look for tiny signals: a flicking tail, ears turning back, a hardening body, a fixed stare, or piloerection (fur standing up). Those little signs mean, “Okay, that’s enough.” Paying attention to them is the fastest way to avoid a surprise bite.

    Try a stepwise desensitization plan so touch feels safe and predictable. Keep sessions really short so your cat learns they’re in control. Think of it like teaching your kitty to say yes to petting, one tiny step at a time.

    1. Offer one very short touch, one to two seconds, in a spot your cat likes.
    2. Stop right away and reward with a treat or calm praise.
    3. Repeat several times a day. Add another second only when your cat stays relaxed.
    4. Pair touches with high-value treats so contact becomes a clear good thing.
    5. If any warning sign appears, end the touch and walk away for a minute.
    6. Do short handling sessions regularly instead of one long session.

    If you see tail lashing, skin ripples, piloerection (fur standing up), or a body that goes hard, stop immediately. Don’t yank your hand away or yell, because that can make the fear or anger worse. Pause quietly, pull your hand back slowly, and then redirect to a wand toy (like a fishing rod for cats) or a food puzzle so biting doesn’t get rewarded with attention.

    A tiny tip: for busy days, try a two-minute handling drill before you leave the house. Toss a treat after each touch and your cat gets safe play plus a snack. Worth every paw-print.

    I once watched Luna go from blissed-out purrs to a lightning pounce when I overstroked her belly, so now I always watch for the whisker-twitch. You’ll get the hang of it, and your cat will feel safer, which means fewer surprise bites and more cuddle time.

    Special cases: kittens, adult cats, and multi-cat household play aggression

    - Special cases kittens, adult cats, and multi-cat household play aggression.jpg

    Kittens need social play early on to learn bite inhibition (figuring out how hard is too hard). Keep play short, supervised, and never use your hands as the toy , use a wand or plush instead. These tiny lessons help a kitten grow into a polite, playful cat. See the Toys section for safe tools and examples.

    Adult cats can show play aggression for a few reasons: they missed those kitten lessons, they’re stressed, or they could be in pain. If a cat suddenly starts biting or pouncing more, or if predictable play and calm spots don’t help, follow the When to consult guidance for a medical check and a behavior plan from a vet or certified behaviorist (a behavior expert with formal training).

    In multi-cat homes, tension drops when every cat has their own stuff and when playtime is staggered (playtimes scheduled so cats take turns). Slow, structured intros and supervised group play cut down on competitive chasing. If patterns are tough to break, go back to the Training and When to consult sections for step-by-step help.

    Kittens: supervised socialization checklist

    A short list for that critical early window:

    • Let littermates or other friendly kittens play together when you can.
    • Keep human hands out of play; use a wand or plush toy instead.
    • Limit play to quick, prey-like bursts so kittens don’t over-arouse.
    • Start wand training early using items listed in the Toys section.
    • Reward calm behavior with treats or gentle praise.
    • Teach “give” or “drop” with a treat swap , say “Drop,” then hand the treat.

    Multi-cat introductions and play management

    Start slow and let cats set the pace:

    1. Set up a quiet sanctuary room for the newcomer.
    2. Do scent swaps , rub bedding and swap carriers so they learn each other’s smell.
    3. Run short, supervised play sessions with separate toys so nobody feels chased.
    4. Provide separate food, litter, and resting spots for each cat.
    5. Move to joint sessions only after you see more calm signals.

    Red flags for rehoming or professional help

    Get help if you notice any of these:

    • Bites that break skin or draw blood.
    • One cat avoids shared areas for days.
    • Aggression keeps escalating despite consistent management.
    • Sudden aggression that comes with limping, appetite loss, or other medical signs.

    When to consult a vet or certified behaviorist for play aggression

    - When to consult a vet or certified behaviorist for play aggression.jpg

    If your usually gentle cat suddenly gets more bitey, or biting ramps up quickly, get a medical check right away. Look for signs that something’s wrong: limping, hiding, a drop in appetite, changes in litter box habits (peeing or pooping differently), or bites that break the skin. If skin is broken, that’s urgent.

    Ask for a certified behaviorist (a pro trained in animal behavior) when you’ve tried consistent home strategies for a few weeks and the biting keeps getting worse or becomes a safety risk for people. Think of a behaviorist as a detective who uses records and video to spot triggers and patterns you might miss during one visit.

    Bring these items to the vet or behaviorist appointment:

    1. Video clips of incidents , several short examples showing approach, bite, and what happened right after.
    2. Incident log printouts with dates and times.
    3. Medical history and vaccination records (shots and past illnesses).
    4. A list of daily routines, feeding times, and the toys you use.
    5. Notes on what you already tried and how the cat reacted.
    6. Photos of any wounds or injuries.
    7. Current medication list and dosing schedule.
    Date/Time Trigger Behavior Response Outcome
    2025-06-14 07:30 Owner putting on shoes Quick pounce and bite to ankle Tossed plush toy; walked away Cat chased toy; owner uninjured
    2025-06-16 21:10 Petting on lower back Sudden bite to hand Stopped petting; removed hand slowly Cat hid for 10 minutes
    2025-06-18 12:45 Child running past Ambush and scratch Redirected with wand toy Child safe; cat engaged with toy
    2025-06-20 03:20 Sudden vocalizing in sleep Wake-up bite to owner Held still; turned on lamp Owner bitten; skin broken; vet called

    Film incidents in steady, well-lit video from a side angle so the cat and the person are both visible. Keep audio on to capture hisses, growls, or the sound of a yelp. Label each clip with date and time, and keep several short clips instead of one long file.

    When you summarize patterns for the vet or behaviorist, note time of day, common triggers, how long each episode lasted, what you did, and whether the cat returned to normal afterward. Bring your top three representative videos and the incident log so the pro can form a clear plan fast. Worth the effort.

    Troubleshooting and corrected owner mistakes with play aggression

    - Troubleshooting and corrected owner mistakes with play aggression.jpg

    Small, repeated owner mistakes add up. A few missed steps can mean scratched skin, a stressed cat, and slow progress. Your hands can end up feeling like chew toys and everyone gets frustrated.

    The good news: most fixes are cheap and quick. A steady routine, short daily training, and consistent toy use get results fast. Think of your cat’s hunting drive like a battery , short, focused bursts recharge them best. And yes, your hands stay intact.

    Owner mistakes checklist:

    • Using your hands as toys , Stop right away. Grab a wand or teaser and never let fingers become prey (see Toys).
    • Wrestling or roughhousing , End the session calmly. Offer a plush capture toy so your cat learns what’s okay to bite and hold (see Training).
    • Inconsistent play schedule , Pick two predictable 10 to 15 minute sessions each day. Cats thrive on routine and it helps channel that hunting energy (see Training).
    • Rewarding rough play with attention , If rough play gets attention, it’s reinforced. Withdraw attention briefly, then redirect to a favorite toy (see Training).
    • Yelling or physical punishment , Don’t. Stop interaction calmly, give a short quiet time-out, then reward calm behavior when it returns (see Training).
    • Leaving all toys out constantly , Keep novelty alive by rotating toys every few days. Out of sight is often back in play sooner.
    • Not recording incidents , Write down each event with date, what triggered it, and video if you can. Patterns jump out when you look at the log (see When to consult).
    • Overlong, high-arousal sessions , Shorten play bursts. Finish with a food puzzle so the last thing is a calm capture and a full belly (see Toys, Training).

    Worth every paw-print.

    Final Words

    Jump into action: this article gave a quick action plan, then covered causes, symptoms, training routines, toy and enrichment choices, overstimulation fixes, special-case tips, vet red flags, and troubleshooting.

    Start today – stop hand-play, carry a small toy for instant redirection, run two 10-15 minute interactive sessions ending with a meal or puzzle feeder, add a daily foraging puzzle, and log any bites that break skin.

    With steady practice and the right tools, rough play calms down. For more on cat play aggression: causes and solutions, read the detailed sections and seek help if needed, and you’ll be feline fine.

    FAQ

    Frequently Asked Questions

    What causes play aggression in cats and how do I fix it?

    Play aggression in cats is usually caused by poor bite inhibition from kitten socialization, a strong predatory drive, boredom, or medical issues like hyperesthesia (heightened skin sensitivity). Fix it with consistent interactive play, safe toys, redirection, and vet checks.

    How do I stop play aggression toward humans?

    Stop play aggression toward humans by stopping hand-play, using a wand toy to redirect, scheduling two short play sessions daily, rewarding calm behavior, carrying a small toy for instant redirection, and contacting your vet if bites break skin.

    How do I stop play aggression between cats or manage aggression toward other cats?

    Stop play aggression between cats by giving separate toys and resources, supervising play, staggering sessions, adding vertical spaces, doing gradual introductions, and asking a vet or behaviorist if fights persist or escalate.

    Are male and female cats different in play aggression causes and solutions?

    Male and female cats show mostly similar play aggression causes—socialization, predatory drive, boredom, or pain. Solutions are the same: structured play, enrichment, medical checks, and neutering/spaying when advised by your vet.

    How can I get a cat out of play mode quickly?

    Get a cat out of play mode quickly by redirecting to a favorite toy, pausing interaction, offering a food puzzle feeder, dimming lights, or leaving a quiet room so the cat can calm down on their own.

    What is the 3-3-3 rule for cats?

    The 3-3-3 rule for cats means three days in a safe room to settle, three weeks to explore and bond with the household, and three months to fully adapt to a new home or routine.

    When should I see a vet or behaviorist for play aggression?

    See a vet or behaviorist if play aggression starts suddenly, escalates, bites break skin, there are appetite or mobility changes, or home strategies fail. Bring videos, an incident log, and medical history to appointments.

    Related Articles

  • Best Cat Food for Indoor Cats: Top Picks

    Best Cat Food for Indoor Cats: Top Picks

    Wow, nearly 60 percent of indoor cats are overweight. A lot of the time, the food in their bowl is part of the problem.

    Indoor cats move less, so they need different food. Look for lower-calorie recipes (kcal means kilocalories), smaller kibble (dry crunchy pellets), and added fiber (plant stuff that helps them feel full and keeps digestion happy). It’s all about giving the same cat less work to burn off.

    Think of picking food like trading a hiking pack for pajamas, same body, less effort. Ever watched your kitty loaf on the couch and wonder if that bowl could help? This post points out top indoor formulas and gives clear tips on choosing protein-first ingredients (meat listed first), adding moisture (more wet food or a splash of water), and setting the right portion sizes so your cat stays lean, hydrated, and purring.

    Worth every paw-print.

    Best Cat Food for Indoor Cats: Top Picks

    - Top quick picks and fast checklist to choose indoor cat food.jpg

    • Top quick pick (Best overall) – Hill's Science Diet Indoor Adult , a balanced choice that helps control weight and smells good to picky noses.
    • Best dry for weight control – Royal Canin Indoor Adult Dry , smaller kibble and a formula made to slow calorie intake.
    • Best wet for hydration – Hill's Science Diet Adult Indoor Wet (Ocean Fish Entrée) , extra moisture for urinary health and happy slurps.
    • Best budget pick – Purina Pro Plan Indoor Care Dry , solid nutrition that won’t break the bank.

    Indoor formulas matter because most indoor cats move less and need fewer calories. Nearly 60 percent of house cats are overweight, so lower calorie density and added fiber help keep weight and digestion on track. Think of it like picking clothes for a quiet day at home instead of a long hike.

    1. Calories and portion guidance , Check the kcal per cup or can (kcal means kilocalories, the same energy number you see on human food) and match it to your cat’s target daily calories. Use body condition as your guide , not just weight, but how your cat feels under your hands. Smaller kibbles and reduced calorie formulas help control portions without leaving your cat starving.

    2. Animal-first protein , Look for a named meat as the first ingredient, like chicken, turkey, fish, or beef. Real animal protein helps keep muscle mass; avoid vague labels like meat by-product (that means leftover animal parts). Think of it like choosing whole chicken over mystery meatloaf.

    3. Moisture strategy , Pick a plan: mixed feeding (kibble plus wet) or wet-first meals to raise hydration. Wet food and broths add water and support urinary health, and toppers are an easy trick to boost moisture on busy days. Ever watched your cat’s whiskers twitch as they lap up a saucer of wet food? Pretty cute.

    AAFCO-complete labeling is required for basic nutrition (AAFCO means Association of American Feed Control Officials, the group that sets pet food standards). If your cat has weight, urinary, or digestive issues, talk to your vet and check the Feeding Guidelines section for portion math and the Special Needs section for therapeutic diets. Worth every paw-print.

    Best Cat Food for Indoor Cats: Top Picks

    - Top picks best cat food for indoor cats (ranked dry and wet choices).jpg

    We picked these foods to help indoor cats stay trim and healthy. Our main checks were weight control, hairball transit (how easily swallowed fur moves through the gut), urinary support (helps bladder and urinary tract health), palatability (how tasty it is), and where ingredients come from. Pretty simple – low-activity kitties need food that keeps calories in check and bodies working right.

    Look for life-stage and special-needs versions , kitten, adult, senior, or formulas that focus on urinary or GI care. If your cat has medical needs, don’t switch to a therapeutic or prescription diet without talking to your vet. Also check AAFCO (Association of American Feed Control Officials) statements on the label – they tell you if a food meets basic nutrition standards.

    Shopping tips: try sample packs or subscription trials so picky kitties don’t end up wasting a bowl. Ever seen Luna do a sniff-test? She checked one pouch three days in a row, then finished it – keeper. Check kibble size for your cat’s mouth and watch appetite the first week – appetite tells you a lot. If hydration is a concern, stir in a little low-sodium broth (chicken or beef broth with less salt) or add a daily wet-food serving for extra moisture.

    Rank Product (Brand + Formula) Type (Dry or Wet) Primary benefit(s) Best for Approx price per day
    Top Overall Hill’s Science Diet Adult Indoor Dry Weight control, balanced nutrition Most indoor adult cats $1.20/day
    Best Dry for Weight Royal Canin Indoor Adult Dry Lower calorie density, smaller kibble Weight management $1.30/day
    Best Wet for Hydration Hill’s Science Diet Adult Indoor (Ocean Fish Entrée) Wet High moisture for urinary support Hydration boost $2.00/day
    Best for Long Hair Royal Canin Indoor Long Hair Dry Fiber blend for hairball transit (helps move swallowed fur) Long-haired cats $1.40/day
    Best for Hairball Control Purina Pro Plan Indoor + Hairball Dry Natural fibers, prebiotics (food for good gut bacteria) Frequent hairballs $1.00/day
    Best Vet-Therapeutic Choice Hill’s Prescription Diet c/d Multicare (vet-prescription) Dry/Wet Urinary support, clinically tested Urinary disease – vet prescribed $3.00/day
    Best Ethical/Sourced Option Open Farm Rustic Blend (Chicken & Salmon) Dry Humanely raised protein (meat from animals raised with better welfare), broth for moisture Ingredient-conscious buyers $1.80/day
    Best Value Purina Pro Plan Indoor Care Dry Balanced nutrition at lower cost Budget-minded households $0.80/day

    The "Best for" tags point you to likely matches for common needs – weight, hairball help, hydration, and so on. For medical or prescription diets, check the AAFCO statement and talk with your veterinarian before switching formulas. Worth every paw-print.

    Best dry cat food for indoor cats: nutrient profile, kibble factors and ingredient guidance

    - Best dry cat food for indoor cats nutrient profile, kibble factors and ingredient guidance.jpg

    Dry food is a big help for busy homes. It stores well, portions easily, and that satisfying crunch can help scrape tartar (tartar is hardened plaque) off teeth. Pick kibble when you need steady meal control and your cat actually eats dry food without gagging on fur. For low-activity indoor cats, choose formulas that keep calories in check so your couch potato doesn’t pack on pounds.

    Key nutrients for indoor dry food

    Look for a named animal protein first on the ingredient list , chicken, turkey, fish, or beef , since cats need meat to keep muscle. Fiber matters too. Soluble fiber (holds water and feeds good gut bugs) and insoluble fiber (adds bulk to help move hair and stool) both help with poops and hairball transit.

    Make sure the food includes omega-3s like EPA and DHA (types of omega-3 fats that help skin, coat, and general inflammation). Taurine is non-negotiable , it’s an amino acid critical for heart and eye health. L-carnitine (a nutrient that helps the body use fat for energy) is handy in weight-control formulas. Finally, check the calories per cup , moderate calorie density makes portion control much easier.

    Ever watched your cat’s whiskers twitch as a kibble rolls across the floor? That little play moment is great, but keep track of portions, especially if your kitty mostly lounges indoors.

    Ingredients to avoid or keep low

    Avoid vague terms like meat by-product (this usually means leftover animal parts that aren’t clearly named). Also be wary of long lists of unnamed “grains” that dominate the recipe. Big carb loads add calories without real feline nutrition, so steer clear of obvious high sugars or starches.

    Skip artificial preservatives when you can. Look for natural options like mixed tocopherols (a form of vitamin E used as a preservative). And if a label reads like a mystery novel, I’d pass , your cat deserves clear, simple ingredients.

    Refer to AAFCO (Association of American Feed Control Officials) standards and your veterinarian in the Top quick picks and fast checklist section for label rules and professional advice before making medical diet changes.

    Best wet cat food for indoor cats: how to use wet options and feeding tactics

    - Best wet cat food for indoor cats how to use wet options and feeding tactics.jpg

    Wet food is the quickest way to boost your cat’s daily water intake, because canned and pouch foods are mostly moisture. Count wet calories by reading the label for kcal (kilocalories) per can or pouch, then subtract that number from your cat’s daily kcal target. For example, a 3-oz pouch often runs about 75 to 100 kcal; if your cat’s goal is 200 kcal a day, that pouch already takes a big bite out of the total. Quick math keeps you from overfeeding, and your cat’s whiskers will thank you.

    Meal frequency depends on your cat’s routine and appetite. One wet meal a day works for picky eaters who gobble a single meal; split the wet into two small meals if your kitty prefers to graze. After opening, refrigerate leftovers and use within 48 hours, and toss any wet food left out at room temperature after 1 to 2 hours (less time if it’s warm). If you’ve got multiple cats, serve wet food in separate bowls so the shy one still gets a fair share.

    Mixing wet and dry is easier than it sounds: pick a daily kcal target, subtract the wet kcal, and feed the rest as kibble. Example mixes, using a dry food at about 350 kcal per cup: 160 kcal/day , one 80 kcal pouch + about 0.23 cup dry; 240 kcal/day , one 80 kcal pouch + about 0.46 cup dry. Remember, kibble kcal can vary a lot, so check the label and tweak the math for your brand.

    For cats with urinary, weight, or gut issues, follow the AAFCO & veterinary callout in the Top quick picks and fast checklist section (AAFCO = Association of American Feed Control Officials), and see the Comparing section for full wet vs dry trade-offs. If you’re unsure, ask your vet , it’s worth getting the mix just right. Worth every paw-print.

    Feeding guidelines: portion control, calorie counting and step-by-step transition plans for indoor cats

    - Feeding guidelines portion control, calorie counting and step-by-step transition plans for indoor cats.jpg

    Indoor cats usually move less, so they gain weight more easily. Almost 60 percent of companion cats are overweight. That’s why calorie counting and portion control help keep your cat healthy and their coat shiny. Use a simple body condition check , feel for the ribs and look for a waist , and aim for a daily kcal (kilocalories) target to keep weight stable.

    Transitioning to a new food? Go slow and watch your cat.

    1. Day 1-2: 25% new food, 75% old food.
    2. Day 3-4: 50% new, 50% old.
    3. Day 5-6: 75% new, 25% old.
    4. Day 7: switch to 100% new food if stool and appetite are normal.
    5. Check stool and appetite every day , small changes are your early clues.
    6. If vomiting or diarrhea start, slow down or pause the switch; go back one step and move more slowly.
    7. For prescription or therapeutic diets (vet-prescribed food for health issues), follow the exact timeline your veterinarian gives and any AAFCO (Association of American Feed Control Officials) guidance.
    Adult weight Target kcal/day Dry food (approx) Wet pouch + dry combo
    6 lb 160–180 kcal 0.4–0.5 cup dry (350–400 kcal per cup) One 75–100 kcal pouch + 0.2–0.3 cup dry
    8 lb 200–240 kcal 0.5–0.7 cup dry One 75–100 kcal pouch + 0.25–0.47 cup dry
    10 lb 240–300 kcal 0.6–0.85 cup dry One 75–100 kcal pouch + 0.4–0.64 cup dry
    12 lb 280–340 kcal 0.7–1.0 cup dry One 75–100 kcal pouch + 0.45–0.76 cup dry

    Use a measuring scoop or kitchen scale and an online calorie calculator to keep portions accurate. Check your cat’s body condition regularly and adjust portions if you see weight gain or loss. For weight loss plans, urinary issues, or digestive problems, check with your vet and follow AAFCO and veterinary guidance before switching to a therapeutic formula.

    Ever watched your cat pounce after a toy and think, "Yep, that burned some calories"? Toss an unbreakable ball or quick teaser session before you head out for ten minutes of safe play. Worth every paw-print.

    Special needs: hairball control, urinary health, allergies and life-stage indoor cat diets

    - Special needs hairball control, urinary health, allergies and life-stage indoor cat diets.jpg

    Hairball-control diets help move fur through the gut by adding specific fibers and prebiotics (food for good gut bacteria). Look for mixes that contain both soluble fiber (holds water and feeds helpful microbes) and insoluble fiber (adds bulk to speed things along). These foods can cut down on that gross gagging sound and the little fur pellets in the litter box. If hairballs become frequent, cause retching, or your cat seems tired or has trouble passing stool, see the vet , persistent problems aren’t just grooming drama.

    Urinary-health formulas for indoor cats focus on adding moisture and balancing minerals to keep the bladder happy. Increasing daily water with wet food, low-sodium broths, or a mixed-feeding plan dilutes urine and lowers the chance of crystals forming. Controlled mineral profiles (lower magnesium and balanced levels of other minerals) can help reduce irritation. Watch for urgent signs: straining, frequent trips to the litter, crying while peeing, or blood in the box , those need quick veterinary care and a diet review, plus checking AAFCO (Association of American Feed Control Officials) guidance and your vet’s advice.

    For suspected food reactions, try limited-ingredient diets or hydrolyzed protein formulas (protein broken into tiny pieces so the immune system is less likely to react). The cleanest way to find a trigger is an elimination diet done under vet supervision. Don’t DIY a strict elimination diet , nutrient gaps or mistakes can hide the real cause and make results confusing.

    Life-stage feeds matter for indoor cats. Kitten food is higher in calories and growth nutrients for busy, growing kittens. Adult indoor formulas help control calories and add fiber to manage weight. Senior indoor diets often adjust protein and fluids and include joint support and kidney-friendly nutrients. Check life-stage labels and go back to the Top picks and Feeding Guidelines sections for exact amounts and product matches. Worth every paw-print.

    Comparing wet vs dry: consolidated pros/cons, mixed-feeding strategies and enrichment

    - Comparing wet vs dry consolidated proscons, mixed-feeding strategies and enrichment.jpg

    Wet food is great for indoor cats because it adds water to their diet. Most cans and pouches are mostly water, so they help urinary health and encourage lapping at the bowl, your cat might even make that tiny, happy slurping sound. It’s especially nice when your kitty isn’t a big drinker.

    Dry food is more calorie-dense and handy for measured grazing, so the portion math matters to avoid weight gain. Kibble is convenient for day-long access, but a little goes a long way, so check the Feeding Guidelines calorie table for exact numbers and the Best wet cat food section for notes on formats and servings.

    For mixed feeding, keep it simple and predictable. Try a wet-first plan where one wet meal provides about 25 to 40% of daily kcal (Calories) and kibble fills the rest. For example, if you aim for wet-first 30% kcal (Calories), serve a wet meal that supplies about 30% of the day’s calories, then offer the remaining calories as measured kibble. For precise kcal math and dosing, see the Feeding Guidelines calorie table and the Best wet cat food section.

    Make meals active to slow eating and add fun. Puzzle feeders, slow-feed bowls, timed portion dispensers, and a quick play session before mealtime all help, that content has been moved into the Feeding Guidelines under the new "Make meals active" subheading. Tossing a toy for two minutes before you serve food gives your cat a win and helps portion control. Ever watched your cat chase shadows and then eat like a champ? It’s the best.

    For step-by-step transitions, how to calculate kcal (Calories), stool and weight monitoring, refrigerating leftovers, and other practical tips, check the Feeding Guidelines and the Best wet cat food section. Worth every paw-print.

    Wet food Dry food
    Boosts hydration; good for urinary health Calorie-dense; convenient for grazing
    Usually sold in cans or pouches (soft sealed packet) Easy to measure and leave out safely if portioned
    Best as part of mixed feeding for balance Watch portions to prevent weight gain

    - Price, availability and vet-recommended indoor cat food options.jpg

    Wet food usually costs more per kcal (kilocalorie, the food “calorie” you see on labels) than dry. It’s richer, and your cat often smells that right away, ever watch a bowl of wet food get attacked like it’s treasure? So yes, expect a higher price for that extra moisture and flavor.

    Foods that list named, humanely raised proteins or use specialty sourcing will often carry a bigger sticker price. Ethical sourcing (extra checks on animal welfare or where the meat came from) raises supplier costs, and that shows up at checkout, worth it to some, not to others.

    Where you buy matters. Local retailer markups (the extra a store adds) can change the final cost, and clinically tested formulas (recipes checked for safety and results) or vet-prescribed therapeutic diets (medical foods for issues like kidney disease or weight control) usually cost more. Always check with your veterinarian before switching, your vet knows your cat’s needs, seriously.

    Worth every paw-print!

    • Compare cost easily: see Feeding Guidelines for the boxed kcal-per-cost how-to (calories per dollar) and use Top Picks for medical-diet options.
    • Try sample packs or short subscription trials so a picky cat doesn’t leave you with a giant bag you can’t use, save yourself the waste and the sighs.
    • If your cat needs a therapeutic or prescription diet, follow the Top Picks and Special Needs callouts and talk with your vet; brand names alone shouldn’t decide a medical feeding plan.

    We jumped right into four fast picks to speed your choice, then ranked top dry and wet formulas and laid out what to watch for in kibble and canned food.

    We covered feeding guides with calorie targets, a safe 7-step transition, and special-needs notes for hairballs, urinary care, and allergies. Mixed-feeding tips and enrichment ideas help keep multi-cat homes active (ever seen a cat go for a puzzle feeder?).

    Use the checklist, calories, animal-first protein, moisture plan, to pick the best cat food for indoor cats and keep playtime lively and furniture intact.

    FAQ

    Frequently Asked Questions

    What is the healthiest cat food for an indoor cat?

    The healthiest cat food for an indoor cat focuses on lower calorie density, high animal protein (meat-first ingredient), moderate fiber for weight and hairball control, and a moisture plan like mixed feeding.

    What is the best dry cat food for indoor cats?

    The best dry cat food for indoor cats is a reduced-calorie kibble with animal protein first, added soluble fiber (helps digestion), and kibble sized for chewing and tartar control.

    What is the best wet cat food for indoor cats?

    The best wet cat food for indoor cats raises moisture intake, lists animal protein first (meat-forward), supports urinary hydration, and fits calorie targets when used as full meals or mixed feeding.

    What is the best cat food for indoor kittens?

    The best cat food for indoor kittens is a labeled kitten formula with higher calories, protein, calcium and DHA (brain-supporting omega-3) to fuel growth and healthy development.

    What cat food do vets recommend and what is the #1 best cat food?

    Vets recommend science-backed formulas like Hill’s Science Diet, Royal Canin, and Purina Pro Plan; the #1 choice depends on your cat’s weight, urinary risk and taste.

    What are the top 5 healthiest cat food brands?

    Top 5 healthiest cat food brands often named are Hill’s, Royal Canin, Purina Pro Plan, Orijen and Ziwi Peak; pick formulas that list animal protein first and sensible calories.

    What are some cat food brands to avoid?

    Some cat food brands to avoid are those with vague ingredient lists, unnamed meat sources, heavy fillers or artificial preservatives; check recalls and label specifics before buying.

    What is the best cat food for indoor cats with sensitive stomachs?

    The best cat food for indoor cats with sensitive stomachs is a limited-ingredient or hydrolyzed protein formula (broken-down protein to reduce reactions) with gentle fiber and probiotics.

    Where can I find Reddit or community opinions about best indoor cat food?

    Reddit recommendations for best indoor cat food offer owner-tested tips and palatability reports; use them for ideas, then match suggestions to nutrition labels and your cat’s needs.

    Related Articles

  • What Colors Can Cats See: Blues, Greens, Reds

    What Colors Can Cats See: Blues, Greens, Reds

    Think red toys are irresistible to cats? Think again. I used to buy bright red balls for my cat, thinking she'd leap for them. Ever watched her whiskers twitch at a rolling toy you thought was bold? She barely glanced up, um, true story.

    Cats actually see blues and bluish-greens best. Reds, lots of oranges, and browns often look muted or gray to them. That’s because red can be less saturated (how bright and pure a color looks) for feline eyes, so colors feel softer. Cats rely more on brightness (how light or dark a color is), contrast (the difference between light and dark), and motion. Movement and sharp light-dark changes catch their eye.

    So pick toys in blue, teal, or yellow, and go for high-contrast spots or stripes so your kitty actually notices them. Add motion, a wobble, a roll, or a feather on a string, and you’ll get pounces, flips, and full-on zoomies. Worth every paw-print.

    Quick answer: colors visible to cats

    - Quick answer colors visible to cats (immediate lede).jpg

    Short version: cats best see blues, bluish-greens and some yellows. Reds and many oranges or browns look muted (less bright) or gray to them, so a red toy can read as a dull shape instead of a pop of color.

    Cats’ color world is less saturated (less intense color). That means brightness, contrast and motion matter more than hue (the actual color). Ever watched your kitty’s whiskers twitch as a ball rolls across the carpet? It’s the movement and the light-dark jump that get them every time.

    Practical tip: pick blue, teal or yellow toys, collars, and markers, those show up reliably. Use strong contrast (clear difference between light and dark) so the item stands out, like a bright blue toy on a beige rug, rather than relying on red or brown. Worth every paw-print.

    How cat color vision works: cones, rods and reflective layers

    - How cat color vision works cones, rods and reflective layers (centralized physiology + citations).jpg

    Cats are dichromats, which means they have two working cone types instead of the three most humans have. That two-cone setup narrows the range of hues they can tell apart. I put the more technical notes and sources in the next bit if you want the nitty-gritty.

    Compared with people, cats have roughly ten times fewer cone cells (cones are the color-detecting photoreceptors) and a much higher rod-to-cone ratio. Rods (the light-and-motion receptors) help them see in dim light, and their pupils open wide to let in more light. They also have a reflective retinal layer called the tapetum lucidum (a mirror-like layer behind the retina that bounces light back through the eye) and a field of view of about 200 degrees with useful binocular overlap. All this makes them excellent at spotting movement and contrast, but not great at rich color or sharp long-distance detail [1–4].

    Perceptually, that anatomy creates a world with softer colors and stronger focus on brightness, contrast and motion. Your cat sees dim shapes and flickers much better than subtle color shifts. Up close, colors can blur or lose their vividness faster than they do for human eyes.

    Cones and wavelength sensitivity

    Cats have two cone types: a short-wavelength cone (blue-sensitive) and a second cone shifted toward green-yellow. Exact peak sensitivities and how much the two overlap are still debated by scientists. Reds and many oranges weakly stimulate these cones, so those colors often look washed out or gray to a cat. Think of it like turning down the saturation on a photo.

    Rods, tapetum lucidum and low-light vision

    Rods dominate the feline retina, making them superb at detecting motion in low light. The tapetum lucidum (that reflective layer) gives photons a second chance to be caught by the retina, and big flexible pupils fine-tune how much light gets in. Together these parts let cats hunt at dusk and dawn, they see well when it’s dim, but with less color fidelity and lower distance sharpness than we do. Ever watch your cat track a tiny moth at dusk? That’s the combo working.

    Colors cats see best , concise color-by-color notes

    - Colors cats see best  concise color-by-color notes and quick reference table.jpg

    Quick perceptual notes below (see the physiology section for anatomy and citations).

    • Blue – This one pops for most cats. It looks clear and distinct, so blue toys and markers are a safe bet. Your kitty will likely notice a blue ball from across the room.
    • Blue-green / Teal – Often reads like blue to a cat, just with a slightly different brightness. Great for indoor toys when you want something that still stands out. (Example: A teal ball will look bright against carpet, much like a blue one.)
    • Green – Cats see it, but it usually looks more muted than blue. Think soft green, not neon. Good, but not the top attention-grabber.
    • Yellow – Shows up better in strong light. Use yellow for daytime play when sunlight or bright lamps make it brighter.
    • Purple – Often appears blue to a cat, so purple toys usually read as blue rather than a separate hue. (That purple mouse? Your cat might file it under blue.)
    • Red – Tends to look dark, dull, or grayish instead of bright red. Don’t rely on red alone if you need high visibility.
    • Pink – Frequently shifts toward gray or a greenish-gray in feline vision. Focus more on contrast with the background than the pink itself. (A pink toy on a light rug may vanish; try dark trim so it stands out.)
    • Brown / Gray / White – These neutrals are mostly decided by contrast and brightness, not color. High-contrast pairings make them easy to spot.
    Color (human) How it likely appears to cats Practical note for owners
    Blue Clear, distinct Reliable top pick for toys
    Blue-green / Teal Blue-like with different brightness Good indoor visibility
    Green Muted green tone Less vivid than blue
    Yellow Visible in bright light Use for daytime play
    Purple Usually reads as blue Pick blue for clarity
    Red Muted, dark, or grayish Avoid relying on red for visibility
    Pink Shifts toward gray/greenish-gray Prioritize contrast over hue
    Brown / Gray / White Neutrals where contrast rules Pair with contrasting backgrounds

    Cat vision vs human and dog vision: concise comparative points (refer to physiology)

    - Cat vision vs human and dog vision concise comparative points (refer to physiology).jpg

    This is a short species comparison. For anatomy and citation details, see How cat color vision works.
    Quick example: a toy that looks crisp to you across the room may look soft to a cat at 6 meters, so motion matters. Ever watched a cat ignore a bright toy until it twitches? Yep.

    1. Visual acuity / distance (visual acuity = how sharp details look): cats see clearly up to about 6 m (20 ft). Humans see much farther, roughly 30–60 m (100–200 ft). So tiny patterns or fine print that you notice from across the room will blur for a cat. (See How cat color vision works for citation details.)

    2. Field of view differences (field of view = how wide each eye can see): cats about 200°, dogs about 240°, humans about 180°. That wider sweep helps dogs spot things to the side, while cats keep a balance between forward focus and peripheral awareness for stalking.

    3. Low-light performance: cats pick out shapes and movement in much dimmer light because their retinas have lots of rods (rods = light-sensitive cells). They also often have a tapetum lucidum (tapetum lucidum = a reflective layer that boosts low-light vision), which gives them an edge at dawn and dusk. Numbers and test details are in the physiology section.

    4. Motion detection and hunting specializations: cats are tuned to fast motion and depth cues for pouncing. So a small, moving toy will beat a faint color contrast every time. Think fishing-rod play: a quick twitch, a satisfying thud, and they’re hooked.

    5. Dogs vs cats: both are dichromats (dichromat = two cone types for color), so their hue range is limited compared with humans. But contrast, field of view, and acuity differ enough that a toy that “reads” for a dog may look different to a cat. In short, color alone isn’t the full story. (See How cat color vision works for citation details.)

    Practical takeaway: pick toys and collars that prioritize motion and strong contrast more than subtle color shades. For color specifics and more numbers, see Colors cats see best and How cat color vision works. Worth every paw-print.

    Choosing toys, collars and rooms by what cats actually see (actionable guidance)

    - Choosing toys, collars and rooms by what cats actually see (actionable guidance).jpg

    See the Quick answer for a short note on which hues cats see best. See the physiology section for the why. No need to repeat that here.

    Top toy color picks

    • Blue , shows up well against most carpets and couches, so your cat can follow it more easily.
    • Teal / blue-green , a great middle ground that often pops indoors.
    • Yellow , really pops in bright light, so bring it out for sunny play.
    • High-contrast patterns (dark and light) , bold contrast helps cats spot things faster than soft, subtle shades.
    • Reflective / metallic accents (shiny bits that bounce back light) , useful on outdoor collars and for low-light spotting.

    Practical setup and selection tips

    • Motion matters more than color. Cats chase movement first, so use wand toys and automatic movers. A little twitch wins every time. Ever watched your cat lock on and zoom after a wobble? Yeah, that.
    • Add texture and sound. Toys with bumps, crinkles, or small bells give touch and noise cues when color is hard to see. It’s easier for a cat to find a toy that rustles under a couch than one that just sits there.
    • Use green or blue laser pointers when color is important. Keep sessions short and never shine lasers in the eyes. Point at the floor or wall, not the eyes.
    • Pick reflective, high-contrast collars for outdoor visibility. Plain red or orange can blend into leaves and grass, so go shiny or bold for safety.
    • Brighten the play area. A little extra light makes contrast clearer and helps cats spot toys faster. Natural light is great, but even a lamp works.
    • Rotate toys and change how they move. New motion tricks can make an old toy suddenly irresistible. Toss it, drag it, hide it for a minute, then bring it back. Your cat will pounce.

    Safety and upkeep
    Keep toys in good shape. Fix or replace frayed bits that could shed stuffing or small pieces. Save money by keeping spare parts for teaser wands (a stick with feathers or toys on a string). For DIY replacement attachments for teaser wands see https://titanclaws.com/diy-replacement-attachments-for-teaser-wands/

    Worth every paw-print.

    How to test and observe what colors your cat sees

    - How to test and observe what colors your cat sees (practical home methods and vet triggers).jpg

    Quick answer: cats see blues and yellows best; reds often look dull or gray to them. Think of their color sense as similar to a person with red-green color blindness , they still see color, just a narrower palette.

    If you try this at home, make sure scent, shape, brightness and movement are the same so color is the only thing your cat can use to choose.

    Simple home observation method

    Pick two small objects that are identical in size, shape and material, and change only the color , say two caps or two disks, one blue and one red. Wash them or handle them with the same gloves so scent doesn't give your cat a clue. Place them on the floor under steady bright light, like daylight from a window or a desk lamp, so shadows don't confuse things.

    Randomize left and right each trial. Run 10 to 20 short trials spread over several days and record which item your cat approaches or touches first on a simple tally sheet. Keep each trial brief, just a few seconds, and don't move the items while your cat decides. If you give a treat for choices, hide the treat under identical covers so neither smell nor sight of the reward skews results.

    Want a training angle? Teach your cat to touch a colored target with a clicker or treat so they learn to touch on command. Then swap in a new color and see whether they generalize. Look for a consistent pattern across trials rather than one-off snatches. That tells you more than a lucky paw.

    Ever watched your cat hesitate, then suddenly pounce? Pay attention to whisker and ear movement , those little clues make it fun to read what they're choosing.

    When to consult a veterinarian

    If your cat suddenly stops tracking toys, bumps into furniture, hesitates on jumps, or you notice cloudy or strangely colored eyes, book a vet visit. Those signs can mean vision loss.

    A vet will do basic checks like the pupillary light reflex (does the pupil shrink when light hits it?) and the menace reflex (do they blink when something approaches their face?). They may refer you for tests such as electroretinography (ERG, which measures electrical responses from the retina – the light-sensing tissue) or an exam by a specialist to check for cataracts (clouding of the eye's lens), retinal disease, or other issues.

    Better safe than sorry. Your cat will thank you with more confident zoomies.

    Development, aging and vision disorders that change color perception in cats

    - Development, aging and vision disorders that change color perception in cats.jpg

    Kittens start out seeing the world in soft, fuzzy shapes. Their cone cells (the color-detecting cells in the eye) mature over weeks to months, and their sight sharpens as they learn to track and pounce. You’ll notice steady gains in tracking and playfulness , one day they’re pawing at a blur, the next they’re chasing a bright toy across the rug.

    Older cats can lose color clarity and detail as different eye issues set in. Common problems include cataracts (clouding of the lens), retinal degeneration (breakdown of the retina, the light-sensing layer at the back of the eye), and inherited retinal disorders (genetic eye diseases). Watch for signs like bumping into furniture or cloudy eyes. See the "When to consult a veterinarian" section for warning signs and diagnostic tests, and ask your vet about progressive changes , veterinary ophthalmology texts note cataracts and retinal disease are frequent causes of vision decline in senior cats (Maggs et al., 2018).

    For tips on toys, collars and room setups see "Choosing toys, collars and rooms." A few senior-friendly extras make a big difference day to day:

    • Non-slip rugs at favorite jumps and doorways to cut down on slips and missed landings.
    • Tactile bedding (soft textures your cat can nudge) and gentle ramps so they can move and rest with confidence.
    • Brighter, even lighting in hallways and main rooms so colors and contrasts read better for aging eyes.

    If vision loss seems to worsen over a few weeks, get a veterinary referral for specialized testing. It’s worth acting quickly , your cat will thank you with calmer, more confident walks around the house.

    What Colors Can Cats See: Blues, Greens, Reds

    - Common misconceptions about what colors cats can see.jpg

    Quick answer: cats are not seeing only black and white. They do notice color, especially blues and greens, but colors look different to them because of saturation (how vivid a color appears). Think of it like a photo with softer tones.

    That old idea that cats only see in grayscale is a myth. They do pick up hues, just not with the same brightness or richness we do. So a blue ball really can stand out to your kitty.

    No solid proof cats see infrared. Infrared (light we mostly feel as heat) is not known to be visible to cats, so toys sold as "infrared-visible" probably won't look magical to your cat. Caveat: lots of marketing claims, few reliable studies.

    Research on UV (ultraviolet, light just beyond violet) is still unsettled, so be cautious with big promises about UV-visible toys. Reds, in particular, often read as muted or grayish to cats, but that does not mean cats ignore them. They still register reds through brightness, contrast, and motion , which is usually what gets them to pounce.

    Practical tip: pick toys with blues, greens, or high-contrast patterns, and make them move. Motion and contrast beat color alone every time. Your cat’s whiskers will twitch. Worth keeping in mind when you shop for playtime.

    Final Words

    In the action, you learned that cats most clearly see blues, bluish-greens and some yellows, as reds and many oranges look muted or gray.

    We covered cones, rods and the tapetum (reflective layer behind the retina), color-by-color notes, comparisons, toy picks and common myths.

    Pick blue, teal or yellow toys, use high-contrast patterns, motion-first play and brighter light for seniors; repair parts when needed.

    Quick reminder on what colors can cats see, favor blue-green hues and contrast, then enjoy watching them pounce with joy.

    FAQ

    Frequently Asked Questions

    What colors can cats see?

    The colors cats can see are mainly blues, bluish-greens and some yellows; reds, many oranges and browns usually look muted or grayish to them.

    Which colors do cats see best and which are easiest for them to spot?

    The colors cats see best are blue and blue-green, followed by yellow; high-contrast patterns and motion make toys and collars easiest for them to spot.

    Can cats see purple, pink, orange or yellow?

    Cats see purple mostly as blue; pink and many light browns shift toward grayish tones, orange and red usually appear muted, while yellow stays somewhat recognizable.

    What colors can cats see in low light or in complete darkness?

    In low light, cats can still perceive colors but with reduced saturation; in complete darkness they can’t see, relying instead on rods (light-sensitive cells) and the tapetum lucidum (reflective layer behind the retina).

    What colors can dogs see compared to cats?

    The colors dogs can see are mainly blues and yellows due to dichromatic vision (two-color vision); cats are similar but detect bluish-greens better while dogs are less sensitive to green tones.

    What is the 3-3-3 rule for cats?

    The 3-3-3 rule for cats is three days to settle into one room, three weeks to explore the home comfortably, and three months to form a steady bond and feel secure.

    Related Articles

  • Managing chronic kidney disease in cats

    Managing chronic kidney disease in cats

    Could your cat’s extra naps and a little weight loss be early kidney disease?
    About 30% of cats over 10 have signs of chronic kidney problems, and nearly half of cats over 15 do too. That’s a lot of seniors, so it’s worth paying attention.

    What kidneys do and why it matters
    Kidneys (organs that filter blood, remove waste, and control water balance) help your kitty stay energized and healthy. When they slow down, your cat may drink more, pee more, feel a bit queasy, and lose weight. Those are small, slow changes you can easily miss if you’re not looking.

    How it often looks at home
    You might notice extra naps, a thinner waist when you scratch their sides, or a litter box habit change. Your cat’s whiskers might not twitch at their favorite toy like before. Ever watched a cat chase a sunspot and then give up mid-pounce? Yeah, that subtle tiredness can mean something’s up.

    Simple action plan to catch it early

    • Get screening. Ask your vet for a blood test and a urine test, and a blood pressure check. Also ask about SDMA (a blood marker that spots early kidney decline).
    • Track trends, not single readings. One test is a snapshot. Repeat tests over weeks or months give the real picture.
    • Work with your vet on a plan that fits your cat’s life and needs.

    How treatment usually looks

    • Diet tweaks: a kidney-friendly diet (food lower in phosphorus and balanced protein for kidneys) can help. It’s like switching to food that gives less work to tired kidneys.
    • Hydration boosters: wet food, a running water fountain, or adding water to meals keeps them topped up. For some cats, at-home subcutaneous fluids (fluids under the skin) help a lot, your vet can show you how.
    • Meds and support: veterinarians may use medicines for nausea, blood pressure, appetite, or phosphate control. These don’t cure, but they can slow decline and make your cat feel better.

    What to watch for at home

    • Drinking and peeing more.
    • Steady weight loss or loss of appetite.
    • Vomiting, bad breath, or a dull coat.
    • Changes in energy or litter box habits.
      Weigh your cat once a month if you can. Even a few ounces lost matters.

    When to call the vet
    Call sooner for sudden vomiting, bloody urine, collapse, or not eating for more than a day. For slow changes, schedule a vet visit and ask for the screening tests above. Early action gives you more good days with your pal.

    I once watched a cat named Luna go from sleepy to springy after early treatment, worth every worried minute. Keep an eye, ask the vet, and you’ll help your buddy stay feline fine.

    Immediate action plan and overview for cat owners

    - Immediate action plan and overview for cat owners.jpg

    About 30% of cats over 10 years old , and about half of cats over 15 , show signs of chronic kidney disease. Chronic kidney disease (CKD) means the kidneys slowly lose their ability to do their jobs, so your cat can’t balance fluids and electrolytes or clear toxins like it used to.

    If you spot extra thirst, peeing more, weight loss, vomiting, low appetite or more sleep and hiding, get vet screening sooner rather than later. Your vet will usually run bloodwork including SDMA (a sensitive early kidney marker), creatinine (a common waste-measure in blood), and a urinalysis (a urine test to check concentration and infections). SDMA is helpful early on; see the Diagnosis and IRIS (International Renal Interest Society) sections for numbers and interpretation.

    What do kidneys do? They keep your cat hydrated, control salt and acid balance, filter waste from the blood, and support hormones that help make red blood cells (so your cat doesn’t get anemic). When kidneys slow down, waste products build up and fluid balance tips, so cats drink more, pee more, feel nauseous, eat less and lose weight. You might notice tiny changes first , less jumping, sleeping in weird spots, or a subtle drop in play , before the obvious signs show up.

    Common triggers include age-related decline, accidental toxins like antifreeze (ethylene glycol), certain medications, bad or repeated kidney infections, and some inherited conditions. There’s no cure for CKD. But with early diagnosis and a tailored plan , think diet changes, hydration help, meds and regular monitoring , many cats enjoy a slower decline and comfortable, happy months to years. Worth every paw-print.

    Early signs and symptoms of chronic kidney disease in cats

    - Early signs and symptoms of chronic kidney disease in cats.jpg

    Cats are experts at hiding pain and illness. Tiny changes at home are often the first clue that something’s off, so pay attention to how your cat looks and acts, whiskers twitching, a slow paw at the food bowl, or a quieter purr than usual.

    Kidneys can work harder for a long time before they show trouble, so signs often appear after the organs have been compensating. That means shifts in drinking, eating, energy, and litterbox habits are usually the earliest hints. Ever watched your cat suddenly nap all day? That could be one of them.

    1. increased thirst – polydipsia (drinking noticeably more water). You might see water bowls emptied faster or your cat dipping a paw into the bowl more often.
    2. increased urination – polyuria (more trips to the litterbox or wetter clumps). More frequent litterbox visits or puddles outside the box count.
    3. weight and muscle loss – ribs or spine become easier to feel or see, and hind legs look thinner with less muscle. Think of a once-bouncy cat that looks a bit bonier.
    4. reduced appetite – picky eating or skipping meals, less interest in treats. Your cat might sniff food and walk away.
    5. nausea and vomiting – lip-licking, drooling, or throwing up after eating. Cats may paw at their mouth or act queasy.
    6. lethargy and weakness – long naps, less jumping, not chasing toys. The zoomies fade and playtime shrinks.
    7. bad breath or mouth sores – breath that smells like urine or tiny ulcers in the mouth. Yuck, but it’s a clue.
    8. signs of dehydration despite drinking – dry gums, sunken eyes, or skin that slowly returns when gently pinched. These are subtle but important.
    9. behavioral changes – hiding more, irritability, or unusual meowing. Your friendly cat might seem grumpier or more withdrawn.
    10. signs of high blood pressure – sudden blindness, seizures, or confusion and disorientation. These are urgent and need fast attention.

    Spotting several of these signs means it’s time to call your vet. They’ll usually start with bloodwork (a blood test that checks kidney function) and urinalysis (a urine test to look for concentration and protein). Quick testing can make a big difference, and it’s nice to know what you’re dealing with, worth every paw-print of effort.

    How chronic kidney disease in cats is diagnosed: tests and what the numbers mean

    - How chronic kidney disease in cats is diagnosed tests and what the numbers mean.jpg

    Diagnosis starts with your cat's story and a hands-on exam. Next comes bloodwork, urine checks and imaging to fit the clues together. Early markers, how concentrated the urine is, and what the images show help your vet decide if the problem is long-term or recent. Watching numbers over time is usually more useful than one single test result.

    Blood tests

    SDMA (an early marker tied to kidney filtration; GFR means how well kidneys filter blood) often goes up when about 25 percent of kidney function is lost. Think of SDMA like an early smoke alarm. Values above about 14 µg/dL are a red flag. Creatinine and BUN (blood urea nitrogen, a waste product from protein breakdown) usually rise later, when roughly 60 to 70 percent of function is gone. Typical creatinine cutoffs used in practice are: normal less than about 1.6 mg/dL, mild 1.6 to 2.8 mg/dL, moderate 2.9 to 5.0 mg/dL, and severe over 5.0 mg/dL. Healthy BUN is often around 14 to 36 mg/dL and goes up with kidney damage. Serum phosphorus (blood phosphate) tends to rise as kidneys fail; values above about 5 to 6 mg/dL often prompt treatment.

    Urine tests

    Urine specific gravity, USG (how well the kidneys concentrate urine), tells us if the kidneys are holding water. A healthy cat usually concentrates above 1.035. A USG below 1.030 is dilute and suggests loss of concentrating ability. Isosthenuria, where urine matches blood in concentration, sits near 1.008 to 1.012. The urine protein:creatinine ratio, UPC (how much protein leaks into urine), flags protein loss; under 0.2 is normal, 0.2 to 0.4 is borderline, and over 0.4 is usually meaningful proteinuria. If infection is possible, we do a urine culture.

    Imaging and biopsy

    Ultrasound or X-rays look for small, bumpy kidneys that point to chronic change, or swollen, enlarged kidneys that suggest recent injury. Images also catch stones, blockages or masses. Biopsy is rare, but we consider it if an unusual or treatable cause is suspected or if imaging and labs don't give clear answers.

    Test What it measures Typical abnormality in CKD
    SDMA Early GFR-related marker (GFR = how well kidneys filter blood) Often >14 µg/dL when about 25% function is lost
    Creatinine Waste product showing filtration (blood) Normal < ~1.6 mg/dL; rises with moderate to severe CKD
    BUN Blood urea nitrogen (waste level from protein) Often >36 mg/dL with kidney disease
    Urine Specific Gravity (USG) How concentrated the urine is (urine) Normal >1.035; dilute <1.030; isosthenuric ~1.008–1.012
    Urine Protein:Creatinine (UPC) Protein lost into urine (ratio) <0.2 normal; >0.4 significant proteinuria
    Serum Phosphorus Phosphate level in blood Often elevated (>5–6 mg/dL) as CKD progresses

    IRIS staging and monitoring for chronic kidney disease in cats

    - IRIS staging and monitoring for chronic kidney disease in cats.jpg

    IRIS is a tool vets use to stage feline kidney disease. It leans on creatinine (a blood waste marker) to set the stage, and uses SDMA (an earlier blood signal tied to how well kidneys filter) to help when numbers sit in a gray zone. Proteinuria (measured as UPC, the urine protein:creatinine ratio) and blood pressure add subcategories so your vet knows if protein loss or high blood pressure need their own plan.

    Trends beat single snapshots. A slow rise in creatinine or SDMA over months usually matters more than one odd lab result, because kidneys can wobble day-to-day. Steady upward movement says the disease is progressing, and that often means we step up care. Staging shapes the plan: early stages usually mean diet changes and watching, while later stages bring more checks, fluid support, blood-pressure control, and treatments for protein loss or electrolyte issues.

    1. Baseline at diagnosis: get full bloodwork including SDMA and creatinine, a urinalysis with USG (urine specific gravity), UPC, and a blood pressure check.
    2. Stage 1–2: recheck every 3 to 6 months with bloodwork (SDMA/creatinine), urinalysis/UPC and blood pressure.
    3. Stage 3: recheck every 1 to 3 months depending on how stable your cat is; do labs, UPC and blood pressure at each visit.
    4. Stage 4 or unstable disease: recheck monthly or as your vet advises; increase frequency after any change in how the cat looks or acts.
    5. After therapy changes (new med, different fluid plan or diet): re-evaluate in 2 to 8 weeks with targeted labs to see the response.
    6. Proteinuria or hypertension monitoring: check blood pressure at every recheck; repeat UPC as your vet recommends, often every 1 to 3 months if proteinuria is present.

    Home care matters too. Log weights, how much your cat eats and drinks, and litterbox habits , those little clues tell you more than you might think. For busy days, a quick weight and a note about urine frequency before you head out can buy you peace of mind.

    Ever watched a cat purposefully nudge a water bowl? Those tiny behaviors are part of the story. Worth every paw-print.

    Managing chronic kidney disease in cats

    - Treatment strategies for chronic kidney disease in cats.jpg

    Treating chronic kidney disease, or CKD, is about keeping your cat comfortable and slowing things down, not curing it. Early on you might see hospital care to fix dehydration and run tests, then a steady plan at home that mixes diet, fluids, medicines and checkups so your kitty stays playful and pain free. Think of it as quality-of-life care, day by day.

    When a cat comes in very dehydrated or suddenly sick, vets often give IV fluids (intravenous fluids, a sterile salt solution given into a vein) to quickly restore circulation and balance minerals. That fast fix helps appetite and urine output show whether things are turning the corner. After that urgent care, many cats move to at-home support with subcutaneous fluids (under-the-skin fluid injections) and kidney-friendly prescription food while we watch how they’re doing.

    Home fluids can feel weird at first, but they really help. Subcutaneous fluids boost hydration, usually cut down on nausea, and can make a tired cat act more like their old self. Warm wet food up to release aroma and tempt eating. Little changes like that can mean big, happy moments, your cat’s whiskers twitching as a bowl is set down, the tiny purr of contentment when they take a bite.

    Expect ups and downs. Doses change, side effects happen, and skipping meds or rechecks lets problems sneak back in. Avoid NSAIDs (nonsteroidal anti-inflammatory drugs, pain relievers that can hurt fragile kidneys) unless your vet says otherwise. For a few cats, dialysis or transplant might be options, but those are rare and not available everywhere.

    Fluids and electrolyte support

    IV fluids are for immediate rehydration and fixing dangerous mineral imbalances like low potassium (an electrolyte, a mineral the body needs to work). Vets watch appetite, urine output and electrolyte levels to see if the cat is responding. For long term support at home, subcutaneous fluids help keep hydration steady and often improve energy and eating. Clinicians also track body weight and skin turgor (how quickly the skin springs back) to guide adjustments.

    Medications used in CKD

    Common medicines include antiemetics (drugs that stop vomiting) such as maropitant and ondansetron, and appetite stimulants like mirtazapine. Phosphate binders (drugs that prevent phosphate from being absorbed) such as sevelamer or aluminum hydroxide help control blood phosphate. Potassium supplements may be needed if levels are low. Erythropoietin (a hormone treatment that stimulates red blood cell production) can help with severe anemia. Doses are tailored to your cat and labs are repeated to check safety and effect.

    Managing blood pressure and proteinuria

    High blood pressure can speed up damage, so vets usually aim for a systolic pressure under about 160 mmHg to protect organs. Blood pressure gets checked at diagnosis and during follow ups, more often if readings are high. Amlodipine is the usual first choice for feline hypertension. Telmisartan or ACE inhibitors may be used to lower urine protein (UPC, a urine test that measures protein loss) and help protect the kidneys.

    Small comforts matter. For busy days, give a quick subcutaneous fluid session before you head out and warm a spoonful of wet food when you get home, that’s a little help that often equals more good days. Ever watched a cat leap for a toy after a week of slow energy? Worth every paw print.

    Diet and nutrition for cats with chronic kidney disease

    - Diet and nutrition for cats with chronic kidney disease.jpg

    The main goal of feeding a cat with CKD is to ease the kidneys' workload while keeping your cat in good shape and feeling well. Prescription renal diets (kidney-friendly food) usually lower phosphorus (a mineral that rises in the blood as kidneys fail) and moderate protein (the body-building nutrient), but they use high-quality protein to help preserve muscle. They also balance sodium and calories so your cat has energy and produces fewer waste byproducts like uremia (waste build-up that makes pets feel sick).

    Wet food is often the best first choice because it boosts fluid intake and has a stronger smell. Warm a bowl slightly to let the aroma wake up and your picky eater may come running. Try adding a little low-salt broth or plain water to canned food, rotate flavors, and consider a cat water fountain to tempt sipping.

    If your cat stops eating, short-term syringe feeding can bridge a few days while you work with your vet on strategies. A feeding tube (a small tube that delivers food directly to the stomach) is considered when intake stays poor or weight keeps dropping; both options need vet guidance and training. Ever try syringe feeding? Ask your vet to show you the technique so you feel confident.

    Some supplements can help. Omega-3 fatty acids (healthy fats from fish oil) may support blood flow to the kidneys. Soluble fiber (fiber that absorbs water and soothes the gut) can ease stomach upset. Higher-calorie renal-safe options help keep weight on when appetite is low.

    If food alone does not control blood phosphate, your vet may prescribe phosphate binders (drugs that prevent phosphate from being absorbed). See the Treatment section for drug details. For practical day-to-day tips on meals, syringe feeds, or tube feeds, check the Home Care section for step-by-step instructions and logs.

    Worth every paw-print.

    Home care, monitoring and long-term management of chronic kidney disease in cats

    - Home care, monitoring and long-term management of chronic kidney disease in cats.jpg

    Keep a simple home-monitoring checklist so little changes don’t slip by. Think of it like a daily cat diary: date, weight, water, appetite, litterbox trips and any vomiting. Bring this log to the vet , trends are way more helpful than one-off numbers.

    We recommend recording weights every day or every other day using grams or ounces, and writing down how much food your cat ate (portion or kcal). Note water in milliliters, how often they use the litterbox, and urine volume as small / normal / large. Jot down vomiting episodes and appetite details like ate a full meal, nibbled, or refused. A quick template you can use: date | weight | water ml | appetite ✓/✗ | litterbox trips | vomit ✓/✗. Little things add up, and you’ll notice patterns sooner this way.

    If your vet wants you to give subcutaneous fluids at home, get hands-on training first. Subcutaneous fluid therapy means fluids given under the skin (a safe way to hydrate at home). Start with clean hands and sterile supplies (germ-free tools), pick a quiet spot, sit at eye level with your cat, and give treats between steps. Practice the whole routine while the vet watches until you feel confident. Keep the fluid bags sealed and refrigerated until you’re taught how to warm and handle them, and follow the clinic’s instructions for discarding leftovers. Log every session , date, volume given, site, and how your cat reacted , so your vet can tweak the plan if needed. Call your clinic right away if you see swelling, coughing, trouble breathing, or a sudden drop in appetite.

    Routines for meds really help. Use a visible dosing calendar or set phone reminders, mark missed doses, and keep a pill plan near feeding spots so you don’t forget. For stubborn pills try hiding them in a tiny tasty bite, or ask about a compounding pharmacy (a pharmacy that makes flavored or custom-dose meds) to make things easier. If you miss a dose, call the clinic instead of doubling up. Watch for side effects like severe vomiting, sudden sleepiness, not eating, or any swelling, and contact your vet right away. For timing of formal rechecks and lab schedules see the IRIS section, and for drug names and uses see the Treatment section.

    Prognosis, emergency signs and end-of-life considerations for chronic kidney disease in cats

    - Prognosis, emergency signs and end-of-life considerations for chronic kidney disease in cats.jpg

    Prognosis can swing widely from cat to cat. Some kitties drift slowly for months or years with good days and bad days. Others decline faster if they have advanced IRIS stage (the kidney-disease staging system vets use), uncontrolled high blood pressure (hypertension), very high blood phosphate (hyperphosphatemia – too much phosphate in the blood), repeated dehydration, or ongoing vomiting that won’t stop with treatment. Your vet will use bloodwork (blood tests), blood pressure checks, urine results and how your cat behaves at home to give you a realistic picture.

    Bad signs don’t always mean an immediate goodbye, but they do mean closer monitoring and maybe more aggressive care. Repeated dehydration, severe weight loss, losing interest in food for days, and frequent, uncontrollable vomiting are red flags. If kidney numbers on bloodwork are climbing fast, that’s another worry. We’re watching overall quality of life, not just lab values.

    Some changes need instant veterinary attention because they can be life-threatening. Call your clinic right away for persistent, severe vomiting or diarrhea, especially if there’s blood. Also call if you see seizures, collapse or sudden unresponsiveness, sudden blindness, or major trouble breathing. Big, sudden behavior changes or legs so weak your cat can’t stand are urgent too. Fast action can sometimes turn a disaster into something treatable.

    Quality-of-life checks are simple: Is your cat comfortable? Eating enough? Drinking or staying hydrated? Moving around? Still enjoying small things like petting, a treat, or a warm sunbeam? Palliative care aims to keep those wins coming. That can mean appetite support, anti-nausea meds (antiemetics), fluids (subcutaneous fluids – under-the-skin fluids you can learn to give at home), pain control, and a quiet, cozy spot. Little things matter , a soft blanket, a low-sided litter box, tasty boosted meals.

    When repeated treatments stop helping and your cat spends more time suffering than happy, it’s time for an honest chat with your vet about hospice care (comfort-focused support) or humane euthanasia (peaceful, painless end-of-life care). Talk through what matters to you and your cat , pain control goals, where you’d like care to happen, and any final wishes. Ever watched your cat purr in a sunbeam and felt, yes, this is enough? Trust that feeling.

    Worth every paw-print.

    Frequently asked questions about chronic kidney disease in cats

    - Frequently asked questions about chronic kidney disease in cats.jpg

    Can CKD be cured in cats?
    No. CKD can’t be cured. Treatment is about slowing the kidney decline and keeping your cat comfortable and happy for as long as possible. See Prognosis.

    How early can CKD be detected?
    We can often spot it earlier now thanks to SDMA (a blood marker that shows how well kidneys filter). Routine bloodwork and catching small changes early help a lot, especially if your vet is watching for it. See Diagnosis → SDMA.

    Can diet prevent CKD?
    Good nutrition lowers stress on the kidneys and can slow problems, but it won’t guarantee prevention. Prescription renal food (a kidney-specific diet) can help manage the disease and improve quality of life. See Diet.

    Is CKD contagious?
    No. CKD is not infectious, so it won’t spread between cats or to people. You can cuddle without worry.

    What costs and long-term commitments should I expect?
    Plan on ongoing monitoring like blood and urine tests, prescription renal food, possible medications, and sometimes subcutaneous fluids (fluids given under the skin to keep them hydrated). Typical first-year costs often run about $500 to $2,500 depending on how much testing and treatment your vet recommends. See Home Care and Prognosis.

    When should I see a vet?
    Call your vet if your cat has lasting increases in thirst or peeing, weight loss, low appetite, or repeated vomiting. For urgent care, get help right away if your cat has seizures, collapses, suddenly goes blind, or has trouble breathing. See Home Care.

    Any other tips?
    Keep a simple care routine. Small daily things like monitoring water intake, weighing your cat at home, and offering tasty, kidney-friendly food can make a big difference. Worth every paw-print.

    Final Words

    Jump right in: spot extra thirst, peeing more, weight loss or vomiting and get vet screening , bloodwork with SDMA and creatinine, urinalysis, and blood pressure checks.

    We talked about why kidneys matter, the subtle early signs, how tests and IRIS staging guide care, and practical steps like fluids, meds, renal diet and home logs. Quick action helps slow decline and keep your cat comfy. (Vet visits are a chore, I know.)

    With steady care and vet teamwork, cats diagnosed with chronic kidney disease in cats can still enjoy many purr-filled days.

    FAQ

    Frequently Asked Questions — Chronic kidney disease in cats

    Chronic kidney disease in cats treatment

    Chronic kidney disease in cats is treated with rehydration — IV (intravenous — into a vein) or subcutaneous fluids (under-the-skin), prescription renal diets, anti-nausea and blood-pressure medicines, phosphate binders (drugs that lower blood phosphorus), and home support.

    What causes chronic kidney disease in cats

    Chronic kidney disease in cats is caused by age-related kidney decline, toxins like antifreeze, certain medications, repeated urinary or kidney infections, and some inherited kidney disorders.

    End-stage chronic kidney disease in cats — when to consider euthanasia?

    End-stage chronic kidney disease in cats means kidneys fail enough that symptoms are severe and quality of life is poor; euthanasia may be considered if pain, nonstop vomiting, refusal to eat, or repeated dehydration cannot be controlled.

    Chronic kidney disease in cats symptoms and early signs

    Chronic kidney disease in cats often begins with increased thirst and urination, then weight and muscle loss, reduced appetite, nausea or vomiting, lethargy, bad breath, dehydration signs, hiding, and sudden blindness or seizures from high blood pressure.

    Chronic kidney disease in cats stages

    Chronic kidney disease in cats is staged by IRIS using creatinine (muscle-waste marker) and SDMA (an early kidney marker), with proteinuria and blood pressure refining the stage and guiding treatment and monitoring.

    Chronic kidney disease in cats life expectancy — how long can cats live with CKD?

    Chronic kidney disease life expectancy in cats varies widely; some cats live months while many live years with early diagnosis, stable labs, good hydration, suitable diet, and regular veterinary care.

    Are cats in pain with kidney disease?

    Cats with kidney disease can be in pain or uncomfortable, especially with mouth ulcers, nausea, or advanced disease; pain and other symptoms are often manageable with medications and supportive care.

    What to do when your cat has kidney disease?

    When your cat has kidney disease, get veterinary screening (bloodwork including SDMA and creatinine, plus urinalysis), follow the vet’s treatment plan, switch to a recommended renal diet if advised, and track weight, water intake, and litterbox habits.

    What foods should cats with kidney disease avoid?

    Cats with kidney disease should avoid high-phosphorus foods (a mineral that builds up in CKD), salty human meals, unregulated supplements, and dry-only feeding that limits water intake; feed a vet-recommended renal diet.

    Can chronic kidney disease in cats be cured?

    Chronic kidney disease in cats cannot be cured; care focuses on slowing progression, managing symptoms, keeping appetite and hydration, and maintaining quality of life with medications, fluids, and diet.

    Related Articles

  • Karen Pryor clicker training principles for pets

    Karen Pryor clicker training principles for pets

    What if a tiny click could beat scolding every time? Karen Pryor’s marker training shows it can. Marker (a short, sharp sound that pins the exact moment the animal did something right) tells your cat, or dog, or bird exactly when to feel proud. It’s simple and kind.

    Her rules put the animal’s well-being first. Let them come to you. Keep the click-to-treat time very short, under 0.5 seconds (that’s the gap between the click and the reward). Shape big tricks from tiny steps (shaping means rewarding smaller pieces of a behavior until the whole trick appears). And only start using the clicker (a little handheld device that makes a clear click) after the animal reliably approaches and holds steady on the target.

    Think of the click like a camera capturing the exact frame you want.

    Follow these tips and learning gets faster, gentler, and a lot more fun for both of you. Worth every paw-print.

    Karen Pryor clicker training principles for pets

    - What Karen Pryors marker training is  starter checklist (direct answer to the query).jpg

    Karen Pryor helped shape modern marker training, also called bridge training. Marker training uses a short, sharp sound , the click , to mark the exact instant your pet does the thing you want. The click becomes a secondary reinforcer (a signal that predicts a treat). This all sits inside operant conditioning (training by consequences). Start only after the animal willingly approaches and eats, and keep the click-to-treat delay under about 0.5 seconds so the signal stays clear.

    • [ ] Welfare-first check; click-to-treat timing about 0.5 seconds; initial sequence: approach, target, charge, shape.

    Welfare-first means the learner comes on their own terms. If your pet won’t take food, don’t force it. Hand-feed tasty bits, drop a treat a short distance, try something higher value, or switch to play as the reinforcer. Short, calm get-togethers that build trust beat long, pushy sessions every time.

    The basics are simple. Mark the exact moment you like with almost no delay. Give the primary reinforcer (treat or play) right after the click. Shape bigger behaviors by rewarding tiny steps toward the goal. Use a target (a small object or your hand the pet touches) like a fishing rod for cats and dogs , it points their focus and opens the door to lots of behaviors.

    Only add the clicker after approach and targeting are steady. If the clicker makes the pet uneasy, try a softer sound or a consistent word while you charge the marker slowly (pair the sound or word with treats until it predicts reward). Keep sessions upbeat, quick, and predictable so the learner stays confident and curious.

    Worth every paw-print.

    Shaping & Timing: modern Ten Laws, timing best practices, examples, and stepwise table

    - Shaping  Timing modern Ten Laws, timing best practices, examples, and stepwise table.jpg

    We pulled the classic Ten Laws and the timing rules into one easy toolkit so trainers have one go-to place. Think of it as practical steps that help sessions change behavior faster and kinder. It’s short, focused, and meant to get you results without drama.

    Modern Ten Laws of Shaping

    • Be ready before you start. Plan the very next reinforcer (what you will give and when).
    • Keep sessions flowing. Minimize dead air and keep momentum.
    • Reward the current approximation continuously while you’re strengthening it. Continuous reinforcement means rewarding every correct try.
    • Raise criteria in very small steps so the learner can succeed. Tiny wins matter.
    • Work one thing at a time. Don’t try to shape two different criteria at once.
    • Relax old criteria briefly when you add a new detail so the learner doesn’t get overwhelmed.
    • Stay ahead of the learner so you know what to reward if they make a fast leap.
    • End sessions on a high note to keep motivation for next time. Worth every paw-print.
    • If behavior falls apart, go back to kindergarten and rebuild easy wins. Start simple.
    • Use one primary shaper per behavior during acquisition when possible. If multiple handlers must work the same goal, communicate clearly so the animal gets consistent feedback.

    Timing best practices

    Marker timing is the technical heart of marker training. A marker is a sound or signal (like a clicker or a word) that tells the animal exactly which tiny movement earned a reward. Place the marker the instant the movement you want happens. Think in tenths of a second.

    Aim for click placement within 0.0-0.5 seconds of the target action. Get the treat to the animal’s mouth within about 0.0-2 seconds. While shaping a new approximation, give continuous reinforcement (treat every correct bit). Switch to intermittent or variable schedules (rewards less often or unpredictably) only after the response is stable and reliable.

    Quick timing norms:

    • Marker placement: 0.0-0.5 s.
    • Treat to mouth: 0.0-2 s.
    • Reinforcement during shaping: continuous (every correct try).
    • Move to variable schedules after stability.

    Examples:

    • Head dip capture: mark the instant the nose moves down, then treat immediately.
    • Paw touch: click within 0.3 s of the paw meeting the target, then reward.
    • Hold duration: click for the first steady second, then slowly increase required hold across sessions.

    Practical shaping examples and progression rules

    Shape by rewarding tiny, successive approximations and never stack two big changes together. For example, approach → touch → short sit: reward the pet for stepping closer, then for touching the target, then for sitting briefly. Increase the hold by tiny, clear steps.

    For short recall → distance recall: mark and reward the animal for turning and taking one step toward you, then for three steps, then for landing on a mat. Keep each distance increment small so success is obvious.

    For paw touch → longer hold: click and treat each initial quick touch. Then ask for two quick touches, then a single touch held 0.5 seconds, and so on. Reward near-misses that move behavior toward the goal instead of waiting for perfection. Your learner will thank you with a big, goofy pounce. Ever watched whiskers twitch when a goal is close? Yup, that.

    Step Trainer action / setting What to watch for (behavioral target) Click timing (seconds) Reinforcement schedule used
    1 Approaching target Place target nearby; reward any move toward it Step toward or orient to target 0.0-0.5 Continuous
    2 Following target Move target laterally; reward following motion Side-step following target 0.0-0.5 Continuous
    3 Paw touch capture Present touch target; click for light contact Paw meets target 0.0-0.3 Continuous
    4 Sit held 1 second Click when sit is steady; increase hold gradually Sit maintained 1.0 s 0.0-0.5 Continuous → Partial
    5 Short recall Call, click at arrival; reward landing on mat Approach and touch mat 0.0-0.5 Continuous → Variable
    6 Step toward heel Mark an accurate step; shape more steps into sequence Single step initiated toward heel position 0.0-0.5 Variable

    Charging the marker

    Charge the marker in short, low-pressure sessions so the sound predicts reward without stress. Charging means pairing the marker (click or chosen signal) with tasty food until the animal looks for the treat when they hear the sound.

    • Pair in short bursts: 10-20 pairings per session, a few sessions total.
    • Look for signs the marker is charged: orienting, brightening, leaning in, or searching for the treat when they hear the sound.
    • Bridging options when delivery is delayed: drop a pre-placed treat, use a wait target (a known cue that keeps the animal steady), or give a short secondary signal that the treat is coming.

    Move from continuous reinforcement to intermittent or variable schedules once the behavior is consistent and errors drop. Check the timing best practices and the stepwise table above when you plan that shift so progress stays smooth and confidence stays high.

    Step-by-step clicker training for beginners using Karen Pryor principles

    Use this quick-start checklist to get hands-on practice. For the full timing rules, marker charging (pairing the click with a treat so the click becomes a reward signal), fading procedures, and staged proofing (practicing the behavior in harder settings), see the Shaping & Timing section.

    • Start only when your learner willingly approaches and takes treats. Offer a treat; when they take it, you’re ready , no pressure, just tasty motivation.

    • Teach following by moving side-to-side and rewarding the follow. Step a few paces, wait for your cat to trail you, then treat. Think of it like a slow, silly dance you both enjoy.

    • Introduce a simple physical target and reward every touch to build reliability. Targeting (teaching the cat to touch an object) is a great foundation for lots of tricks.

    • Bring in the clicker (a small handheld marker that makes a sharp click) only after targeting is steady. Charge the marker (click then treat repeatedly so the click predicts food); the Shaping & Timing section shows exactly how.

    • Alternate capture rounds (rewarding spontaneous offers the cat gives) with deliberate target rounds. That mix keeps sessions playful and prevents burnout , fun and learning together.

    • Shape tiny approximations by rewarding each small step; keep rewards continuous for the step you’re working on. Raise just one criterion at a time so it stays clear and doable.

    • Proof the behavior under mild distraction, increasing the challenge slowly. Proofing (testing the behavior in harder settings) helps the skill hold up when things get noisy or busy.

    • Keep sessions short: 3 to 10 minutes, several times a day. End on an easy win, jot a quick progress note, and walk away while everyone’s feeling good , worth every paw-print.

    Troubleshooting and common mistakes in Karen Pryor clicker training principles (cross-reference Shaping & Timing)

    - Troubleshooting and common mistakes in Karen Pryor clicker training principles (cross-reference Shaping  Timing).jpg

    Quick troubleshooting. The usual suspects when progress stalls are a weak reinforcer (the treat or toy that motivates your pet), jumping criteria too fast, the marker not being reliably paired (the click or word that signals a correct moment), or low motivation. Start simple: lower the criterion so the animal can win, re-pair the marker with tasty treats, or swap or boost the reinforcer (try something extra yummy or a favorite toy). See Shaping & Timing: Stepwise criteria; See Shaping & Timing: Charging the marker; See Shaping & Timing: Reward value.

    Sometimes you’ll see an extinction burst – a sudden spike in the behavior when reinforcement stops. That usually means your learner is stressed or confused, not that they’re making real progress. Fix it by stepping back to the last thing you reliably reinforced and give short, high-value rewards to rebuild predictability. For example, tiny chicken bits for a calm two seconds. Calm, consistent wins help rebuild confidence.

    Appendix , Expanded Q&A (open if you want more)

    What if my dog/cat won’t take treats?

    Start with trust-building. Hand-feed tiny pieces or toss a treat just a few inches away so approaching feels easy. If your pet prefers play, use a quick toy romp while you slowly pair the marker with treats. Short, calm sessions work best. See Shaping & Timing: Charging the marker.

    Example: “Here, tiny cheese, good!” to make food from your hand feel normal and safe.

    Why did behavior get worse after I raised criteria?

    You probably moved too fast. Go back to a simpler approximation, raise the step size smaller, and reward more often so your learner gets frequent wins. Patience pays. See Shaping & Timing: Stepwise criteria.

    Is it OK to withhold reinforcement to get a bigger response?

    Don’t do that on purpose. Withholding rewards to provoke more offers can cause drop-out or confusion. If you suspect extinction, return to the last reinforced step and make reinforcement predictable again. See Shaping & Timing: Shaping path alternatives.

    My clicker seems to scare the animal , what now?

    Switch to a quieter marker or use a soft word and pair it slowly with treats so it becomes a predictor of good things. Short, calm pairing sessions help the sound lose its edge. See Shaping & Timing: Charging the marker.

    Training stalled despite consistency , any strategies?

    Try a different shaping path, create more capture opportunities, or change where you place the reinforcer to spark spontaneous offers. Shorter sessions and tiny wins often restart progress. You can also vary the reinforcer to see what lights your learner up. See Shaping & Timing: Shaping path alternatives.

    How do I stop relying on treats?

    Pair the marker with cues, praise, or play, then fade treats gradually and move to intermittent rewards once the behavior is stable. Shift to variable schedules slowly so the marker stays meaningful. See Shaping & Timing: Intermittent schedules.

    For full timing windows, charging steps, and the stepwise table, see the Shaping & Timing section.

    Fading the Marker & Proofing

    - Proofing, fading the clicker and transferring control in Karen Pryor clicker training principles.jpg

    Layer the cue onto the marker, then trade the marker for the cue. Say a short verbal or gestural cue at the exact moment you click, then give the treat. A marker (a sound like a click that pinpoints the exact moment the behavior happened) makes it easy for your cat to know what earned the reward. Example: say the cue at the moment of the click , "Touch." After several clear cue+click+treat pairings, start replacing some click+treats with cue+treats until the cue alone predicts a reward on a mixed schedule.

    See Shaping & Timing for exact timing norms (click within 0 to 0.5 seconds) and for tips on moving from continuous to intermittent rewards. Shrink food slowly and give easy wins when slippage shows up. Reduce treat size or frequency while keeping the cue crystal clear, and move to intermittent rewards (variable reinforcement, rewards given unpredictably) once the behavior stays steady. If things slide back, give a few generous wins , for example, three clear reps with full treats , then resume the fade. Keep sessions short and playful so your cat stays engaged. Worth every paw-print.

    Proofing means practicing the cue in new places, with new people, and with more distraction, while easing the difficulty a bit so your cat keeps winning. When you add a challenge, loosen an older requirement for a few reps so the pet isn’t overloaded; small wins build confidence and keep motivation high. Ever watched your kitty nail a trick in the kitchen but forget it in the backyard? That’s normal. Next, we build real-world reliability.

    Quick steps

    • Fading marker into cue: say the cue at the click, then reward. Gradually swap click+treats for cue+treats on a mixed schedule so the cue becomes the reliable predictor.
    • Transferring to verbal or gestural cues: start cue+click together, then shift the cue just before the click and reward the correct response. Follow Shaping & Timing timing norms (click within 0 to 0.5 seconds).
    • Move rewards from continuous to intermittent once behavior is solid. Variable reinforcement keeps the behavior strong and interesting.

    Short proofing drills (quick list)

    • Hallway: 5 reps.
    • Backyard with light distraction: 5 reps.
    • Same behavior with a different handler: 5 reps.
      During each drill, relax hold-times or distance for a few reps so your cat has easy wins.

    Troubleshooting
    If fading or generalization gives you trouble, go step by step: layer the cue at the click, trade click+treats for cue+treats, hand out easy wins, and run short proofing drills. Keep it playful, keep it short, and don’t be afraid to step back a bit if your cat looks confused. It’s training, not a race , and a few soft purrs make everything better.

    Books, courses and further resources on Karen Pryor clicker training principles

    - Books, courses and further resources on Karen Pryor clicker training principles.jpg

    Start with the original sources. The Ten Laws of Shaping (1984) is the historical anchor for shaping (teaching a behavior by rewarding tiny steps). Then read Karen Pryor’s books for step-by-step examples and real trainer stories. They make the ideas click , literally. Ever watched a pet’s ears perk up the moment you click? That moment matters.

    A marker (a short sound that pinpoints the exact moment the pet did the right thing) is central. So is timing. Good workshops give hands-on feedback on your timing and shaping, so you don’t just read about it , you practice it with a coach watching. Karen Pryor Academy workshops and certification programs do that kind of coaching.

    When you pick a course, favor ones that include live practice, video review, or mentor feedback. Look for programs that use welfare-first methods, short sessions, and lots of paired marker + treat drills (click, then treat; repeat). Those quick cycles build clarity and keep animals motivated.

    If you’re studying on your own, choose books that come with clear exercises and companion videos. Record your sessions so you can check your click-to-treat timing (how fast you give the treat after the click) and track shaping progress. You’ll spot small fixes that make a big difference.

    Certification programs are worth it if you work in shelters, professional training, or service-animal work where documented competence matters. For casual pet parents, the books and a few coached sessions may be plenty.

    Key resources

    • Ten Laws of Shaping (origin: 1984)
    • Don’t Shoot the Dog! (Karen Pryor)
    • Reaching the Animal Mind (Karen Pryor)
    • Karen Pryor Academy workshops and certification programs

    Pick a hands-on workshop if you want coached practice. Pick the books for steady, self-paced study. Either way, practice the little clicks and celebrate the tiny wins. Worth every paw-print.

    Final Words

    Jump right in: we answered what Karen Pryor’s marker training is and gave a starter checklist and charging steps (Ten Laws, 1984; Pryor books/Karen Pryor Academy). You have practical timing norms, a shaping table, and a beginner checklist for short sessions.

    We explained modern Ten Laws, click timing (0.0–0.5s), charging the marker, shaping progressions, and proofing drills. Troubleshooting tips show how to go back to easier steps when things stall.

    Keep practicing short sessions and follow Karen Pryor clicker training principles, precise marking, welfare-first starts, and steady shaping. Happy training, your cats will thank you with zoomies.

    FAQ

    Frequently Asked Questions

    What is clicker training for humans / clicker training for dummies?

    Clicker training for humans uses a distinct sound as a precise marker to reinforce desired actions, shaping behavior through small steps with timely treats or rewards for fast, clear learning.

    What are the benefits of clicker training?

    Benefits include precise timing, faster learning, reduced force, clearer communication, easier shaping of complex behaviors, and more enjoyable sessions for learner and trainer.

    How does clicker training help with separation anxiety?

    It uses gradual desensitization and counterconditioning, marking calm, relaxed responses before departures, then slowly increasing absence length while rewarding low-stress behavior.

    What is the Premack principle?

    The Premack principle states a more likely behavior can reinforce a less likely one (for example, letting a pet play after it sits to boost the sit response).

    In the Autism Partnership Method, shaping involves a level of which of the following?

    Shaping involves successive approximations at the response level, reinforcing ever-closer attempts toward the target behavior until the full skill appears reliably.

    What clicker training commands should I use?

    Use short, consistent one-word cues paired with the click and reward; use the same voice, and add the click only after the behavior is reliably offered.

    How do I train an “off” cue (teach a pet to get off furniture)?

    Capture the stepping-down behavior, click the exact moment the feet leave the surface, reward immediately, shape duration away from the surface, then add the word “off” as the response stabilizes.

    How do I start charging the clicker and timing clicks?

    Charge the clicker by pairing the sound with treats in short sessions until anticipation appears. Click within about 0.0–0.5 seconds of the target action and give the reward right after.

    Related Articles