Author: Isabella Tiu

  • 4-week old kitten feeding schedule

    4-week old kitten feeding schedule

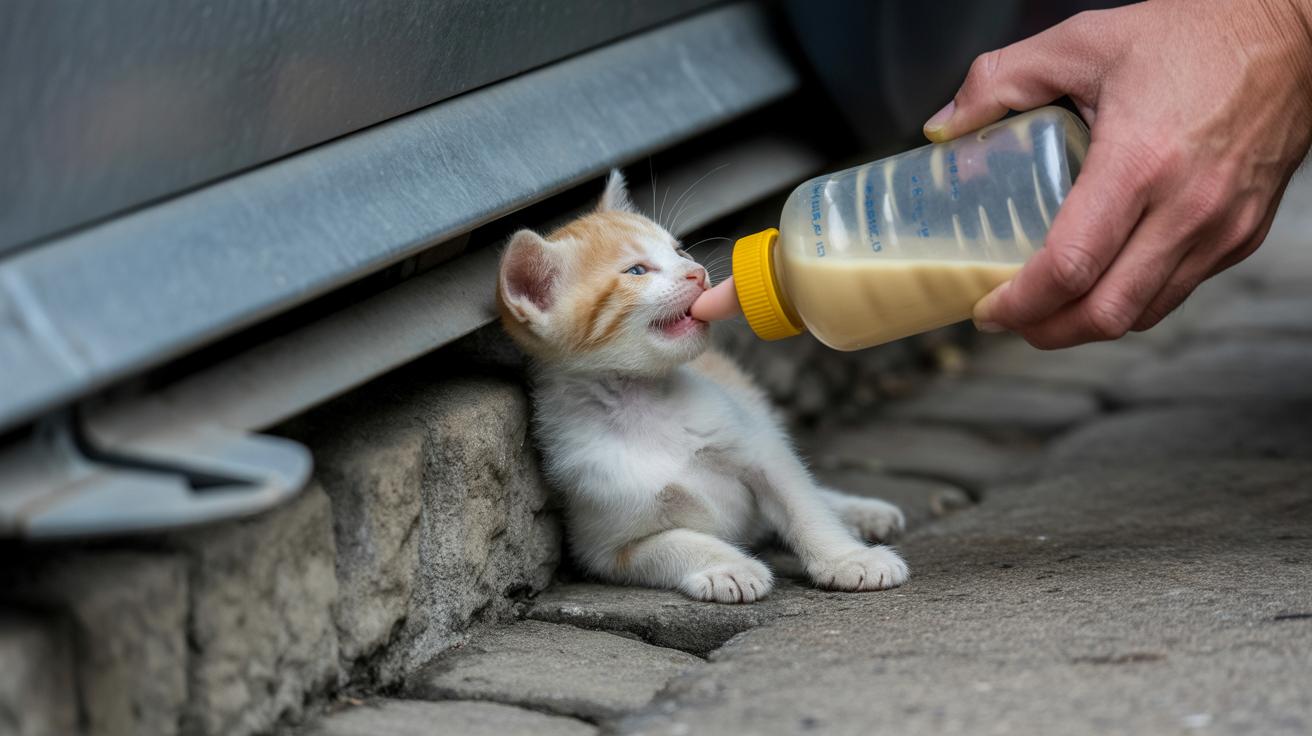
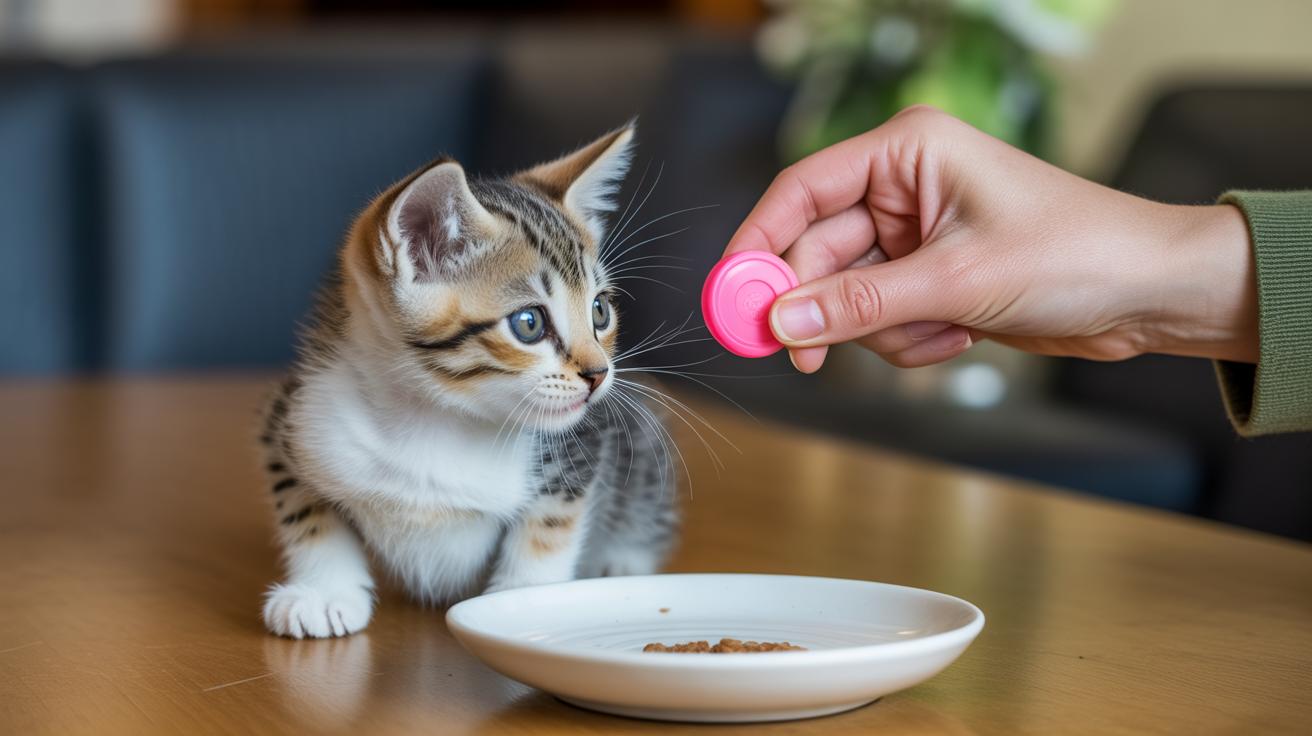
    Think a 4-week-old kitten can wait for grown-up food? Nope. At four weeks they still need kitten-friendly meals and a little formula support.

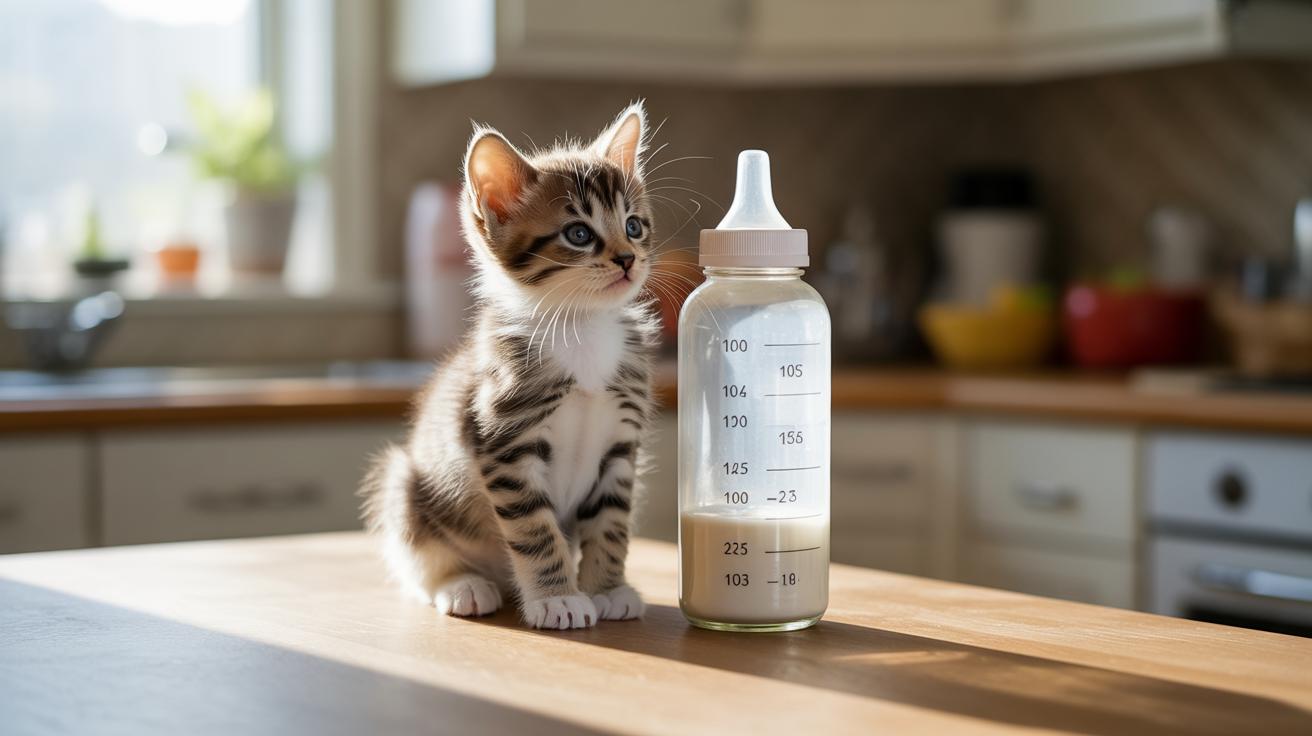
    This quick, waking-hours plan uses warm mixed gruel (soft, mashed kitten food blended with kitten formula) and tiny bottle top-ups (kitten-milk replacement – a commercial powdered milk made for kittens). Keep portions simple and rounded – 1 or 2 tablespoons so you can spoon-feed fast, even half-asleep.

    Ever watched a tiny head bob over a saucer? Pretty cute. Aim for steady weight gain of about 0.5 to 1 ounce per day. If the kitten is orphaned or underweight, do one brief overnight check and offer a small bottle feed.

    You’ll find exact portions, easy recipes, and step-by-step how-to tips in the rest of this post. Worth every purr.

    4-week old kitten feeding schedule

    - 24hour actionable feeding timetable (single 4week kitten).jpg

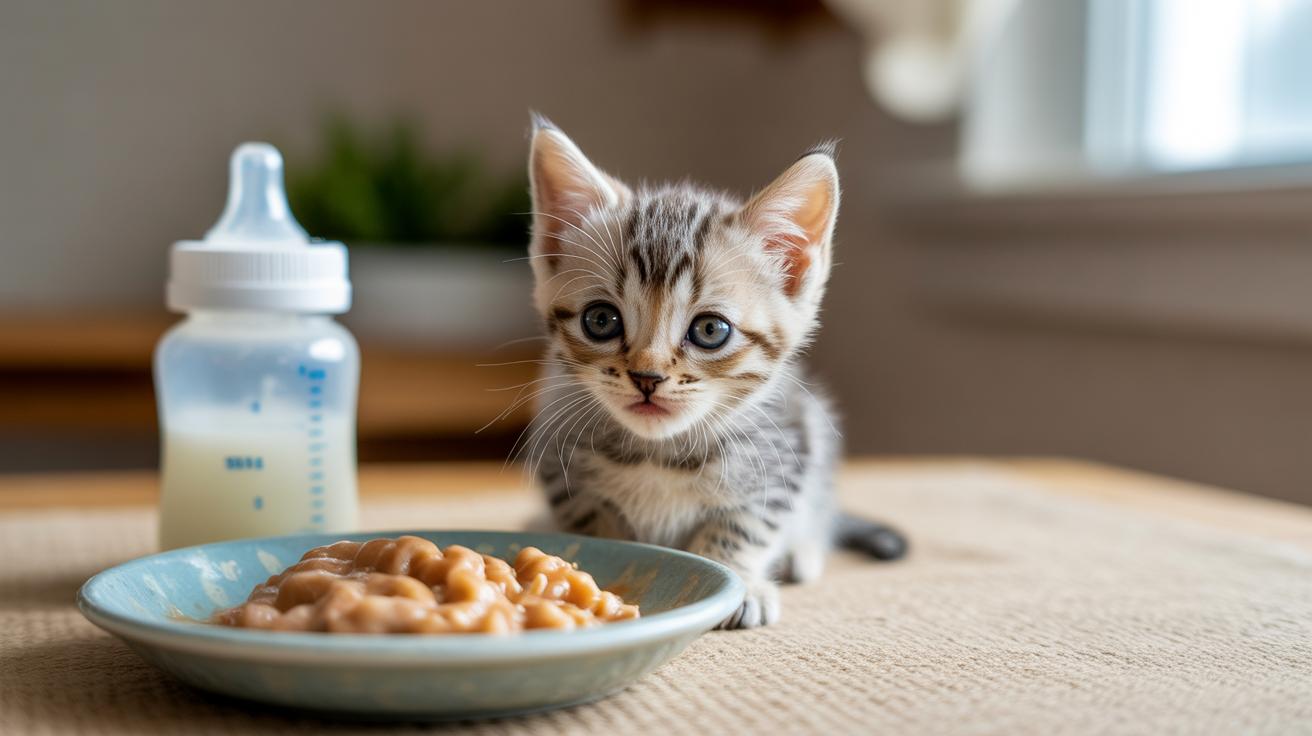
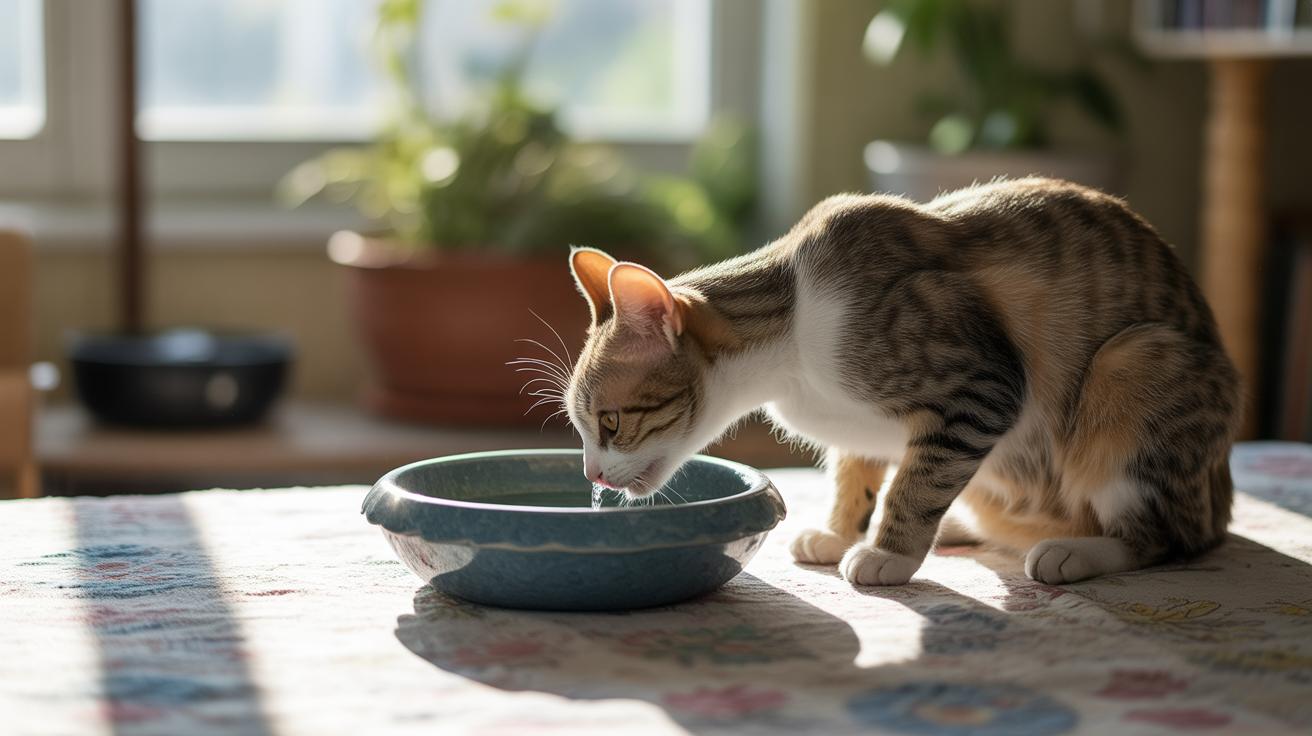
    This is a simple, waking-hours plan: offer mixed gruel (soft, mashed kitten food made with formula) warmed to body temperature, plus small bottle top-ups. Aim for steady weight gain of about 0.5 to 1 ounce per day, and do one short overnight check if the kitten is orphaned or underweight. Ever watched a tiny head bob over a saucer? Pretty cute, and useful too.

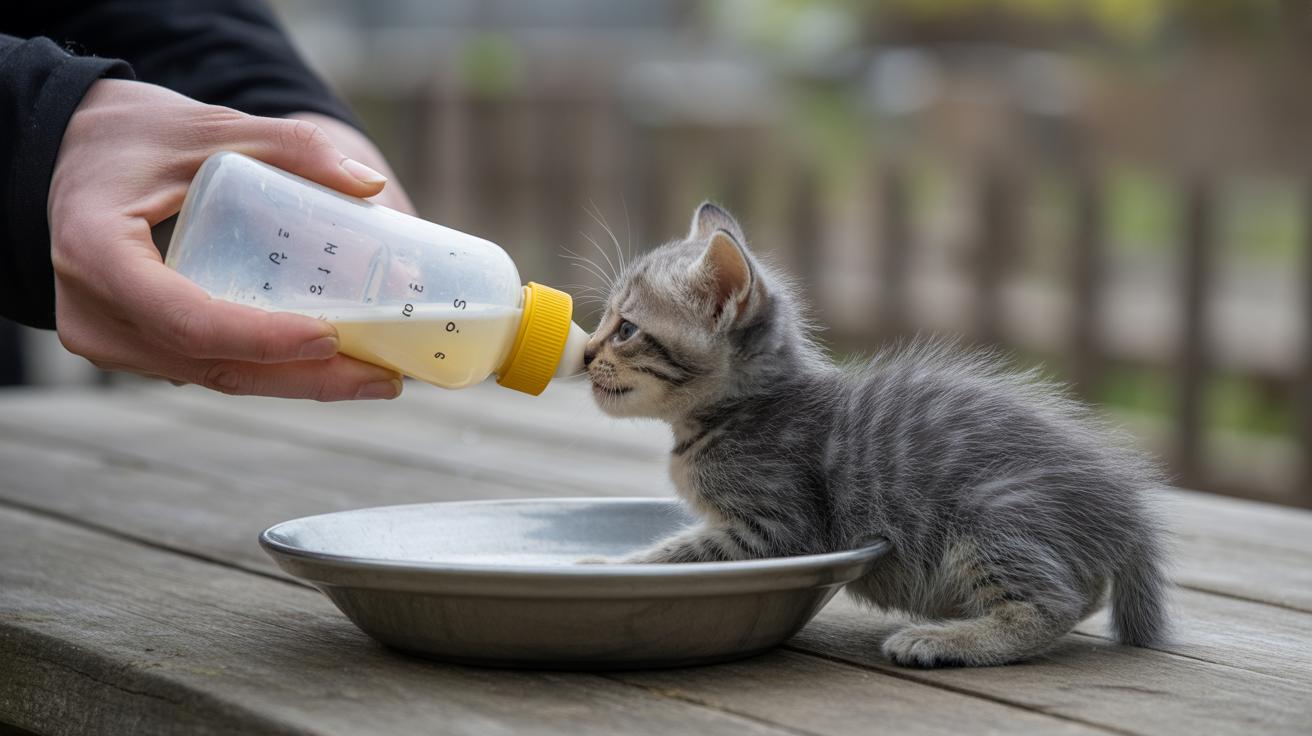
    Keep portions easy to grab when you're half asleep. Round to single numbers like 1 tbsp or 2 tbsp so you can feed fast. Gruel is the daytime star; bottle top-ups (small formula feeds from a bottle) fill the gaps and calm kittens who miss nursing. Serve gruel in a shallow dish so they lap, not suck, keep bottles warm and free of clumps, and check the Weight Monitoring and Weaning sections for exact tbsp/ml and recipes if you need precise numbers.

    Night-care for fragile kittens is short and focused. If the kitten is orphaned or not gaining well, do one quick overnight check: warm the kitten, offer 1 tbsp bottle if they’re sleepy but can swallow, and stimulate elimination (gently rub the belly and genitals with a warm, damp cloth to help them pee and poop). If you see breathing trouble, refusal of two meals, or weight loss over two to three days, get urgent help. For full how-to on preparing formula, choosing nipple sizes, latch technique, and exact growth targets, see Formula Handling, Bottle Technique, and Weight Monitoring.

    Time Feed type Approx portion (rounded) Notes
    Morning wake Mixed gruel + bottle top-up 2 tbsp (30 ml) gruel + 1 tbsp (15 ml) bottle Serve warm in a shallow dish so they lap. Gentle bottle top-up if still hungry; praise the tiny lappers.
    Midday Bottle feed (formula) 1 tbsp (15 ml) Hold belly-side down to mimic nursing, offer the nipple and watch for steady swallowing. Calm, steady strokes help.
    Early afternoon Saucer gruel 1 tbsp (15 ml) Tip very small amounts so they learn to lap. Stay close and cheer on the curiosity.
    Late afternoon Mixed gruel + bottle top-up 2 tbsp (30 ml) gruel + 1 tbsp (15 ml) bottle Keep the texture smooth and clump-free. Offer the bottle if they lose interest in the saucer.
    Early evening Saucer gruel 1 tbsp (15 ml) Let the kitten explore the saucer; gentle lapping is the goal. Little paws in the dish are normal, um, adorable.
    Late evening Bottle feed 1 tbsp (15 ml) Hold calmly and clean the face after feeding to prevent crusty residue. A soft wipe goes a long way.
    Overnight check (if orphan/underweight) Small bottle top-up 1 tbsp (15 ml) Quick warmth and breathing check, offer 1 tbsp if they’ll swallow, and stimulate elimination if needed (warm, gentle rubbing).
    Morning weigh-in Weigh then feed if low 1 tbsp (15 ml) if needed Log the weight daily; target about +0.5 to +1 ounce per day. If not gaining, consult Weight Monitoring steps.

    Week‑by‑week weaning plan (days 1–7 starter + weeks 5–8 overview)

    - Weekbyweek weaning plan (days 17 starter + weeks 58 overview).jpg

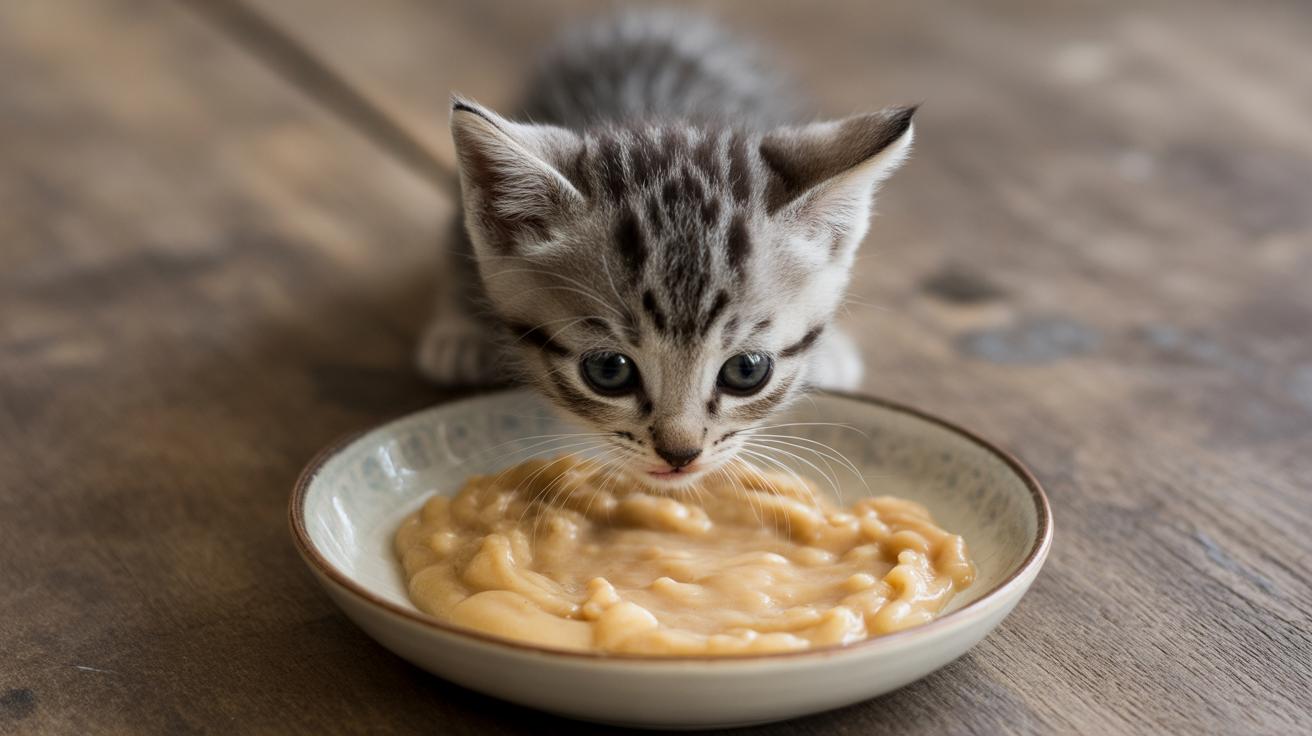
    Start slow and follow your kitten’s cues. Offer a daytime gruel made from the week‑4 recipe (1/4 cup wet kitten food + 1/2 cup kitten formula + 1 tbsp warm water, blended smooth and served at body temperature) while keeping regular bottle top‑ups. Move on to thicker textures only when the kitten licks, laps, and swallows steadily. Think of it like baby steps: tiny saucer tries now, fewer bottles later.

    1. Day 1 , thin gruel introduction
      Make: 1/4 cup canned wet kitten food (60 ml) + 1/2 cup kitten formula (120 ml) + 1 tbsp warm water (15 ml). Kitten formula means commercial powdered kitten milk replacer (a milk substitute made for kittens). Blend until smooth, warm to about body temperature (about 100°F / 38°C) and serve in a shallow dish so they can lap easily. Offer the gruel twice a day and keep giving bottle feeds between saucer attempts. Put tiny drops on the rim so they learn to lap. Move forward when they lick confidently and keep the food down.

    2. Day 2 , repeat thin gruel
      Same recipe and two saucer sessions today, with bottle support. Tip a drop toward their whiskers to encourage lapping, cute and effective. Keep going if they start nosing more of the saucer.

    3. Day 3 , thicken slightly
      Change to: 1/4 cup wet (60 ml) + 1/3 cup formula (80 ml) + 1 tbsp warm water (15 ml). Offer gruel 2–3 times a day and leave it out a few minutes so they can explore the texture. If they lap eagerly and don’t just suck at the dish, you’re ready to advance.

    4. Day 4 , thicker texture
      Make: 1/4 cup wet (60 ml) + 1/4 cup formula (60 ml) + 1 tbsp warm water (15 ml). Do saucer sessions three times daily and slowly reduce bottle top‑ups as they eat more gruel. Advance when they lap steadily and show interest between meals.

    5. Day 5 , prep for chunks
      Use the same thicker mix as Day 4, but stir in tiny soft bits while keeping most of it smooth. Offer three times a day and watch for chewing attempts. Ready to move on when they try to chew the soft pieces or push them around with their tongue.

    6. Day 6 , soft pieces added
      Make: 1/4 cup wet (60 ml) + 1/4 cup formula (60 ml) + 1 tbsp water (15 ml) + 1 tsp soft chunks (5 ml). Serve in a shallow dish three times daily, encouraging lapping and gentle biting. Move forward when they chew and swallow without coughing or gagging.

    7. Day 7 , chunky gruel practice
      Same mix but with slightly larger soft pieces (about 1–2 tsp total). Offer 3–4 saucer meals a day and keep bottles as short top‑ups only. If chewing and lapping are consistent, start shifting toward mostly saucer feeds. Worth every paw‑print.

    Weeks 5–8 overview
    By week 6 aim for about four gruel meals a day. Then in weeks 7–8 move to three firmer meals daily, steadily cutting bottle reliance as lapping and chewing become reliable. For busy days, toss a short saucer session before you head out, ten minutes of play and practice gives you peace of mind. Ever watched a kitten figure out food? It’s the best.

    Formula handling and KMR mixing (mixing ratios, temperature targets, storage)

    - Formula handling and KMR mixing (mixing ratios, temperature targets, storage).jpg

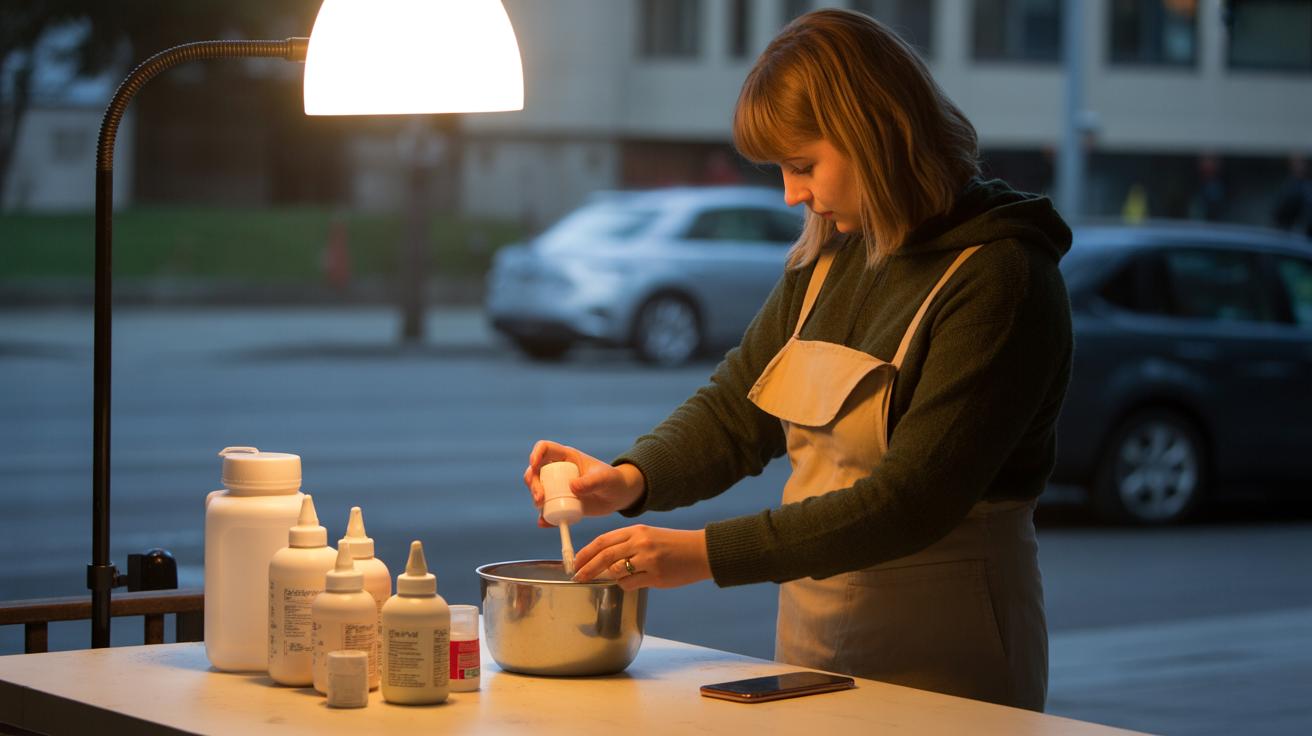
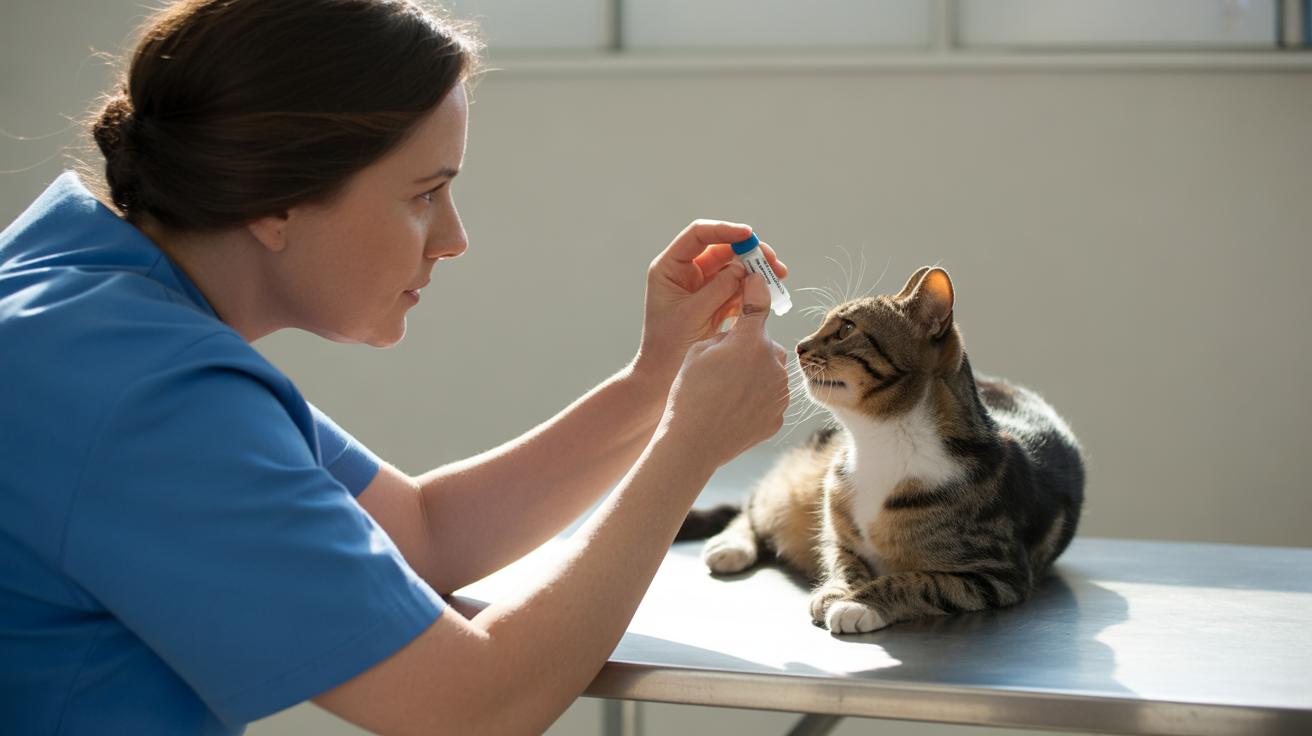
    Pick a commercial kitten formula and follow the directions on the can. KMR (kitten milk replacer) is the right kind of formula for kittens , not cow’s milk, human baby formula, or dairy alternatives; those can give kittens terrible tummy trouble. Keep opened cans or cartons in the fridge the way the maker says and only prepare fresh, clump-free portions right before feeding for the healthiest digestion.

    Read the label first and match the brand’s mixing ratio. A common example is 1 level scoop of powder to 2 fl oz (60 ml) water, but brands vary, so double-check your container. Stir or shake until fully dissolved and test the flow through the nipple (bottle tip) so it drops steadily before you let your kitten latch on.

    Warm prepared formula to about 100 to 102°F (about 38 to 39°C) so it feels like the inside of your wrist. If it’s too cool, pop the sealed bottle into a warm water bath and test again; if it’s too hot, cool it quickly under running cold water. Never heat bottle formula in a microwave , microwaves can create hot spots that burn tiny mouths.

    If the mix clumps, strain it with a fine mesh strainer (like a small kitchen sieve) or just remake that portion so it’s smooth. Store prepared formula in the fridge and follow the manufacturer’s time limit , many recommend using it within 24 hours , and toss any leftovers after that. Wash bottles, nipples, and prep tools with hot, soapy water and sanitize regularly so you don’t invite bacteria to snack on your kitten.

    Want tips on nipple hole cutting, flow testing, or preventing aspiration? See the Bottle Technique and Troubleshooting sections. Ever watched a kitten figure out a bottle for the first time? It’s the cutest thing , and worth making sure every step is safe.

    Bottle technique, syringe feeding options, and introducing the shallow dish

    - Bottle technique, syringe feeding options, and introducing the shallow dish.jpg

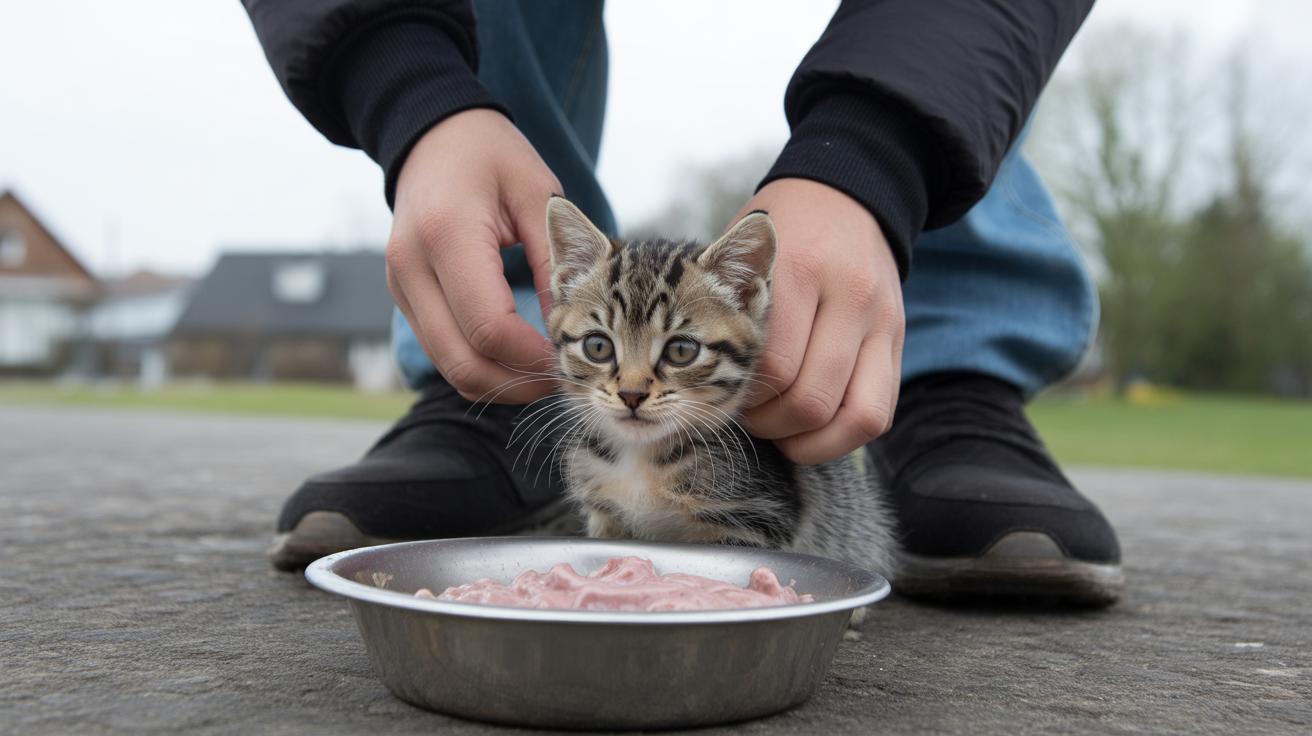
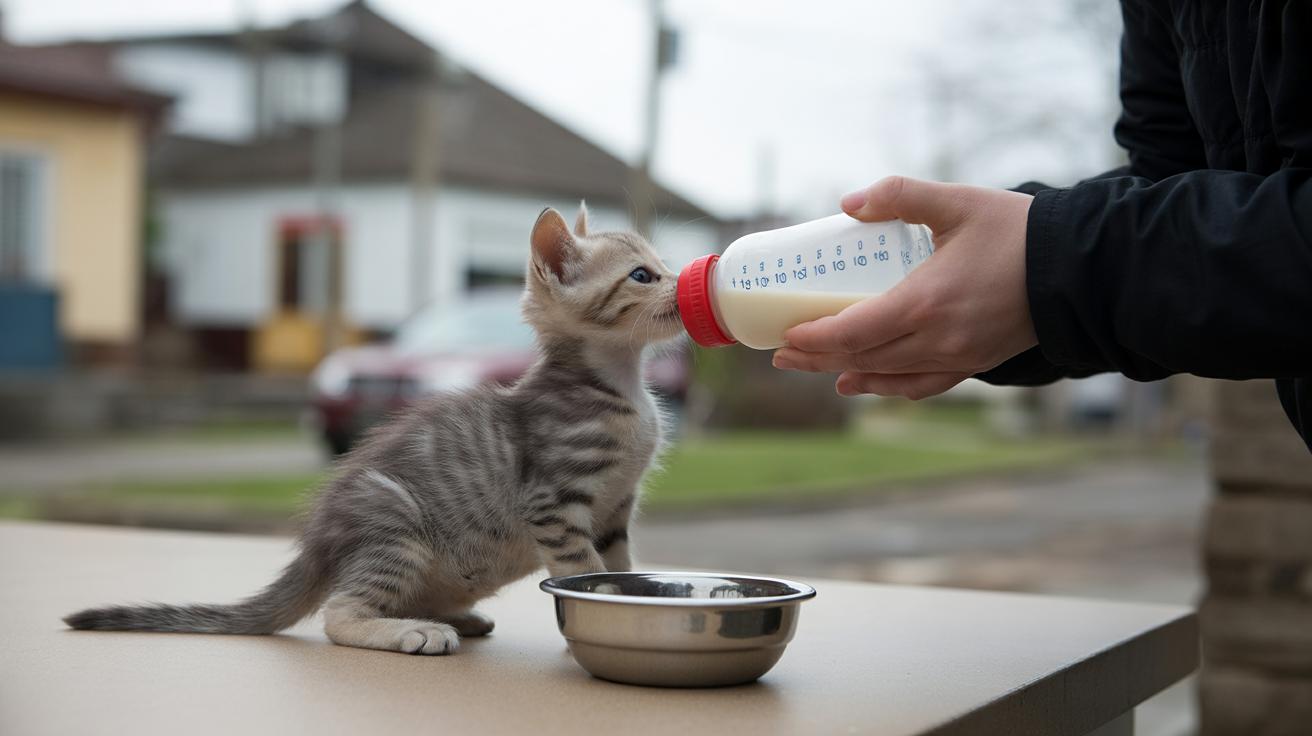
    Ever watched a kitten figure out nursing? Hold the kitten belly-down in a natural nursing position, belly against your forearm like mom would hold them, and steady the head with your non-dominant hand. Offer the nipple (rubber teat) at the lip crease and let the kitten latch and swallow at its own pace; don’t squeeze formula (kitten milk replacer) into the mouth or force the flow. Look for a steady swallow rhythm and little jaw pulses you can feel, those mean they’re doing it right. If the kitten coughs, stops breathing, or the lungs sound wet, stop and get help fast, because that can be aspiration (liquid getting into the lungs).

    Syringe feeding can be a handy backup when the bottle flow is hard to manage or the kitten won’t latch. Use a blunt, needleless syringe (a small plastic tool that gives tiny measured amounts) and work very slowly, a drop or two at a time. Keep the kitten upright enough to swallow. Rapid pushes increase the risk of aspiration, so take your time. For when to try syringe feeding and what warning signs to watch for, see Troubleshooting for flow problems and aspiration signs.

    Nipple prep really matters. Cut the hole so formula drips slowly when the bottle is inverted and always test the flow before offering it; too fast and the kitten may aspirate, too slow and they’ll get tired and give up. If a kitten fusses at the bottle, try a different nipple shape or a slightly larger hole and re-test the flow until it feels right. For detailed step-by-step nipple cutting, flow-rate tricks, and emergency aspiration responses, check Bottle Technique and Troubleshooting.

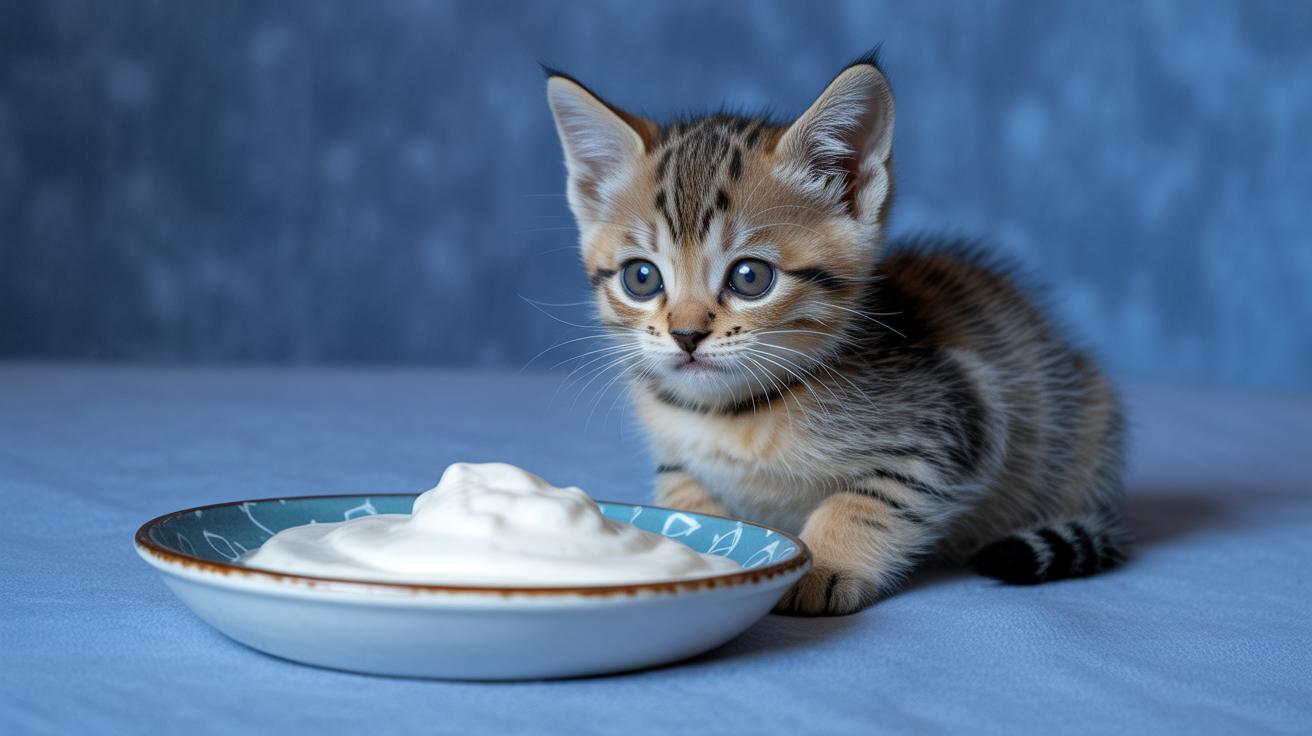
    When it’s time to teach lapping, bring out a shallow dish and serve warm, slightly thinned gruel (a porridge-like mix of formula). Tip tiny amounts toward their whiskers so they discover how to lap rather than suck. Keep saucers very shallow and stay close so you can guide them and praise each little lick. After any feeding, wipe the face clean with a warm, damp cloth to prevent crusty residue. For tips on helping with elimination (stimulating urination and defecation when needed), see Orphaned Kittens.

    Worth every paw-print.

    4-week old kitten feeding schedule

    - Weight monitoring, portion sizing table, and growth targets.jpg

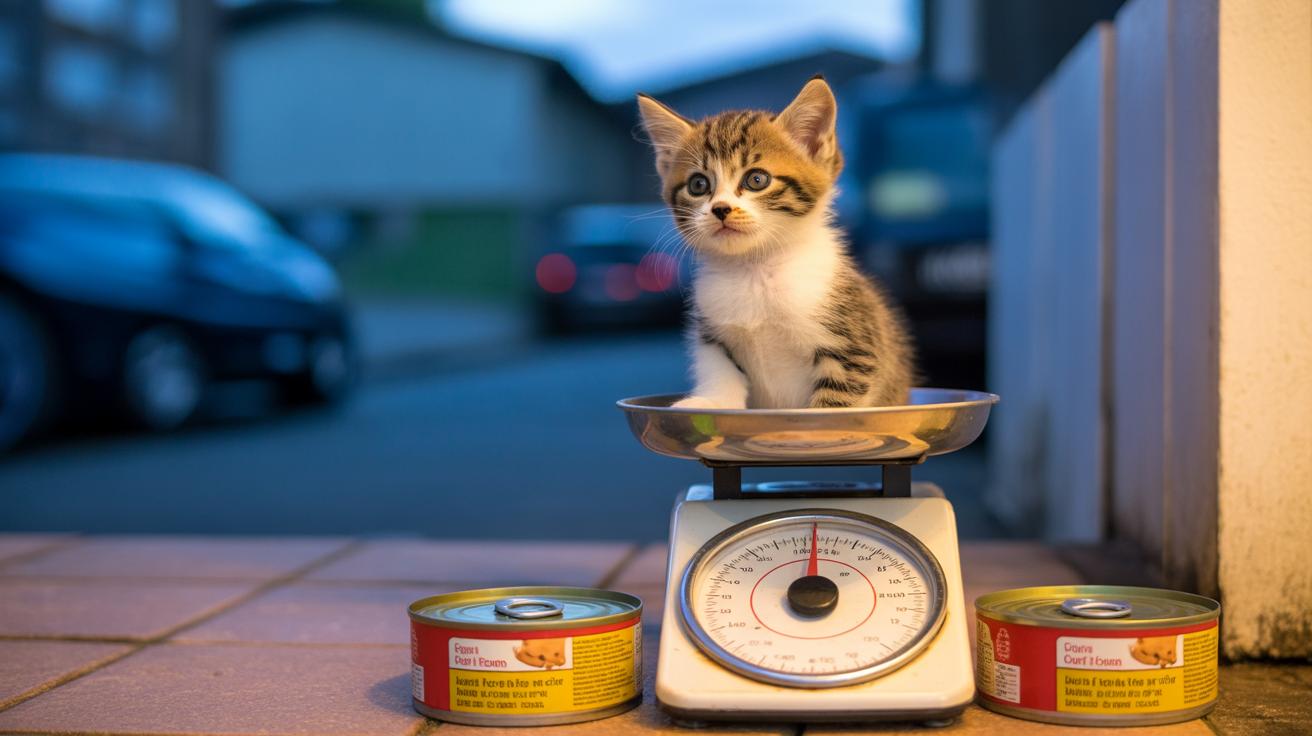
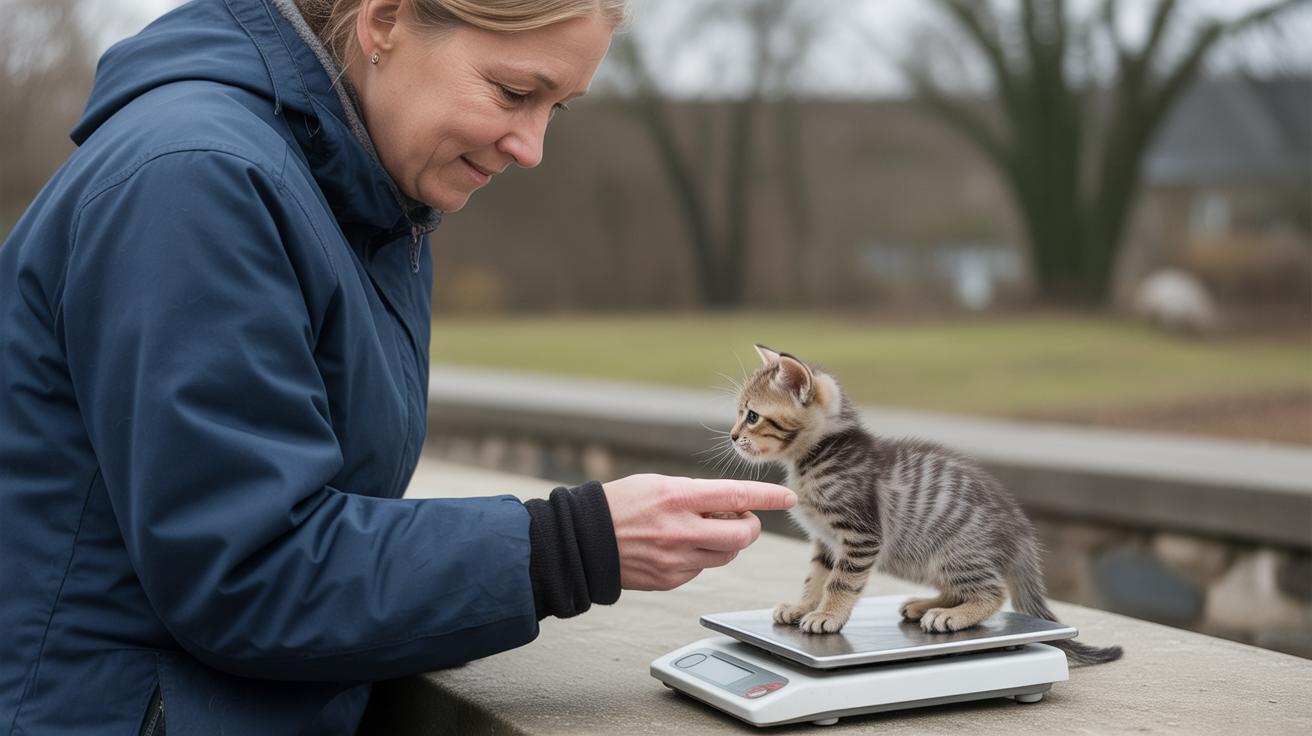
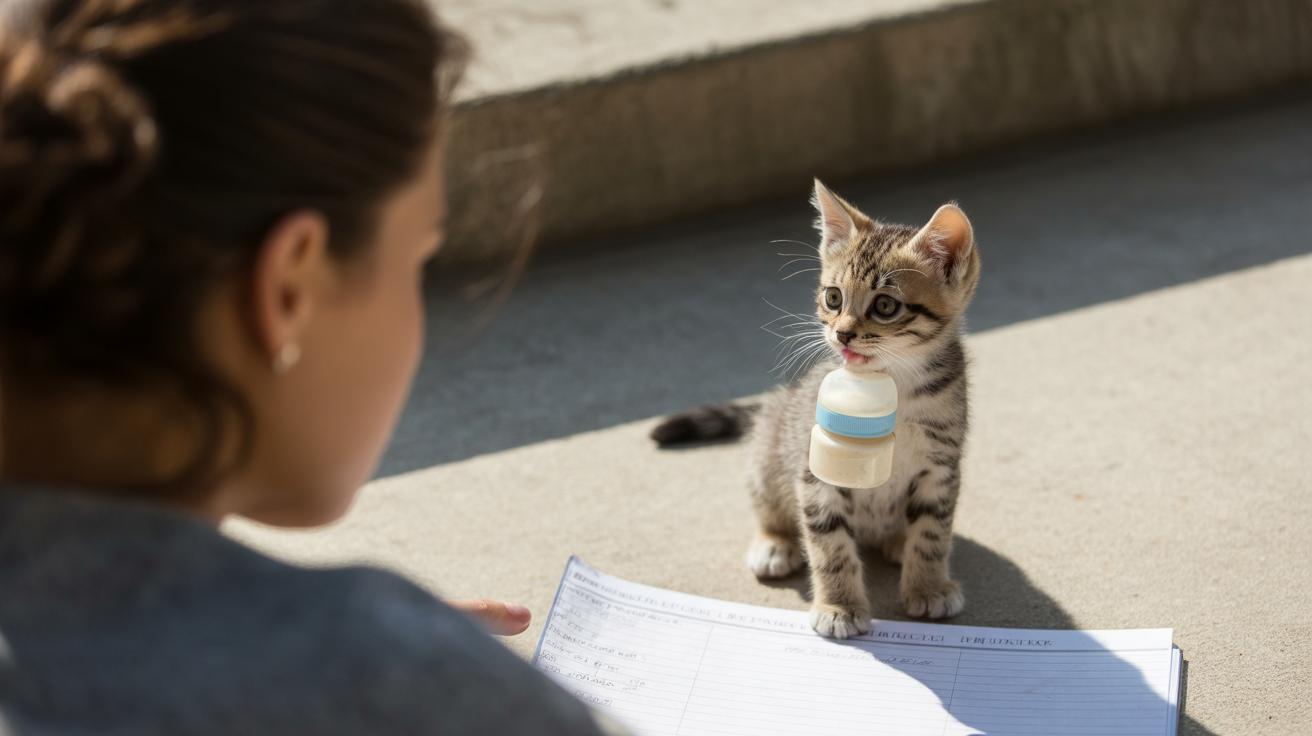
    Wondering how much a 4-week-old kitten should eat? Most are about 440 to 470 g (15.5 to 16.6 oz) at this age and should gain roughly 0.5 to 1 oz (14 to 28 g) each day. Use a digital scale (one that reads to 0.1 oz, like a small kitchen or postal scale) and do a morning weigh-in every day. That daily weigh-in is the single best habit for keeping track of a 4-week kitten's growth.

    Keep a simple log with the date, weight, total daily intake, and any stool notes. Try a three-day rolling average of weight so you can spot trends without panicking over one small dip. If the weights level off or drop, assume the trend is real and increase feeding opportunities instead of guessing. Ever watched a kitten refuse food one meal and then gobble the next? Yep, patterns matter more than a single day.

    Kitten weight (g / oz) Recommended gruel per feeding (tbsp / ml) Typical bottle top-up per feeding (ml) Daily gain target (oz / g)
    <400 g (<14 oz) 2 tbsp (30 ml) – gruel is a milk-based slurry 30 ml 1 oz (28 g)
    440 to 470 g (15.5 to 16.6 oz) 2 tbsp (30 ml) 15 ml 0.5 to 1 oz (14 to 28 g)
    >500 g (>17.6 oz) 3 tbsp (45 ml) 15 ml 0.5 oz (14 g)

    If growth starts to lag, increase the number of small feedings each day. Offer short bottle top-ups after saucer sessions, or try a higher-calorie formula per your troubleshooting notes. Use the chart portions as a starting point and change amounts slowly while watching the three-day trend. Big jumps in volume can cause tummy troubles, so go easy.

    Call your veterinarian if a kitten fails to gain over 2 to 3 days, refuses two meals in a row, becomes unusually sleepy for several hours, has diarrhea lasting more than 24 hours, or shows breathing trouble. Those are clear red flags that need prompt care. Worth every paw-print to catch problems early.

    Troubleshooting common feeding problems, red flags, and emergency first‑aider steps

    - Troubleshooting common feeding problems, red flags, and emergency firstaider steps.jpg

    If your kitten skips two meals in a row, that’s a real red flag. Try warming the gruel a bit and offering a tiny bottle top‑up, or rub a little on the whiskers to spark interest. Weigh the kitten on a kitchen or baby scale. If weight drops or the kitten seems unusually sleepy for several hours, increase feeding attempts and call your vet if things don’t improve. Signs of underfeeding: limp energy, cooler body temperature, and flat or falling weight over two to three days.

    Loose stools or diarrhea that lasts more than 24 hours needs attention. Pause any new textures for a day and give small, bland portions of formula while you watch hydration and stool patterns. If you see blood, mucus, or very watery, frequent stools, bring a stool sample or a clear photo to your vet and get help fast. Kittens can dehydrate quickly, so be proactive.

    Dehydration shows up as a slow skin tent (pinch a bit of skin, if it doesn’t snap back quickly, that’s bad), tacky or pale gums, or sunken eyes. Offer warm formula in tiny amounts and keep the kitten warm with a supplemental heat source on one side (think a low heat heating pad, covered and set so the kitten can move away). If the kitten won’t drink or the skin tent is slow to recover, call your vet right away, fluids and a circulation check may be needed.

    Aspiration and flow problems are serious. Aspiration is when milk or formula goes into the lungs (not the stomach) and that can cause coughing, gagging, or wet, noisy breathing during feeding. If that happens, stop feeding immediately. Sit the kitten upright, keep it warm, do a quick weight check, and get to urgent care if breathing is noisy or difficult. Don’t resume feeding until a professional clears the lungs or shows you syringe‑feeding rescue steps.

    Check stools every day for color, frequency, and texture. Pale, greasy, or very loose stools can mean a dietary mismatch or parasites. Signs a kitten is ready for solids: confident lapping, chewing soft bits, and swallowing without coughing. Move textures slowly and follow a weaning plan so the transition stays gentle.

    When to call the vet: refusal of two meals in a row, diarrhea over 24 hours, failure to gain or weight loss over two to three days, persistent lethargy for several hours, or any breathing trouble. Immediate first‑aider steps: stop feeding if you suspect aspiration, keep the kitten warm, perform a brief weight check, and get the kitten to veterinary care for breathing problems or severe dehydration.

    Orphaned kittens, multi‑kitten feeding logistics, hygiene, and daily care station checklist

    - Orphaned kittens, multikitten feeding logistics, hygiene, and daily care station checklist.jpg

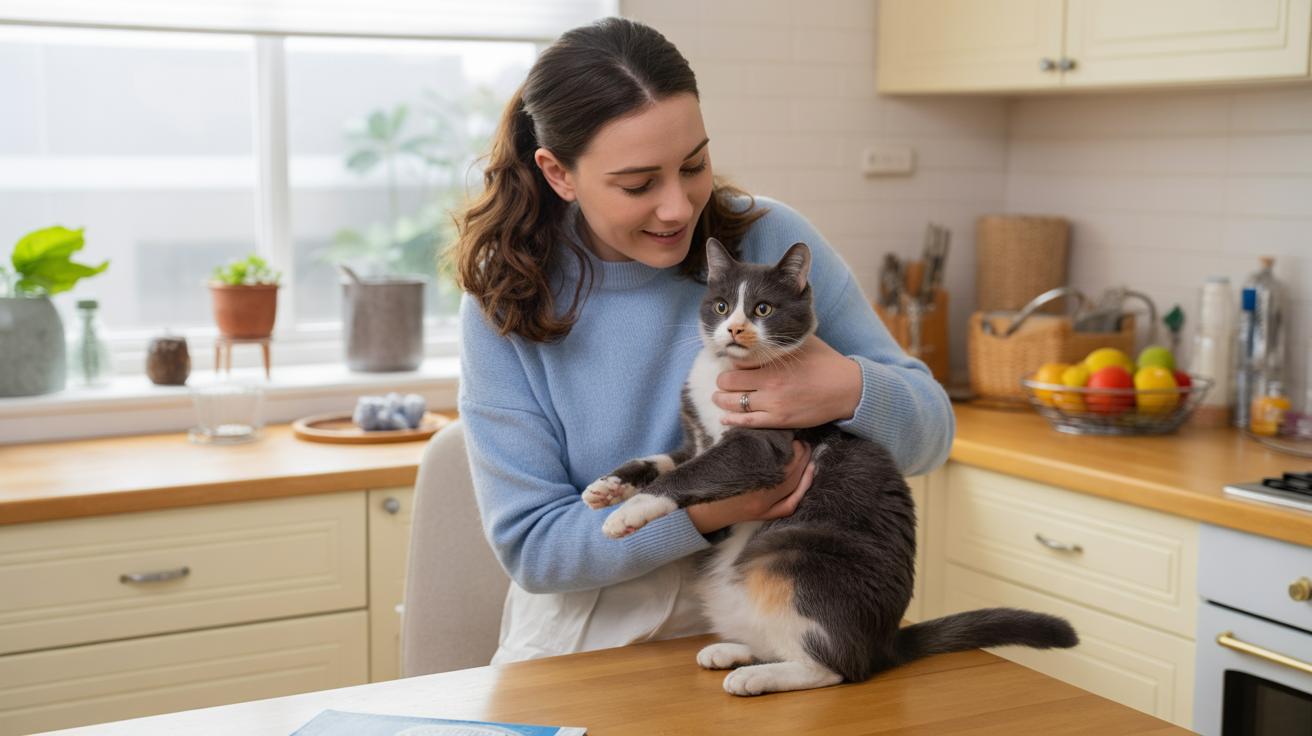
    Orphaned kittens need more hands-on time. Expect extra bottle sessions, more night checks, and a slower move to saucer food. You’ll also need to keep helping them pee and poop with a warm, damp cotton ball or cloth (manual stimulation to mimic the mother’s tongue). Warmth and a calm buddy cat or kitten really help with social skills and immunity, ever watched a tiny belly relax against a warm chest? Cute.

    Set up a tidy care station with:

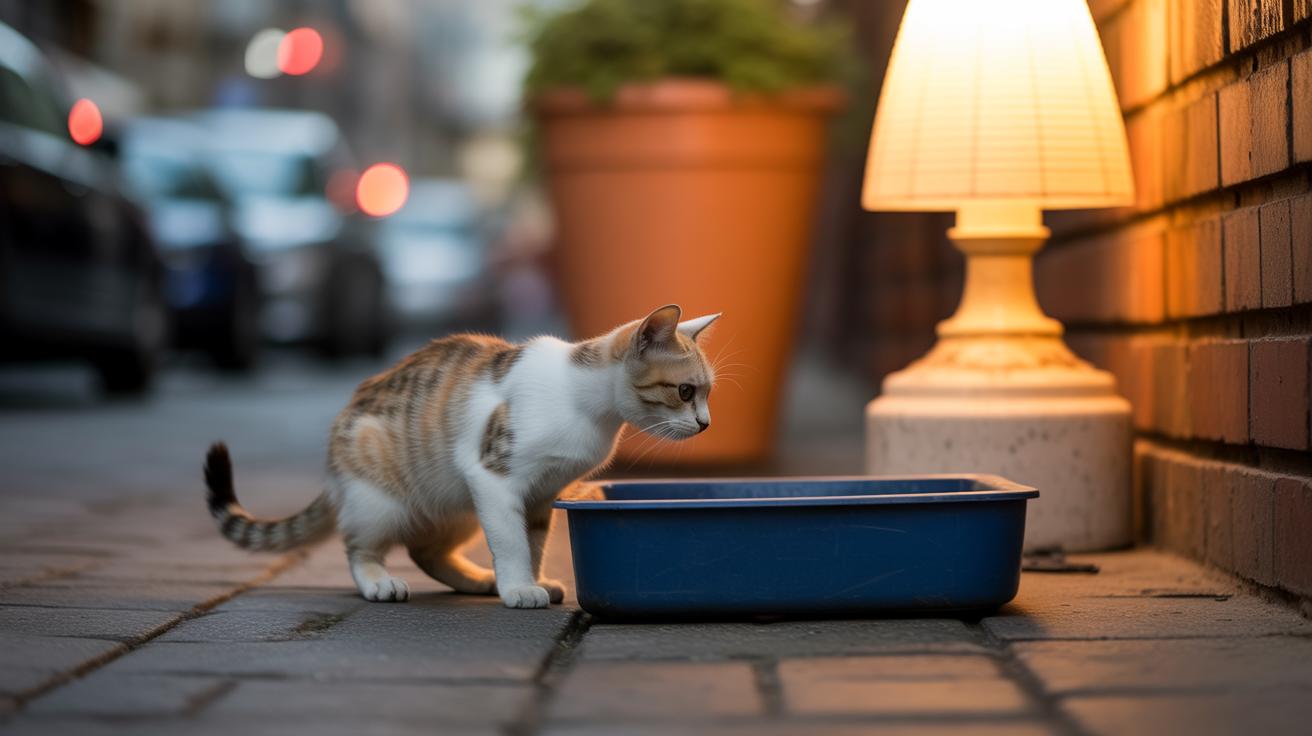
    • A low-sided litter box and non-clumping unscented litter (litter that doesn’t form hard clumps and has no added fragrance). Shallow sides make it easy for tiny legs to get in and out.
    • Shallow food and water dishes so kittens can reach without tipping or slipping.
    • A digital scale that reads to 0.1 oz (about 3 g) so you can track tiny gains accurately (also note grams if you prefer).
    • A one-sided supplemental heat source (like a low-wattage heat pad or ceramic emitter) so the area sits around 75-80°F, with a warm side and a cooler side so kittens can move where they’re comfy.
    • Machine-washable bedding and towels that hold warmth but wash clean.
    • A couple soft, age-appropriate toys for batting and paw practice.

    Keep the heat source covered and give an easy escape route so no kitten gets too toasty. Safety first. Really.

    Start litter training with short, frequent box placements right after meals and naps. Show them how to scratch at the litter so they copy the motion, cats learn fast by watching. If a kitten can’t eliminate on its own, gently stimulate the genital area while they’re in the box (use that warm, damp cloth). Patience, praise, and consistent timing make this less stressful for everyone.

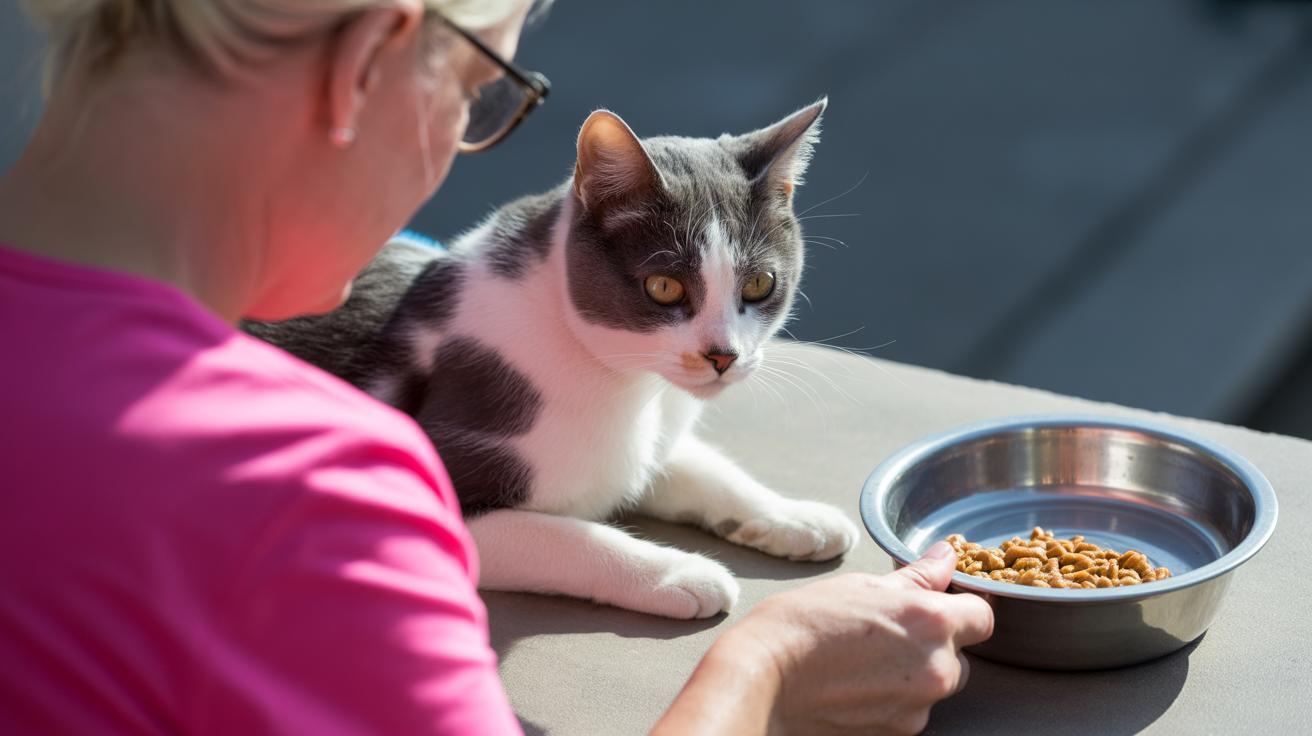
    Feeding more than one kitten takes a plan. Use several bowls and start meals a few minutes apart if one sibling crowds the others. Supervise saucer sessions, move a dominant kitten aside for a short break if it’s hogging food, and give tiny bottle top-ups one by one so the weaker babies meet their goals without competition. Weigh them before and after feeding to be sure they’re getting enough.

    Keep an individual log for each kitten so nothing slips through the cracks. Useful fields: date; morning weight (g & oz); total gruel (ml); bottle volume (ml); stool notes (consistency, color); eliminations stimulated (yes or no); behavior notes (energy level, latching); and night feeds.

    Date Morning weight (g & oz) Total gruel (ml) Bottle volume (ml) Stool notes Eliminations stimulated Behavior notes Night feeds
    2025-01-01 250 g / 8.8 oz 15 ml 10 ml Soft, brown No Active, latched well 2

    Wash bowls and bottles with hot, soapy water after each use and practice good hand hygiene to lower infection risk. Little things like clean hands and clean bottles add up, worth every paw-print.

    Final Words

    Start feeding on the 24-hour timetable: timed gruel at body temp, rounded portions, measured bottle top-ups, and a single overnight check for orphaned or underweight kittens.

    Use the day-by-day weaning steps, KMR temps, bottle-hold tips, saucer lapping, and morning weigh-ins to track ~0.5–1 oz/day growth.

    Keep this 4-week old kitten feeding schedule with the weight chart and troubleshooting notes; it helps you spot problems early and keep night checks simple. You're set to enjoy playful, healthy kittens.

    FAQ

    What should I feed a 3–5 week old kitten without a mother?

    A 3–5 week old kitten without a mother should get commercial kitten formula by bottle. From around week 4, begin offering a thin saucer gruel made by blending canned kitten food with formula so the kitten can lap it easily.

    Can 4‑week old kittens eat wet food?

    Yes. Start a thin gruel: mix 1/4 cup canned kitten food, 1/2 cup kitten formula, and 1 tablespoon warm water; blend smooth and serve at about body temperature.

    How often should a 4‑week old kitten be fed and what does a sample schedule look like?

    Feed every 3–4 hours while the kitten is awake. Use mixed gruel during the day with bottle top-ups as needed. Plan for about 6–8 daytime feeding opportunities and at least one overnight check or feed if the kitten is orphaned or underweight.

    How much should a 4‑week old kitten eat?

    Typically about 1–2 tablespoons (15–30 ml) of gruel per feeding with small bottle top-ups as needed. Aim for a weight gain of roughly 0.5–1 oz (14–28 g) per day.

    What is the 3‑3‑3 rule for kittens?

    The 3‑3‑3 rule highlights milestones: first 3 weeks = neonatal dependence; weeks 3–6 = start of weaning and social play; the next 3 weeks = increasing independence toward about 9–12 weeks old.

    Can 4‑week old kittens go all night without eating?

    A 4‑week old kitten should not routinely go all night without eating unless it is steadily gaining weight. Orphaned or underweight kittens need at least one overnight feed or check.

    How often do 4‑week old kittens need to drink milk?

    They need milk every 3–4 hours, with feeds gradually reduced as gruel and wet food increase. Bottle feeds are still useful for calories and comfort during weaning.

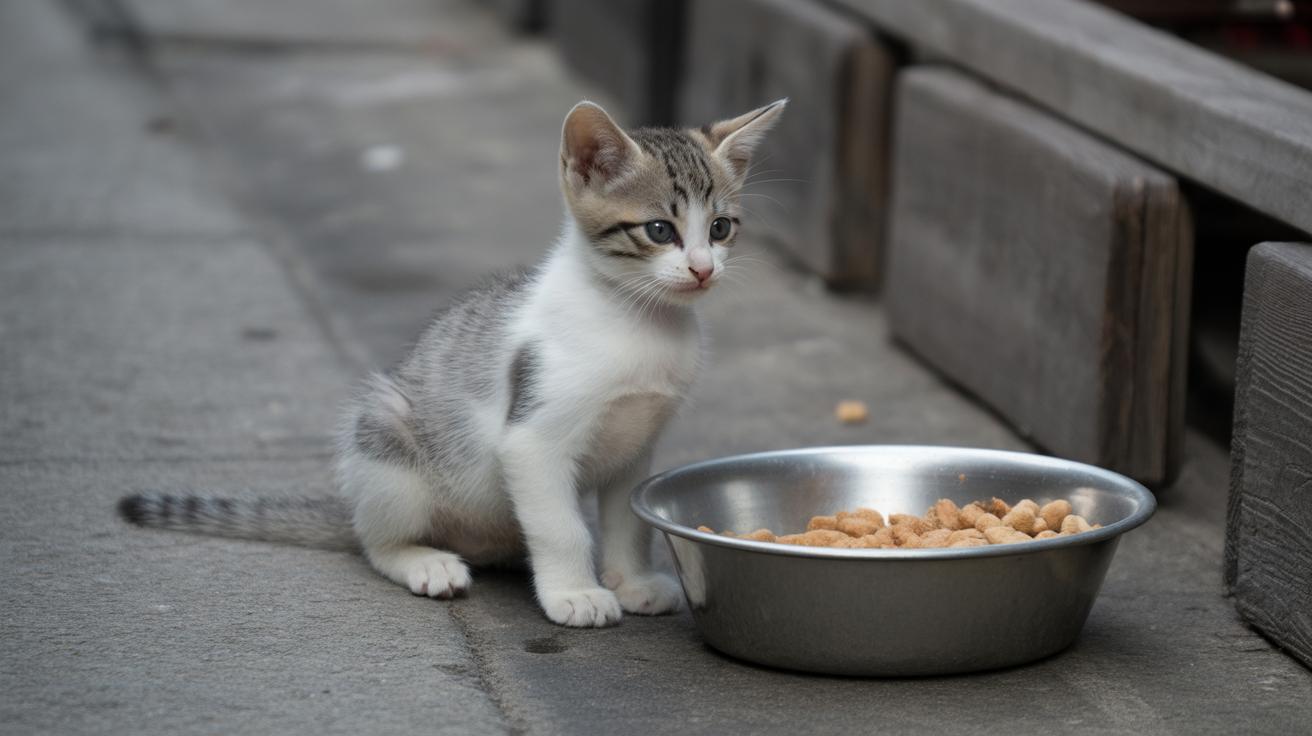
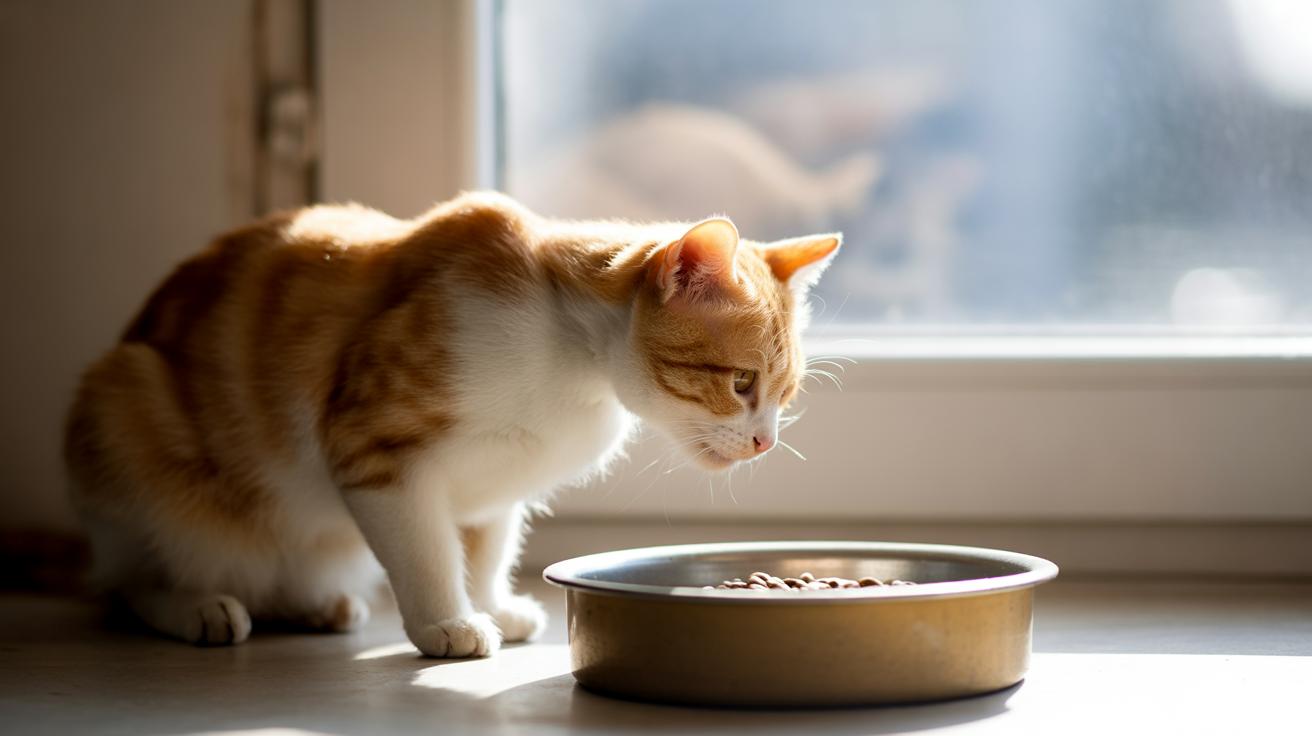
    What signs show a 4‑week kitten is ready to lap from a saucer or eat solids?

    Signs include approaching the saucer, licking thin gruel, scooping gently with the tongue, chewing small soft pieces, and sustained interest in the food.

    Related Articles

  • How Much Wet Food Should a Kitten Eat

    How Much Wet Food Should a Kitten Eat

    Think letting your kitten eat whatever they want will make them healthier? Not really. It sounds sweet, but that free-for-all can lead to under- or over-feeding pretty fast.

    Rule of thumb: aim for 100-300 g per day (grams, g, a small unit of weight, about 1 paperclip per gram). That’s roughly 1 to 4 of those 71 g cans (71 g, single-can size; about 2.5 oz). Newborn kittens need three to four tiny meals a day; by six months most do fine on two meals.

    Your kitten’s whiskers will twitch at a full bowl, happy, satisfied, and ready to pounce. Ever watch them bury their face in the food? Cute, right.

    Practical steps: weigh portions on a kitchen scale, track kcal (kcal, kilocalories, the Calories listed on pet food), check body condition once a week (feel the ribs, look for a waist), and tweak amounts with your vet’s advice. Think of kcal like fuel for playtime, too little and they’re tired, too much and they pack on the pounds.

    Worth every paw-print.

    How Much Wet Food Should a Kitten Eat

    - Wet food portions for kittens age- and weight-based guide (this section answers the search intent).jpg

    Quick start: if you want a simple rule, feed about 100-300 g per day (grams), which is roughly 1-4 of the 71 g (2.5 oz, ounces) sample cans. Split that into 3-4 small meals a day for very young kittens, and move toward two meals a day by about six months when growth slows and appetites settle. This is a starting point, not gospel, so watch your kitten and tweak as you go.

    Pick the row in the chart that best matches your kitten's age and weight. Then choose a daily kcal target (kcal means kilocalories, the Calories listed on pet food) toward the low or high end based on how active your kitten is and how they look – lean or chubby. The wet grams/day and cans/day columns assume about 90 kcal per 71 g can. If your brand lists a different kcal or can size, follow the conversion how-to and use a kitchen scale (digital food scale) to measure portions precisely. Start with the suggested daily grams, divide into the meal count shown for that age group, weigh each serving, and check your kitten's weight and body condition weekly. Talk with your veterinarian to personalize portions for health, activity level, and breed. See the Adjusting section for tips if your kitten needs to gain or lose a little.

    Age (weeks/mo) Approx weight (lbs/kg) Daily kcal target (range) Wet grams/day (based on 90 kcal per 71 g) Approx cans/day (2.5 oz/71 g cans)
    4 weeks 1 lb / 0.45 kg 150-200 kcal 118-158 g 1.7-2.2 cans
    6 weeks 1.5 lb / 0.7 kg 180-260 kcal 142-205 g 2.0-2.9 cans
    8 weeks 2 lb / 0.9 kg 220-320 kcal 174-252 g 2.4-3.6 cans
    3 months 3 lb / 1.4 kg 260-380 kcal 205-300 g 2.9-4.2 cans
    4 months 4 lb / 1.8 kg 300-420 kcal 237-331 g 3.3-4.7 cans
    6 months 6 lb / 2.7 kg 320-420 kcal 252-331 g 3.6-4.7 cans
    12 months 8 lb / 3.6 kg 240-320 kcal 189-252 g 2.7-3.6 cans
    See conversion how-to for brand-specific math and kitchen-scale method.

    How to convert wet food calories and cans into kitten portions

    - How to convert wet food calories and cans into kitten portions.jpg

    Small label differences in kcal and can sizes can change your kitten's meal plan a lot, so do this math once and you can feed precise, comfy portions every day. kcal (kilocalories, the energy in food) and grams (g, a metric weight unit) are the two things you need to compare. Think of it like translating food labels into what your kitten actually eats.

    1. Find the kcal per serving on the label and the serving weight in grams.
    2. Calculate kcal per gram: kcal ÷ grams = kcal/g (example: 90 kcal ÷ 71 g = 1.27 kcal/g).
    3. Pick a target kcal/day from a portions table that fits your kitten’s age and activity level.
    4. Divide the target kcal by kcal/g to get grams per day (example: 200 kcal ÷ 1.27 kcal/g ≈ 158 g/day).
    5. Convert grams per day into cans or pouches using the product’s serving weight (158 g ÷ 71 g ≈ 2.2 cans).
    6. Weigh and record actual portions for 3 to 7 days with a digital food scale (digital food scale – a small kitchen scale that shows grams). Tare the scale with the empty bowl, add the serving, note the grams, and put measured portions in labeled containers in the fridge.
    Label kcal per serving Serving weight (g) kcal per g Grams needed for 200 kcal/day Cans/servings for 200 kcal/day
    90 kcal 71 g 1.27 kcal/g 158 g 2.2 cans
    120 kcal 85 g 1.41 kcal/g 142 g 1.7 cans
    150 kcal 100 g 1.50 kcal/g 133 g 1.3 cans
    100 kcal 75 g 1.33 kcal/g 150 g 2.0 cans
    70 kcal 50 g 1.40 kcal/g 143 g 2.9 pouches

    Handle multipack wet pouches the same way: check each pouch’s kcal and grams, then portion into daily jars or reusable trays and label with the date. For cans, move leftovers into airtight containers and use within the fridge window the label recommends. Weigh servings at each meal the first week so you notice inconsistencies and learn what a proper portion feels like.

    If you mix wet and dry food, add up the kcal from each so the whole day hits the target (see Mixing section for ratio guidance). When choosing kitten formulas, pick higher calorie and higher protein options for growing kittens, here's a good reference: wet cat food high in protein.

    If anything feels off, sudden weight change, different stool, or a drop in appetite, call your veterinarian so portions can be adjusted for health, breed, or activity. Ever seen your kitten pounce on a bowl like it’s prey? That’s a good sign the portion was just right.

    How often should a kitten eat wet food: meal frequency and sample schedules

    - How often should a kitten eat wet food meal frequency and sample schedules.jpg

    Kittens do best with regular, small meals so their energy and growth stay steady. Young kittens usually eat three to four times a day until about four months old, then slowly move toward two meals a day by around six months. Timed meals help you spot appetite changes, stop one kitten from gobbling everything, and make it easier to track calories and weight.

    If you’re caring for an orphaned or bottle-fed kitten, skip the schedules below and see the Weaning section for round-the-clock guidance and formula volumes (kitten milk replacer, the special kitten formula).

    Sample schedule: 4–12 weeks

    For kittens raised by their mother, try three to four small meals: morning (7–9 am), midday (11 am–1 pm), late afternoon (3–5 pm), and evening (7–9 pm). Keep portions small and steady so your kitten gets energy between naps and play. Picture tiny whiskers twitching as the bowl hits the floor, adorable and practical.

    Portion each meal as part of the daily total. Example: if the daily wet-food amount is 200 g (about 7 oz), give roughly 50 g (1.8 oz) at each of four meals, or about 67 g (2.4 oz) at each of three meals. Weigh the servings a few times so you get a feel for a proper portion.

    Sample schedule: 3–6 months

    Start shifting from three meals to two across several weeks: keep a morning meal and an evening meal, and add a small midday snack during growth spurts if needed. Try breakfast around 7–9 am and dinner around 6–8 pm. Watch your kitten’s body condition and weight during this change. If they seem ravenous or lose weight, add a small mid-afternoon portion and reweigh after a week to tweak the amounts.

    Worth every paw-print.

    Mixing wet and dry for kittens: ratios, hydration and calorie tracking

    - Mixing wet and dry for kittens ratios, hydration and calorie tracking.jpg

    Wet food holds about 75% moisture, while dry kibble has roughly 6 to 10% moisture. Wet meals give kittens extra water, which helps hydration, softens stools, supports kidney health, and can tempt picky eaters. Picture a glossy pate that smells like a tuna parade, tempting, right? That aroma often gets timid tummies eating.

    A simple starting plan is to aim for a 2/3 wet to 1/3 dry split by calorie contribution. In plain terms, that means two thirds of the day’s calories come from wet food and one third from kibble. Measure wet and dry separately on a kitchen scale, check each product’s kcal (food calories) per serving on the label, then add the kcal totals so the day matches your kitten’s calorie target.

    If you want to convert calories into how much to feed, you’ll do kcal to grams math (kcal, food calories; grams, metric weight). We walk through the kcal → grams → cans steps in the Conversion section. See How to convert wet food calories for step-by-step math.

    Practical tips that actually help: weigh servings into labeled containers so you don’t guess mid-day. Use timed meals so one kitten doesn’t gobble up all the kibble between wet feedings. Give each kitten its own bowl or use a microchip feeder (feeds only the cat with the matching chip) if competition is an issue.

    Always keep fresh water nearby, even with lots of wet food. And before you mix brands, compare calorie density across wet foods so you don’t accidentally overfeed. For a quick product-choice reference, check wet cat food brands.

    Worth every paw-print.

    When to start wet food: step-by-step weaning from milk or formula to wet food (includes orphan/bottle schedules)

    - When to start wet food step-by-step weaning from milk or formula to wet food (includes orphanbottle schedules).jpg

    We usually start weaning around 3-4 weeks and most kittens are eating solids by 6-8 weeks. Go slow. Think thin gruel first, then a thicker mash, then plain wet food. That gentle pace helps tiny tummies adjust and saves you from a dramatic clean-up scene.

    Stage 1: 3-4 weeks – first exposure

    Put a shallow dish down with a tiny amount of gruel moistened with kitten formula (kitten milk replacer , powdered formula that replaces a mother’s milk). Make it runny, like thin oatmeal, so the kitten can lap or nudge it. Mash and stir with a fork so it’s easy to lap. Let them taste for short sessions a few times a day and keep servings just a spoonful or two while they figure out mouth mechanics.

    Stage 2: 5-8 weeks – increasing solids

    Over several days make the mix thicker by cutting back on formula or water so it becomes pate-like (pate = smooth wet food). Offer three to four small meals a day. By 6-8 weeks most kittens will take straight wet food; if one sniffs and walks away, warm a little to room temperature to boost the smell. Your cat’s whiskers will twitch at that aroma.

    Stage 3: 8+ weeks – fully weaned

    At about eight weeks most kittens eat kitten-formulated wet food only, getting about three meals a day and moving toward two meals by six months. Stop the formula once they consistently eat wet food, and always keep fresh water available. For a 4-week-old, keep portions tiny and mostly moistened, this is practice, not the full diet yet.

    Orphan and bottle-feeding schedules (newborn-focused)

    Newborn orphans need round-the-clock care. Feed every 2-3 hours at first, then slowly stretch the time between feeds as they grow. Follow the formula maker’s feeding chart (it lists volumes by weight), weigh the kitten daily on a kitchen scale (digital kitchen scale , measures grams for accuracy) and follow the ml-per-weight guidelines rather than guessing.

    Use safe bottle technique: warm formula to body temperature and test a drop on your wrist, hold the kitten belly-down (not on its back), let it latch and suck at a gentle angle, and burp by rubbing between the shoulder blades. Clean bottles and nipples after each use, refrigerate unused mixed formula per the label, and discard any warmed leftover formula after the time the maker recommends.

    If a kitten won’t suck, feels cold, cries constantly, breathes fast, or isn’t gaining weight, call your veterinarian right away. For formula-calorie math and exact portion conversions by weight, see the Conversion section and use a digital kitchen scale so you can be precise. Worth every paw-print.

    Signs a kitten is getting the right amount of wet food and red flags for under- or overfeeding

    - Signs a kitten is getting the right amount of wet food and red flags for under- or overfeeding.jpg

    Keeping an eye on a kitten’s weight and eating habits is the best way to know if their wet food amount is right. Watch energy, litter box output, and how they feel when you pet them. Your goal: steady growth, bright eyes, playful pounces, and regular poops. Sounds simple, right? Mostly it is, until it isn’t.

    When to call the vet

    • Call the vet right away if your kitten loses more than 5% of body weight in one week.
    • Call if the kitten won't eat for 24 to 48 hours.
    • Call for ongoing diarrhea or vomiting that lasts more than 24 hours, or for repeated vomiting more than twice.
    • Call if the kitten is very lethargic, having trouble breathing, or showing dehydration signs like sunken eyes or dry gums.
      Quick example note: "Lost 6% in 5 days; refused breakfast and dinner."

    How to weigh accurately (short how-to)

    • Use a digital scale that measures grams (g) or ounces (oz) and reads to at least 5–10 g (a small, precise kitchen or postal scale works).
    • Weigh at the same time each day, ideally first thing in the morning before feeding. Example: "Weighed at 8:00 AM before breakfast: 1.3 lb."
    • Tare method for accuracy: put the carrier or towel on the scale, press tare (zero), then place the kitten inside and record the weight. Tare explained: set the scale to zero with the empty carrier so you only measure the kitten. Example: "Tare carrier = 0.0 oz; kitten = 18.2 oz."
    • If you must hold the kitten, weigh yourself alone, then weigh yourself holding the kitten and subtract the first number.
    • Weigh weekly during weaning (weaning = when kittens move from milk to solid or wet food), then every 1–2 weeks once growth is steady unless something changes.

    Simple 1–5 body condition score (feel + sight)
    Think of this like a quick hand-and-eye check you can do while cuddling.

    • 1 – Emaciated. Ribs, spine, and pelvic bones are very obvious; no fat. Example: "Score 1: ribs show with no fat."
    • 2 – Thin. Ribs easily felt with little fat covering; waist obvious.
    • 3 – Ideal. Ribs can be felt under a slight layer of fat; waist visible from above. Example: "Score 3: ribs felt with slight fat; waist visible."
    • 4 – Overweight. Ribs harder to feel under thicker fat; waist reduced.
    • 5 – Obese. Ribs not palpable; no waist and a noticeable abdominal fat pad.
      Run your hands gently along the ribs and look from above and the side, your touch should tell the story more than a quick glance.

    Concrete red-flag thresholds (short checklist)

    • Weight loss greater than 5% in seven days.
    • No eating for 24 to 48 hours.
    • Diarrhea or vomiting lasting over 24 hours, or vomiting more than twice.
    • Marked lethargy, breathing trouble, or dehydration signs (sunken eyes, dry gums).
      If you see any of these, don’t wait.

    Daily monitoring log template (use once per day)

    Date Time Weight Meals (type + amt) Stool Notes
    2026-01-13 8:15 AM 1.2 lb Wet 3×15 g Firm Ate well, playful

    Adjusting amounts and weaning tips

    • If weight is steady and body score is about a 3, keep the current portion. Small tweaks are fine – add or subtract 5-10% and recheck weight in a week.
    • If the kitten is gaining too fast and moves toward score 4, cut portions a bit and offer short play sessions before meals to slow eating.
    • If the kitten is losing weight or dropping toward score 2, increase food slightly and try offering multiple small meals. If appetite doesn’t improve, call the vet.
      Weaning tips (weaning = gradual switch from milk to wet food): start with moistened wet food and offer small amounts several times a day. Weigh weekly during this time. Once they’re reliably eating and gaining, you can space weigh-ins to every 1–2 weeks.
      Quick note: for busy days, weigh once in the morning and jot down meals and stool, ten minutes of tracking makes a big difference.

    Final little human touch
    Keep it simple, and try to make weighing and logging a calm routine. Your kitten will thank you with happy head butts and ridiculous zooms. I once watched a tiny tabby leap three feet for a wet-food pouch – totally worth the tracking.

    Adjusting wet food portions for health status, breed, spay/neuter and multiple kittens

    - Adjusting wet food portions for health status, breed, spayneuter and multiple kittens.jpg

    Spay or neuter usually lowers a kitten’s baseline energy needs by about 30%. Metabolism (how fast the body burns calories) slows a bit after surgery, so cut daily kcal (kilocalories, the energy in food) by roughly 30% and check body condition once a week. Keep an eye on the weight tape or scale and tweak portions as needed.

    Pregnant or nursing queens need about 25–50% more kcal, since they’re fueling kittens. Very active or outdoor kittens burn extra energy chasing and exploring, so they may need more than the chart shows. Whenever you change portions for life stage or activity, redo the kcal-to-grams math using your Conversion section so the totals stay accurate.

    If a kitten is underweight, try a calorie-dense wet diet (higher kcal per gram, so more energy in each spoonful) and weigh the kitten every 3–5 days while watching stool and play energy. Contact your veterinarian if there’s no steady gain. For mild dehydration or poor appetite, choose moisture-forward wet food (more water per serving) to help rehydrate. For diarrhea or repeated vomiting, only change diets under veterinary direction, some kitties do fine with a short bland diet, others need a prescription gastrointestinal formula and further testing.

    Multi-kitten homes are chaotic in the cutest way, but logistics matter. Use separate bowls in quiet stations, supervise meals, or get a microchip feeder (a feeder that opens only for the cat with the matching implanted chip) to stop one bold kitten from hogging food. Label refrigerated, pre-measured portions, stagger meal times if needed, and record each kitten’s weight weekly so you can spot who’s winning or losing the food race.

    Practical condition-specific actions:

    • Underweight: switch to calorie-dense wet diets; weigh every 3–5 days and call your vet if there’s no steady gain.
    • Overweight: reduce daily kcal by about 10–20% and reweigh weekly; contact your vet for fast or unexplained loss.
    • Diarrhea/vomiting: only fast 12–24 hours under vet advice, then follow a bland or prescription diet per your vet.
    • Post-spay/neuter: lower kcal by roughly 30% and check body condition weekly.
    • Nursing: increase kcal by 25–50% and offer free-choice food so mom can eat when she needs to.
    • Multi-kitten competition: use separate feeding stations or microchip feeders; track individual weights weekly.

    Keep a simple weighing and log routine (a quick notebook or phone note works). Whenever you swap diets, recalculate kcal so portion sizes stay right. And if weight changes persist, diarrhea continues, vomiting repeats, or a kitten refuses to eat, call your veterinarian. Isn’t it nice when a plan makes life easier and your kittens stay happy and healthy?

    Final Words

    We jumped straight into practical stuff: an age- and weight-based portions chart, a clear kcal-to-grams conversion how-to, meal schedules, mixing tips, staged weaning steps, signs to watch, and rules for special cases like post-spay or multi-kitten homes.

    Use the chart as your starting point. Weigh food, follow the conversion steps, split daily grams into the meal counts listed, and check in with your vet if something feels off. Ever watched a kitten ignore a perfect bowl? Me too.

    Now you’ve got a solid answer for how much wet food should a kitten eat, with happier tummies and more playful zoomies ahead.

    FAQ

    Kitten wet food — Frequently Asked Questions

    How much wet food should a kitten eat per day?

    The amount depends on age and weight. Young kittens often need about 100–300 g/day (≈1–4 cans of 71 g), split into 3–4 meals. Older kittens typically drop to 2 meals per day.

    How much wet food should a kitten eat by weight?

    Feed by setting a daily kcal target from a portions chart, then divide by the food’s kcal per gram (kcal = food calories). Typical wet food ranges run about 100–300 g/day for growing kittens, adjusted for weight and activity.

    How much wet food should I feed a kitten at 2, 3, 4, and 6 months?

    Approximate amounts:
    2 months — 100–200 g/day (3–4 meals);
    3 months — 200–300 g/day (3–4 meals);
    4 months — 180–250 g/day (about 3 meals);
    6 months — 120–180 g/day (about 2 meals).

    Can you give a kitten too much wet food?

    Yes. Overfeeding can cause rapid weight gain, loose stools, or metabolic strain. Weigh weekly, track treats and dry food calories, and adjust portions if weight climbs.

    What is the 3-3-3 rule for kittens?

    The 3-3-3 rule: expect about 3 days to hide, 3 weeks to adjust, and roughly 3 months to feel fully settled and confident in a new home—useful for behavior expectations.

    Should kittens have unlimited access to food?

    Generally no. Scheduled meals (3–4/day until ~4 months, then 2/day) help monitor appetite, prevent overeating, and spot health changes early.

    How do I use a wet-food feeding chart and convert cans or grams?

    Pick the kcal/day for your kitten from the chart, find the food’s kcal per serving on the label, then divide target kcal by kcal-per-gram to get grams or cans (kcal = food calories).

    Related Articles

  • Kitten Bottle Feeding Chart: Amounts, Schedule, Weaning

    Kitten Bottle Feeding Chart: Amounts, Schedule, Weaning

    Think you can wing kitten bottle feeding by eye? Don’t. Guessing can cost a life. Those tiny bellies need exact amounts and precise timing, no guesswork, no improv.

    This kitten bottle-feeding chart tells you exactly what to give and when. It lists precise volumes, a clear feeding schedule, and step-by-step weaning instructions (weaning means switching from bottle to solid food). It even shows when to weigh the kitten and how often, so you’re not guessing in the middle of the night. Ever watched a newborn paw at a nipple? Yeah, this makes that moment less frantic.

    Follow the chart and you’ll aim for that healthy 10 to 15 grams of weight gain per day. You’ll also avoid aspiration (when milk gets into the lungs and causes coughing or breathing trouble), which is one of the scariest feeding problems. If you see poor weight gain, weak or cold kittens, persistent diarrhea, milk leaking from the nose, or any trouble breathing, call your vet right away.

    It saves time and worry, too. Instead of fretting over every feed, you’ll know you’re giving the right amount at the right time, and your foster or newborn kitty gets the best start possible. Worth every paw-print.

    Quick Essentials: Fast Rules to Apply the Kitten Feeding Chart

    - Quick Essentials Fast Rules to Apply the Kitten Feeding Chart (weighing, triggers, aspiration, warmingstorage).jpg

    Think of this as your quick cheat sheet , the must-follow weighing, adjustment, emergency, and warming/storage rules. Short, clear, and lifesaving when you need it.

    • Daily weighing protocol – Weigh kittens at the same time each day, before feeding. Use a digital scale (measures tiny weights to 0.1 g) and zero it with a small towel under the kitten. Record weights in grams in a dedicated log so trends are easy to spot. Ever watched those tiny feet twitch on the scale? It helps to note the time too.

    • Target gain – Aim for 10 to 15 g per day. Simple goal. Lots of relief when you see it.

    • 10% weight-loss trigger and first response – If a kitten is down by 10 percent or more by day two, act fast: increase the total daily volume of formula by 10 to 20 percent or add one extra feeding. Call your vet right away and have your weight and feeding log ready for their assessment. Quick note: "total daily volume" just means the total amount of formula the kitten gets in a day.

    • Aspiration red flags – Watch for coughing, noisy breathing, nasal discharge, choking, or failure to swallow. These signs suggest aspiration (formula going into the lungs). Stop feeding immediately. Keep the head elevated, try to clear the airway if you can, and get emergency veterinary care right away. Don’t guess, get help.

    • Safe formula heating and storage rules – Warm bottles in a warm water bath (place the bottle in a bowl of warm water), do not microwave. Test a drop on your wrist so it feels skin-warm (about 95 to 100 °F). Refrigerate unused prepared formula exactly as the product label says, and discard any warmed leftovers after a feeding.

    This box is the authoritative source for weighing and emergency actions referenced elsewhere in the article. Worth every paw-print.

    Age- and Weight-Based Feeding Chart

    - Age- and Weight-Based Feeding Chart (table only)  Use with Quick Essentials.jpg

    This is your go-to starter plan for bottle-feeding kittens. Use it per kitten, and check Quick Essentials for how to tweak amounts if their weight or appetite changes. Ever watched a newborn kitten wiggle for milk? Cute, and you’ll get the hang of timing fast.

    Age (weeks) Typical weight range (g, grams) Feeds per 24 h ml per feeding (ml = milliliters) Total ml per 24 h (ml = milliliters) Approx kcal/day (kcal = kilocalories) Notes
    0-1 wk 80-150 g 8-12 5-8 ml 40-80 ml ~60-100 kcal/day (estimate, check formula label) Very frequent tiny feeds. Watch for aspiration (milk going into the airway).
    1-2 wk 150-200 g 6-8 8-12 ml 48-96 ml ~80-150 kcal/day (estimate, check formula label) Keep them warm. Steady weight gain should start.
    2-3 wk 200-300 g 4-6 12-18 ml 48-108 ml ~120-200 kcal/day (estimate, check formula label) Eyes open, appetite grows. Watch the stool for changes.
    3-4 wk 300-400 g 4-5 18-25 ml 72-125 ml ~180-260 kcal/day (estimate, check formula label) Feeds get bigger, less often. Start trying small amounts of wet food.
    4-6 wk 400-600 g 3-4 20-35 ml 80-140 ml ~240-320 kcal/day (estimate, check formula label) Moving toward canned food. Weigh daily to track gains.
    6-8 wk 600-900 g 2-3 25-50 ml 80-150 ml ~300-450 kcal/day (estimate, check formula label) Mostly weaned. Use the chart to taper bottles gently.

    Read the kitten’s current weight and pick the matching row as your starting plan. Use the ml per feeding and feeds per 24 h to set bottle times (ml means milliliters, the tiny volume measure). Aim for a daily weight gain of about 10-15 g per day.

    If a kitten’s weight hits the 10% drop or trigger, follow Quick Essentials: increase total volume by 10-20% or add a feed, and call your veterinarian. And um, don’t guess, weighing and logging daily saves headaches.

    The combined chart plus feeding log template is downloadable in the Chart and Printable Template sections. Worth every paw-print.

    Preparing Kitten Formula and Bottles

    - Preparing Kitten Formula and Bottles (reference Quick Essentials for warmingstorage and Common Problems for emergencies).jpg

    Getting bottles and formula ready can feel a little nerve-racking, but it's mostly routine once you know the steps. Think of it as prepping a tiny, furry breakfast buffet. Ever watched a newborn kitten (neonate, meaning a baby under about 4 weeks) tuck their face into a bottle? Cute and messy.

    1. Choose a commercial milk replacer (kitten formula powder) , that means a ready-made powder designed to feed kittens. Check the expiration date and the batch or lot sticker on the can so you know it’s fresh and safe.
    2. Mix the powder and water exactly the way the label says. Use measured water and stir until the mix is totally smooth, with no lumps. It should look like thin cream, not gloppy paste.
    3. Warm bottles in a warm water bath, not a microwave. Microwaves heat unevenly and can make hot spots. Swirl the bottle so the heat spreads evenly, then test a drop on the inside of your wrist , it should feel warm, not hot.
    4. Check nipple flow by turning a filled bottle upside down , one slow drop should fall from the nipple (the little rubber teat). If it’s too slow, trim the tip a tiny bit at a time and re-test until the flow is right. Too fast is bad, and too slow makes the kitten work too hard.
    5. Clean and disinfect bottles and nipples after each use. Hot soapy water works, or you can boil parts briefly, or use the dishwasher if the bottle is labeled dishwasher-safe. Let everything air dry. Replace any nipples that look brittle or cracked, and label bottles with the date you mixed them.

    A few quick notes: follow the product label for exact mixing and storage rules, and check Quick Essentials for precise temperature and storage timelines. If you run into choking, aspiration (milk getting into the lungs), or other emergencies, see Common Problems for step-by-step actions. Worth every paw-print.

    Bottle Feeding Technique and Positioning

    - Bottle Feeding Technique and Positioning (see Quick Essentials and Common Problems for aspiration rules).jpg

    Place the kitten belly-down on your lap or on a warm towel so it feels like natural nursing. The warm towel and the kitten’s soft fur help calm them, and keeping them on their belly keeps the airway (the breathing passage) above the milk so swallowing is safer.

    Hold the bottle at about a 45 degree angle and steady the head and neck with your non-dominant hand so the kitten can concentrate on latching. Ever watched those whiskers twitch as they get ready? That steady hold makes all the difference.

    Gently touch the nipple (the soft rubber teat) to the kitten’s tongue and wait for the kitten to curl its tongue into a U-shape and swallow. That curling-and-swallowing rhythm is your green light , it means they’ve got the right latch and pace.

    Let the kitten control the flow with its suck, not you squeezing the bottle. Test the nipple size first so the kitten can draw milk without gagging , not a flood and not a dribble. If the milk comes too fast or too slow, swap to a smaller or larger teat.

    If the kitten won’t latch after gentle coaxing, starts coughing, or seems to choke, stop feeding and get help right away. See Common Problems for step-by-step emergency actions and Quick Essentials for the aspiration red flags you need to watch. Worth every paw-print.

    Tracking Weight and When to Consult Quick Essentials

    - Tracking Weight and When to Consult Quick Essentials (daily logs, simple math, refer to Quick Essentials for adjustments).jpg

    See Quick Essentials for the daily weighing protocol (simple steps to weigh your pet each day), the adjustment rules (how and when to change feeding amounts), and clear guidance on when to consult a veterinarian (vet). It’s all laid out so you don’t have to guess.

    Printable feeding and weight-log templates are in the Chart and Printable Template sections. Print one, stick it on the fridge, and you’ve got an easy spot to jot down numbers before you rush out the door.

    Ever watched your cat stare at the scale, like it’s judging you? If you notice sudden weight loss or gain, big appetite changes, or your pet seems off, follow the Quick Essentials advice and call your vet, sooner rather than later.

    Common Problems and Emergency Signs

    - Common Problems and Emergency Signs (full list of red flags and first-response actions).jpg

    Kittens can go from playful to very sick fast, so watch them closely. Ever heard a tiny, raspy cough or felt a cold, limp kitten in your hands? Those are the moments to act calm and act fast.

    • Aspiration (when milk or formula goes into the lungs) – Stop feeding right away. Keep the airway clear by gently tilting the kitten forward and wiping visible milk from the mouth with a soft cloth. Do not push more formula. Seek emergency vet care immediately if you see choking, coughing, noisy breathing, or bluish gums.

    • Failure to gain weight or losing more than 10% by day two – Increase feeds per Quick Essentials (boost feeds by 10 to 20% or add one feed) and call your vet. Bring the kitten's weight and your feeding log so the vet can see patterns.

    • Diarrhea (loose, watery, green or yellow stools) – Write down what formula you used and what the stool looked like. If diarrhea lasts more than 24 hours, or the kitten seems depressed, call the vet. Diarrhea can quickly cause dehydration, so watch for that.

    • Constipation or no stool for over 48 hours – Try gentle stimulation: massage the area under the tail with a warm, moist cloth to encourage a bowel movement. If nothing changes, check with your vet before trying any laxatives.

    • Dehydration (sunken eyes, tacky gums – gums feel slightly sticky) – This needs urgent vet care and fluids. Do not try aggressive rehydration at home; you could make things worse.

    • Lethargy or hypothermia (dangerously low body temperature) – Warm the kitten slowly using warm towels or a low-heat pad while you arrange transport. Don’t warm too fast. Get an urgent vet assessment.

    • Refusal to swallow or signs of choking – Stop feeding and get immediate care. Don’t force fluids or feedings if the kitten can’t swallow or is struggling to breathe.

    • Skin or face irritation from formula residue – Clean gently with warm water and pat dry. If irritation keeps happening, change feeding technique or the nipple and keep an eye on the area.

    Keep a clear record of every incident in the printable template so your vet can review the details and advise promptly.

    Weaning Schedule and Using the Chart to Transition to Wet Food

    - Weaning Schedule and Using the Chart to Transition to Wet Food.jpg

    Kittens usually start weaning around 3 to 4 weeks old. Look for eager sniffing, persistent nibbling, or a sudden interest in what you are eating, those are your cues. Ever watched your kitten poke at your sandwich? That’s the one.

    When to Introduce Wet Food

    Begin with warmed, softened canned kitten food (wet food) mixed with formula (kitten milk replacer). Start with about 1 part formula to 3 parts food and slowly move toward a 1:1 mix. Serve a small spoonful after a couple bottle feeds so the kitten is not starving or too sleepy to try new textures. Offer it on a shallow dish or your fingertip so they can investigate with their whiskers and little nibbles. Weigh daily and watch appetite and stool (poop). If the kitten loses weight, stop cutting back formula and go back to the previous amounts.

    Sample 7-Day Weaning Plan (for a 3–4 week old kitten)

    Try this gentle 7-day plan as a baseline; adjust by what the chart and daily weighs tell you.

    1. Day 1 to 2: Offer moistened wet food once a day after a bottle feed; keep other bottles at chart volumes. Let them lick and explore.
    2. Day 3 to 4: Offer wet food twice daily; reduce total formula by about 10 to 20 percent over 48 hours, spread across feeds. Keep weighing and checking energy.
    3. Day 5: Encourage lap-eating from a shallow dish; if they eat well, reduce two smaller bottle feeds down to one. Watch those whiskers twitch.
    4. Day 6: Shift the mix toward more food, closer to a 1:1 ratio; look for steady stools and bright, playful behavior.
    5. Day 7: Aim for mostly wet food with one or two small bottle feeds left; keep weighing each day and pause any reductions if weight drops.

    Introduce dry kibble softened with warm water or formula (kitten milk replacer) after about 6 to 8 weeks, once canned intake is steady. If a kitten struggles to adapt or loses weight, call your veterinarian for individualized guidance. Worth every paw-print.

    Printable Kitten Feeding Template (merged chart + feeding log) and Foster-Care Use

    - Printable Kitten Feeding Template (merged chart + feeding log) and Foster-Care Use.jpg

    This downloadable merged template pairs an age and weight chart with a fillable 24-hour feeding log for each kitten. You can grab it from the Chart section to print or use digitally in a foster home or with adopters. It’s set up to share with your vet, and it tracks weight in grams (g = grams) and feed volume in milliliters (ml = milliliters) so everyone is on the same page.

    Below is an example day filled in for a two-week-old kitten so you can see how the log works.

    Time Age (wks) Weight (g) ml given Cumulative ml Stool color/consistency Notes (urine, temp, behavior)
    00:00 2 120 6 6 brown/formed active, warm
    03:00 2 123 6 12 brown/formed pee, good tone
    06:00 2 126 6 18 yellow/soft slightly sleepy
    09:00 2 129 8 26 brown/formed good appetite
    12:00 2 132 8 34 brown/formed nursing well
    15:00 2 135 8 42 brown/formed energetic
    18:00 2 138 8 50 brown/formed wet diaper
    21:00 2 141 8 58 brown/formed calm, warm

    For foster setups, label each kitten and use color coded sheets so bottles and logs do not get mixed up. Share the merged file as a fillable PDF (a digital form you can type into) with your team so every caregiver updates the same record. Stagger feed times between kittens, scale the ml by each kitten’s weight, and always time stamp entries so it is easy to follow shifts.

    Keep individual weight and stool (poop) and urine records in the merged template for quick vet review. That way a vet can glance at one file and see trends, not a stack of sticky notes. Ever watched the vet nod and ask for a consolidated log? Yeah, this helps.

    Conversion note: 1 oz ≈ 30 ml (use this when charts or labels list ounces and for simple feeding math).

    Worth every paw print.

    Final Words

    In the action, this post lays out the Quick Essentials for weighing, warming, and emergency steps, the age-and-weight feeding chart, bottle prep, feeding technique, tracking tips, common problem responses, a weaning plan, and a printable merged template.

    Use the kitten bottle feeding chart as your baseline, weigh at the same time each day, aim for about 10–15 g gain, and follow Quick Essentials if weight drops or aspiration (milk entering the airway) happens.

    You’ll feel calmer with a simple plan and a tidy log. Happy, healthy kittens and fewer shredded cushions ahead.

    FAQ

    Kitten bottle feeding FAQ

    Where can I get a newborn kitten bottle feeding chart, PDF, or calculator by age or weight?
    A newborn kitten bottle feeding chart or PDF gives age- and weight-based baselines; many rescues and manufacturers offer downloadable charts or calculators to convert weight into total daily ml and feed counts.
    <dt>What is kitten milk replacer and how do I use it?</dt>
    <dd>Kitten milk replacer is a commercial formula (a balanced milk substitute for kittens); follow the product label for mixing, feeding amounts, and storage, and use small nipples sized for neonates.</dd>
    
    <dt>How much should a bottle-fed kitten eat?</dt>
    <dd>A bottle-fed kitten should eat a total daily volume based on age and weight; newborn baselines often run 40-80 ml per 24 hours, adjusted to hit weight gain goals of about 10-15 grams daily.</dd>
    
    <dt>Can you overfeed a bottle baby kitten?</dt>
    <dd>You can overfeed a bottle-fed kitten, which raises vomiting, diarrhea, and aspiration risks; stick to chart volumes, avoid squeezing the bottle, and stop if the kitten coughs, chokes, or refuses to swallow.</dd>
    
    <dt>How do I correctly bottle feed a kitten?</dt>
    <dd>To correctly bottle-feed a kitten, place it on its stomach, hold the bottle at about a 45° angle, touch the nipple to the tongue for a latch, watch for a U-shaped swallow, and never squeeze the bottle.</dd>
    
    <dt>Do kittens need to be bottle fed overnight?</dt>
    <dd>Kittens under four weeks usually need overnight bottle feeds; newborns may require feeding every 2-4 hours around the clock, with frequency dropping as they age and start weaning at about 3-4 weeks.</dd>
    
    <dt>What are common side effects or problems from bottle feeding kittens?</dt>
    <dd>Side effects from bottle feeding kittens include aspiration (coughing, noisy breathing), diarrhea, constipation, skin irritation from formula residue, dehydration, and stress; keep good hygiene, correct flow, and daily weighing to catch issues early.</dd>
    

    Related Articles

  • Managing chronic kidney disease in cats

    Managing chronic kidney disease in cats

    Could your cat’s extra naps and a little weight loss be early kidney disease?
    About 30% of cats over 10 have signs of chronic kidney problems, and nearly half of cats over 15 do too. That’s a lot of seniors, so it’s worth paying attention.

    What kidneys do and why it matters
    Kidneys (organs that filter blood, remove waste, and control water balance) help your kitty stay energized and healthy. When they slow down, your cat may drink more, pee more, feel a bit queasy, and lose weight. Those are small, slow changes you can easily miss if you’re not looking.

    How it often looks at home
    You might notice extra naps, a thinner waist when you scratch their sides, or a litter box habit change. Your cat’s whiskers might not twitch at their favorite toy like before. Ever watched a cat chase a sunspot and then give up mid-pounce? Yeah, that subtle tiredness can mean something’s up.

    Simple action plan to catch it early

    • Get screening. Ask your vet for a blood test and a urine test, and a blood pressure check. Also ask about SDMA (a blood marker that spots early kidney decline).
    • Track trends, not single readings. One test is a snapshot. Repeat tests over weeks or months give the real picture.
    • Work with your vet on a plan that fits your cat’s life and needs.

    How treatment usually looks

    • Diet tweaks: a kidney-friendly diet (food lower in phosphorus and balanced protein for kidneys) can help. It’s like switching to food that gives less work to tired kidneys.
    • Hydration boosters: wet food, a running water fountain, or adding water to meals keeps them topped up. For some cats, at-home subcutaneous fluids (fluids under the skin) help a lot, your vet can show you how.
    • Meds and support: veterinarians may use medicines for nausea, blood pressure, appetite, or phosphate control. These don’t cure, but they can slow decline and make your cat feel better.

    What to watch for at home

    • Drinking and peeing more.
    • Steady weight loss or loss of appetite.
    • Vomiting, bad breath, or a dull coat.
    • Changes in energy or litter box habits.
      Weigh your cat once a month if you can. Even a few ounces lost matters.

    When to call the vet
    Call sooner for sudden vomiting, bloody urine, collapse, or not eating for more than a day. For slow changes, schedule a vet visit and ask for the screening tests above. Early action gives you more good days with your pal.

    I once watched a cat named Luna go from sleepy to springy after early treatment, worth every worried minute. Keep an eye, ask the vet, and you’ll help your buddy stay feline fine.

    Immediate action plan and overview for cat owners

    - Immediate action plan and overview for cat owners.jpg

    About 30% of cats over 10 years old , and about half of cats over 15 , show signs of chronic kidney disease. Chronic kidney disease (CKD) means the kidneys slowly lose their ability to do their jobs, so your cat can’t balance fluids and electrolytes or clear toxins like it used to.

    If you spot extra thirst, peeing more, weight loss, vomiting, low appetite or more sleep and hiding, get vet screening sooner rather than later. Your vet will usually run bloodwork including SDMA (a sensitive early kidney marker), creatinine (a common waste-measure in blood), and a urinalysis (a urine test to check concentration and infections). SDMA is helpful early on; see the Diagnosis and IRIS (International Renal Interest Society) sections for numbers and interpretation.

    What do kidneys do? They keep your cat hydrated, control salt and acid balance, filter waste from the blood, and support hormones that help make red blood cells (so your cat doesn’t get anemic). When kidneys slow down, waste products build up and fluid balance tips, so cats drink more, pee more, feel nauseous, eat less and lose weight. You might notice tiny changes first , less jumping, sleeping in weird spots, or a subtle drop in play , before the obvious signs show up.

    Common triggers include age-related decline, accidental toxins like antifreeze (ethylene glycol), certain medications, bad or repeated kidney infections, and some inherited conditions. There’s no cure for CKD. But with early diagnosis and a tailored plan , think diet changes, hydration help, meds and regular monitoring , many cats enjoy a slower decline and comfortable, happy months to years. Worth every paw-print.

    Early signs and symptoms of chronic kidney disease in cats

    - Early signs and symptoms of chronic kidney disease in cats.jpg

    Cats are experts at hiding pain and illness. Tiny changes at home are often the first clue that something’s off, so pay attention to how your cat looks and acts, whiskers twitching, a slow paw at the food bowl, or a quieter purr than usual.

    Kidneys can work harder for a long time before they show trouble, so signs often appear after the organs have been compensating. That means shifts in drinking, eating, energy, and litterbox habits are usually the earliest hints. Ever watched your cat suddenly nap all day? That could be one of them.

    1. increased thirst – polydipsia (drinking noticeably more water). You might see water bowls emptied faster or your cat dipping a paw into the bowl more often.
    2. increased urination – polyuria (more trips to the litterbox or wetter clumps). More frequent litterbox visits or puddles outside the box count.
    3. weight and muscle loss – ribs or spine become easier to feel or see, and hind legs look thinner with less muscle. Think of a once-bouncy cat that looks a bit bonier.
    4. reduced appetite – picky eating or skipping meals, less interest in treats. Your cat might sniff food and walk away.
    5. nausea and vomiting – lip-licking, drooling, or throwing up after eating. Cats may paw at their mouth or act queasy.
    6. lethargy and weakness – long naps, less jumping, not chasing toys. The zoomies fade and playtime shrinks.
    7. bad breath or mouth sores – breath that smells like urine or tiny ulcers in the mouth. Yuck, but it’s a clue.
    8. signs of dehydration despite drinking – dry gums, sunken eyes, or skin that slowly returns when gently pinched. These are subtle but important.
    9. behavioral changes – hiding more, irritability, or unusual meowing. Your friendly cat might seem grumpier or more withdrawn.
    10. signs of high blood pressure – sudden blindness, seizures, or confusion and disorientation. These are urgent and need fast attention.

    Spotting several of these signs means it’s time to call your vet. They’ll usually start with bloodwork (a blood test that checks kidney function) and urinalysis (a urine test to look for concentration and protein). Quick testing can make a big difference, and it’s nice to know what you’re dealing with, worth every paw-print of effort.

    How chronic kidney disease in cats is diagnosed: tests and what the numbers mean

    - How chronic kidney disease in cats is diagnosed tests and what the numbers mean.jpg

    Diagnosis starts with your cat's story and a hands-on exam. Next comes bloodwork, urine checks and imaging to fit the clues together. Early markers, how concentrated the urine is, and what the images show help your vet decide if the problem is long-term or recent. Watching numbers over time is usually more useful than one single test result.

    Blood tests

    SDMA (an early marker tied to kidney filtration; GFR means how well kidneys filter blood) often goes up when about 25 percent of kidney function is lost. Think of SDMA like an early smoke alarm. Values above about 14 µg/dL are a red flag. Creatinine and BUN (blood urea nitrogen, a waste product from protein breakdown) usually rise later, when roughly 60 to 70 percent of function is gone. Typical creatinine cutoffs used in practice are: normal less than about 1.6 mg/dL, mild 1.6 to 2.8 mg/dL, moderate 2.9 to 5.0 mg/dL, and severe over 5.0 mg/dL. Healthy BUN is often around 14 to 36 mg/dL and goes up with kidney damage. Serum phosphorus (blood phosphate) tends to rise as kidneys fail; values above about 5 to 6 mg/dL often prompt treatment.

    Urine tests

    Urine specific gravity, USG (how well the kidneys concentrate urine), tells us if the kidneys are holding water. A healthy cat usually concentrates above 1.035. A USG below 1.030 is dilute and suggests loss of concentrating ability. Isosthenuria, where urine matches blood in concentration, sits near 1.008 to 1.012. The urine protein:creatinine ratio, UPC (how much protein leaks into urine), flags protein loss; under 0.2 is normal, 0.2 to 0.4 is borderline, and over 0.4 is usually meaningful proteinuria. If infection is possible, we do a urine culture.

    Imaging and biopsy

    Ultrasound or X-rays look for small, bumpy kidneys that point to chronic change, or swollen, enlarged kidneys that suggest recent injury. Images also catch stones, blockages or masses. Biopsy is rare, but we consider it if an unusual or treatable cause is suspected or if imaging and labs don't give clear answers.

    Test What it measures Typical abnormality in CKD
    SDMA Early GFR-related marker (GFR = how well kidneys filter blood) Often >14 µg/dL when about 25% function is lost
    Creatinine Waste product showing filtration (blood) Normal < ~1.6 mg/dL; rises with moderate to severe CKD
    BUN Blood urea nitrogen (waste level from protein) Often >36 mg/dL with kidney disease
    Urine Specific Gravity (USG) How concentrated the urine is (urine) Normal >1.035; dilute <1.030; isosthenuric ~1.008–1.012
    Urine Protein:Creatinine (UPC) Protein lost into urine (ratio) <0.2 normal; >0.4 significant proteinuria
    Serum Phosphorus Phosphate level in blood Often elevated (>5–6 mg/dL) as CKD progresses

    IRIS staging and monitoring for chronic kidney disease in cats

    - IRIS staging and monitoring for chronic kidney disease in cats.jpg

    IRIS is a tool vets use to stage feline kidney disease. It leans on creatinine (a blood waste marker) to set the stage, and uses SDMA (an earlier blood signal tied to how well kidneys filter) to help when numbers sit in a gray zone. Proteinuria (measured as UPC, the urine protein:creatinine ratio) and blood pressure add subcategories so your vet knows if protein loss or high blood pressure need their own plan.

    Trends beat single snapshots. A slow rise in creatinine or SDMA over months usually matters more than one odd lab result, because kidneys can wobble day-to-day. Steady upward movement says the disease is progressing, and that often means we step up care. Staging shapes the plan: early stages usually mean diet changes and watching, while later stages bring more checks, fluid support, blood-pressure control, and treatments for protein loss or electrolyte issues.

    1. Baseline at diagnosis: get full bloodwork including SDMA and creatinine, a urinalysis with USG (urine specific gravity), UPC, and a blood pressure check.
    2. Stage 1–2: recheck every 3 to 6 months with bloodwork (SDMA/creatinine), urinalysis/UPC and blood pressure.
    3. Stage 3: recheck every 1 to 3 months depending on how stable your cat is; do labs, UPC and blood pressure at each visit.
    4. Stage 4 or unstable disease: recheck monthly or as your vet advises; increase frequency after any change in how the cat looks or acts.
    5. After therapy changes (new med, different fluid plan or diet): re-evaluate in 2 to 8 weeks with targeted labs to see the response.
    6. Proteinuria or hypertension monitoring: check blood pressure at every recheck; repeat UPC as your vet recommends, often every 1 to 3 months if proteinuria is present.

    Home care matters too. Log weights, how much your cat eats and drinks, and litterbox habits , those little clues tell you more than you might think. For busy days, a quick weight and a note about urine frequency before you head out can buy you peace of mind.

    Ever watched a cat purposefully nudge a water bowl? Those tiny behaviors are part of the story. Worth every paw-print.

    Managing chronic kidney disease in cats

    - Treatment strategies for chronic kidney disease in cats.jpg

    Treating chronic kidney disease, or CKD, is about keeping your cat comfortable and slowing things down, not curing it. Early on you might see hospital care to fix dehydration and run tests, then a steady plan at home that mixes diet, fluids, medicines and checkups so your kitty stays playful and pain free. Think of it as quality-of-life care, day by day.

    When a cat comes in very dehydrated or suddenly sick, vets often give IV fluids (intravenous fluids, a sterile salt solution given into a vein) to quickly restore circulation and balance minerals. That fast fix helps appetite and urine output show whether things are turning the corner. After that urgent care, many cats move to at-home support with subcutaneous fluids (under-the-skin fluid injections) and kidney-friendly prescription food while we watch how they’re doing.

    Home fluids can feel weird at first, but they really help. Subcutaneous fluids boost hydration, usually cut down on nausea, and can make a tired cat act more like their old self. Warm wet food up to release aroma and tempt eating. Little changes like that can mean big, happy moments, your cat’s whiskers twitching as a bowl is set down, the tiny purr of contentment when they take a bite.

    Expect ups and downs. Doses change, side effects happen, and skipping meds or rechecks lets problems sneak back in. Avoid NSAIDs (nonsteroidal anti-inflammatory drugs, pain relievers that can hurt fragile kidneys) unless your vet says otherwise. For a few cats, dialysis or transplant might be options, but those are rare and not available everywhere.

    Fluids and electrolyte support

    IV fluids are for immediate rehydration and fixing dangerous mineral imbalances like low potassium (an electrolyte, a mineral the body needs to work). Vets watch appetite, urine output and electrolyte levels to see if the cat is responding. For long term support at home, subcutaneous fluids help keep hydration steady and often improve energy and eating. Clinicians also track body weight and skin turgor (how quickly the skin springs back) to guide adjustments.

    Medications used in CKD

    Common medicines include antiemetics (drugs that stop vomiting) such as maropitant and ondansetron, and appetite stimulants like mirtazapine. Phosphate binders (drugs that prevent phosphate from being absorbed) such as sevelamer or aluminum hydroxide help control blood phosphate. Potassium supplements may be needed if levels are low. Erythropoietin (a hormone treatment that stimulates red blood cell production) can help with severe anemia. Doses are tailored to your cat and labs are repeated to check safety and effect.

    Managing blood pressure and proteinuria

    High blood pressure can speed up damage, so vets usually aim for a systolic pressure under about 160 mmHg to protect organs. Blood pressure gets checked at diagnosis and during follow ups, more often if readings are high. Amlodipine is the usual first choice for feline hypertension. Telmisartan or ACE inhibitors may be used to lower urine protein (UPC, a urine test that measures protein loss) and help protect the kidneys.

    Small comforts matter. For busy days, give a quick subcutaneous fluid session before you head out and warm a spoonful of wet food when you get home, that’s a little help that often equals more good days. Ever watched a cat leap for a toy after a week of slow energy? Worth every paw print.

    Diet and nutrition for cats with chronic kidney disease

    - Diet and nutrition for cats with chronic kidney disease.jpg

    The main goal of feeding a cat with CKD is to ease the kidneys' workload while keeping your cat in good shape and feeling well. Prescription renal diets (kidney-friendly food) usually lower phosphorus (a mineral that rises in the blood as kidneys fail) and moderate protein (the body-building nutrient), but they use high-quality protein to help preserve muscle. They also balance sodium and calories so your cat has energy and produces fewer waste byproducts like uremia (waste build-up that makes pets feel sick).

    Wet food is often the best first choice because it boosts fluid intake and has a stronger smell. Warm a bowl slightly to let the aroma wake up and your picky eater may come running. Try adding a little low-salt broth or plain water to canned food, rotate flavors, and consider a cat water fountain to tempt sipping.

    If your cat stops eating, short-term syringe feeding can bridge a few days while you work with your vet on strategies. A feeding tube (a small tube that delivers food directly to the stomach) is considered when intake stays poor or weight keeps dropping; both options need vet guidance and training. Ever try syringe feeding? Ask your vet to show you the technique so you feel confident.

    Some supplements can help. Omega-3 fatty acids (healthy fats from fish oil) may support blood flow to the kidneys. Soluble fiber (fiber that absorbs water and soothes the gut) can ease stomach upset. Higher-calorie renal-safe options help keep weight on when appetite is low.

    If food alone does not control blood phosphate, your vet may prescribe phosphate binders (drugs that prevent phosphate from being absorbed). See the Treatment section for drug details. For practical day-to-day tips on meals, syringe feeds, or tube feeds, check the Home Care section for step-by-step instructions and logs.

    Worth every paw-print.

    Home care, monitoring and long-term management of chronic kidney disease in cats

    - Home care, monitoring and long-term management of chronic kidney disease in cats.jpg

    Keep a simple home-monitoring checklist so little changes don’t slip by. Think of it like a daily cat diary: date, weight, water, appetite, litterbox trips and any vomiting. Bring this log to the vet , trends are way more helpful than one-off numbers.

    We recommend recording weights every day or every other day using grams or ounces, and writing down how much food your cat ate (portion or kcal). Note water in milliliters, how often they use the litterbox, and urine volume as small / normal / large. Jot down vomiting episodes and appetite details like ate a full meal, nibbled, or refused. A quick template you can use: date | weight | water ml | appetite ✓/✗ | litterbox trips | vomit ✓/✗. Little things add up, and you’ll notice patterns sooner this way.

    If your vet wants you to give subcutaneous fluids at home, get hands-on training first. Subcutaneous fluid therapy means fluids given under the skin (a safe way to hydrate at home). Start with clean hands and sterile supplies (germ-free tools), pick a quiet spot, sit at eye level with your cat, and give treats between steps. Practice the whole routine while the vet watches until you feel confident. Keep the fluid bags sealed and refrigerated until you’re taught how to warm and handle them, and follow the clinic’s instructions for discarding leftovers. Log every session , date, volume given, site, and how your cat reacted , so your vet can tweak the plan if needed. Call your clinic right away if you see swelling, coughing, trouble breathing, or a sudden drop in appetite.

    Routines for meds really help. Use a visible dosing calendar or set phone reminders, mark missed doses, and keep a pill plan near feeding spots so you don’t forget. For stubborn pills try hiding them in a tiny tasty bite, or ask about a compounding pharmacy (a pharmacy that makes flavored or custom-dose meds) to make things easier. If you miss a dose, call the clinic instead of doubling up. Watch for side effects like severe vomiting, sudden sleepiness, not eating, or any swelling, and contact your vet right away. For timing of formal rechecks and lab schedules see the IRIS section, and for drug names and uses see the Treatment section.

    Prognosis, emergency signs and end-of-life considerations for chronic kidney disease in cats

    - Prognosis, emergency signs and end-of-life considerations for chronic kidney disease in cats.jpg

    Prognosis can swing widely from cat to cat. Some kitties drift slowly for months or years with good days and bad days. Others decline faster if they have advanced IRIS stage (the kidney-disease staging system vets use), uncontrolled high blood pressure (hypertension), very high blood phosphate (hyperphosphatemia – too much phosphate in the blood), repeated dehydration, or ongoing vomiting that won’t stop with treatment. Your vet will use bloodwork (blood tests), blood pressure checks, urine results and how your cat behaves at home to give you a realistic picture.

    Bad signs don’t always mean an immediate goodbye, but they do mean closer monitoring and maybe more aggressive care. Repeated dehydration, severe weight loss, losing interest in food for days, and frequent, uncontrollable vomiting are red flags. If kidney numbers on bloodwork are climbing fast, that’s another worry. We’re watching overall quality of life, not just lab values.

    Some changes need instant veterinary attention because they can be life-threatening. Call your clinic right away for persistent, severe vomiting or diarrhea, especially if there’s blood. Also call if you see seizures, collapse or sudden unresponsiveness, sudden blindness, or major trouble breathing. Big, sudden behavior changes or legs so weak your cat can’t stand are urgent too. Fast action can sometimes turn a disaster into something treatable.

    Quality-of-life checks are simple: Is your cat comfortable? Eating enough? Drinking or staying hydrated? Moving around? Still enjoying small things like petting, a treat, or a warm sunbeam? Palliative care aims to keep those wins coming. That can mean appetite support, anti-nausea meds (antiemetics), fluids (subcutaneous fluids – under-the-skin fluids you can learn to give at home), pain control, and a quiet, cozy spot. Little things matter , a soft blanket, a low-sided litter box, tasty boosted meals.

    When repeated treatments stop helping and your cat spends more time suffering than happy, it’s time for an honest chat with your vet about hospice care (comfort-focused support) or humane euthanasia (peaceful, painless end-of-life care). Talk through what matters to you and your cat , pain control goals, where you’d like care to happen, and any final wishes. Ever watched your cat purr in a sunbeam and felt, yes, this is enough? Trust that feeling.

    Worth every paw-print.

    Frequently asked questions about chronic kidney disease in cats

    - Frequently asked questions about chronic kidney disease in cats.jpg

    Can CKD be cured in cats?
    No. CKD can’t be cured. Treatment is about slowing the kidney decline and keeping your cat comfortable and happy for as long as possible. See Prognosis.

    How early can CKD be detected?
    We can often spot it earlier now thanks to SDMA (a blood marker that shows how well kidneys filter). Routine bloodwork and catching small changes early help a lot, especially if your vet is watching for it. See Diagnosis → SDMA.

    Can diet prevent CKD?
    Good nutrition lowers stress on the kidneys and can slow problems, but it won’t guarantee prevention. Prescription renal food (a kidney-specific diet) can help manage the disease and improve quality of life. See Diet.

    Is CKD contagious?
    No. CKD is not infectious, so it won’t spread between cats or to people. You can cuddle without worry.

    What costs and long-term commitments should I expect?
    Plan on ongoing monitoring like blood and urine tests, prescription renal food, possible medications, and sometimes subcutaneous fluids (fluids given under the skin to keep them hydrated). Typical first-year costs often run about $500 to $2,500 depending on how much testing and treatment your vet recommends. See Home Care and Prognosis.

    When should I see a vet?
    Call your vet if your cat has lasting increases in thirst or peeing, weight loss, low appetite, or repeated vomiting. For urgent care, get help right away if your cat has seizures, collapses, suddenly goes blind, or has trouble breathing. See Home Care.

    Any other tips?
    Keep a simple care routine. Small daily things like monitoring water intake, weighing your cat at home, and offering tasty, kidney-friendly food can make a big difference. Worth every paw-print.

    Final Words

    Jump right in: spot extra thirst, peeing more, weight loss or vomiting and get vet screening , bloodwork with SDMA and creatinine, urinalysis, and blood pressure checks.

    We talked about why kidneys matter, the subtle early signs, how tests and IRIS staging guide care, and practical steps like fluids, meds, renal diet and home logs. Quick action helps slow decline and keep your cat comfy. (Vet visits are a chore, I know.)

    With steady care and vet teamwork, cats diagnosed with chronic kidney disease in cats can still enjoy many purr-filled days.

    FAQ

    Frequently Asked Questions — Chronic kidney disease in cats

    Chronic kidney disease in cats treatment

    Chronic kidney disease in cats is treated with rehydration — IV (intravenous — into a vein) or subcutaneous fluids (under-the-skin), prescription renal diets, anti-nausea and blood-pressure medicines, phosphate binders (drugs that lower blood phosphorus), and home support.

    What causes chronic kidney disease in cats

    Chronic kidney disease in cats is caused by age-related kidney decline, toxins like antifreeze, certain medications, repeated urinary or kidney infections, and some inherited kidney disorders.

    End-stage chronic kidney disease in cats — when to consider euthanasia?

    End-stage chronic kidney disease in cats means kidneys fail enough that symptoms are severe and quality of life is poor; euthanasia may be considered if pain, nonstop vomiting, refusal to eat, or repeated dehydration cannot be controlled.

    Chronic kidney disease in cats symptoms and early signs

    Chronic kidney disease in cats often begins with increased thirst and urination, then weight and muscle loss, reduced appetite, nausea or vomiting, lethargy, bad breath, dehydration signs, hiding, and sudden blindness or seizures from high blood pressure.

    Chronic kidney disease in cats stages

    Chronic kidney disease in cats is staged by IRIS using creatinine (muscle-waste marker) and SDMA (an early kidney marker), with proteinuria and blood pressure refining the stage and guiding treatment and monitoring.

    Chronic kidney disease in cats life expectancy — how long can cats live with CKD?

    Chronic kidney disease life expectancy in cats varies widely; some cats live months while many live years with early diagnosis, stable labs, good hydration, suitable diet, and regular veterinary care.

    Are cats in pain with kidney disease?

    Cats with kidney disease can be in pain or uncomfortable, especially with mouth ulcers, nausea, or advanced disease; pain and other symptoms are often manageable with medications and supportive care.

    What to do when your cat has kidney disease?

    When your cat has kidney disease, get veterinary screening (bloodwork including SDMA and creatinine, plus urinalysis), follow the vet’s treatment plan, switch to a recommended renal diet if advised, and track weight, water intake, and litterbox habits.

    What foods should cats with kidney disease avoid?

    Cats with kidney disease should avoid high-phosphorus foods (a mineral that builds up in CKD), salty human meals, unregulated supplements, and dry-only feeding that limits water intake; feed a vet-recommended renal diet.

    Can chronic kidney disease in cats be cured?

    Chronic kidney disease in cats cannot be cured; care focuses on slowing progression, managing symptoms, keeping appetite and hydration, and maintaining quality of life with medications, fluids, and diet.

    Related Articles

  • Cat scratch disease (bartonellosis): Symptoms, Treatment

    Cat scratch disease (bartonellosis): Symptoms, Treatment

    Think a harmless cat scratch is nothing to worry about? Not always. A tiny nick from a playful paw can let Bartonella henselae (a tiny bacteria that lives in blood cells) sneak in, and you might not notice right away.

    About a week or two later the lymph nodes (small glands that help fight infection) near the scratch can swell, feel warm, and ache. Your skin might feel tender where the paw hit. If your immune system (your body's infection-fighting team) is weak, these problems can be worse, you know.

    I’ll walk you through the common signs, when to call a doctor, and the usual treatment options that clear it up, usually antibiotics (drugs that kill bacteria). Oops, let me rephrase that… I’ll also cover what to do if your immune system is weak.

    Worth watching every paw-print.

    Cat scratch disease (bartonellosis): Symptoms, Treatment

    - Executive summary key takeaways (brief clinicianpatient lede).jpg

    Cat scratch disease, also called bartonellosis, comes from Bartonella henselae (a type of bacteria). Cats are the main reservoir (they can carry the germ without looking sick). Ever watched your cat bat at a toy and come away with a tiny nick? That’s when this can start.

    Symptoms usually show up about 2 to 3 weeks after a scratch or bite. At first you might see a small red papule (a tiny bump) at the spot. Then nearby lymph nodes (glands that help fight infection) often swell and feel tender or warm. You might have a low-grade fever or just feel a bit off. Most cases are self-limited , they get better on their own , but some need antibiotics or a doctor to drain a big, painful node.

    Watch closely and get medical care if a lymph node keeps growing or becomes more painful, if redness spreads, or if you develop worse symptoms like high fever or neurologic signs (confusion, severe headache, or seizures). If you’re immunocompromised (your immune system is weak) seek help sooner , even a small scratch can be riskier for you.

    For testing and step-by-step care, see "Diagnosis" and "Treatment" for testing and management details. Worth every paw-print of attention.

    Causes and transmission: detailed transmission biology, flea ecology, and numbers

    - Causes and transmission detailed transmission biology, flea ecology, and numbers.jpg

    Bartonella henselae is the main bug behind cat scratch disease. It’s part of a group called Bartonella spp. (small, slow-growing bacteria that can live inside blood cells). Cats are the usual home for these bacteria (a reservoir, meaning they carry it without getting sick). Lots of cats show no signs. About 30% of cats pick it up at some point. In warm, humid places that can climb to about 40%. Scientists have found Bartonella in roughly 27 other animal species, but most human cases still start with cats.

    Fleas are the key players in how this spreads among cats. When a flea feeds on an infected cat, it picks up the bacteria and then sheds it in flea dirt (dried flea poop that holds live bacteria). A scratch can drag that flea dirt into the skin and plant the bacteria there. Fleas are needed for cat-to-cat spread. There’s little proof that cats spread it just by sniffing or touching each other without fleas involved. Ever watch a cat groom and you wonder where that stuff ends up? Yep.

    People usually get exposed when a scratch or bite pushes contaminated flea dirt into broken skin. Kittens are extra risky because they’re more likely to be bacteremic (have bacteria in their bloodstream) and to shed the bug. If contaminated material hits the eye it can cause conjunctival inoculation (the bacteria getting into the eye’s surface). That’s why shelter workers and veterinarians face higher occupational risk. The good news is that strict flea control cuts the chance of spread. Highest-risk situations are kittens, strays, or clearly flea-infested animals. Worth keeping those fleas away.

    Symptoms and clinical signs: detailed checklist and pediatric nuance

    - Symptoms and clinical signs detailed checklist and pediatric nuance.jpg

    Cat scratch symptoms usually start at the skin as a small red bump. That little bump, called a papule (a small raised spot), can turn into a pustule (a pus-filled spot) or a vesicle (a tiny fluid blister). The spot may crust over, leak, or stay almost invisible, depending on how the scratch or bite introduces bacteria or flea-contaminated material (stuff that can carry germs) into the skin.

    In kids, nearby lymph nodes (the small glands that swell when your body fights infection) often get tender and bigger. Sometimes those nodes feel soft or squishy – that’s called fluctuance (soft and possibly full of pus) – and children more often need aspiration (drawing fluid with a needle) or imaging like an ultrasound when a node looks like an abscess.

    Systemic signs tend to be mild. Expect low-grade fever, chills, and tiredness. The swollen nodes can hang around for weeks to months even after other symptoms improve. Serious widespread illness is uncommon and usually happens in people with weakened immunity (a less able immune system).

    • inoculation papule at scratch/bite site (small red bump)
    • pustule or vesicle formation at inoculation site (pustule = pus spot; vesicle = tiny blister)
    • tender regional lymphadenopathy (swollen lymph nodes – axillary under the arm, cervical in the neck, inguinal in the groin)
    • low-grade fever
    • malaise / lethargy (feeling unwell or very tired)
    • regional erythema or fluctuance / abscess formation (erythema = redness; fluctuance = soft, pus-filled feel)
    • prolonged node enlargement (weeks to months)
    • ocular signs (conjunctival granuloma = bump on the eye surface, neuroretinitis = inflammation affecting the retina and optic nerve causing vision changes)
    • neurologic manifestations (encephalitis = brain inflammation, seizures = seizures – rare)
    • hepatosplenomegaly or systemic dissemination (enlarged liver and spleen or spread of infection – rare, more likely if immunocompromised)

    High fever, new vision changes, focal neurologic signs, or rapidly enlarging or draining lymph nodes need urgent evaluation. If you’re unsure, trust your gut and get medical attention sooner rather than later – see Complications/FAQs for red-flag thresholds.

    Diagnosis of cat scratch disease (serology, PCR, culture, imaging): testing algorithms and thresholds

    - Diagnosis of cat scratch disease (serology, PCR, culture, imaging) testing algorithms and thresholds.jpg

    When the aim is diagnosing bartonellosis we want tests that actually change care, like deciding to give antibiotics, drain a node, or protect an immunocompromised person in the home. Order testing when the result will affect those choices: unexplained progressive lymph node swelling, systemic signs, or an unusual presentation. Be ready to act on a positive result. A single negative test does not safely rule out disease when suspicion is high.

    Serology and antibody testing

    Serology (antibody blood tests) like ELISA (enzyme-linked immunosorbent assay – a lab test that detects antibodies), IFA (indirect fluorescent antibody – a visual antibody test), and Western blot (a protein-based antibody test) measure the immune response, not the bug itself. Higher antibody titers often suggest more recent exposure, but antibodies can take days to weeks to appear. About 11% of cats with bacteria in their blood (bacteremia, bacteria circulating in the bloodstream) may be seronegative, so don’t rely on antibody tests alone if clinical suspicion is strong.

    Molecular testing, culture, and tissue sampling

    PCR (polymerase chain reaction – a test that finds and amplifies the bug’s DNA) on blood or tissue is specific and fast. But because bacteremia can come and go, a negative PCR doesn’t always mean no infection. Blood culture is the most reliable proof of infection, yet it’s slow and often needs multiple samples over time; serial sampling improves yield. Think of culture like patience and persistence, while PCR is like a quick magnifying glass.

    Consider lymph node aspiration (needle sampling of the node) or excisional biopsy when disease is mainly local, when noninvasive tests disagree, or when blood culture and PCR are negative but you still suspect bartonellosis. For swollen nodes, use ultrasound for superficial or fluctuant nodes and CT for deep or complex collections. Image when an abscess is suspected, when nodes are in odd locations, or before surgical drainage. Consult infectious disease or surgery for persistent, enlarging, or atypical cases. Repeat testing after a few days or get paired samples when signs persist or worsen.

    Test Sample Notes on sensitivity/limitations
    Serology Blood Shows exposure not proof of active infection; may miss about 11% of bacteremic cases.
    PCR Blood / Tissue High specificity; intermittent bacteremia can cause false negatives.
    Blood culture Multiple samples Most reliable confirmation but slow and resource intensive; benefits from serial samples.
    Lymph node aspirate / culture / histopath Tissue Helpful for local disease, abscess evaluation, and when noninvasive tests are inconclusive.

    If clinical suspicion stays high despite negative single tests, do paired testing or get tissue samples. Worth every paw-print.

    Treatment and management of bartonellosis in humans and cats: decision algorithms and action thresholds

    - Treatment and management of bartonellosis in humans and cats decision algorithms and action thresholds.jpg

    If you’re otherwise healthy and the scratch is small with only mild symptoms, it’s reasonable to watch closely and hold off on antibiotics for now. Lymphadenitis (inflamed lymph nodes) that’s limited and not painful often gets better on its own. Start antibiotics if there’s systemic illness, rapidly worsening or painful lymphadenitis, eye or neurologic signs, or if the person is immunocompromised. Ever seen a node swell up overnight? That’s the kind of change that pushes me toward treatment.

    Signs that should make you treat right away include high or persistent fever, nodes that grow quickly or become fluctuant (soft and likely filled with pus), new vision changes, or any focal neurologic sign. Those situations usually need prompt therapy and often specialist input, so don’t wait.

    Antibiotics for people commonly used are azithromycin (azithromycin – an oral antibiotic often used for mild cat-scratch disease), and doxycycline (doxycycline – a tetracycline antibiotic used for more complicated or eye/brain involvement). For severe infections clinicians may use ciprofloxacin (ciprofloxacin – a fluoroquinolone antibiotic) or add rifampin (rifampin – an antibiotic often used in combination) with others. For mild, localized disease a short azithromycin course is common, for example a five-day regimen. Ocular, neurologic, or disseminated infections usually need longer treatment, often several weeks, and sometimes combination therapy. Dose and duration depend on the prescriber and the patient’s age and weight, so follow specialist guidance. Also check pregnancy status and pediatric dosing before choosing doxycycline or other agents.

    For cats, treat when the cat looks sick, when the cat lives with an immunocompromised person, or when the cat is being screened as a blood-donor. Common feline options include amoxicillin-clavulanate (a broad-spectrum antibiotic combo), azithromycin, doxycycline, or enrofloxacin (enrofloxacin – a veterinary fluoroquinolone). Courses are usually at least three weeks, and for severe or immunosuppressed animals treatment often extends to four to six weeks. Pair antibiotics with strict flea control, either topical or oral flea prevention, to lower the chance of reinfection. Routine testing of healthy cats usually isn’t needed.

    When a node is fluctuant or looks like an abscess, procedures matter. Needle aspiration or incision and drainage can ease pain and speed recovery, and surgical drainage should be done with proper antibiotic cover and sterile technique. Basic wound care is simple. Clean with soap and water, keep it covered if it’s draining, and check tetanus status for skin breaks. Admit people who show sepsis (sepsis – a body-wide infection that affects organs), severe systemic signs, or rapidly progressive local disease; see Complications/FAQs for full red-flag guidance.

    Follow-up and monitoring

    Expect lymphadenopathy (swollen nodes) to shrink slowly. Nodes often linger for weeks to months even after other symptoms get better, so don’t be alarmed if they’re still there. Track objective signs like fever resolution, smaller node diameter, and wound healing. Watch for treatment failure signs such as persistent fever, enlarging or new painful nodes, or new neurologic or eye problems. If progress stalls after a week or two of therapy, or if worrying changes show up sooner, repeat imaging or get a specialist consult.

    Complications and high-risk groups: red flags, algorithms for urgent care, and thresholds for escalation

    - Complications and high-risk groups red flags, algorithms for urgent care, and thresholds for escalation.jpg

    Severe Bartonella infections are uncommon, but they can be serious for people with weakened immune systems (immunocompromised), newborns, pregnant people, and anyone with prosthetic heart valves (replacement heart valves). Keep an eye out for a few clear red flags , they’re the main reason to escalate care quickly.

    Seek urgent care if you have a persistent high fever above 38.5°C (101.3°F) that lasts more than 48 hours. You should also get immediate medical evaluation for any of these warning signs: rapidly growing or draining lymph nodes; new focal neurologic problems like confusion, weakness, or seizures; sudden vision changes; signs that suggest endocarditis (a new heart murmur or embolic signs such as sudden limb pain or shortness of breath); or unstable vital signs such as low blood pressure, a very fast heart rate, or shock. Ever watched a swollen node suddenly drain? Not fun.

    "If your temp stays above 101.3°F for two days, or a swollen node bursts and drains, go to urgent care right away."

    Key severe presentations to watch for

    1. Bacillary angiomatosis (vascular skin or organ lesions that bleed or grow very fast).
    2. Bartonella endocarditis (often culture-negative endocarditis, meaning blood cultures may not grow the bacteria; prosthetic valves – replacement heart valves – are a specific high-risk factor).
    3. Encephalitis (brain inflammation) with focal neurologic deficits or seizures.
    4. Ocular neuroretinitis (inflammation of the retina and optic nerve) or other sudden vision loss.
    5. Severe systemic infection with hepatosplenomegaly (enlarged liver and spleen) or sepsis physiology (organ dysfunction from infection).
    6. Rapidly enlarging, fluctuant, or draining abscesses that typically need admission and surgical drainage.

    We moved occupational and pregnancy-specific prevention details into the Causes/transmission and the Treatment (prevention) subsection to avoid repeating guidance. See that unified Complications/FAQs section for consolidated prevention advice and the single escalation-criteria list; it covers veterinarian and shelter-staff exposure risk and pregnancy counseling (avoid rough kitten play, keep cats indoors, and maintain strict flea control).

    Prevention, pet hygiene, and public health guidance for cat owners

    - Prevention, pet hygiene, and public health guidance for cat owners.jpg

    The best way to lower risk is simple: control fleas and cut down on scratches or bites, especially if someone at home has a weakened immune system (immunocompromised – their body fights infections less well). Fleas (tiny biting insects that live on pets) are the main problem, so follow CDC, WHO, or your national veterinary association guidance for flea-control programs and animal-handling policies in high-risk homes. There’s no vaccine for Bartonella (the bacteria that can cause cat-scratch disease), so prevention rests on good pet hygiene, keeping the environment clean, and choosing pets wisely. When you put the final article together, cite CDC/WHO or your national veterinary professional guidance for prevention recommendations.

    At the personal level, keep claws trimmed, wash your hands with soap and water after touching cats (scrub about 20 seconds and clean under the nails), avoid rough play that could lead to scratches or bites, and wash any scratch right away with soap and water. Routine testing of healthy cats isn’t usually recommended; talk with your veterinarian for sick animals or if someone in the home is immunocompromised. Ever watched a kitten pounce and you think, uh-oh? A few small habits go a long way.

    • Year-round flea prevention for all cats (monthly topical or oral meds your vet recommends).
    • Inspect pets regularly for fleas and treat promptly if you find them.
    • Keep cats indoors when possible to reduce flea and stray exposures.
    • Avoid rough play with kittens and cats that can lead to scratches or bites.
    • Trim cat claws regularly (short enough to lower puncture risk, but not too short).
    • Wash hands after handling or feeding cats – soap and water, about 20 seconds, and clean under the nails.
    • Clean scratches immediately with soap and water.
    • Seek veterinary advice for cats that are sick or showing symptoms.
    • For households with immunocompromised people, consider adopting older, indoor cats that are less likely to scratch or carry fleas.
    • Do not declaw as a preventive measure. It’s not a safe or recommended fix.
    • Follow your veterinarian’s product-safety guidance when choosing flea treatments (some products are not safe for all animals).
    • Shelters and clinics should follow national public-health and veterinary protocols for screening and worker protection.

    Worth every paw-print of effort. Small steps keep both people and kitties healthy – and you get more time to enjoy the purrs.

    Frequently asked questions and guidance on when to seek medical or veterinary care

    - Frequently asked questions and guidance on when to seek medical or veterinary care.jpg

    1. What is cat scratch disease (bartonellosis)?
      Cat scratch disease is an infection usually caused by Bartonella henselae (a bacterium). Cats often carry this germ without looking sick, so your purring pal can seem fine. See Overview.

    2. How soon do symptoms appear?
      Symptoms most often start about 2 to 3 weeks after a scratch or bite. Incubation means the time between the scratch and the first signs of illness (basically the waiting period). See Symptoms.

    3. When should I seek care?
      Get medical or veterinary help if you have a fever above 38.5°C / 101.3°F, new or worsening neurologic signs (problems with the brain or nerves), eye problems (ocular signs), or lymph nodes that grow fast or start draining fluid (lymph nodes are the little glands that swell when your body fights infection). Also seek care quickly if you or the person bitten is immunocompromised (has a weakened immune system). See Complications.

    4. Pregnancy and household risk summary?
      Pregnant people can usually keep cats, but take precautions: avoid rough play that can cause scratches or bites, wash any wounds right away, and talk with your obstetrician and your vet about risks. Simple steps help a lot. See Complications/Prevention.

    5. Prevention in one line
      Controlling fleas strictly is the main way to lower risk (fleas help spread the bacterium). See Prevention.

    If you have fever over 38.5°C / 101.3°F, worsening neurologic or eye symptoms, fast-growing or draining lymph nodes, or if you are immunocompromised (weaker immune defenses), seek prompt evaluation and care. See Complications for the urgent-care checklist.

    Final Words

    Bartonella henselae (a bacterium) lives quietly in many cats, making them the main reservoir for cat scratch disease (bartonellosis). Symptoms usually pop up around 2–3 weeks after a scratch or bite as a small papule that can lead to swollen regional lymph nodes and mild fever. Seek medical care for progressive lymph node swelling, systemic symptoms, neurologic signs, high fever, or if immunocompromised. With simple flea control, trimmed claws, and prompt wound cleaning, most homes keep cats playful and people safe.

    FAQ

    What is cat scratch disease?

    Cat scratch disease is an infection caused by Bartonella henselae (a bacterium) carried mainly by cats; humans typically get exposed after scratches, bites, or when flea dirt (flea feces) contaminates a wound.

    How soon do symptoms appear after a cat scratch?

    Symptoms usually appear about 2-3 weeks after a scratch or bite, typically starting as a small papule at the injury site and later with swollen nearby lymph nodes.

    What are the common symptoms of cat scratch disease?

    Common symptoms are an inoculation papule (small raised bump) that may form a pustule, tender regional lymph node swelling, low-grade fever, fatigue, and occasional eye or neurologic signs in rare cases.

    Is cat scratch disease dangerous and is it contagious?

    Cat scratch disease can be dangerous for immunocompromised people, while most healthy people have a mild, self-limited illness; it is not usually spread from person to person.

    How is cat scratch disease diagnosed?

    Cat scratch disease is diagnosed using serology (ELISA/IFA), PCR on blood or tissue (DNA test), blood culture, and lymph node aspiration or imaging; tests can miss infections, so paired or tissue sampling may be needed.

    What is the best antibiotic or treatment for cat scratch disease in people?

    The best antibiotic depends on severity: many mild cases resolve without drugs, while azithromycin or doxycycline are commonly used; severe or systemic disease may need longer or combination therapy.

    How is cat scratch disease treated in cats?

    Cat scratch disease in cats is treated with antibiotics like azithromycin, doxycycline, or enrofloxacin when symptomatic or if household members are immunocompromised; treatment usually lasts at least three weeks plus strict flea control.

    Can you get Bartonella from a cat scratch and how does someone get Bartonella?

    You can get Bartonella from a cat scratch when flea dirt (flea feces) carrying the bacteria is rubbed into broken skin, or via bites; kittens and flea-infested cats carry the highest risk.

    Does Bartonella ever go away and can cats be cleared forever?

    Bartonella infection can clear in people and cats, but reinfection is possible if flea exposure returns; cats may remain asymptomatic carriers and are not reliably cleared forever.

    Is Bartonella worse than Lyme disease?

    Bartonella and Lyme are different infections; Bartonella often causes lymph node and rare systemic issues, while Lyme mainly affects joints and nerves. Severity depends on the person and specific complications.

    When should I see a doctor about a cat scratch?

    See a doctor when symptoms worsen or you are worried. Seek medical care for progressive lymph node swelling, systemic symptoms, neurologic signs, high fever, or if you are immunocompromised.

    Related Articles

  • Causes of Diarrhea in Cats and Warning Signs

    Causes of Diarrhea in Cats and Warning Signs

    Is your cat’s litter box suddenly full of watery puddles and soggy clumps? Yuck. Ever watched your kitty hop out like they just stepped in a puddle?

    Diarrhea is a symptom, not a disease. Think of it like your cat’s stomach flushing itself after something upset the balance, sometimes it’s short-lived and harmless, sometimes it isn’t.

    Short bouts usually follow a diet change or a tummy bug. Longer runs, frequent episodes, or bloody stool can mean parasites (tiny worms or single-celled germs), infections, medication side effects, IBD (inflammatory bowel disease , long-term gut inflammation), or pancreatitis (pancreas inflammation , painful swelling of the pancreas).

    Call your vet or go to emergency care if the diarrhea is bloody, lasts more than a day for kittens or more than two days for adults, or comes with vomiting, fever, weakness, or not drinking , dehydration happens fast. When in doubt, call the vet. Keep your cat feeling feline fine.

    Quick triage: Is my cat’s diarrhea an emergency?

    - Quick triage Is my cats diarrhea an emergency.jpg

    Diarrhea is a symptom, not a disease , loose or watery stool that happens more often or in larger amounts. Acute diarrhea (short-term, under two weeks) and chronic diarrhea (longer-term, three weeks or more) mean different things and need different approaches. Causes often include diet change, parasites, infection, toxins, IBD (inflammatory bowel disease, chronic gut inflammation), pancreatitis (pancreas inflammation), or medications. Below are easy-to-follow signs and what to do next.

    • Duration tip: one loose stool or a mild change often clears in a day or two. Action: watch your cat, offer fresh water, and save a stool sample if you can. Call your vet if diarrhea lasts more than 48 hours or keeps coming back.
    • Vomiting with diarrhea, especially if it’s happening over and over , action: go to an emergency vet right away. Cats can dehydrate fast.
    • Very sleepy, weak, or collapsed , action: emergency veterinary care now.
    • Blood in the stool (bright red) or black, tarry stool , action: save a sample and contact your vet immediately.
    • Signs of dehydration (sunken eyes, dry sticky gums, less skin bounce when you gently pinch the scruff) , action: offer small sips of water and get prompt vet care for fluids if signs are moderate or worse.
    • Straining with only tiny watery stools or a swollen, painful belly , action: possible partial blockage; head to an emergency clinic.
    • Kitten or senior cat with diarrhea , action: higher risk of quick decline. Contact your vet sooner. Kittens with diarrhea lasting more than 48 hours need prompt care.
    • Suspected poison or chemical ingestion , action: call ASPCA Animal Poison Control at 888-426-4435 right away, and gather any packaging. Don’t give human anti-diarrheal meds or try to make your cat throw up unless a professional tells you to.

    Call your regular veterinarian if diarrhea keeps going past 48 hours without other severe signs, or if episodes repeat , that’s the time to get testing and targeted treatment. If any red-flag item above shows up, go to an emergency clinic, especially if diarrhea and vomiting won’t stop. If you suspect toxin exposure, call poison control at 888-426-4435 immediately and bring the stool sample and any packaging with you to the visit.

    Dietary causes of diarrhea in cats: sudden changes, food intolerance, and toxic foods

    - Dietary causes of diarrhea in cats sudden changes, food intolerance, and toxic foods.jpg

    A surprise switch in food, a new treat, or one big meal can upset a cat’s short gut (a short digestive tract built for a meat-first diet). Quick swaps often cause loose stool and a gurgling tummy. Change food slowly over 7 to 10 days and most kitties settle down. Kittens are extra sensitive , their tiny tummies can go from fine to sloppy fast. Ever watched a kitten turn a dinner bowl into a tidal wave of crumbs? Yeah, been there.

    Food intolerance (a digestive upset) and food allergy (an immune system overreaction) can look the same but need different fixes. The usual first step is a strict diet trial: feed a novel protein (a protein your cat has not eaten before) or a hydrolyzed prescription diet (protein broken into tiny pieces so the immune system won’t recognize it) and nothing else for several weeks. Many cats start to improve in a few weeks, but true food-allergy testing from a vet or a veterinary dermatologist can take time and may take 6 to 12 weeks to show clear results. Patience helps. Really.

    Some human foods and household items cause diarrhea or worse. Keep these well out of paw’s reach:

    • Chocolate
    • Grapes and raisins
    • Onions and garlic
    • Avocado
    • Alcohol
    • Xylitol (a sweetener found in gum, some peanut butters, and toothpaste)
    • Dairy , most adult cats are lactose intolerant

    Don’t withhold food for more than 24 hours. Cats risk hepatic lipidosis (a dangerous liver disease caused by prolonged fasting) if they stop eating. Cut back on table scraps, offer treats sparingly, and watch the stools while you switch foods. A tiny change and a little patience can save a lot of clean-up. Worth every paw-print.

    Food intolerance vs food allergy in cats

    Diagnosis usually starts with a strict diet trial using a novel protein or a hydrolyzed diet for several weeks. If stools don’t firm up, a veterinarian or veterinary dermatologist may recommend blood or skin testing and more advanced steps. Prescription hypoallergenic diets often help, and many cats show improvement within a few weeks to a couple months.

    Safe diet transition steps

    1. Days 1–3: 25% new food, 75% old food. Watch stools.
    2. Days 4–6: 50% new, 50% old. Note any softness or vomiting.
    3. Days 7–9: 75% new, 25% old. Keep portion sizes steady.
    4. Day 10: 100% new food if stools are normal. If not, pause and call your vet.

    Quick tip: for busy days toss an unbreakable ball or leave a treat puzzle and then switch meals slowly when you have time. It’s claw-tastic to see them thrive.

    Infectious and parasitic causes of diarrhea in cats

    - Infectious and parasitic causes of diarrhea in cats.jpg

    Tiny unwelcome guests, like intestinal parasites, plus a few bacterial or viral infections, are common reasons your cat might have loose stool, vomit, get dehydrated, or seem a little dull in the coat. You’ll see things like roundworms (long, spaghetti-like intestinal worms), Giardia (a tiny single-celled parasite that makes stool greasy and smelly), coccidia (single-celled parasites common in kittens), and Tritrichomonas (a single-celled protozoan, meaning one-celled organism, that often causes long-lasting large-bowel diarrhea). Bacterial gastroenteritis can come from Clostridium perfringens (a bacteria that can overgrow and irritate the gut), and viral problems like FPV (feline panleukopenia virus) or FeLV-related GI disease (FeLV is feline leukemia virus) can be serious. Some parasites can jump to people, so use gloves when scooping litter and wash your hands. Fecal testing is usually the very first thing your vet will ask for to figure out what’s going on.

    A fresh stool sample helps your vet decide the next steps. Fecal flotation (a test that looks for parasite eggs under a microscope), antigen testing (checks for parasite proteins), and PCR (a DNA test that finds parasite genetic material) each catch different bugs. Treating all cats that share a home often stops the cycle of re-infection. Ever watched your kitty chase shadows and thought, hmm, maybe something else is up? This is where testing helps.

    Cause type Typical clinical signs Age or risk group
    Roundworms Soft to watery stool, vomiting, pot-bellied look Kittens, outdoor or hunting cats
    Giardia Greasy, foul-smelling diarrhea, occasional vomiting Any age; common in kennels and shelters (see giardia in cats symptoms)
    Coccidia Watery diarrhea, weight loss, dehydration Kittens and stressed cats
    Tritrichomonas Chronic large-bowel diarrhea, mucus, urgency Multi-cat homes, young cats
    Bacterial gastroenteritis (Clostridium) Sudden watery diarrhea, sometimes bloody, fever Any age, often after diet change or antibiotics
    Viral (FPV / FeLV) Severe diarrhea, vomiting, depression, low white blood cells FPV hits kittens hardest; FeLV affects immunocompromised or FeLV-positive cats

    Prevention is simpler than it sounds. Keep up with routine deworming your vet recommends, vaccinate when appropriate, and separate sick kittens until you know the cause. Sanitation matters , scoop litter daily, wash food bowls and bedding, and clean litter boxes with hot water and a pet-safe disinfectant. If you think a parasite is the problem, bring a fresh stool sample for fecal flotation, antigen testing, or PCR so the vet can choose the right medicine. Treating every cat in the house often stops a repeat infection. Worth every paw-print.

    When parasites are most likely

    Parasite-driven diarrhea shows up more when cats go outside, live in multi-cat homes or shelters, are young kittens, missed deworming, or hunt rodents. So if your cat fits any of those, keep an extra eye on their litter box and call your vet if things look off.

    Chronic and systemic causes of diarrhea in cats: IBD, pancreas, liver, thyroid, and cancer

    - Chronic and systemic causes of diarrhea in cats IBD, pancreas, liver, thyroid, and cancer.jpg

    When your cat has loose stools that stick around or keep coming back, it often means something more than a one-night tummy ache. Chronic diarrhea usually points to a longer-term or body-wide problem, not just a bug. Think of it as your cat’s way of saying, um, "something’s off," and yes, your vet will want to take it seriously.

    Common long-term causes include:

    • IBD (inflammatory bowel disease – long-term gut inflammation that irritates the intestines).
    • Exocrine pancreatic insufficiency (pancreas not making enough digestive enzymes – enzymes are the little helpers that break food down).
    • Pancreatitis (pancreas inflammation that makes digestion painful and messy).
    • Hyperthyroidism (too much thyroid hormone that speeds up metabolism).
    • Liver disease (liver not processing nutrients and toxins well).
    • Kidney disease (kidneys not filtering wastes properly).
    • Intestinal lymphoma (cancer of the intestinal lining).

    Small-bowel versus large-bowel signs can steer your vet in the right direction. Small-bowel problems usually give loose, larger-volume stools, weight loss, and a dull coat from not absorbing nutrients. Large-bowel problems cause more frequent trips to the litter box, urgency, straining, mucus, and small-volume stool with accidents. One makes your cat thinner over time. The other makes life messy and urgent. You’ll notice the difference at the litter box.

    Finding the exact cause often takes more than trying a new food. Vets typically do bloodwork, abdominal ultrasound (a picture of the organs), endoscopy (a camera to look inside the gut), and biopsy (tiny tissue samples) to see what’s really going on. Some problems get better with diet changes or medicines. Others need long-term care or a specialist’s help.

    Prognosis depends on the diagnosis and how fast you start treatment, so keep a little log of weight, appetite, and stool, bring it to the appointment. Ever watch your kitty chase a phantom dot of light? Little clues like that can help too.

    Worth every paw-print.

    Medications, toxins, and foreign-body causes of diarrhea in cats

    - Medications, toxins, and foreign-body causes of diarrhea in cats.jpg

    Medications can sneak up on you as a cause of loose stool. Antibiotics (drugs that kill or slow bacteria) often upset the gut microbiome (the helpful bacteria living in your cat’s gut), and that shift can lead to diarrhea. Metronidazole (an antibiotic commonly used for GI infections) gets used a lot, but it can hurt beneficial gut bacteria and it won’t fix every tummy problem, so talk with your vet about risks and other options. Even some topical flea and tick products (applied to the skin to kill parasites) or supplements can upset a sensitive stomach.

    Household toxins and people foods can trigger sudden, severe diarrhea along with other worrying signs. Common offenders are rodenticides (rat poison), insecticides (bug killers), ethylene glycol antifreeze (a sweet-tasting but deadly chemical), some houseplants and flowers, and human treats like xylitol (an artificial sweetener) or chocolate (contains theobromine, which is toxic to pets). If your cat has tremors, drooling, wobbliness, or fast breathing combined with diarrhea, treat it as urgent and call your veterinarian, an emergency clinic, or poison control right away. Have any packaging or the product label handy when you call; it really helps.

    Swallowing foreign objects like string, small toys, or fabric can cause a partial blockage and it shows up differently than simple stomach upset. Look for repeated straining with only tiny watery stools, persistent vomiting, a painful or swollen belly, or sudden weakness. Those signs suggest an obstruction and need immediate veterinary evaluation; don’t try to induce vomiting at home unless your vet tells you to. Ever watched a cat go after a bit of string like it’s treasure? Yup, that’s when you keep a close eye. Worth every paw-print.

    How vets diagnose causes of diarrhea in cats: tests, sample collection, and what results mean

    - How vets diagnose causes of diarrhea in cats tests, sample collection, and what results mean.jpg

    A good diagnosis starts like a conversation with a curious friend. Tell the vet what your cat ate, if you traveled recently, met new pets, got any vaccines, or is on meds. That short backstory points the vet in the right direction and gets testing started faster so your kitty feels better sooner.

    1. History and physical exam , the vet will ask about diet changes, vomiting, weight loss, and how long the diarrhea has lasted. They’ll feel your cat’s belly for pain and check hydration and body condition. These clues decide what tests come next during the same visit.
    2. Fecal flotation (a stool test that helps eggs float so a microscope can spot parasite eggs) , this looks for worms and other parasites. Results usually come in 24 to 48 hours. Quick and cheap.
    3. Antigen testing and fecal PCR (antigen tests find parasite proteins fast; PCR is a DNA test that detects tiny amounts of parasite genetic material) , antigen tests can give same-day results, sometimes in hours. PCR takes a bit longer, like 1 to 3 days, but it catches sneaky germs.
    4. Fecal culture and cytology (culture grows bacteria; cytology looks at cells and tiny bugs) , these help spot bacterial overgrowth or inflammation. Cultures often take 2 to 5 days while the lab grows whatever is there.
    5. CBC and biochemical profile (CBC is a complete blood count that checks white blood cells and anemia; biochemical profile is blood chemistry that checks liver, kidneys, and electrolytes) , these tests tell if your cat is dehydrated, fighting infection, or has organ issues. Many clinics get blood results the same day or within 24 hours.
    6. Urinalysis and thyroid testing (urinalysis checks kidney and bladder health; thyroid testing measures thyroid hormone that can speed up digestion) , these catch problems that mimic or worsen diarrhea. Labs usually return these in 1 to 2 days.
    7. Abdominal X-rays and ultrasound (X-rays show blockages and gas patterns; ultrasound gives a detailed look at organs) , X-rays can be done quickly and give immediate clues. Ultrasound may be done the same day or scheduled soon after to see the intestines and other organs up close.
    8. Endoscopy and biopsy in cats (endoscopy uses a camera to see the gut lining; biopsy means tiny tissue samples are taken for histopathology, the tissue exam) , endoscopy lets the vet see inside and grab small samples. Histopathology usually takes several days to a week and can give a definitive diagnosis for things like inflammatory bowel disease or cancer.

    Collecting a fresh stool sample saves time and money. Scoop a pea-sized to teaspoon amount into a clean, sealed container within a few hours of passage. If you can’t get it to the clinic right away, keep it chilled in the fridge (not frozen) and bring it within 24 hours. Jot down any recent meds, treats, or diet changes on a short note to hand to the vet.

    Keep a simple stool chart with dates, stool consistency, and any vomiting or appetite changes , that little log is surprisingly useful. It helps your vet figure out whether the issue is in the small intestine or the large intestine. Ever watched your cat’s whiskers twitch as a toy rolls by? Same kind of detail can help here. Worth every paw-print.

    Treatment and home care for diarrhea in cats: fluids, diets, medications, and follow-up

    - Treatment and home care for diarrhea in cats fluids, diets, medications, and follow-up.jpg

    We folded the long standalone section into shorter, practical tips you can use right away. Think of this as quick triage for mild cases and clear signs for when to call the vet. Cozy up with your cat, let’s make this as simple as possible.

    Quick home-care bullets

    • Offer tiny, frequent sips of water instead of letting them gulp. Example: "Try a teaspoon of water every 10 to 15 minutes. Sip, don’t chug." Your cat’s whiskers will twitch and maybe give you a grateful head-bump.
    • Collect a fresh stool sample in a clean container and refrigerate. Example: "Scoop into a clean jar, label with date, chill in fridge." Bring that to the vet if asked.
    • Call the vet right away for severe signs: persistent vomiting, bloody stool, marked weakness, or diarrhea lasting more than 48 hours. If your cat looks very sick, don’t wait.

    At-home feeding for acute mild diarrhea
    For a day or two, offer bland, easy-to-digest foods. Plain boiled skinless chicken (shredded) with plain cooked white rice works well. Example: "Offer 1 to 2 tablespoon portions of shredded boiled chicken with a spoonful of white rice every 4 to 6 hours." Low-residue canned foods also work short-term. These are short fixes, okay? If food looks like the problem, vets may recommend a prescription gastrointestinal diet or a hydrolyzed protein diet (protein broken into tiny pieces to reduce allergic reactions) for 6 to 12 weeks.

    Medications and supplements
    Avoid human anti-diarrheal drugs like loperamide and bismuth subsalicylate (Pepto-Bismol). They can be harmful to cats. Probiotics (live beneficial bacteria) and prebiotics (food for those bacteria) might help. Start very small and use strains and doses your vet recommends. Example: "Try one-quarter to one-half of a recommended capsule sprinkled on food for two days, then re-evaluate." Gentle fiber additions can help some kitties. Inulin (a plant fiber) and psyllium (a bulk-forming fiber) are options; introduce slowly and watch how kitty responds.

    Fluids, rechecks, and tracking
    Home oral rehydration is fine for mild dehydration. For moderate to severe dehydration, clinics use subcutaneous fluids (under the skin) or IV fluids (into a vein). Recheck or call your vet within 48 to 72 hours, or sooner if things get worse. Keep a simple daily log: weight and a stool chart noting consistency, color, frequency, appetite, and vomiting. Example entry: "Day 1 – 4.1 kg; stool soft, once; eating two small meals." Little notes like this help your vet know what’s changed.

    A few extra, cozy tips

    • For busy days, toss an unbreakable toy or give a short session of play before you leave. That ten minutes of play can help digestion and cheer everyone up.
    • Ever watched your kitty chase shadows? It’s oddly satisfying and a good way to keep them moving gently.
    • Worth every paw-print.

    Oops, one last thing: if you’re ever unsure, call your vet. They’d rather hear from you early than treat something that got worse.

    Preventing future episodes and monitoring chronic cases of diarrhea in cats

    - Preventing future episodes and monitoring chronic cases of diarrhea in cats.jpg

    Prevention steps are now in the Dietary causes section. Quick checklist: slow food changes over 7 to 10 days, no table scraps, measured portions, and new treats one at a time. Example: mix 25% new food with 75% old for 2 to 3 days, then 50/50, then finish the switch by day 7 to 10. Easy to do. Your cat will thank you. Or at least look curious.

    Sanitation and isolation notes live in Infectious and parasitic causes. Scoop litter daily. Wash bowls and bedding in hot water. Clean boxes with a pet-safe disinfectant. Separate sick kittens until they’re cleared. And wear disposable gloves when you handle stool or anything contaminated. Seriously, gloves are your friend.

    For chronic cases, keep short, clear records and save samples your vet can use. Use the stool-chart template below and log weight and appetite every week. Store stool samples in a sealed container in the refrigerator for up to 24 to 48 hours. Wear gloves when collecting. Yes, it’s a little gross, but it helps the vet help your kitty.

    Date Consistency (standard scale 1–5) Color Frequency (times/day) Weight (weekly) Appetite/notes
    2025-03-12 4 (soft, unformed) Brown 3 4.2 kg Less interest in dry food

    Consider a specialist referral if diarrhea keeps going after a 6 to 12 week diet trial, routine deworming, and basic tests. Basic tests to discuss with your vet:

    • Fecal test (stool parasite test that looks for worms, giardia, and other bugs)
    • CBC (complete blood count – checks red and white blood cells and platelets)
    • Chemistry (blood chemistry panel – checks liver, kidneys, and electrolytes)
    • Imaging (X-ray or ultrasound – pictures of the inside to look for blockages or organ changes)

    Refer sooner if your cat is losing weight, vomiting, has blood in stool, or runs a fever. If you’re unsure, call your vet. Better safe than sorry, right?

    Final Words

    Loose, watery stool is a symptom, not a disease, so quick triage matters. Acute cases often clear in 1–2 days, but common triggers include diet change, parasites, infection, toxins, IBD/pancreatitis, or medications, see the sections above for details.

    Collect a fresh stool sample, offer small sips of water, and call your vet if diarrhea lasts past 48 hours or comes back.

    Keep a stool chart and any packaging. With timely steps you’ll likely pin down the causes of diarrhea in cats and get back to cozy, purring nights.

    FAQ

    Frequently Asked Questions — Cat Diarrhea

    What is the most common cause of diarrhea in cats?

    The most common cause of diarrhea in cats is a sudden diet change, new treats, or overeating, which often causes mild upset that settles within 1–2 days with water and monitoring.

    Why does my cat have diarrhea but is acting normal?

    A cat can have diarrhea but act normal because mild diet upset, stress, parasites (worms or protozoa), or a brief infection may not change behavior; monitor hydration, collect stool, and call your vet if it lasts more than 48 hours.

    Causes of diarrhea in cats — treatment

    Causes include diet change, parasites (worms or protozoa), bacterial or viral infection, toxins, inflammatory bowel disease (IBD), pancreatitis, or medications. Treatment ranges from fluids and deworming to diet trials and targeted drugs.

    Causes of diarrhea in cats and vomiting

    Causes often include infections, toxins, parasites, pancreatitis, or obstruction. Vomiting with diarrhea increases urgency, so seek prompt veterinary care.

    What to feed a cat with diarrhea?

    Offer small water sips and a short-term bland meal like plain cooked chicken with boiled white rice, or a prescription gastrointestinal or hydrolyzed diet. Do not fast beyond 24 hours.

    When should I be concerned about my cat’s diarrhea?

    Be concerned if diarrhea lasts more than 48 hours, recurs, or comes with vomiting, blood, lethargy, dehydration, straining, if the cat is a kitten or senior, or if toxin exposure is suspected. Bring a stool sample and any packaging to the vet.

    Why does my indoor cat have diarrhea?

    An indoor cat can have diarrhea from sudden diet or treat changes, houseplants or household toxins, stress, parasites tracked inside, or medication side effects. Fecal testing and a thorough history usually reveal the culprit.

    Related Articles

  • Best durable interactive cat toys for multi-cat households

    Best durable interactive cat toys for multi-cat households

    Think a pile of cheap toys will keep the peace in a multi-cat home? Think again.

    You need toys that actually survive biting, clawing, and being dragged across the living room. Pick pieces made from tough molded polymer (like a hard shell), sturdy metal (strong, won’t bend), or reinforced plastic (plastic strengthened with fibers). Also choose toys with replaceable lures (little feathers or faux fur you can swap) and multiple play hubs (several spots for cats to bat and chase).

    Read on for the best durable interactive cat toys for multi-cat households. I rate them for rough group play, easy cleaning, and shared access so shy cats get safe options and bold cats get more targets to pounce, ever watched a shy one suddenly join the fun? You’ll love the sight of whiskers twitching and the satisfying thud of a rolling ball.

    Claw-tastic.

    How durable interactive cat toys for multi-cat households deliver on what buyers need

    - How durable interactive cat toys for multi-cat households deliver on what buyers need.jpg

    If you have more than one cat, you know toys need to survive serious playtime. Pick toys with sturdy housings, replaceable lures, and multiple play hubs so more than one kitty can join the chase. You’ll want something that takes biting, clawing, and being dragged across the living room, so it stays useful for 6 to 12 months and saves you from constant replacements. The satisfying thud of a rolling ball and the soft swish of a wand are better when the toy actually lasts, claw-tastic, right?

    Look for a few practical features when you shop. Secure battery compartments with screw-locked access (so curious paws can’t pop them open), metal or reinforced plastic (tough molded polymer, like a hard shell), replaceable lures or refillable scent chambers, and washable surfaces that dry quickly after spills. Nylon (strong synthetic fiber) or canvas covers stand up to scratching way better than thin fabrics. Multiple play modes keep cats interested, and refillable parts mean you’re not throwing the whole thing away when one piece wears out.

    The payoff is simple: longer play, fewer squabbles over one toy, and less time fixing or buying replacements. Shy cats get safe options, bold cats bounce between hubs, and busy owners get dependable entertainment without a fuss. Um, isn’t that nice?

    Worth every paw-print.

    • sturdy housings (metal or reinforced plastic, tough molded polymer)
    • replaceable lures/parts or refillable scent chambers
    • multiple play hubs or modes for shared access
    • washable, fast-drying surfaces
    • sealed battery compartments with screw-locked access (keeps batteries safe from curious paws)

    Top durable interactive cat toys for multi-cat households , rated picks and quick comparison

    - Top durable interactive cat toys for multi-cat households  rated picks and quick comparison (includes product test observations and trade-offs).jpg

    We scored these toys on how well they hold up to rough group play, whether several cats can use them at once, how easy they are to clean, and if worn parts can be replaced. Scores come from hands-on testing in real multi-cat homes and simple durability checks like tug trials, motor run-time tests, and how easy it is to swap lures.

    Quick test notes and trade-offs. The automatic randomized laser toy is USB-powered (plugs into any USB port), runs about 2.5 hours, and has three speed modes , great for getting a room full of cats moving, but bold kitties might rocket into furniture if your space is tight. Wand toys like the Pet Fit for Life have a 66-inch nylon shaft (strong synthetic fiber) with replaceable feather lures, so they’re perfect for group chases, just give them room to stretch. Puzzle and track toys do a lot of mental work for multiple cats; heavier plastics and metal parts last longer but can add noise and weight. And heads up: replaceable parts matter. A toy that ships spare lures or easy-replacement parts will outlast a cheaper sealed novelty every time.

    Ever watched whiskers twitch as a ball rolls across the carpet? That’s the kind of play these are built for. Below is a quick comparison to help you pick the best fit for your crew.

    Toy Best for Materials / Key durability features Price range Suitability for multi-cat use (1–5)
    Automatic randomized laser toy Group chasing & exercise USB-powered motor (small electric motor via USB), enclosed plastic housing (protects innards); randomized laser patterns $$ 4
    KONG Window Teaser Solo window play & independent hunting Suction-cup mount (attaches to glass), wand attachment; compact sturdy plastic (durable polymer) $ 3
    Pet Fit for Life Ultimate Feather Teaser Long-reach interactive wand sessions 66-inch nylon shaft (strong synthetic fiber), replaceable feather lures (easy swap) $–$$ 4
    Cat-Stages Tower of Tracks Quiet, multi-cat ball play Durable plastic tracks (tough polymer), multi-tier design to spread access and reduce fighting $$ 5
    Nina Ottosson Buggin’ Out Puzzle Multi-cat mental stimulation Wood/plastic composite (sturdy blended material), BPA-free (no harmful plastics), modular compartments $$ 4
    Cat Amazing Treat Maze Recyclable puzzle feeding Recycled cardboard (eco-friendly but watch hygiene); fully recyclable when worn $ 3
    Yeowww! Catnip Banana Rough batting, kicking, and chew-friendly play Canvas-like cotton twill (heavy weave cotton), packed with strong catnip $ 3
    Cat Dancer spring-steel wire High-engagement bouncing & chasing Spring-steel wire (flexible metal) with cardboard ends; simple, repairable design $ 4

    Short takeaway: for heavy chewers and rough play, the Yeowww! banana and canvas-style toys hold up best. For multi-user brainy play, pick the Nina Ottosson puzzle or the Cat-Stages Tower of Tracks to keep several cats busy at once. Worth every paw-print.

    Durability materials and safety features for multi-cat durable toys

    - Durability materials and safety features for multi-cat durable toys.jpg

    Materials matter. Your toys get bitten, scratched, and pulled in a four-way tug-of-war, so pick stuff that survives the chaos. Metals (like steel or aluminum) give hard shells that shrug off bites. Fiber-reinforced plastics (plastic mixed with glass or carbon fibers for extra strength) make rigid housings that resist punctures. And rubber or silicone (flexible, bouncy polymers) handle chewing and keep a nice, consistent bounce for chase sessions.

    Think about common pairings when you shop. Metal or reinforced plastic housings beat thin plush or canvas for puncture resistance. In lab-style puncture tests, metals and reinforced plastics usually take many times the force needed to pierce heavy canvas. Rubber or silicone shells soak up claw attacks better than stuffed toys. Nylon (a strong synthetic fiber) and canvas (heavy woven cotton) are great for wands and pads, but yep, they’ll show claw marks over time.

    Electronics need extra love. Look for chew-proof housings with battery doors that stay shut during play. Sealed enclosures with screw-down or tamper-resistant fasteners and gasketed panels (rubber strips that keep out dust and water) help keep motors and batteries safe. Check the IP rating (ingress protection score that shows how well something resists dust and water) , for example, IPX4 means splashes won’t short the motor. Avoid toys with exposed wiring, loose batteries, or tiny screws cats can work loose.

    Surface safety and hygiene save headaches. Favor BPA-free plastics (no bisphenol A, a chemical sometimes used in plastics) and non-toxic finishes that wipe clean. Removable, quick-drying covers for fabric parts are a lifesaver , toss them in the wash and air-dry. Skip dangly ribbons and small detachable bits that become choking hazards, and treat toys that hold damp food like mold magnets , dry them completely between uses.

    A few practical tips: before you buy, squeeze and tug a toy to see how seams and fasteners hold up. If a toy has replaceable parts, check how easy it is to swap them without tools. For busy days, give your cat an unbreakable ball or rubber shell toy , ten minutes of safe play, and you’re out the door.

    Worth every paw-print.

    (Okay, one tiny confession: my cat once opened a battery door in thirty seconds flat. So yeah, test the closures.)

    Play modes and toy designs that support simultaneous play in multi-cat households

    - Play modes and toy designs that support simultaneous play in multi-cat households.jpg

    I tightened things up so the article doesn't repeat itself, and put the most useful tip right at the top. The quick idea: make toys that let more than one cat join in, without falling apart or turning into a snack for claws. Think sturdy tracks, multiple play points, and motion that invites a few kitties to pounce at once.

    How durable designs let multiple cats play at once. Use tough materials and layouts that share the action. Wide or double tracks keep two cats chasing a ball side by side. Staggered or concentric track layouts (tracks nested or offset so toys pass each other without jamming) let cats take turns batting without tangles. And yes, make it quiet and smooth so shy cats feel safe joining the fun.

    Motion-activated notes now sit with each product description. Sensors matter: inertial sensors (simple motion detectors) give different behavior than mechanical switches (basic on/off triggers). Battery choices are important too: Li-ion batteries (rechargeable lithium-ion packs) usually give longer run time and faster recharge, while AA batteries (standard replaceable cells) are easy to swap at the store. We moved those tradeoffs into each toy entry so readers see the real-world pros and cons where it counts.

    Motor noise and vibration tips are in the durability and safety section. Look for low-RPM gearboxes (slower motor gears that cut noise) and rubber dampers (soft mounts that absorb vibration) to keep motors from scaring off skittish cats. Also consider enclosed housings and screw-locked battery doors (battery covers fastened with screws) so curious paws and teeth can’t fling batteries or tangle wiring.

    Wand details are now all together in the wand product table entry. Fiberglass (like a strong fishing-rod core) and reinforced nylon shafts are the usual choices for flex and strength. Quick-release lure mounts (easy-swap toy attachments) and two-piece connector designs (shafts that separate for storage) make wands more versatile and less likely to break when two cats tug at once.

    A short runtime and battery-door warning, collapsed into one line: randomized lasers often run about 2.5 hours on a charge and usually offer three speed modes, so check runtime specs. And please, look for enclosed housings and screw-locked battery doors to keep your cat from redecorating the toy with battery parts.

    Worth every paw-print.

    Managing sharing, resource guarding, and playtime routines with durable interactive cat toys for multi-cat households

    - Managing sharing, resource guarding, and playtime routines with durable interactive cat toys for multi-cat households.jpg

    Small routine changes can cut down on fights and make playtime feel fair. Spread out toys, give shy cats their own safe options, and set simple schedules so every kitty gets hunting time without turning a toy into a trophy. Ever watched your cat stalk a wand like it’s the best thing ever? That’s what we want to preserve.

    • Scheduled individual wand sessions , set aside 5 to 10 minutes of focused wand play per cat so each kitty gets solo hunting attention. A wand here means a teaser wand (a stick with feathers or ribbon on the end) that mimics prey. Keep these one-on-one so rivals don’t swoop in.

    • Multiple identical toys , buy two or three of the same toy, especially wands and small mice, so several cats can play at once. It’s less drama when there isn’t just one prized item.

    • Staggered puzzle-feeder placement , put puzzle-feeders (food-dispensing toys) in different rooms or run them at staggered times so cats can eat calmly without guarding food. Calm meals = fewer snips and tense tail flicks.

    • Rotate toys weekly , swap toys in and out to keep things fresh and lower the chance one item becomes an obsession. Novelty matters. Your cat will act like it’s a brand new treasure.

    • Spread communal hubs across rooms , set up more than one track, tree, or activity station so access isn’t a single choke point. Think small activity zones around the house rather than one big hotspot.

    • Supervised multi-cat sessions with neutral toys , use lasers, self-moving balls, or track toys together while you watch; step in if one cat gets possessive. Neutral toys mean no one thinks it’s theirs alone.

    • Provide quiet solo toys for shy cats , leave soft heartbeat plushes or window-mounted teasers so timid cats can play without pressure. Those gentle, solo options help them build confidence.

    Aim for about 1.5 to 2 interactive toys per cat, plus one communal hub, to balance solo outlets with shared play opportunities. Worth every paw-print.

    Maintenance, testing protocols, and signs a durable interactive cat toy needs replacement

    - Maintenance, testing protocols, and signs a durable interactive cat toy needs replacement.jpg

    A simple maintenance routine keeps busy multi-cat homes safe and smelling fresh. Do a quick weekly spot check and a deeper clean once a month. Focus on toys that get messy – food, drool, or outdoor dirt make smells build up and fabric (washable cloth) stay damp. Ever watched your cat sniff a soggy toy? Yeah, not great.

    After one to two weeks of play, run a short testing routine. Look at seams and stitching (the thread that holds pieces together) for loose or pulled threads. Press and flex hard-shell housings (rigid plastic shell) to see if hairline cracks appear. Wiggle battery doors and try the latch gently – don’t force it. Give motorized toys a short power run and listen closely for grinding, rattles, or slack in moving parts. That little grind can tell you a lot.

    For treat toys, open and dry internal chambers (where the treats sit) and rinse any washable fabric pieces with water. Hose-down rubber or mat-style toys and let them air-dry fully. I also do a gentle bite test – apply steady, gentle pressure at key stress points to spot weak spots before they fail. Oops, make that a gentle squeeze, not a full chomp.

    Take a toy out of service right away if you find loose parts, exposed stuffing, persistent dampness, or any active mold. Replace toys that squeak oddly, have cracked housings, or show bitten-through seals. Safety first. Your cat will thank you with enthusiastic pounces.

    Quick checklist:

    • Loose seams or pulled stitching (thread coming undone)
    • Exposed stuffing or foam
    • Chipped or sharp plastic edges
    • Cracked or compromised housings (rigid plastic shell)
    • Battery compartment integrity (where the batteries sit) – doors that don’t latch
    • Lingering moisture or mold in treat toys (internal chambers)

    A little upkeep goes a long way. Toss a toy that looks risky, and you’ll save yourself a vet visit and your cat from chewing on something unsafe. Worth every paw-print.

    Pricing, warranties, replaceable parts, failure modes, and DIY options for durable interactive cat toys for multi-cat households

    - Pricing, warranties, replaceable parts, failure modes, and DIY options for durable interactive cat toys for multi-cat households.jpg

    If you share your home with more than one cat, price is more than upfront cost. Budget picks , tiny mice, plush catnip toys , feel cheap at first, and they are. They cost less, but with multiple cats gnawing, pouncing, and kicking, they wear out fast. You’ll hear the sad little squeaks and see stuffing poke out sooner than you expect.

    Premium interactive hubs and electronic toys cost more up front, but they’re built tougher. Look for housings made from polymer (tough plastic) or fiberglass (like a strong fishing-rod core). Those parts stand up to rough play. Lots of higher-end toys also use replaceable lures and modules, so you swap the worn bits instead of tossing the whole toy. Over time that saves money, honestly.

    Watch for these common failure modes: feathers that wear off, cardboard that falls apart, stuffing that gets punctured, and suction cups losing their grip on window-mounted toys. Each of these shortens a toy’s useful life and can double your replacement costs if spare parts aren’t available. Oops , that favorite toy can become a short-lived casualty.

    Toys with refillable catnip chambers or easy lure swaps are the real winners for multi-cat houses. Replace the catnip pouch or the lure, and the toy feels new again. Think of it like replaceable batteries for fun , quick fixes that keep playtime going.

    Always read the warranty and spare-part details before you buy. Aim for mechanical-failure coverage of at least 6 to 12 months, and make sure the brand mentions spare-part availability or repair channels. If a company lists extra feather lures, track modules, or motor assemblies (small electric motors and gears) and sells them separately, that’s a green flag.

    Worth every paw-print.

    1. Warranty length and terms (mechanical failure coverage for parts and motors)
    2. Spare-part availability (feathers, motors, lures, track or module replacements)
    3. Sealed battery compartments (screw-locked or tamper-resistant for safety)
    4. Washable surfaces or removable covers (fast-drying fabrics are best)
    5. Refillable scent chambers or replaceable catnip pouches
    6. Clear return policy and responsive support for defective units

    If a lure frays, or a wand connector strips, try the DIY replacement attachments for teaser wands resource for quick, low-cost fixes that keep toys working longer.

    Final Words

    In the action, follow the buying capsule: pick sturdy housings (the tough outer shell), replaceable lures or parts, and multiple play hubs so every cat gets a turn.

    We covered what buyers need, tough materials, sealed battery compartments, washable surfaces, and play modes that let several cats play without squabbles. Fewer broken parts and lower replacement costs over 6–12 months. Calm afternoons. Happy zoomies.

    Choose durable interactive cat toys for multi-cat households and you’ll get happier cats, fewer replacements, and more relaxed, playful moments. Worth every paw-print.

    FAQ

    What toys do cats never get bored with?

    Toys cats rarely get bored with are hunting-style items: wand teasers, self-moving balls, puzzle feeders (treat-dispensing puzzles), and refillable catnip toys—rotate them weekly to keep interest high.

    How do I keep my house cat entertained?

    To keep a house cat entertained, schedule short daily play sessions, offer window perches, mix interactive and solo toys, and use puzzle feeders for mental and physical activity.

    Are interactive cat toys worth it?

    Interactive cat toys are worth it because they boost exercise, reduce boredom and unwanted behavior, and improve mental health when you pick sturdy, safe designs for your cats.

    What toys are good for two cats?

    Toys good for two cats include multi-access track systems, rotating hubs, long wands, puzzle feeders with multiple openings, and duplicate toys so both cats can play without guarding.

    What are the best durable interactive cat toys for multi-cat households?

    The best durable interactive cat toys for multi-cat households prioritize sturdy housings (reinforced plastic (thicker polymer shell)), replaceable lures, and multiple play hubs—think randomized lasers, track towers, and heavy-duty wands.

    What are the best stimulating interactive toys for indoor cats?

    The best stimulating interactive toys for indoor cats blend motion, puzzle solving, and scent: randomized lasers, multi-level track balls, puzzle feeders, and refillable catnip pouches.

    What is the Cat Dancer interactive cat toy and is it durable?

    The Cat Dancer is a spring-steel (flexible metal wire) wand that makes fast, erratic motion—very engaging and long-lasting, though not chew-proof for determined nibblers.

    How do I choose a durable interactive toy for a multi-cat home?

    Choose toys with sealed battery compartments, metal or reinforced plastic housings (resist punctures), replaceable lures, washable surfaces, and multiple play modes to cut breakage and sharing fights.

    Related Articles

  • Munchkin Cat Care Tips for New Owners

    Munchkin Cat Care Tips for New Owners

    Think short legs mean Munchkins are fragile? Nope. These tiny legged felines are zippy, brave, and packed with personality, claw-tastic energy in a small package. Ever watched one sprint across the rug, whiskers twitching as it zeroes in on a toy? It’s adorable.

    Your job is mostly simple: watch their health, keep their weight steady, and make the home easier to move around in. Start with a vet visit for vaccinations (shots that prevent disease) and a deworming plan (medicine to remove intestinal parasites). Measure meals, use a kitchen scoop or scale, so they don’t pack on extra pounds. Add a low-entry litter box (a box with a short side so cats can step in easily) and soft ramps or rugs where they jump most.

    Worth the effort. You’ll get more playful pounces, fewer ouch moments, and lots of happy head-butts. I once watched a Munchkin leap like a tiny superhero for a crinkly ball, totally worth it.

    Munchkin Cat Care Tips for New Owners

    - Munchkin cat care essentials one-minute action plan for new owners.jpg

    Munchkins usually live about 12 to 15 years. Your main jobs are watching their health, keeping their weight steady, and making small indoor changes so moving around is easier. It’s worth the effort. You’ll get more playful pounces and fewer ouch moments.

    • Schedule that first vet visit and set up a vaccination (shots that prevent disease) and deworming plan (medicine to remove intestinal parasites).
    • Start portion-controlled feeding (measuring meals so they don’t overeat); weigh your cat once a week for the first three months so you can tweak portions.
    • Put in a low-entry litter box for easy access, and add a ramp or low step to their favorite perch so they don’t have to leap up.
    • Begin weekly brushing and do monthly nail checks; start simple dental care too, like tooth wipes or a pet-safe toothpaste.
    • Learn urgent signs to watch for and bookmark See Health checklist: Red flags so you have it when you need it.

    Munchkins have characteristically short legs because of a dominant genetic mutation. That makes their walk a bit different and raises a few health risks to watch: lordosis (an inward curve of the lower spine), pectus excavatum (a sunken breastbone), and osteoarthritis (wear-and-tear joint pain). Ever watch a Munchkin sprint? It’s cute, but keep an eye on how they land and move.

    For feeding plans, mobility ideas, grooming tools, starter supplies, and medical timelines, jump to the detailed sections below. Next, we’ll get into easy, real-life tips you can use tomorrow.

    Feeding Munchkin cats: schedules, portion formulas, and monitoring metrics

    - Feeding Munchkin cats schedules, portion formulas, and monitoring metrics.jpg

    Keep calories balanced and feed protein-rich recipes. Munchkins do best on life-stage food approved by AAFCO (Association of American Feed Control Officials) so you aren’t guessing about nutrition. Kittens need extra fuel to grow; adults need tighter portion control so extra weight doesn’t stress hips and joints. You’ll thank yourself later when they’re still springy and playful.

    Wet food is a great main meal for Munchkins because it helps with hydration and is often higher in protein and lower in carbs, both of which help keep a cat lean. Pick wet formulas labeled for the cat’s life stage. Dry food works well as a measured snack or in timed puzzle feeders (puzzle feeder = toy that lets food out slowly so eating is slower and more fun). If you want to support joints, look at diets made for mobility or ask your vet about supplements like glucosamine (joint-support supplement) and omega-3s (fatty acids that reduce inflammation).

    Always keep fresh water available and put water bowls away from the litter box. In homes with multiple cats, set up separate feeding stations so shy kitties don’t get bullied away. When you start a new food, run a short trial, weigh your cat often, and watch stool quality.

    Life Stage Typical Daily Calorie Guideline Portion Example
    Kitten (up to 12 mo) 200–300 kcal/day per lb of expected adult weight Expected adult 8 lb → 1600–2400 kcal/day total for growth; if a can is 85 kcal, that’s about 19–28 cans split across meals (use vet guidance)
    Adult (1–7 yrs) 40–50 kcal/day per lb 8 lb × 45 kcal = 360 kcal/day; tweak up or down by BCS (body condition score, 1–9 scale)
    Senior (7+ yrs) 30–40 kcal/day per lb; watch for muscle loss 8 lb × 35 kcal = 280 kcal/day; consider senior formulas with joint support
    • Weigh-ins: kittens every 4–8 weeks; healthy adults every 3 months; weigh every month during diet changes.
    • Body Condition Scoring: use a 1–9 BCS at each weigh-in and record trends so you see slow gains or losses.
    • Treat budgeting: keep treats under 10% of daily calories. Quick math: 360 kcal/day × 0.10 = 36 kcal max from treats.
    • Feeding mechanics: use slow-feeders or puzzle meals when you need to trim calories and add mental play.

    Ever watched your kitty’s whiskers twitch while a ball rolls? Little choices like wet food, measured meals, and a puzzle feeder turn a snack into play and help protect tiny Munchkin hips. Worth every paw-print.

    Grooming and hygiene for Munchkin cats: schedules, tools, and a practical care table

    - Grooming and hygiene for Munchkin cats schedules, tools, and a practical care table.jpg

    Grooming helps Munchkins stay comfy and stops them from over-licking or getting mats that pull on joints. Short-haired Munchkins usually do fine with a weekly brush. Long-haired Munchkins need brushing two or more times a week to keep tangles and hairballs away. Dental care is best as a daily habit when you can, use pet toothpaste or tooth wipes and a soft brush.

    Because those cute short legs make some spots hard to reach, pay special attention to the lower back, flanks, and the base of the tail where mats and trapped debris hide. If mats form near the hind end or your cat hates being handled, see a pro groomer. Same for dental cleanings that may need anesthesia, talk with your vet about timing and risks.

    Task Frequency Recommended Tool Notes
    Brushing short coat Weekly Fine-toothed slicker brush (brush with fine wire bristles) Focus on flanks and base of tail; short legs may miss these spots
    Brushing long coat 2+ times weekly Undercoat rake (tool that pulls loose underfur) + wide-tooth comb Work gently through tangles; check hindquarters carefully
    Nail trim Every 2–4 weeks Cat nail clippers or guillotine trimmer (scissor-style or single-blade trimmer) Trim tips only; claws can catch more on bedding because of short legs
    Dental care Daily when possible Pet toothbrush or tooth wipes (towel-like wipes for teeth) Start slow and reward after brushing to build a calm routine
    Ear check Monthly Soft cotton pad and ear cleaner Look for wax, odor, or redness; do not poke deep into the canal
    Bathing Occasional (every few months) Cat shampoo and towel Use waterless wipes or dry shampoo between baths for quick cleanups
    Deshedding (seasonal molt) Weekly–twice weekly Rubber brush or de-shedding tool (removes loose underfur) Removes loose fur and helps prevent hairballs
    1. Hold your cat gently on a towel or your lap so they feel steady.
    2. Press the toe pad to extend the claw and find the quick (pink area with a blood vessel).
    3. Clip only the clear tip, avoid the quick. Do small trims, one claw at a time.
    4. Praise and offer a treat; stop if your cat panics and try again later.

    If mats are tight, grooming causes stress, or you need dental scaling, book a professional groomer or vet visit and review anesthesia and dental risks with your clinician. See Health checklist: Medical timeline and red flags

    Mobility, joints, and home adaptations for Munchkin cats

    - Mobility, joints, and home adaptations for Munchkin cats.jpg

    Short legs change the way a Munchkin walks and how weight lands on hips and knees. That means spine and bone care for short-legged cats should aim to cut joint strain and keep them moving. You’ll notice their gait is different, some have a bouncy, fast sprint but jumping to high spots can be trickier. Watch for early stiffness or limping that might be osteoarthritis (wear-and-tear joint pain) or lordosis (an inward curve of the lower spine). Small home tweaks stop awkward jumps and hard landings from adding up over time.

    See Health checklist: Red flags

    • Ramps to furniture: set a 20 to 30-degree angle with a non-slip surface so they can walk up without sliding. Think of it like a little cat hill.
    • Steps or stair runs: make each step 6 to 8 inches deep with risers 2 to 4 inches high so they get frequent, low perches. Fewer big jumps means happier joints.
    • Low-tier cat trees: choose trees with platforms every 4 to 6 inches and padded landings to soften the bounce. Your cat still gets play and views, just easier on the knees.
    • Low-entry litter boxes: keep the box at floor level and add a short ramp if needed so getting in and out isn’t a challenge.
    • Non-slip rugs and runners: place them along favorite paths and near litter, beds, and food so paws get better traction.
    • Carrier choice: pick a carrier with a low front entry or a removable top so loading is gentle and fast, vet trips will be less stressful.
    Accessory Recommended Dimension/Spec Why it helps
    Ramp 20 to 30-degree angle; non-slip surface Reduces vertical force on joints when they access furniture
    Step set Run depth 6 to 8 in; riser 2 to 4 in Creates frequent, low-height perches and cuts down big jumps
    Low-tier tree Platforms every 4 to 6 in; soft landings Makes climbing doable while shortening fall distance
    Carrier Low front entry or removable top Makes vet visits safer and less stressful to load

    Consider physical therapy (PT) if your Munchkin starts moving slower, gentle exercises can rebuild strength. Hydrotherapy (water-based exercise that reduces joint load) is another great option for cats who tolerate it. Chat with your veterinarian about joint supplements like glucosamine (a joint-support supplement) or omega-3s (anti-inflammatory fatty acids) if weight or stiffness becomes an issue. Keep an eye on body condition and activity level, losing a little weight can take a lot of pressure off their joints, you know?

    If you spot persistent limping, sudden changes in posture, or trouble getting around, get a clinical evaluation sooner rather than later. Worth every paw-print.

    Litter box setup and training for low-clearance Munchkin cats

    - Litter box setup and training for low-clearance Munchkin cats.jpg

    Pick a litter box with a low front lip so your short-legged Munchkin can step in without stretching. Aim for about 2-3 in at the entry. Give the box a footprint at least 1.5x your cat's length so turning and digging feel natural (footprint means the floor space the box takes). Keep litter shallow, about 1-2 in for adults, so paws don’t get buried (litter is the sand-like, clumping material cats dig in). Put a litter mat (a trap-mat that catches stray litter) in front to cut down tracking. Ever watched little paws kick and fling litter everywhere? This helps.

    Your cat should be able to scratch and cover without balancing on the rim. It feels better for them, and honestly, it’s easier on you. Worth every paw-print.

    Box Type Minimum Entry Height Notes
    Open low-side box 2-3 in Best for most Munchkins; easy access and easy to clean; footprint at least 1.5x cat length
    Hooded low-front 2-3 in Gives privacy and helps control odor; pick one with front vents and a wide entry
    Top-entry Not recommended Only works with a sturdy ramp or for very athletic cats; otherwise they may avoid it
    Large shallow pan (kittens) 1-2 in Low step for tiny kittens; upgrade as they grow to a bigger footprint

    Troubleshooting quick tips:

    • Wrong location: move the box to a quiet, low-traffic spot. Keep food and water in a different area.
    • Entry too high: swap for a lower-front box or add a gentle ramp (think pet-stair, not a cliff).
    • Scent change: introduce a new litter by mixing 25% new with 75% old each day until fully swapped.
    • Litter depth: if your cat digs like a little cactus or steps out with clumps, try reducing depth a bit.

    Want supplies? For product costs and starter options see Starter supplies, and check this deeper guide on comparing top-entry vs open litter box designs.

    Health checklist: routine vet visits, vaccinations, testing, and emergency signs for Munchkins

    - Health checklist routine vet visits, vaccinations, testing, and emergency signs for Munchkins.jpg

    This is your go-to medical timeline for Munchkins, and the place to spot red flags early. Follow a standard kitten vaccine series through 16 weeks, plan spay/neuter (surgical sterilization) when your vet recommends it, and keep parasite prevention for fleas, ticks, and worms (parasites that live on or in your cat) on a steady schedule. Because Munchkins have a short-leg gene, chat with your vet about screening for spinal and chest issues like lordosis (abnormal spine curve) and pectus excavatum (sunken chest), and ask whether genetic testing (DNA screening for inherited risks) makes sense for your cat. Keep a simple log of weights, vaccine dates, meds, and any odd behavior so appointments are focused and useful.

    Age Range Recommended Care / Vaccines Frequency
    Kitten (0–16 wks) Core vaccines: FVRCP (vaccine for feline viral rhinotracheitis, calicivirus, and panleukopenia), rabies per local rules, deworming (treats intestinal worms), microchip (tiny ID implant), baseline weight checks Follow vaccine schedule; weigh weekly
    Adult (1–7 yrs) Annual exam, booster vaccines as needed, parasite control (fleas, ticks, heartworm/intestinal worm prevention), baseline bloodwork if new to the vet Yearly exam
    Senior (7+ yrs) Checkups every 6 months, bloodwork and urine screen, mobility and dental checks, discuss pain screening and joint supplements (like glucosamine) if mobility is a concern Every 6 months

    If you notice any of these signs, call your vet or an emergency clinic right away.

    • Rapid breathing or obvious struggle to breathe, like open-mouth breathing or heavy flaring nostrils.
    • Sudden trouble walking, dragging a leg, or wobbliness.
    • Gums that look very pale or blue instead of pink.
    • A sudden big drop in appetite or not eating at all.
    • Blood in the litter box or painful, frequent urination.
    • Extreme listlessness, collapsing, or fainting.
    • Repeated vomiting or diarrhea lasting more than a day.
    • Sudden swelling anywhere on the body.
    • Acute lameness or refusing to put weight on a limb.

    Talk with your veterinarian about genetic testing and any health records from the breeder. Ask about safe pain-management options and joint support if your Munchkin shows stiffness or mobility changes. Keep a short notes file and weight log for each visit so you can spot trends, makes vet visits faster and way more useful.

    Socialization, training, and enrichment tailored for Munchkin kittens and adults

    - Socialization, training, and enrichment tailored for Munchkin kittens and adults.jpg

    Munchkins stay playful well into adulthood. They’re friendly, curious, and love short, lively bursts of play. Because their legs are short, low-to-the-ground games , think rolling, pouncing, and gentle climbs , build strength without putting stress on joints. Ever watched your kitty chase a toy across the carpet? That kind of quick, ground-level fun is perfect.

    Here are simple daily habits that work great for Munchkins:

    • Two 5–10 minute interactive play sessions each day. Use a feather wand or a low-swing teaser (teaser wand with a short attachment) so the action stays close to the floor.
    • One meal from a puzzle feeder (toy that releases food slowly) to mix eating with problem-solving.
    • Hide small treats around floor-level spots for scent work and practice hunting.
    • Supervised low-surface climbing: shelves or ramps kept under 12 inches high. It’s safer and still fun.
    • Short leash walks in a quiet place for training and controlled exercise , introduce a harness (soft safety vest) slowly.
    • Leave a solo puzzle toy during naps for mental stimulation.
    • Rotate a small set of toys weekly to keep things novel and exciting.
    • Scent games: tuck a dabbed cloth or a small box in different spots for quick sniff sessions.

    Best toys and setups for short-legged play:

    These picks favor low-floor motion and short bursts of energy. Your cat’s whiskers will twitch.

    1. Feather wand with a low-swing motion , mimics ground-level prey and invites pouncing.
    2. Ground-level rolling balls (soft and quiet) , great for chasing without high jumps.
    3. Low-track battery toys (small motorized toys) , quick, short runs that grab attention.
    4. Puzzle feeders (food-dispensing toys) , slow down meals and add a brain game.
    5. Plush tunnels (soft fabric tubes) , perfect for a sprint-and-hide moment.
    6. Teaser wands with short attachments , less fling, more close-range chase.

    For DIY fixes, check DIY replacement attachments for teaser wands. For cost estimates and starter toy budgets see Starter supplies.

    Worth every paw-print.

    Adoption, breeder selection, costs, and ethical considerations for Munchkin ownership

    - Adoption, breeder selection, costs, and ethical considerations for Munchkin ownership.jpg

    Expect to pay about $800 to $1,500 for a Munchkin kitten from a reputable breeder. Some pedigreed lines or rare colors can cost more. Adoption or rescue is usually cheaper, and honestly, sometimes more rewarding. Ever watched a shy shelter kitten blossom? It’s the best.

    The short-leg gene raises real ethical questions. So look for breeders who share clear health records and who avoid producing homozygous kittens (homozygous means the kitten has two copies of the same gene, which can cause serious problems). Ask about genetic testing (DNA checks for inherited traits) and about outcrossing to domestic lines (breeding with non-Munchkin cats to keep diversity and reduce health risks). For a detailed starter budget and monthly estimates, see Starter supplies.

    What to ask a breeder

    • Which health tests are provided – spine X-ray (image of the backbone), cardiac check (heart exam), genetic panels (DNA tests for inherited conditions).
    • Parent history and current pictures of the parents as adults.
    • Full veterinary records for the litter and the mother.
    • A written contract that spells out health guarantees and each party’s obligations.
    • A clear return policy if a serious health problem appears or your life changes.
    • Early socialization practices used for the kittens – handling, exposure to household sounds, and people.
    • Screening for lordosis and pectus (spine and chest shape problems that can affect breathing and movement).
    • Vaccination and deworming records with dates.
    • Microchip status and transfer paperwork.
    • Spay/neuter agreement and timing if the kitten isn’t already fixed.

    Red flags – when to walk away

    • No paperwork or vague answers about health testing.
    • Refusal to show the parents in person or via current photos.
    • Pressure to buy right away.
    • No return policy or no willingness to take a kitten back if health issues show up.

    If you hit any of those red flags, step back and ask more questions. Talk to a vet or consult the Health checklist for medical concerns before you commit. Worth every paw-print to be thorough.

    Starter supplies, monthly care checklist, and budget for new Munchkin owners

    - Starter supplies, monthly care checklist, and budget for new Munchkin owners.jpg

    Bringing home a Munchkin? Congrats. This is a friendly starter list of what to buy in year one, a real budget range, and a simple care log tip. Keep receipts and jot down monthly costs and weight checks so you can spot changes fast.

    • Low-entry litter box: $20–$80 (front entry so short legs can step in easily)
    • Quality wet food (monthly): $20–$60 (wet food helps hydration and is easier for tiny mouths)
    • Food + water bowls (weighted or ceramic): $10–$40 (weighted bowls stay put; ceramic is easy to clean)
    • Low-step cat tree or ramps: $50–$200 (short tiers and padded landings for their little legs)
    • Brush per coat type: $8–$25 (slicker brush or undercoat rake (tool that pulls loose underfur))
    • Nail clippers: $5–$20 (small, sharp clippers work best for kitten nails)
    • Low-entry carrier with removable top: $30–$120 (removable top makes vet visits easier)
    • Dental kit (toothbrush/toothpaste): $10–$30 (start slowly, make it a game)
    • Puzzle feeder (food-dispensing toy): $10–$40 (puzzle feeder = toy that releases food slowly to slow gobblers)
    • Bedding and nest spot: $15–$60 (soft, washable, and cozy)

    Care checklist , what to do and how often

    1. Brush short hair once a week; long hair two times a week. Your cat will love the attention and you’ll cut down on hairballs. Ever watched your kitty flop over for a brush? Pure joy.
    2. Check and trim nails every 2 to 4 weeks. Short nails mean fewer torn curtains and happier toes. If your kitty hates it, try a quick trim after a nap.
    3. Weigh and log monthly; weigh weekly for kittens. Tiny weight changes matter. Keep a simple notebook or notes app entry.
    4. Check ears monthly for wax or smell. Clean only if you see dirt or a funky odor. If it looks red or your cat seems bothered, call the vet.
    5. Deep-clean the litter box weekly and scoop daily. Clean litter keeps noses happy and smells down. For short-legged cats, a larger footprint helps them move comfortably.
    6. Rotate toys and puzzle feeders every month. New toys feel new again and keep playtime exciting. Toss in a feather wand for a quick burst of hunting fun.
    7. Use a dental wipe or brush daily when possible. Start slow and keep it positive. Good habits now save trouble later.
    8. Restock food and litter , check supplies every two weeks. Running out is stressful for you and your kitten. Plan ahead.
    Item Estimated Cost Range Notes
    Litter box $20–$80 Low-entry front; footprint at least 1.5× cat length
    Food + bowls $20–$80/month High-quality wet food helps hydration
    Grooming kit $8–$40 Slicker brush, undercoat rake (pulls loose underfur), nail clippers
    Cat tree / ramps $50–$200 Low tiers and padded landings for short legs
    Carrier $30–$120 Low front entry or removable top for easy loading
    Initial vet visit $75–$250+ Exam, vaccines, deworming; prices vary by clinic

    FAQs for Munchkin cat care: quick answers to the most asked owner questions

    as the central supplies and budget reference for the article.jpg

    1. Typical lifespan – About 12 to 15 years. See the Health checklist for age-specific care and senior screening so you know what to expect as your kitty gets older.

    2. Can they jump? Short answer: yes. They can jump and climb, but not usually as high as longer-legged cats. Check Mobility for ramps and low-step ideas to keep them safe and happy.

    3. Best exercise? Think short, energetic bursts on the floor and fun puzzle feeders. These keep them lean and mentally sharp. See Socialization for a simple weekly play plan, your cat will thank you (with a purr or a zoom).

    4. Feeding approach – Use portion-controlled, life-stage diets that meet AAFCO standards (AAFCO , pet food nutrition guidelines). Don’t free-feed. Feeding formulas and portion examples are in Feeding.

    5. Grooming frequency – Short hair: about once a week. Long hair: two or more times a week to avoid mats. Tools, timing tips, and a practical care table are in Grooming.

    6. Litter box tip – Pick a low-entry box so they can hop in easily. The box footprint should be at least 1.5 times your cat’s length so they can turn around comfortably. Exact dimensions and setup help are in Litter box.

    7. When to see a vet for mobility – If you notice limping, sudden wobbliness, or trouble getting up, call your vet. Those are red flags; follow the full list in the Health checklist.

    8. Good with kids and pets? Usually yes, if they’re socialized early. Friendly Munchkins tend to do well with children and other animals, find practical tips in Socialization.

    9. Breeding and genetic concerns – Always ask breeders for parent health records, spinal and chest screening (checks for spine or rib-cage problems), and genetic test results (tests that look for inherited conditions). See Adoption for a checklist of questions to ask.

    10. Typical first-year cost – It varies by region and choices, but you’ll find itemized estimates and budget ranges in the Starter supplies table at Starter supplies. Worth every paw-print.

    Final Words

    in the action: Munchkins typically live about 12–15 years, so act fast on health checks, tight weight control, and home tweaks that make moving around easy.

    This guide gave feeding formulas, grooming schedules, low-entry litter-box specs, ramps and low-tier play ideas, a clear vet timeline, and starter-supply cost ranges.

    Use the one-minute checklist, set up low steps and portioned meals, and keep vet records. Munchkin cat care done this way keeps your crew playful, cuts toy turnover, and protects furniture. Happy cats, happier home.

    FAQ

    What health problems do Munchkin cats have?

    Munchkin cats commonly have lordosis (spinal curve), pectus excavatum (sunken chest), and osteoarthritis (joint wear). Obesity raises joint stress, so routine vet checks and weight control matter.

    Are Munchkins in constant pain?

    Munchkins are not in constant pain by default; some develop spinal or joint issues that cause pain, so watch mobility, sudden limps, or stiffness and contact your veterinarian if you see changes.

    What is the lifespan of a Munchkin cat?

    The Munchkin cat lifespan is about 12 to 15 years with indoor living, regular veterinary exams, weight management, and prompt care for any breed-related spine or joint concerns.

    Are Munchkin cats hard to take care of or high maintenance?

    Munchkin cats are generally low- to moderate-maintenance; they need portion control, low-step home tweaks, regular grooming, and vet screenings, but they’re playful and easy to bond with.

    How much does a Munchkin cat cost and where can I buy one?

    Munchkin cat prices typically run $800 to $1,500 or more; adoption is cheaper. Buy from reputable breeders or rescues and request parent health records and genetic testing details.

    What is the 3-3-3 rule for cats?

    The 3-3-3 rule means expect three days of hiding, three weeks to adjust to a new routine, and three months to fully settle and trust you in a new home.

    Can Munchkins jump and exercise like other breeds?

    Munchkins can jump and climb but usually not as high as longer-legged cats; give low-level climbing, short-burst play, and puzzle feeders to build muscle without stressing joints.

    How do Munchkins compare to breeds like Sphynx, Devon Rex, Maine Coon, Ragdoll, and Peterbald?

    Munchkins stand out for their short legs and lower jump height; other breeds vary in size, coat care, and activity, so pick the breed that fits your home and energy level.

    Do female or color variants like blue Munchkins need special care?

    Female Munchkins need the same core care as males, with spay timing discussed with your vet; “blue” is only a coat color and does not change health needs—focus on weight and joint care.

    Related Articles

  • what is clicker training: simple steps for beginners

    what is clicker training: simple steps for beginners

    What if one tiny click could turn chaos into calm and help your cat or dog learn tricks faster than treats alone? Picture the small, satisfying click, your pet’s whiskers twitching and tail giving a curious flick. Ever watched your kitty chase a shadow? This is kind of like that, but way more productive.

    Clicker training uses a short sound as a marker (a quick noise that tells your pet the exact moment they did the right thing). It’s a kind of positive reinforcement, which just means you reward good behavior so they’re more likely to do it again. Think of the click like a little photograph , it freezes the perfect moment.

    Start by charging the clicker (teach your pet that click equals treat) with tiny, tasty bites. Then either capture the behavior or shape it: capture means you wait and reward the pet when they do the behavior on their own, shape means you build the behavior in small steps by rewarding closer and closer tries. Click, then give a reward within one second so the message stays crystal clear. Watch whiskers twitch. Watch tails flick. It’s so fun.

    This quick intro gives beginners the simple steps to get clear results and more joyful playtime. Try a few short sessions a day, and you’ll notice calmer, sharper pets before you know it. Worth every paw-print.

    Clicker training explained , quick-start action plan

    - Clicker training explained  quick-start action plan.jpg

    Clicker training is a marker-based positive reinforcement method (a marker is a short sound that tells the animal exactly when it did the right thing; positive reinforcement means you add something good to increase that behavior). It starts with classical pairing (pairing the click with a reward until the sound predicts food, like teaching a bell means dinner) and then becomes operant conditioning (the animal repeats actions that earn rewards).

    1. Charge: Pair the click with a treat until the click alone predicts food. Use tiny, tasty bits, think pea-sized or smaller, so your cat or dog stays hungry for more practice. Do a few quick repeats, like 10 to 20 clicks with a treat right after each one, until the animal looks for a reward after hearing the click.

    2. Capture or shape the behavior: Wait for the action you want to happen, or guide it in small steps. Capture means you click the moment the animal naturally does the thing (a sit, a paw, a spin). Shaping means you reward closer and closer approximations , like rewarding a head turn, then a paw lift, then a full paw touch.

    3. Click and reinforce: Click the exact instant the target action happens. Then give the reinforcer within about one second so the animal links the click to the action. Reinforcers can be tiny food bits, a short play burst, a favorite toy, or petting (whatever your pet loves most).

    Timing is everything. The click marks the micro-moment you want repeated, and the reward tells the pet, “Yes, do that again.” Ever watched your kitty zoom after a toy right after a click? Magic.

    See H2 "Why clicker training works" for the science and H2 "How to clicker train" for a detailed step-by-step plan.

    Why clicker training works: operant and classical conditioning plus the marker function

    Why clicker training works for the science and.jpg

    Clicks get their power in two steps. First we pair the click with food so it becomes meaningful. That’s classical conditioning (a neutral cue, like a sound, comes to predict a reward). Next we use the click to reward actions so the animal repeats them. That’s operant conditioning (things that bring good outcomes happen more often). Think of the click as a tiny, instant "yes" that tells your cat exactly what worked.

    The marker is the magic. The marker (a short, sharp sound that points to an exact moment) is distinct, consistent, and immediate, so it pins down tiny micro-moments better than a changing human voice. Click the instant the paw lifts. That precise split-second gets reinforced. Ever watched your kitty freeze mid-pounce? That’s the kind of tiny moment a click can lock in. See the "How to clicker train" section for step-by-step procedures.

    Trainer tips What to do
    Accidental clicks Give a free treat right away to keep the click→treat link strong, then move on.
    Faded marker Rebuild quickly with a few short click→treat rounds to restore the sound’s value.
    Historical note Karen Pryor helped popularize this marker method from marine-mammal work.

    How to clicker train: a beginner step-by-step guide

    How to clicker train for a detailed step-by-step plan.jpg

    Refer back to the quick-start lede for the basic idea. Keep it simple: sound, treat, repeat. Your cat will get it faster than you expect.

    1. Prepare equipment and tiny treats.

      • Get a clicker (a small handheld sound marker), a treat pouch (hands-free pocket or wide-mouth bag), and pick a quiet spot with few distractions.
      • Cut rewards into pea-sized bits so your cat eats fast and keeps momentum. Think diced hotdog, tiny cheese cubes, or freeze-dried liver (concentrated, meaty bites).
    2. Charge the clicker with 10-20 pairings.

      • Click, then give a treat right away. Do that until the click means food. The click is your cat's "you did it" sound.
      • If you click by accident, give a free treat immediately so the click stays positive.
      • For deaf cats, use a brief light flash or a gentle tap on the shoulder or rump paired with the treat the same way. Same idea, different sense.
      • Quick example: Click. Treat in hand. Repeat 10 to 20 times.
    3. Choose a known behavior to capture or pick a target to shape.

      • For fast wins, capture something your cat already does, like a sit, a head turn, or a paw lift. Reward those moments.
      • To shape a new trick, break the final action into tiny steps and reward small forward moves. Raise the criteria slowly. Patience pays off.
    4. Click at the precise micro-moment.

      • Mark the exact split-second that made the behavior correct. The instant the butt hits the floor, the paw touches the target, or the head turns. That one crisp click teaches what to do next.
      • Timing matters. A fuzzy click tells your cat nothing. A sharp click says, "Yes, that."
    5. Deliver the treat within about one second and manage retrieval speed.

      • Keep treats tiny so chewing does not break the flow. If your cat lingers, try even smaller pieces, softer treats, or have someone roll treats to you so timing stays tight.
      • Quick reward. Quick reset. That keeps the game moving.
    6. Run short, frequent sessions.

      • Do several 5 to 15 minute sessions a day. Aim for about 10 to 20 clicks per session. Short bursts beat marathon sessions any day.
      • Take short breaks between sets so your cat stays engaged, not tired. Your cat will thank you with a focused pounce.
    7. Introduce the cue once the behavior is reliable.

      • Say or signal the cue just before the action, then click the correct response. If you cue too early, drop expectations and reward smaller approximations until timing rebuilds.
      • Quick example: Say "Sit" just before the butt touches the floor. Then click.
    8. Fade clicks and treats using intermittent rewards and real-life outcomes.

      • Start with click then treat every time. Then slowly reduce food and mix in praise, play, or access to a favorite spot. Keep occasional food rewards so motivation stays high.
      • This helps the behavior stick in the real world, not just training time. See the science section for research on marker fading and reinforcement schedules.

    Note: Follow this numeric guide, 10 to 20 click→treat pairings to charge the clicker, 5 to 15 minute sessions, and about 10 to 20 clicks per session. Worth every paw-print.

    Clicker training for dogs, cats, and birds: species-specific examples and tips

    - Why clicker training works operant and classical conditioning plus the marker function.jpg

    For dogs, pick quick wins like sit, recall (coming when called), or a tidy trick so everyone feels successful fast. Use a clicker (a small handheld device that makes a sharp click) and tiny, high-value treats so the dog stays focused. Cue "sit," click the instant the butt hits the floor, then toss a pea-sized treat. The click plus that tiny reward creates a clear, repeatable cue and yes, you get that satisfying thud when they sit. Keep sessions short and cheerful. Puppies learn fast, so short reps beat marathon practice every time.

    Training cats and small pets is more about catching what they already do than forcing poses. Use short bursts and shape behavior (rewarding tiny steps toward the final action) so they choose to try things. I taught my cat to touch a target by clicking for a head turn, then a little lean, then a tap, each tiny win felt like a mini celebration. Use very tasty bites and read body language; if a rabbit or chinchilla freezes, slow the pace and reward the smallest brave move. Seriously, even a tiny twitch counts.

    Birds need calm pairing, tiny food bits, and strict flight-space safety so wings and perches stay happy. Pair the clicker or marker with treats until the bird links the sound to food, and always make sure there’s clear room for a quick hop or flap. Be gentle and patient; a nervous parrot will teach you a new kind of quiet.

    For deaf animals swap the click for a visual marker (a brief light flash) or a tactile marker (a gentle tap you can feel) paired with a treat so the marker still means something. Try the visual or touch cue a few times before adding the food so it’s obvious. You’ll know it worked when the animal looks for the marker like clockwork.

    Think about age and stamina. Young animals often have speed and energy on their side, so you can raise criteria faster. Older pets may need slower steps, comfy positions, and extra praise. Adjust expectations, and you’ll save everyone stress and time.

    Short sessions. Tiny treats. Lots of praise. Worth every paw-print.

    Choosing clickers and rewards: equipment, treat size, and alternatives

    - How to clicker train a beginner step-by-step guide.jpg

    Pick a clicker that feels good in your hand. Ergonomics (how it fits your hand) matters. Look for one that makes a crisp sound you can hear but that won’t scare your cat (sound quality). Try audible and silent models and watch your pet’s reaction. Click once, does your cat’s head turn? Ever had them ignore it? Uh, yeah, me too. Phone-app clickers are handy for practice, but a physical clicker gives faster, more consistent timing and tactile feedback (the little click you feel in your fingers).

    Use tiny, high-value treats only. Think pea-sized bits of diced hotdog, small cheese cubes, or freeze-dried liver (concentrated protein, low mess). Keep an eye on calories so training doesn’t sneakily replace a meal. See earlier treat examples for specifics. Short sessions. Lots of tiny rewards.

    For noisy rooms or deaf pets use a different marker (a signal that marks the exact right moment). Try a quick visual flash of your hand, a gentle tap, or a small bell. Make the marker obvious and consistent so your cat connects it to the reward. Carry treats in a pouch with a wide mouth and a secure snap (so goodies come out smoothly when you need them). Ready, click, treat. Worth every paw-print.

    Timing, session length, and reinforcement schedules in clicker training

    - Clicker training for dogs, cats, and birds species-specific examples and tips.jpg

    Click right on the tiny moment your cat does the thing you want. Use the click as your marker (the short sound that says "yes – do more of this"), then give the treat within about 1 second so the click-to-treat link stays clear. For chained behaviors (a series of actions linked together), either click each micro-moment or mark one key step and treat at the short pause. Small example: click at the paw lift – "click…treat."

    Keep sessions short and fun. Aim for 5 to 15 minutes, with roughly 10 to 20 marked reps (reps = repetitions) per session. Then take a 30 to 90 second break and run another short set. Do several short sessions across the day instead of one long marathon, your cat stays engaged and you both avoid burnout. Ever watched your kitty’s whiskers twitch as a toy rolls? That’s when the learning sticks.

    If your marker starts to slip or your cat looks confused, run a quick charging/booster round (fast, repeated click-to-treat pairings to rebuild the link). Think: click, treat, click, treat, about 8 to 12 fast reps to refresh the association. It’s quick, simple, and usually gets things back on track. Worth every paw-print.

    Troubleshooting clicker training: common mistakes, fixes, and when to get help

    - Choosing clickers and rewards equipment, treat size, and alternatives.jpg

    Quick recap: when your cat’s progress stalls, most fixes are small and fast. Below is a short, practical checklist of fixes you can try right now without repeating the full how-to stuff.

    • Oops, accidental click? Give a free treat right away so the click stays honest. Clicker (a small handheld device that makes a click sound) mistakes are common. Example: click, then toss a treat and watch the whiskers twitch.

    • Reward tinier steps when precision slips. Lower your expectation and click the smallest approximation you can see. Example: a tiny paw lift gets a click and a treat. It rebuilds confidence fast.

    • Swap to a higher-value reward when motivation dips. Try a tastier treat like a bit of chicken or tuna (higher-value reward = something your cat really wants).

    • Change location or remove distractions. Move to a quieter room or a different surface so attention stays on you, not the noisy heater or that fluttering curtain.

    • Stop clicking the unwanted action. Instead, teach a replacement behavior that earns the same payoff, using tiny shaping steps (shaping means rewarding small, progressive improvements).

    • Run a quick charging round to rebuild the click→treat link. Charging (rebuilding the association between the click and a reward) can be as simple as 8 to 12 quick click-and-treat pairs. Your cat will remember the sound means good things.

    • If timing feels off, practice short timing drills. Timing drills are brief exercises where you focus only on clicking at the exact moment of the behavior. It’s awkward at first, but you get better fast.

    • If attention drops quickly, do very short, frequent sessions and try again later. Two minutes of intense focus beats ten minutes of distracted training.

    See the How to clicker train section for basics, the Timing section for timing drills, and the Charging table for step-by-step recharge guidance.

    When to seek professional help

    If aggression increases, fear gets worse, or anyone might get hurt, call a qualified behavior consultant right away. A good consultant will rule out medical causes, assess safety risks, identify triggers, and give you a step-by-step plan that usually mixes management, desensitization, and targeted training. Expect clear homework, regular progress checks, and a safety plan you can use at home. Worth it.

    Look for credentialed specialists such as a veterinary behaviorist (a veterinarian with behavior specialty) or a certified applied animal behaviorist (a science-trained behavior expert). Your vet can refer you, or search professional directories to find someone with documented training and experience.

    Final Words

    In the action: you’ve got the quick-start, charge, capture, click & reinforce, and the why , classical conditioning (pairing a sound with a reward) and operant conditioning (doing things that earn rewards).

    1. Charge the clicker.
    2. Click the exact micro-moment and give the treat within about one second.
    3. Keep sessions short and use tiny, high-value rewards.

    If you’re wondering what is clicker training, it’s a tiny, clear marker that helps cats learn fast , perfect for busy, multi-cat homes. Try it; your cats will purr (and your furniture will thank you).

    FAQ

    Frequently Asked Questions

    What is clicker training used for?

    Clicker training is used to teach precise behaviors by marking the exact moment with a click (a marker signal), then giving a reward, shifting from pairing into operant conditioning (learning by consequences).

    Who invented clicker training?

    Karen Pryor popularized modern clicker training; its roots go back to marine-mammal work (like dolphins) and earlier animal trainers who used markers to shape behaviors.

    What is clicker training for dogs and cats?

    Clicker training for dogs and cats teaches sit, recall, or target touches by clicking the precise micro-moment and rewarding tiny treats; cats usually need shorter, playful sessions.

    What is clicker training for humans and how is it used online or as slang?

    Clicker training for humans applies the same marker-and-reward method to shape small actions in classrooms, therapy, or skill practice; online slang sometimes jokes about “conditioning” people.

    What is an example of clicker training?

    An example of clicker training is teaching a dog to sit: click the instant its rear touches the floor, then give a pea-sized treat, repeating until the behavior is offered willingly.

    What are the disadvantages of clicker training or why is it considered bad?

    Disadvantages include poor timing, accidental clicks that confuse animals, over-reliance on food rewards, limits with aggression or severe fear, and the need for qualified help in risky cases.

    What age should you start clicker training?

    You should start clicker training when an animal can eat tiny treats and focus, commonly around eight weeks for puppies and kittens, while older animals learn with stamina and mobility adjustments.

    Related Articles

  • Kitten Clicker Training: Start, Rewards, Troubleshooting

    Kitten Clicker Training: Start, Rewards, Troubleshooting

    Want your kitten to sit on cue faster than a laser pointer can steal their attention? Let’s make training feel fun and easy!

    Clicker training uses a clicker (a tiny handheld device that makes a sharp click) plus tiny aromatic treats (soft, smelly bites cats love) and very short practice bursts, one to three minutes, to build clear "aha" moments your kitten remembers. Start as early as eight weeks. Learn the simple load-click-treat rhythm: get the treat ready, click the moment your kitten does the thing you want, then give the treat. You’ll hear the crisp click and watch their ears perk up.

    I’ll show you how to begin, pick treats that actually motivate your kitty, run short sessions that fit busy days, and make a simple practice plan you can stick to. I’ll also cover the usual hiccups, like distraction or timing flubs, and quick fixes so training stays fun, not frustrating. Worth every paw-print.

    What kitten clicker training provides

    - What kitten clicker training provides.jpg

    Start as early as about 8 weeks. Use tiny aromatic treats (strong-smelling treats that grab a kitten’s attention) and keep sessions short so the fun never fades. First lightbulb moments usually show up after just a few clear repetitions. Your kitten’s ears will perk. You’ll grin.

    1. Load the clicker (clicker is a small handheld sound device). Use the saucer or toss method so the kitten learns click means treat.
    2. Pick tiny aromatic treats reserved only for training , diced chicken, tuna, Churu (a squeezable paste treat), or meat baby food. Fingertip-sized morsels work best.
    3. Run 1–3 minute sessions. Very short bursts keep attention sharp.
    4. Ask for a simple behavior or lure gently , think sit or a nose touch. Make the cue clear and calm.
    5. Click the exact instant the correct movement finishes, then give the treat by hand. Timing is everything.
    6. Repeat these short sessions many times across the day. Track reps in a simple log , date, behavior, and when you saw that “aha” moment.
    7. End while the kitten is still interested and reward a calm exit so training ends on a good note.

    Use lots of short bursts instead of one long training push. Positive reinforcement for kittens works best with quick repeats. Try a practical weekly plan: twenty 2-minute bursts spread across the week, or micro-bursts like ten 1-minute rounds on busy days. Watch your kitten’s interest to guide pacing. Most kittens show progress after a few good reps , note that third-time spark and then slowly increase distance or add a verbal cue.

    Want visuals? Make a 20–30 second how-to clip or three stills: loading the clicker, the click-to-treat handoff, and a short sit exercise. Easy to do, and super helpful when you replay it while your cat practices.

    Curious for more details? Check Clicker Training Basics , it’s a great next step for the clicker-curious.

    Kitten clicker training equipment and treats: clickers, alternatives, and reward selection

    Pick one clear marker and stick with it. A small plastic click box (a tiny device that makes a sharp, repeatable click) is great for precise timing and fast lessons. If your kitten is noise-sensitive, try a softer marker like a pen snick, a tongue click, or a one-syllable word such as "yes", those feel less spooky to shy kitties. Think about personality: shy kittens like gentler sounds and steady repetition. Bold kittens usually love a crisp click. When you shop, search "kitten training clicker" or "best clicker for kittens" so you get a lightweight model made for tiny paws and short sessions.

    Use tiny, high-value rewards and save them just for training. High-value treats (strong-smelling, super tasty bites) keep the session flowing because they’re eaten fast. Cut treats to fingertip size so your kitten can pop them in and get back to the behavior. See the Quick-Start above for the loading method and ideal treat size. For ideas on keeping training positive and rewarding, check Positive reinforcement basics (ASPCA). Worth every paw-print.

    Round out your kit with a few practical items and a plan for non-food rewards. Treat pouch (a small bag with a fast-access mouth) makes it easy to grab snacks without fumbling. Store tiny treats in sealed tins (metal containers that keep morsels fresh) or dividers to avoid crushed crumbs. Pick a feather or small ball to use only as a special play reward so toys stay exciting. For busy days, a quick toy toss before you leave gives ten minutes of safe play and mental stimulation.

    Vendor-style tips and what to look for:

    • Clicker options: regular click boxes and soft-click variants , choose something lightweight and reliable for clear timing.
    • Alternative markers: pen click, tongue click, or "yes" , switch to these for noise-sensitive kittens or busy homes.
    • Training treats and storage: tiny, aromatic bites; keep them in sealed tins or divided containers so you can grab one in a flash.
    • Treat pouch styles: clip-on, belt pouch, or magnetic-closure , pick the one that keeps your hands free and your movements smooth.
    • Target stick choices: lightweight wands or foam-tipped sticks (a target stick is a wand with a small marker to guide your cat) , helps you add distance and shape behaviors without constant treats.
    • Toy rewards and play-launch tips: reserve one feather or small ball for training-only play so it stays special; use short, high-energy bursts after a successful rep.

    A few last notes: keep sessions short, stay cheerful, and praise the small wins. Ever watched your kitty suddenly get it and do a perfect little pounce? Pure gold.

    When to start kitten clicker training: readiness signals, vaccine/safety caveats, and teething adjustments

    - Kitten clicker training equipment and treats clickers, alternatives, and reward selection.jpg

    Start when your kitten seems curious and calm. That calm curiosity makes lessons faster and kinder, and it falls inside the socialization window when gentle, positive moments stick. Ever watch your kitten’s whiskers twitch as they focus? That’s a great sign.

    Look for simple readiness signals:

    • Calm approach to you , not hiding or freaking out
    • Accepts tiny food rewards from your hand (small tasties work best)
    • Short, focused gazes , brief eye contact as they pay attention
    • Not overly worked-up after playtime; they can settle quickly

    If your kitten shows most of these, short cheerful sessions will be way more productive and less stressful.

    Keep training at home during routine vaccine windows (when they get their shots). Avoid outdoor exposure until your vet gives the okay. If your kitten is sore after shots or feels under the weather, keep sessions extra gentle and brief , low-stress timing aids recovery.

    Teething (when their baby teeth fall out and their gums get sore) can make kittens bite more. Swap to softer rewards like a smear of wet food or tiny spoon-fed tastes. Use stationary lures instead of moving your fingers, and shorten bursts to match their bitey attention span. Actually, make that plenty of short, tasty wins.

    See the Quick-Start H2 for the baseline age and start guidance.

    Kitten clicker training step-by-step exercises: progressive training and advanced variations for sit, recall, litter, carrier, and bite reduction

    - When to start kitten clicker training readiness signals, vaccinesafety caveats, and teething adjustments.jpg

    Use the Quick-Start H2 as your baseline for how many treats to load, treat size, and session length. These progressions follow those core rules and slowly push your kitten toward distance, distraction, and real-world proofing with clicker training (clicker = small handheld device that marks the exact moment you want your cat to repeat).

    Sit (progression & proofing)

    Start by shaping the sit with tiny guides and a target-stick (a wand with a foam tip that shows where the nose should go). Short, clear motions work best , think gentle guidance, not wrestling.

    1. Ask for a target-touch to the nose, then lift your hand slightly so the hips lower. Do 3 to 10 reps to notice a change; repeat over days.
    2. Add a small upward arc of the lure (lure = hand-held treat guide) so the back end drops into a sit. Reliable in a few days to one week.
    3. Swap the lure for the target-stick to reduce treat grabbing. Give it a week or two.
    4. Fade the visible lure toward an empty-hand cue; click at the finish and reward the behavior. This takes more weeks.
    5. Add a 1 to 3 second pause before you mark with the clicker to build patience. Proof this over days to weeks.
    6. Slowly increase distance and introduce mild distractions, rewarding sometimes as reliability grows. Proofing at distance can take multiple weeks. Worth the effort.

    Recall (progression & distance proofing)

    Recall keeps kittens safe and makes for great bonding. Shape it from short hops to eager dashes.

    1. Say the name, take one step back, then click and reward when your kitten comes. Short-distance reliability can happen in days.
    2. Add a few backward steps after each successful rep; build up over days to weeks.
    3. Offer a visible target or mat for the kitten to aim at , a clear end point helps focus.
    4. Use intermittent high-value rewards or reserved play as distance grows. Try a variable schedule (reward often at first, then less: for example 3 rewards out of 4, later 1 out of 5).
    5. Practice with low-level distractions, then raise the challenge slowly over weeks.
    6. Occasionally follow a successful recall with a quick play session or a toy toss to make coming back fun and generalize eagerness.

    Litter, Carrier, and Bite reduction

    These skills need slow shaping and calm sessions. Pick quiet moments and log small wins. Tiny celebrations welcome.

    A) Litter

    1. Reward every confident entry to the box. The smell of the treat may help at first.
    2. Gradually delay the treat until the kitten finishes the task, so the whole action gets reinforced.
    3. Proof placement by moving the tray in small steps and rewarding correct choices. Patience pays off.

    B) Carrier

    1. Reward approach and sniffing at the open carrier. Make it a safe, interesting spot.
    2. Reward for sitting at the carrier mouth. Celebrate small steps.
    3. Reward stepping in, then close the door briefly and give a calm reward; lengthen the closed-door time slowly so the cat learns the carrier is okay.

    C) Bite reduction

    1. Watch for tiny triggers that lead to nips and note them. Awareness is half the battle.
    2. Shape gentler contact by rewarding soft touches and immediately swapping to a toy on a short timer.
    3. Set a clear rule: gentle touch gets play, hard bite ends the fun. Be consistent.
    4. Increase tolerated handling time little by little, with calm food rewards for staying relaxed.
    Behavior Progression steps Reward type for each stage Expected timeline (range)
    Sit Target-touch → fade lure → empty-hand cue → distance proof Tiny aromatic treats → target-stick rewards → intermittent play 3 to 10 reps to notice; days to weeks to proof
    Recall Name → short step-back → increase distance → variable rewards High-value treats → reserved toy play Short-distance: days; generalized: multiple weeks
    Litter entry Reward entry → delay-to-reward → placement proofing Small smell-first treats → occasional praise Days to reliable; weeks for proofed placement
    Carrier step-in Approach → sit-by → step-in → brief close-door increments Soft treats and calm petting → slow desensitization rewards Days to weeks depending on fear level
    Scratching-post use Target the post → reward initial contacts → shape full use Tiny treats → praise → play after good use Quick wins: days; solid habit: weeks
    Bite reduction Record triggers → shape soft touch → timed toy swaps Toy rewards → calm food rewards for tolerance Weeks for steady improvement

    Session management for kitten clicker training: advanced timing, reinforcement schedules, and tracking

    for age and initial session defaults).jpg

    Start with the Quick-Start baseline for loading the clicker (a small handheld sound marker) and the first session length, then tweak from there to fit your kitten’s mood and your schedule. Think of that baseline like a warm-up. It gets the clicker meaning into your kitten’s head before you stretch sessions longer or pile on reps. Ever watched a kitten freeze, ears twitching, when a new sound shows up? That’s normal.

    Keep training in two main flavors: micro-bursts and proofing blocks. Micro-bursts are very short checks (10–60 seconds) to keep attention high. Proofing blocks are longer, focused practice on one skill so your kitten learns to do it under more pressure (proofing block – longer practice to build reliability). Use micro-bursts when you’re busy and proofing blocks when you want real progress.

    Here’s an easy reinforcement progression to follow as your kitten gets better: 1:1 → 3:2 → 3:1 → variable. That just means you start by rewarding every correct click, then slowly give fewer treats for the same number of clicks, and finally switch to variable reinforcement (rewards given unpredictably so motivation stays high). It’s like moving from training wheels to free-riding.

    Weekly plan examples so you can pick what fits your week:

    • Busy week: 10 × 1-minute micro-bursts spread through the day. Perfect if you’re rushing out the door.
    • Moderate week: 3 × 3-minute short sessions plus one 8-minute proofing block. Nice balance.
    • Intensive week: 5 × 3-minute sessions plus one 10-minute proof day for heavier practice.

    Advanced session rules (quick, usable):

    • Always use the Quick-Start baseline before you lengthen or densify sessions.
    • Stop a session before engagement drops. End on a calm, rewarded note so training feels like a win.
    • Shorten or shift sessions during teething, illness, or over-arousal. Kittens get cranky then.
    • Vary reward types so value stays high: tiny treats, a reserved toy play session, or a brief pet (tiny treat – small food reward; reserved toy play – a special toy only used after training).
    • Tag each session in a log for quick review later. You’ll thank yourself when you can see what worked.

    Keep a tiny training log with these columns so you can spot patterns and tweak fast:

    Date Time Session length Behavior Success Reward Notes (mood, teething, distractions)

    Finish sessions with a calm cue so the kitten learns training ends predictably and happily. A soft “all done” or a gentle pet works wonders. Worth every paw-print.

    Troubleshooting kitten clicker training: advanced fixes for nonresponse, noise sensitivity, and multi-cat challenges

    - Kitten clicker training step-by-step exercises progressive training and advanced variations for sit, recall, litter, carrier, and bite reduction.jpg

    Treat the Quick-Start H2 as your baseline. If a kitten stops responding, don’t panic. Go back to basics with tiny steps and calm repetition. Short re-loads , brief click→treat pairings using a clicker (small device that makes a sharp click) , and careful reward swaps usually get attention back fast.

    When motivation flags, try a reward hierarchy (low to high value treats) and small timing tweaks. Feed a smaller meal first so training treats feel extra tempting, or train right before a regular mealtime when hunger helps focus. Test each swap in tiny trials , one or two reps , so you don’t waste a whole session on a dud. Concrete swaps I like: kibble → tiny tuna dice → Churu smear → reserved toy play. Keep treats fingertip-sized so the kitten eats fast and you can run more reps. Worth every paw-print.

    1. Run quick re-load sessions: three short 30 to 60 second click→treat pairings and note how the kitten reacts.
    2. Build a reward hierarchy and test higher-value items in tiny trials, one step at a time.
    3. Do a staged desensitization for the click sound (desensitization = gradual getting used to a trigger): start soft, then slowly raise volume only when the kitten stays calm.
    4. For multiple kittens, use spatial separation, different treat bowls, and staggered sessions so one cat’s excitement doesn’t ruin another’s focus.
    5. Shorten session bursts and move training to calmer windows when arousal spikes.
    6. If fear or avoidance keeps showing up, get a pro involved and send video examples so they can help faster.

    If the click sound spooks a kitten, try this step-by-step plan. Start with a barely audible marker , a pen snick or a whisper “yes” , while dropping a treat from a saucer at the same time. Run 10 to 15 micro-sessions over a few days. Each micro-session should be 30 to 60 seconds, then pause and give one or two calming pats. Only raise the marker’s volume when the kitten has been calm for three reps in a row. Slow and steady wins the purr.

    Multi-cat homes need rotation and logging. Stagger sessions, use separate bowls, and give each kitten 3-minute bursts with clear log entries: date, time, kitten initials, reward used, success rate. A short volunteer script that works in shelters: "Hi, I’m [name]. Click, treat, good sit." For staff handoff keep it simple: "3-minute turn, feed tiny Churu pieces, log results."

    Ever watched a kitten flinch at a click? It’s a little heartbreaking, but fixable. With calm, tiny steps and consistent notes you’ll get back to fun, focused training , and maybe a few dramatic pounces along the way. Claw-tastic progress.

    Progress milestones and maintaining results in kitten clicker training: logs, fading, and proofing timelines

    We moved this material into the Step-by-step exercises and the Session management timeline so all milestone timelines live in one place. Keep the Quick-Start as your baseline and watch for the classic "third-rep lightbulb" , that sudden moment when the kitten offers the behavior more often. Ever seen it? One minute you’re luring, the next your cat sits on cue like it’s been doing it forever. Example note: third-rep lightbulb – "On the third try, Luna sat and then repeated the sit twice more without the lure (a visible food guide)."

    Logging fields suggested earlier , date, behavior, session length, reps, success percentage, reward used, one-line mood , are now merged into the single Session management log template; duplicate tables were removed. Use the unified log to spot trends fast and measure progress day-to-day or week-to-week. A quick glance should show whether you’re improving, plateauing, or need to change rewards.

    Date Behavior Session Length Reps Success % Reward Mood
    2025-06-01 Sit 5 min 12 83% Freeze-dried chicken Curious

    We removed the longer reinforcement-fading progression from this spot to avoid clutter; fading cues, planned reduction ratios (how you gradually give fewer food rewards), and proofing steps are all in Session management now. Quick note on when a behavior looks ready to fade: steady success across sessions, fast responses, and low reliance on visible food lures (you can cue from a little farther away). Example ready-to-fade note: "Three sessions with 90%+ responses, cue given at a slight distance, no visible lure needed."

    Proofing means practicing the behavior in different places and with more distractions so it holds up outside training (think living room, hallway, under mild distraction). For busy days, do one short, focused session before you head out , ten minutes of tidy reps gives your cat good practice and buys you peace of mind. Worth every paw-print, honestly.

    Kitten Clicker Training: Start, Rewards, Troubleshooting

    - Session management for kitten clicker training advanced timing, reinforcement schedules, and tracking.jpg

    Start with the Quick-Start baseline as your core rule set for loading, treat size, and session length. Keep things steady: the same marker (a click or short word that marks the exact good behavior), the same tiny treats (pea-sized bites), and the same calm voice so shy rescue kittens learn to trust different handlers fast. See the log template and Quick-Start baseline for the exact fields and timings instead of repeating them here.

    Keep sessions spaced so kittens don’t pile up at one station. Use separate treat bowls and different reward types to reduce squabbling. Put visual barriers or use different rooms and rotate training stations so cues don’t get mixed up (cue contamination is when different handlers give different signals and the kitten gets confused).

    Make a simple per-kitten log with these fields: kitten ID, time, session length, behavior, success rate, reward used (see log template). That keeps data quick and useful. Example log line: "Luna | 09:03 | 3 min | sniff, pawed toy | 4/5 | fish kibble."

    Volunteer script to keep things crisp: "3-minute turn; click, treat, log." Short, repeatable, easy to remember. That way volunteers can swap in and out without changing the loading or timing.

    Shelter workflow idea: three stations per volunteer, rotating every kitten for 3-minute bursts. Keep short log entries (kitten ID, time, session length, behavior, success rate, reward) so records stay speedy. Swap stations gently, use separate treat inventories, and keep everyone using the same Quick-Start loading protocol so timing and reward rates match.

    Celebrate small wins. Watching a shy kitten catch on is seriously joyful and worth every paw-print.

    Kitten clicker training FAQ and additional resources (video, books, and professional help)

    - Troubleshooting kitten clicker training advanced fixes for nonresponse, noise sensitivity, and multi-cat challenges.jpg

    We retired the standalone FAQ and folded the useful, actionable bits into the main guide so you don’t have to hunt for them. Here’s a friendly guide to what changed and where to find the stuff you actually need.

    What changed

    1. We added a Further Resources box under Visuals/Equipment with 2–3 short video demos and 4–5 cat-specific book picks. These are quick, practical clips you can watch in a minute or two.
    2. Notes about clicker apps were merged into Session Management. Short version: apps can help, but physical clickers are usually clearer for a kitten learning the marker. Apps still shine as timers and session logs.
    3. “How to prep for a professional” moved into Troubleshooting. Bring 30–60 second clips, a short session log, and the Quick-Start steps you already tried. That makes any consult faster and more useful.
    4. We removed duplicate Q&A and tightened Troubleshooting into a short 3–5 bullet FAQ with only the newest guidance: apps, exactly what to bring to a pro, and where to find the demo videos and books.

    Further resources (to place under Visuals/Equipment)

    • Short video examples to link:

      • Click→treat handoff demo , "Click, then reach with the same hand and offer the treat immediately." (shows timing and smooth hand motion)
      • Loading the marker and one-minute sit drill , "Start with two easy clicks and treats, then add a sit cue in one-minute chunks." (easy chunked practice)
      • Timing replay for owners , "Record a 30s trial and watch the click-to-treat gap; tight timing matters." (record, replay, learn)
        These are short, hands-on clips you can watch while your kitten naps. Ever watched your kitty twitch a whisker and pounce? Timing like that is everything.
    • Recommended cat-specific books (4–5):

      • "Clicker Training for Cats" , simple drills and troubleshooting.
      • "The Trainable Cat" , behavior-focused steps for small wins.
      • "Cat Sense of Play" , practical ideas for reward hierarchies.
      • "Positive Training for Feline Friends" , short sessions and shaping methods.
      • Optional: a quick-reference booklet for quick sessions (small, tear-out pages you can stash by the treats).

    Session management (apps note to add)
    Clicker apps can work in a pinch, but a physical marker is generally clearer for the kitten. Apps are great for timers, session logs, and tracking reps. Try a combo: use a simple clicker for the actual marker, and an app to log short notes like "3 min, 10 reps, high-value treat." It makes follow-up easier.

    Troubleshooting , short FAQ (3–5 bullets to add)

    • Apps vs physical clicker: physical clickers are preferred for clarity; use apps for timers and logging if you want easy records.
    • Preparing for a pro consult: bring 30–60 second video clips that show the behavior, a one-page log of recent reps and rewards, and the Quick-Start steps you used. That helps the pro give fast, specific tips.
    • When to call a pro: if your kitten shows persistent fear, aggression, or zero progress after several weeks of steady Quick-Start practice, get a consult. Seriously, don’t wait too long if things feel stuck.
    • Quick resource pointer: check the Further Resources box under Visuals/Equipment for the demo videos and the book list above. They’ll save you time and show exactly what good timing looks like.

    Worth every paw-print. Oops, let me rephrase that, these changes are all about saving you time and making training feel doable, even on busy days.

    Final Words

    Jump right in: you’ve got the quick-start, begin around eight weeks, load the clicker with tiny fragrant treats, run many short 1–3 minute bursts, and watch for those first lightbulb reps.

    We covered markers and treats, spotting readiness and teething tweaks. Then we walked through step-by-step exercises, sit, recall, carrier, bite reduction, plus session plans, troubleshooting, and milestone logs.

    Stick with short, playful sessions and clear records; kitten clicker training pays off with happier cats, calmer homes, and plenty of joyful pounces.

    FAQ

    Kitten Clicker Training — FAQs

    Is clicker training effective for kittens?

    Clicker training is effective for kittens, creating clear communication with short, fun reps and tasty treats; many kittens show ‘lightbulb’ signs after just a few correct responses.

    When should I start clicker training my kitten?

    Start as early as about 8 weeks, using tiny aromatic treats, many 1–3 minute sessions, and expect first clear responses within a few short reps.

    What is the 3-3-3 rule for kittens?

    The 3-3-3 rule means three days to settle into a new home, three weeks to adjust to routines, and three months to feel fully comfortable and bonded.

    What are the negatives of clicker training?

    Negatives include the time and consistency required, ruined learning from poor timing, noise-sensitive kittens who dislike the click, and risking treat-dependence without proper fading.

    How do I clicker train a cat to stay off counters or stop bad behavior?

    Reward a clear alternative (a go-to mat or sit), click the instant the correct action finishes, remove counter rewards, and be consistent across sessions.

    What clicker or training kit is best for cats?

    Look for a small plastic clicker or soft-click alternative (pen snick or a ‘yes’ word), tiny sealed treats, a clip-on treat pouch, and a lightweight target stick with a small ball tip.

    Where can I find free kitten clicker training resources or community help?

    Free resources include Reddit training groups, YouTube demos (including Jackson Galaxy clips), free articles and PDFs, and local shelters or trainers offering advice.

    Related Articles